Visual Studio Code Enablement#
With the Simplicity Studio 5 (SSv5) 5.6.0.0 release, Silicon Labs introduced support for using Visual Studio Code (VS Code) in combination with Simplicity Studio. To enable this support, a VS Code extension is required. It can be either downloaded directly from the VS Code marketplace or with this link to marketplace. The preferred method of installation is to download it from the marketplace within the VS Code application itself.
Simplicity Studio is still needed to create the initial project and to make project changes with the Project Configurator GUIs. However, when you are using the Visual Studio Code compatible project generator, all editing, building, and debugging of the project should be done in VS Code. In other words, do not try to build the project in both Simplicity Studio and in VS Code.
Enabling a Project for Use Within VS Code#
In order to operate on a Silicon Labs project from within VS Code, the correct project generator must be used. This can be set from within an existing project or at initial project creation.
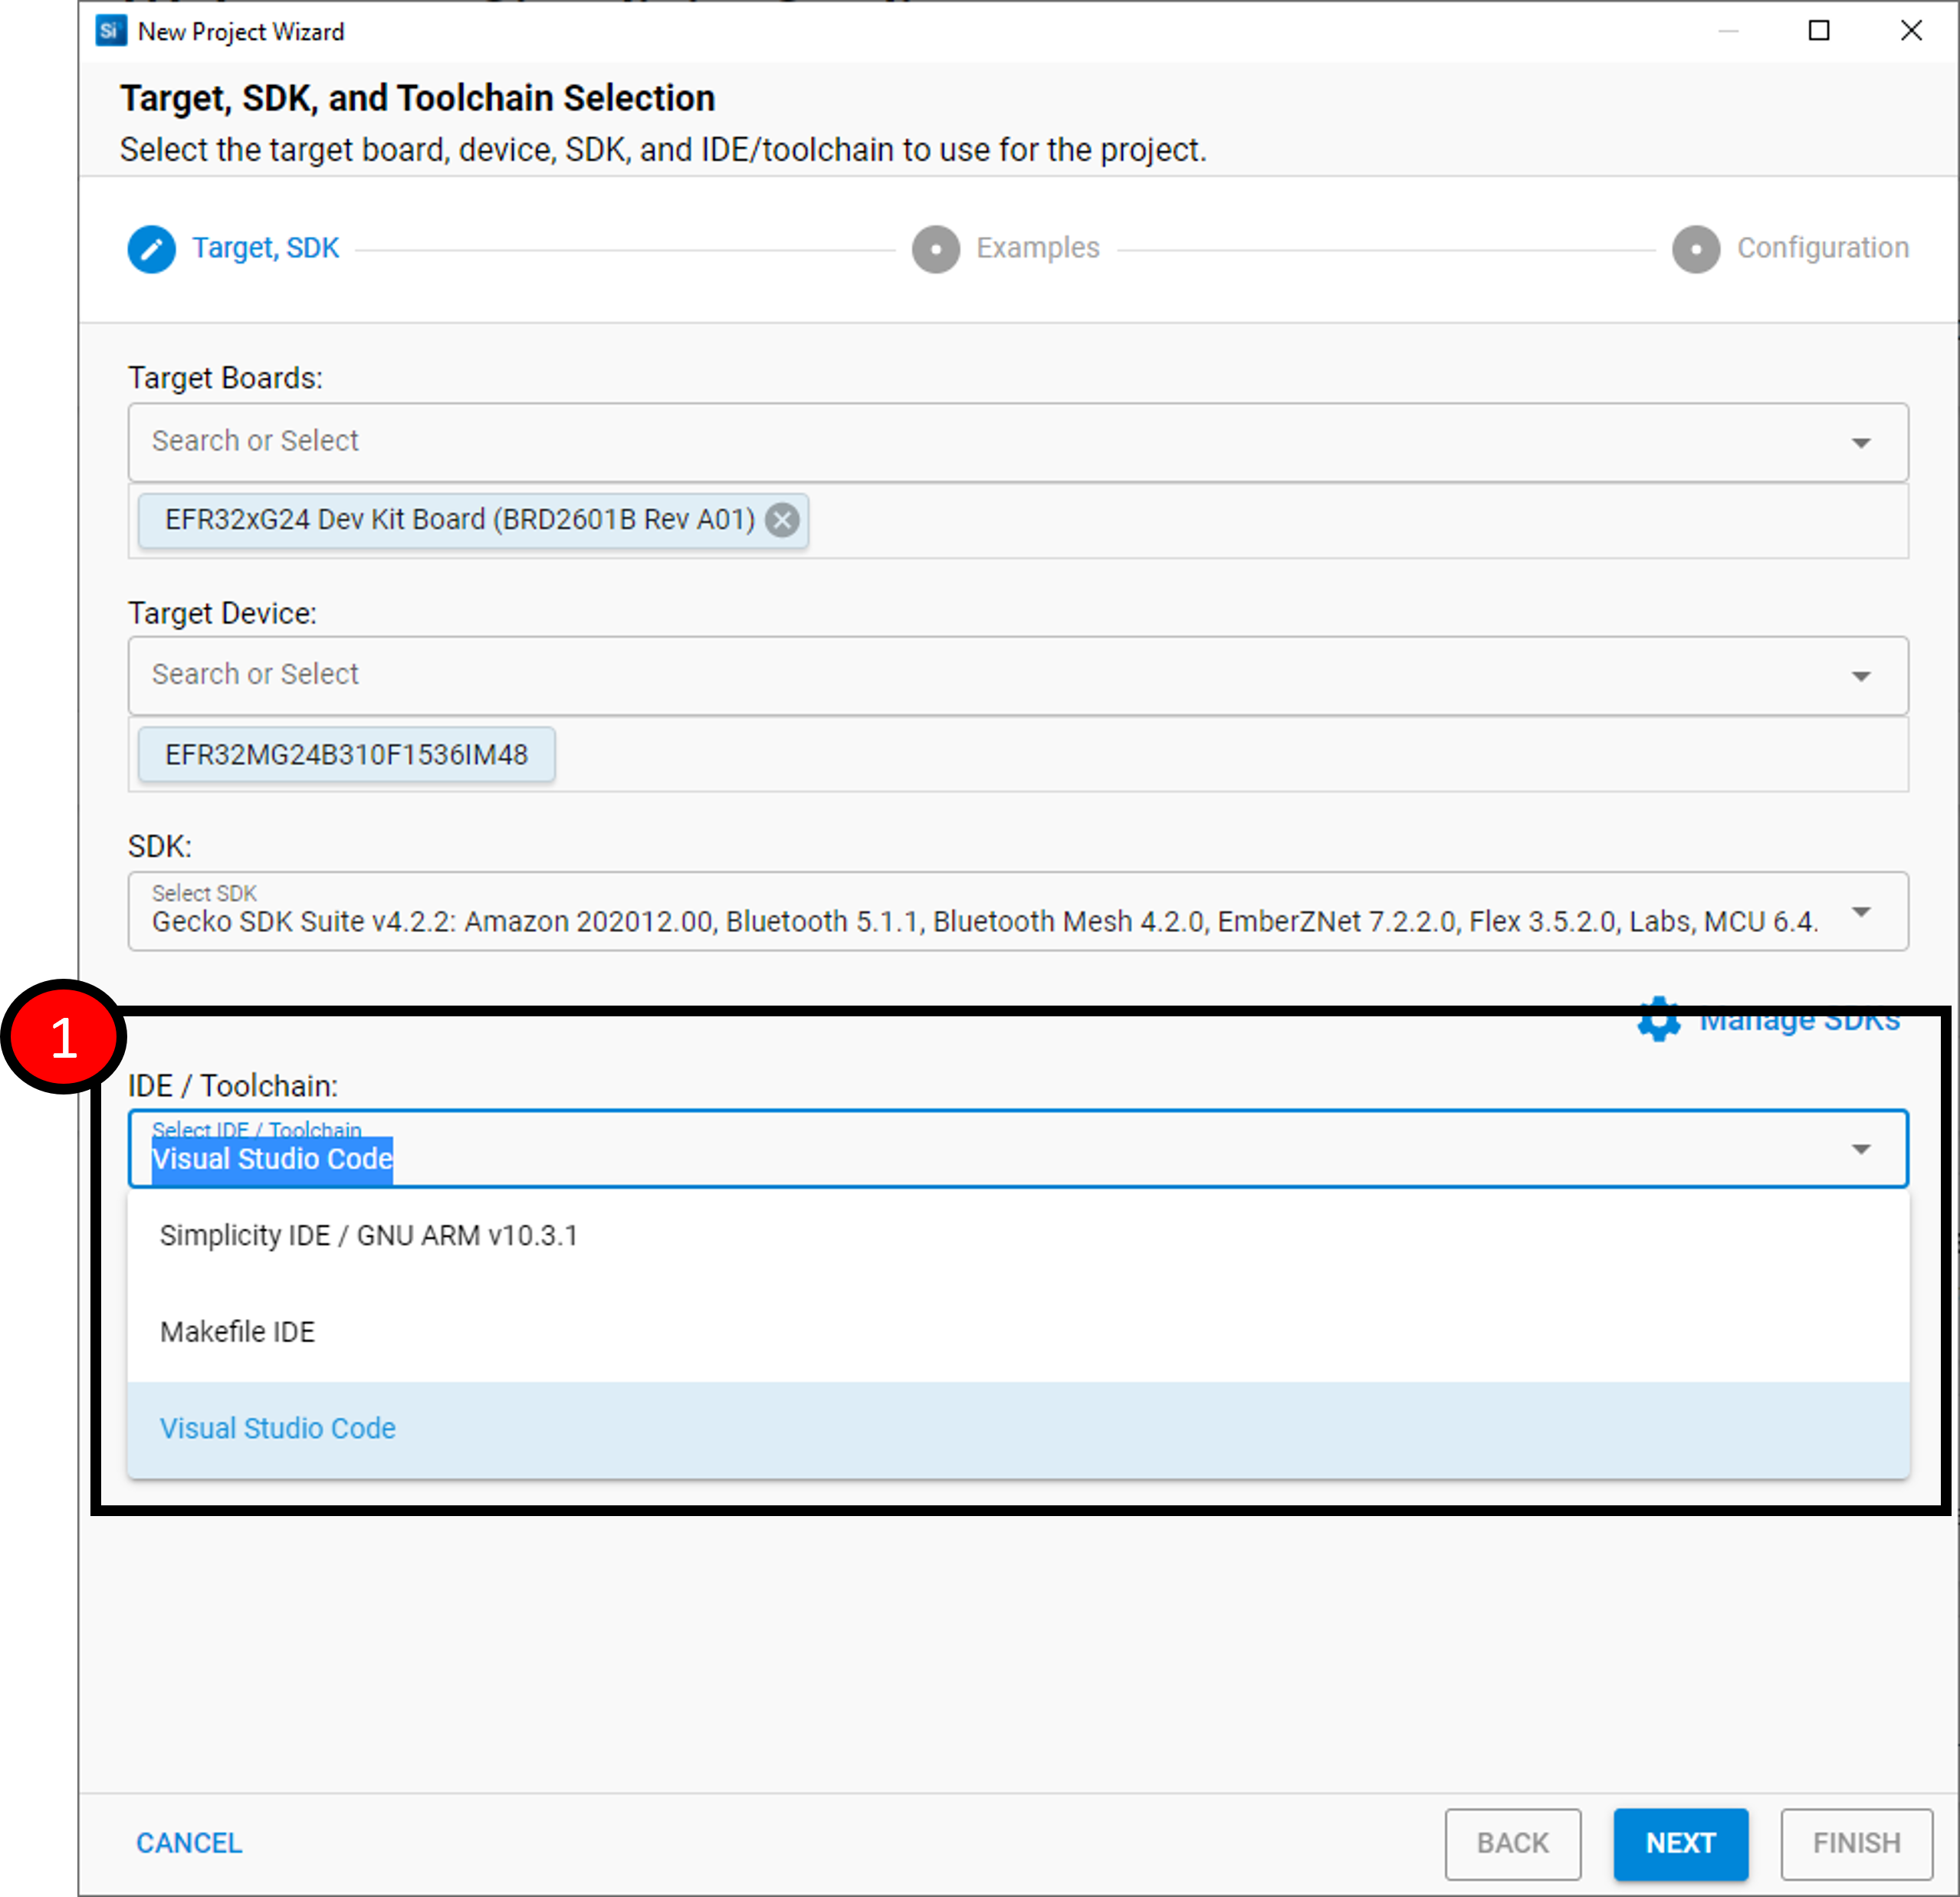
For new projects, you can set the target generator in the new project wizard on step 1 as shown below.

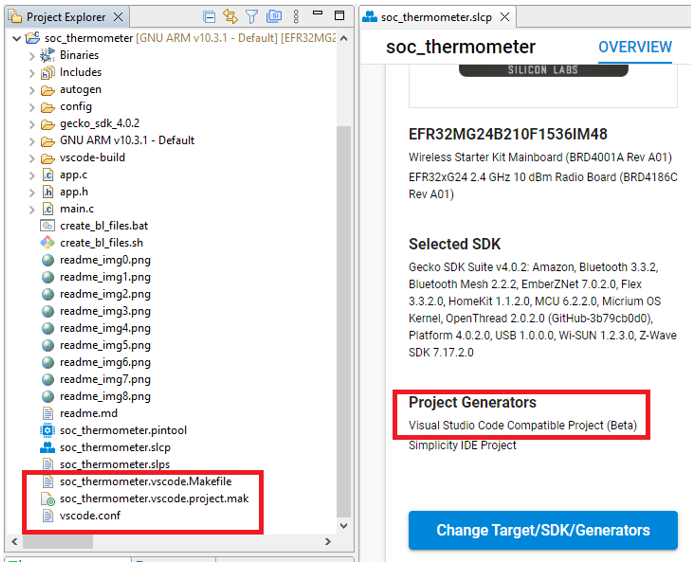
For existing projects, from the Project Configurator Overview tab, click Change Target/SDK/Generators and select the VS Code generator.
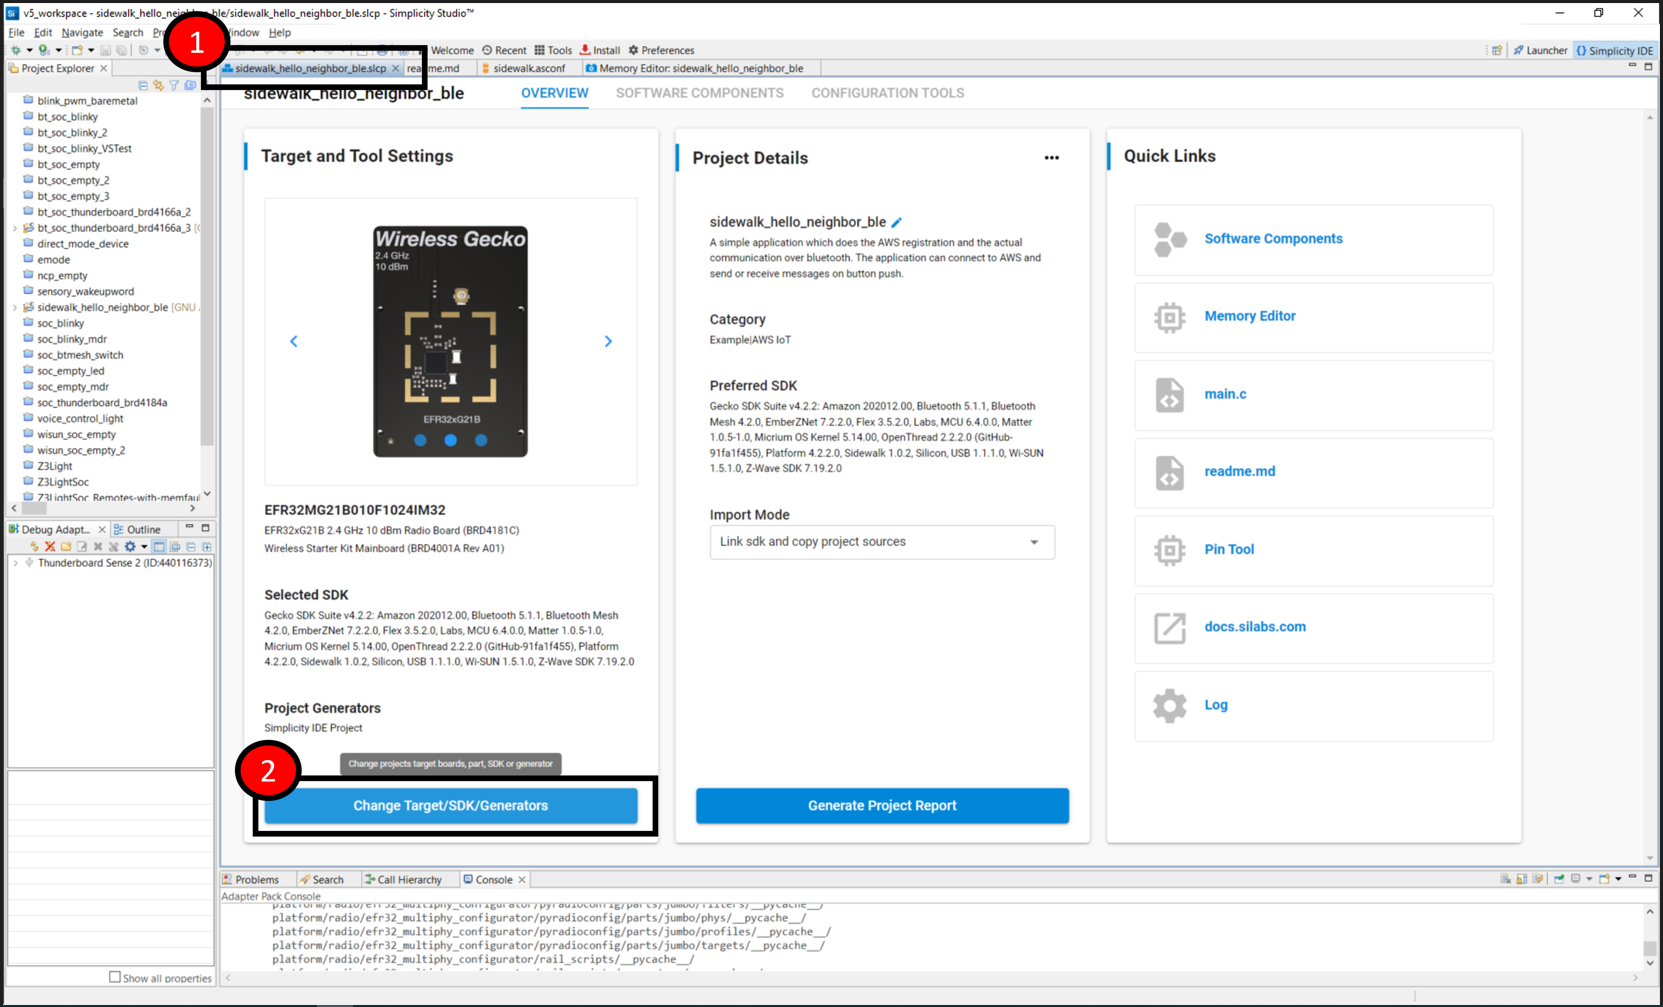

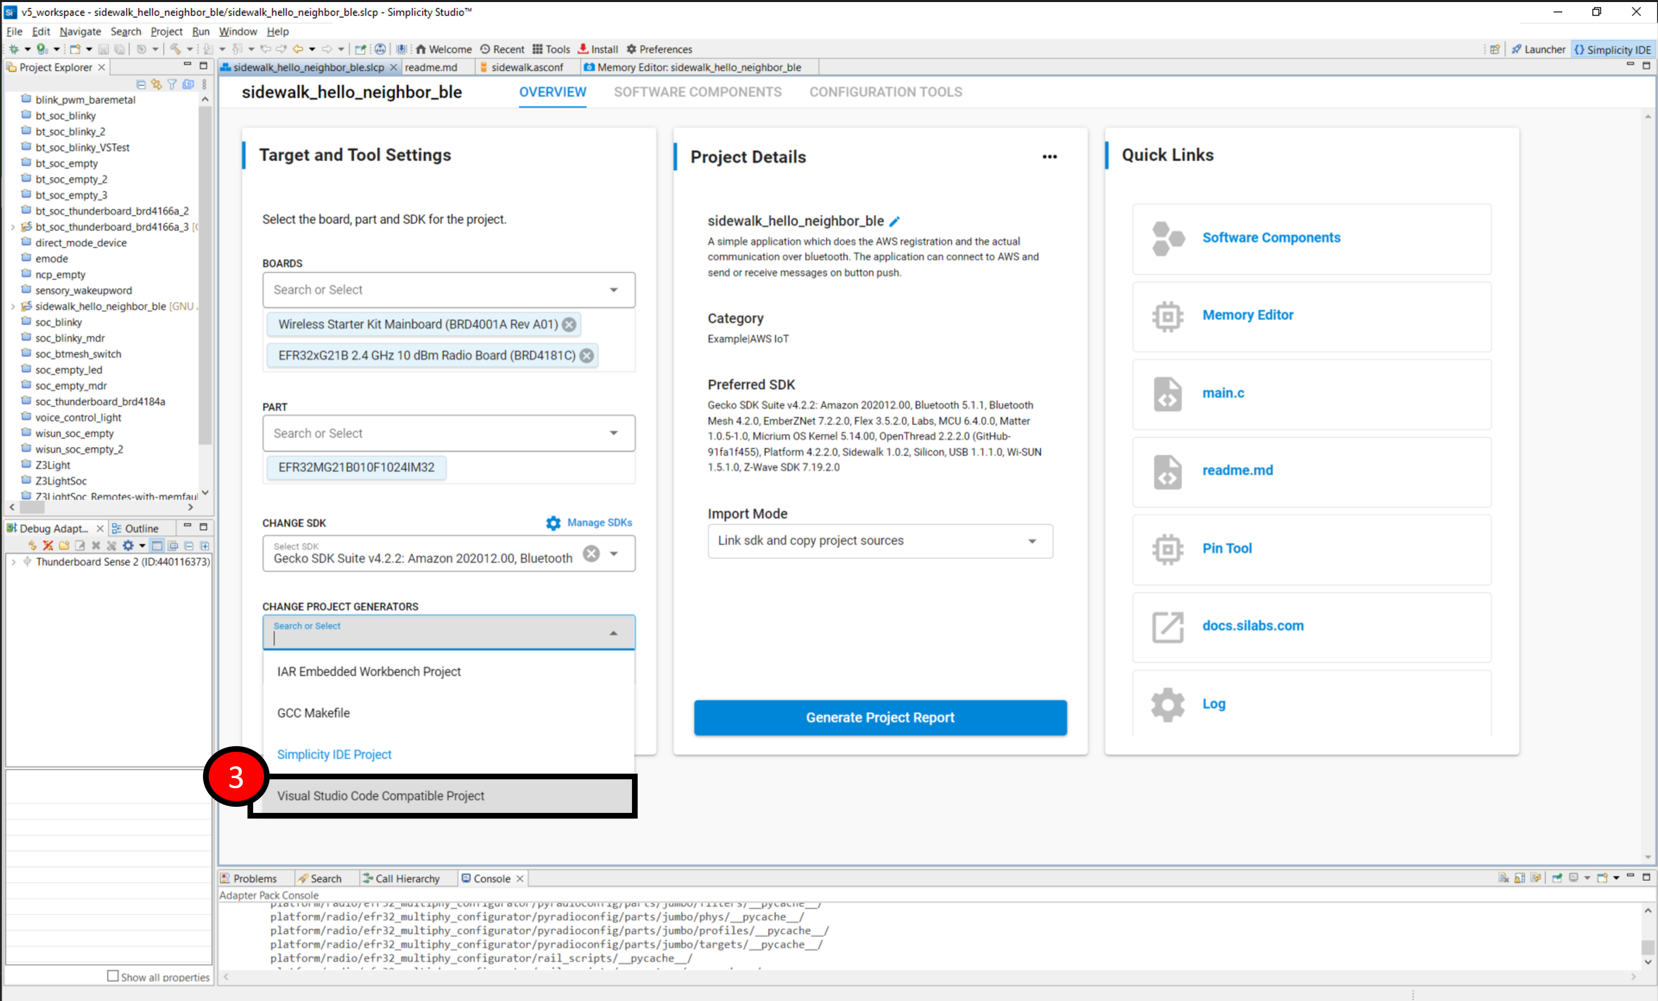

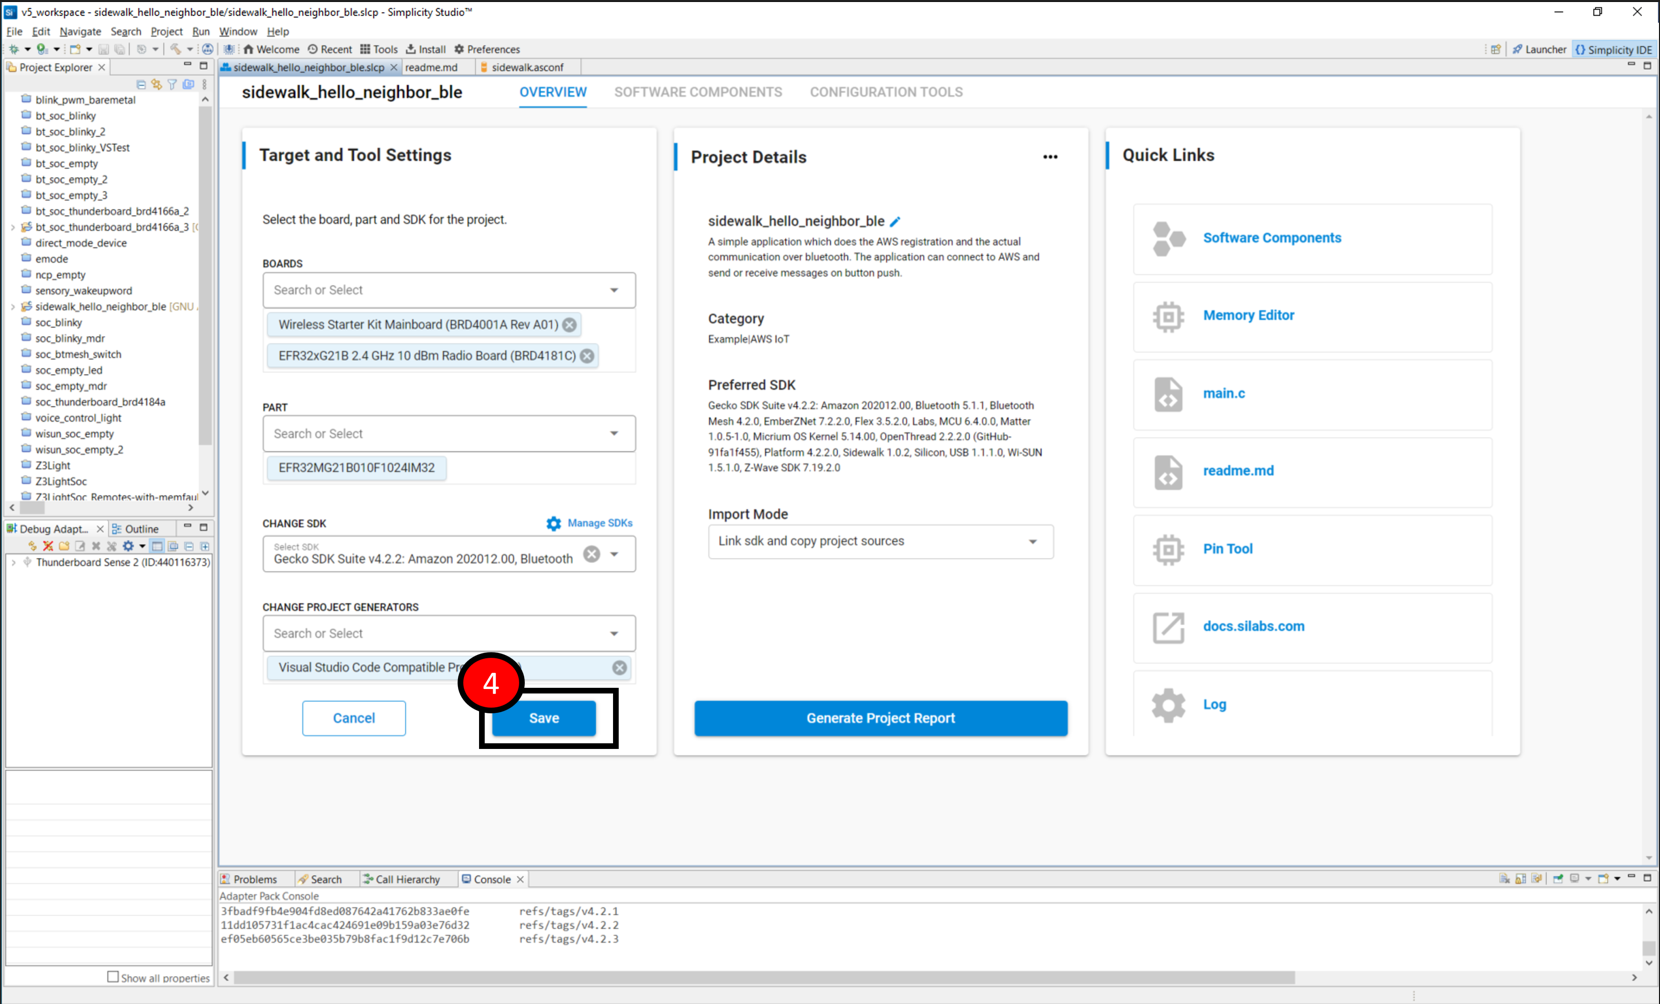

Once you have set your project to generate for VS Code, and generation is complete, you will notice new files in the Project Explorer view. This includes three new files to support development in VS Code. If a popup dialog appears asking what to do with some project configuration files, leave the setting at the default “Keep my file” and click OK.
The three VS Code support files are:
<projectname>.vscode.Makefile
<projectname>.vscode.project.mak
vscode.conf.

You can make any other project configurator changes, such as adding a component, to the project from within Simplicity Studio. From there, the project can be continued in VS Code. Once you begin using VS Code for development, it is not recommended to build the project in Simplicity Studio. However, before any changes have been made in VS Code, you can verify that it builds in Simplicity Studio before continuing development in VS Code.
The VS Code generator is Gecko SDK Suite (GSDK)-independent. This means it can be used with any 4.x.x GSDK. It has been functionally tested with at least GSDK 4.0.2, GSDK 4.1.3 and GSDK 4.2.0.
Using the Project in Visual Studio Code#
Preparing VS Code for Silicon Labs Support#
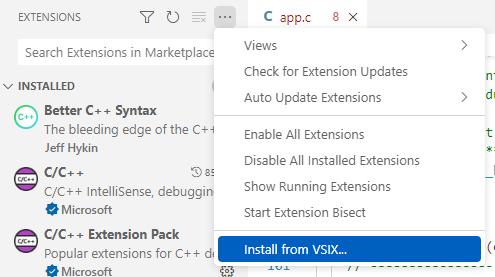
To use VS Code for development with Silicon Labs projects, VS Code must first be downloaded and installed from the Visual Studio website (Download Visual Studio Code). Then the Silicon Labs extension must be installed either from within VS Code by clicking on the Extensions icon and then searching the Marketplace for “SiLabs” or by downloading the extension as a .vsix file from the marketplace and then adding it to VS Code by clicking the three dots next to EXTENSIONS and selecting 'Install from vsix…'.

Installing the Simplicity Studio for VS Code extension will also install other extensions it depends on: C++ Extension Pack and Cortex-Debug.
VS Code is now ready to add the Silicon Labs project from the earlier step.
Adding a VS Code-Enabled Simplicity Studio Project to VS Code#
You can add a project to VS Code in two ways.
Use File > Open Folder… and browse to the project folder in the Simplicity Studio workspace (default workspace is v5_workspace) or the source-controlled project folder.
Use File > Add Folder to Workspace… and again browse to the project folder. This second method is recommended, especially if working with multiple projects. This will place the folder in an untitled workspace. Select File > Save Workspace As… and select a folder and name for the workspace. The VS Code workspace should be saved outside of the Simplicity Studio workspace folder in a folder dedicated to VS Code workspaces. Subsequent projects can be added to this open workspace using File > Add Folder to Workspace….
After adding projects to a workspace, you should notice that the project appears in the explorer and the 'SILICON LABS SUPPORT' section is now populated with project related actions as shown below.
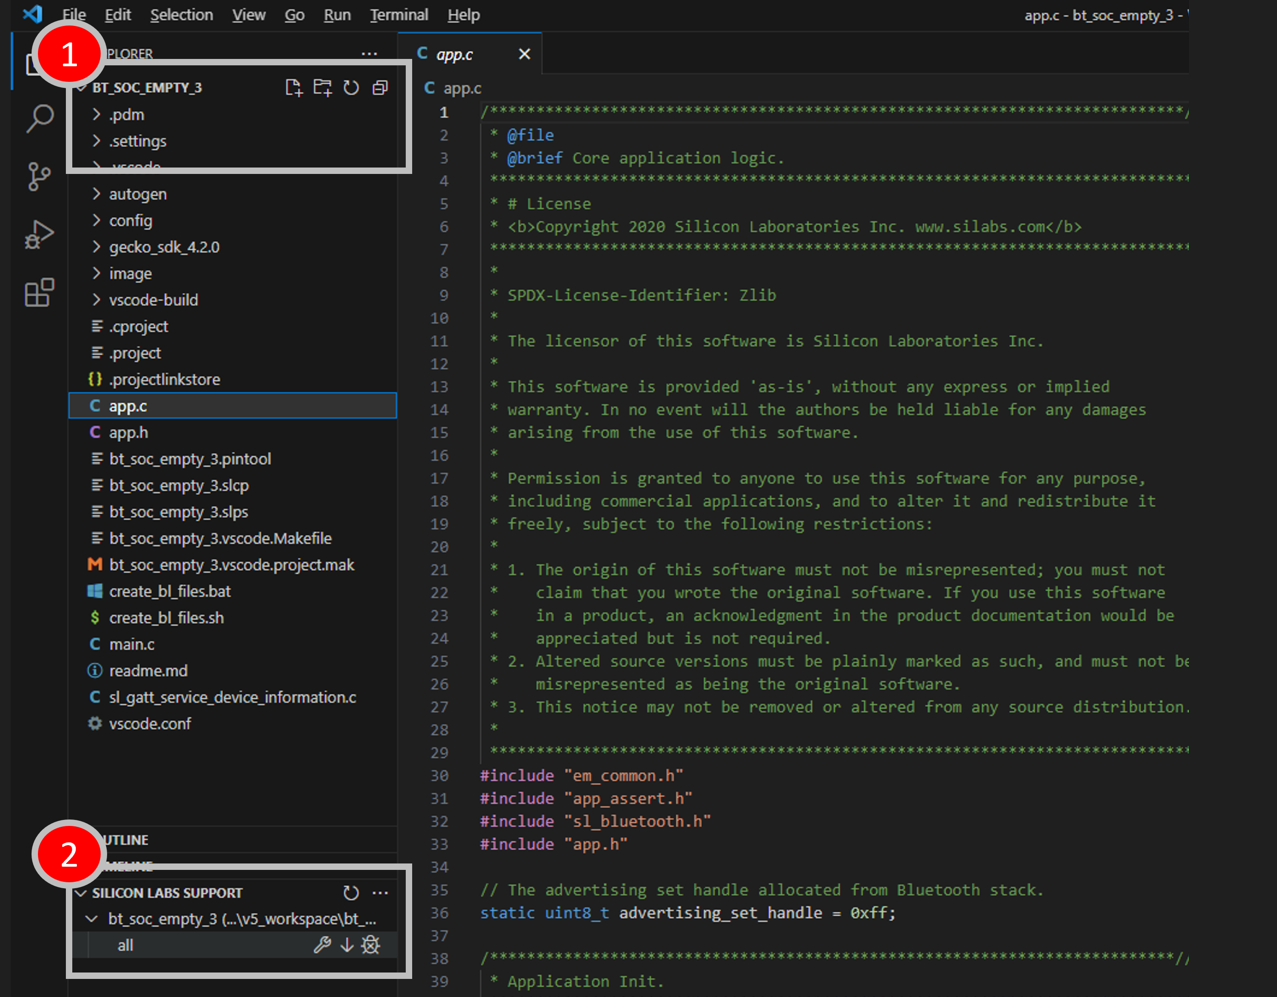

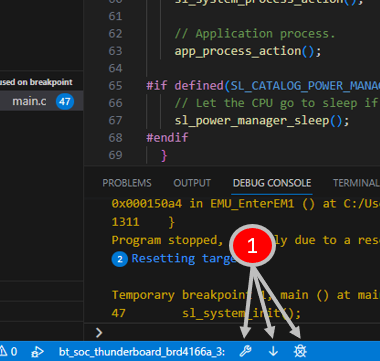
The source files can be edited and additional files may be added to the projects. When ready to build the project, select the project build configuration ('all' is the default for now) in the SILICON LABS SUPPORT section and the icons for three support options are displayed.


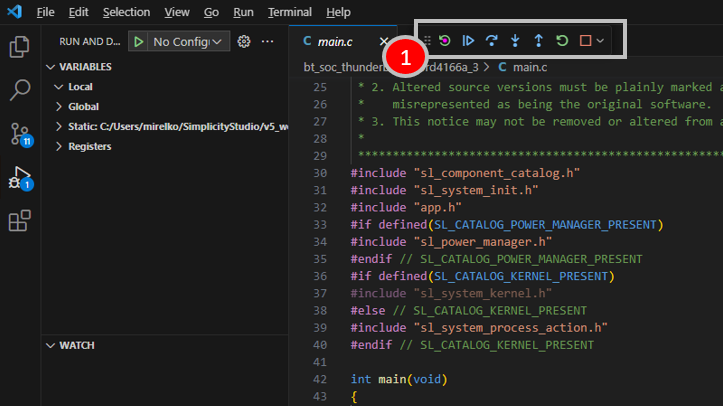

Additionally, you can access these functions from the bottom ribbon as shown below.

Note: The vscode.conf file is used as the ‘glue’ file between the project configuration of the Simplicity Studio-installed resources and the Silicon Labs VS Code extension. The links in this file are used by the Silicon Labs VS Code extension to find the associated tools necessary for building, flashing, and debugging the project. It is not meant to be manually edited.
Note for Matter developers: After you have generated your project in Simplicity Studio and added it to VS Code Workspace, Silicon Labs has provided four VS Code tasks to facilitate developing Matter projects in VS Code. See the GitHub Matter documentation for more information.
