Project Migration#
Simplicity Studio v6 supports the migration of projects developed in Simplicity Studio v5 (SSv5) using the Simplicity SDK. Because v6 introduces an updated build infrastructure and a new project management model, the migration process depends on how the project was originally generated and which build system it used in SSv5.
Some SSv5 projects can be opened directly in v6 without modification, while others require updates to their build system files before they can be built successfully.
Note: SSv5 projects created using the Simplicity IDE / IAR toolchain are not supported by v6, as the IAR toolchain is not supported in the Simplicity Studio VS Code extension.
However, you can still migrate these projects by enabling one of the v6-supported IAR project generators, either before or after migration:
IAR EWARM (IAR) – for building and debugging in IAR Embedded Workbench
CMake (GCC/IAR) – for command-line builds using the IAR toolchain
After enabling the appropriate project generator, follow the migration steps for your project type to complete the migration process.
Migrating to 2025.12.0 SDK from Older SDK Versions#
Note: The Project Migration feature in Simplicity Studio supports migrating existing projects to Simplicity SDK 2025.12, which uses a new modular, Conan-based package model. The migration process updates the project to align with the updated SDK directory structure and packaging format.
Starting the Migration#
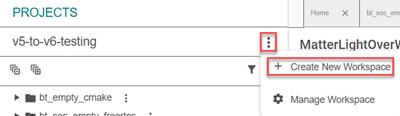
If the projects are in an SSv5 workspace, the simplest way to start the migration is from the v6 Projects section.
Click the vertical (…) menu and select Create New Workspace.
Click the Browse button, browse to the SSv5 workspace, and then click OKAY.
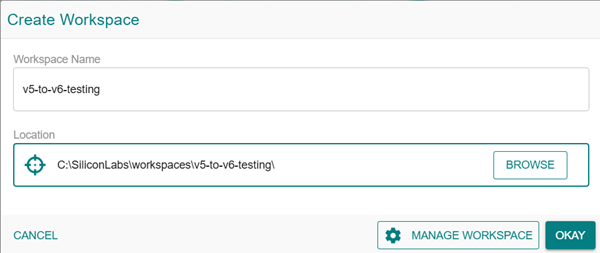
In this example, the name of the SSv5 workspace is v5-to-v6-testing. The new workspace will be empty as the projects are not automatically detected.
Click the Open Project(s) button.

The workspace folders will be shown in the selection window.
Select a project folder and click Select Folder.
The project will be added to the workspace, a project configurator file (.slcp file) will automatically be opened, and project generation will begin.
If the SSv5 project is based on an older version of the Simplicity SDK than the version currently installed in v6, you will be prompted to confirm the SDK upgrade before migrating the application project.
To migrate additional projects, repeat the Open Project(s) step from the Home tab.
Additional Migration Steps#
Follow the additional migration steps below based on the type of SSv5 project you are migrating from:
Makefile CLI projects#
If your project used Makefile (GCC):
Click Open in CLI Make to open a terminal or command prompt (depending on the operating system) to the root folder of the project:

The terminal or command prompt opens:
Microsoft Windows [Version 10.0.19045.6332]
(c) Microsoft Corporation. All rights reserved.

C:\SiliconLabs\workspaces\v5-to-v6-testing\bt_soc_empty_freertos_make>
Build the project using the same
makecommands as in SSv5.The only difference is if a source file (.c or .h) is opened, it will now be opened in Visual Studio Code (VS Code).
CMake CLI Projects#
If your project used CMake (GCC/IAR):
Select Open in CLI CMake to open a terminal or command prompt (depending on the operating system) to the root folder of the project:

The terminal or command prompt opens:
C:\SiliconLabs\workspaces\v5-to-v6-testing\bt_soc_empty_freertos_make>Navigate to one of the following folders, depending on the toolchain used:
the
PROJECTNAME_cmakefolderthe
PROJECTNAME_iar_cmakefolder
Run the same CMake commands as in SSv5.
IAR EWARM Projects#
After opening the project in v6, the project will be regenerated using the IAR EWARM project generator.
If any external source files were added to the project as links (not copies), re-add them using v6, IAR EWARM, or the OS file manager.
VS Code Projects#
If your project used VSCode (GCC):
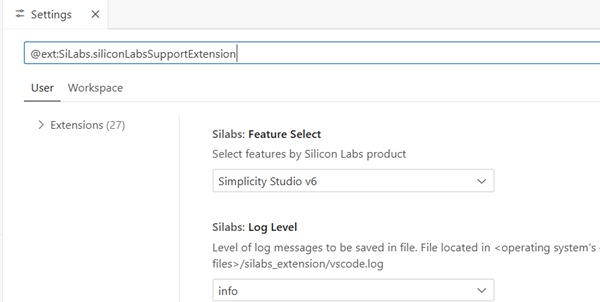
Open VS Code and set Feature select to Simplicity Studio 6.
Click Import Workspace and browse to the workspace folder being used for the migrated projects.

You may be prompted to Trust the Workspace; this is required for projects to show up in the Si Extension section of VS Code. All projects that use the VS Code generator are shown.
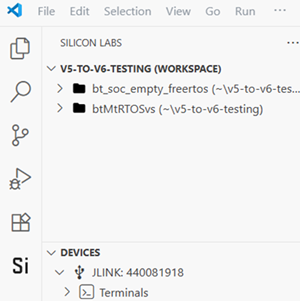
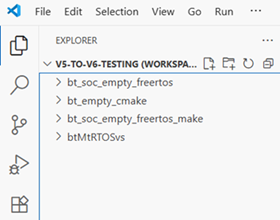
Projects that do not use the VS Code generator will not show up in the Silicon Labs section. However, they are visible in the VS Code Explorer to allow editing but not building, flashing or debugging.
SSv5 Projects that were using the VS Code generator are now fully migrated and they can be edited, built, and debugged in VS Code as before.
Simplicity IDE Projects#
If your SSv5 project was generated with the Eclipse-based Simplicity IDE project generator, it will be converted to VS Code (GCC), as the Simplicity IDE project generator is not supported in v6.
Re-add external sources files that were added as links (not copies) to the SSv5 project:
In VS Code Explorer view, right click and select New Folder and New File.
Files added this way are not automatically included in the build system. Add them by either editing the
CMakeLists.txtfile (step 2) or using the build configurator (step 3) in VS Code.
Edit
cmake_gcc/CMakeLists.txtto add the external source files to theadd_executablesection: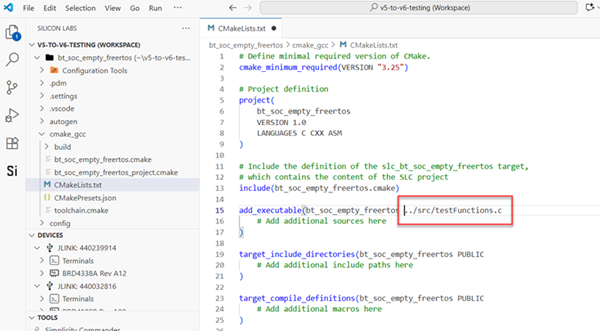
Alternatively, you can use the build configurator in the VS Code extension to add external source files, including symbols and compiler settings to the project.
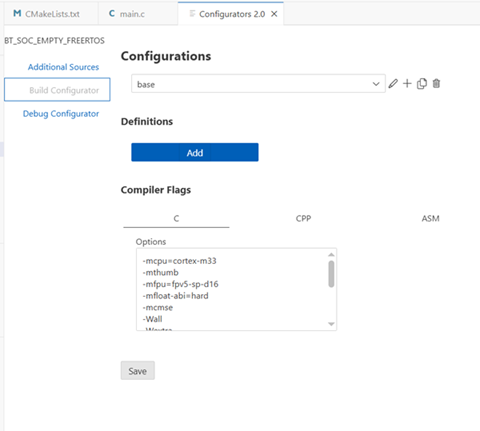
To access the build configurator, right click the project folder from the Si View and select Open Configurators 2.0.
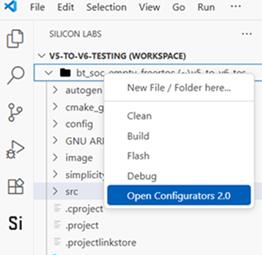
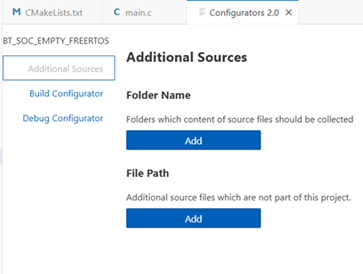
This opens the Configurators editor.
In the Additional Sources section, add folders and files to the project by selecting the relevant option. The folders and files must first have been added from the VS Code Explorer view.
In the Build Configurator section, you can:
Rename or create build configurations.
Add symbol definitions and compiler flags.