Using Hardware Timers#
Description#
Silicon Labs Wireless Gecko Products offer user-friendly software timers that are suitable for most of the tasks. Despite software timers that perform well, some tasks require hardware timers. Hardware timers offer faster response time than software timers and are well suited for Pulse-width modulation (PWM). This example explains how to create a simple application that uses PWM functionality. The example application includes the BLE service that is used to control the PWM functionality remotely.
Setting up#
Open Simplicity Studio, and create
SOC - Emptyexample project for your device.Import the attached
gatt.xmlfile and generate. Open the.iscfile, click on custom BLE GATT and click import from the tools section on the right. This will overwrite the existing GATT. Click generate button on the top and accept any pop-ups. The name of the device is changed toPWM_Exampleand a characteristic created to control the behavior of the on-board LEDs, as shown here.

Verify the new service and characteristic created for this project.


Verify the settings for the new service and characteristic.
Light_PWM_Control service settings


Control Characteristic settings


Overwrite the attached
app.cin the project folder. Inapp.c, Timer and GPIO libraries are included. These libraries are required for a PWM signal.#include "em_timer.h" #include "em_gpio.h" #include "em_cmu.h" // this PWM_FREQ = 65000 creates about 1kHz signal. #define PWM_FREQ 65000Hardware timer uses the High Frequency oscillator which will be disabled in the sleep mode. To ensure that timer works, make sure that sleep is disabled. Disable sleep by setting
DISABLE_SLEEPto 1 inapp.h.Pins are initialized and clocks enabled. In the example, WSTK LEDs are used.
/* Enable clock for GPIO module */ CMU_ClockEnable(cmuClock_GPIO, true); /* Enable clock for TIMER0 module */ CMU_ClockEnable(cmuClock_TIMER0, true); /* Initialize pins used for PWM */ GPIO_PinModeSet(BSP_GPIO_LED0_PORT, BSP_GPIO_LED0_PIN, gpioModePushPull, 0); GPIO_PinModeSet(BSP_GPIO_LED1_PORT, BSP_GPIO_LED1_PIN, gpioModePushPull, 0);Then, timer channels are routed to LED pins. Keep in mind that routing pins are board-dependent. For different platforms, the LOC30 parameter may differ. See the data sheet of your platform for details. This information can be found under "Alternate functionality overview" section of the data sheet. Look for rows starting with
TIM0_CC0andTIM0_CC1. Check the number associated with the LED port and pin. For example in BG1, port PF6 and PF7 are associated with number 30 and 30 respectively in timersTIM0_CC0andTIM0_CC1./* Route pins to timer */ // $[TIMER0 I/O setup] /* Set up CC0 */ TIMER0->ROUTELOC0 = (TIMER0->ROUTELOC0 & (~_TIMER_ROUTELOC0_CC0LOC_MASK)) | TIMER_ROUTELOC0_CC0LOC_LOC30; TIMER0->ROUTEPEN = TIMER0->ROUTEPEN | TIMER_ROUTEPEN_CC0PEN; /* Set up CC1 */ TIMER0->ROUTELOC0 = (TIMER0->ROUTELOC0 & (~_TIMER_ROUTELOC0_CC1LOC_MASK)) | TIMER_ROUTELOC0_CC1LOC_LOC30; TIMER0->ROUTEPEN = TIMER0->ROUTEPEN | TIMER_ROUTEPEN_CC1PEN; // [TIMER0 I/O setup]$The timer properties and initializing is done in this section.
/* Select CC channel parameters */ TIMER_InitCC_TypeDef timerCCInit = { .eventCtrl = timerEventEveryEdge, .edge = timerEdgeBoth, .prsSel = timerPRSSELCh0, .cufoa = timerOutputActionNone, .cofoa = timerOutputActionNone, .cmoa = timerOutputActionToggle, .mode = timerCCModePWM, .filter = false, .prsInput = false, .coist = false, .outInvert = false, }; /* Configure CC channel 0 */ TIMER_InitCC(TIMER0, 0, &timerCCInit); /* Configure CC channel 1 */ TIMER_InitCC(TIMER0, 1, &timerCCInit); /* Set Top Value */ TIMER_TopSet(TIMER0, CMU_ClockFreqGet(cmuClock_HFPER)/PWM_FREQ); /* Set compare value starting at 0 - it will be incremented in the interrupt handler */ TIMER_CompareBufSet(TIMER0, 0, 0); /* Set compare value starting at top value - it will be decremented in the interrupt handler */ TIMER_CompareBufSet(TIMER0, 1, TIMER_TopGet(TIMER0)); /* Select timer parameters */ TIMER_Init_TypeDef timerInit = { .enable = true, .debugRun = true, .prescale = timerPrescale64, .clkSel = timerClkSelHFPerClk, .fallAction = timerInputActionNone, .riseAction = timerInputActionNone, .mode = timerModeUp, .dmaClrAct = false, .quadModeX4 = false, .oneShot = false, .sync = false, }; /* Enable overflow interrupt */ TIMER_IntEnable(TIMER0, TIMER_IF_OF); /* Enable TIMER0 interrupt vector in NVIC */ NVIC_EnableIRQ(TIMER0_IRQn); /* Configure timer */ TIMER_Init(TIMER0, &timerInit);For the handler function in this example, there is PWM function which has dimming and breathing modes, depending on
pwm_modeparameter (0-100 dimming and 101-255 constant breathing)./* Define PWM mode. The light is constantly changing or staying constant. Value 1-100 defines constant brightness and the value define duty-cycle. Values 101-255 sets light to constantly changing brightness which makes breathing effect. */ uint16_t pwm_mode = 200; /**************************************************************************//** * @brief TIMER0_IRQHandler * Interrupt Service Routine TIMER0 Interrupt Line * This function is used to configures PWM modes. *****************************************************************************/ void TIMER0_IRQHandler(void) { uint32_t compareValue; /* Clear flag for TIMER0 overflow interrupt */ TIMER_IntClear(TIMER0, TIMER_IF_OF); compareValue = TIMER_CaptureGet(TIMER0, 0); if (pwm_mode > 100){ /* increment duty-cycle or reset if reached TOP value */ if( compareValue == TIMER_TopGet(TIMER0)) TIMER_CompareBufSet(TIMER0, 0, 0); else TIMER_CompareBufSet(TIMER0, 0, ++compareValue); compareValue = TIMER_CaptureGet(TIMER0, 1); /* decrement duty-cycle or reset if reached MIN value */ if( compareValue == 0) TIMER_CompareBufSet(TIMER0, 1, TIMER_TopGet(TIMER0)); else TIMER_CompareBufSet(TIMER0, 1, --compareValue); } /* sets the given duty-cycle value to the timer */ else if ( pwm_mode >= 0 && pwm_mode <= 100) { // IF YOU USE BGM121 change 1-0.01*pwm_mode to pwm_mode/100. TIMER_CompareBufSet(TIMER0, 1, TIMER_TopGet(TIMER0)*(1-0.01*pwm_mode)); TIMER_CompareBufSet(TIMER0, 0, TIMER_TopGet(TIMER0)*(1-0.01*pwm_mode)); } }Finally, the case which configures the
pwm_modevariable.case gecko_evt_gatt_server_attribute_value_id: if (evt->data.evt_gatt_server_user_write_request.characteristic == gattdb_Control_Value){ pwm_mode = 0; pwm_mode = ((uint16_t) evt->data.evt_gatt_server_user_write_request.value.data[0]); } break;Build and flash the app to your preferred device.
Usage#
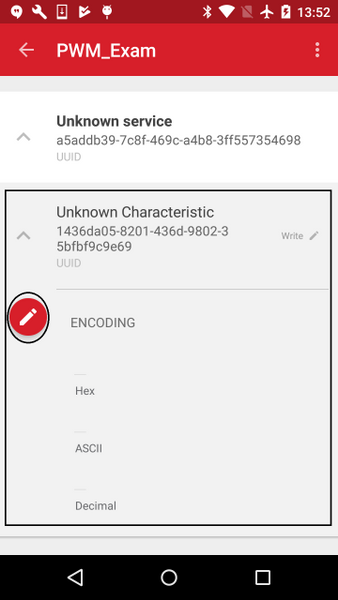
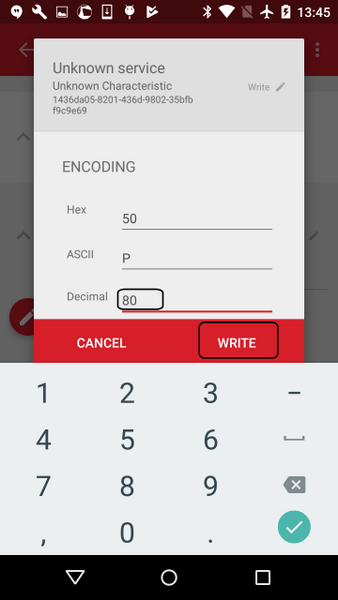
Open the EFR Connect app on your mobile, then open the Bluetooth Browser tab and connect to the device, the name will display as PWM_Example.
Now, change the decimal value between 0-255 and observe the results with on-board LEDs. You can modify the pins for you custom design.


For more information on the timers, see: https://www.silabs.com/documents/public/application-notes/AN0014.pdf.
