Extended Advertising Example#
Introduction#
The feature – LE Advertising Extensions – is introduced by Bluetooth Specification Version 5.0. It defines two types of advertising channels, primary advertising channel and secondary advertising channel. Channels from 0 to 36 known as LE piconet channels in Bluetooth Specification 4.2 or earlier versions can also be used to send advertisements, and they are called secondary advertising channels. Table below shows the differences between Bluetooth 5.0 and earlier versions supporting this feature.
Bluetooth 4.2 or earlier | Bluetooth 5.0 | |
|---|---|---|
Channels – 37, 38 and 39 | Advertisement broadcast channel | Primary advertising channel |
Channels – 0 to 36 | LE piconet channel | LE piconet channel or secondary advertising channel |
Max payload for single adv packet (AdvData) | 0-31 bytes | 0-254 bytes |
Table 1. Comparison of Bluetooth 5.0 and Earlier Versions
How it Works#
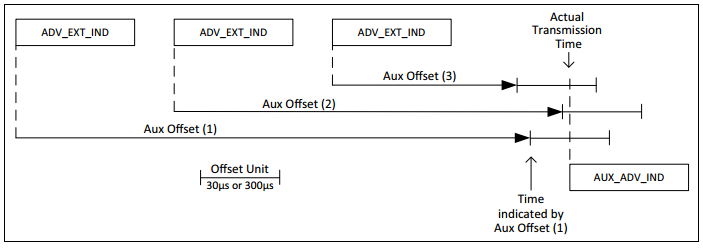
The PDU payload of primary advertising channels can vary in length from 6 to 37 bytes. 6-byte address is mandatory to present in the packet, so the advData is limited to no more than 31 bytes, which is the same as previous versions. Bluetooth 5.0 introduces a way to use secondary advertising channels to offload data that would otherwise be transmitted on the primary advertising channel. The advertising packets on primary channels contain the information in which secondary advertising channel and the offset to the start time the auxiliary data will be transmitted. Figure below shows the timing of extended advertising.


ADV_EXT_IND – advertising packets on primary advertising channels. These packets only include the information on which channel and when the AUX_ADV_IND will happen.
AUX_ADV_IND – advertising packet on secondary advertising channels. This packet could contain up to 254 bytes payload.
The procedure of a scanner to scan an extended advertising looks like the following:
Scan on 3 primary channels for advertising packets.
If ADV_EXT_IND is scanned, record the secondary channel information (which channel and when etc.)
Scan the specific secondary channel at the given time.
Use This Feature with Bluetooth SDK#
Bluetooth SDK has the support for Bluetooth LE advertising extensions feature since version 2.9.0. For the latest SDK, the limitation for now is 1> maximum 191 bytes of data can be set for connectable extended advertising and 2> maximum 253 bytes of data can be set for periodic and non-connectable extended advertising. The stack handles the above three steps. Users need to configure the advertising packet payload, set the advertising type, and start advertising. Note, the advertising cannot be scannable and connectable at the same time according to the Bluetooth 5.0 SPEC.
Import the Example#
To run this example, download Simplicity Studio and the attachment at the end of this article.
Advertiser#
Download the latest Bluetooth SDK via Simplicity Studio if not already done.
Create a "soc-empty" project base on the board you are using as the starting point.
Drag and drop the app.c, app.h and log.h to your project to replace the existing ones.
Compile and run the program. Use a Bluetooth scanner to check the advertisement.
Scanner#
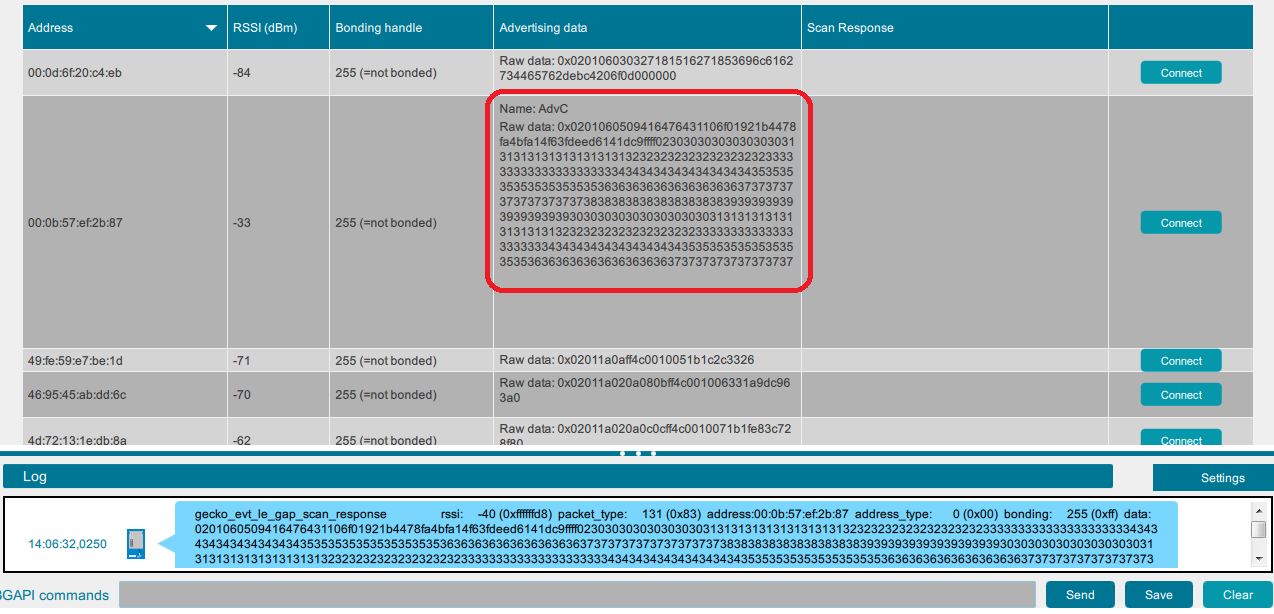
Typically, you can flash a board with ncp-empty and use the BGTool to scan for the extended advertisement, as shown in the figure below.


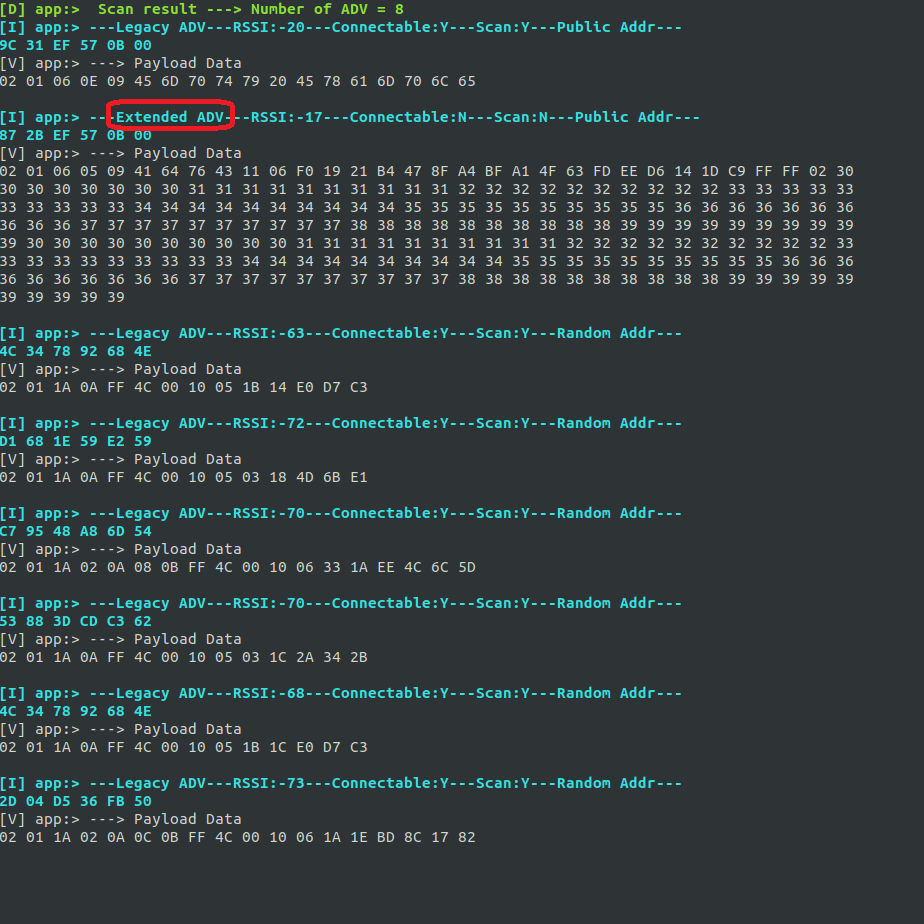
Silicon Labs Bluetooth stack also support scanning for extended advertising. To develop also on the scanner side, you can follow below steps to use the scanner. Note, the scanner project has the facts - 1> Use malloc (calloc) and free, 2> Use LRU mechanism. You can easily remove or modify them if it doesn't fit your requirements.
Download the latest Bluetooth SDK via Simplicity Studio if not already done.
Create a "soc-empty" project based on the board you are using as the starting point.
Drag and drop the scanner_app.c, scanner_app.h and log.h files to the project created just now, then compile and program to your board.
Modify the project settings in app.c if needed:


