Add a Standard Bluetooth Service to Your BLE project#
Overview#
With the introduction of Simplicity Studio v5 (SSv5) many aspects of the development process have changed, such as project creation, configuration tools, code structure, and so on. From a Bluetooth perspective, the tools that were found in Simplicity Studio v4 are now different in Simplicity Studio v5. This lab focuses on getting started with Bluetooth GATT Configurator, which is a simple-to-use tool to help you build your own GATT database with an intuitive GUI instead of coding. It helps adding profiles/services/characteristics defined by the Bluetooth SIG and defining custom ones using SSv5 by building a basic example and extending the capabilities of the projects created. It also helps adding Universal Components (UC) and learning how to add them to a project.
Getting Started#
Ensure that you have the correct hardware and software prepared to successfully complete the lab.
Prerequisites#
For this lab you will need the following:
EFR32BG22 Thunderboard (SLTB010A)
Micro-USB to USB Type-A cable (Not included with Thunderboard and no power charging cable. It must include data lines)
Simplicity Studio v5
Gecko SDK Suite 3.1.1 or later
Bluetooth SDK 3.1.1 or later
EFR Connect Mobile App
Accept Location Access. “While using the App” will work. This is required for the Traffic Browser.
Download the Workshop Source Files and Update Images#
app.c - Modified application source file.
Set up Thunderboard Kit and Simplicity Studio#
Launch Simplicity Studio from your desktop.
Connect the Thunderboard BG22 to your PC using a micro-USB cable.
When the device is connected to your PC, you should see it listed in the Debug Adapters window in Simplicity Studio.
Select the J-link for the device to display the associated Overview, Example Projects, Documentation, and Demos.
Set the preferred SDK to Gecko SDK Suite v 3.1.1 or newer.
Ensure that the Secure Firmware Version is the latest one. Read and Update if not displayed or less.
Ensure your device has a bootloader installed. You can install a bootloader by flashing a demo example, such as the SoC-empty demo in the Example projects & Demo’s tab or by creating a bootloader project, such as the BGAPI UART DFU Bootloader, generating the code, and then building and flashing the bootloader image. For a more detailed explanation, see How to Use Bootloaders and OTA in Your Project.

Creating the Project#
Silicon Labs provides different example projects as a starting point for Bluetooth Low Energy application development. This lab starts with the Bluetooth - SoC Empty example, which is the most common starting point as the example demonstrates the bare minimum needed for a Bluetooth C application. Then, it will be modified to Add a Standard Bluetooth GATT Service and interface the sensor to provide the data to the service in the application.
Create Example Project#
Go to the Launcher perspective in Simplicity Studio by clicking on the “Launcher” icon on the top right corner. “Launcher” and “Simplicity IDE” options should be visible.
Select the J-link device.
Click on Example projects & Demo’s tab to browse the example projects.
Select “Bluetooth” from the Technology Type filters. Additionally, you can type “Empty” in Keywords to narrow results.
Select Bluetooth - SoC Empty from the Bluetooth examples and click Create. (Do not select the "demo").
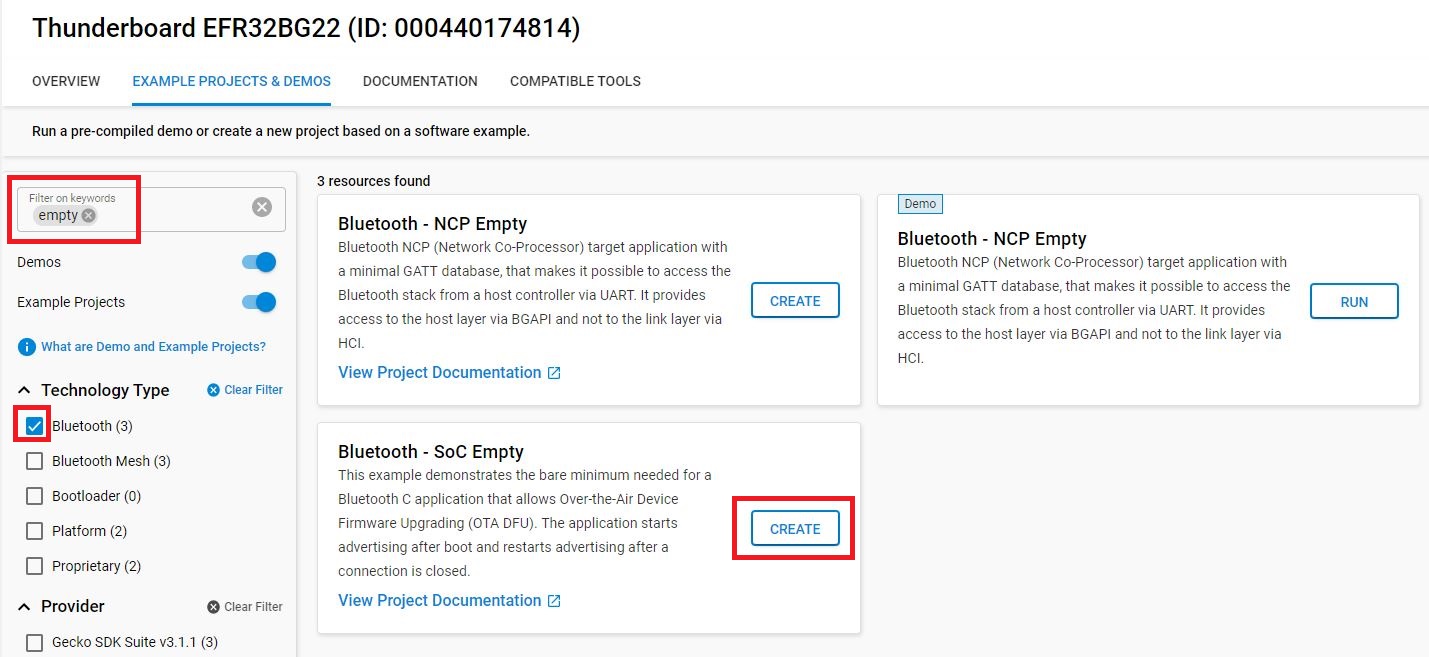
Change the name of the project to “soc_add_service” and select "Copy contents" under "With project files" to copy the project files into your project. This makes version control easier to manage and future updates to the Simplicity Studio libraries will not impact the copied files in this project.
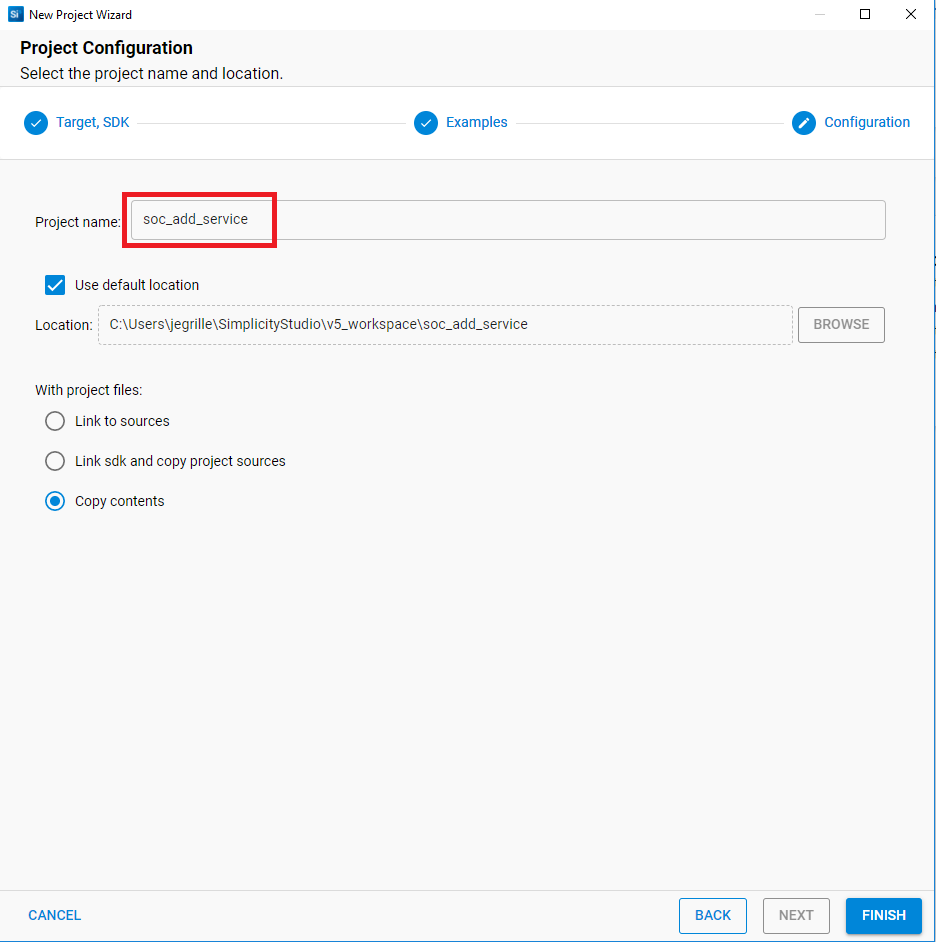
Click “Finish” on the following prompt to create the example project and switch to the Simplicity IDE perspective.
Modify the Project#
To add a standard Bluetooth Service to our project, this lab explores the Bluetooth GATT configurator. Additionally, different components will be added to the project to allow the service to access the sensor on the board and poll the information needed to update said service. Standard Bluetooth services are defined by the Bluetooth SIG, which allows any device to recognize data communicated by the service. Using these services will allow most mobile apps to accurately represent data communicated.
This lab also uses the standard Bluetooth Service Environmental Sensing, which contains several characteristics and descriptors. For this lab, the temperature and humidity characteristics will be updated when reading them from the EFR Connect app.
Modify the GATT database configuration to add the standard Bluetooth service.
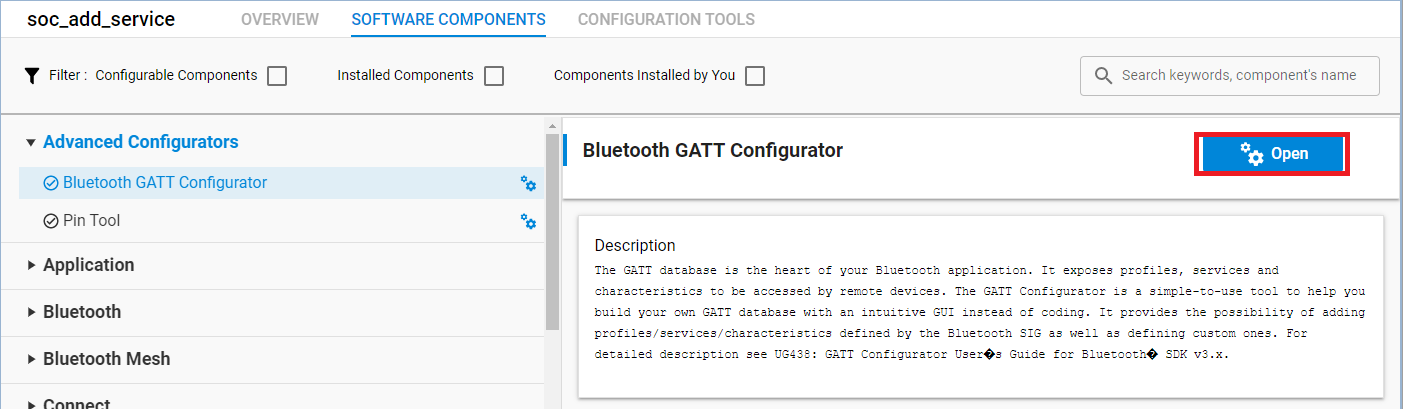
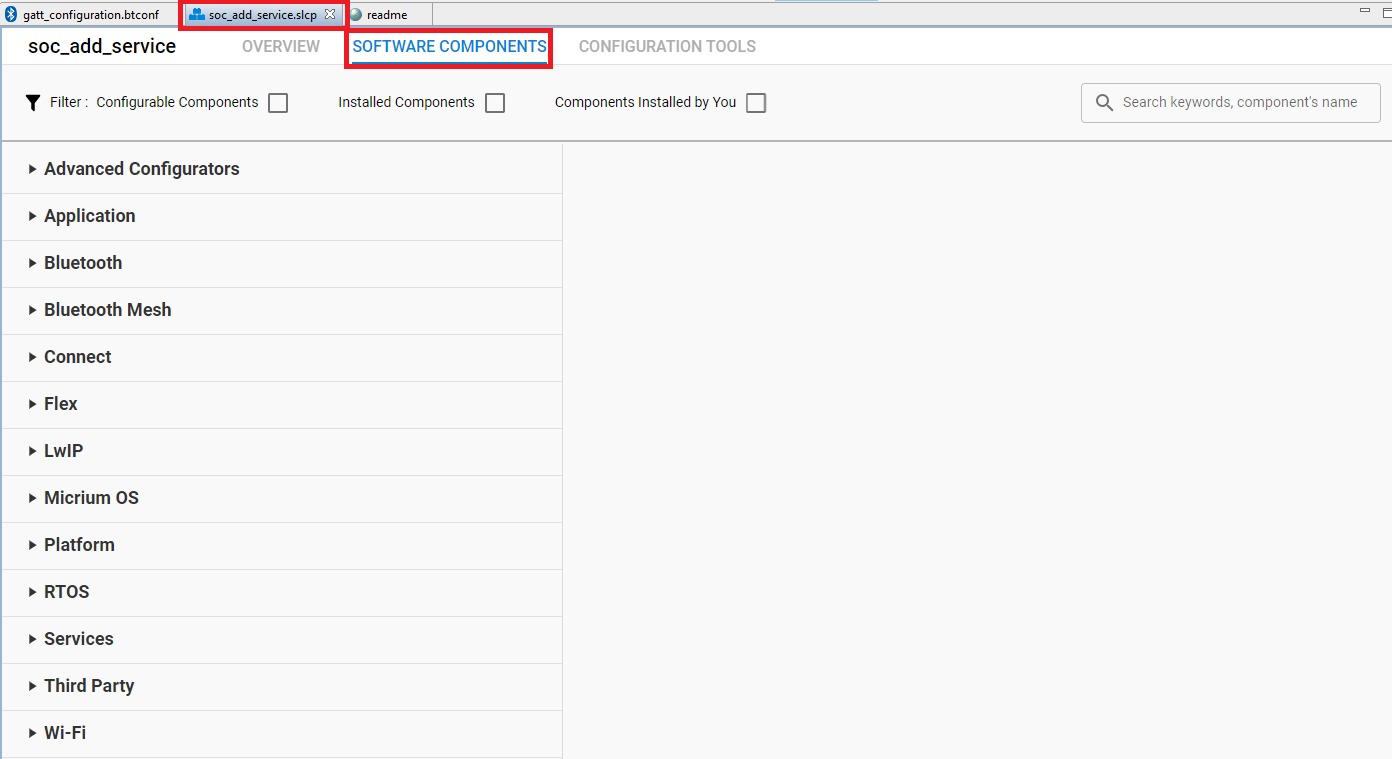
In the Project Configurator, the default tab is opened after creating the project or you can open it by double clicking the soc_add_service.slcp. Go to the Software Components tab and browse to Advanced Configurators > Bluetooth GATT Configurator. You will see the button to open on the top right corner when you select the component. Click it.
Once in the GATT Configurator, you can click on the Toggle - Add Standard Bluetooth GATT items - view.
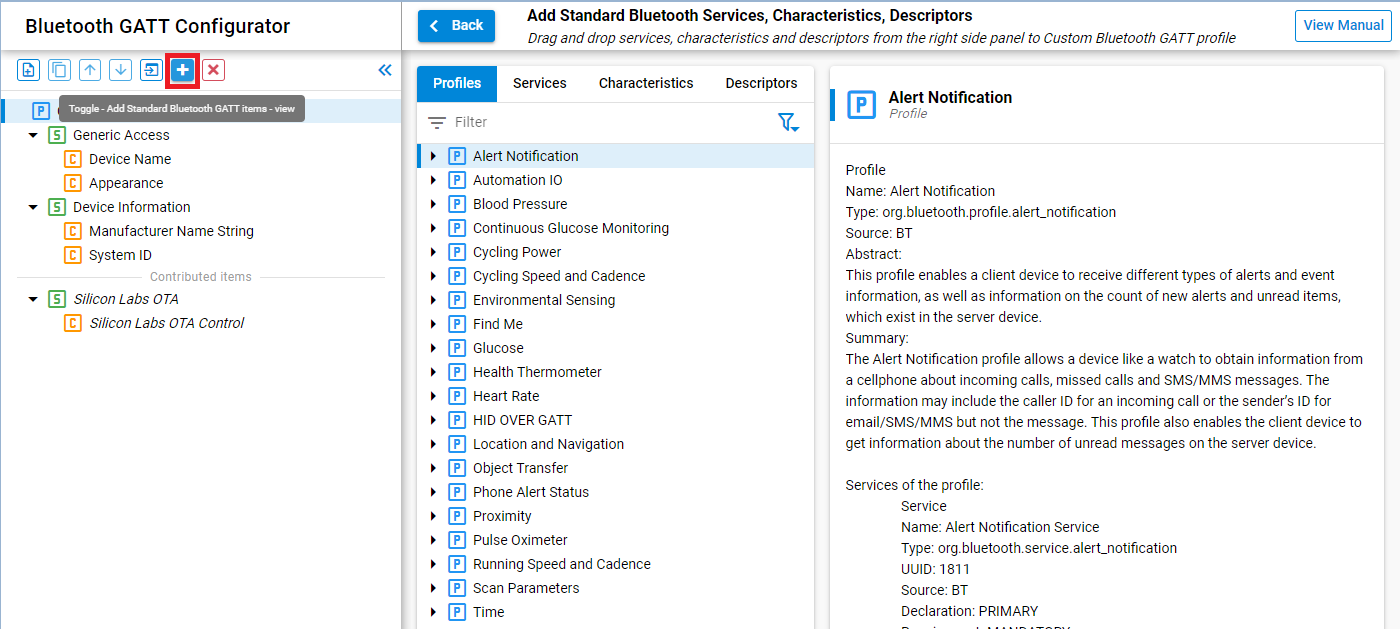
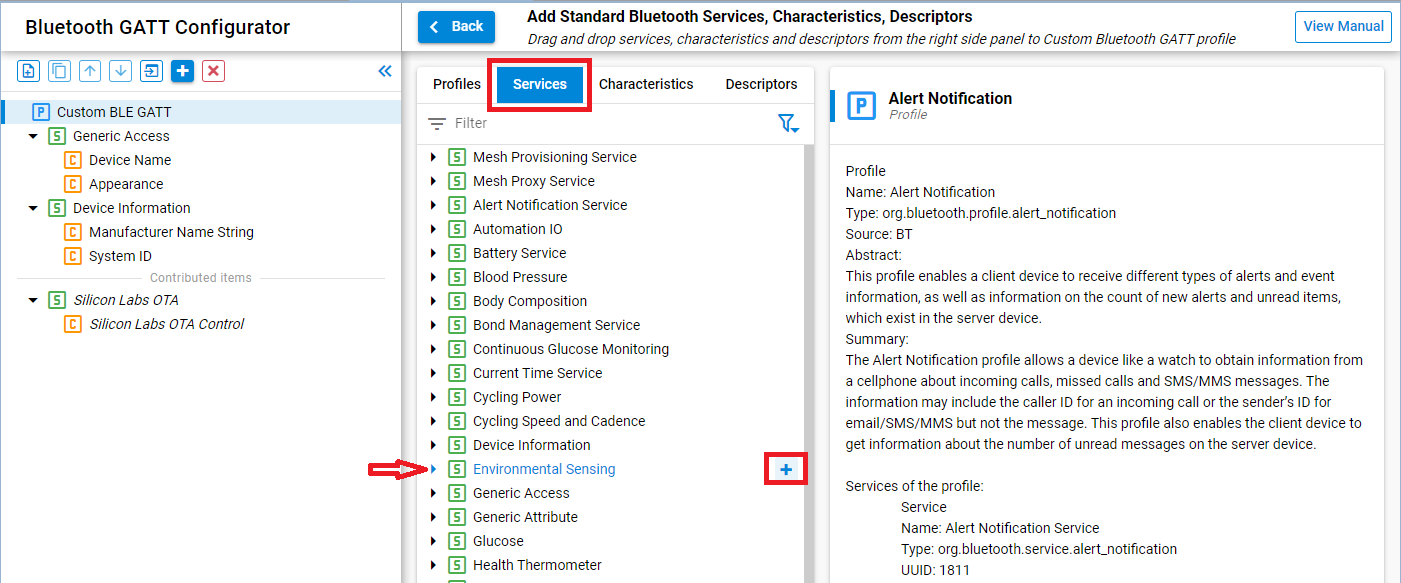
Once in the Add Standard Bluetooth Services, click on the services tab and look for the Environmental Sensing service and click on add.
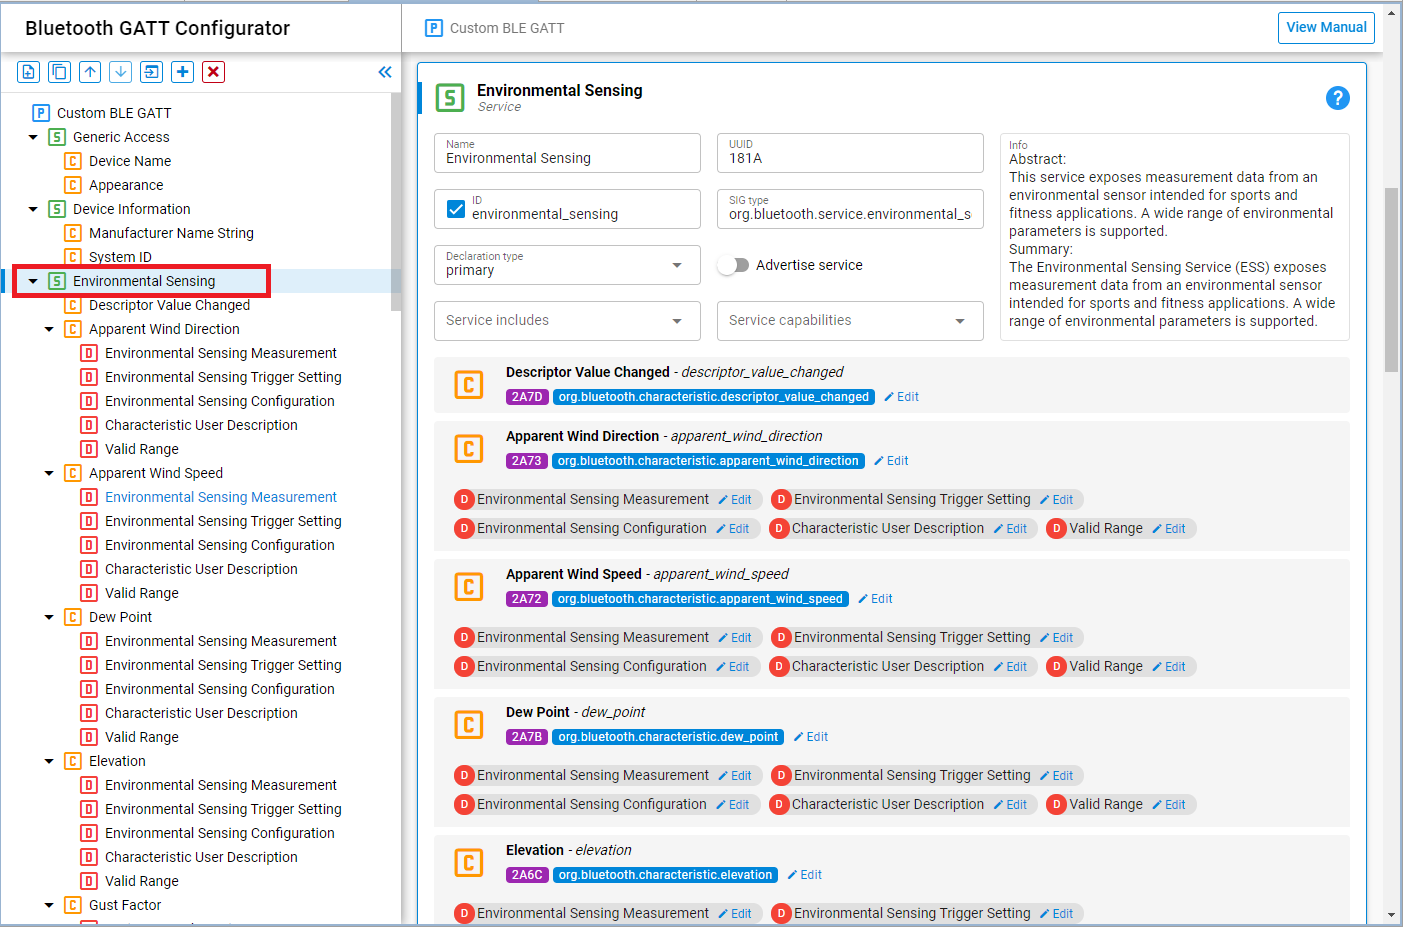
The Environmental Sensing Service will be added to the GATT database on the left side including all standard characteristics and descriptors. Now click on the Toggle - Add Standard Bluetooth GATT items - view again to go back to the standard view.
Humidity and Temperature are the two characteristics that will be used. Scroll down to find the Humidity characteristic and click on it to open the characteristic settings. Change the Value settings from HEX to USER. Notice the ID of the characteristic, in this case "humidity", as it will be used when identifying the characteristic in the application as "gattdb_humidity".

Scroll down to the Temperature characteristic and click on it to open the characteristic settings and change the Value settings from HEX to USER. Notice the ID of the characteristic, in this case "temperature" as it will be used when identifying the characteristic in the application as "gattdb_temperture".

Save the configuration (Ctrl+S), which will apply the changes to the GATT database files gatt_db.c and gatt_db.h.
Install the necessary components to enable the Thunderboard on board Temperature and Humidity sensor. This sensor will be used to measure the environment to update the Temperature and Humidity characteristics values.
Open the Project Configurator and go into the Software Components tab.
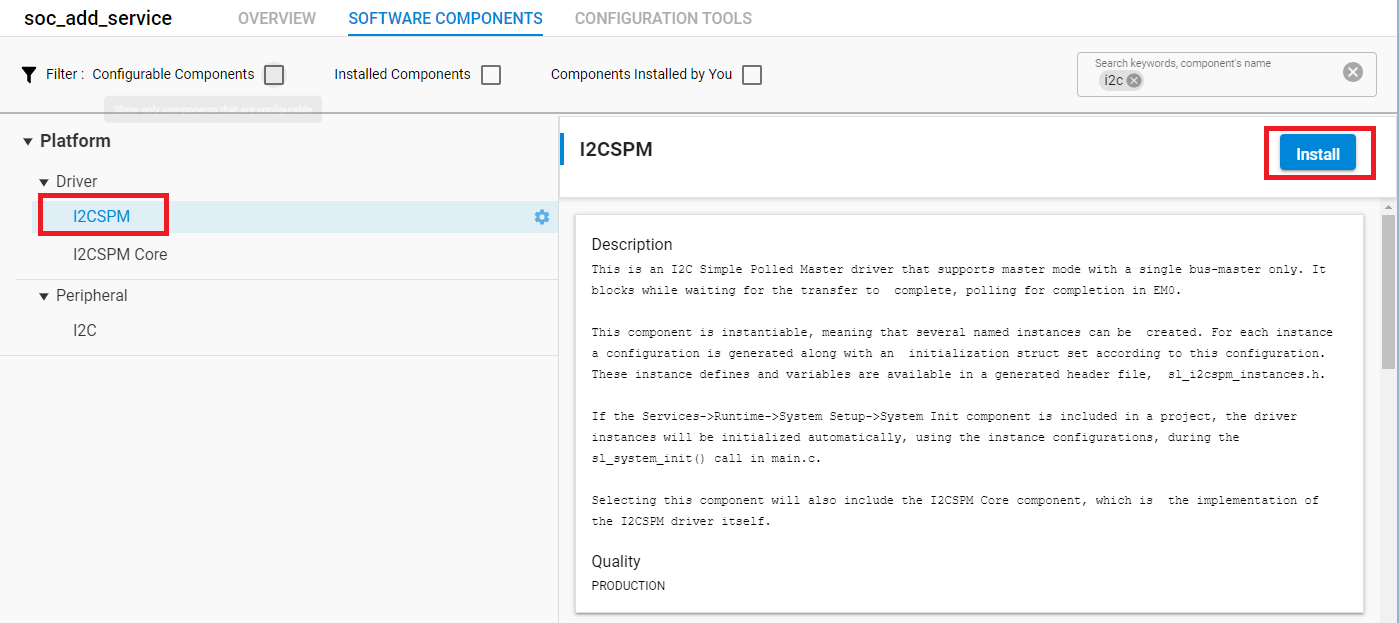
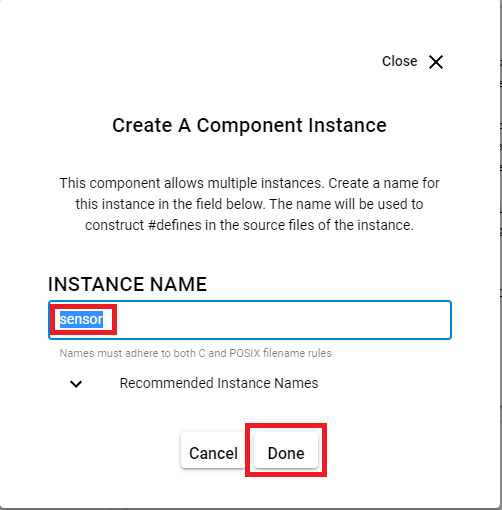
Find the I2CSPM component (Platform > Driver > I2CSPM or type I2CSPM in the search tab) and click install. A window will prompt named Create A Component Instance, asking to choose the instance name, leave it as "sensor" the default value and click done.
Find the Relative Humidity and Temperature sensor component (Application > Sensor > Relative Humidity and Temperature sensor) and install it. This is a sensor driver abstraction designed for the Thunderboard.
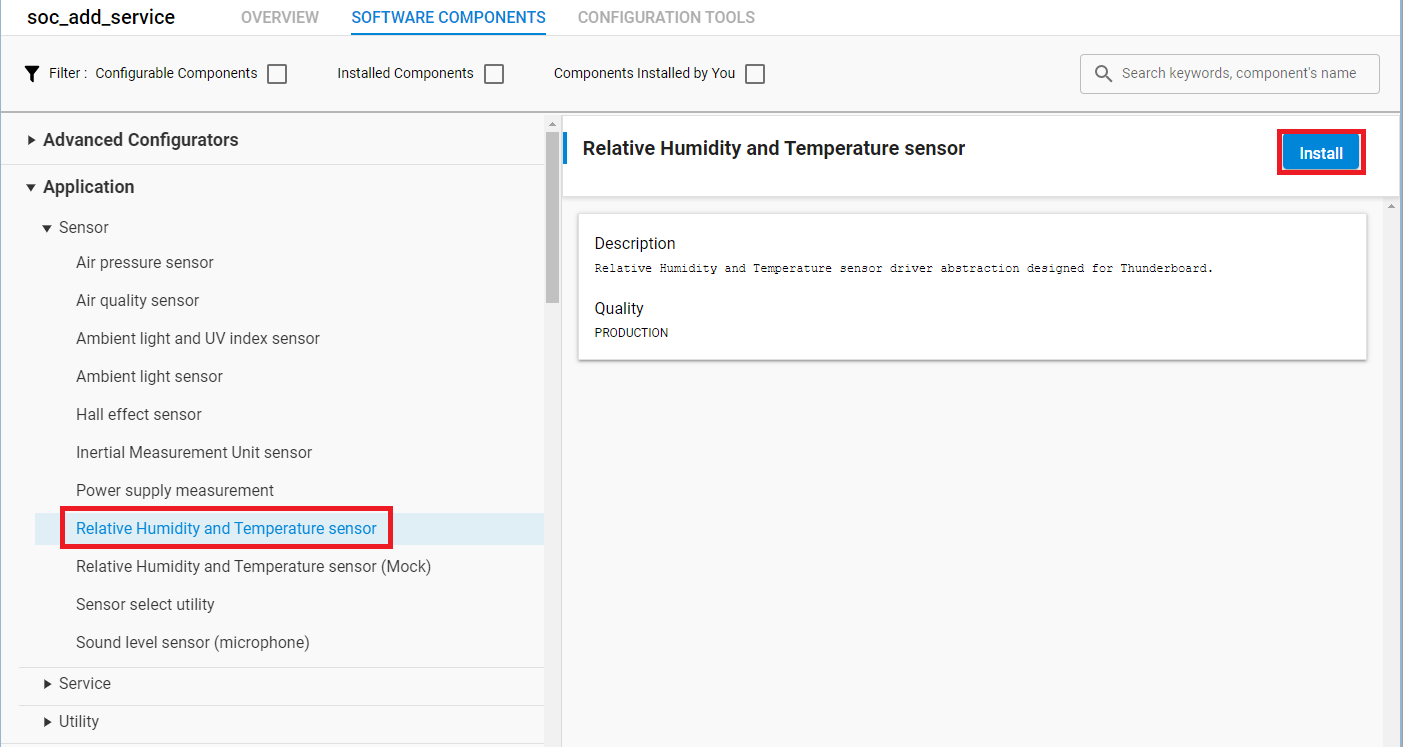
This section also includes other sensor driver abstractions designed for Thunderboard, such as air pressure sensor, air quality sensor, ambient light and UV index sensor, and so on. These components add the driver files of the sensor to the project but the application implementation still has to be added to the code. For the Relative Humidity and Temperature sensor, the driver header file is included and installed by the component. Then, the code is implemented in app.c to make use of that driver.
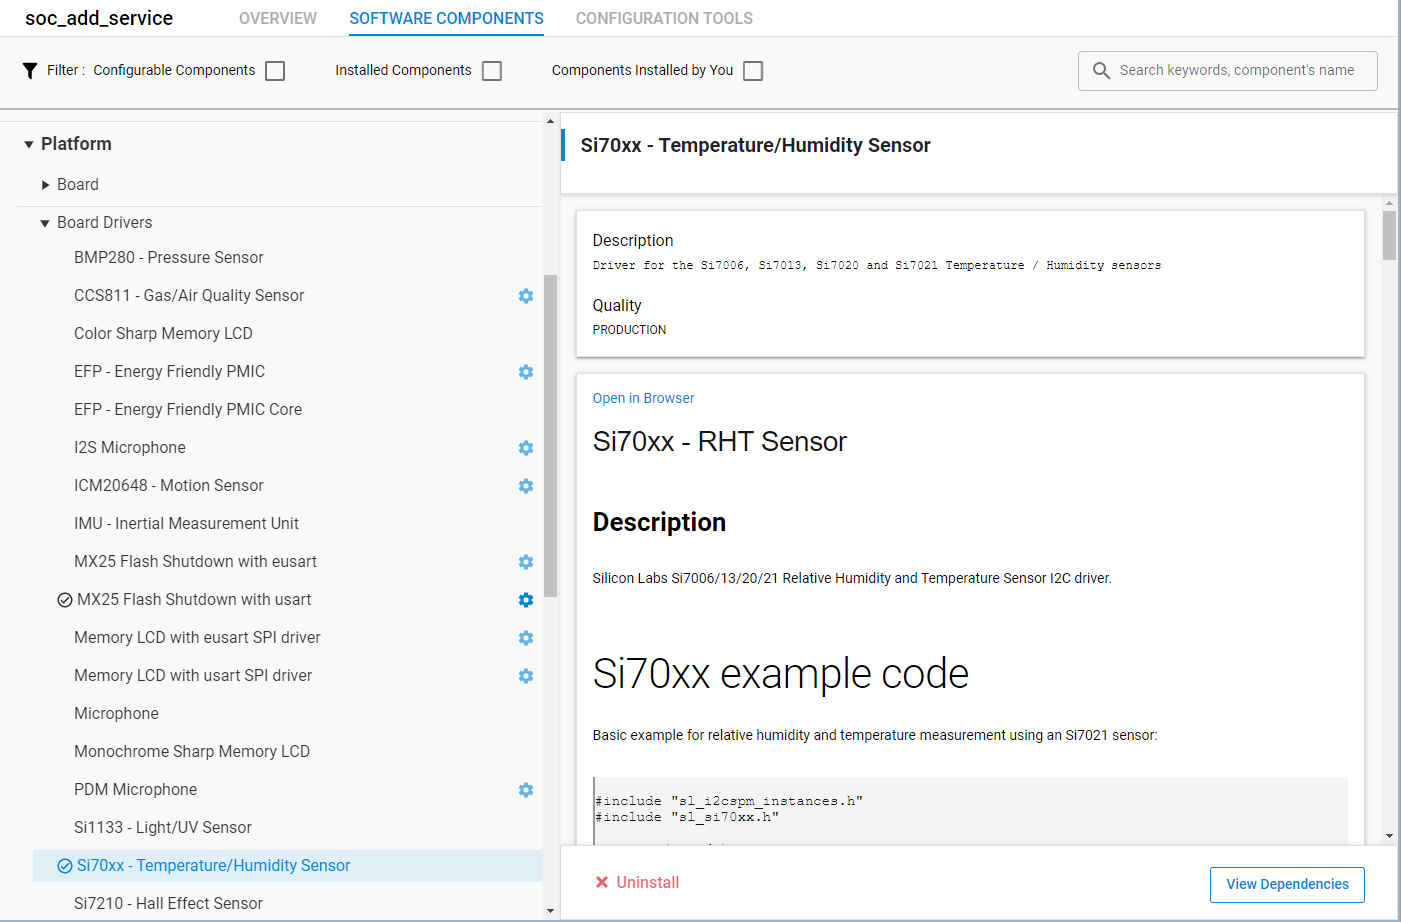
You can install the driver for different sensors components without the abstraction layer for the Thunderboard. These can be found in the Platform section of software components ( e.g., Platform > Board Drivers > Si70xx = Temperature/Humidity Sensor). This driver is automatically installed with the Relative Humidity and Temperature sensor component).
Note: Failure to install the components in the above section will cause errors when building the project because of undefined references in the provided source code.
Finally, the provided source file “app.c” is copied to the project (overwrites the default app.c from the project). The modified file includes the code to initialize and handle the sensor interface in the application and also to update the values of the characteristics with the information from the sensor. These sections are not included in the default SoC-empty project. For more information about the changes made, see the code section of the lab.
Build the project by clicking on the hammer icon, which will generate the application image to be flashed to your device. Note that the build process will finish with 190 warnings, which are caused by the descriptor's IDs in the Standard Service. If using descriptors, modify their IDs to avoid multiple redefinitions.
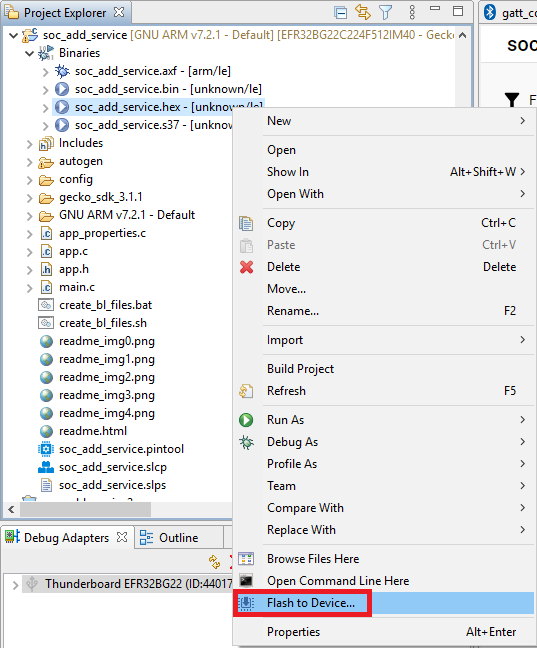
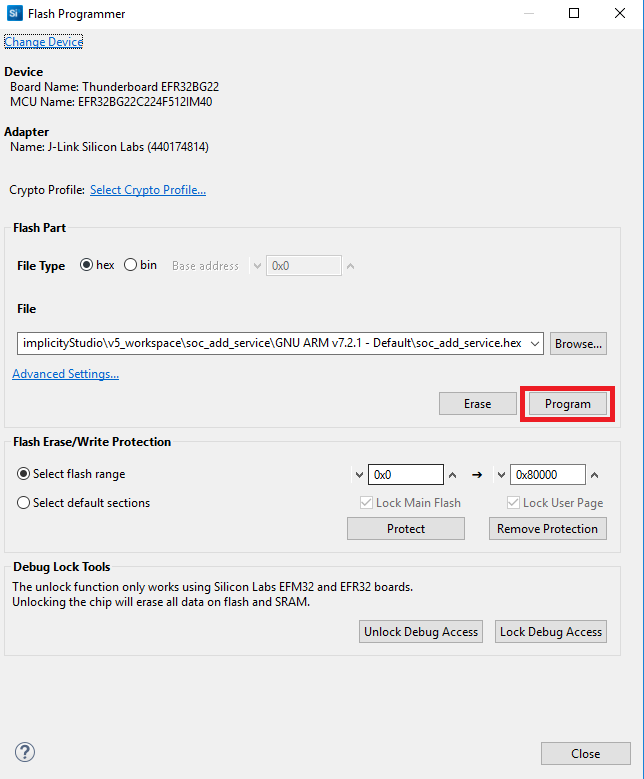
Flash the application image to your device by going into the project explorer tab. In your project root folder, in a binaries folder, click on the drop down arrow and right click on "soc_add_service.hex" > flash to device.
Use EFR Connect to Read the Environmental Sensing Standard Bluetooth Service on the Thunderboard BG22#
This section shows you how to read the value from the standards Temperature and Humidity characteristics.
Start EFR Connect app on your phone.
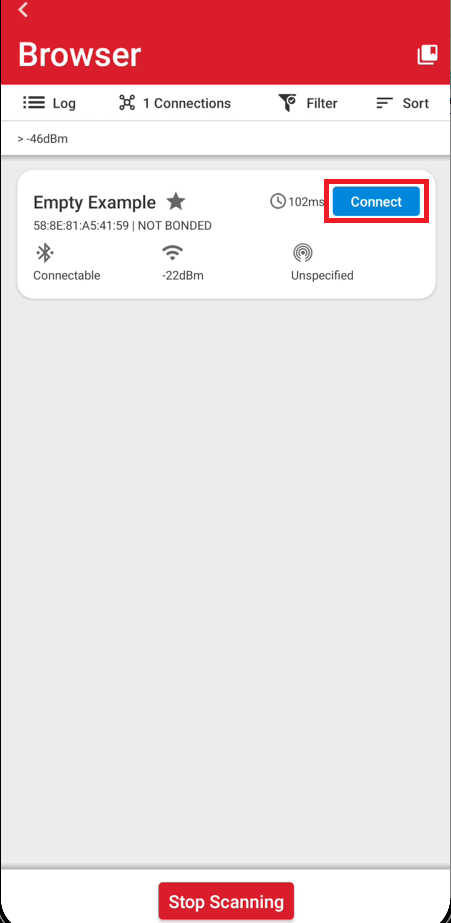
Start Bluetooth Browser.
Connect to your device advertising as “Empty Example”. Note: If you cannot find the "Empty example", you might not have a bootloader installed. See the section "Set up Thunderboard Kit and Simplicity Studio" step 7.
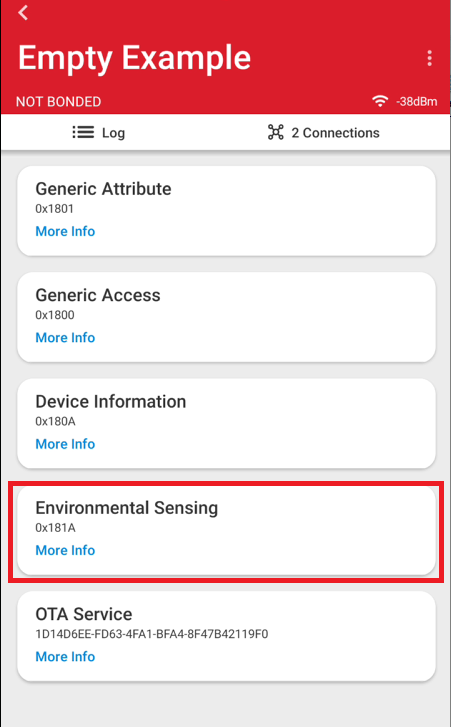
After connecting in the EFR connect app, the services will be shown in the browser. Click on the Environmental Sensing service to open it.
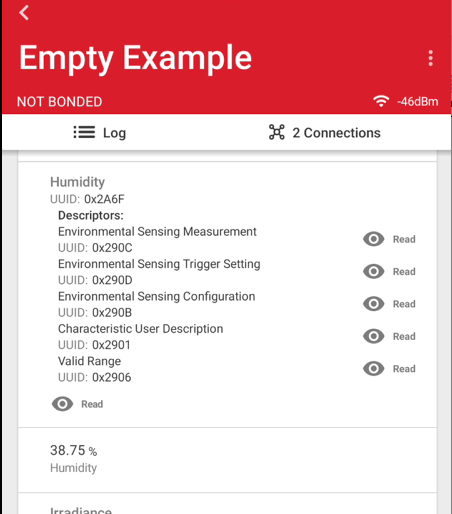
Look for the characteristic Humidity (UUID: 0x2A6F) and click on read at the lower part of the characteristic tab. The device will send the request to read the value of this characteristic from the Thunderboard and update the value on screen. The Humidity value should appear on screen.
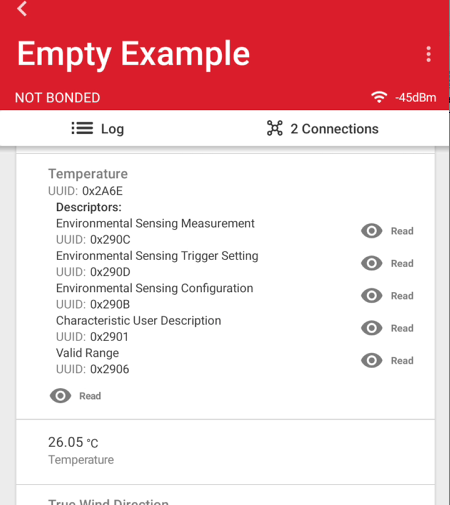
Now, Look for the next characteristic Temperature (UUID: 0x2A6E) and click on read at the lower part of the characteristic tab. The device will send the request to read the value of this characteristic from the Thunderboard and update the value on screen. The Temperature value should appear on screen.
A functional Standard Bluetooth Service is added to the project that can be Read from a mobile app, in this case EFR connect.
Code Explanation#
This section reviews parts of the code that are important to understanding this lab example.
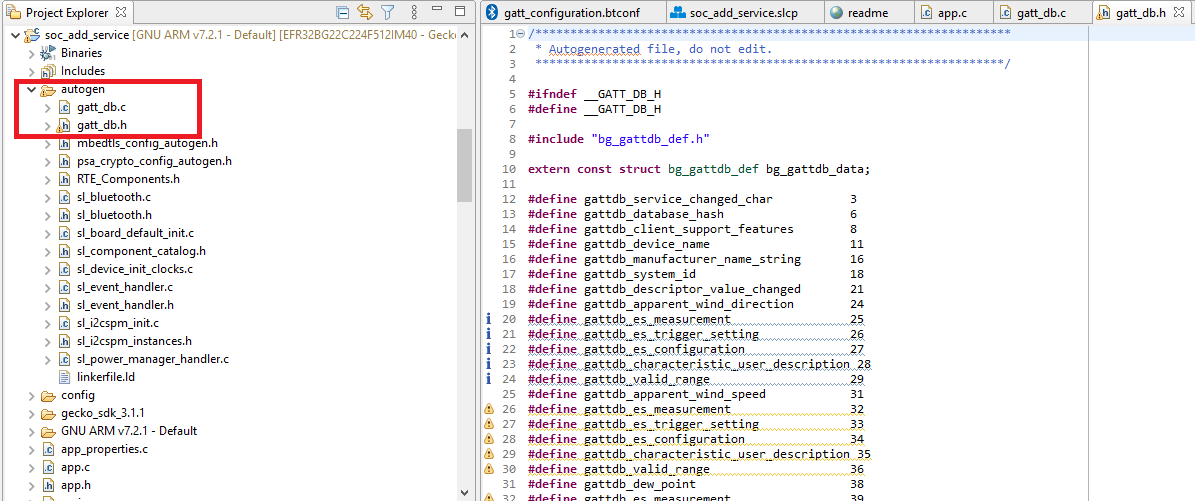
When a component, such as the Relative Humidity and Temperature sensor is installed, files are added to your project to enable the use of the component. Also, additional components are also installed as dependencies to allow it to work. In this case, the Relative Humidity and Temperature sensor dependencies are shown in the image below.
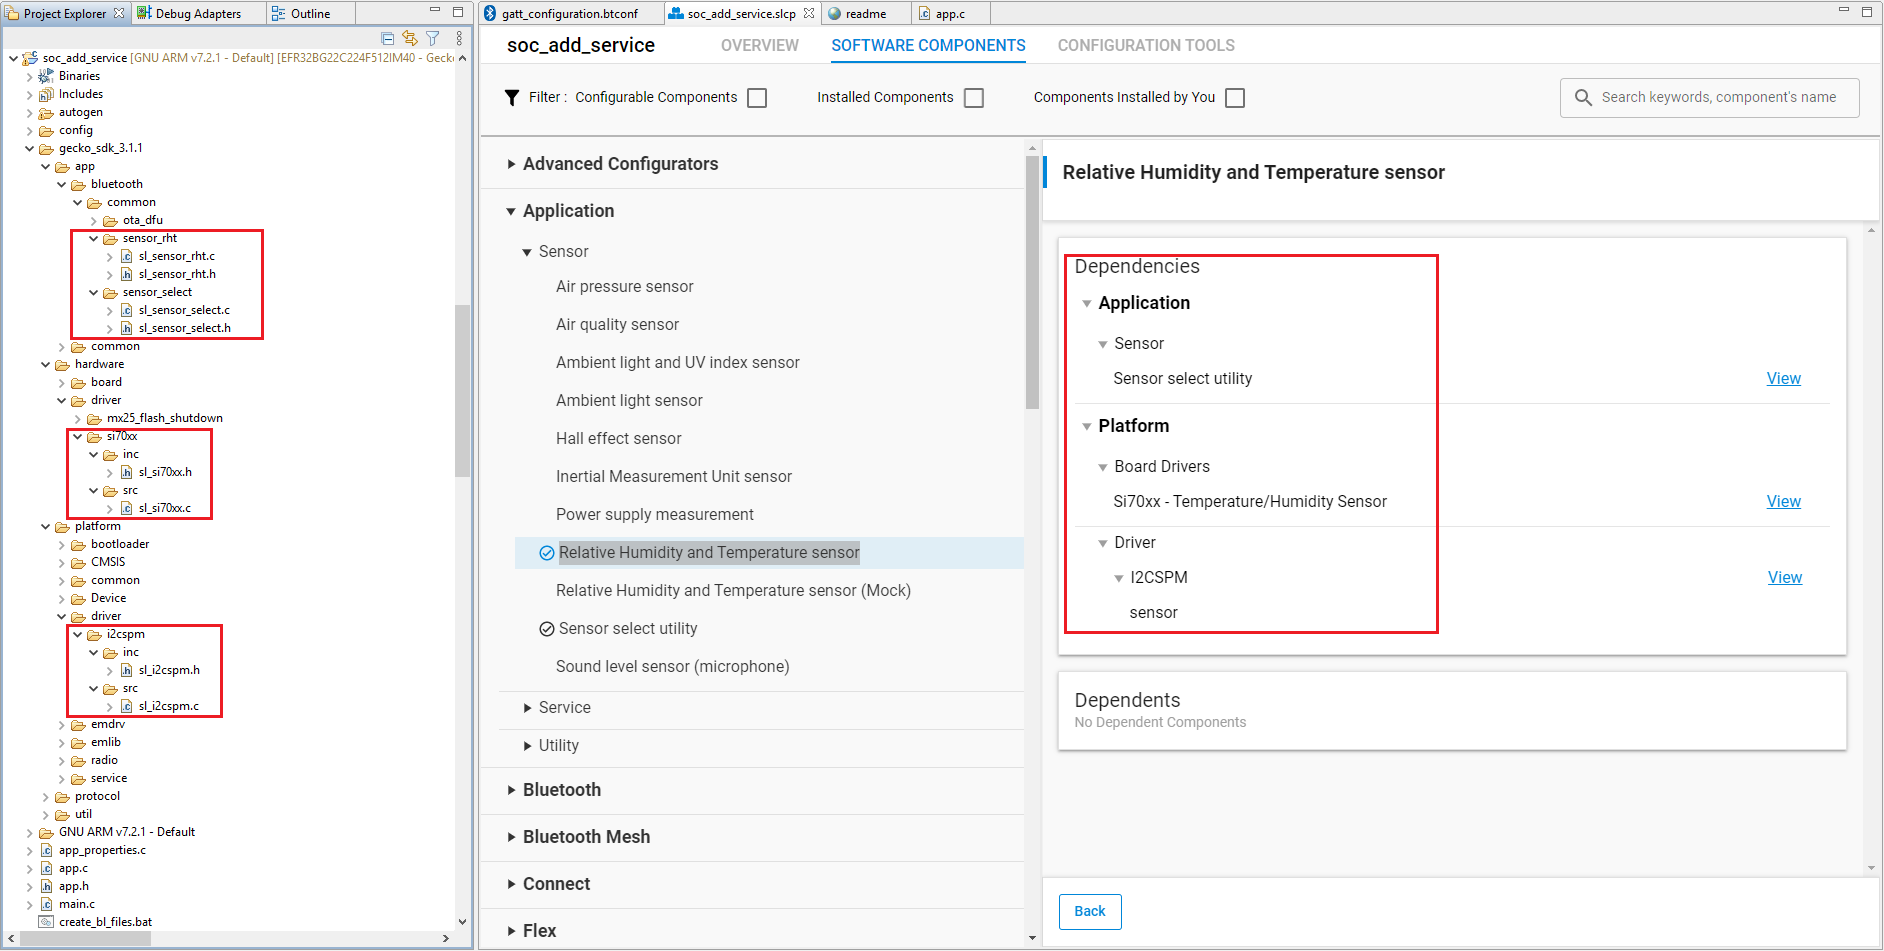
The sl_sensor_rht.h/.c files are the sensor driver abstraction files. The sl_sensor_select, sl_si70xx and I2CSPM are installed as dependencies and the files added because they are needed by the abstraction driver sl_sensor_rht.
The installed sensor abstraction component requires interfacing with the Bluetooth application to provide the necessary information and update the values in the Standard Bluetooth Service, in this case for the Humidity and Temperature characteristics. To achieve this, the code below was added in the custom app.c file.
Include the sensor abstraction header files and define variables.
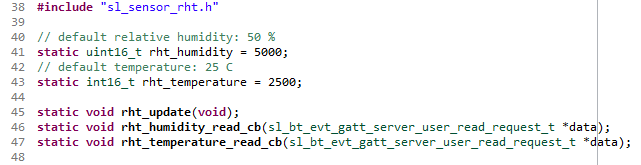
Variable to store the Humidity value:
// default relative humidity: 50 %
static uint16_t rht_humidity = 5000;Variable to store the Temperature value:
// default temperature: 25 C
static int16_t rht_temperature = 2500;Function definitions:
static void rht_update(void);
static void rht_humidity_read_cb(sl_bt_evt_gatt_server_user_read_request_t *data);
static void rht_temperature_read_cb(sl_bt_evt_gatt_server_user_read_request_t *data);The sensor will be initialized in the application init function "app_init()" with the following function call:
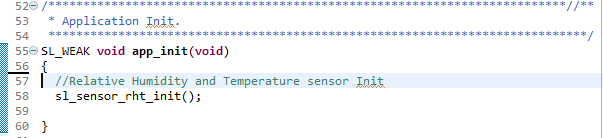
//Relative Humidity and Temperature sensor Init
sl_sensor_rht_init();This is the initialization function provided by the Relative Humidity and Temperature sensor components that were previously installed in the project.
The code, which processes the read requests from the mobile application was added in the Bluetooth Event Handler of the custom app.c file. Additionally, receive event use case is added, as shown below.

sl_bt_evt_gatt_server_user_read_request_idThis event is raised when a read request, which contains the value of the GATT characteristic being read, is received from the client.
evt->data.evt_gatt_server_user_read_request.characteristicThis value is compared to the handles of the characteristics of implemented service characteristic, in this case "gattdb_temperature" and "gattdb_humidity". If more sensors are added, this section needs to be extended to account for the amount of characteristic that are being read. For example, if you add an air pressure sensor and use the pressure characteristic, you need to additionally check if the received read request is for the pressure characteristic:
(gattdb_pressure == evt->data.evt_gatt_server_user_read_request.characteristic)Note: The definition of these characteristics handles can be found in the file gatt_db.h and are obtained from the ID you assign to the characteristic in the GATT configurator, where the format is gattdb_"ID". In this case, the default IDs "temperature" and "humidity" are used, which means that the definition for their handles in gatt_db.h will be "gattdb_temperature" and "gattdb_humidity".
Depending on which characteristic is being read, the function to read the value from the sensor for said characteristic is called. If it's temperature, the following function is called:
rht_temperature_read_cb(&evt->data.evt_gatt_server_user_read_request);If it's humidity, the following function is called:
rht_humidity_read_cb(&evt->data.evt_gatt_server_user_read_request);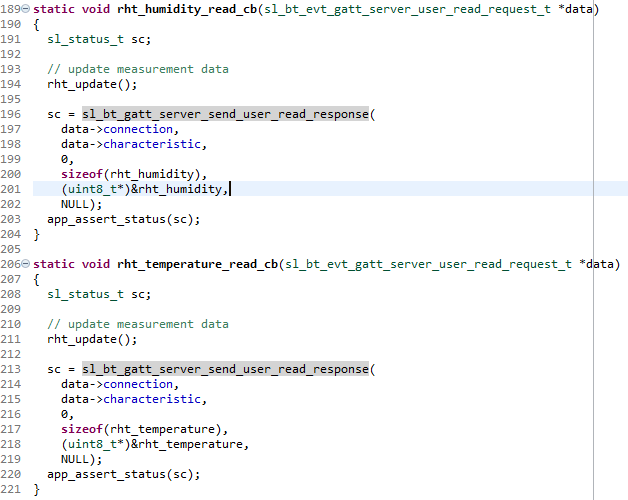
Both functions are very similar internally and differ in the variables used. For example, the rht_humidity_read_cb function first defines a variable to receive the returned status of API calls.
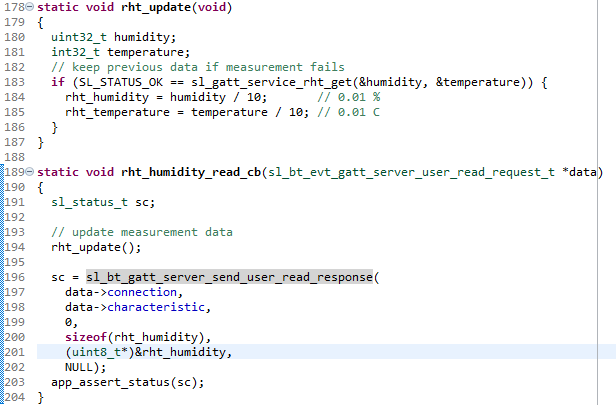
// update measurement data
rht_update();Then it's called to update the humidity and temperature values by polling the sensor. After that, all that is left is to send the response with the Humidity or temperature values to the client by using the API, as follows:
sl_bt_gatt_server_send_user_read_response(
data->connection,
data->characteristic,
0,
sizeof(rht_humidity),
(uint8_t*)&rht_humidity,
NULL);This API sends the response to the client and specifies parameters, such as connection and characteristic, to whom it's being sent, and the error code zero, which means success. Also, it provides the parameters size of the value and the pointer to the variable with the value. After this response is sent, the EFR connect app receives the temperature value and updates the characteristic.
Source Files#
app.c - Modified application source file.