Getting Started with the WSTK#
To get started with Bluetooth demo software, you should have downloaded Simplicity Studio 5 (SSv5) and the Bluetooth SDK v3.x as described in the Simplicity Studio 5 User’s Guide, available online and through the SSv5 help menu. The Bluetooth SDK comes with some prebuilt demos that can be flashed to your EFR32 device and tested using a Smartphone. This section describes how to set up the WSTK and how to test three prebuilt demos on both Android and iOS devices:
NCP Empty demo
iBeacon demo
Health Thermometer demo
Prepare the Mainboard#
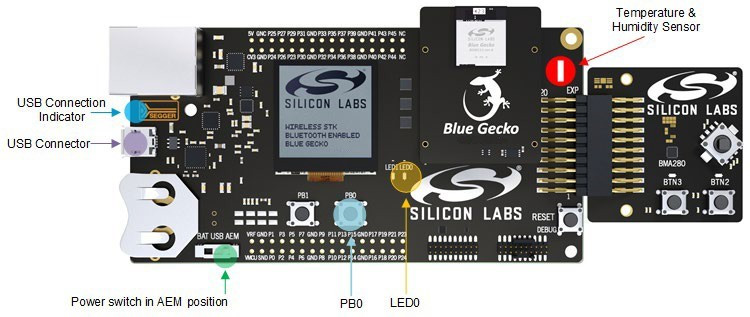
Connect a Bluetooth Module Radio Board to the mainboard as shown in the following figure.
Connect the mainboard to a PC using the Mainboard USB connector.
Turn the Power switch to "AEM" position.
Note: At this stage you might be prompted to install the drivers for the mainboard, but you can skip this for now.
Check that the blue USB Connection Indicator LED turns on or starts blinking.
Check that the mainboard LCD display turns on and displays a Silicon Labs logo.
Before starting to test the demo application note the following parts on the mainboard:
Temperature & Humidity Sensor
PB0 button
LED0
Flash the Demo#
With your device connected as described above, open Simplicity Studio v5.
Select your device in the Debug Adapters view.
On the Example Projects & Demos tab, click RUN on the demo of choice.
Test the Bluetooth Demos Using an Android or iOS Smartphone#
Testing the NCP Demo#
Load the NCP demo on the target:
Open Simplicity Studio with a mainboard and radio board connected and select the corresponding debug adapter.
On the OVERVIEW tab, under “General Information”, select the Gecko SDK Suite if it is not selected. On the Example Projects & Demos tab, find the Bluetooth - NCP demo and click RUN. This flashes the demo to your device, but it does not start advertising automatically.
At this point, BGAPI 3.x commands can be sent to the kit. Starting with Bluetooth SDK version 3.1.0, Silicon Labs introduced a new tool, the Bluetooth NCP Commander, that can be used to send BGAPI 3.x commands to the kit, using UART. Connections, advertising and other standard Bluetooth Low Energy operation can be controlled via this tool.
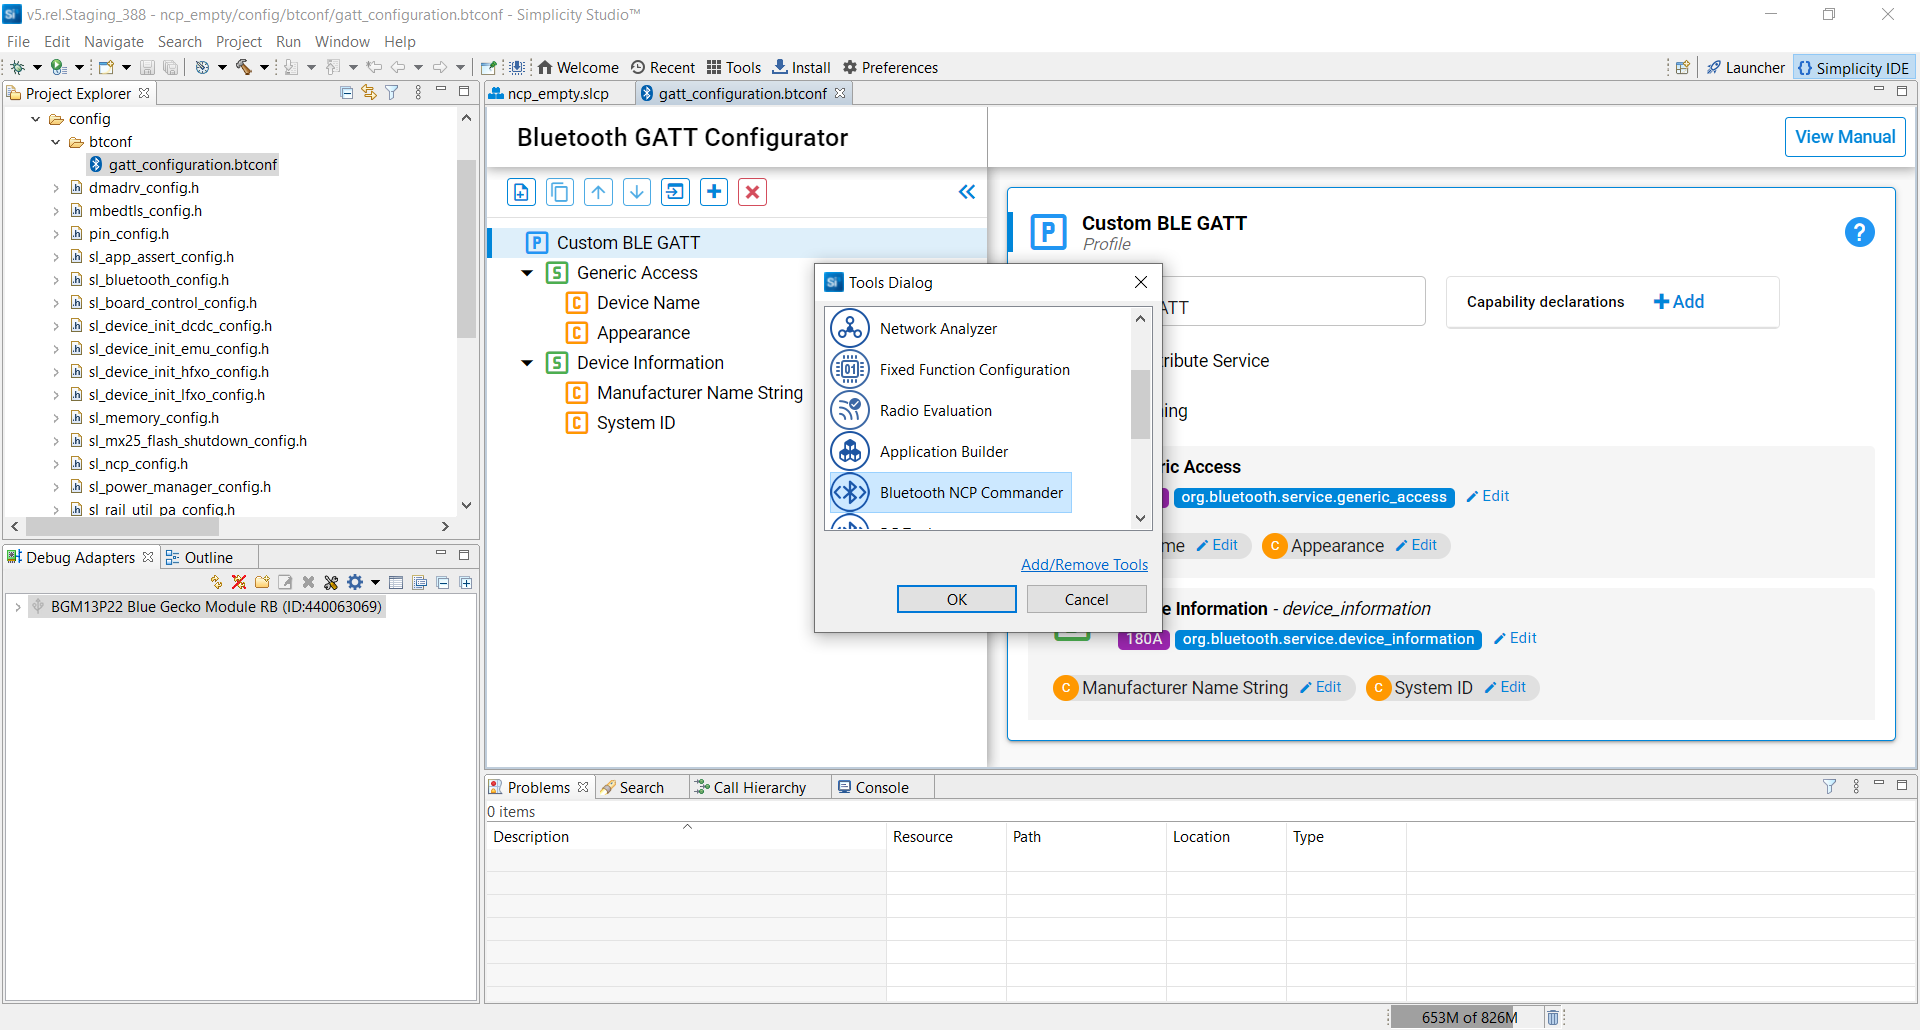
Bluetooth NCP Commander#
Bluetooth NCP Commander can be opened through the Project Configurator’s Configuration Tools tab, or from the Simplicity Studio Tools menu.
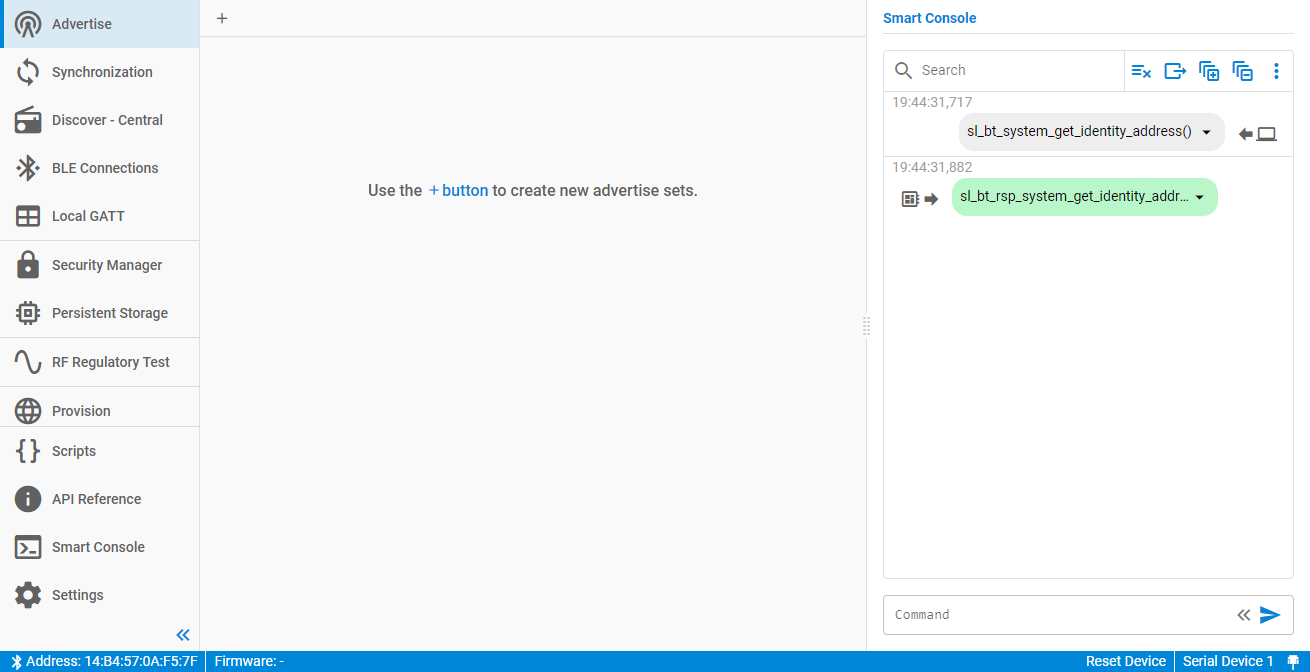
Launch Bluetooth NCP Commander and then establish the virtual UART connection to the kit using the JLink adapter:
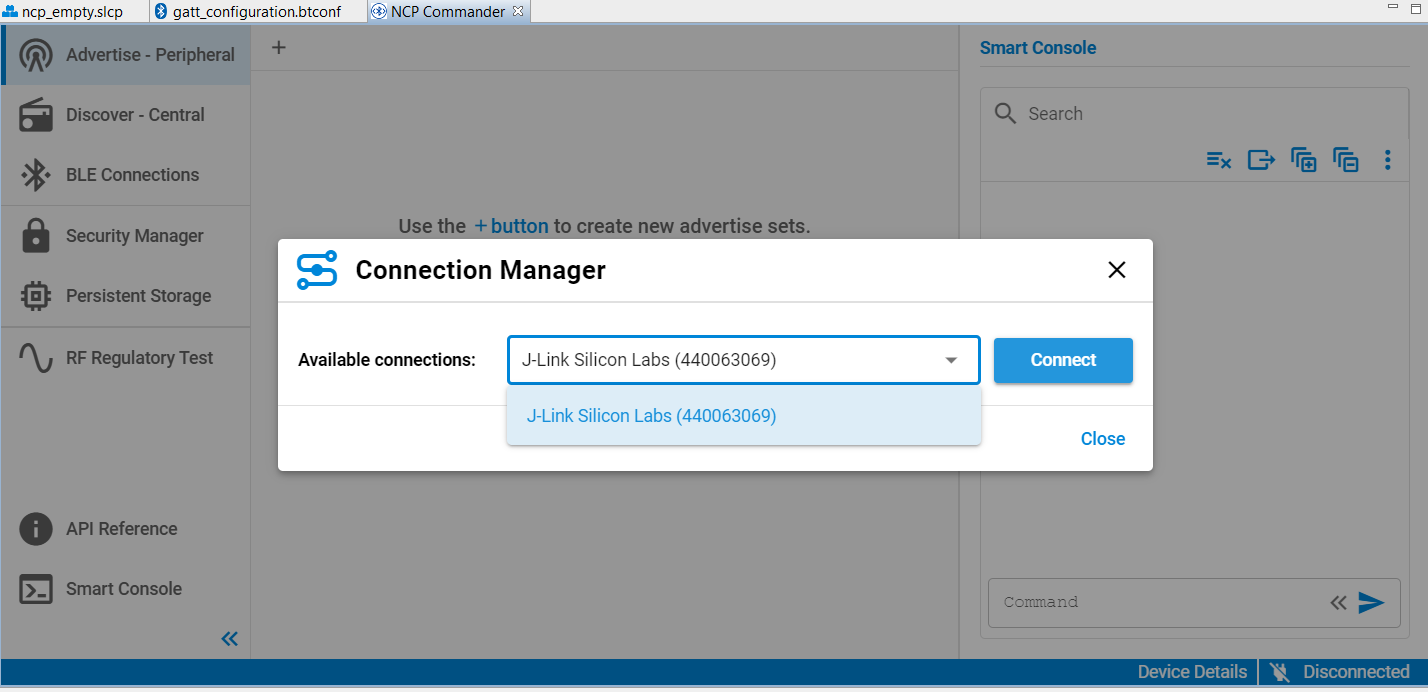
Click Connect. If everything works correctly you should see the result of the “sl_bt_system_get_identity_address” command displayed in green:
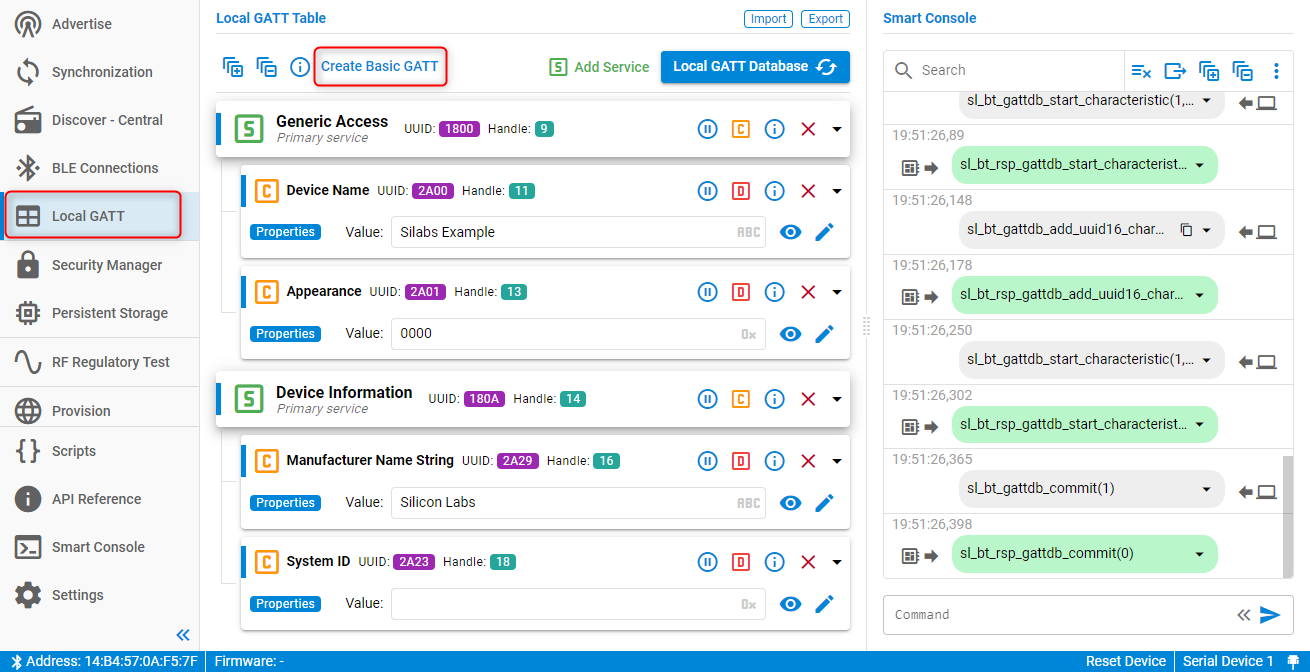
Unlike SoC examples, the NCP demo does not have a built-in GATT database and it expects the host to build the GATT database using the dynamic GATT database BGAPI commands. To create a basic GATT database, select the Local GATT menu, and click Create Basic GATT. This triggers a series of BGAPI commands that will build a basic database. You can modify this GATT database as you want. You can also change the device name here by changing the value of the Device Name characteristic.
To start advertising your device so that other devices can discover it and connect to it, select the ‘Advertise’ menu, click the ‘+’ button (Create Set) to create an advertiser set.

To populate the advertisement payload with the device name set the Advertising Data Type to Generated data.
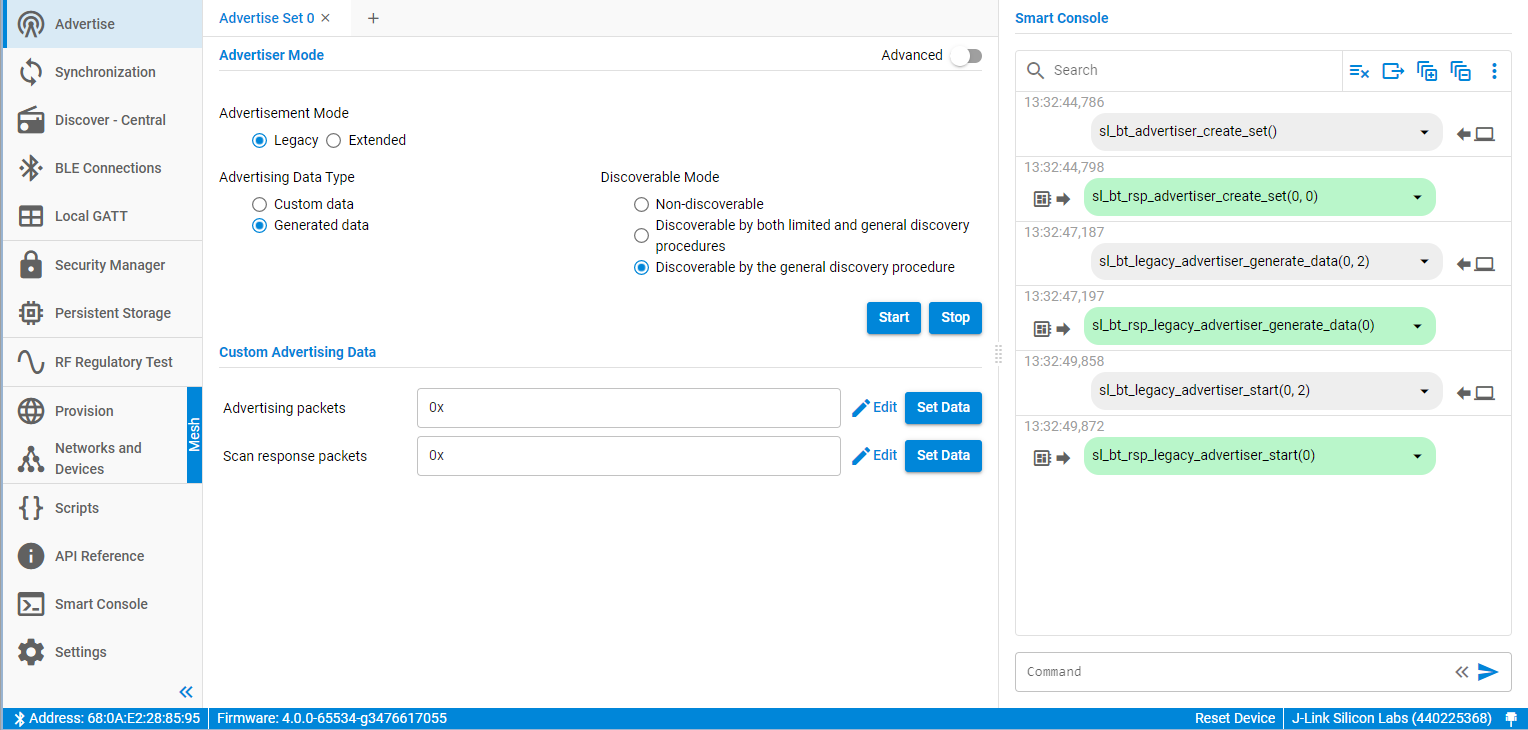
Click Start to start advertising.
Testing with the Smartphone App#
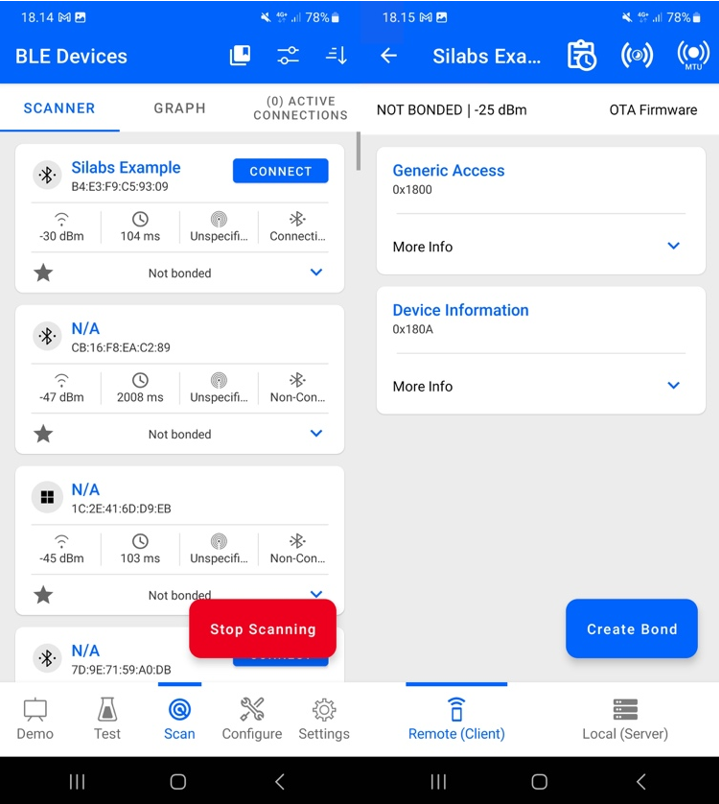
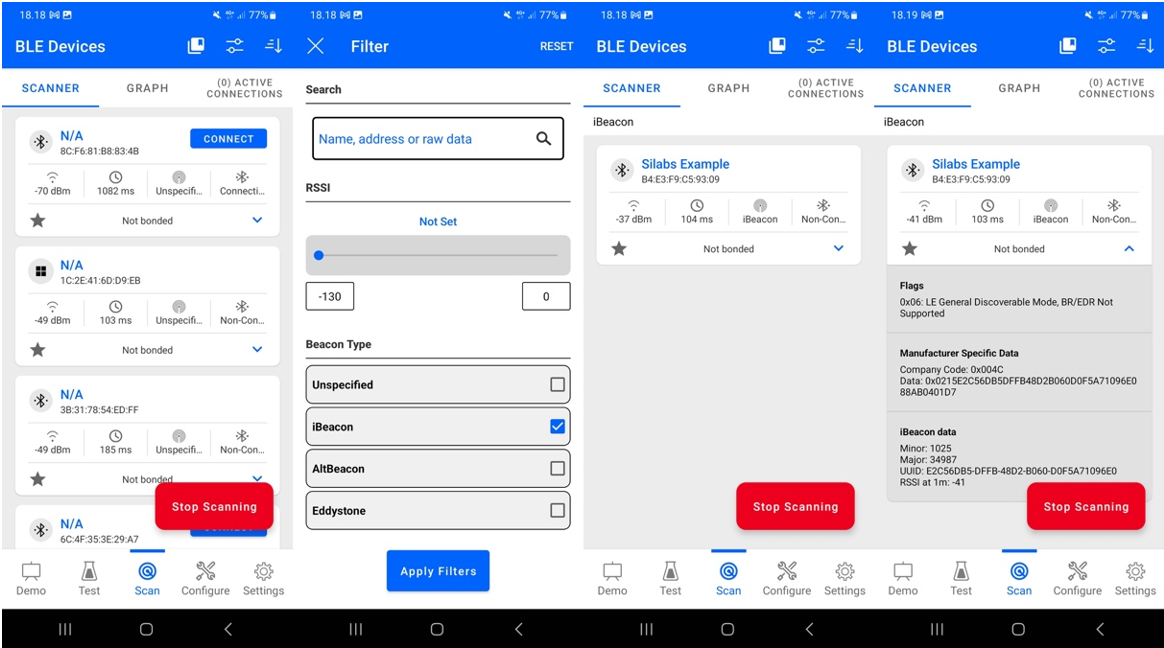
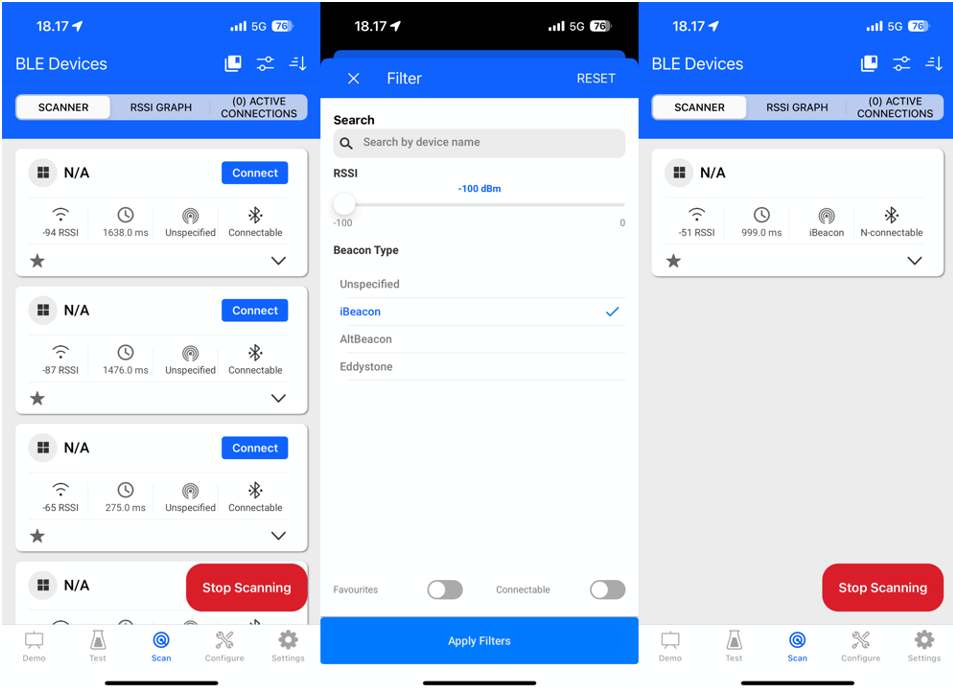
On the master side (smartphone), install the EFR Connect app from the Google Play Store or the App Store, and open it. To find your advertising device, first tap Scan on the bottom menu. Tap the Scanner tab and tap Start/Stop Scanning. This shows all advertising devices nearby. You can tap Sort (


Testing the iBeacon Demo#
Bluetooth beacons are unconnectable advertisements that help you locate a device, determine your own position, or get minimal information about an asset the beaconing device is attached to.
After flashing the iBeacon demo to your device, you can find the beacon signal with Scan feature in the EFR Connect app. Start EFR Connect and tap the Scan in the bottom menu. Tap the Scanner tab and tap Start/Stop Scanning to start scanning. To filter beacons, tap 
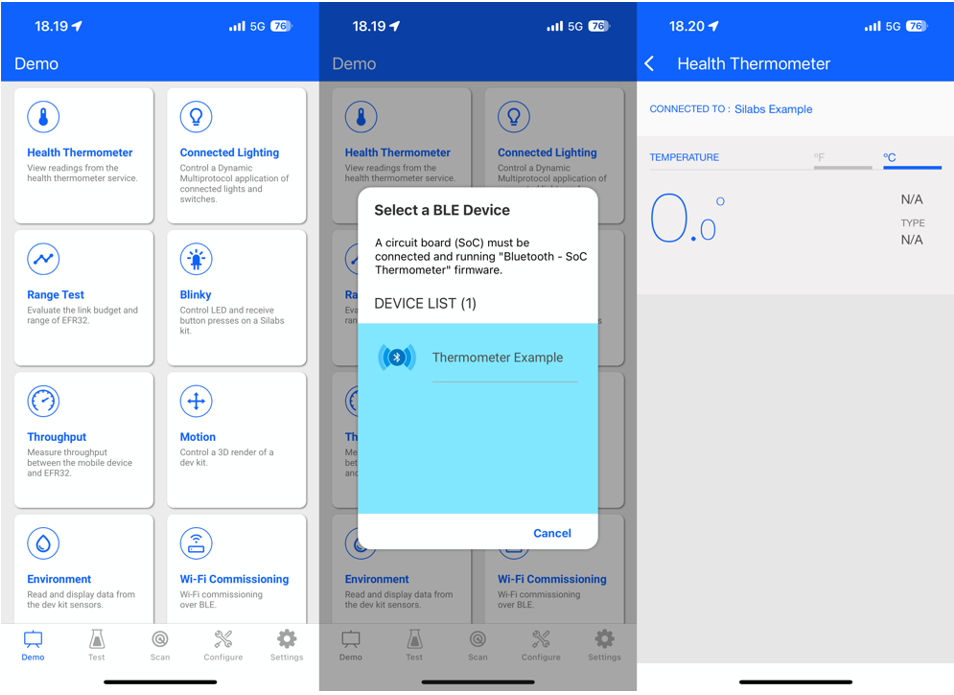
Testing the Health Thermometer Demo#
While the NCP Empty demo implements a minimal GATT database with basic static information like device name, the Health Thermometer demo extends this database with live temperature measurements.
After flashing the Health Thermometer demo to your device, start EFR Connect, tap Demo in the bottom menu, and tap Health Thermometer. Find your device advertising as Thermometer Example in the device list and tap it to connect. The smartphone app automatically finds the Temperature measurement characteristic of the device, reads its value periodically, and displays the value on the screen of the phone.
Try touching the temperature sensor located on the mainboard (see Prepare the mainboard). You should be able to see the temperature changing. Note: Some products might not have a real temperature sensor but a simulated value. Android might provide different details than iOS. The Android interface is shown first, then iOS.