Debugging on Secure Boot Enabled Device#
Assume a correctly signed GBL image has been programmed to the device. Follow the procedures in Generate an Unsigned Application Image to generate an unsigned application image for the GBL.
The Windows environment variable PATH should include the folder (C:\SiliconLabs\SimplicityStudio\v5\developer\adapter_packs\commander) that locates the commander.exe of Simplicity Commander.
The following sections describe how to debug an application firmware with Simplicity IDE, or IAR on a Secure Boot enabled device.
Simplicity IDE#
This application note uses Simplicity Studio v5.2.3.1. The procedures and pictures may be different for the other versions of Simplicity Studio 5.
The Simplicity IDE creates a folder below (
\<NAME>is the Windows User Name on PC) in Windows when building the unsigned application image.C:\Users\<NAME>\SimplicityStudio\v5_workspace\blink_baremetal\GNU ARM v10.2.1 - DefaultFollow the procedures in Signing for ECDSA-P256-SHA256 Secure Boot or Signing for Certificate-Based Secure Boot to create a batch file (Windows) to sign the unsigned application image and then flash it to the device. This application note uses ECDSA-P256-SHA256 Secure Boot (Using Simplicity Commander) as an example to create a
secure_boot_debug.batfile below.commander convert blink_baremetal.s37 --secureboot --keyfile sign_key.pem --verify sign_pubkey.pem --outfile blink_baremetal.s37 commander flash blink_baremetal.s37Copy the batch file in step 2 and files (
sign_key.pemandsign_pubkey.pemin this example) specified insecure_boot_debug.batto the folder in step 1.Right-click the project in the Project Explorer window, and then click Properties to open the properties dialog.
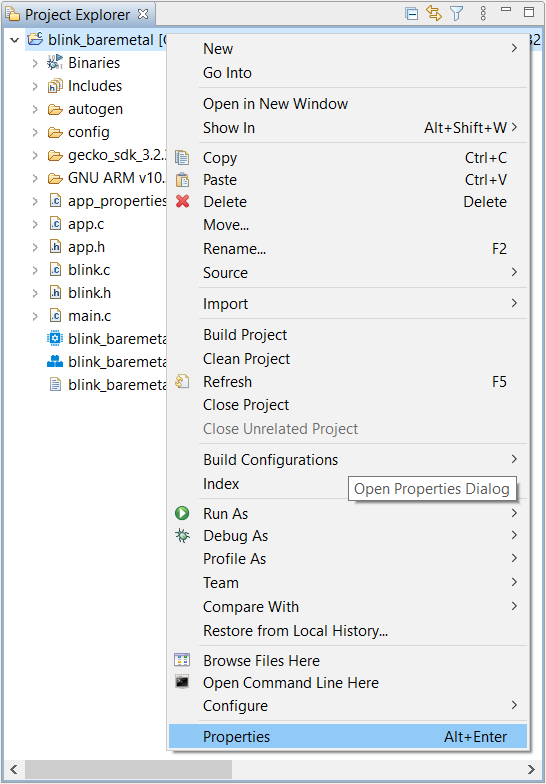
Select C/C++ Build→Settings→Build Steps. Enter the phrase below to the Command: box under the Post-build steps (enter text to Description: box is optional) to run the batch file as a post-build action. Click [Apply and Close] to exit.
cmd //c 'secure_boot_debug.bat'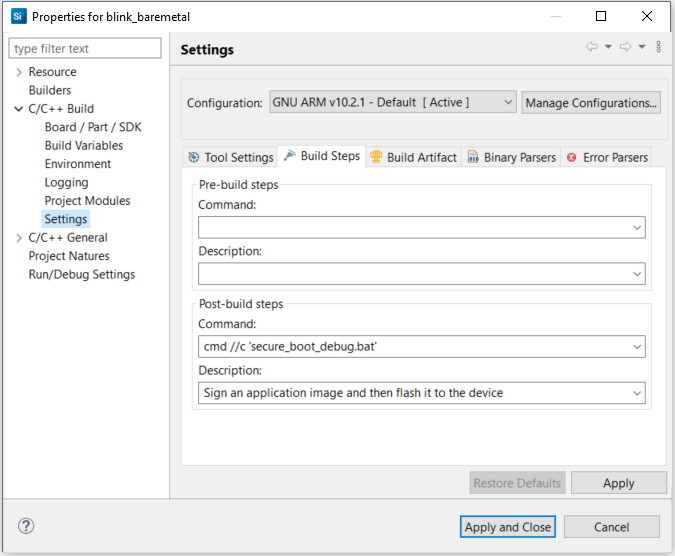
After building the project, the batch file in the Post-build steps overwrites the unsigned application image with the signed application image.
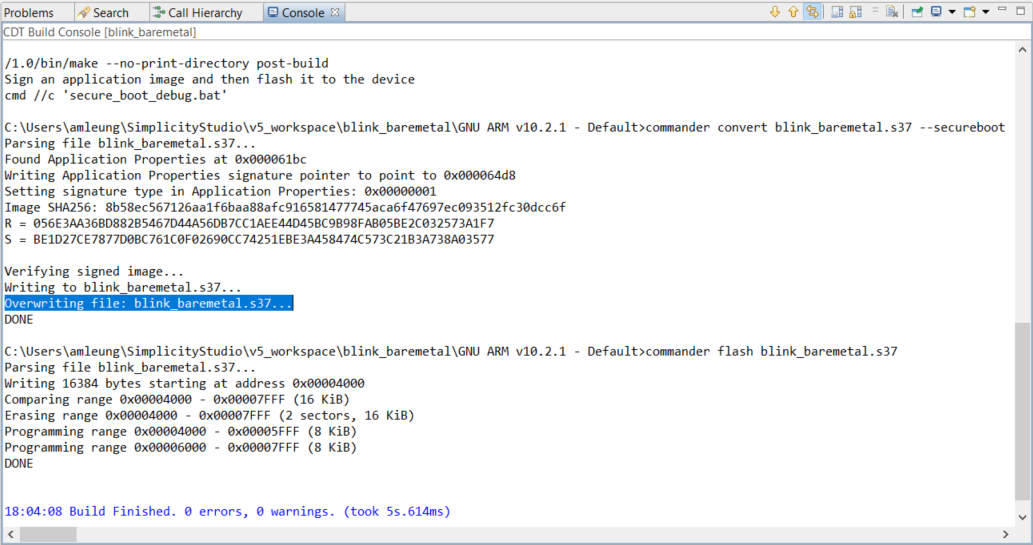
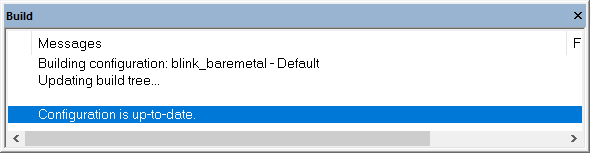
Note: If the project is already up-to-date, it will not invoke the Post-build steps in step 5 to run the batch file. Use a dummy edit (add space or newline) on one of the source files in the project to trigger the build action.

The application starts to run if no error in step 6.
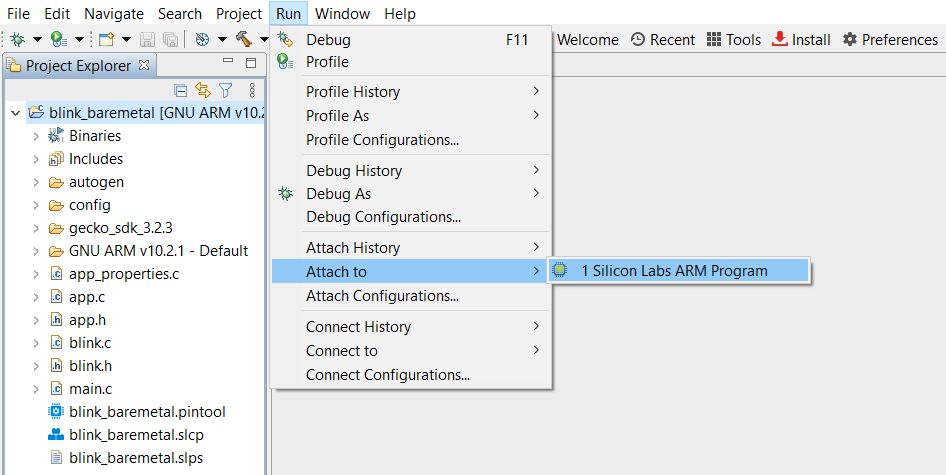
Select the project in the Project Explorer window, click Run→Attach to→1 Silicon Labs ARM Program to attach to the running target for debugging on the signed application image.
IAR#
This section uses Simplicity Studio v5.4.2.0 and IAR v9.20.4. The procedures and pictures may be different for the other versions of Simplicity Studio 5 and IAR.
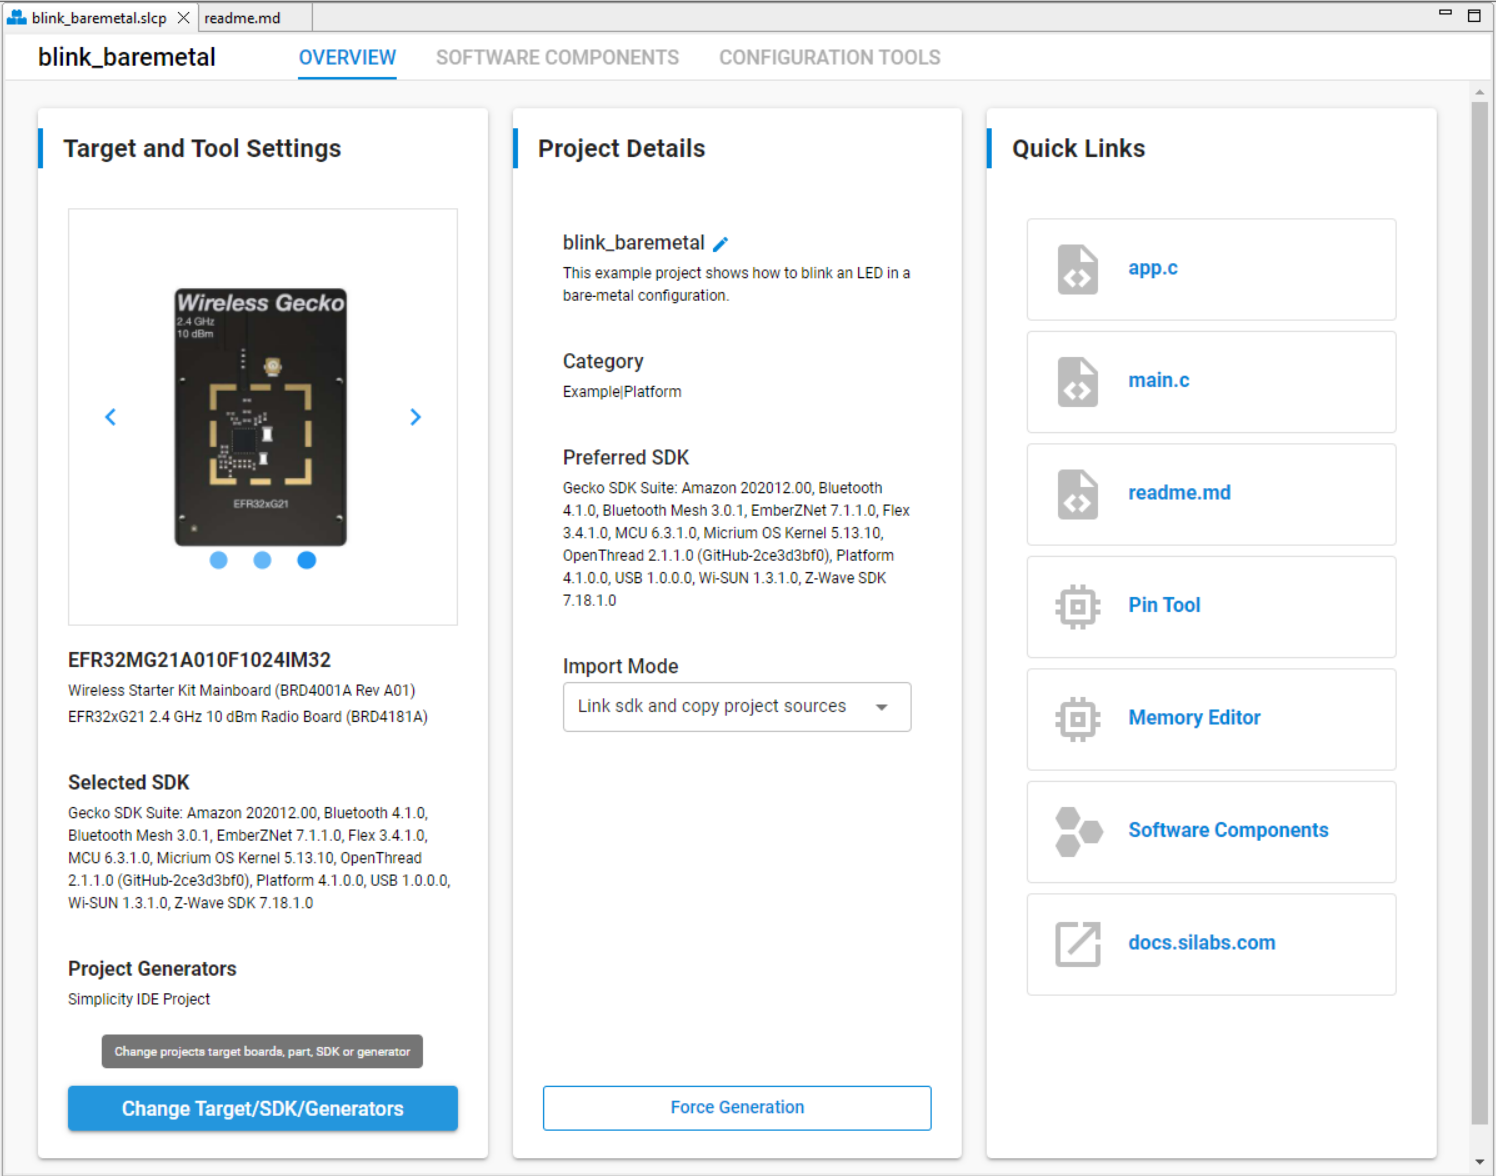
The Overview tab shows the Target and Tool Settings card on the left side. Scroll down if necessary and click [Change Target/SDK/Generators].
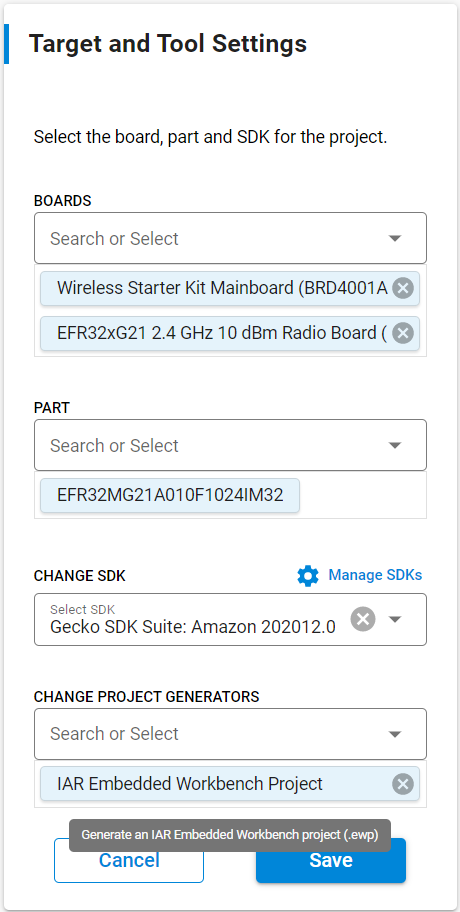
Drop down the CHANGE PROJECT GENERATORS list and select IAR Embedded Workbench Project. Click [Save] to generate an IAR project.
Double click the IAR workspace file (blink_baremetal.eww) in the Project Explorer window to open the IAR project. The IAR creates a folder below (<NAME> is the Windows User Name on PC) in Windows to store the compiled image.
C:\Users<NAME>\SimplicityStudio\v5_workspace\blink_baremetal\ewarm-iar\exe

Follow the procedures in Signing for ECDSA-P256-SHA256 Secure Boot or Signing for Certificate-Based Secure Boot to create a batch file (Windows) to sign the unsigned application image. This application note uses ECDSA-P256-SHA256 Secure Boot (Using Simplicity Commander) as an example to create a secure_boot_debug.bat file below.
cd C:\Users\<NAME>\SimplicityStudio\v5_workspace\blink_baremetal\ewarm-iar\exe commander convert blink_baremetal.s37 --secureboot --keyfile sign_key.pem --verify sign_pubkey.pem --outfile blink_baremetal.s37 ```CCopy the batch file in step 4 and files (sign_key.pem and sign_pubkey.pem in this example) specified in secure_boot_debug.bat to the folder in step 3.
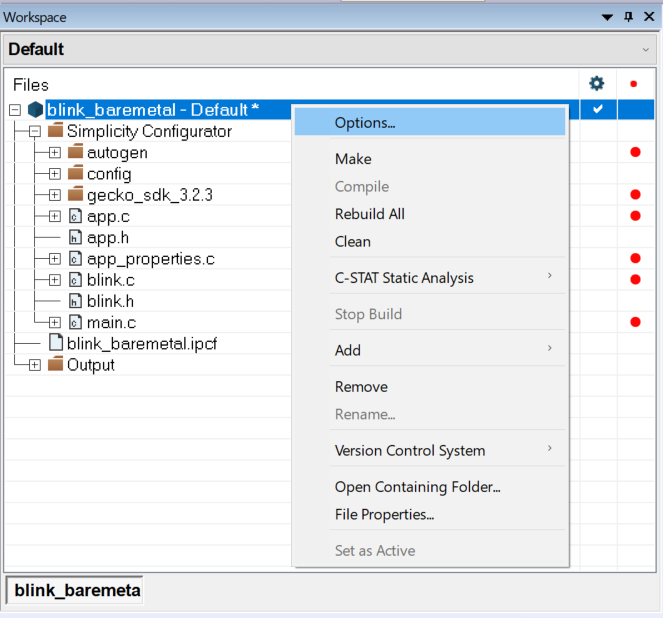
Right-click the project in the workspace, and then click Options....
Note: For GSDK v3.2 and lower, the app_properties.c is manually added to the IAR project.
Click Build Actions to open the Build Actions Configuration dialog box. Enter the phrase below to the Post-build command line: box to run the batch file as a post-build action. Click [OK] to exit.
cmd /c "$PROJ_DIR$\ewarm-iar\exe\secure_boot_debug.bat > $PROJ_DIR$\log.txt 2>&1"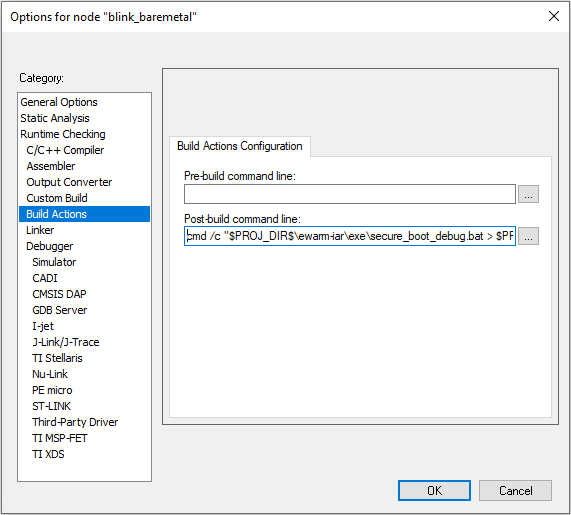
After building the project, the batch file in the Post-build command overwrites the unsigned application image with the signed application image.

Note: If the project is already up-to-date, it will not invoke the Post-build command in step 7 to run the batch file. Use a dummy edit (add space or newline) on one of the source files in the project to trigger the build action.
The >
\log.txt 2>&1 redirects the batch file output to the log.txt file in the IAR project folder. 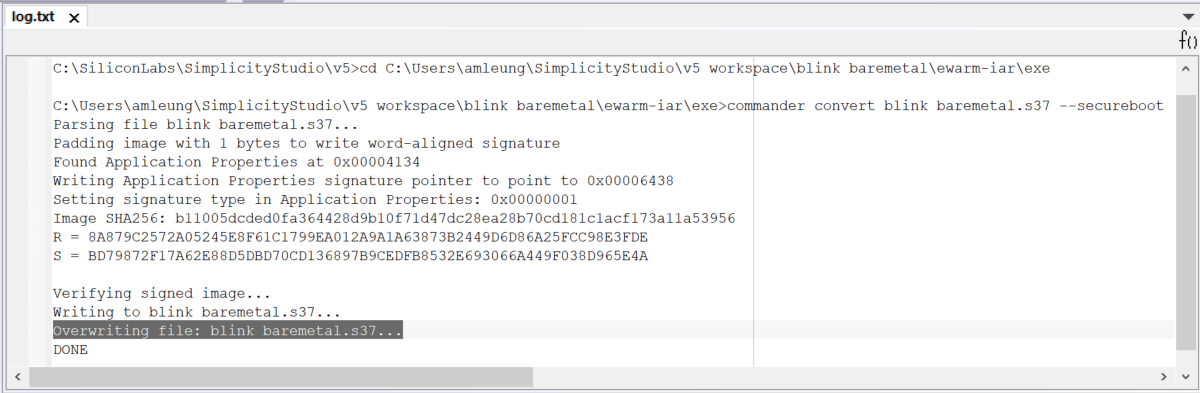
If no error in step 8, click the
