Remote Provisioning Example Walkthrough#
A three- or two-device setup is used to test the Remote Provisioning feature.

Device Roles#
The first device is the Provisioner using NCP mode target application with the NCP mode host PC application or our Bluetooth Mesh smartphone application. It will provision the Unprovisioned device into the network indirectly via the Remote Provisioning Server.
The second device is the Remote Provisioning Server that really communicates with the Provisioner and provisions the Unprovisioned device.
The third device is the Unprovisioned device to be provisioned. This is a generic Bluetooth Mesh device without any additions for Remote Provisioning.
Applications#
Three devices are required that can run Bluetooth Mesh (two, in the case of using a smartphone as Provisioner). Those can be any of these devices: MG12/BG12, MG21/BG21, MG24/BG24, MGM12, BGM210/MGM210, BGM240/MGM240.
Remember to flash a bootloader to the devices, either by running a demo as those include also a bootloader or by creating, building, and flashing a bootloader separately.
For more information about the bootloaders, see Silicon Labs Gecko Bootloader User’s Guide for Series 3 and Higher or Silicon Labs Gecko Bootloader User's Guide for GSDK 4.0 or Higher.
The Provisioner, Remote Provisioning Client#
If using a smartphone, omit the steps below.
The first device should run Bluetooth Mesh - NCP Empty 1.1. It can be the pre-built demo or a compiled example application. It does not need any changes as it already contains the Remote Provisioning Client feature.
Also compile the PC host application, btmesh_host_provisioner and test that it connects to the NCP target device. The readme.txt is included in the application folder app/bluetooth/example_host/btmesh_host_provisioner.
The Remote Provisioning Server#
This device is also called the PB-Remote Server, the Provisioning Protocol executor target node, the Remote Provisioning Protocol target, the Node Provisioning Protocol Interface executor, the Provisioning Server, and so on.
The project for this device can start from a variety of examples, such as Bluetooth Mesh - SoC Light. Then add the component Remote Provisioning Server Model found under Bluetooth Mesh -> Models -> Remote Provisioning. Build and flash the application. For more information, see the Bluetooth Mesh Quick-Start Guide.
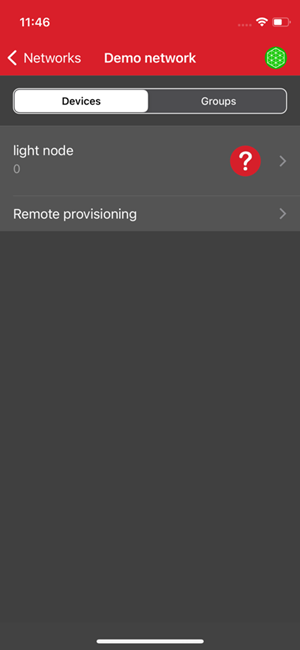
The Unprovisioned Device#
The third device should run the Bluetooth Mesh - SoC Light example, or any other example. It can be the pre-built demo or a compiled example application, as it does not need any changes.
Running the Example with NCP Provisioner#
When all three devices are ready, run the PC host provisioner application connected to the first Provisioner device should show a display like this:
Please select a functionality
1. Scan available nodes
2. Provision a beaconing node
3. List nodes in the network
4. Information about a node in the network
5. Remove node from the network
6. List available remote provisioning servers
7. Remote scan unprovisioned nodes
8. Remote provision an unprovisioned node
9. Reset provisioner node
0. Exit applicationSelect 1 to scan for the available unprovisioned nodes. Two nodes should then be visible. Identify which one is the Remote Provisioning Server and which one is the Unprovisioned Device. In this example, the device UUID ending bc 69 is the Remote Provisioning Server.
1
[I] Scanning started
[I] Unprovisioned node
[I] ID: 0
[I] UUID: 6b 11 40 f7 be 9f e5 56 95 52 30 48 20 60 bc 69
[I] OOB Capabilities: 0x0000
[I] Unprovisioned node
[I] ID: 1
[I] UUID: 6e e9 34 56 5d 73 b5 5c aa 20 31 97 10 3b 4b 84
[I] OOB Capabilities: 0x0000
[I] Scanning stopped
Press enter to continue...Press Enter to continue. Then press 2 to provision the Remote Provisioning Server node. This example selects the unprovisioned node with ID 0. The following is displayed:
0
[I] Provisioning...
[I] Device provisioned
[I] UUID: 6b 11 40 f7 be 9f e5 56 95 52 30 48 20 60 bc 69
[I] Address: 0x20005
Configuration of node (netkey_idx=0,addr=0x2005) is started.
DCD query of node (netkey_idx=0,addr=0x2005) completed.
Node (netkey_idx=0,addr=0x2005) runs btmesh_soc_light example.
[E] Status: model_attr_status = 0x002d (?) Failed to get btmesh model (0xbf42) attributes.
[E] Status: model_attr_status = 0x002d (?) Failed to get btmesh model (0xbf44) attributes.
Configuration of node (netkey_idx=0,addr=0x2005) is successful.
[I] Provisioning finished
Press enter to continue...Ignore the failed models 0xbf42 and 0xbf44 as those are not Remote Provisioning-related.
Press Enter and check by pressing 1 if there is still one unprovisioned node and by pressing 3 if there is one provisioned node.
Press 6 to see available Remote Provisioning Servers. The one that was just provisioned should be displayed.
6
[I] Scanning for remote provisioner servers
[I] Remote provisioning server address: 0x2005
[I] Scanning for remote provisioner servers completed
Press enter to continue...Press Enter and scan unprovisioned nodes using the Remote Provisioning Server by pressing 7.
7
Select a remote provisioning server
Type either the ID or the address from the list below
[I] 0. Remote provisioning server: 0x2005Select the server by pressing 0.
0
[I] Remote scanning for unprovisioned nodes started
[I] Unprovisioned device UUID: 6e e9 34 56 5d 73 b5 5c aa 20 31 97 10 3b 4b 84
[I] Remote scanning completed
Press enter to continue...You can see the Unprovisioned node via the remote server. Provision it by pressing Enter and then 8.
8
Select a remote provisioning server
Type either the ID or the address from the list below
[I] 0. Remote provisioning server: 0x2005Press 0 to select the server.
0
[I] Selected remote provisioning server address 0x2005
Select the unprovisioned node for remote provisioning
Type either the ID, or UUID from the list below
[I] Unprovisioned node
[I] ID: 0
[I] UUID: 6e e9 34 56 5d 73 b5 5c aa 20 31 97 10 3b 4b 84Press 0 to select the node.
0
[I] Remote provisioning...
[I] Device provisioned
[I] UUID: 6e e9 34 56 5d 73 b5 5c aa 20 31 97 10 3b 4b 84
[I] Address: 0x2008
Configuration of node (netkey_idx=0,addr=0x2008) is started.
DCD query of node (netkey_idx=0,addr=0x2008) completed.
Node (netkey_idx=0,addr=0x2008) runs btmesh_soc_light example.
[E] Status: model_attr_status = 0x002d (?) Failed to get btmesh model (0xbf42) attributes.
[E] Status: model_attr_status = 0x002d (?) Failed to get btmesh model (0xbf44) attributes.
Configuration of node (netkey_idx=0,addr=0x2008) is successful.
[I] Provisioning finished
Press enter to continue...Ignore the failed models 0xbf42 and 0xbf44 as those are not Remote Provisioning related.
Press Enter and then press 3 to list the nodes in the network. Two should be available, the Remote Provisioning Server and the previously Unprovisioned node, remotely provisioned.
3
[I] Querying DDB list
[I] Address: 0x2005
[I] Element count: 3
[I] UUID: 6b 11 40 f7 be 9f e5 56 95 52 30 48 20 60 bc 69
[I] Address: 0x2008
[I] Element count: 3
[I] UUID: 6e e9 34 56 5d 73 b5 5c aa 20 31 97 10 3b 4b 84
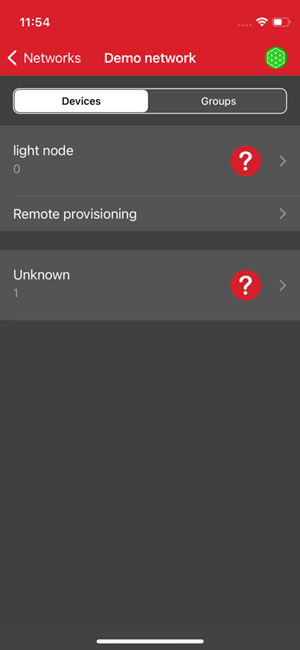
Press enter to continue...Running the Example with Smartphone App#
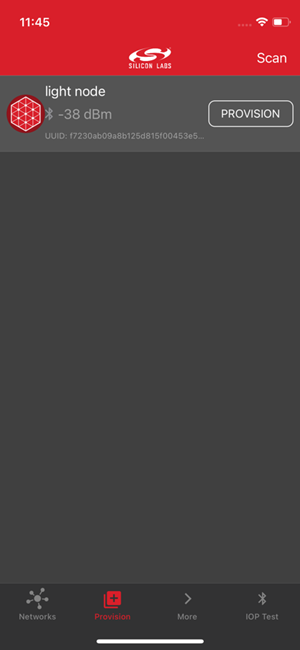
Install the Silicon Labs Bluetooth Mesh App from Google Play / App Store. When the “Remote Provisioning Server” and the “Unprovisioned Device” devices are up and running, start the provisioning process. To distinguish the two devices more easily, you can boot up the “Remote Provisioning Server” before the first provisioning.
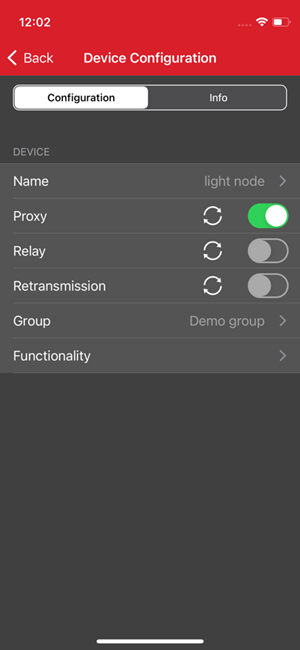
Scan for the “Remote Provisioning Server” device and provision it the usual way (turn on Proxy and add it to Group).
As the Remote Provisioning Server Model is added to the DCD, the App will offer the functionality in the network device list. By selecting it, you can scan for devices available for provisioning, via the Remote Provisioning Server (both devices should be online by now).
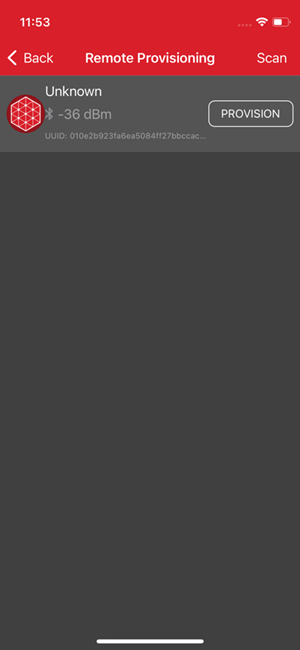

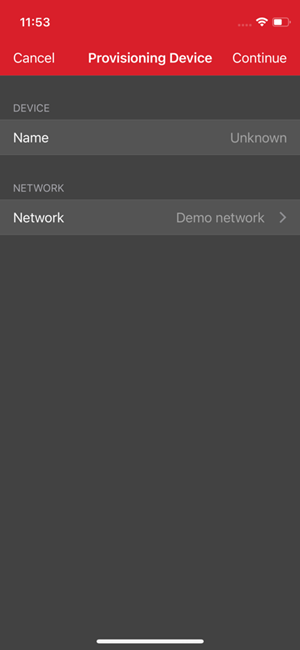
If your efforts were successful, you will be able to see the newly added device in your network.