Examples#
Provisioning for Security#
Run the following command to generate keypairs for secure boot and secure debug:
commander util genkey --type ecc-p256 --privkey sign_key.pem --pubkey sign_pubkey.pemGenerating ECC P256 key pair... Writing private key file in PEM format to sign_key.pem Writing public key file in PEM format to sign_pubkey.pem DONEcommander util genkey --type ecc-p256 --privkey command_key.pem --pubkey command_pubkey.pemGenerating ECC P256 key pair... Writing private key file in PEM format to command_key.pem Writing public key file in PEM format to command_pubkey.pem DONEProvision the Public Sign Key in Simplicity Commander.
To write the Public Sign Key to the device, run the command:
commander security writekey --sign sign_pubkey.pem --device SIMG301M104LIH --serialno 440048205Device has serial number 000000000000000014b457fffe045a8e ================================================================================ Please look through any warnings before proceeding. THIS IS A ONE-TIME command, all code to be run on the device must be signed by this key. Type 'continue' and hit enter to proceed or Ctrl-C to abort: ================================================================================ continue DONEwhere
sign_pubkey.pemis the Public Sign Key in Privacy Enhanced Mail (PEM) format. A third party cannot change this setting once it has been set.Provision the Public Command Key in Simplicity Commander.
To write the Public Command Key to the device, run the command:
Device has serial number 000000000000000014b457fffe045a8e ================================================================================ Please look through any warnings before proceeding. THIS IS A ONE-TIME command, all code to be run on the device must be signed by this key. Type 'continue' and hit enter to proceed or Ctrl-C to abort: ================================================================================ continue DONE commander security writekey --command command_pubkey.pem --device SiMG301M104LIH --serialno 440048205where
command_pubkey.pemis the Public Command Key in PEM format. A third party cannot change this setting once it has been set.Provision the GBL Decryption Key.
To generate the text file for the GBL Decryption Key, run the command:
commander util genkey --type aes-ccm --outfile aes_key.txtUsing Windows' Cryptographic random number generator DONEwhere
aes_key.txtcontains the randomly generated AES-128 key.To write the GBL Decryption Key to the HSE device, run the command:
commander security writekey --decrypt aes_key.txt --device SiMG301M104LIH --serialno 440048205Device has serial number 000000000000000014b457fffe045a8e ================================================================================ Please look through any warnings before proceeding. THIS IS A ONE-TIME command, any encrypting of GBL files must be done with this key. Type 'continue' and hit enter to proceed or Ctrl-C to abort: ================================================================================ continue DONE
Enabling Secure Boot and Tamper Configuration#
The Secure Boot feature verifies the integrity and authenticity of the host application before allowing it to execute. Enabling this feature is IRREVERSIBLE, which means once enabled, Secure Boot can no longer be disabled throughout the life of the device. The Secure Boot settings are written to the one-time-programmable (OTP) memory. They cannot be changed once programmed. The anti-tamper configuration is provisioned with Secure Boot settings. The anti-tamper configuration determines the response from the device if a tamper event occurs.
Note: The user_configuration.json is a JSON file that contains the desired Secure Boot settings and anti-tamper configuration. Use the following command on the target device (e.g., SiMG301M104LIH) to generate a default configuration file. The content of the JSON file is device-dependent (--device <device name>).
The security genconfig command above generates a generic configuration file for SiMG301M104LIH consisting of the properties listed in Table: Secure Boot Items (mcu_flags) for Series 3 Devices and Table: Tamper Items for Series 3 Devices. A text editor can be used to modify the default settings shown below to the desired configuration.
commander security genconfig --nostore -o user_configuration.json --device SiMG301M104LIH --serialno 440048205DONETable: Secure Boot Items (mcu_flags) for Series 3 Devices.
Name | Description |
|---|---|
SECURE_BOOT_ENABLE | If set, verifies the host image on the Cortex-M33 before releasing the Cortex-M33 from reset. |
SECURE_BOOT_VERIFY_CERTIFICATE | If set, requires certificate-based signing of the host image. |
SECURE_BOOT_ANTI_ROLLBACK | If set, prevents secure upgrading to a host image with a lower version than the image that is currently stored in flash. |
Enabling Anti-Rollback Protection and Certificate-Based Secure Boot#
Enable anti-rollback protection and certificate-based secure boot as follows:
Open the user_config.json file created in the previous step with any text editor.
Change the SECURE_BOOT_VERIFY_CERTIFICATE setting from 'false' to 'true' and save the file.
{ "OPN": "SIMG301M104LIH", "VERSION": "1.0.0", "mcu_flags": { "SECURE_BOOT_ANTI_ROLLBACK": true, "SECURE_BOOT_ENABLE": true, "SECURE_BOOT_VERIFY_CERTIFICATE": true }, "tamper_filter": { "FILTER_PERIOD": 0, "FILTER_THRESHOLD": 0, "RESET_THRESHOLD": 0 }, "tamper_flags": { "ALIVE_DURING_SLEEP": false, "DGLITCH_ALWAYS_ON": false }, "tamper_levels": { "CRYPTO_ERROR": 4, "DCI_AUTH": 0, "DECOUPLE_BOD": 4, "DPLL_FAIL": 0, "ETAMPDET": 0, "FILTER_COUNTER": 0, "GLITCH_DETECTOR": 0, "KSU_1_BIT_ECC_ERROR": 0, "KSU_2_BIT_ECC_ERROR": 4, "L2ICACHE_PARITY_ERROR": 4, "MAILBOX_AUTH": 0, "OTP_ALARM": 4, "PRS0": 0, "PRS1": 0, "PRS2": 0, "QSPI_RESEED_ERROR": 4, "SECURE_BOOT_FAILED": 0, "SECURE_LOCK_ERROR": 4, "SELFTEST_ERROR": 4, "SE_ASSERT": 4, "SE_CPU_MAJOR_FAULT": 4, "SE_ICACHE_ERROR": 4, "SE_RAM_ECC_1BIT": 0, "SE_RAM_ECC_2BIT": 4, "SE_WATCHDOG": 4, "SOCPLL_FAIL": 0, "TEMP_SENSOR": 0, "TRNG_MONITOR": 0 } }Table: Tamper Items for Series 3 Devices.
Name
Description
tamper_levels
The tamper levels of different tamper sources.
tamper_filter
The settings for tamper filters.
tamper_flags
The settings for tamper flags.
The following command writes the Secure Boot settings and anti-tamper configuration in user_configuration.json file to the device. This command can be executed only once per device.
commander security writeconfig --configfile user_configuration.json --device SiMG301M104LIH --serialno 440048205To check the device's Secure Boot settings and anti-tamper configuration, run the security readconfig command.
================================================================================ THIS IS A ONE-TIME configuration: Please inspect file before confirming: user_configuration.json Type 'continue' and hit enter to proceed or Ctrl-C to abort: ================================================================================ continue DONEcommander security readconfig --device SiMG301M104LIH --serialno 440048205MCU Flags Secure Boot : Enabled Secure Boot Verify Certificate : Enabled Secure Boot Anti Rollback : Enabled Secure Boot Page Lock Narrow : Disabled Secure Boot Page Lock Full : Disabled Tamper Levels FILTER_COUNTER : 0 SE_WATCHDOG : 4 CRYPTO_ERROR : 4 SE_RAM_ECC_2BIT : 4 SE_CPU_MAJOR_FAULT : 4 L2ICACHE_PARITY_ERROR: 4 SECURE_BOOT_FAILED : 0 MAILBOX_AUTH : 0 DCI_AUTH : 0 SE_ASSERT : 4 SELFTEST_ERROR : 4 TRNG_MONITOR : 0 SECURE_LOCK_ERROR : 4 GLITCH_DETECTOR : 0 OTP_ALARM : 4 SE_ICACHE_ERROR : 4 SE_RAM_ECC_1BIT : 0 DECOUPLE_BOD : 4 TEMP_SENSOR : 0 DPLL_FAIL : 0 SOCPLL_FAIL : 0 ETAMPDET : 0 KSU_1_BIT_ECC_ERROR : 0 KSU_2_BIT_ECC_ERROR : 4 QSPI_RESEED_ERROR : 4 PRS0 : 0 PRS1 : 0 PRS2 : 0 Tamper Filter Filter Period : 0 Filter Threshold : 0 Reset Threshold : 0 Tamper Flags Digital Glitch Detector Always On: Disabled Keep Tamper Alive During Sleep: Disabled DONE
Secure Boot#
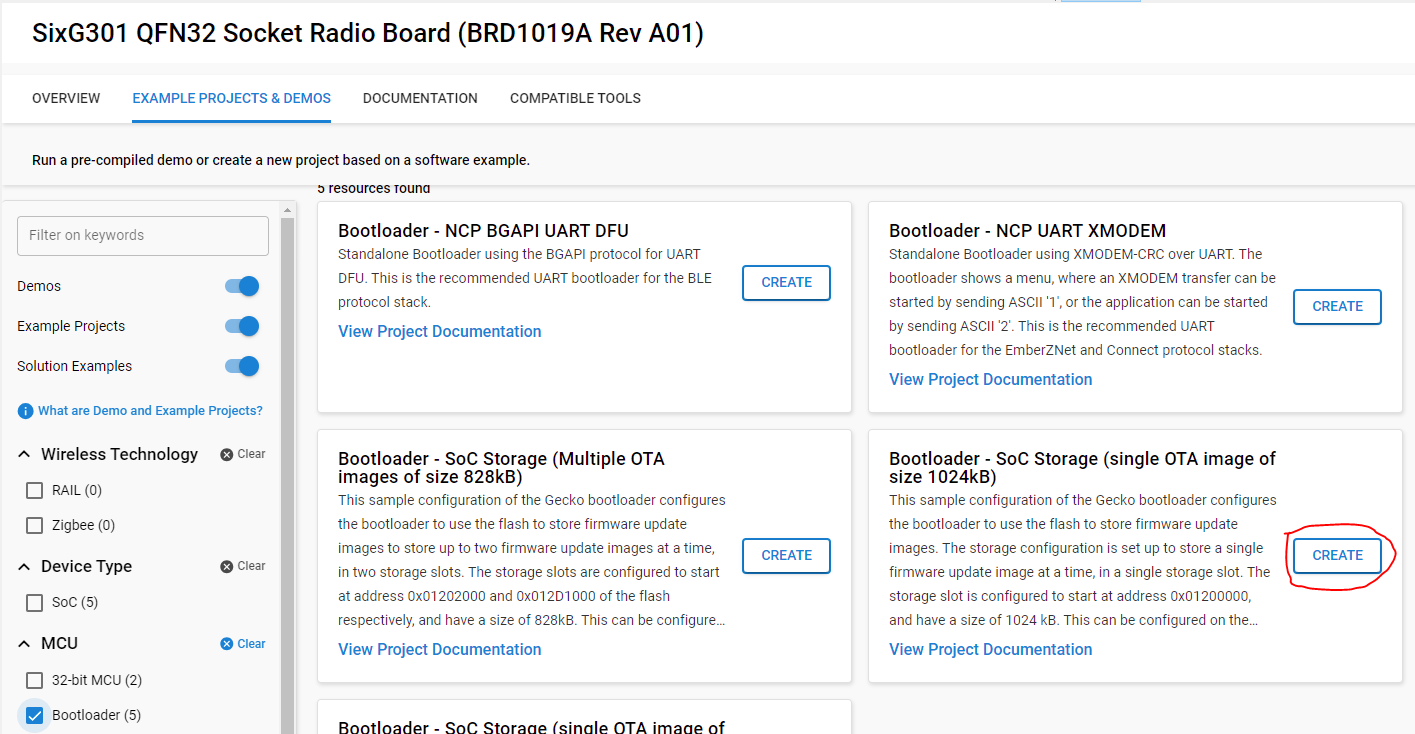
Create a bootloader project for your chosen device as shown below:
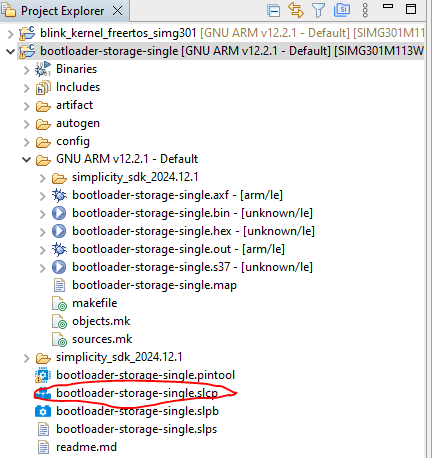
Open the bootloader project's slcp file by double-clicking it.
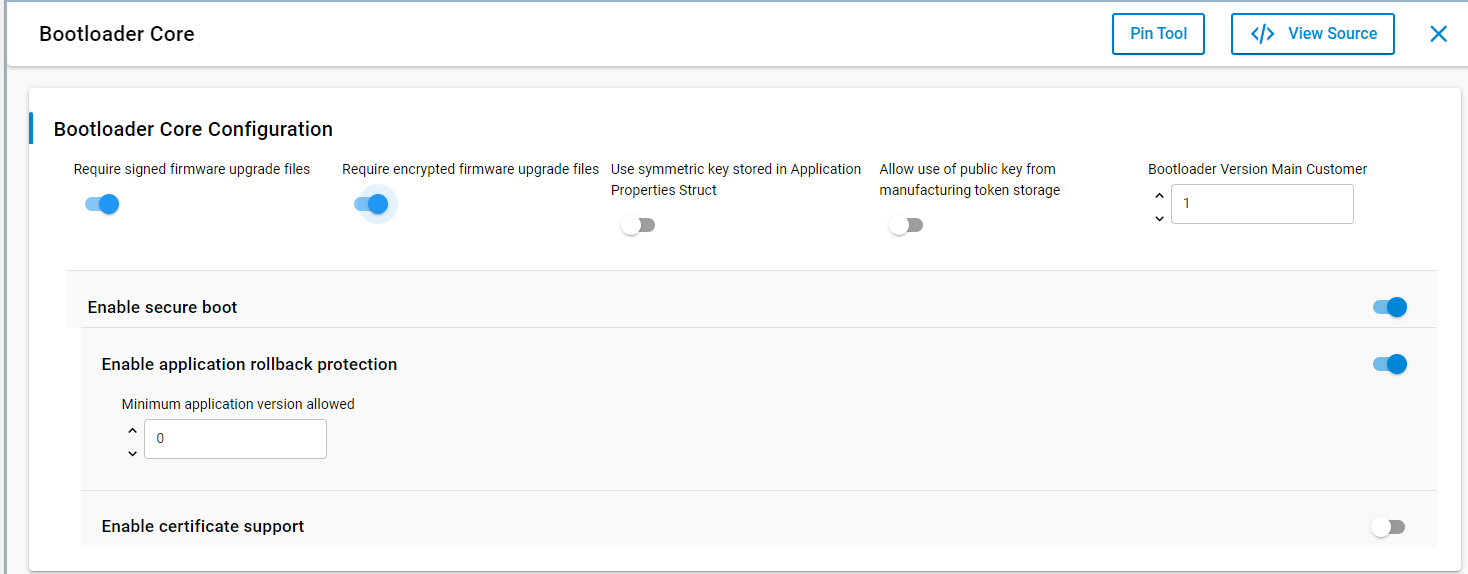
In the bootloader core component, enable the secure boot features as shown:
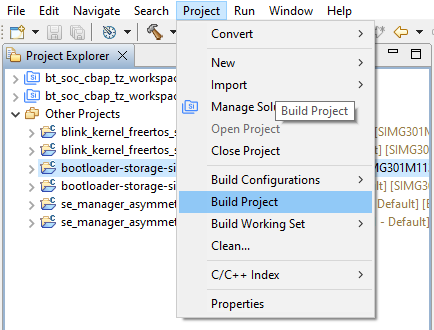
Build the bootloader project as shown.
Create a keypair for a certificate.
commander util genkey --type ecc-p256 --privkey cert_sign_key.pem --pubkey cert_sign_pubkey.pemGenerating ECC P256 key pair... Writing private key file in PEM format to cert_sign_key.pem Writing public key file in PEM format to cert_sign_pubkey.pem DONECreate a certificate with the new key, signing the certificate with the BL private key.
commander util gencert --cert-type secureboot --cert-version 1 --cert-pubkey cert_sign_pubkey.pem --sign sign_key.pem --outfile bl_cert.binSuccessfully signed certificate DONEAdd the certificate into the bootloader.
commander convert bootloader-storage-single.s37 --secureboot --certificate bl_cert.bin --keyfile cert_sign_key.pem --outfile bootloader-storage-single-signed-cert-v1.s37Parsing file bootloader-storage-single.s37... Adding certificate to image... Private key matches public key in certificate. Found Application Properties at 0x0100330c Writing Application Properties signature pointer to point to 0x01003810 Setting signature type in Application Properties: 0x00000001 Image SHA256: 2e51b2b3f41b5a42f3072bc62e843a3f4406dfe4afd46de20e03b508b662acf7 R = 15209BFF03BCD42CA05C0C14175D90D2E25A5FAEDB0ADA18B511144B94C79A13 S = C37886136746A193C78AD4AADE541F373A6D61BDBC462C4D6BAD188610FDF49DFlash the bootloader to the device.
commander flash bootloader-storage-single-signed-cert-v1.s37 -d SIMG301M104LIH --serialno 440048205WARNING: Failed secure boot detected. Issuing a mass erase before flashing to recover the device... Parsing file bootloader-storage-single-signed-cert-v1.s37... Writing 14280 bytes starting at address 0x01000000 Erasing range 0x01000000 - 0x01007FFF (1 sector, 32 KB) Programming range 0x01000000 - 0x01000FFF (4 KB) Programming range 0x01001000 - 0x01001FFF (4 KB) Programming range 0x01002000 - 0x01002FFF (4 KB) Programming range 0x01003000 - 0x01003FFF (4 KB) Programming range 0x01004000 - 0x01004FFF (4 KB) Programming range 0x01005000 - 0x01005FFF (4 KB) Programming range 0x01006000 - 0x01006FFF (4 KB) Programming range 0x01007000 - 0x01007FFF (4 KB) JLinkError: Failed to halt CPU. Closing region 0 (this consumes one OTP bit, consider --noclose on development/testing devices) Flashing completed successfully! DONEReset the device to update the boot status of the device. This step is necessary to prevent Simplicity Commander from performing a masserase in the next section.
Build an instance of the sample application as shown below:

Sign the resulting executable image with the private BL key.
commander convert blink_kernel_freertos_simg301.s37 --secureboot --keyfile sign_key.pem --outfile signed-blink.s37Flash the application to the device.
commander flash signed-blink.s37 --device SIMG301M104LIH --serialno 440048205Parsing file blink_kernel_freertos_simg301.s37... Found Application Properties at 0x01018878 Writing Application Properties signature pointer to point to 0x010194f0 Setting signature type in Application Properties: 0x00000001 Image SHA256: 73627f86b624bf0bd52b93e857a7518b0408b71dee2dba639f1fc5c67afff284 R = F553D3DE255786FB2629C93EEC40E03F223C831D9E7F93E2074C4C83294ABA10 S = AC8BD6AF0E680B4590132E3D1317D09E2CEB9EF89434880E6E96369960C724A8 Writing to signed-blink.s37... Overwriting file: signed-blink.s37... DONE
Wrapping a Key for Secure Storage#
In this example, you'll generate an asymmetric keypair and wrap it securely.
Start with any of the available sample applications in the Simplicity SDK.
Add the following snippet of code to create storage for the key material and a key descriptor.
#define ECC_P256_PRIVKEY_SIZE (SL_SE_KEY_TYPE_ECC_P256 & SL_SE_KEY_TYPE_ATTRIBUTES_MASK) #define ECC_P256_PUBKEY_SIZE (2 * ECC_P256_PRIVKEY_SIZE) #define OVERHEAD (12 + 16) #define P256_BUFFER_SIZE (ECC_P256_PRIVKEY_SIZE + ECC_P256_PUBKEY_SIZE + OVERHEAD) uint8_t key_buffer[P256_BUFFER_SIZE]; sl_se_key_descriptor_t example_ecc_key = { .type = SL_SE_KEY_TYPE_ECC_P256, .flags = SL_SE_KEY_FLAG_ASYMMETRIC_BUFFER_HAS_PRIVATE_KEY | SL_SE_KEY_FLAG_ASYMMETRIC_BUFFER_HAS_PUBLIC_KEY | SL_SE_KEY_FLAG_ASYMMMETRIC_SIGNING_ONLY, .storage.method = SL_SE_KEY_STORAGE_EXTERNAL_WRAPPED, .storage.location.buffer.pointer = key_buffer, .storage.location.buffer.size = sizeof(key_buffer) };Add a call to the SE manager init function.
sl_se_init();Set up a context for the SE Manager command and a status variable, then call the generate-key function.
sl_se_command_context_t ctx; sl_status_t status; status = sl_se_generate_key(&ctx, &example_ecc_key);Print the status returned by the API call to confirm success.
printf("result of generating a wrapped key is 0x%2.2X\r\n", status);Program output:
result of generating a wrapped key is 0x00
Sign and verify a message with the wrapped key#
Create a sample message to be signed and a buffer for the signature.
Program output:
result of signing with the wrapped key is 0x00char message[] = "message"; uint8_t signature[64];Call the API to sign the message using the private part of the key from the previous example and check the return value.
status = sl_se_ecc_sign(&ctx, &example_ecc_key, SL_SE_HASH_SHA256, false, /* message is not hashed */ message, sizeof(message), signature, sizeof(signature)); printf("result of signing with the wrapped key is 0x%2.2X\r\n", status);Call the API to verify the signature using the public part of the key.
status = sl_se_ecc_verify(&ctx, &example_ecc_key, SL_SE_HASH_SHA256, false, /* message is not hashed */ message, sizeof(message), signature, sizeof(signature)); printf("result of verifying with the wrapped key is 0x%2.2X\r\n", status);result of verifying with the wrapped key is 0x00
Secure SE Firmware Update#
This section describes how to upgrade the SE firmware running on the Series 3 device.
Locate the SE firmware folder, typically
C:\Users\<user name>\SimplicityStudio\SDKs\simplicity_sdk\util\se_release\public(replace<user name>with your Windows username).Sign the SE firmware updater application with your private signing key
commander convert --secureboot x301_se_fw_upgrade_app_3v3p1.hex --keyfile rootsign-unsafe-privkey.pem --outfile x301_se_fw_upgrade_3v3p1_signed.hexParsing file x301_se_fw_upgrade_app_3v3p1.hex... Found Application Properties at 0x01028838 Writing Application Properties signature pointer to point to 0x01029334 Setting signature type in Application Properties: 0x00000001 Image SHA256: 605a1afc8196efecc7f87e0b7444ed8268051a8f9d58878a1d64b27c5c5999d2 R = 10267CEBD206C9C1E881C2AD3252EED26416C44B8DCB402C0CBC83679B191026 S = B180DA23EF1E6962B967B27E87332994A57A75E3DB09C1B45C6905F34DBC4A32 Writing to x301_se_fw_upgrade_3v3p1_signed.hex... DONEFlash the signed SE firmware updater application to the device
commander flash x301_se_fw_upgrade_3v3p1_signed.hex --device SiMG301M114LIH --serialno 440048205Check the version of the SE firmware to confirm that the update was successful
SE ROM version : 5.2 SE Firmware version : 3.3.1 Serial number : 000000000000000094a081fffe53b457 Debug lock : Disabled Device erase : Enabled Secure debug unlock : Disabled Tamper status : OK Secure boot : Enabled Boot status : 0x20 - OK Command key installed : False Sign key installed : True DONEcommander security status --device SiMG301M114LIH --serialno 440048205
Enabling and Working with Secure Debug#
The debug lock is an important feature to prevent attackers from using the debug interface to perform illegal operations on the device. The following sections describe how to apply three different locks to the Series 3 debug interface. Only secure debug lock is described here, for other debug lock modes, refer to AN1190.
The following command enables the secure debug unlock.
commander security lockconfig --secure-debug-unlock enable --device SIMG301M104LIH --serialno 440048205Secure debug unlock was enabled DONEAfter enabling the Secure Debug feature, lock the debug interface using the following command.
commander security lock --device SIMG301M104LIH --serialno 440048205Device is now locked. DONE