Positioning Tool#
While it is easy to configure a single locator and get angle information of asset tags, configuring and running a multi-locator setup to get position information can be rather complicated. To calculate position, the RTL needs to know the coordinates and orientation of the locator so that it can translate the angle feeds from each one of them with respect to the coordinate system of a given topology. Simplicity Studio provides the Positioning tool, which makes the configuration and testing of a multi-locator setup easy and quick.
To launch Positioning Tool:
From Simplicity Studio 5’s Launcher perspective, click Tools.
In the Tools Dialog, select Positioning Tool.
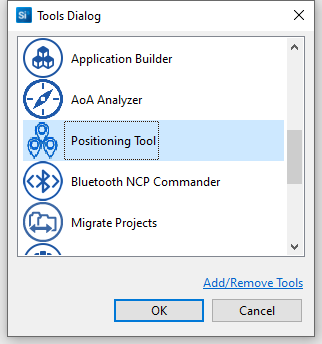
Click OK. Positioning tool opens in the Simplicity IDE perspective.
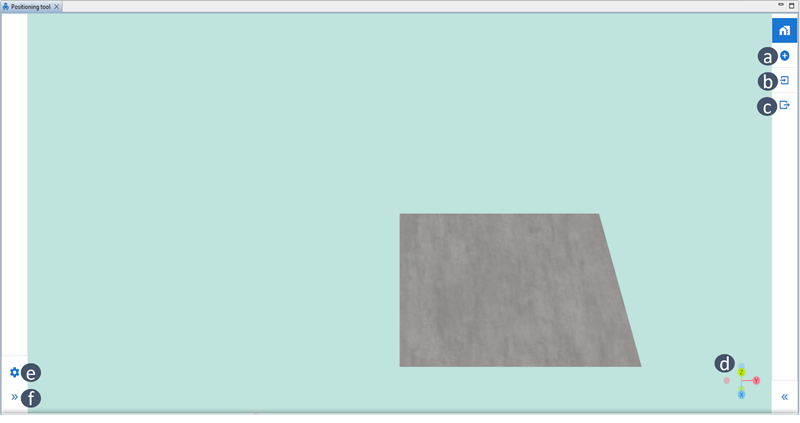
Here you can:
(a) Add a locator to topology.
(b) Import existing topology config JSON file, for instance from your GSDK directory: example_host/bt_host_positioning/config/positioning_config.json).
(c) Export the existing topology into a config JSON file.
(d) See the orientation of the topology’s coordinate system.
(e) Change the settings of the positioning parameters of the RTL.
(f) Expand/collapse the sidebar menu.
Adding Locators#
To test the position tool, you need to add two or more locator devices to your topology. To add a locator to a topology:
Click the Add locator button (a in Positioning Tool Launch Window), and a Devices window opens.
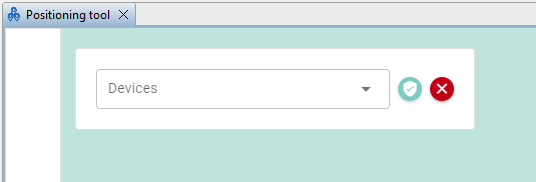
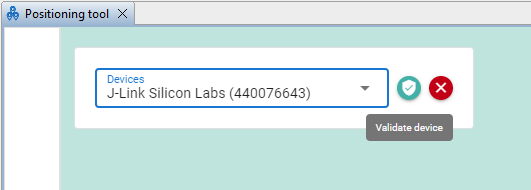
Click the drop-down menu and select your locator by its J-Link serial number.
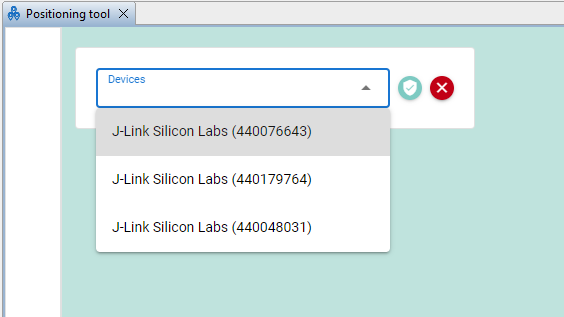
Then, Validate your device. During the validation process the positioning tool (behind the scenes) connects with the chosen J-Link device in the previous step over serial (or IP), and executes a BGAPI command asking for the Bluetooth device ID. This is an important step since the RTL uses the Bluetooth device ID of the locator, and not the J-Link ID.
Note: The board must be pre-programmed with Bluetooth – NCP AoA Locator firmware.
After the validation procedure is completed, the positioning configuration window for the locator opens (see the following figure). Use this window to
Check the locator’s Bluetooth device ID.
Set the locator’s x,y,z coordinates.
Set the locator’s orientation (rotation) using the sliding bars.
Configure the RTL parameters used in angle calculation, add allow list and angle constraints (see 3D View).
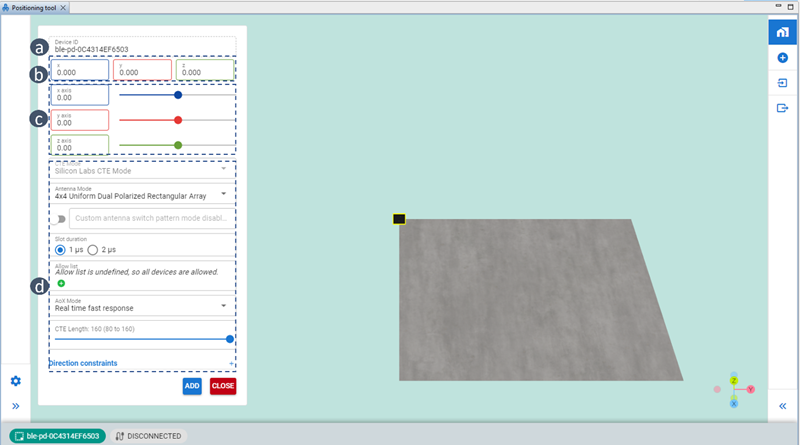
When finished click ADD and the locator will be added to the topology. Add as many locators as you want the same way.
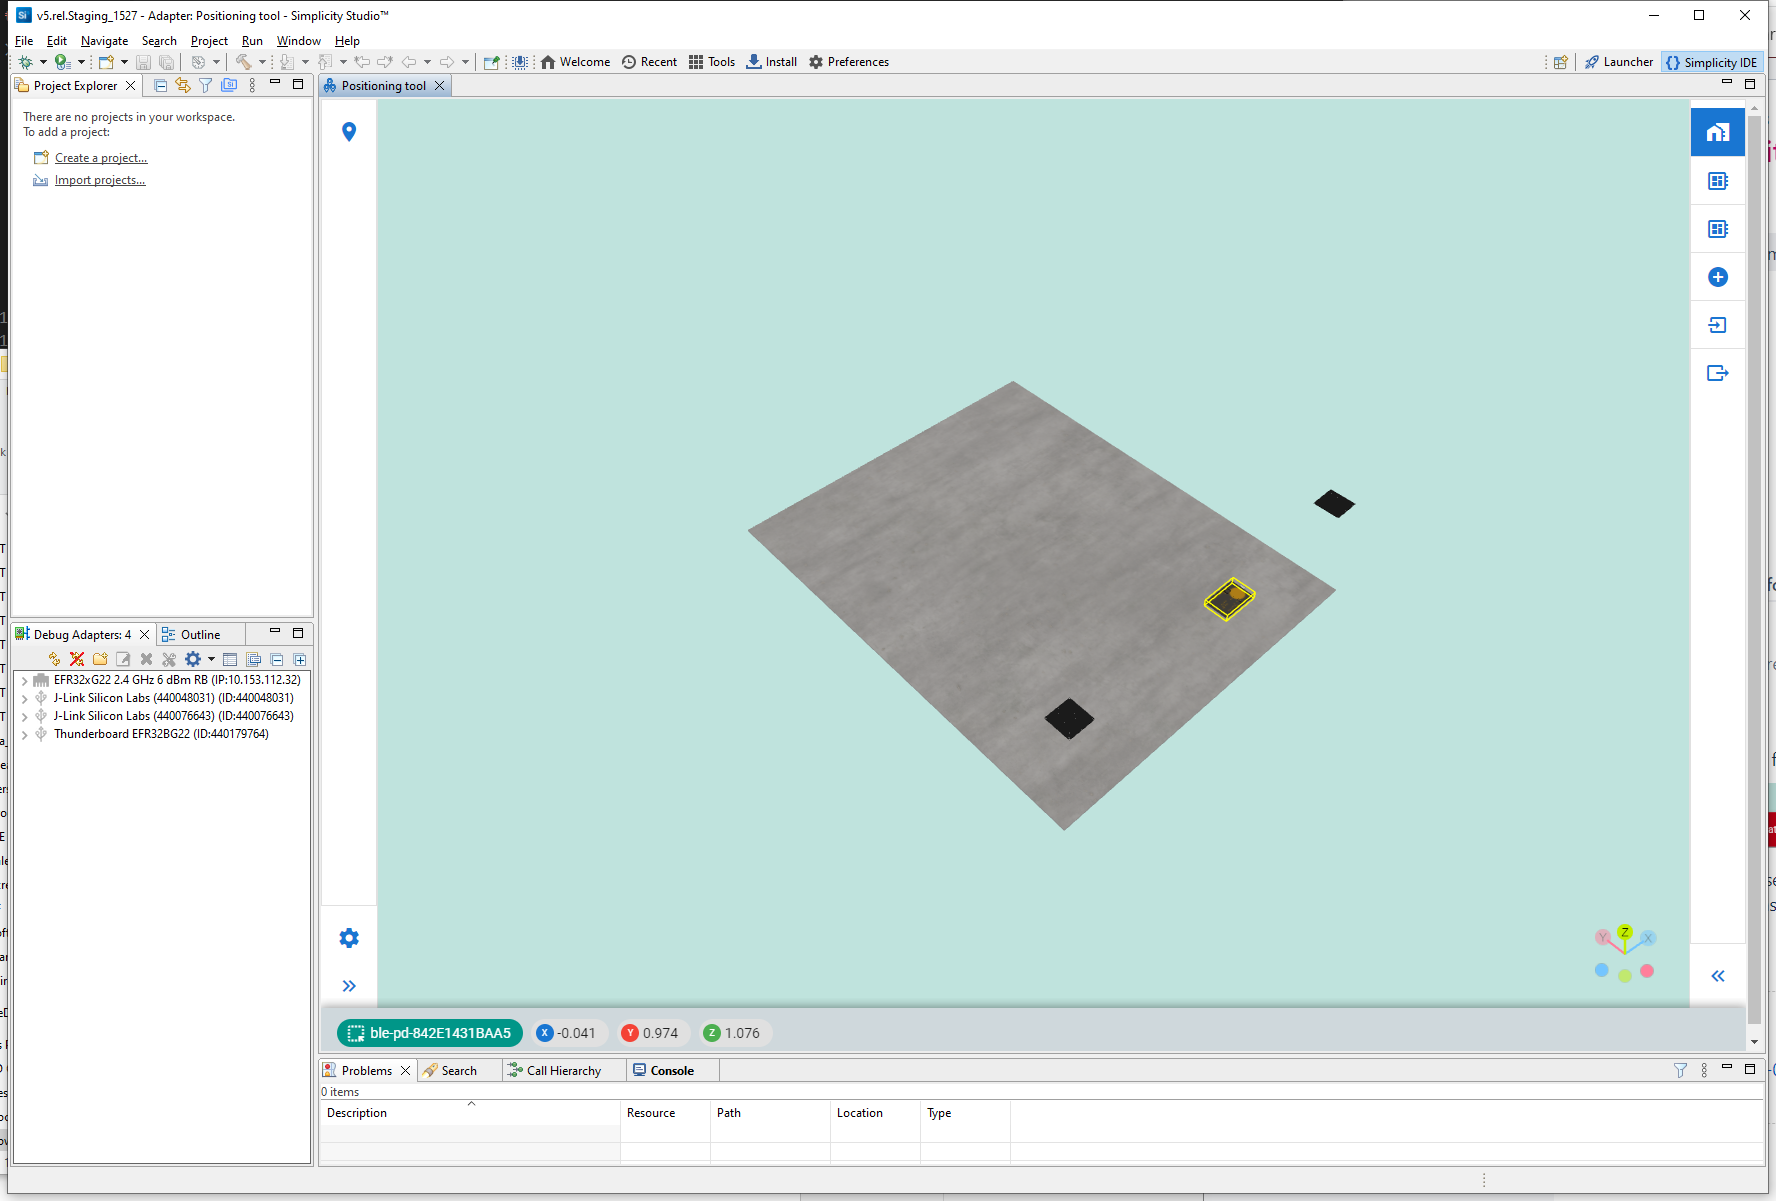
Locating Asset Tags
The Positioning tool will locate the tags (if any) immediately after the second locator is added. Expand the sidebar menu on the left side and click on the plus sign next to the tag address ((a) in the following figure) and you will be able to see the tag’s x,y,z positional values in real time at (b) in the following figure.
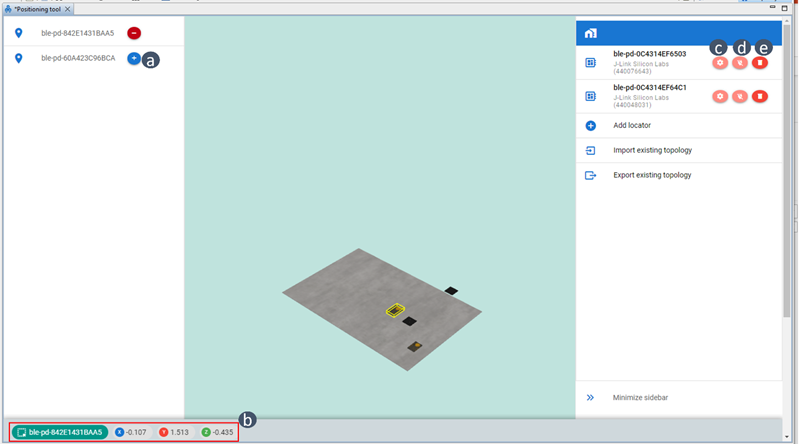
In the sidebar menu on the right side of the figure above you can (c) make changes to a locator’s settings, (d) connect/disconnect a locator, or (e) delete a locator.
Setting Positioning Parameters#
Use the settings control to change the RTL’s positioning parameters, such as estimation mode, validation method, and so on. Through this control you can also enable/disable line vectors showing the direction of the asset tags as seen pointed by each locator device.
To change positioning settings:
Click Settings on the left sidebar menu.
Make changes to the parameters.

Click Save. The changes will take effect automatically.
Importing a Topology#
Use the Import feature to use your existing topology config file, for instance the one in your GSDK directory: $GSDK/app/Bluetooth/example_host/bt_host_positioning/config/positioning_config.json.
To import a topology, first launch the Positioning Tool following the steps in Positioning Tool. Then do the following:
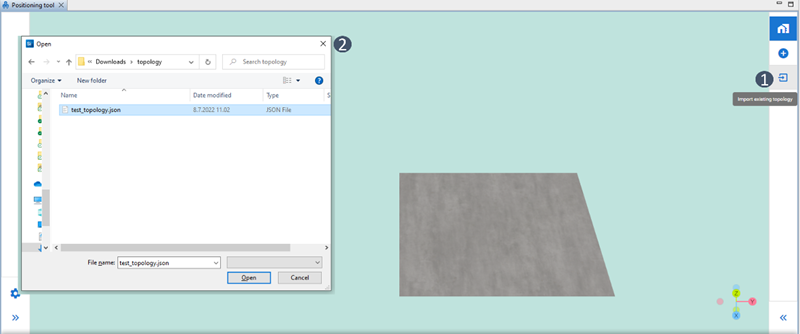
Click Import Existing Topology.
Browse to the topology file and click Open.
Another window opens to connect and sync with a list of locator device IDs found in the topology file.
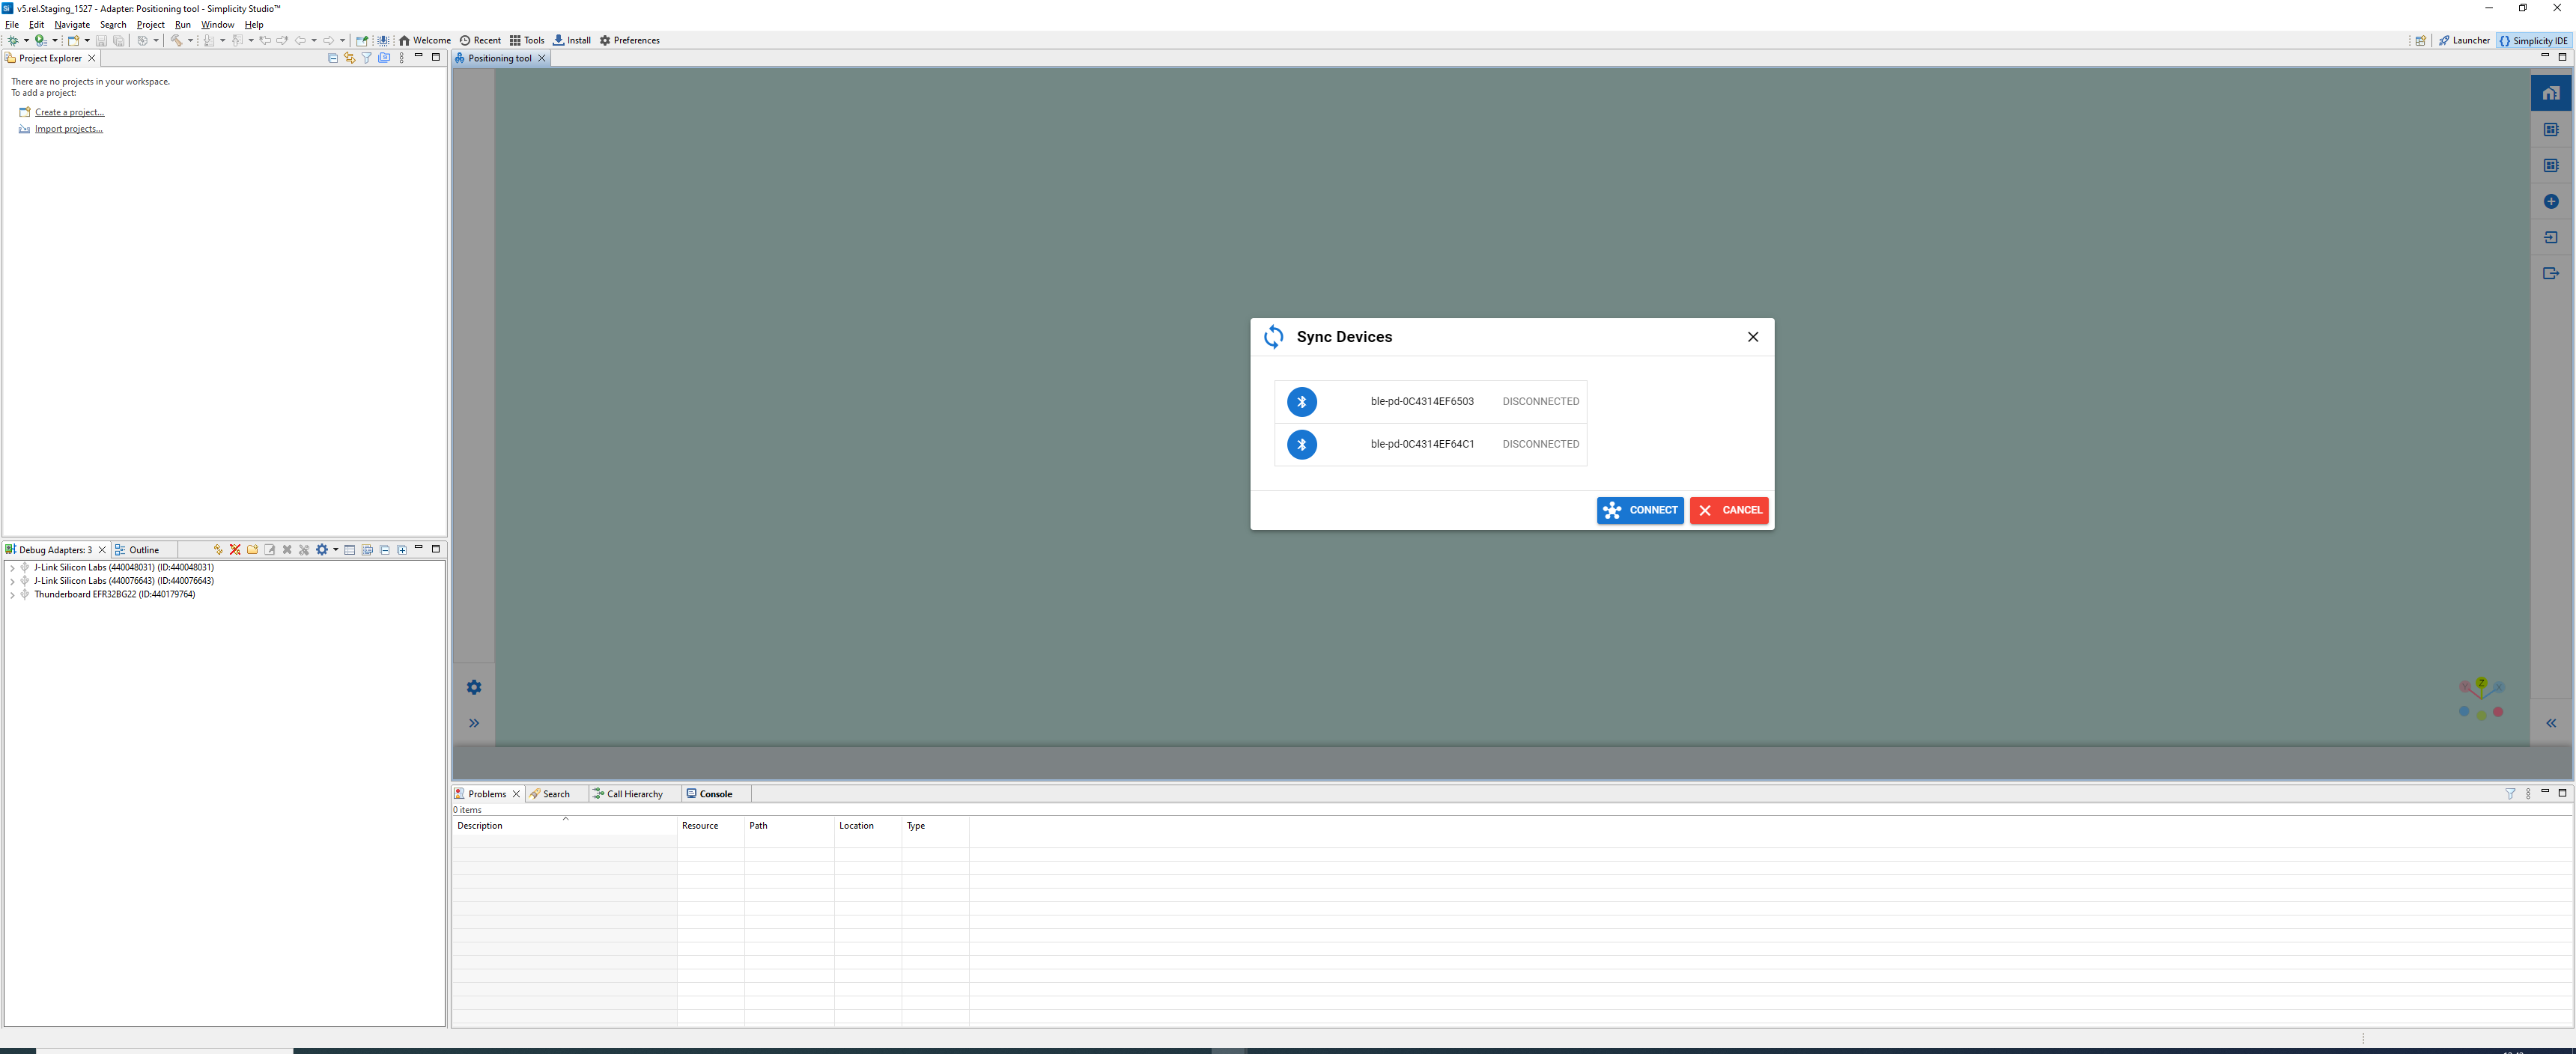
Click Connect and importing will be completed. The connect procedure is the reverse operation of the validation process discussed in step 3 of Adding Locators. During this procedure the positioning tool scans through all the J-Link devices that it finds through Simplicity Studio and tries to connect and communicate with them using BGAPI commands asking for their Bluetooth device address. It syncs with those J-Link devices whose Bluetooth device address matches with the list of locator IDs in the imported topology file. After it completes synching, it immediately starts locating the assets in real time.
Exporting a Topology#
Use the Export feature to export a topology configuration in the Positioning tool, for instance to re-use it in the GSDK host sample project: $GSDK/app/Bluetooth/example_host/bt_host_positioning/config/.
To export a topology:
Click Export existing topology.
Browse to the destination folder.

Name the configuration file and click Save to finish exporting.