Project Configurator#
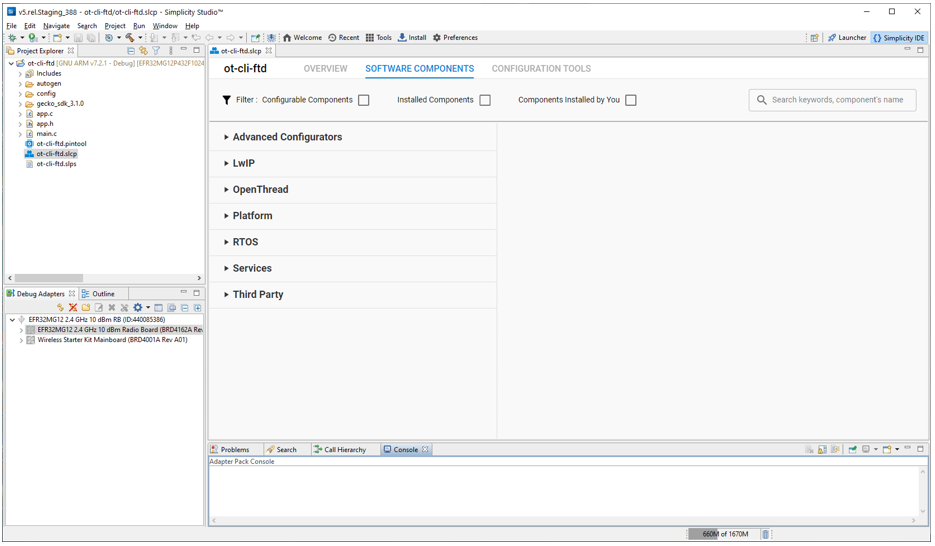
When you create a component-based project (.slcp), the Project Configurator automatically opens an OVERVIEW tab in the Editor area of the Simplicity IDE perspective. A SOFTWARE COMPONENTS tab provides access to a library of software components and their configuration functions. A CONFIGURATION TOOLS tab allows for quick access to project-specific tools.
Open the Project Configurator for an existing project by double-clicking the <project>.slcp file in the Project Explorer view.
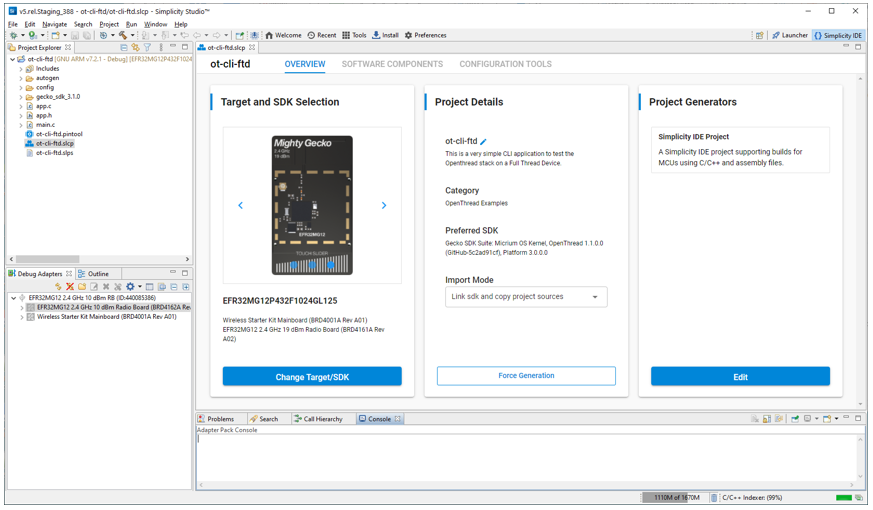
Overview Tab#
The OVERVIEW tab has three cards:
Target and SDK selection, where you can change your development target and SDK.
Project Details, where you can change the Import mode and, in rare cases, force generation.
Project Generators, where you can change the files SSv5 generates for your project.
Target and SDK Selection#
Click Change Target/SDK to change the device for which the project is developed, or the SDK version to be used in development. Changes made here do not apply to the project until you save changes.
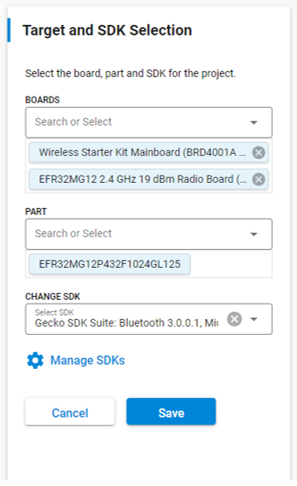
Search for target hardware by part number. If you select a different part, it replaces the part already selected, or you can delete the part and then add a new one.
If you have more than one Gecko SDK Suite (GSDK) version installed, you can select it here. If you do not see a version that you expect to see, click Manage SDKs to open the SDK Preferences.

Here you can search for SDKs that might be installed outside of SSv5. Note that, if you have more than one SDK protocol installed in the same GSDK version, for example Bluetooth and Zigbee, you cannot change between them. You can only choose among GSDK versions.
Project Details#
Project details include a description of the example on which the project is based, the category of the example, the versions of SDK included in the currently selected GSDK version, and the import mode. Here you can edit the project name, and change the import mode.

The import mode determines what resources are copied into your project and what are linked. If you change the import mode, the change is autosaved and your project files are regenerated.
Link to sources means all project and SDK resources are linked. Only generated files are saved with the project.
Link SDK and copy project sources (default) means that all the example project sources are copied, but SDK libraries are linked. If you update the SDK and regenerate the project files, the project will change.
Copy contents means that all resources are copied with the project. You can update SDK or load an updated example project and your project will not change.
Force Generation is used only in rare cases when autogeneration is not triggered, usually because of some change made outside of SSv5. It will run all available generators (slcp, radio config, gatt, and so on).
Note for Simplicity Studio 4/AppBuilder users: Because many project configurator files are autogenerated, Project Configurator does not include a Generate control like the one in AppBuilder. Force Generation is not a replacement for that control.
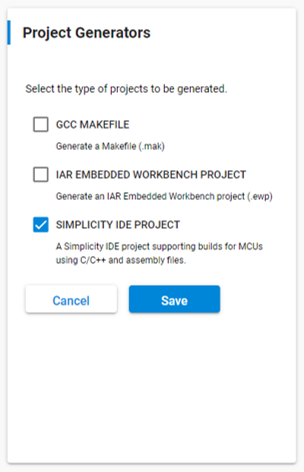
Project Generators#
Click Edit to change the files that are generated by Project Configurator. Changes take effect when the selection is saved. The options are:
GCC Makefile
IAR Embedded Workbench Project
Simplicity IDE project
The options that are available for selection and the default vary depending on the SDK and toolchain you selected when you created the project.
Note that changing the project generator does not change the project toolchain.
Software Components Tab#
Projects are configured by installing and uninstalling components, and configuring installed components. The SOFTWARE COMPONENTS tab displays categories of components on the left, and details about the selected component on the right.
A number of filters as well as a keyword search are available to help you explore the various component categories. Note that components for all installed SDKs are presented. Expand a component category\subcategory to see individual components. Select a component to see its details. Components that were included in the original project or installed by the user are checked (1), and can be uninstalled. Configurable components are indicated by a gear symbol (2). Configurable components must be installed before their configuration can be changed.
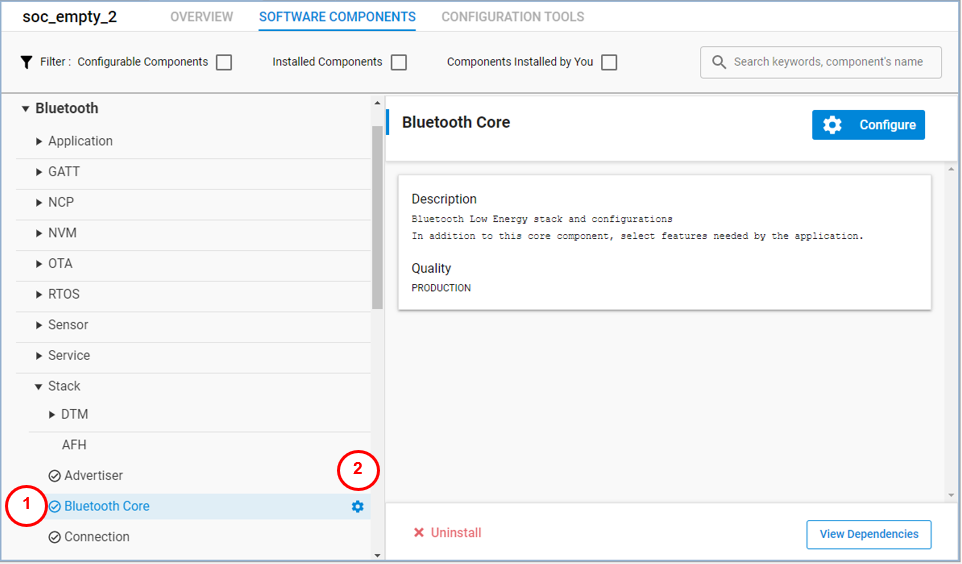
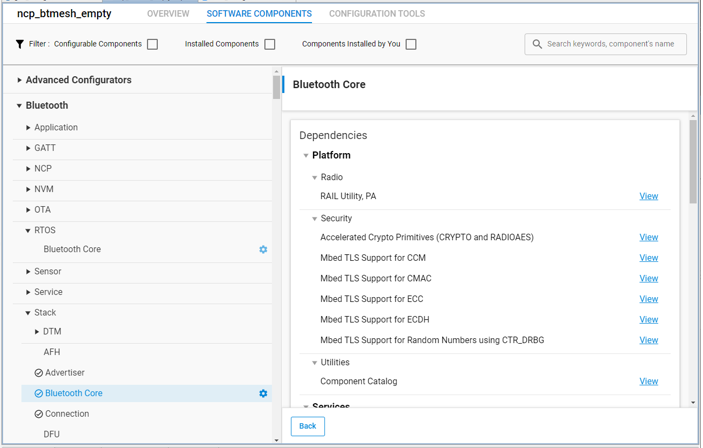
Click View Dependencies to see the components on which this component depends, and components dependent on it.
When you install a component, the installation process will:
Copy the corresponding SDK files from the SDK folder into the project folder.
Copy all the dependencies of the given component into the project folder.
Add new include directories to the project settings.
Copy the configurations files into the /config folder.
Modify the corresponding auto-generated files (in the autogen folder) to integrate the component into the application.
Additionally, "init" type software components will implement the initialization code for a given component, utilizing their corresponding configuration file as input. Some software components will fully integrate into the application to perform a specific task without the need of any additional code, while other components provide an API to be used in the application.
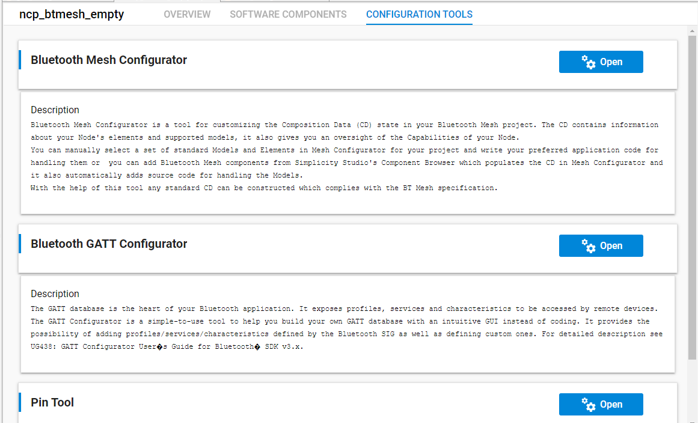
Configuration Tools Tab#
This tab provides an easy way to open a tool when the tool's tab is not open. The tab shows configuration tools relevant to the project type. A Bluetooth Mesh project shows a number of tools, while an OpenThread project might only show the Pin Tool. Click Open on the tool's card to open it in a separate tab.