Bluetooth NCP Commander#
Bluetooth NCP Commander is a Simplicity Studio® 5 (SSv5) tool for sending BGAPI commands to an NCP target application during development.
Two versions of the tool are available in SSv5:
Bluetooth NCP Commander
Bluetooth NCP Commander Standalone
For detailed information about using NCP Commander and developing Bluetooth NCP-Host applications, see AN1259: Using the Silicon Labs Bluetooth® Stack v3.x and Higher in Network Co-Processor Mode.
Bluetooth NCP Commander Standalone#
The Standalone version is provided for customers who need to control an NCP device on custom hardware. The Standalone version can access the system COM ports that are not exposed in SSv5. Users who wish to work outside of the SSv5 environment can do so by copying the directory <SSv5-install>/developer/adapter_packs/ncp_commander.
The Standalone version cannot access parts over Ethernet, which the integrated SSv5 version can.
Bluetooth NCP Commander#
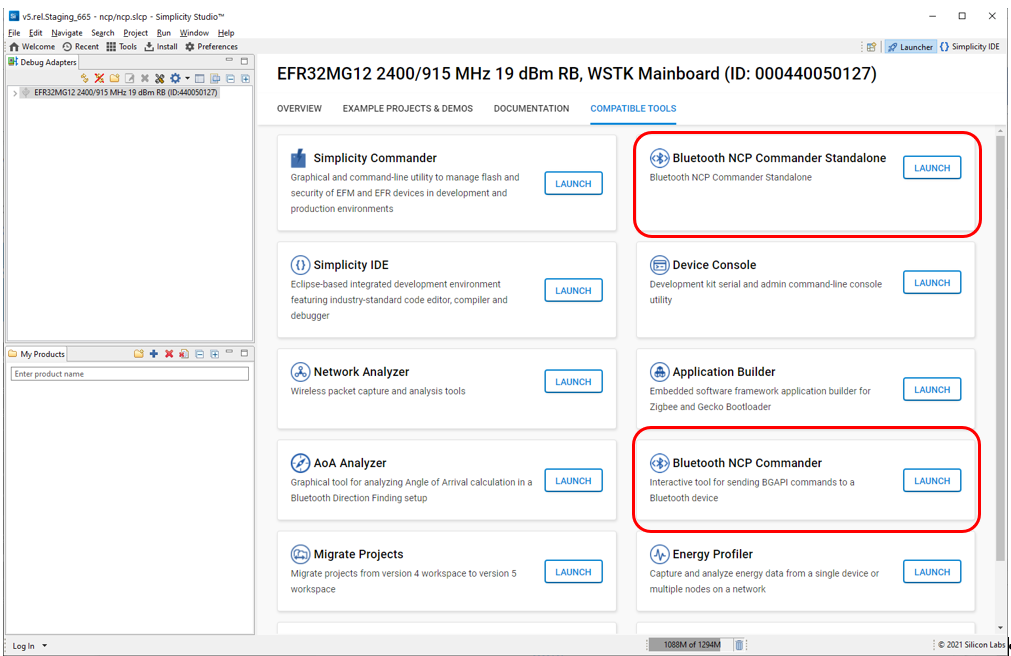
To open Bluetooth NCP Commander, make sure that the correct board is connected. If you are just getting started, build and flash a project based on Bluetooth - NCP.
In the Project Configurator COMPATIBLE TOOLS tab, click LAUNCH on the Bluetooth NCP Commander card. In the Connection Manager dialog, select the target device and click Connect.
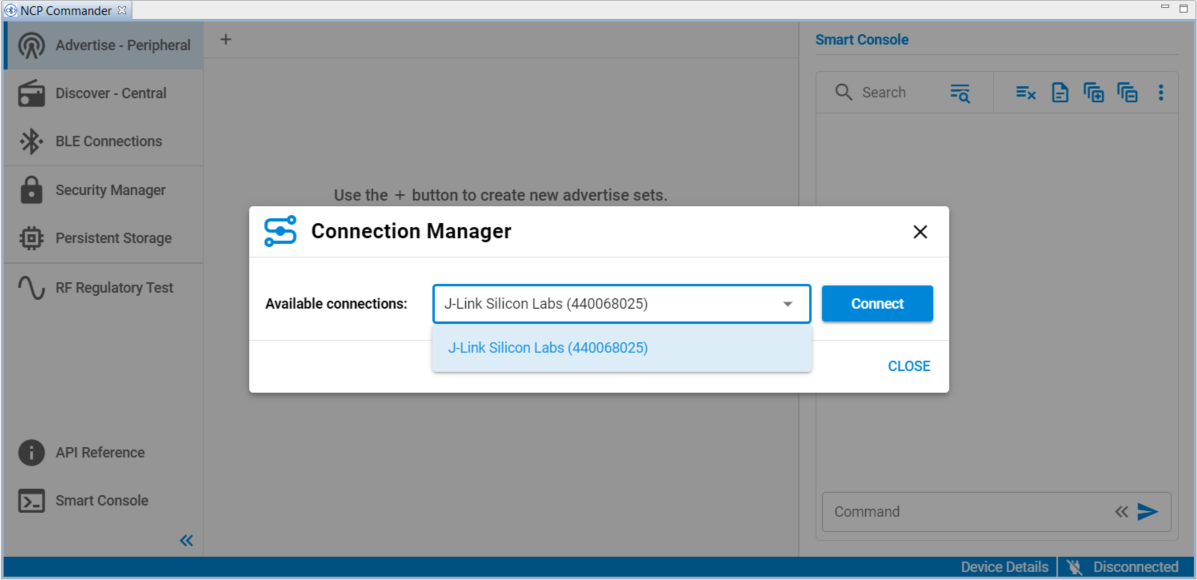
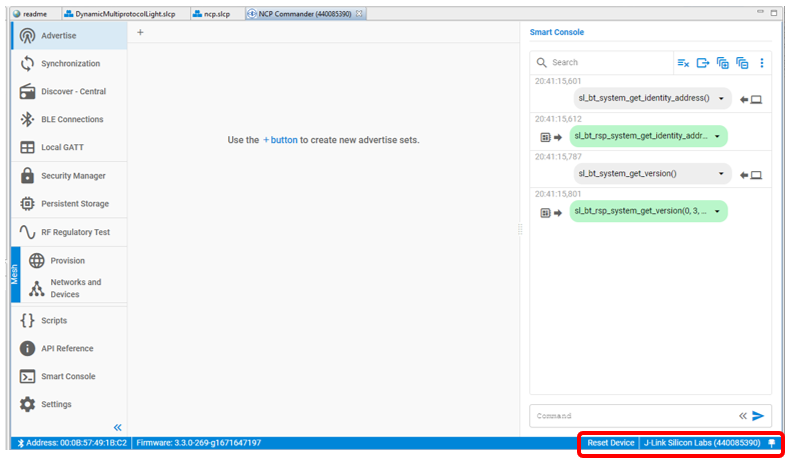
Once the UART connection to the mainboard is established, an Interactive view opens, which you can use to issue BGAPI commands. Note that the connected device is shown in the lower right. You can change target devices without leaving Bluetooth NCP Commander by clicking that area. It will show "Disconnected" if not connected to any device. Check the log for the NCP target response and status messages.
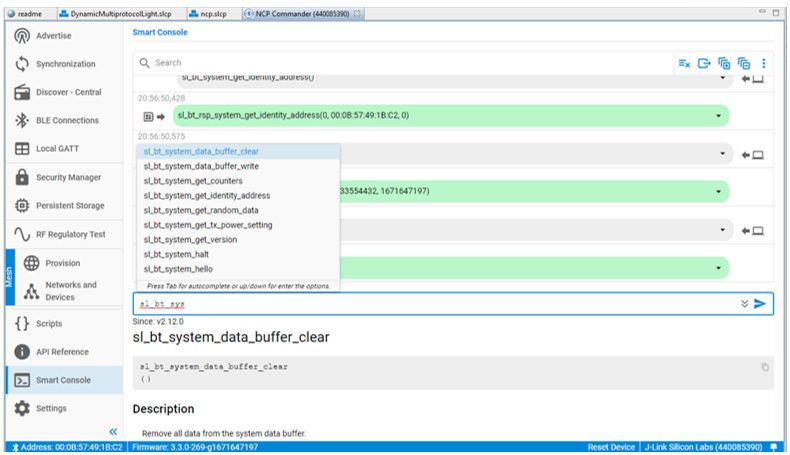
You can also issue commands manually. For example, you can issue the 'sl_bt_system_hello()' command at any time to verify that communication between the host and the device is working. The Smart Console provides auto completion and documentation for the possible commands.
NCP Commander provides a simple scripting feature. Create or import an existing script using the controls in the top right corner. You can use any BGAPI commands in the script, but it has no additional features, such as branching or error handling. Click Export to save the commands sent through the console to a file that can be imported back as a script.
Advertising#
To start advertising, click "+" next to "Advertise" to create an advertiser set.
Select the desired advertising mode, create custom advertising packets if desired, and click Start.
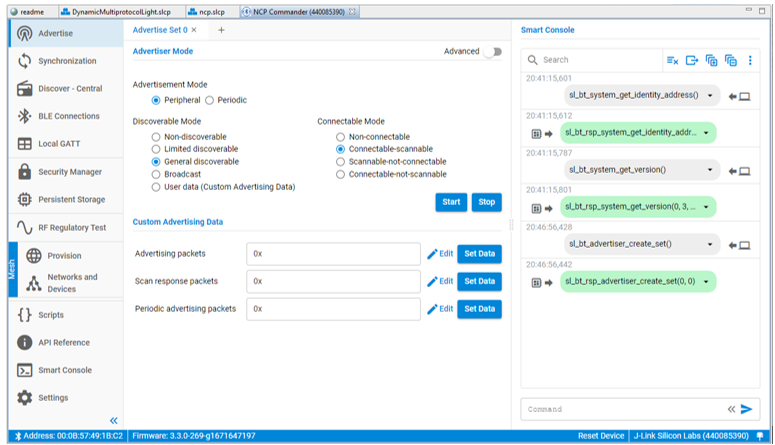
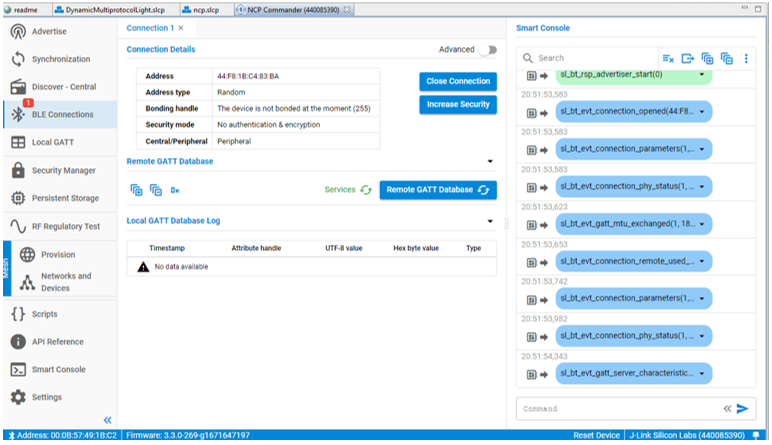
When advertising, the NCP target example accepts Bluetooth connections. If you connect to a WSTK or with another central device (for example with your phone), you can see the events and commands on the log.
GATT Database#
NCP commander supports creating a GATT database. To generate a basic GATT database, open the Local GATT view, and click Create Basic GATT. The following database is generated.
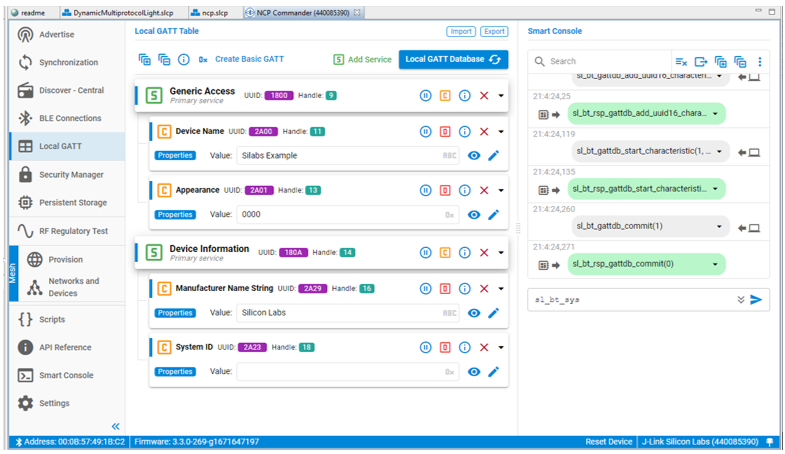
Here you can add services and characteristics. You can also read out the local GATT database from the device.
Bluetooth mesh#
NCP Commander supports Bluetooth mesh features. You can issue Bluetooth mesh commands manually in the Smart Console, or use the interactive host provisioner feature to provision and configure mesh nodes and manage mesh networks, instead of using a Bluetooth mesh mobile application. To use the Bluetooth Mesh features, create, build, and flash the device with an NCP example supporting Mesh features, such as Bluetooth Mesh - NCP Empty. This section provides a summary of host provisioning. For details see AN1259: Using the Silicon Labs Bluetooth® Stack v3.x and Higher in Network Co-Processor Mode.
To start using the host provisioner, select either Provision or Networks & Nodes on the left menu, and click Initialize as Provisioner.

If you do not have a network from a previous configuration or have reset the provisioner node, you must create a new network with Create New Network.
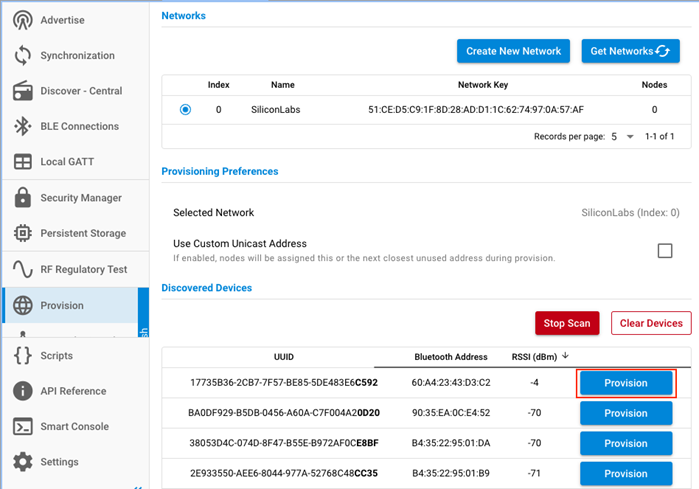
To provision devices, select Provision on the left menu, and click Start Scan in the right panel. The devices that are transmitting unprovisioned beacons are shown in the Discovered Devices section. Click Provision next to the device you want to provision.
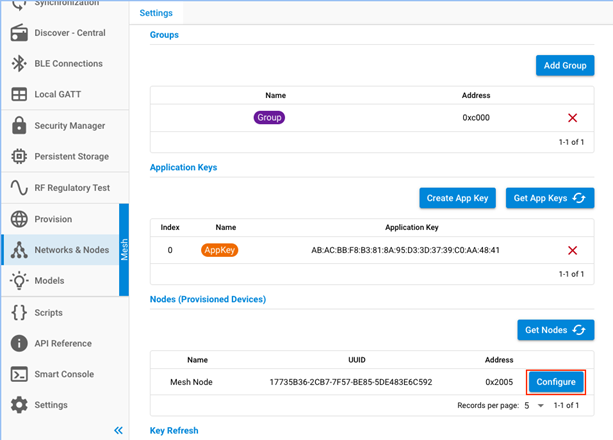
Before configuring provisioned devices, you may need to create application keys and groups. Application keys, groups and other network settings can be managed in the Settings tab of the Networks & Nodes menu item.
To configure provisioned devices, select Networks & Nodes on the left menu. Provisioned devices are shown in the Provisioned Devices section of the Settings tab. Click Configure.
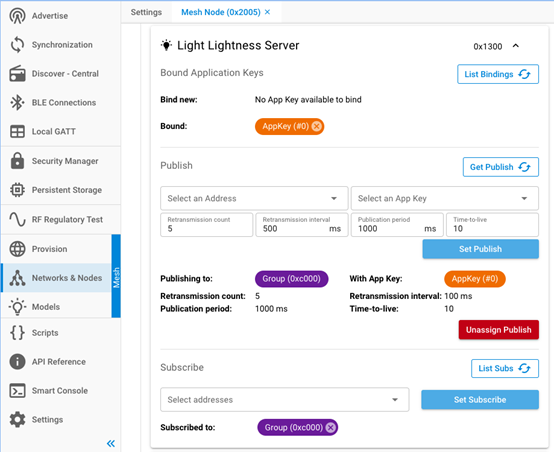
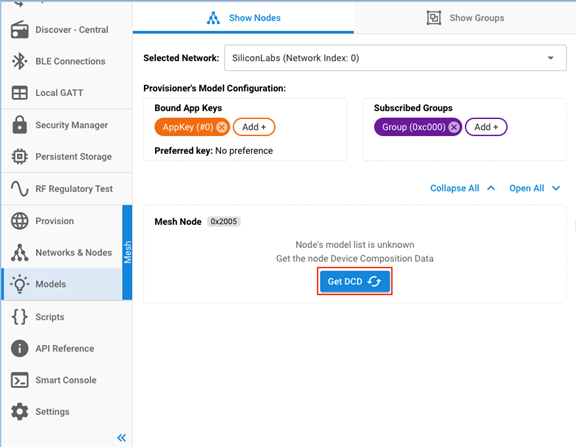
This opens a Mesh Node tab in which you can add an application key. Once you have added the key, the interface changes to include a Get DCD control (not shown). Click Get DCD to to configure all the Models available on your node(s), bind to app keys, set publishing or subscription to groups, fine tune parameters, and so on.
To configure the host provisioner, first initialize models using Initialize Client Models.
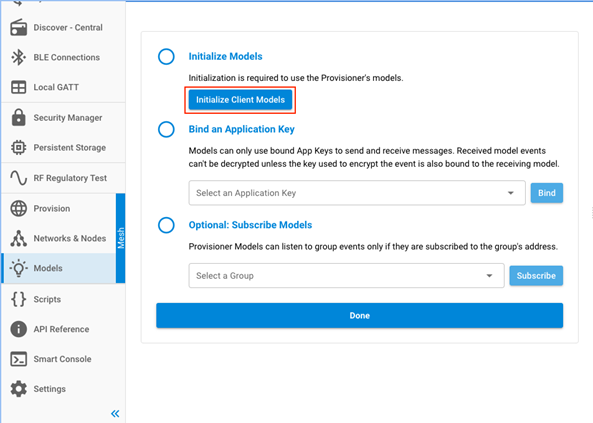
Bind an application key to the models and, optionally, subscribe the models to a group. When configuration is complete, click Done
The Show Nodes tab is displayed. Click Get DCD to configure all the Models available on your node(s), bind to app keys, set publishing or subscription to groups, fine-tune parameters, and so on.
After listing, you can Get or Set the Server states of the Node(s).
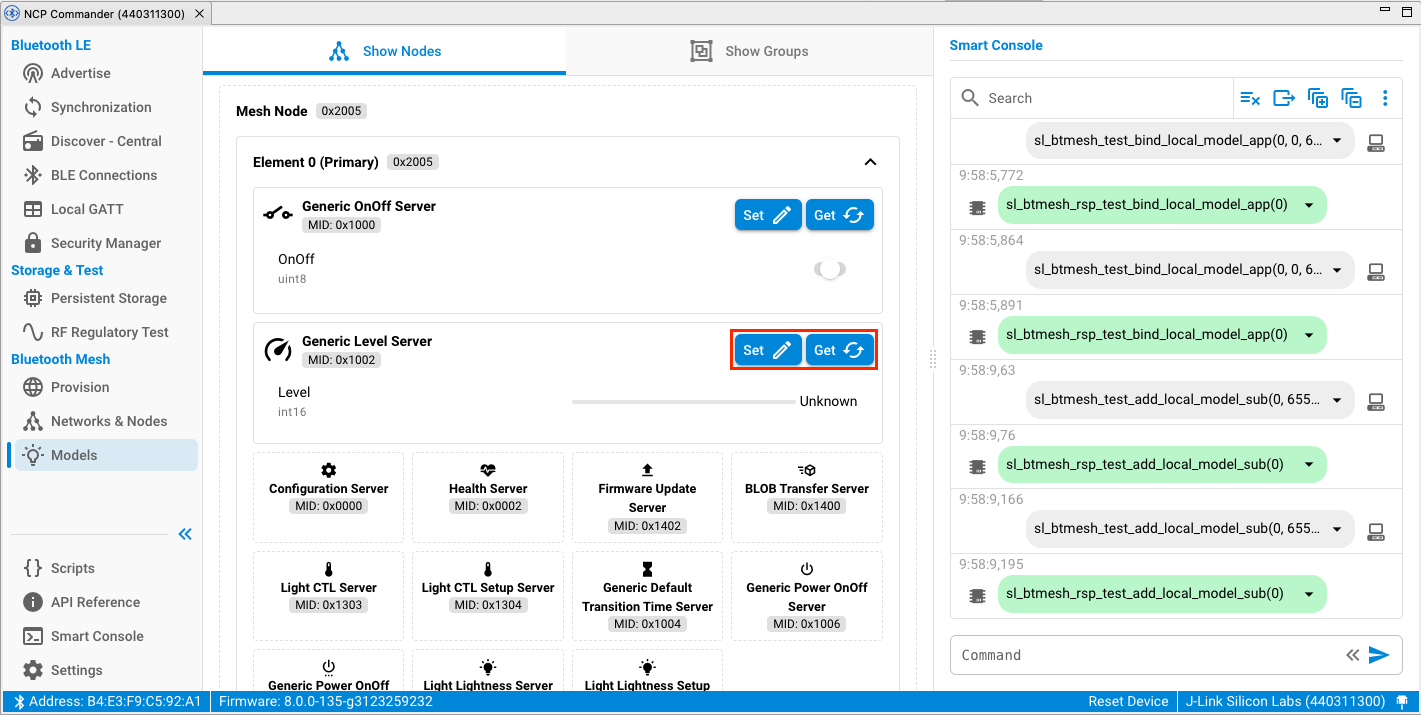
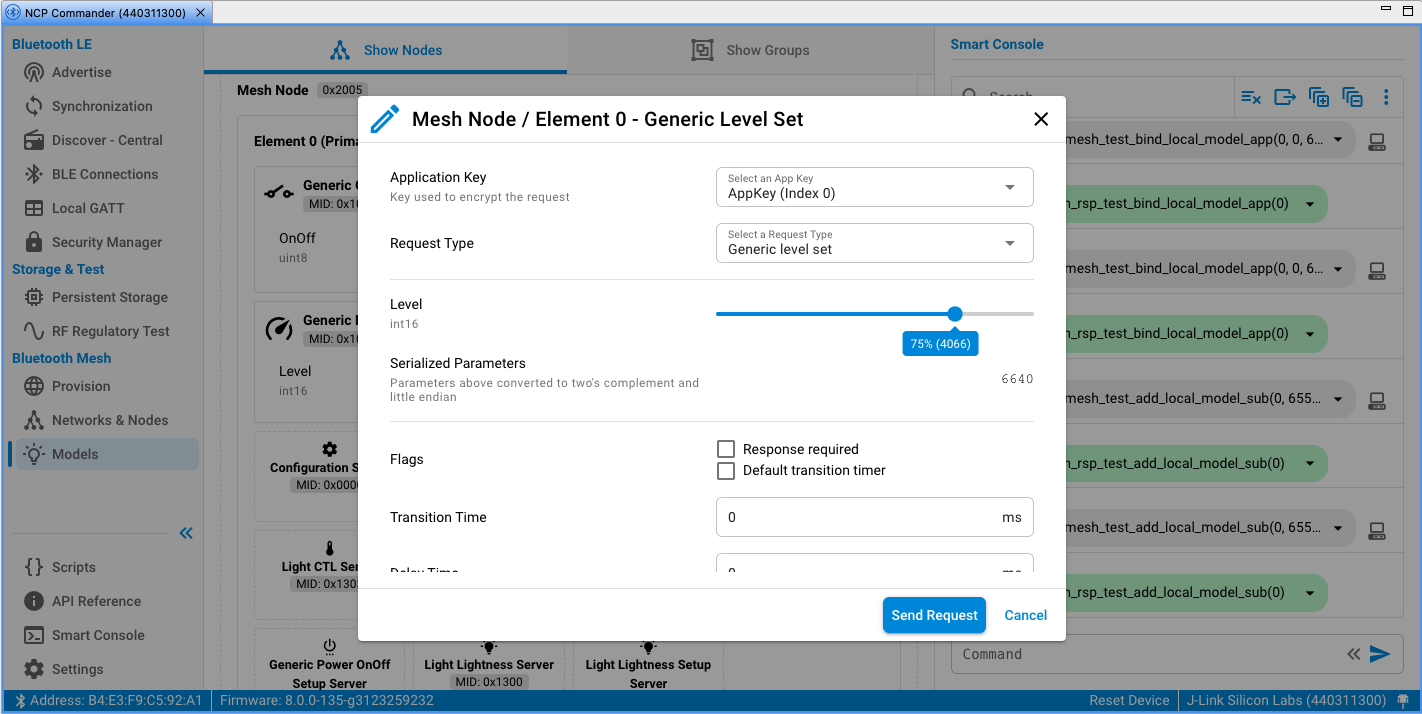
Click Set to set the current state of the selected Server of the selected Node.
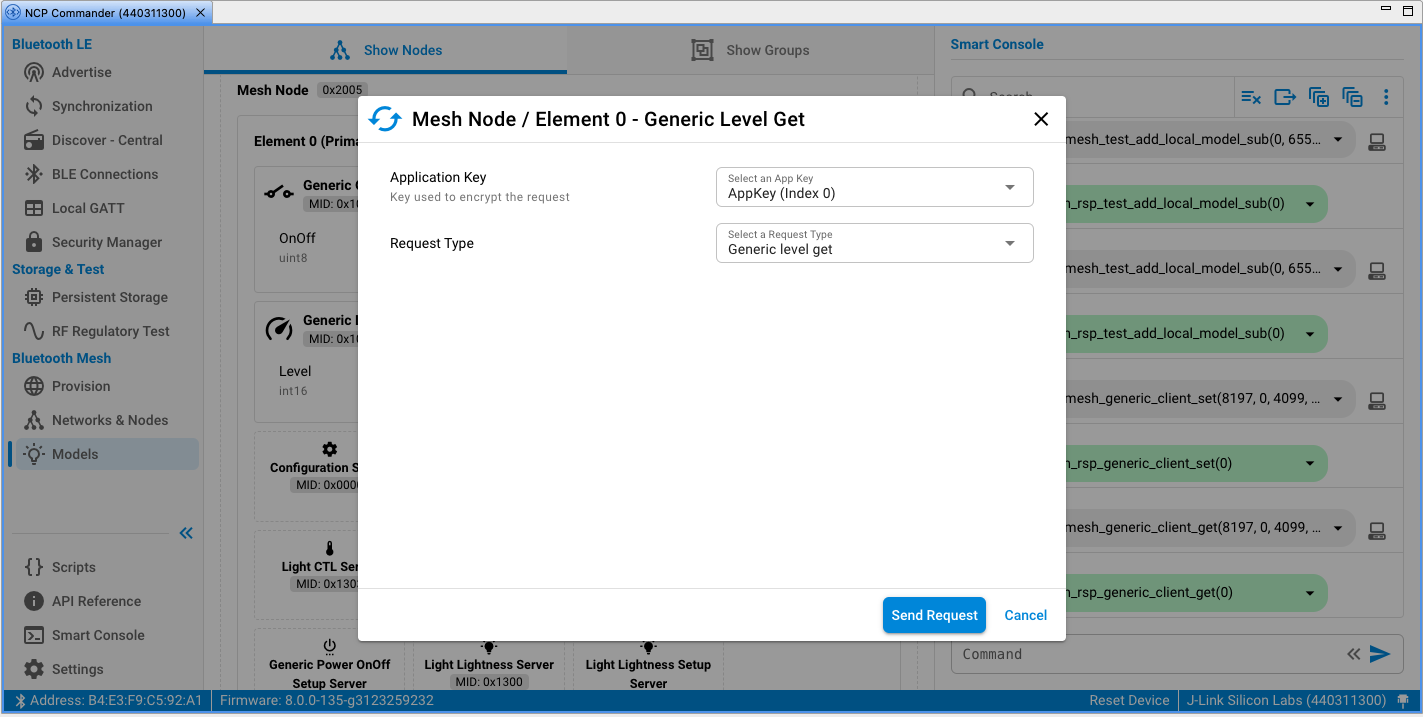
Click Get to get the current state of the selected Server of the selected Node.
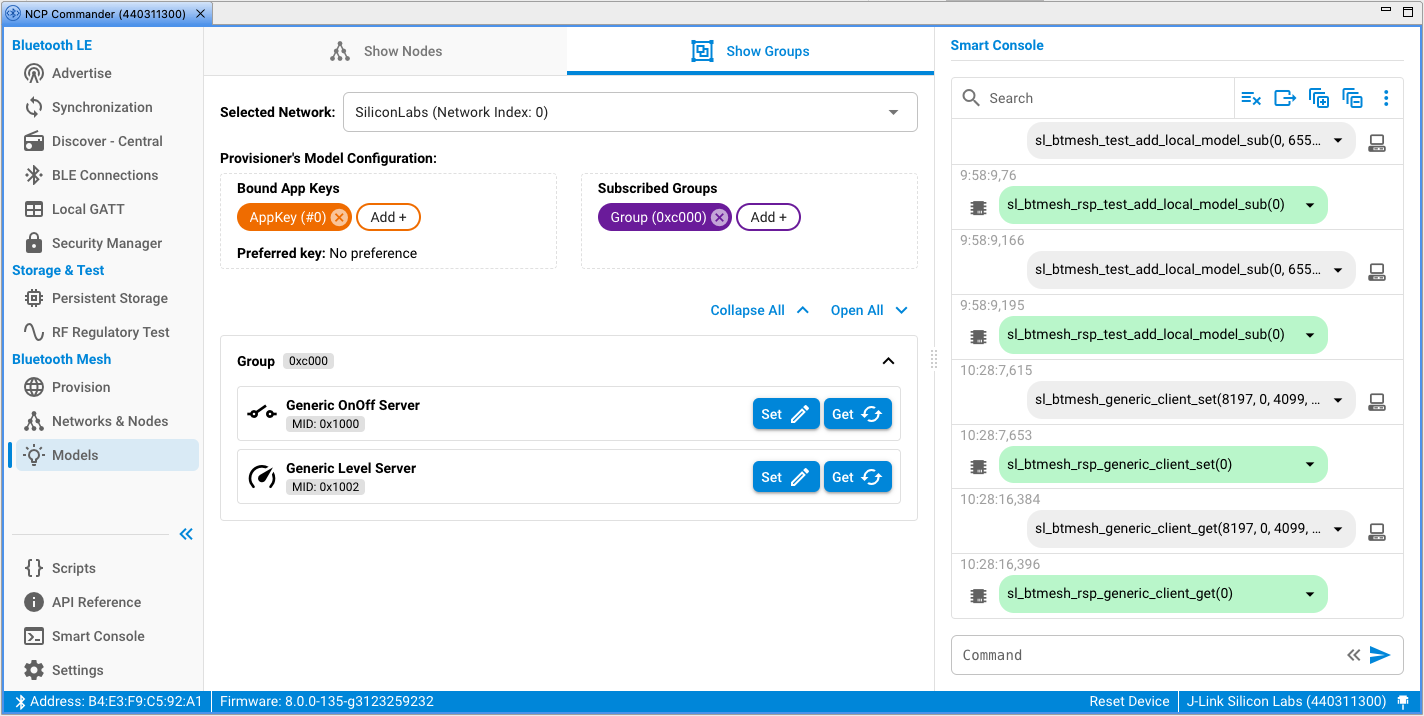
On the Show Groups tab, you can Set or Get the Server Model(s) states on a Group level.
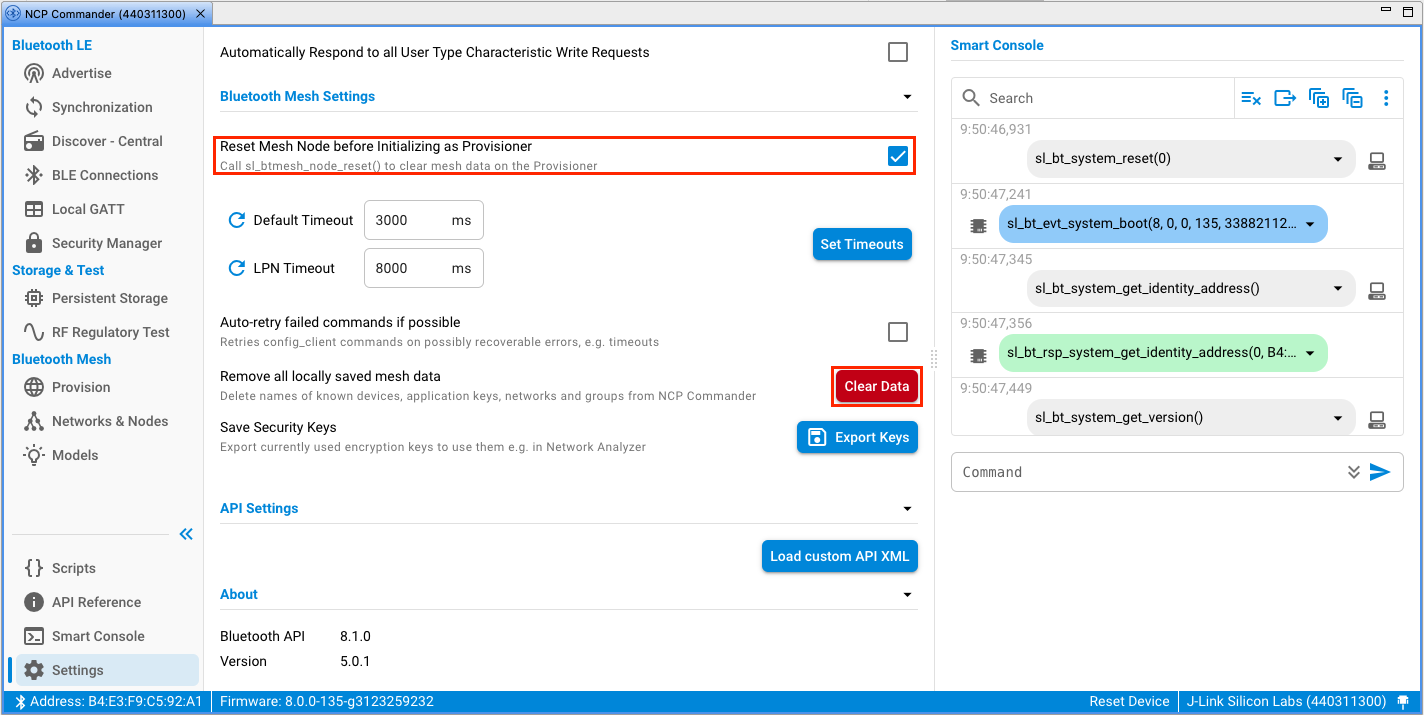
In Settings, if the Reset Mesh Node before Initializing as Provisioner option is enabled, the host provisioner does a factory reset (the sl_btmesh_node_reset() command) on the NCP target device before initializing the node. Clicking Clear Data next to Remove all locally saved mesh data removes the network and application keys that were configured during initialization.