Add WiSeConnect™ SDK to Your Application#
Prerequisites#
Your host application must contain the CMSIS-RTOS2 API and an RTOS library.
As an example, for STM32F411RE™ (hereafter referred to as STM32), let us consider a sample Keil µVision project host application project (Sample_STM32_project) created using STM32CubeMX tool.
Select the host MCU.
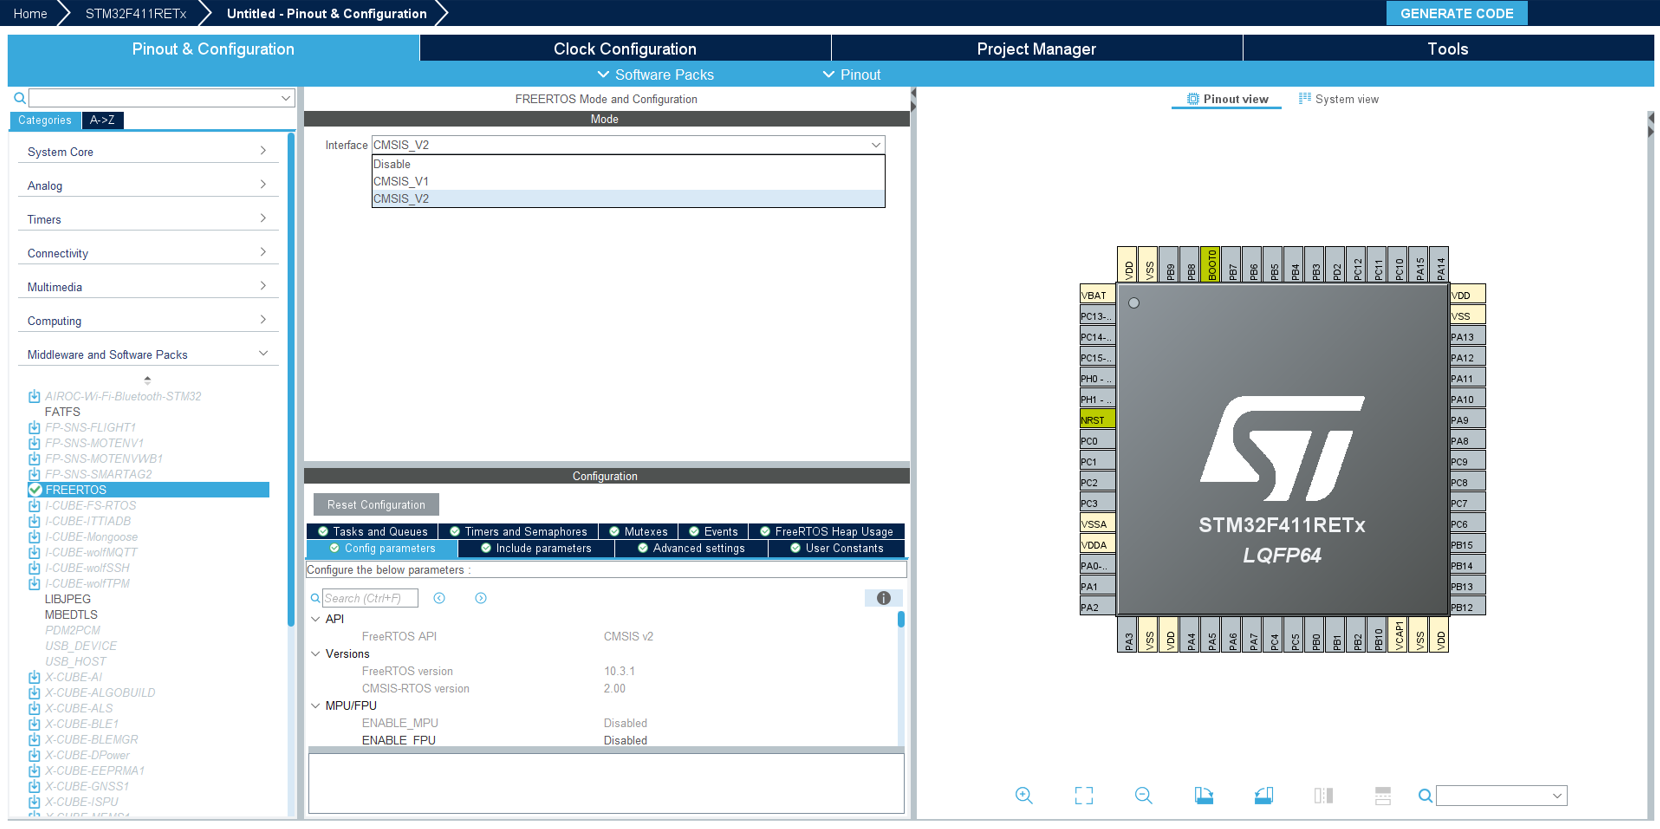
Under "Middleware and Software Packs", select "FREERTOS", and on the "Interface" drop-down menu, select "CMSIS_V2.
The STM32CubeMX provides an implementation of the CMSIS-RTOS2 API ported to the FreeRTOS library. The implementation path is:
<STM32 project>\Middlewares\Third_Party\FreeRTOS\Source
Follow the below sequence of steps to port WiSeConnect™ SDK (hereafter referred to as SDK) to your host MCU application.
Prepare Project for Porting#
The initial step in porting is to integrate the WiSeConnect SDK into your host application. The SDK depends on a few header and C source files present in the Silicon Labs Simplicity SDK (formerly Gecko SDK) ( SiSDK (formerly GSDK)). So, it is necessary to integrate the required files from SiSDK as well as WiSeConnect SDK for developing an SiWx917 application using a host platform.
Download the SiSDK and WiSeConnect SDK:
SDK downloads must be performed using SLT-CLI (v1.1.0 or later) — a standalone command-line tool.
Follow steps 1–4 in the Installation and Setup section to install SLT-CLI and download the SDKs via SLT-CLI.
Note:
In step 2, use the following recipe file.
wiseconnect="~" simplicity-sdk="~"To download specific SDK versions, use a recipe file like the following. If you are not sure which simplicity-sdk version corresponds to your WiSeConnect SDK version, refer to the WiSeConnect SDK release notes.
wiseconnect="4.1.2" simplicity-sdk="2025.12.0"
Create a new folder or a directory in the host platform project’s root directory or any convenient location in the project.
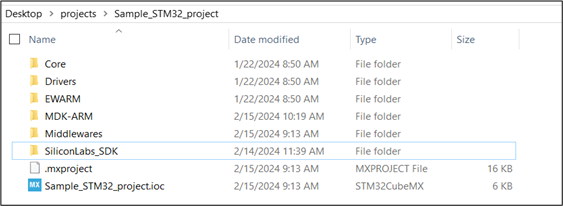
For example, let us consider a sample STM32 Keil µVision project (Sample_STM32_project) created using the STM32CubeMX tool. In this case, create a directory, say
SiliconLabs_SDKin the sample project’s root directory.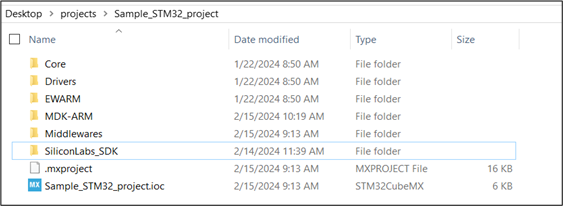
Within
SiliconLabs_SDK, create two sub-directories for SiSDK (formerly GSDK) and SDK.For STM32 project, two sub-directories with names
SiSDK (formerly GSDK)andWSDKare created.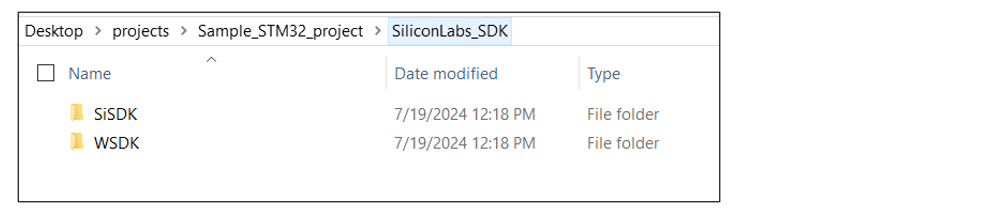
Add Code from Simplicity SDK (formerly Gecko SDK) (SiSDK (formerly GSDK))#
Add the following c source files from SiSDK (formerly GSDK)present to your project.
"sl_string.c" present at path:
<sisdk>/platform_common/platform/common/src/sl_string.c."sli_cmsis_os2_ext_task_register.c" present at path:
<sisdk>/cmsis_common/platform/common/src/sli_cmsis_os2_ext_task_register.c"sl_mem_pool.c" present at path:
<sisdk>/platform_core/platform/service/mem_pool/src/sl_mem_pool.c
In case of STM32F411RE, the required c source files are added at
SiSDK (formerly GSDK)/srcfolder.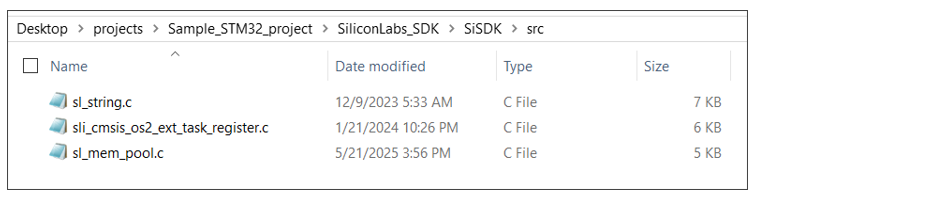
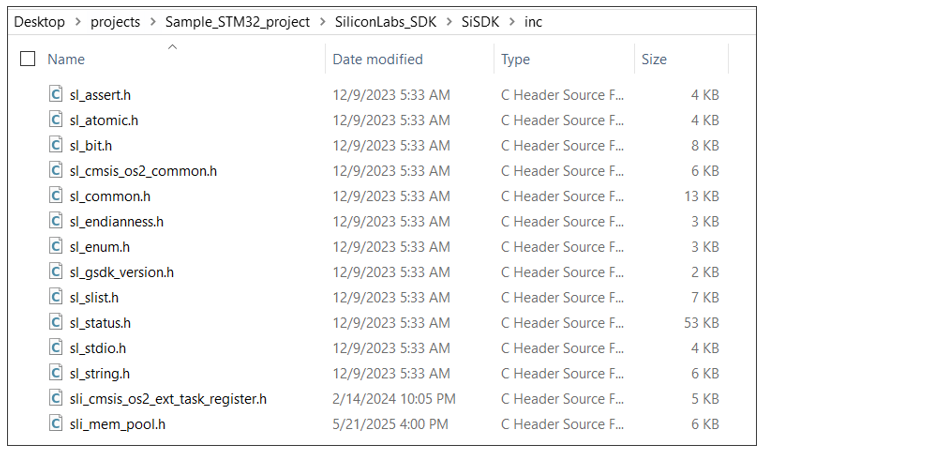
Include the following C header files from SiSDK (formerly GSDK) in your project. SiSDK will be automatically downloaded from the Simplicity Studio v6 and saved to your local PC. Default path:
C:\Users\xxxxx\.silabs\slt\installs\conan\p\simplxxxxx\p"sli_mem_pool.h" present at path:
<sisdk>/platform_core/platform/service/mem_pool/inc/sli_mem_pool.hAll header files present at path:
<sisdk>/platform_common/platform/common/inc/"sl_core.h", "sl_endianness.h" and "sl_stdio.h" present at path:
<sisdk>/platform_core/platform/common/inc/"sl_cmsis_os2_common.h" and "sli_cmsis_os2_ext_task_register.h" present at path:
<sisdk>/cmsis_common/platform/common/inc/"sli_mem_pool.h" present at path:
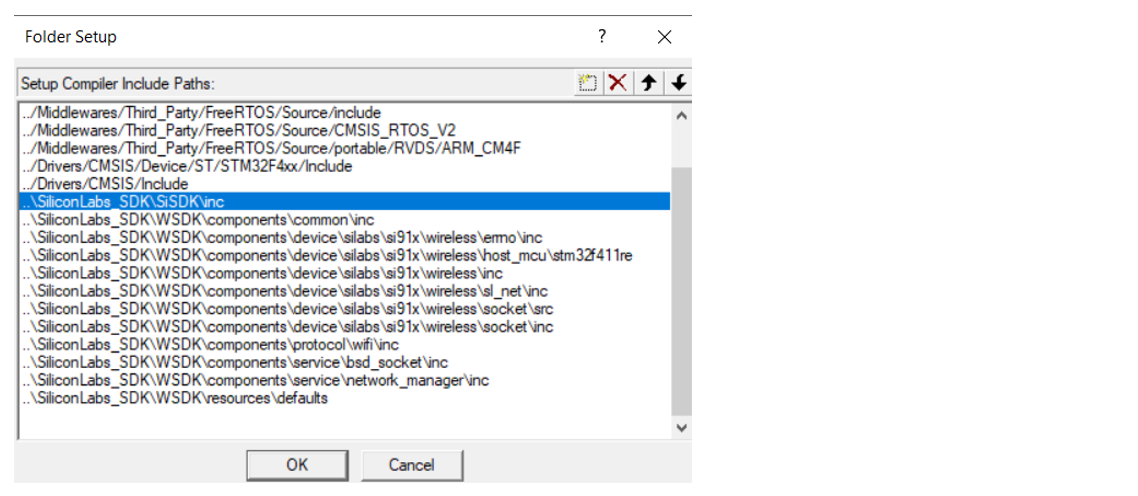
<sisdk>/platform_core\platform\service\mem_pool\incIn case of STM32F411RE, the header files are added atSiSDK (formerly GSDK)/incas shown below.
Port Compiler and Architecture-Specific Functions#
The following compiler-specific function prototypes present in "sl_core.h" should be defined based on the compiler used for your project.
CORE_EnterAtomic | CORE_ExitAtomic | CORE_EnterCritical | CORE_ExitCritical
Create a C source file to define the compiler-specific functions to define the above functions. In case of STM32F411RE, a file named sl_host_core.c is created and added at
SiSDK (formerly GSDK)/srcfolder.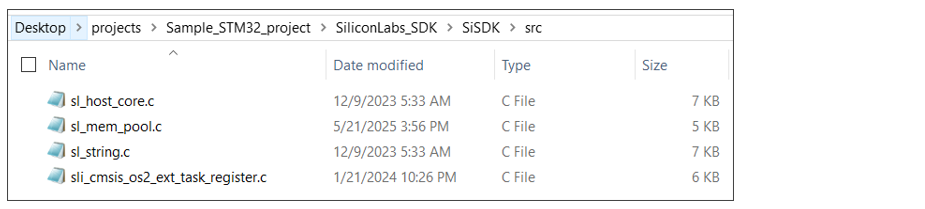
Ensure to include compiler-specific CMSIS header file in the C source file created in above step 2. For example, for ARMCC compiler, include "cmsis_armcc.h", for GCC compiler, include "cmsis_gcc.h" etc.
CORE_EnterAtomic#
Prototype#
CORE_irqState_t CORE_EnterAtomic(void);
Description#
This function disables global interrupts to ensure the specific code executes atomically, without interruption from ISRs. It returns the previous interrupt state, allowing safe restoration later.
Parameters#
None.
Return values#
CORE_irqState_t - The saved interrupt state, indicating whether interrupts were enabled before entering the atomic section.
Note: The CORE_irqState_t is defined in "sl_core.h" file of SiSDK (formerly GSDK).
Examples#
EFR32: Refer to the implementation instructions in the "sl_core_cortexm.c" file present at path:
<sisdk>/platform_core/platform/common/srcfor the definition of the function.STM32:
CORE_irqState_t CORE_EnterAtomic(void)
{
CORE_irqState_t irqState = __get_PRIMASK();
__disable_irq();
return irqState;
}CORE_ExitAtomic#
Prototype#
void CORE_ExitAtomic(CORE_irqState_t irqState);
Description#
This function restores the interrupt state saved by CORE_EnterAtomic(). If interrupts were enabled before entering the atomic section, they are re-enabled.
Parameters#
CORE_irqState_t - The interrupt state returned by CORE_EnterAtomic(), used to determine whether interrupts should be re-enabled.
Return values#
None
Examples#
EFR32: Refer to the implementation instructions in the "sl_core_cortexm.c" file present at path:
<sisdk>/platform_core/platform/common/srcfor the definition of the function.STM32:
void CORE_ExitAtomic(CORE_irqState_t irqState)
{
if (irqState == 0) {
__enable_irq();
}
}CORE_EnterCritical#
Prototype#
CORE_irqState_t CORE_EnterCritical(void);
Description#
This function disables global interrupts to prevent preemption while executing time-sensitive or shared-resource code. It returns the previous interrupt state to be restored later using CORE_ExitCritical().
Parameters#
None.
Return values#
CORE_irqState_t - The saved interrupt state before disabling interrupts.
Note: The CORE_irqState_t is defined in "sl_core.h" file of SiSDK (formerly GSDK).
Examples#
EFR32: Refer to the implementation instructions in the "sl_core_cortexm.c" file present at path:
<sisdk>/platform_core/platform/common/srcfor the definition of the function.STM32:
CORE_irqState_t CORE_EnterCritical(void)
{
CORE_irqState_t irqState = __get_PRIMASK();
__disable_irq();
return irqState;
}CORE_ExitCritical#
Prototype#
void CORE_ExitCritical(CORE_irqState_t irqState)
Description#
This function re-enables global interrupts only if they were enabled prior to entering the critical section, using the saved interrupt state from CORE_EnterCritical().
Parameters#
CORE_irqState_t - The interrupt state returned by CORE_EnterCritical(), the saved interupt state.
Return values#
None
Examples#
EFR32: Refer to the implementation instructions in the "sl_core_cortexm.c" file present at path:
<sisdk>/platform_core/platform/common/srcfor the definition of the function.STM32:
void CORE_ExitCritical(CORE_irqState_t irqState)
{
if (irqState == 0) {
__enable_irq();
}
}
Add Code from WiSeConnect SDK#
It is not required to add all the files and folders present in the SDK to your project. The SDK contains the SiWx917 features such as Wi-Fi, BLE, application layer protocols etc., and their implementations organized into components. This benefits the user to add only the required files and folders associated with the respective feature from the components folder to their host MCU application project.
The following figures show the hierarchy of files and folders present in the components, resources, and third_party folders of the SDK.
The entities (component/c source file/header file/folder) that are marked Mandatory must be added to your application project. These include
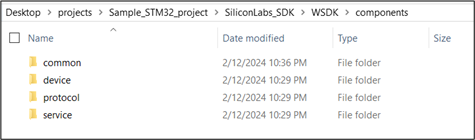
common,device,protocol,service,network_manager,wifi,errno,ncp_interface,sl_net,sli_hal_si91x,sli_si91x_wifi_command_engine,sli_si91x_wifi_event_handler,sli_buffer_manager,sli_command_engine,sli_event_engine,sli_queue_manager,sli_routing_utility,sli_wifi, andresources.The entities that are marked Optional can be added based on the features your application requires. For example, add
http_client,mqtt,mdns,sntp,bsd_socket,sl_http_server, orsl_websocket_clientfromcomponents/service; orasynchronous_socket,ble,crypto,firmware_upgrade,icmp, orsocketfromcomponents/device/silabs/si91x/wireless. Add libraries fromthird_partysuch asaws_sdk,azure_freertos_middleware,iot_socket,json_parser, orpaho_mqtt_embeddedonly when your application needs them.The entities that are marked Options imply that any of the available options (marked in red) can be chosen while adding Mandatory or Optional entities. For example, the memory configuration used by the SDK can be
malloc_buffers.c,mem_pool_buffers.c, ormem_pool_buffer_quota.cfromcomponents/device/silabs/si91x/wireless/memory. Similarly, under ncp_interface, add the mandatorysl_si91x_ncp_driver.cand choose either thespioruartfolder based on your host interface. For resources, choosedefaultsorlwip_defaultsbased on your network stack.The entities that are marked To be ported must be implemented for your host platform. For example, under
components/device/silabs/si91x/wireless/host_mcu, create a host-platform folder for the HAL API. The reference platform folders (efr32fg25,efx32,si91x,stm32) shown in the hierarchy are not copied as-is; create a folder for your host MCU instead.The entities that are marked Not required need not be added. These include
at_commands_auto_gen,board,console,logger,mcu(underdevice/silabs/si91x),ahb_interface,sli_wifi_per_mode,littlefs,qcbor, andtcose(underthird_party), andsl_net_ethernet.c(undernetwork_manager). Refer to the hierarchy figures for the complete list.Add the
socketcomponent fromcomponents/device/silabs/si91x/wireless,asynchronous_socket, orbsd_socketfromcomponents/servicewhen your application needs socket-based data transfers.The
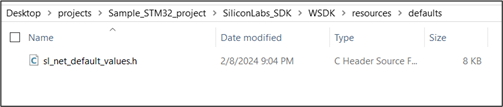
resourcesfolder is Mandatory and contains default configuration values used by thenetwork_managercomponent.The
third_partyfolder is Optional. Add only the third-party libraries your application requires.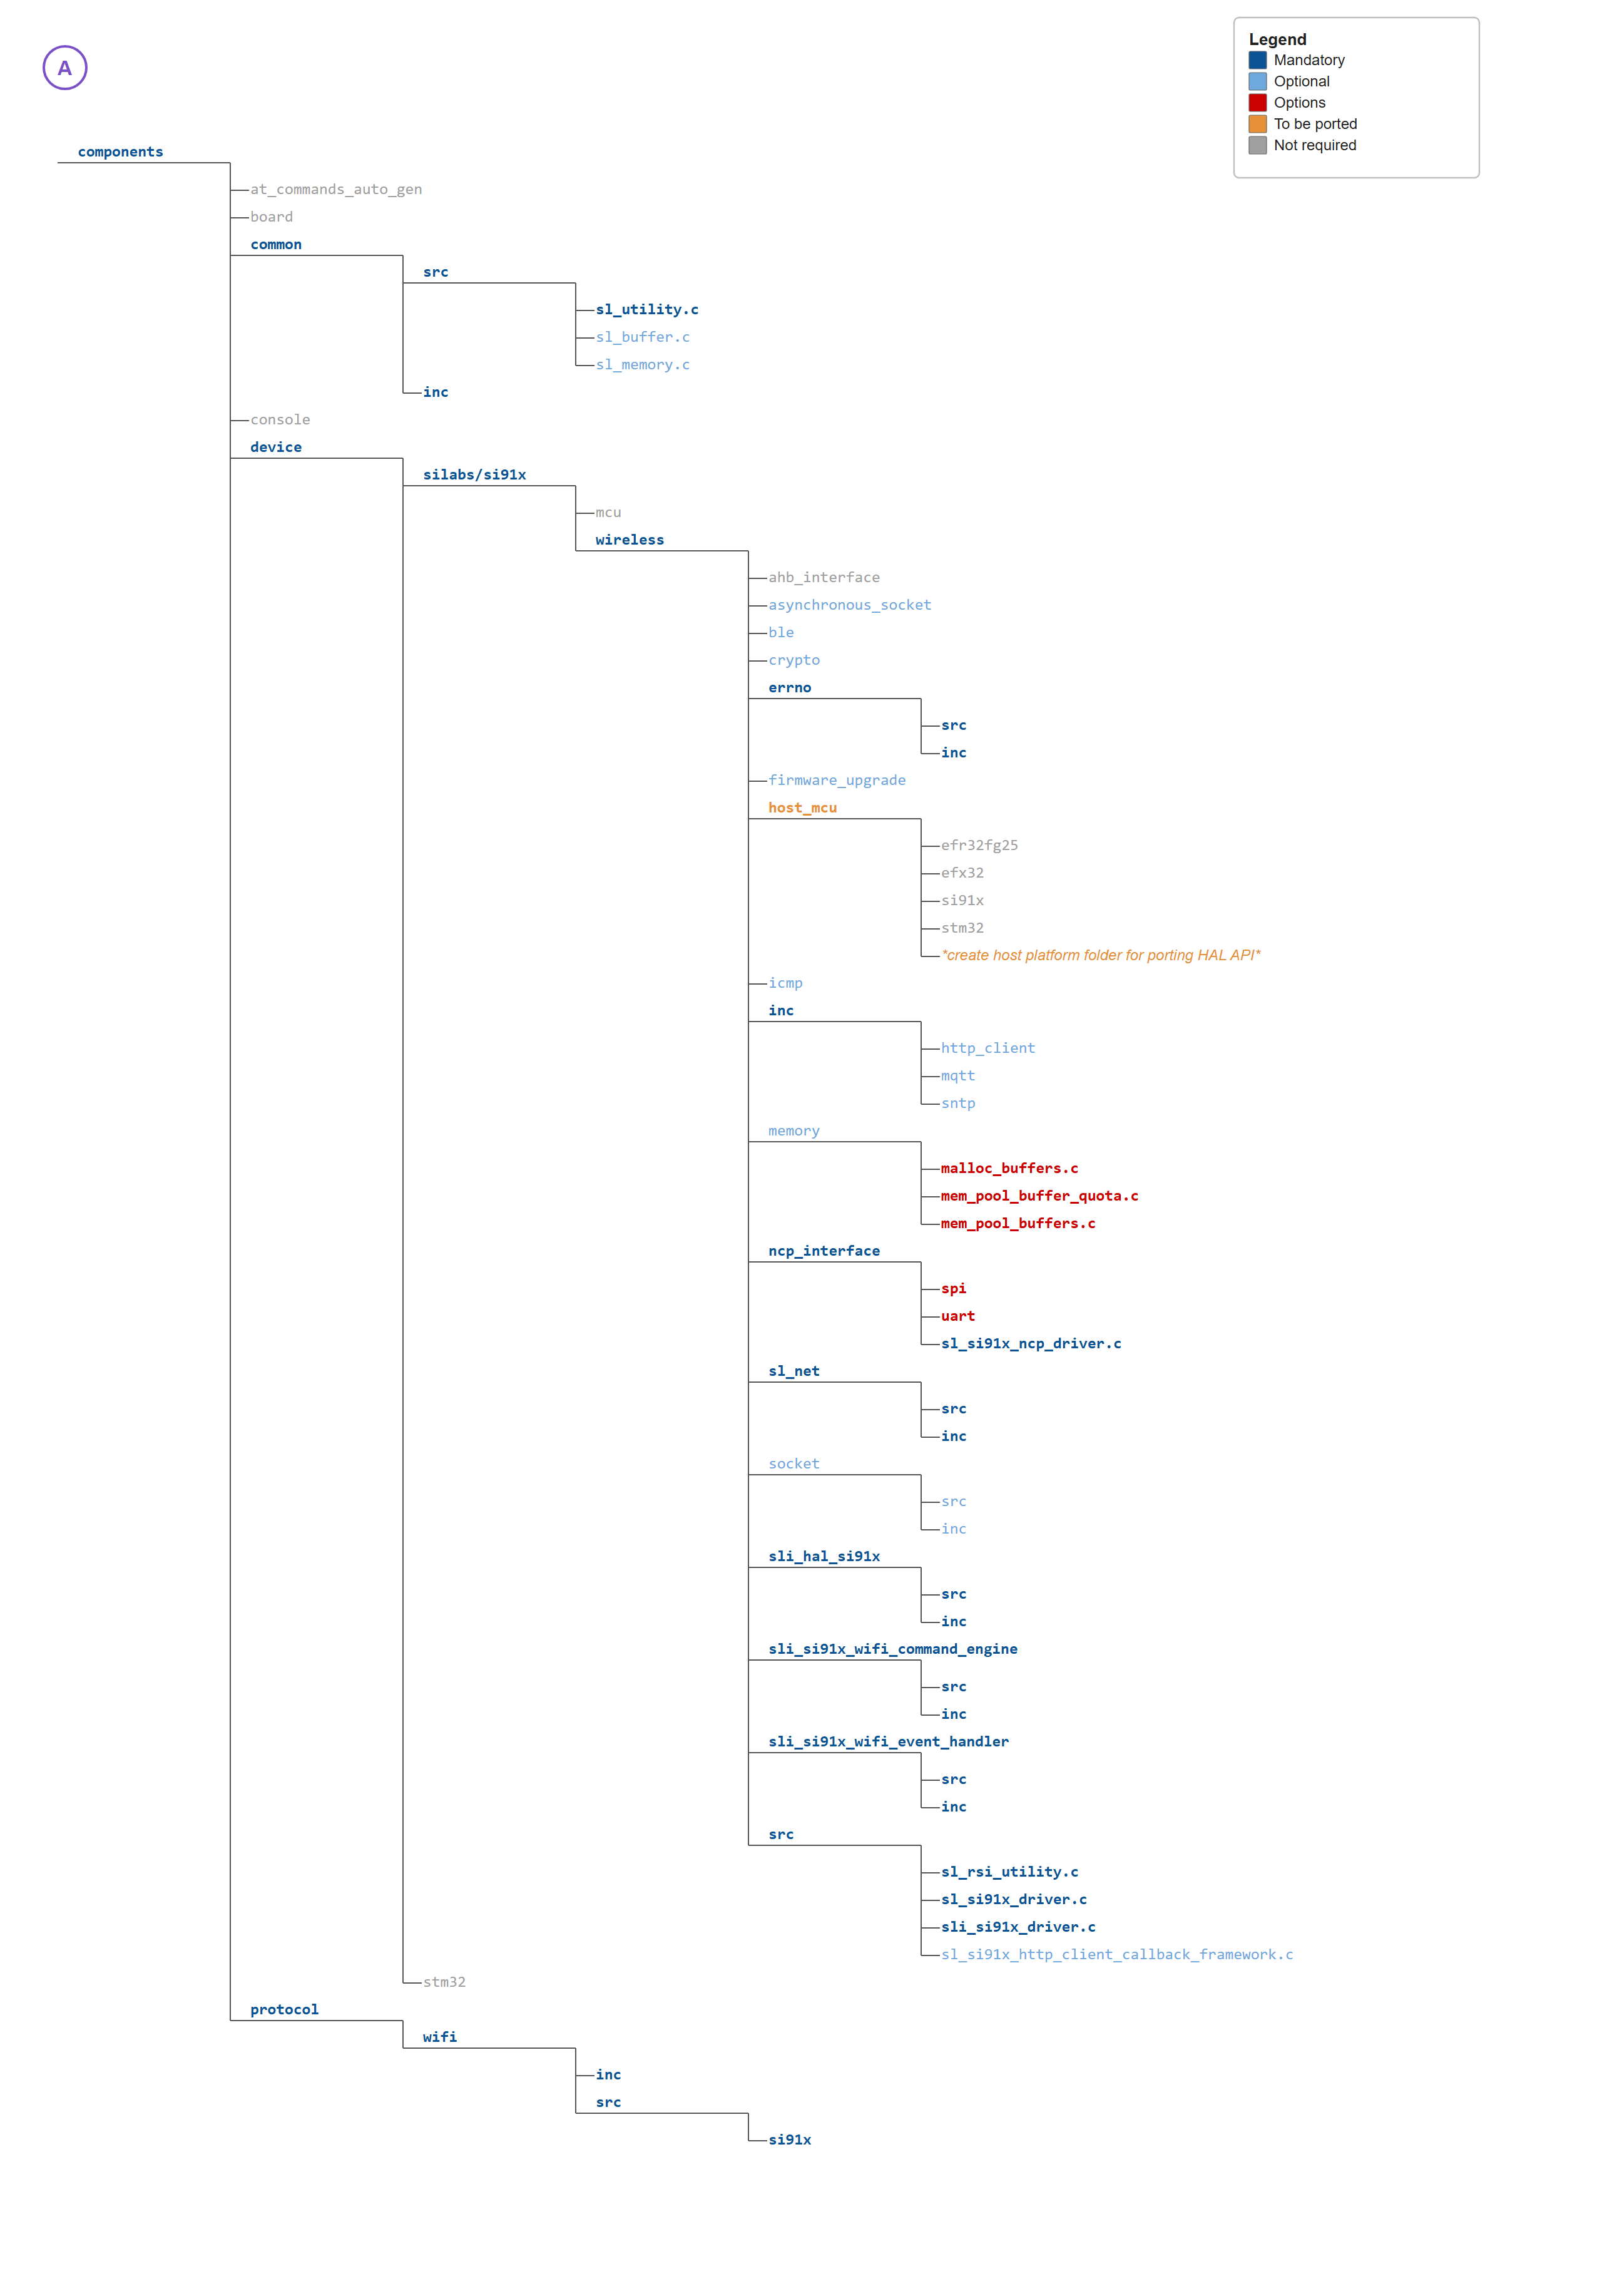
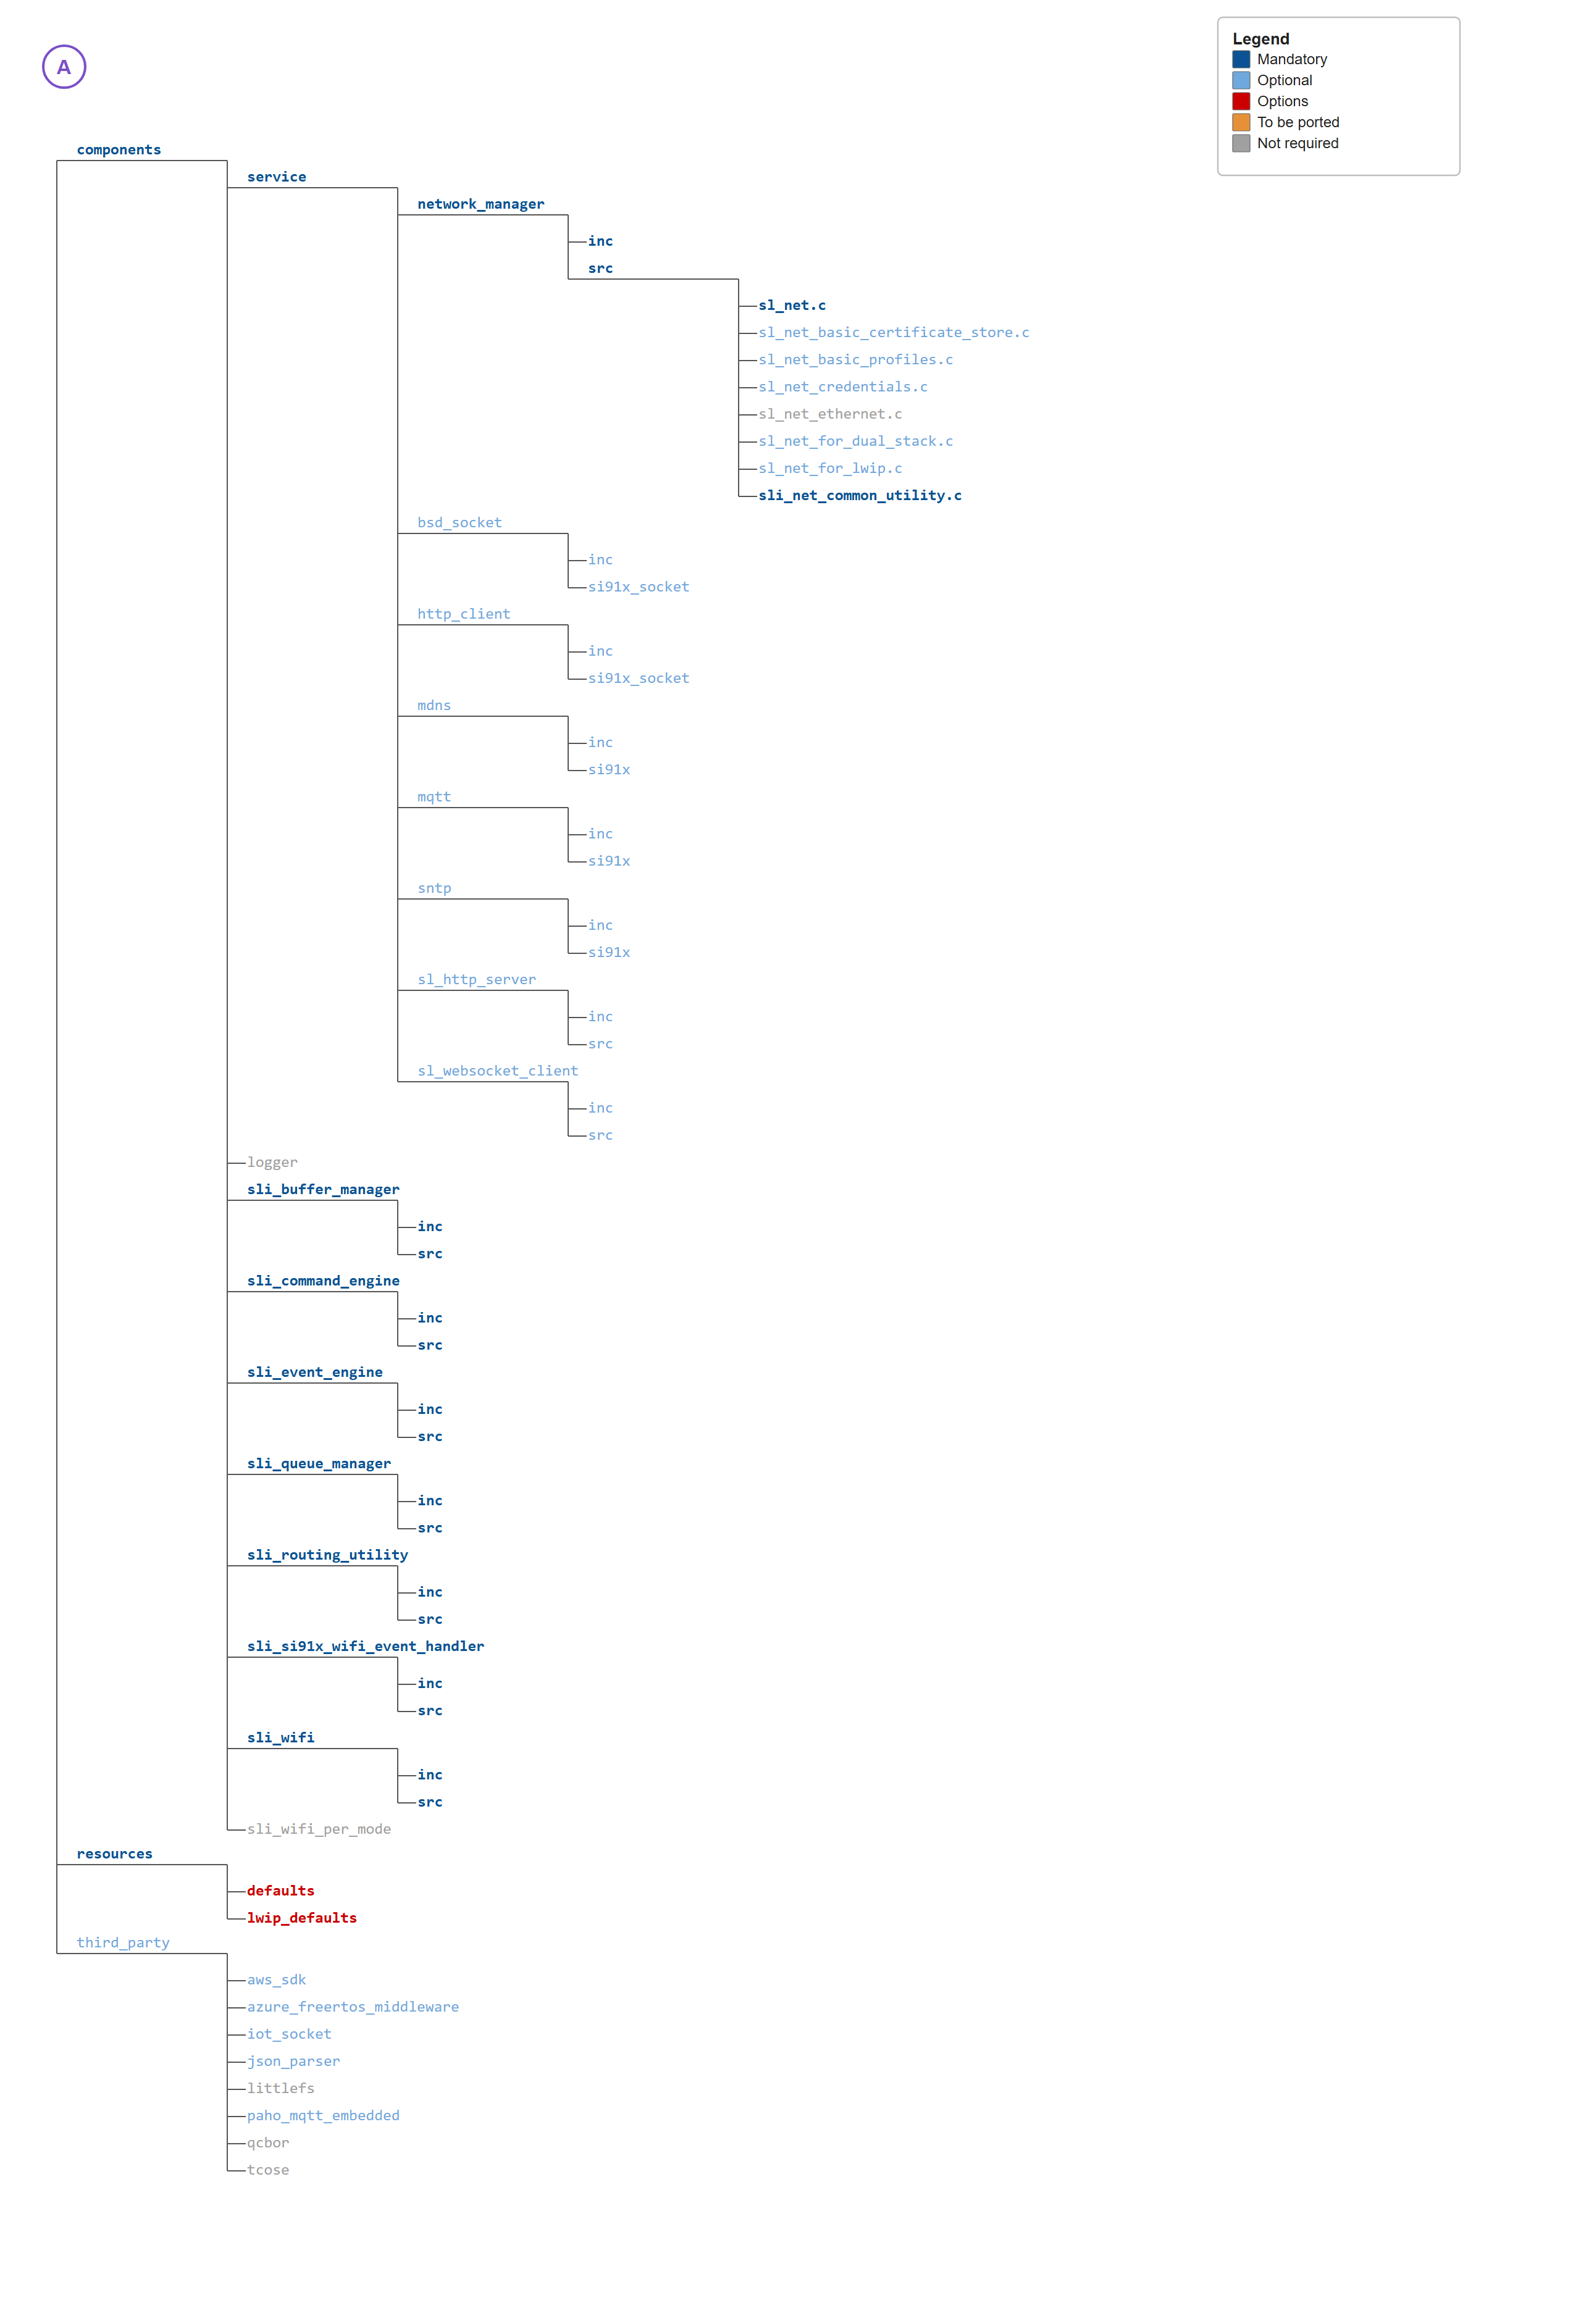
The files and folders that are to be added entirely depends on the application requirements. For instance, consider a typical example application where the SiWx917 as a Wi-Fi client must connect to a Wi-Fi network, send application data to a TCP Server and then should be set in connected sleep mode. This SiWx917 application requires the wifi and asynchronous_socket or socket or bsd_socket components. In this case, let us choose the bsd_socket component. At this point, add the complete folders or only those required as per your choice.
NOTE: Ensure the "malloc" is made thread safe in your project. For more details, refer to the
malloc_thread_safety.cfile at path:<SDK>/components/common/src.
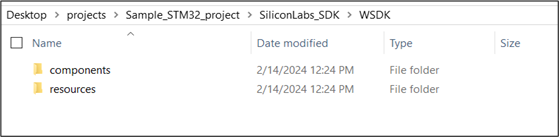
For STM32 project, copy the required entities from the SDK to the WSDK directory. From the components folder, add the required files/folders from common, device, protocol, service, and the mandatory sli_* components (sli_buffer_manager, sli_command_engine, sli_event_engine, sli_queue_manager, sli_routing_utility, and sli_wifi). Also add sli_si91x_wifi_event_handler and sli_si91x_wifi_command_engine from components/device/silabs/si91x/wireless, the required folders from resources, and any third_party libraries based on your application needs.
Configure the Project#
Import the project into the IDE.
For STM32, the Sample_STM32_project is imported into Keil µVision IDE. For MDK-ARM tool chain, it is mandatory to enable the preprocessor symbol: “__Keil”.
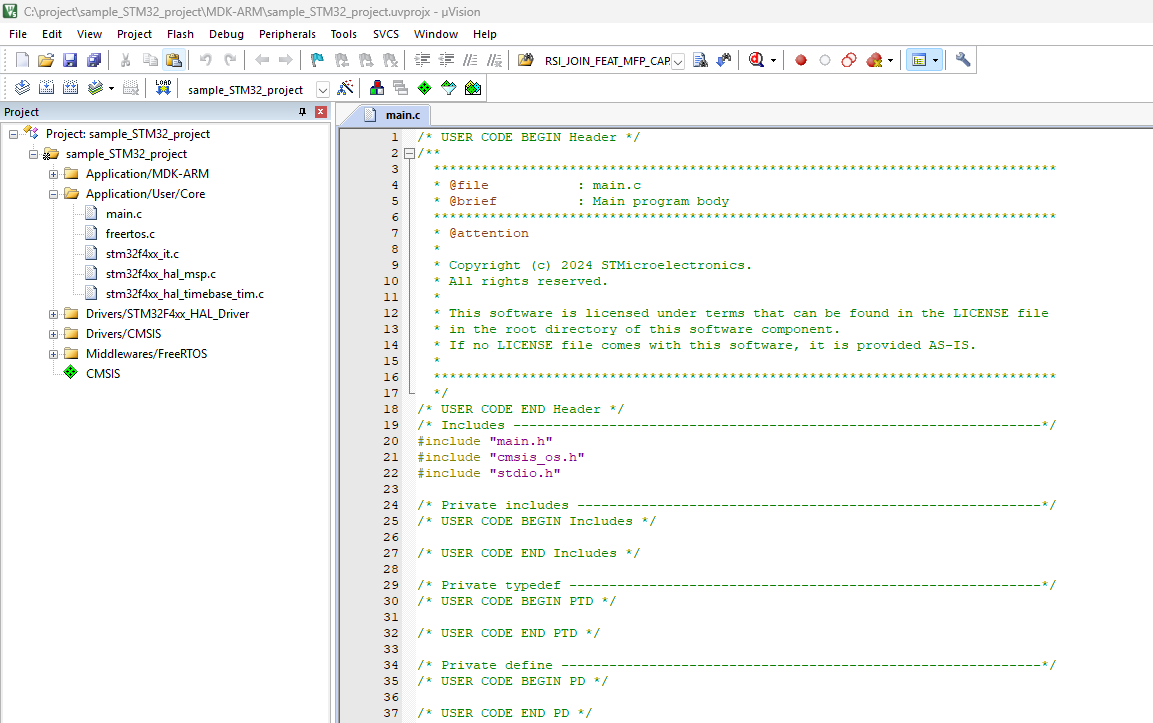
Add the required files and folders from SiSDK (formerly GSDK) and SDK to your application project. Organize the files and folders as per SDK structure. Ensure to include the respective header files present in the mandatory folders.
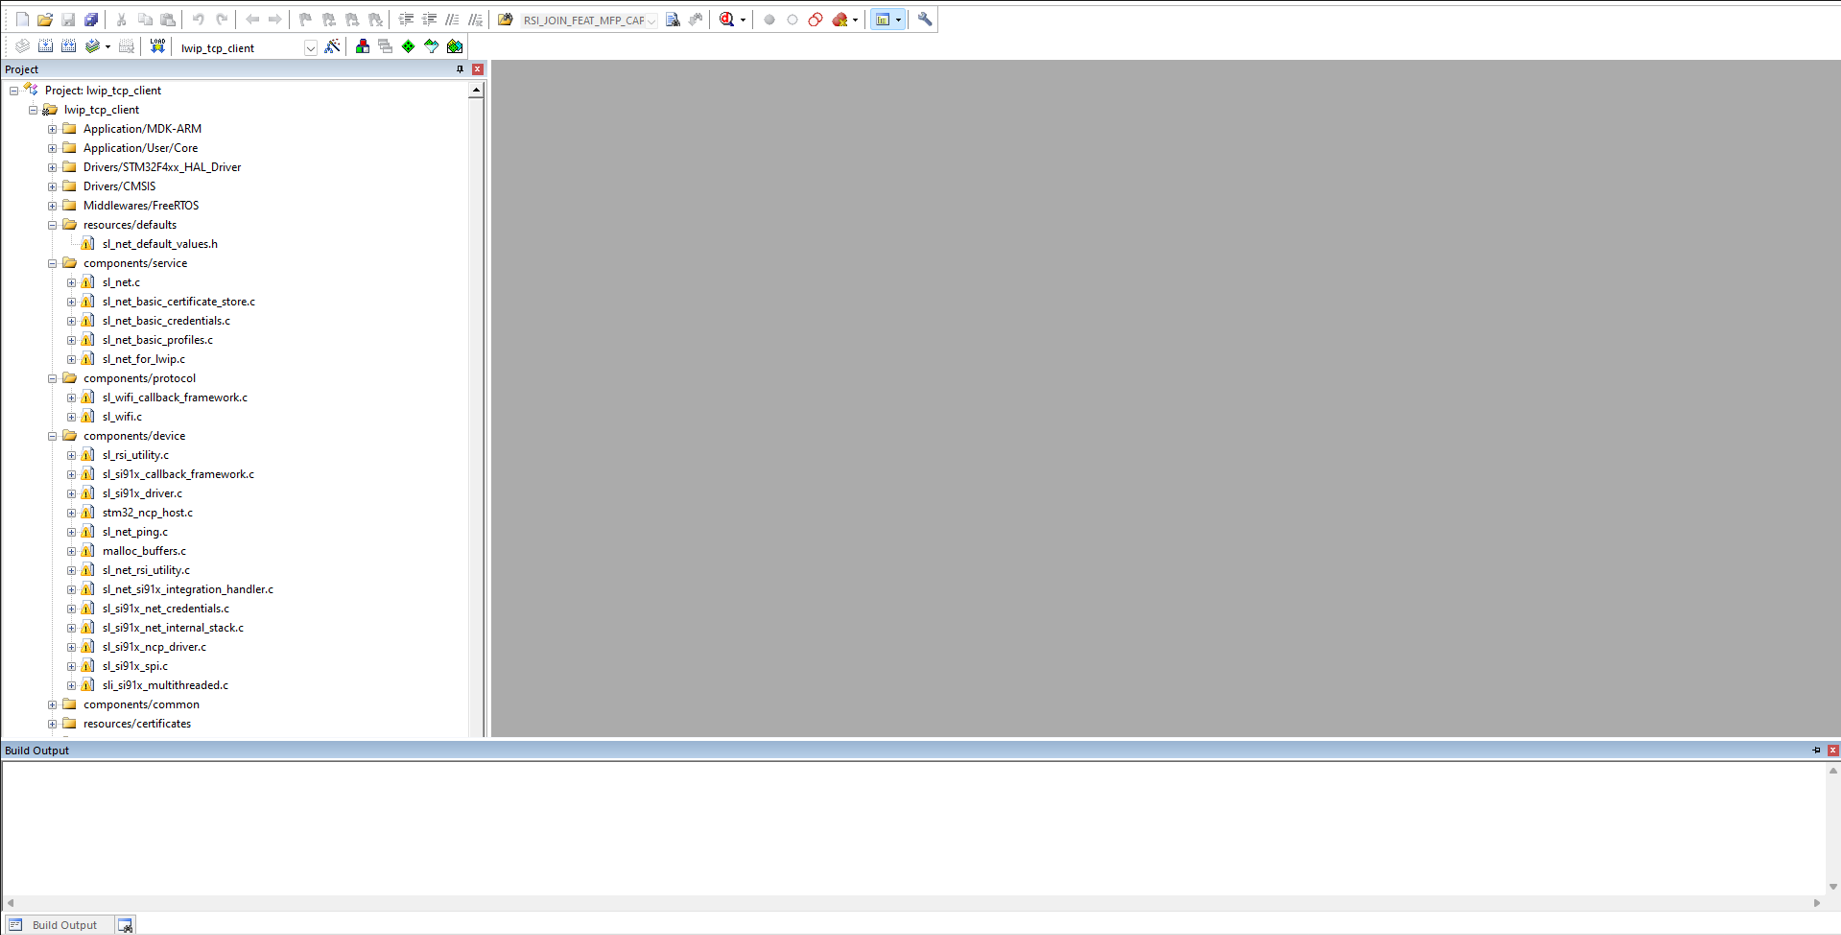
For STM32 project, the required files and folders are added to the project as shown below: