LCD Screen Interface#
The first interface that can be used to interact with the Wi-SUN Network Measurement application is the mainboard LCD screen and two push buttons. They provide an easy-to-use interface to configure/start ping tests and consult the test results. The LCD interface can leverage most of the application features with few limitations related to the limited interface it offers (for example, it is not possible to input an IPv6 address to start a test with a “unknown” device).
Note: When using the LCD screen interface, keep track of the actions associated with each push button because they can change depending on the context.
Connection Screen#
The Wi-SUN Network Measurement application starts with a connection attempt to the Wi-SUN network configured in the project. The network name is displayed in the upper part of the screen. The connection steps are shown in the lower section (Wi-SUN connection steps 1 to 5 on the LCD screen).
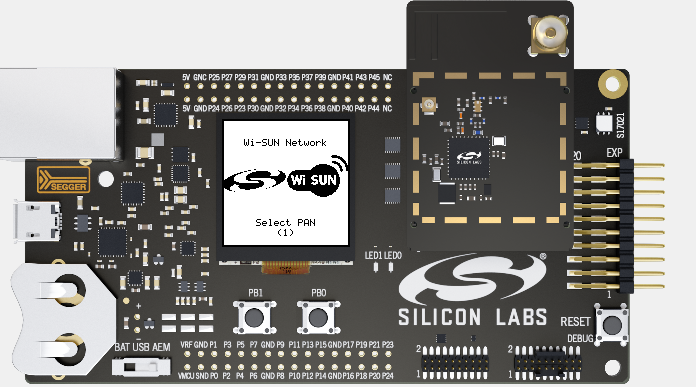
When the node is successfully connected to the Wi-SUN network, the Wi-SUN Network Measurement application switches the screen to display the main menu.
Note: If the Wi-SUN Network Measurement application is stuck in the connection step 1 Select PAN, verify the configuration used matches the border router configuration (network name and Wi-SUN PHY used).
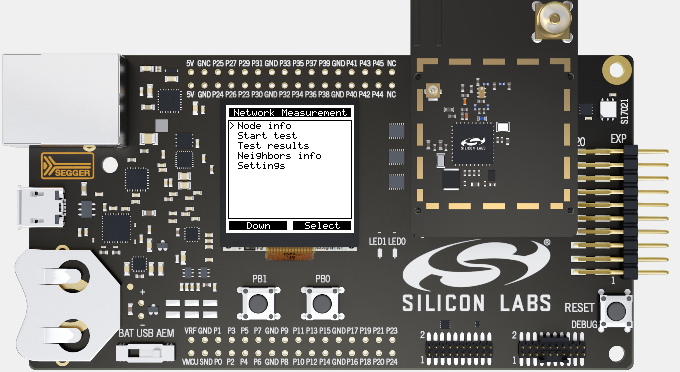
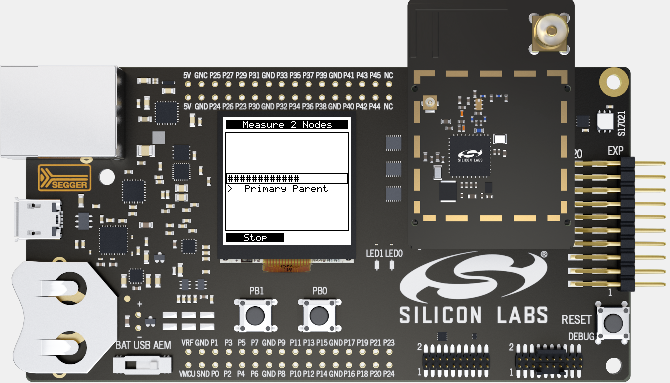
Main Menu
The Network Measurement main menu provides access to the Wi-SUN Network Measurement application main features. Scroll down through the options using push button 1 (PB1). Select a sub-menu using PB0.
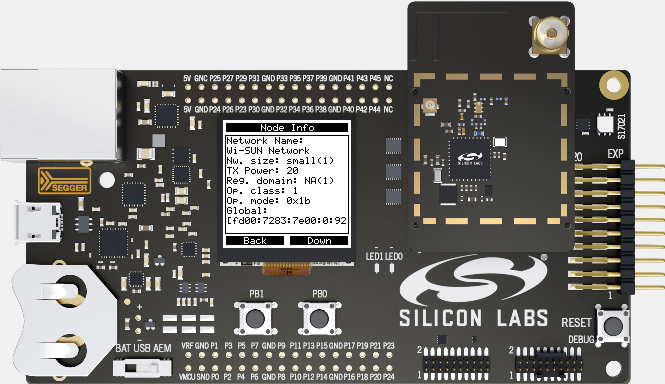
Node Info Screen#
The Node Info screen displays information related to the Wi-SUN device and its configuration (network name, Wi-SUN PHY configuration, TX power, IPV6 addresses, and so on). You can scroll through the information available using PB0.
Start Test Option#
If you select Start Test on the main menu, the Wi-SUN Network Measurement application starts a ping test with the settings previously configured with the other menus. A progress bar indicates the number of ping packets sent over the packet count configured for the test. The test is replicated for each configured target device (border router, parent, and children).
You can stop the test for a given target at any time by pressing PB1. When the tests are completed, pressing PB0 opens the test results display.
Test Results Display#
You can access the Test Results display either after a test or from the main menu. The results are split for each available target. When you select a target, you access its test results, including the ping packet loss and associated percentage, the minimum/maximum/average ping latency, the test settings, and the associated RPL metrics.
Neighbors Info Screen#
The Neighbors Info screen provides access to metrics individualized per neighbor device. This includes the mandatory parent in the Wi-SUN network but also all the potential children using the device to communicate with the rest of the network. The information includes the device IPv6 address and numerous RPL-related metrics.
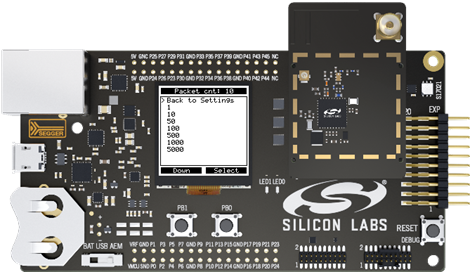
Settings Menu
The Settings menu enables you to configure the ping test settings like packet count, packet length, and target devices. In each sub-menu, the currently configured value is displayed in the upper black box. You can select a new value using the two push buttons.
In the following figure, the application packet count is currently configured to 10 packets.