Prepare the Kit Hardware#
The Silicon Labs Pro Kit for Amazon Sidewalk includes nearly everything you need to run the "out-of-the-box" demo application.
Ⓘ INFO Ⓘ: A USB-C cable, required to power the device, is not included in the kit - you must use a cable that is appropriate for your power source.
Main Boards and Radio Boards#
Required kit items for the "out-of-the-box" demo are:
Wireless Pro Kit Main Board (BRD4002A), which provides power and peripherals to the radio boards
Either of the two radio boards:
EFR32xG24 2.4 GHz 20 dBm Radio Board (BRD4187C)
KG100S Sidewalk Module Radio Board (BRD4332A) + 915Mhz antenna
Demo firmware is pre-flashed on both the EFR32xG24 and the KG100S Module radio boards. Silicon Labs recommends using the EFR32xG24 when you first run the demo, as this version presents a more complete experience. The differences are:
EFR32xG24 Radio Board - this demo app drives the LCD on the main board to display a QR code for your mobile device to scan. This application uses only Bluetooth Low Energy (BLE) to communicate with the gateway.
KG100S Radio Board - the QR code is printed on a sticker on the KG100S radio board. Make sure to power up the board first before scanning the QR code. This application communicates with the gateway over both BLE and the sub-GHz FSK radios.
As an alternative to scanning the QR code, the radio board serial number can be entered in Silicon Labs' "out-of-the-box" demo Web interface at silabssidewalkdemo.com. The radio board serial number is located behind the board as shown in the following picture.


Assembling the Demo Hardware#
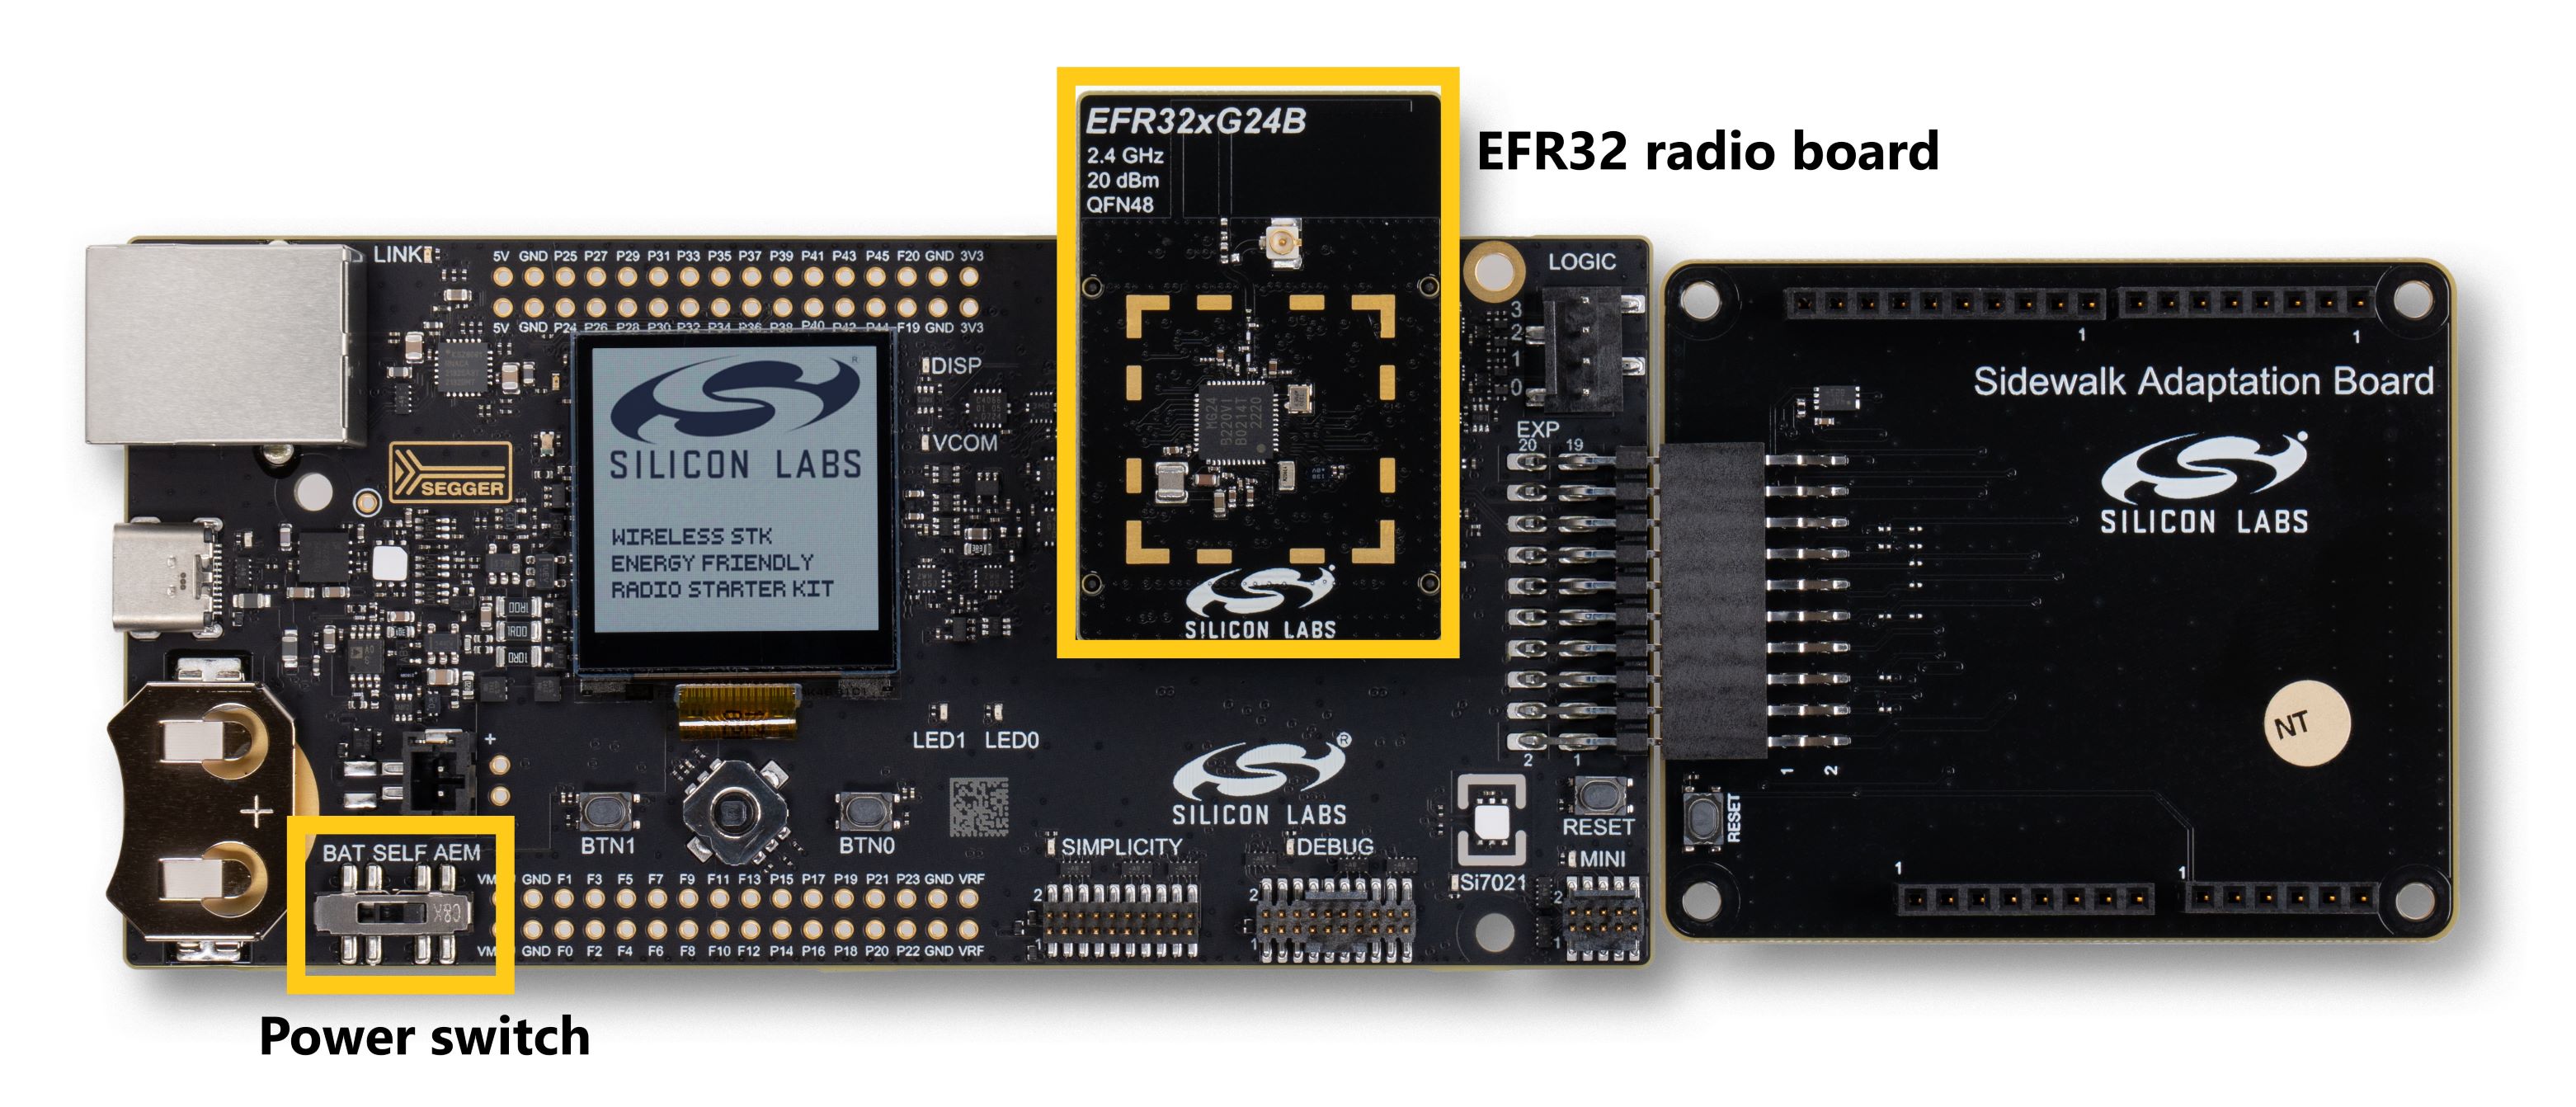
Next, install the radio board on the main board. Take care to align the contact points between the radio and main boards. For reference, the EFR32xG24 is shown mounted on a main board.


Ensure that the power switch is in the AEM position, which supports supplying power to the main board as described in the next section. The additional Sidewalk Adaptation Board shown in the image above is not needed for this demo.
If you are using the KG100S Module, you must also connect the 915 MHz antenna onto that radio board.
Powering the Demo Hardware#
With the power switch in the AEM position, the kit hardware is powered through the main board's USB-C connector. Connecting the main board to a USB power source starts the demo, so first check for network availability as described in the next step.
For the purposes of the "out-of-the-box" demo, only bus power is required - enumeration with a USB host is not necessary.
Next Step: Sidewalk Network Access#
With your kit assembled and a USB-C power source available, next confirm Amazon Sidewalk Network Availability at your location.
