Provision your Amazon Sidewalk Device#
Firmware running on an embedded device forms only part of an Amazon Sidewalk solution. Cloud resources must be created to recognize and process data moving through the network between AWS Services and your endpoint. Credentials must be generated and written to the device so that it is accepted and granted access to the Sidewalk network by in-range gateways.
AWS CloudFormation#
AWS CloudFormation is a service that helps you model and set up your AWS resources so that you can spend less time managing those resources and more time focusing on your applications that run in AWS. You create a template that describes all the AWS resources that you want (like Amazon EC2 instances or Amazon RDS DB instances), and CloudFormation takes care of provisioning and configuring those resources for you. You do not need to individually create and configure AWS resources and figure out dependencies, because CloudFormation handles that on your behalf.
The Hello Neighbor example depends on AWS resources created using AWS CloudFormation. In the graphic below, green indicates the resources created by the CloudFormation script and yellow indicates the resources strictly associated with a device. The red arrows show the flow of information before an action can be performed on the cloud side.
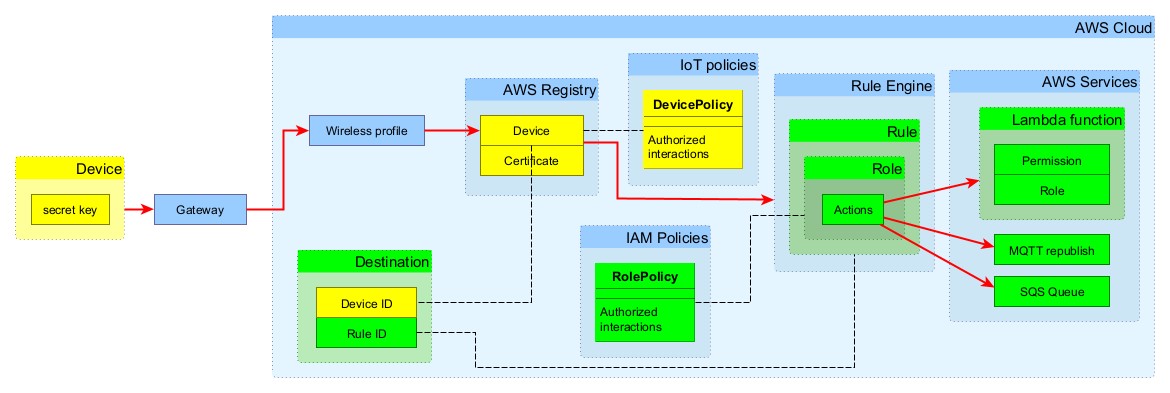

Even with helpful task aggregator tools like CloudFormation, many steps are involved with the process to create and interlink these resources. Silicon Labs provides Sidewalk developers with a tool to rapidly accomplish these tasks for our example applications.
Sidewalk Assistant#
After creating your example project, when your new .slcp project file opens, an additional tab sidewalk.asconf containing the Sidewalk Assistant tool also appears. If you had closed your project tabs, you can reopen them by going to the root of the project folder in Project Explorer view, and double-clicking the .slcp and .asconf files.
The Sidewalk Assistant tool abstracts multiple underlying scripted interactions via AWS CLI (or manual interactions with the AWS Management Console) into an intuitive graphical user interface that vastly simplifies these operations. Using this tool allows you to focus on the high-level results of your development, rather than the details of each step. You can delve deeper into these details later, when you are ready to move beyond the simplistic AWS constructs of our example applications.
Sidewalk Assistant: AWS Credentials & Selected Device#
The sidewalk.asconf file (in /config/sidewalk/ within the project directory) opens in the Sidewalk Assistant on project creation, or you can access the tool by navigating to and opening the .asconf file.
The tool automatically scans your system for valid AWS credentials, which were established when the AWS CLI was installed and AWS account was created previously, and shows that no target device has been selected yet. If your AWS CLI credentials are not found, take a look at the dedicated section in our Sidewalk Assistant User Guide.
Click Select Device to open the Connection Manager dialog and choose from the attached devices.
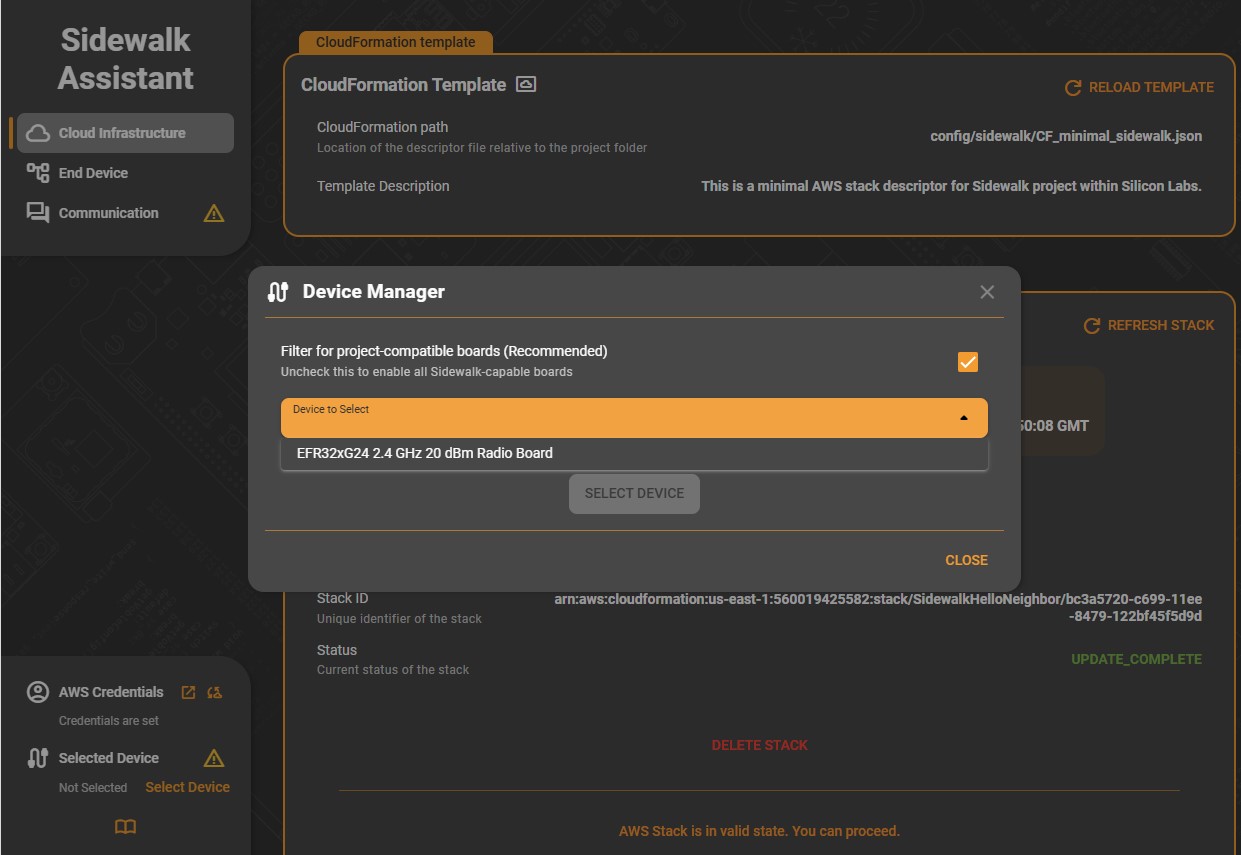

The Sidewalk Assistant contains two primary pages, the Cloud Infrastructure page and the End Device page.
Sidewalk Assistant: Cloud Infrastructure#
Initially, for a new project, the Sidewalk Assistant Cloud Infrastructure page may look like this:
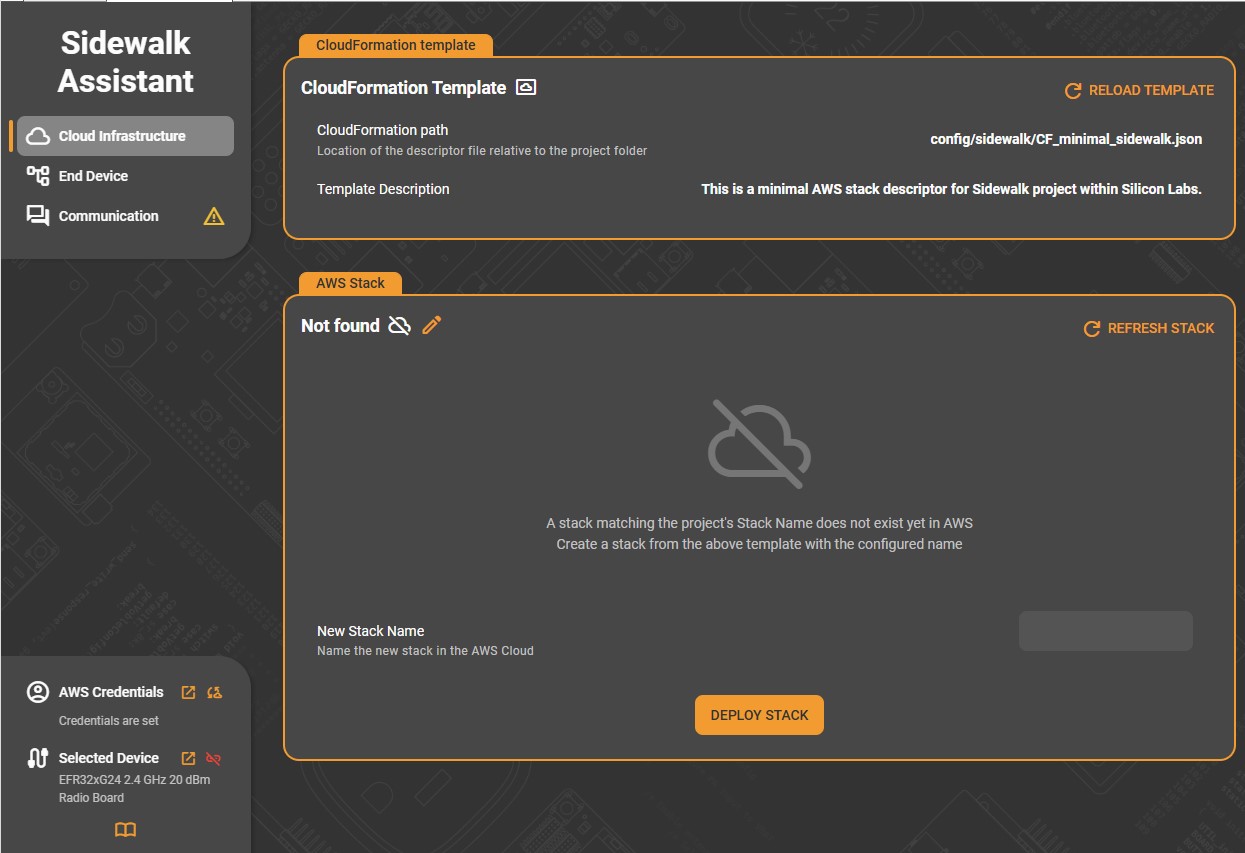

The CloudFormation Template used by this example is described in the top section. The AWS Stack name defined in the project is also visible.
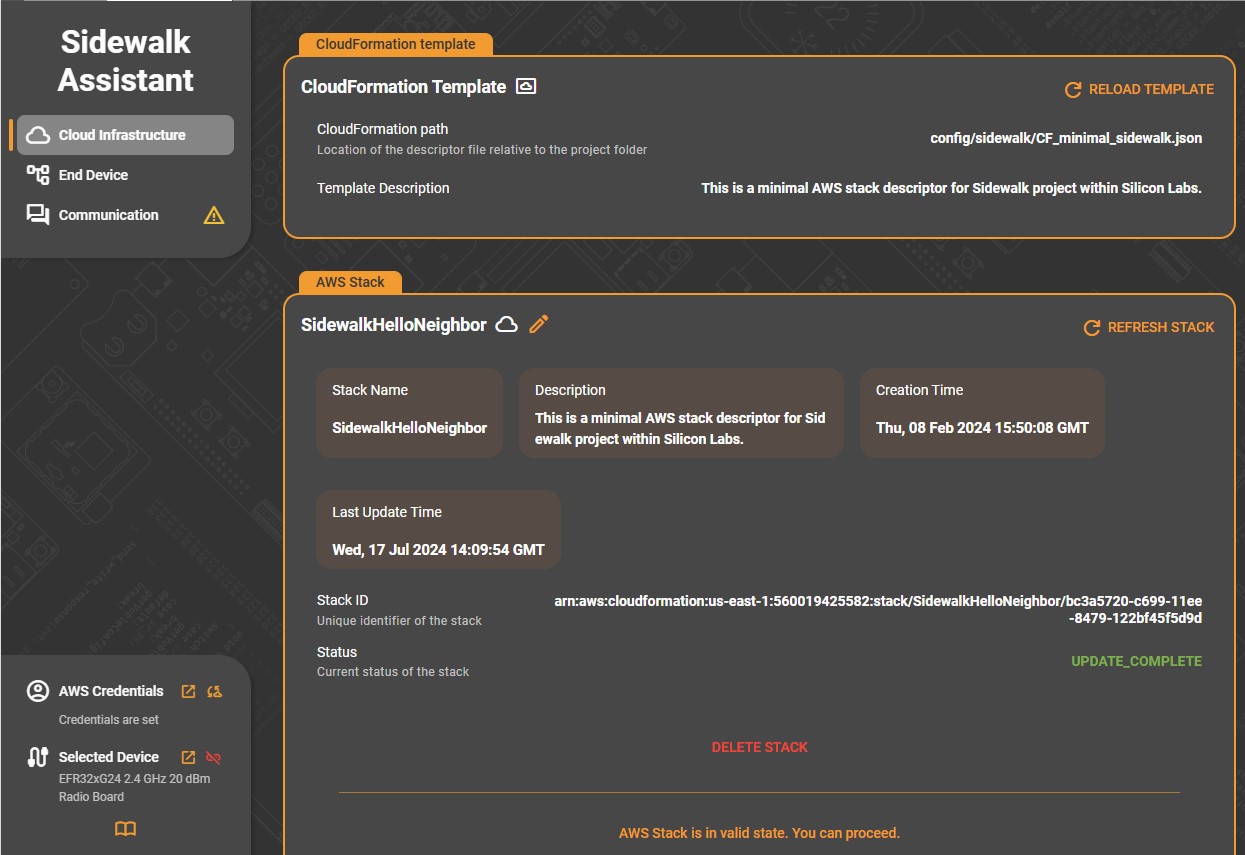
Clicking Create Stack triggers the creation of the stack using AWS CloudFormation. The interface displays Creation in Progress during the process. You may have to click the Refresh Data control multiple times until the results are ready. When stack creation is successfully completed, the AWS Stack section now displays details about the new stack and a DELETE STACK control.

Sidewalk Assistant: End Device#
Ⓘ INFO Ⓘ: Instead of using the Sidewalk Assistant, Silicon Labs also provides scripts to provision a device. You can find the documentation to use the script here.
The cloud must be provided with a virtual representation of your device, and a "manufacturing page" must be created from the AWS resources that will equip the endpoint with necessary cryptographic resources to successfully authenticate and encrypt/decrypt traffic to/from your AWS resources in the Sidewalk network.
The manufacturing page is a .s37 binary file containing the keys and certificates for your device that will be flashed to a specific address. (.s37 files contain the program bytes and the target address.) To let the Sidewalk Assistant design your virtual device in the cloud and generate a manufacturing page for your physical endpoint, click the CREATE AWS DEVICE AND MANUFACTURING PAGE button.
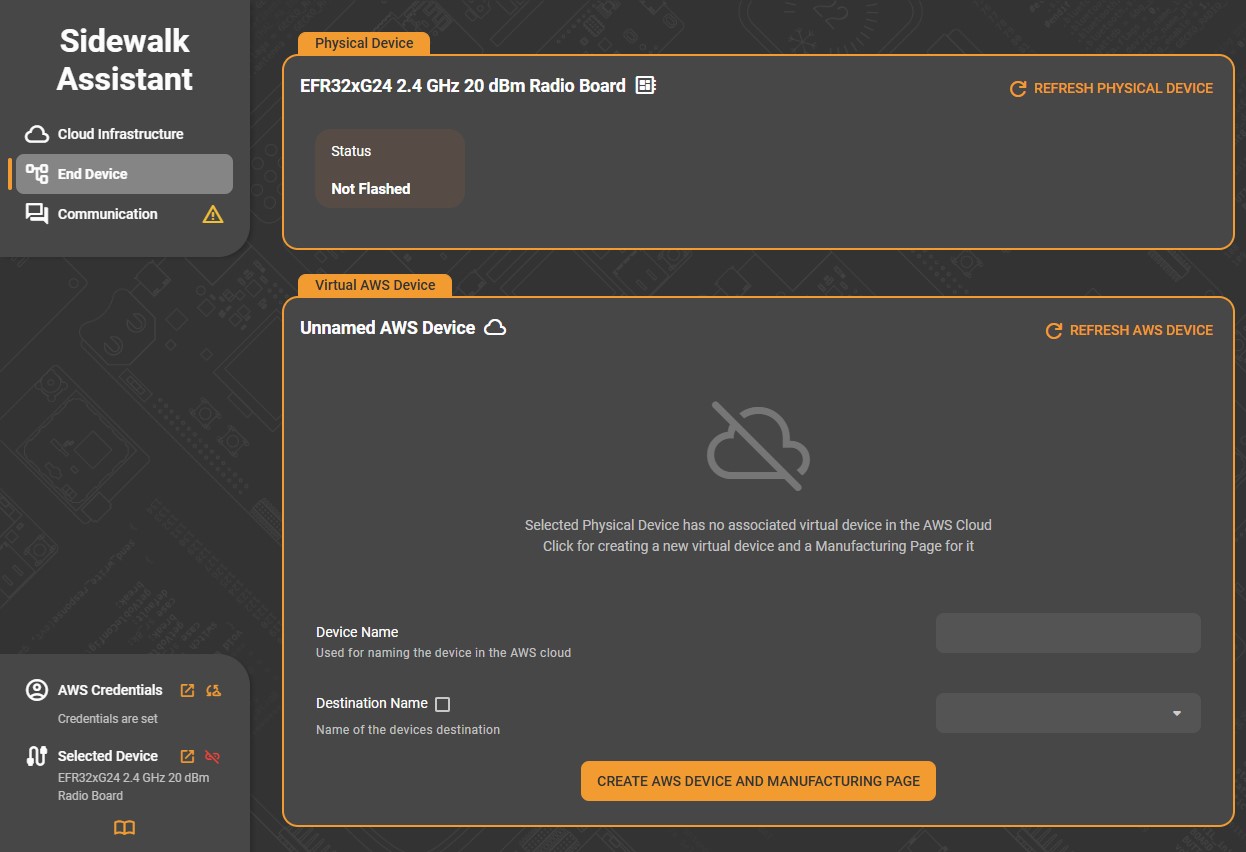

When this first step is complete, the Virtual AWS Device section displays details of the newly-created virtual device.
The GUI also now provides a FLASH TO DEVICE control. Click this to flash the manufacturing page to your endpoint. This complements the application image already flashed to the device in a previous step.
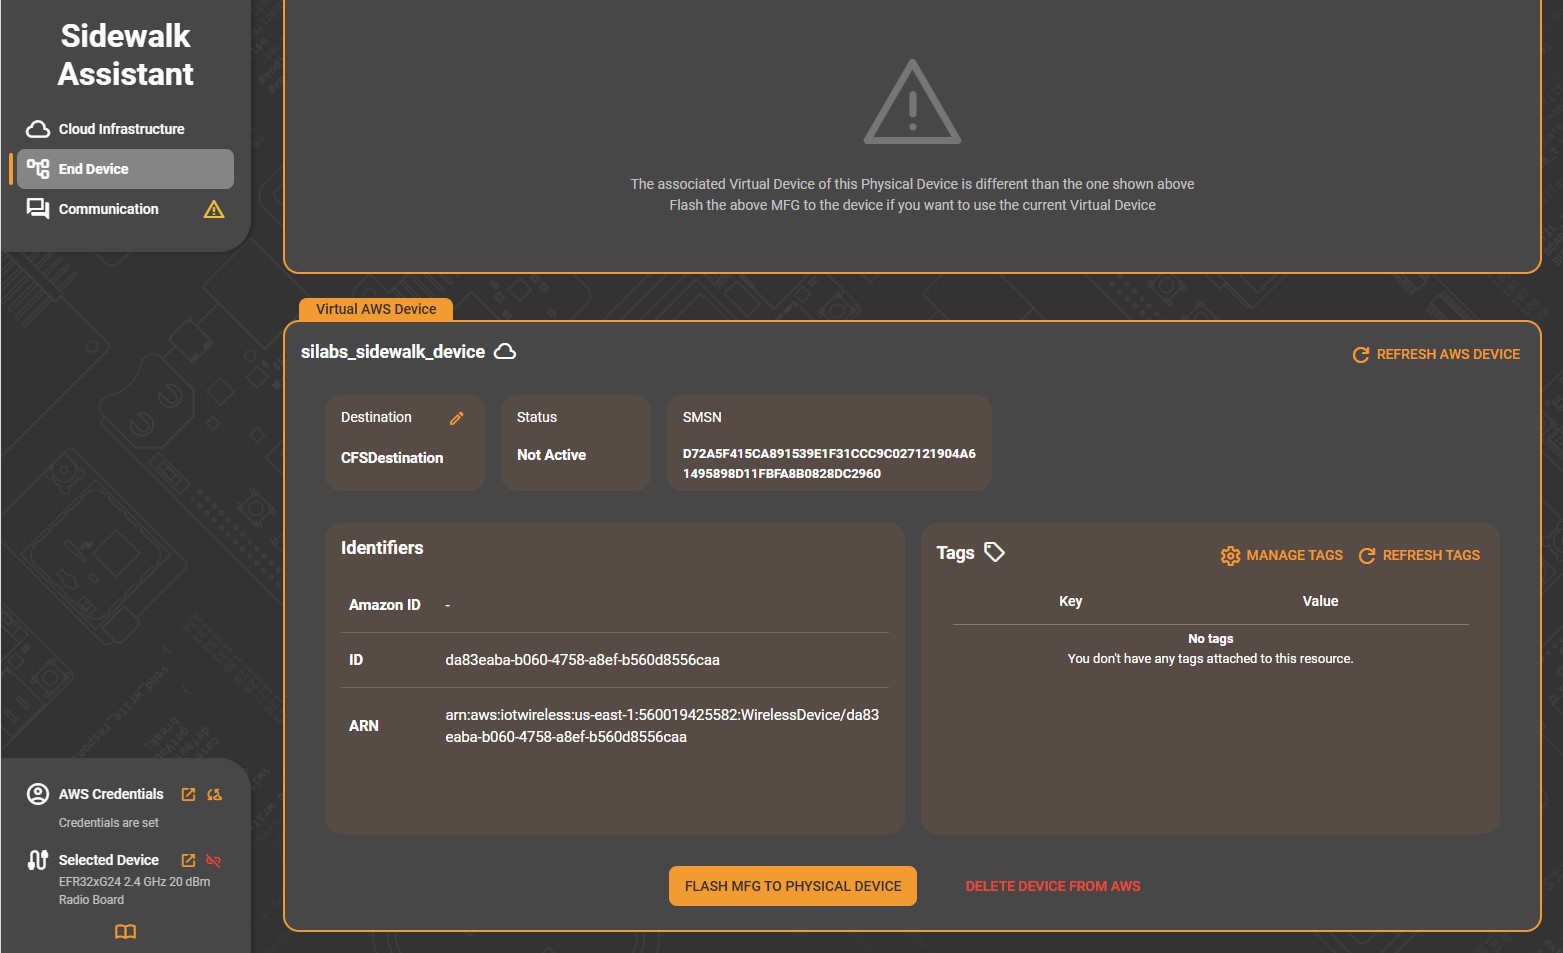

If successful, the End Device page should now display details for both the virtual and physical devices.


Check the Device Registration and Time Sync#
Recall that in Create and Compile your Sidewalk Application, you saw the following log from your device (Terminal 2):
02> [00000006] <I> pal kv-storage: kv store opened with 0 object(s)
02> [00000008] <W> pal mfg: no objects found in mfg store
Now that you used the Sidewalk Assistant to flash the manufacturing page, if you return to the RTT Viewer (you may need to reset the device and/or reconnect the RTT Viewer), you will see the following log from your device (Terminal 2):
02> [00000006] <I> pal kv-storage: kv store opened with 0 object(s)
02> [00000007] <I> pal swi: interrupt init ok
02> [00000008] <I> pal mfg: mfg store opened with 36 object(s)
...
When the application is up an running, the logs in terminal 0 are as follows:
[00000001] <I> hello neighbor application started
[00000001] <I> sidewalk stack version 1.17.1-13
[00000002] <I> silabs sidewalk extension version 2.2.1
[00000004] <I> sidewalk SMSN: DAF0XXXXXXXXXXXXXXXXXXXXXXXXXXXXXXXXXXXXXXXXXXXXXXXXXXXXXXXXXXEA
[00000005] <I> sidewalk ID:
[00000009] <I> mfg page valid
[00000009] <I> platform initialized
[00000011] <I> main task created
> [00000012] <I> BLE link supported
[00000012] <I> FSK link supported
[00000013] <I> CSS link supported
[00000013] <I> Secure Vault is disabled
[00000055] <I> sidewalk initializated, link mask: 1
[00000056] <I> sidewalk connection policy set, policy: 2
[00000057] <I> sidewalk multi-link policy set, policy: 4
[00000076] <I> sidewalk status not ready
[00000077] <I> registration status: 1, time sync: 1, link: 0
[00000079] <I> sidewalk started, link mask: 1
[00000080] <I> main task started
In this log snippet, we can find several useful information:
The application name: hello neighbor
The Amazon Sidewalk stack version: 1.17.1-13
The Sidewalk extension version: 2.2.1
The Amazon Sidewalk device SMSN: DAF0XXXXXXXXXXXXXXXXXXXXXXXXXXXXXXXXXXXXXXXXXXXXXXXXXXXXXXXXXXEA
The Amazon Sidewalk ID: BFFFXXXXXX
The supported radio links in Amazon Sidewalk context: BLE link supported, FSK link supported and CSS link supported
The status line: registration status: 1, time sync: 1, link: 0
The status line is very important and is used to know about the device status in the Amazon Sidewalk network:
Registration status
Registration status indicates if the device is registered on Amazon's backend or not.
0: the device is registered
1: the device is not registered
Time sync status
Time sync status indicates if the device has synchronized its current time with the gateway or not. You need to be time-synchronized in order to send and receive messages.
0: time is synchronized
1: time is not synchronized
Link status
Link status displays the currently active communication channel.
0: No connection
1: BLE
2: FSK
4: CSS
For your device to communicate properly, registration status and time sync must be 0. If the endpoint is in-range of a Sidewalk gateway, this process (registration, if a new device, followed by successful time synchronization) should occur within a few minutes. Continue to Interacting with the Cloud to see how to fully exercise this example application in both directions across the Sidewalk network.
Enable Location Service#
To evaluate the Sidewalk location capability, you can build the location sample application, which includes the Sidewalk library with integrated positioning support. For the cloud to receive and display a device’s location data, positioning must be explicitly enabled for each device.
Check the Device's Positioning Status#
By default, location reporting is disabled. You can verify this in the AWS IoT Wireless console by opening your Sidewalk device’s details page.
Open AWS IoT Core > LPWAN devices > Sidewalk > Devices
Select your Sidewalk device.
In the device details panel, look for the Positioning field. It will show either Positioning Disabled or Positioning Enabled, as shown in the screenshots.
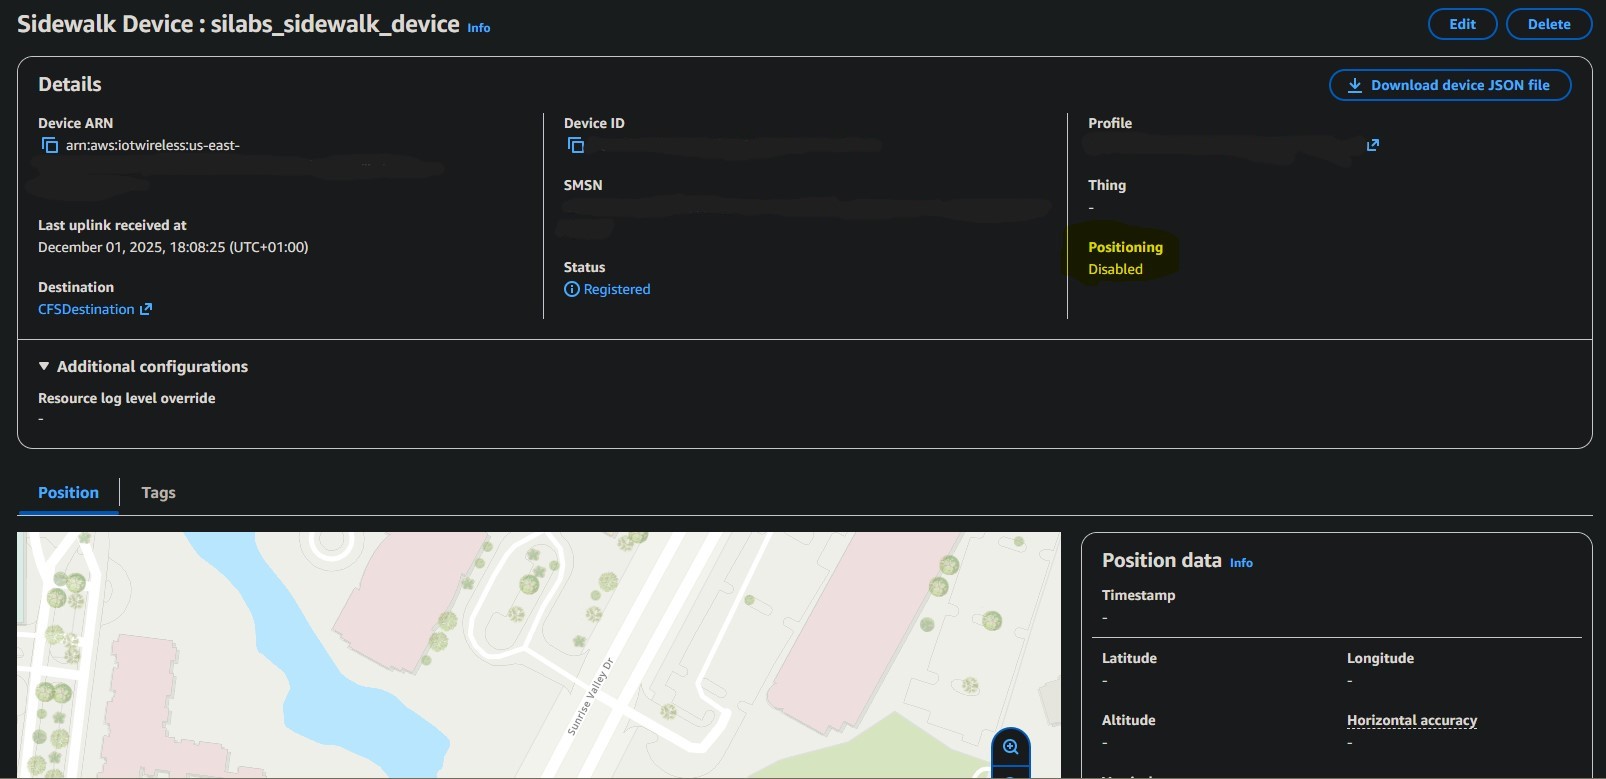

This helps confirm whether the device is currently allowed to report location data.
Enable Positioning for the Device#
To activate the positioning feature:
Click Edit on the device details page.
Scroll down to the Device Position Configuration section.
Under Geolocation, check Activate positioning.
In Position data destination, choose the destination where you want AWS to send the device’s location information.
This rule defines how the location payload will be processed in your cloud application.
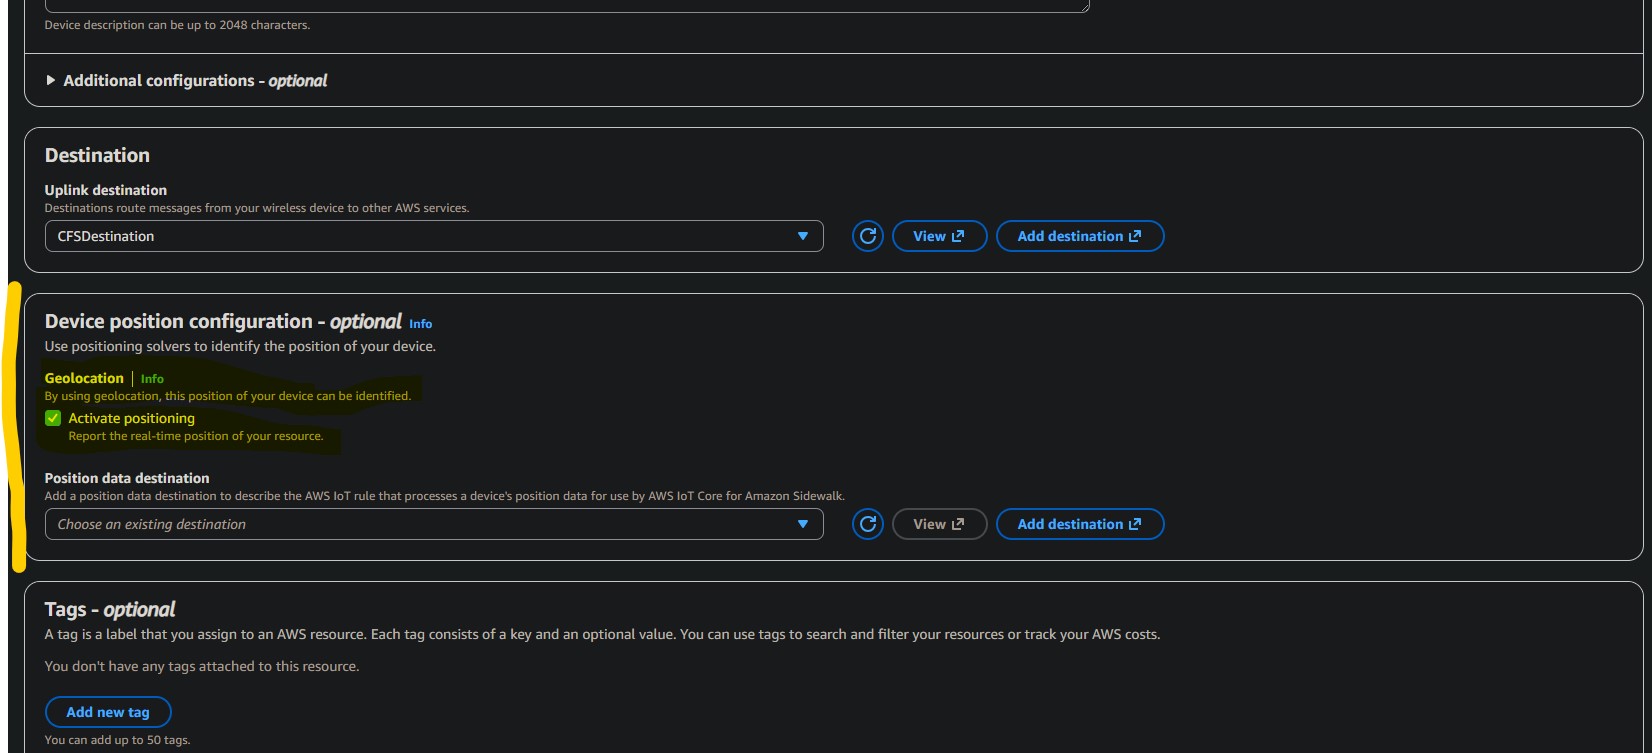


Make sure to save your changes before leaving the page.
Confirm the Configuration#
After saving:
Return to the device overview page.
The status should now display Positioning Enabled.
AWS will begin processing location data once the device sends uplinks that contain the required Sidewalk location metadata.


Viewing Location Data#
When the device has sent at least one uplink with location information, a Position tab will appear on the device page.
This tab displays:
The latest timestamp
Latitude and longitude
Accuracy data, when available
A map view showing the device’s estimated location
If the fields remain empty, it usually means the device has not yet reported any compatible location uplinks.


