Using Simplicity Connect Mobile App for OTA DFU#
Introduction#
This tutorial explains how to perform a Device Firmware Upgrade (DFU) with Bluetooth Over-The-Air (OTA) update.
Any device that has OTA updates enabled in their GATT profile can have an OTA upgrade. Most of the example applications provided in the Bluetooth SDK already have OTA support built into the code. In these examples, the DFU mode is triggered through the Silicon Labs OTA service that is included as part of the application’s GATT database. OTA functionality can be added by installing either the In-Place OTA DFU or the Application OTA DFU software component in your project.
Note: The
In-Place OTA DFUor so called AppLoader method is an obsolete solution and not recommended for new developments.
For tutorial purposes, the Bluetooth - SoC Empty SDK example application will be upgraded to the Bluetooth - SoC Thermometer example application. Because the Bluetooth - SoC Thermometer has the Health Thermometer service for visual feedback, users can easily check that the functionality of the user application has changed.
Requirements#
Wireless Starter Kit and Bluetooth-capable radio board
Simplicity Studio 5
Android or iOS mobile device
First Steps#
Connect the kit to your computer and select it in Simplicity Studio.
Create the Bluetooth - SoC Empty example project from Simplicity Studio Launcher.
Build the Bluetooth - SoC Empty project and flash the firmware image to the device.
Create the Bluetooth - SoC Thermometer example project.
Build the Bluetooth - SoC Thermometer project and double click the
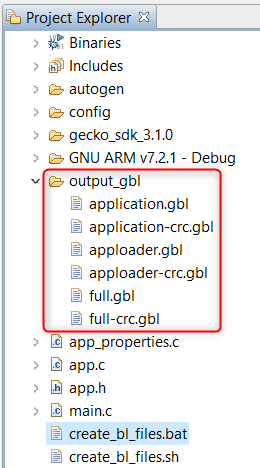
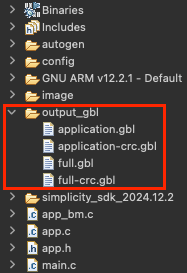
create_bl_files.bat/sh/pyscript in the project tree (BLE Post Build component might have to be installed) or use the Post-Build Editor to generate the upgrade files. You may need to define two environment variablesPATH_SCMDandPATH_GCCARMbefore running the script:Variable Name Example Variable Values PATH_SCMD C:\SiliconLabs\SimplicityStudio\v5\developer\adapter_packs\commander /Applications/Simplicity Studio 5.app/Contents/Eclipse/developer/adapter_packs/commander ~/SimplicityStudio_v5/developer/adapter_packs/commander PATH_GCCARM C:\SiliconLabs\SimplicityStudio\v5\developer\toolchains\gnu_arm\12.2.rel1_2023.7 /Applications/Simplicity Studio 5.app/Contents/Eclipse/developer/toolchains/gnu_arm/12.2.rel1_2023.7 ~/SimplicityStudio_v5/developer/toolchains/gnu_arm/12.2.rel1_2023.7 The script creates a folder named
output_gblunder your project and multiple.gblupgrade image files in this folder:application.gbl: user application (including full Bluetooth stack)application-crc.gbl: user application with a CRC32 checksumfull.gbl: user application and Bootloader/AppLoader (full update) for UART DFU, not needed in this example.full-crc.gbl: user application and Bootloader/AppLoader (full update) with a CRC32 checksum for UART DFU, not needed in this example.
A full update is needed only if the Bootloader/AppLoader needs to be updated. See AN1086 for more details. Bootloader .s37 file has to be placed together with the create_bl_files scripts, named appropriately (i.e. bootloader-second-stage.s37) to be incorporated into the full.gbl file.
Transfer the
.gblfiles to your smartphone so the mobile app can find them. You can either transfer them via USB to any folder on your phone or place it to a cloud storage, which is available from your phone (e.g., Google Drive, Dropbox, iCloud, and so on).Launch the Simplicity Connect mobile app.
In the Simplicity Connect Mobile App#
After you are in the app, do the following:
Go to the
Scanmenu and find and connect to your kit (default name "Empty Example").Open the pop-up menu in the upper right corner and select
OTA Firmware.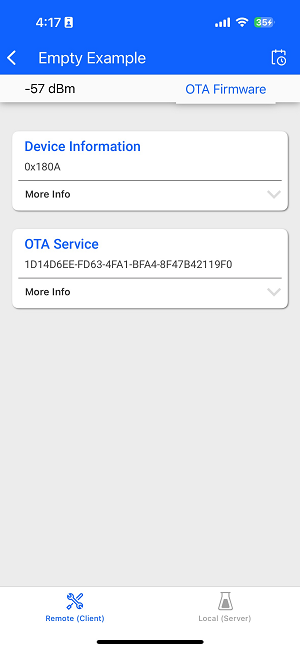
Select
Partialand look for the gbl file in your smartphone.Finally, tap
Uploadand your upgrade should start.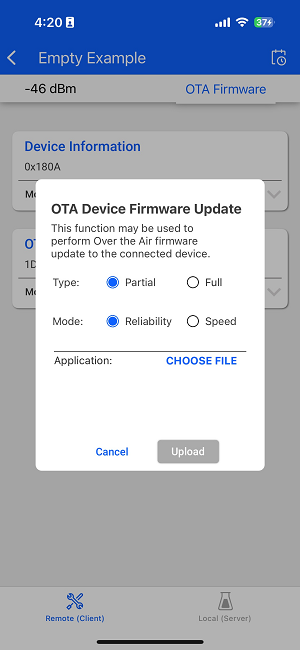

After the OTA process has finished, verify that the kit is now running the Bluetooth - SoC Thermometer example application. You can find the kit in the Bluetooth Browser with a new name "Thermometer Example".
Note#
To enable the Bluetooth OTA upgrade, the target device must be programmed with the Gecko Bootloader. This is an application bootloader, which requires that the new firmware image acquisition is managed by the application.
Running the "Demos" in Simplicity Studio will flash the bootloader and user application to the device. However, flashing an "Example Project" flashes the application only. If your OTA upload stops at 0% and you get a message on an Android phone saying "GATT CMD STARTED", that might indicate a missing or incorrect bootloader. In this case, do the following:
Click on Create New Project from the Launcher Perspective to create a Gecko Bootloader project for your kit. Select the "Internal Storage Bootloader" example project with a suitable configuration for your storage size.
In the
<projectname>.slcpfile of the bootloader project, you can configure some options.Build the project and find the bootloader image in the build directory named
“GNU ARM <compiler version number> - Default”. For Series 1 devices, you need the<projectname>-combined.s37file that is the combined image of the first stage bootloader and the main bootloader with a CRC32 checksum. For Series 2 devices, you need the<projectname>.s37file that is the main bootloader.Flash the bootloader image to the device.
Note: If you are using one of the "Internal Storage Bootloader" examples, you have to install the
Application OTA DFUsoftware component in your "Empty Example" project.