Getting Started with the Bluetooth Mesh Demonstration Software#
To get started with Bluetooth Mesh demo software, you should have downloaded Simplicity Studio 5 (SSv5) and the Bluetooth Mesh SDK as described in the Simplicity Studio 5 User's Guide, available online and through the SSv5 help menu.
This section focuses on a light-switch demonstration using SDK 4.x examples. To see how to demonstrate Mesh 1.1 Device Firmware Update functionality, see AN1370: Bluetooth Mesh Device Firmware Update Example Walkthrough.
To see how to demonstrate Remote Provisioning, see AN1368: Bluetooth Mesh Remote Provisioning.
For building a network, based on the Networked Lighting Control profiles, see AN1438: Networked Lighting Control.
Preparing the Mainboard#
The layout of the Wireless Starter Kit mainboard with attached EFR32xG24B radio board is shown in the following figure:
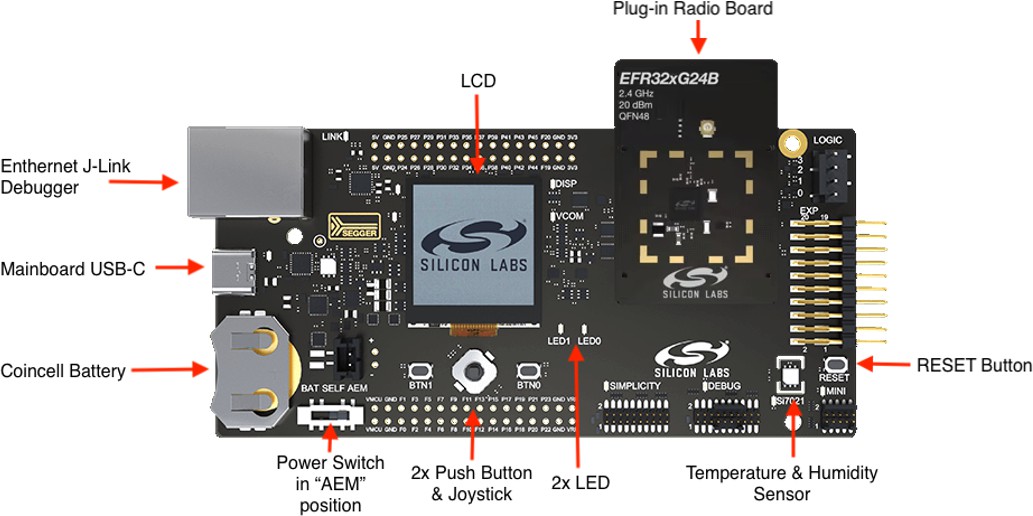
Connect a Blue Gecko Radio Board to the mainboard.
Use radio board BRD4187C EFR32xG24B 2.4 GHz (+20 dBm) (or similar) for this demo experience.
Connect the mainboard to a PC using the J-Link USB connector and the cable provided with the starter kit.
If not already set, turn the power switch to the AEM position.
Repeat the above steps for the other two kits so all three kits are connected to your computer.
Verifying the Setup#
Check that the blue USB Connection Indicator LED (next to J-Link USB) turns on or starts blinking.
Check that the mainboard LCD display turns on and displays a Silicon Labs logo.
Install the Demonstration Firmware#
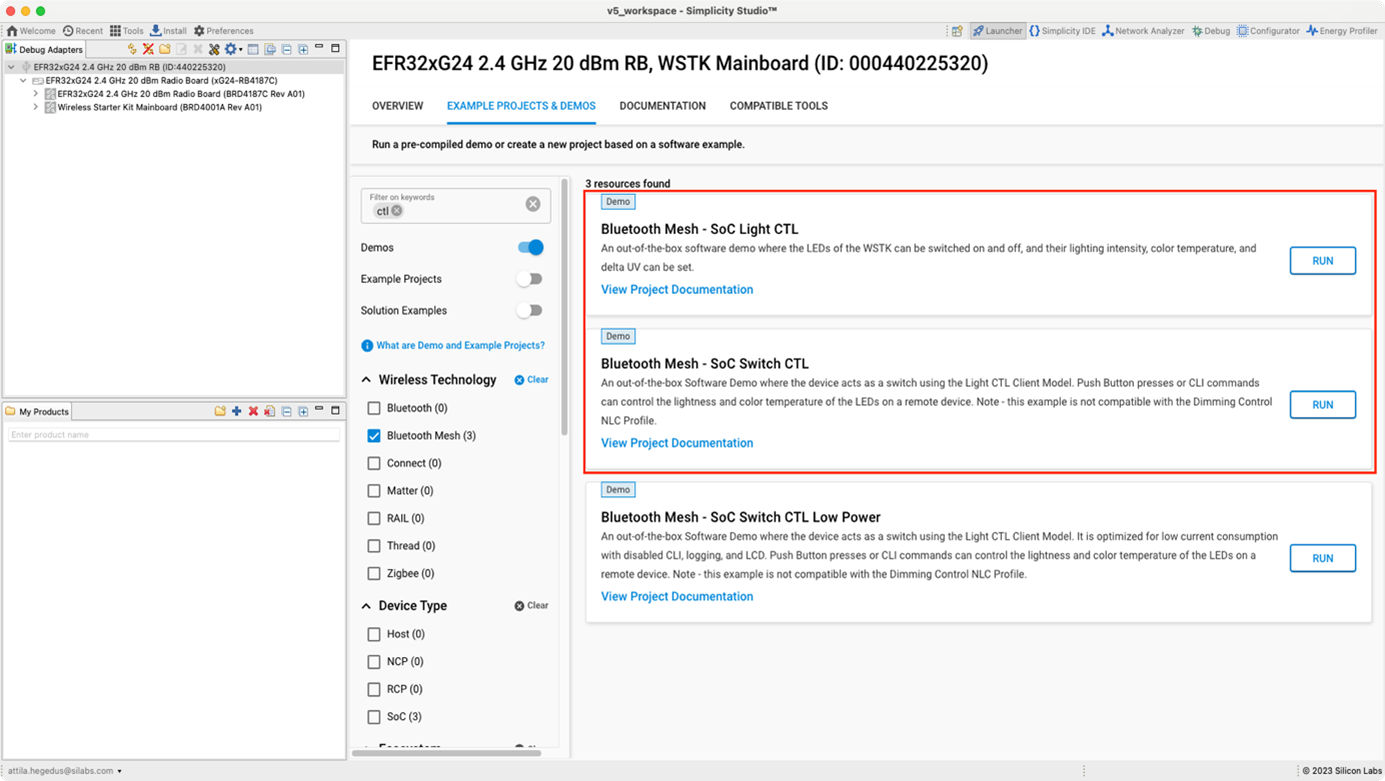
When the devices are connected to your PC with a USB cable, you can see three devices listed in the Debug Adapters view in Sim-plicity Studio. Select the J-link for a device to display demonstrations, examples, and documentation associated with the Bluetooth Mesh SDK.
For this demo, you need to flash two devices with Bluetooth Mesh – SoC Light CTL and one device with Bluetooth Mesh – SoC Switch CTL. Go to the Example Projects & Demos tab. Click the target device in the Debug Adapters view and click [RUN] next to the desired demo (if available). If the demo is not available, click [CREATE] for an instance of the selected example, build it, and flash it. (In this case, the bootloader is required. See Getting Started with Application Development).
Use the Demo with an Android Smartphone#
Make sure that all three devices have the status of unprovisioned on the device LCD screen before starting with the application. Open the Bluetooth Mesh app by Silicon Labs on your Android phone.
Follow the procedures below to set up and use the demonstration.
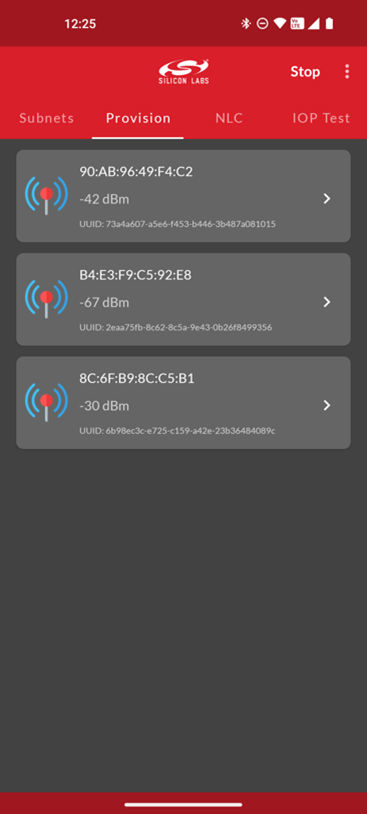
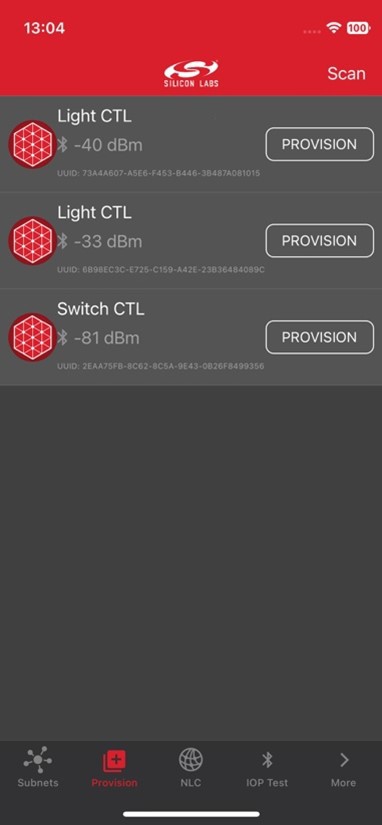
Go to the Provision view and tap scan to search for unprovisioned devices.
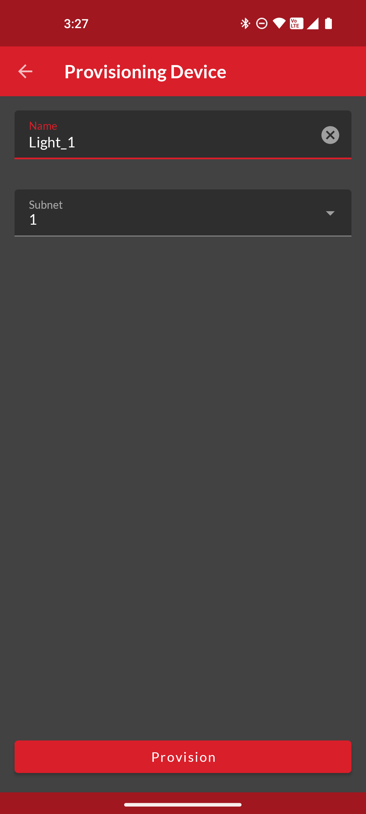
Select the Bluetooth mesh device you want to provision and configure.
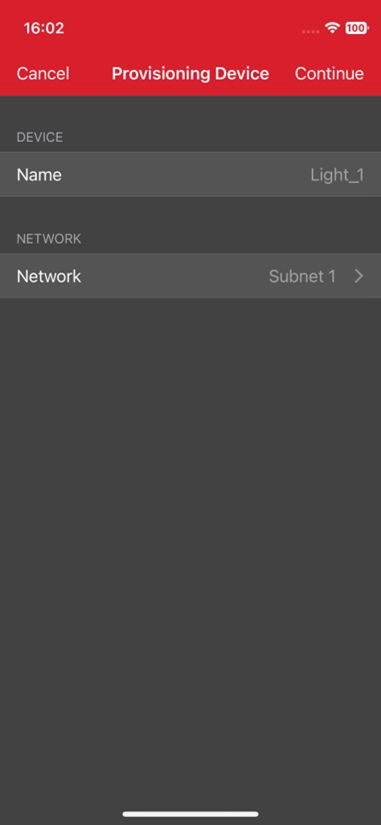
Enter the descriptive name for the device and select the network you want to add it to.
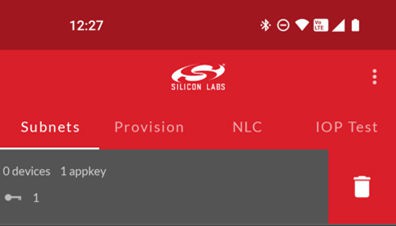
Note: The Android application has a pre-generated subnetwork and appkey, but you can add more to the application if you like. The subnetwork and node database can be erased by either left-swiping or long-pressing the subnetwork in the main view and by pressing the trash icon.
The network and node database can be erased by long-pressing the network in the main view and by pressing the trash icon.
To configure the newly provisioned Bluetooth mesh device:
Right after provisioning, the Android application connects the proxy service on the node.
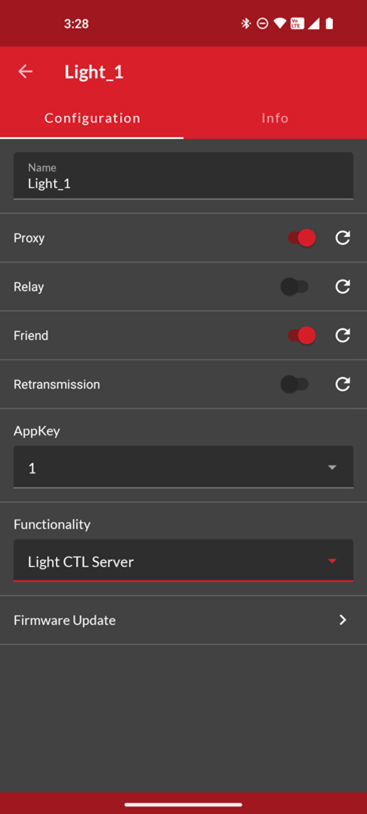
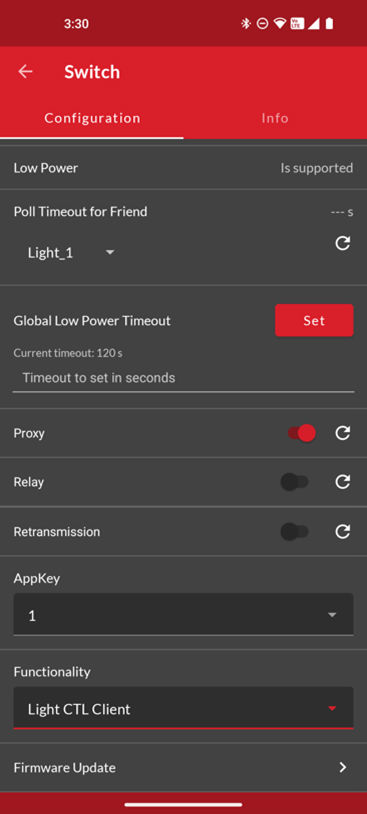
During configuration select the Bluetooth mesh features (proxy, relay, low power, and friend) that you want to enable.
Notice that if you disable proxy, the node can no longer be directly accessed over GATT.
Select the Functionality (mesh model) that you want to enable.
Select the AppKey you want to associate the device with.
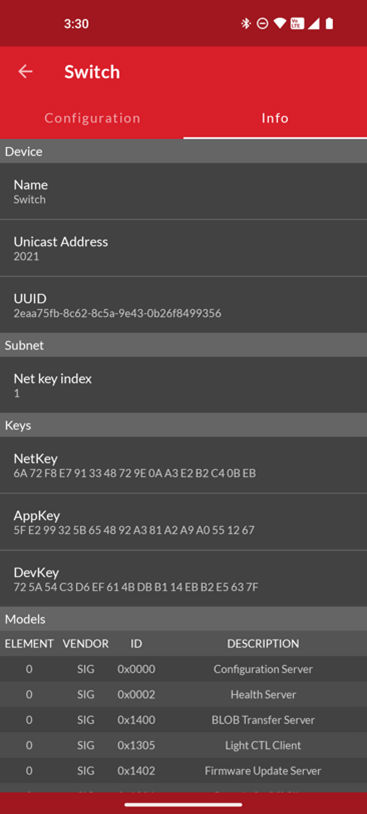
Note: The information view shows the Bluetooth Mesh node features, such as Unicast address, UUID, and security keys as well as the supported mesh models. It can be used for debug purposes.
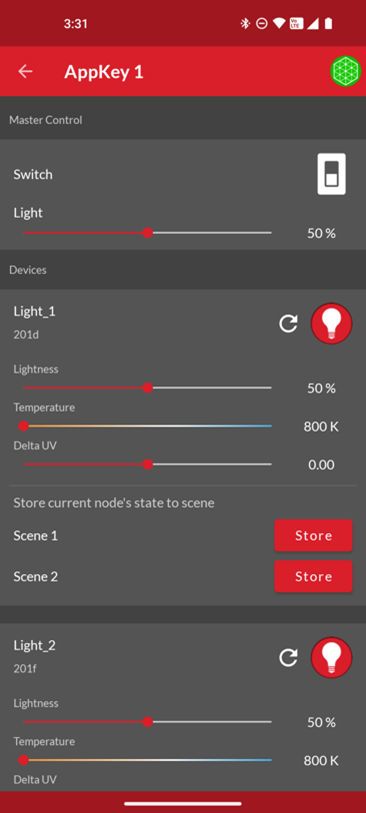
To control a Bluetooth mesh node with the Android application:
Select the Subnet and AppKey you want to control.
The application will show the available nodes assigned to that appkey.
You can control the light by:
Pressing the light bulb icon will send an On/Off message.
Moving the upper slider will send Light Lightness (dimming) messages.
Moving the medium and lower sliders will send CTL (temperature and delta UV) messages.
Pressing [STORE] stores the corresponding scene.
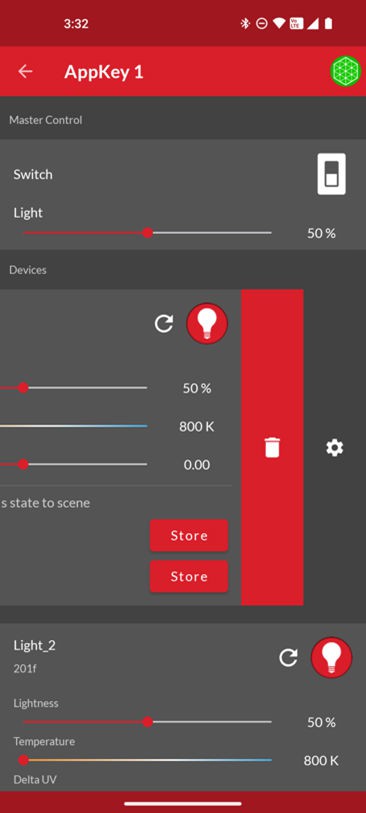
By going to devices view and either left-swiping or long-pressing a node, you can then either delete or reconfigure the node.
Once the Android application has been used to provision a light bulb and a light switch to a subnetwork and appkey, the light switch (WSTK) can also be used to control the light bulb (WSTK) with the PB0 and PB1 buttons.
PB0 Button
Short press: Decrease Light Lightness by 10%
Medium press: Decrease CTL (temperature) value
Long press: Send Off message
Very long press (5 seconds or more): Recall scene 1
PB1 Button
Short press: Increase Light Lightness by 10%
Medium press: Increase CTL (temperature) value
Long press: Send On message
Very long press (5 seconds or more): Recall scene 2
On devices with only one button, such as Thunderboard BG22:
Short press: Decrease Light Lightness by 10%, wraps back to 100% after 0%
Medium press: Decrease CTL (temperature) value, wraps back to maximum after minimum
Long press: Toggle sending Off message and On message
Very long press (5 seconds or more): Recall scene 1
Button presses during startup (power-on or reset) execute the following actions:
On devices with two buttons: PB0 = Full factory reset; PB1 = Node reset
On devices with one button: PB0 = Full factory reset
Use the Demo with an iOS Smartphone#
Make sure that all three devices have the status of unprovisioned on the device LCD screen before starting with the Mobile App. Open the Bluetooth Mesh app by Silicon Labs on your iOS phone.
Follow the procedures below to set up and use the demonstration.
Go to the provisioning view and tap scan to search for unprovisioned devices.
Select the Bluetooth Mesh device you want to provision and configure.
Enter the descriptive name for the device and select the network you want to add it to.
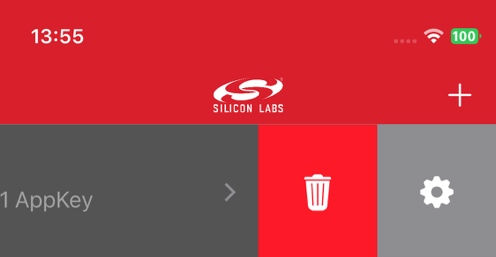
The subnetwork and node database can be erased by left-swiping the network in the main view and then pressing the trash icon.
To provision a Bluetooth Mesh device and configure the node:
During provisioning, select the subnetwork you want to add the device to.
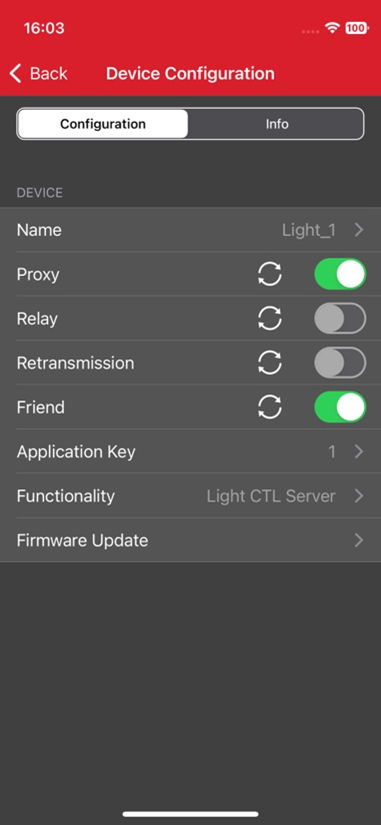
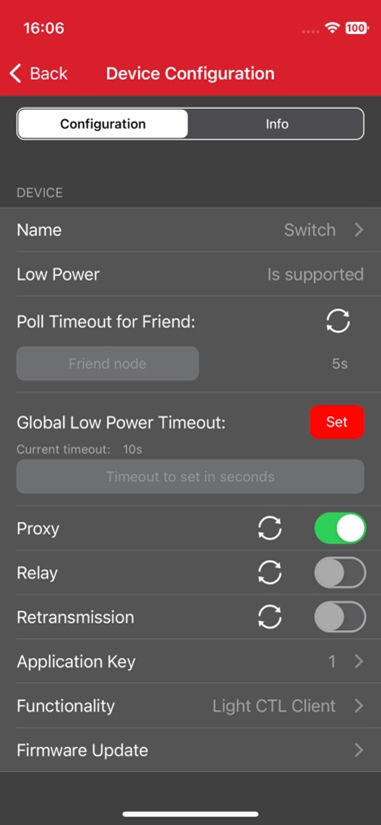
During configuration, select the Bluetooth Mesh features (proxy, relay, low power and friend) that you want to enable.
Notice that if you disable proxy, the node can no longer be directly accessed over GATT.
Select the AppKey you want to associate the device with.
Finally, select the Functionality (mesh model) that you want to enable.
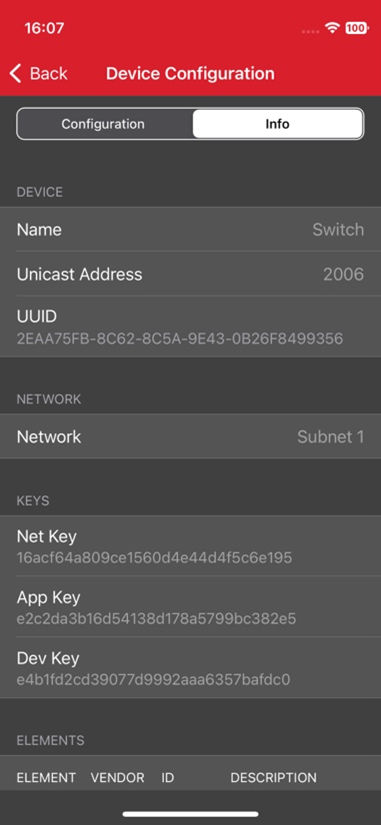
Note: The information view shows the Bluetooth mesh node features, such as Unicast address, UUID, and security keys as well as the supported mesh models. It can be used for debug purposes.
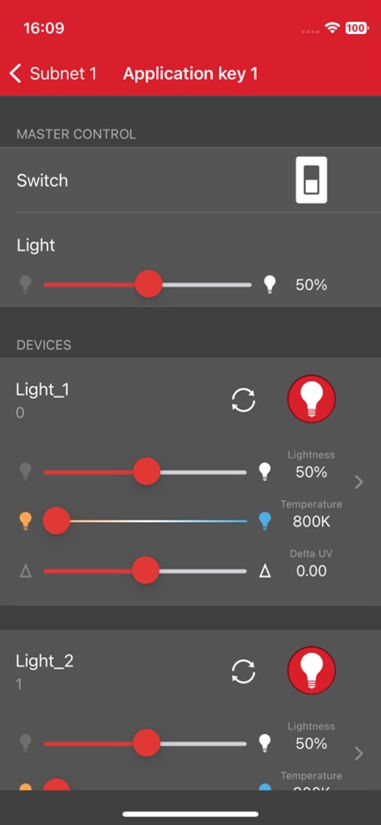
To control a Bluetooth Mesh node with the iOS application:
Select the Subnetwork and AppKey you want to control.
The application will show the available nodes associated with that AppKey.
You can control the light:
Pressing the light bulb icon will send an On/Off message.
Moving the upper slider will send Light Lightness (dimming) messages.
Moving the medium and lower sliders will send CTL (temperature and delta UV) messages.
Pressing [STORE] stores the corresponding scene.
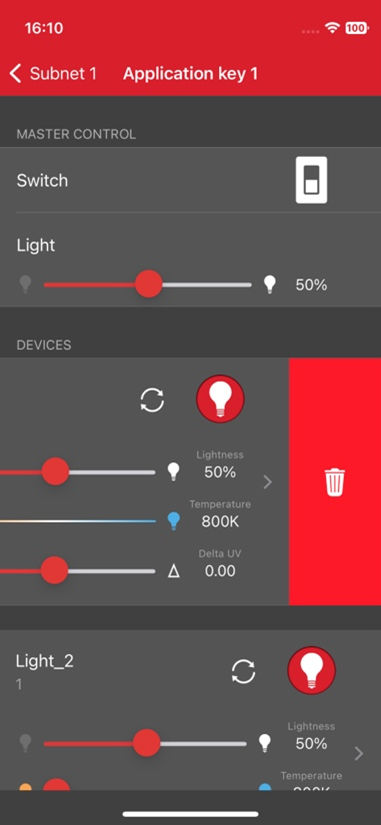
By going to the Devices view and tapping a node name you can reconfigure the node. To remove the node from the subnetwork, left-swipe it and press the trash icon.
Once the iOS application has been used to provision a light bulb and a light switch to a subnetwork and appkey, the light switch (WSTK) can also be used to control the light bulb (WSTK) with the PB0 and PB1 buttons.
PB0 Button
Short press: Decrease Light Lightness by 10%
Medium press: Decrease CTL (temperature) value
Long press: Send Off message
Very long press (5 seconds or more): Recall scene 1
PB1 Button
Short press: Increase Light Lightness by 10%
Medium press: Increase CTL (temperature) value
Long press: Send On message
Very long press (5 seconds or more): Recall scene 2
On devices with only one button, such as Thunderboard BG22:
Short press: Decrease Light Lightness by 10%, wraps back to 100% after 0%
Medium press: Decrease CTL (temperature) value, wraps back to maximum after minimum
Long press: Toggle sending Off message and On message
Very long press (5 seconds or more): Recall scene 1
Button presses during startup (power-on or reset) execute the following actions:
On devices with two buttons: PB0 = Full factory reset; PB1 = Node reset
On devices with one button: PB0 = Full factory reset