Add Machine Learning to a New or Existing Project#
This guide shows how to add a machine learning model to a Simplicity Studio project using the ML Model (ml_model) component. You will enable the AI/ML SDK extension, install the component, point it at a .tflite file in an .mlconf file, and confirm the generated headers.
The steps below use an Empty C++ project as the starting point. To add a model to an existing project, skip Step 1 and open your project's .slcp file instead.
Application code that calls the model APIs must be written in C++. If you are starting with a predominantly C application, see Interfacing with C Code.
For inference code after the model is in the project, see Machine Learning on Silicon Labs Devices from Scratch. For more than one model, see Multiple-Model Support.
Prerequisites#
Simplicity Studio installed (screenshots from Studio 2234)
Simplicity SDK Suite installed (e.g., v2026.6.0)
A target board or platform selected in your workspace
A
.tflitemodel file on your local machineThe AI/ML extension enabled in your workspace
Procedure#
Step 1: Create an Empty C++ Project#
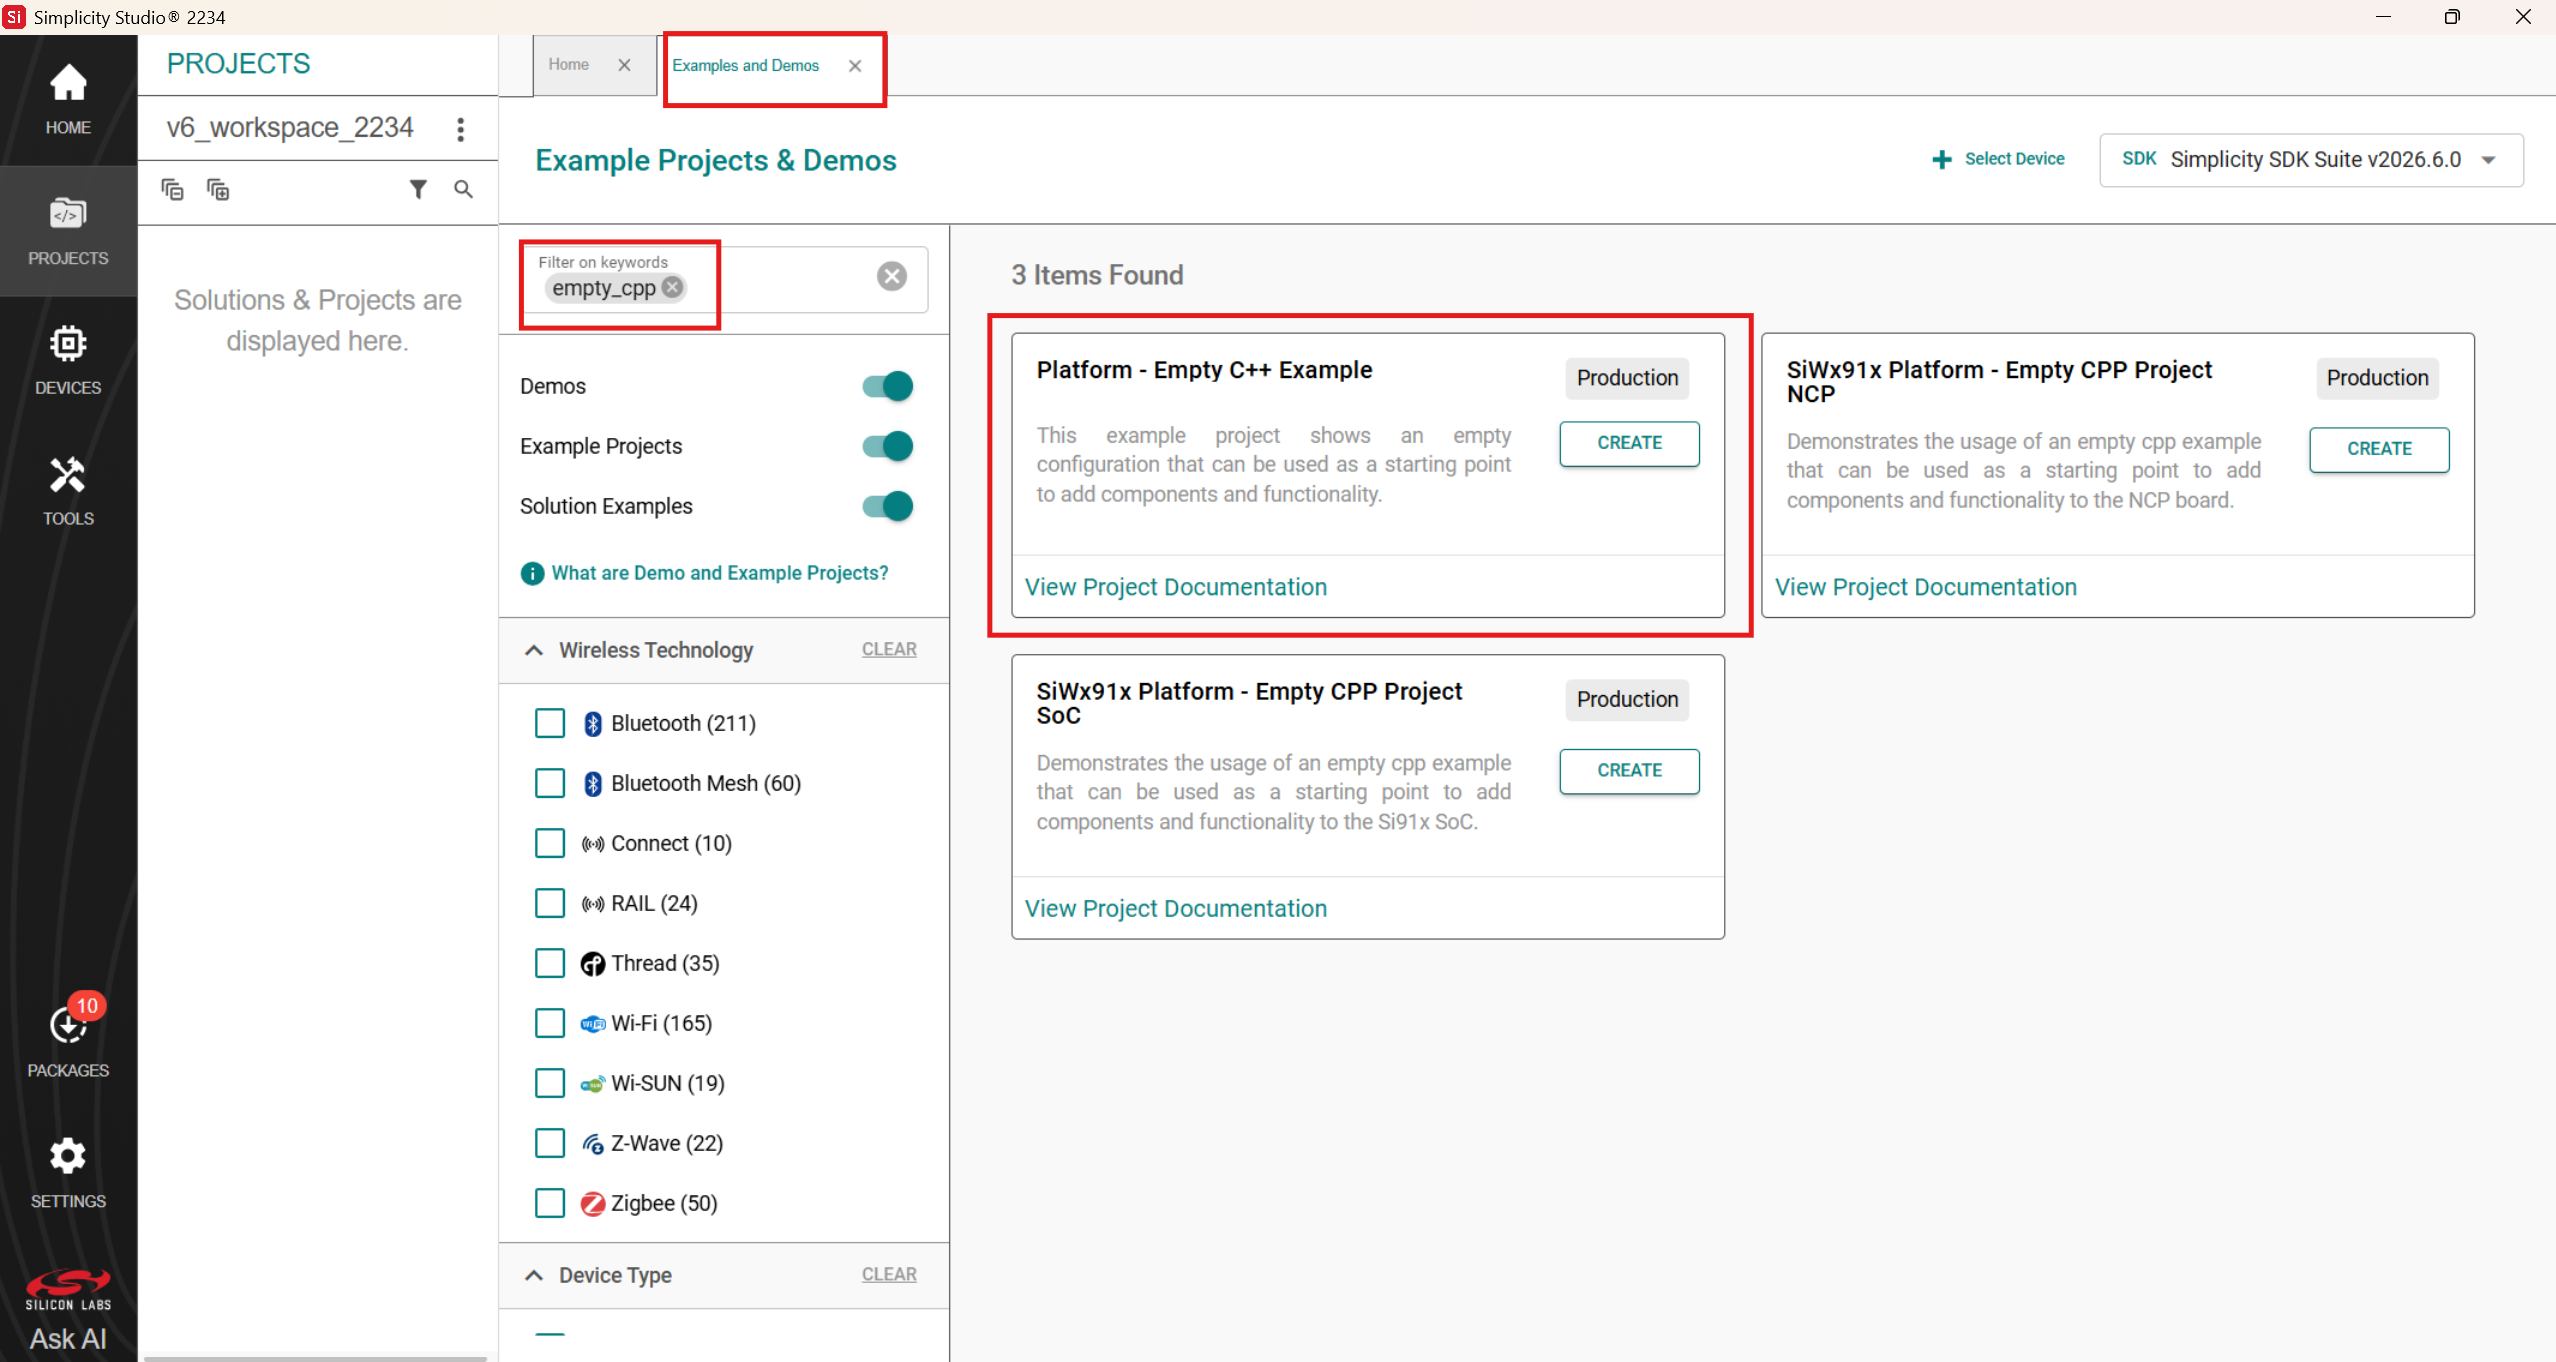
Open Simplicity Studio and go to the PROJECTS view.
Open the Example Projects & Demos tab.
Search for
empty_cpp.Select Platform - Empty C++ Example and click CREATE.
The empty C++ template is a good starting point when you want to add components yourself.
Step 2: Open the Software Components Tab#
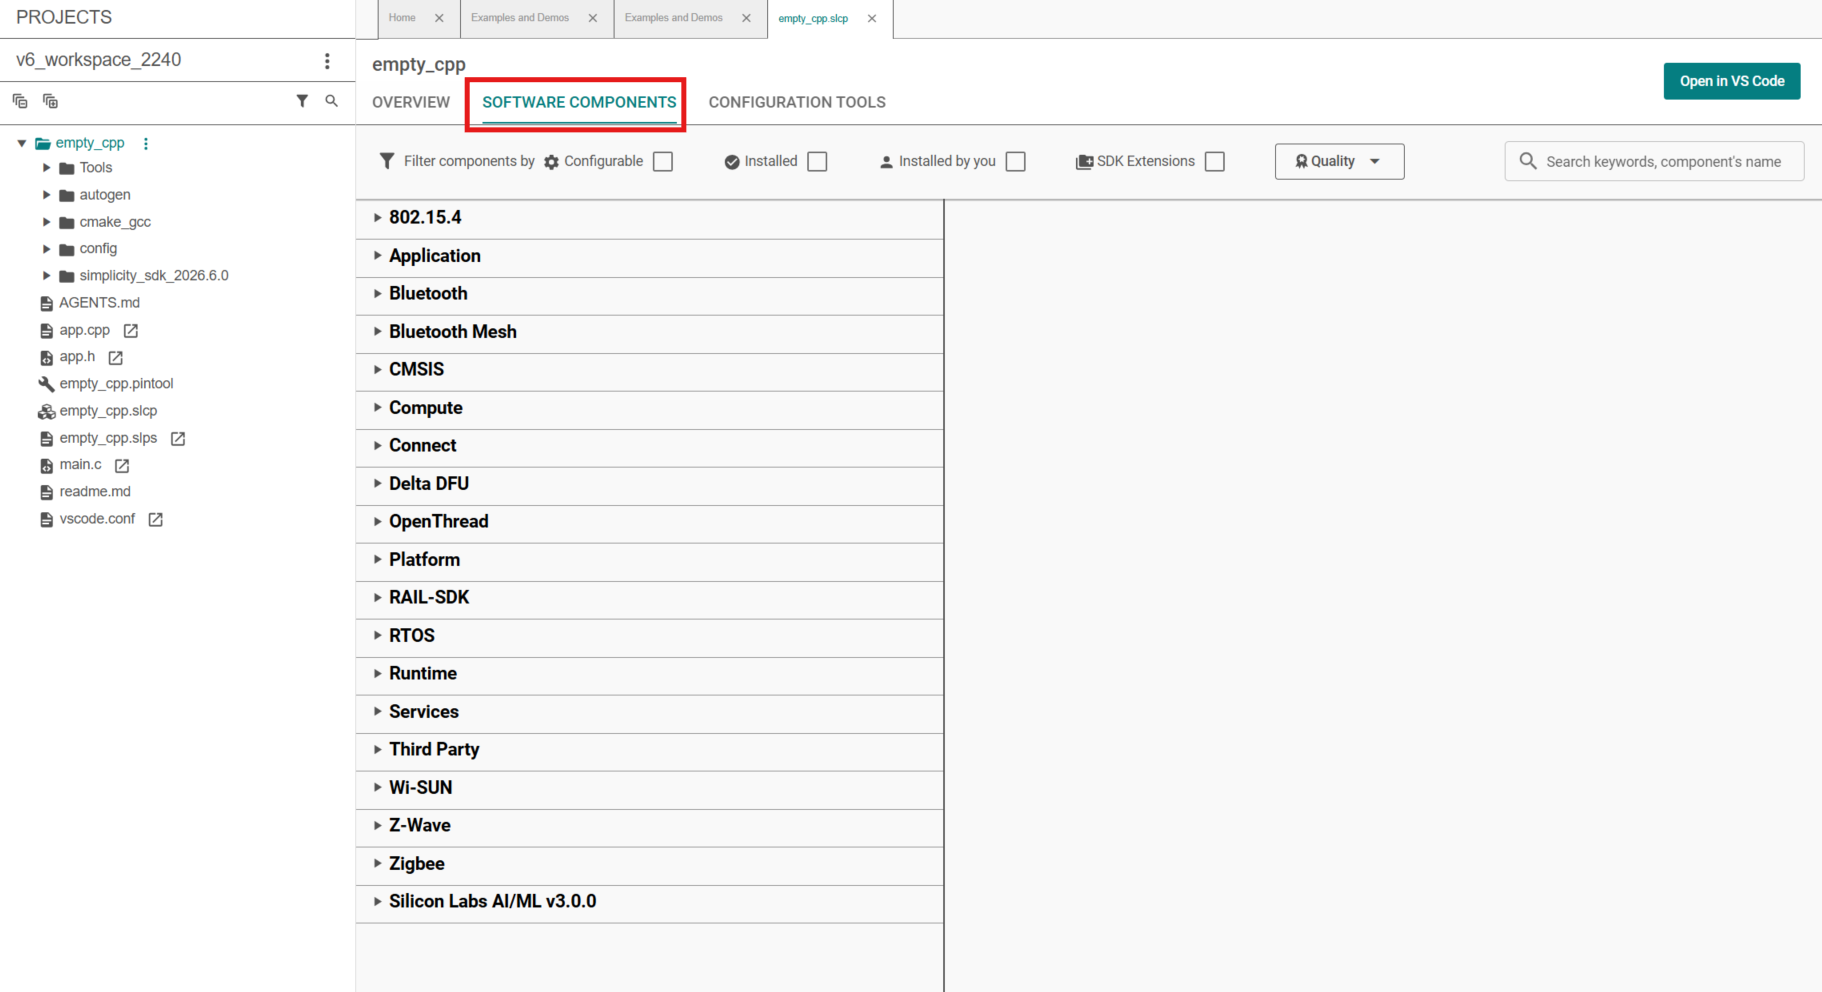
In Project Explorer, open your project (for example
empty_cpp).Open the project
.slcpfile.Switch to the SOFTWARE COMPONENTS tab.
From here you can browse and install components, including the Silicon Labs AI/ML stack.
Step 3: Enable the AI/ML SDK Extension#
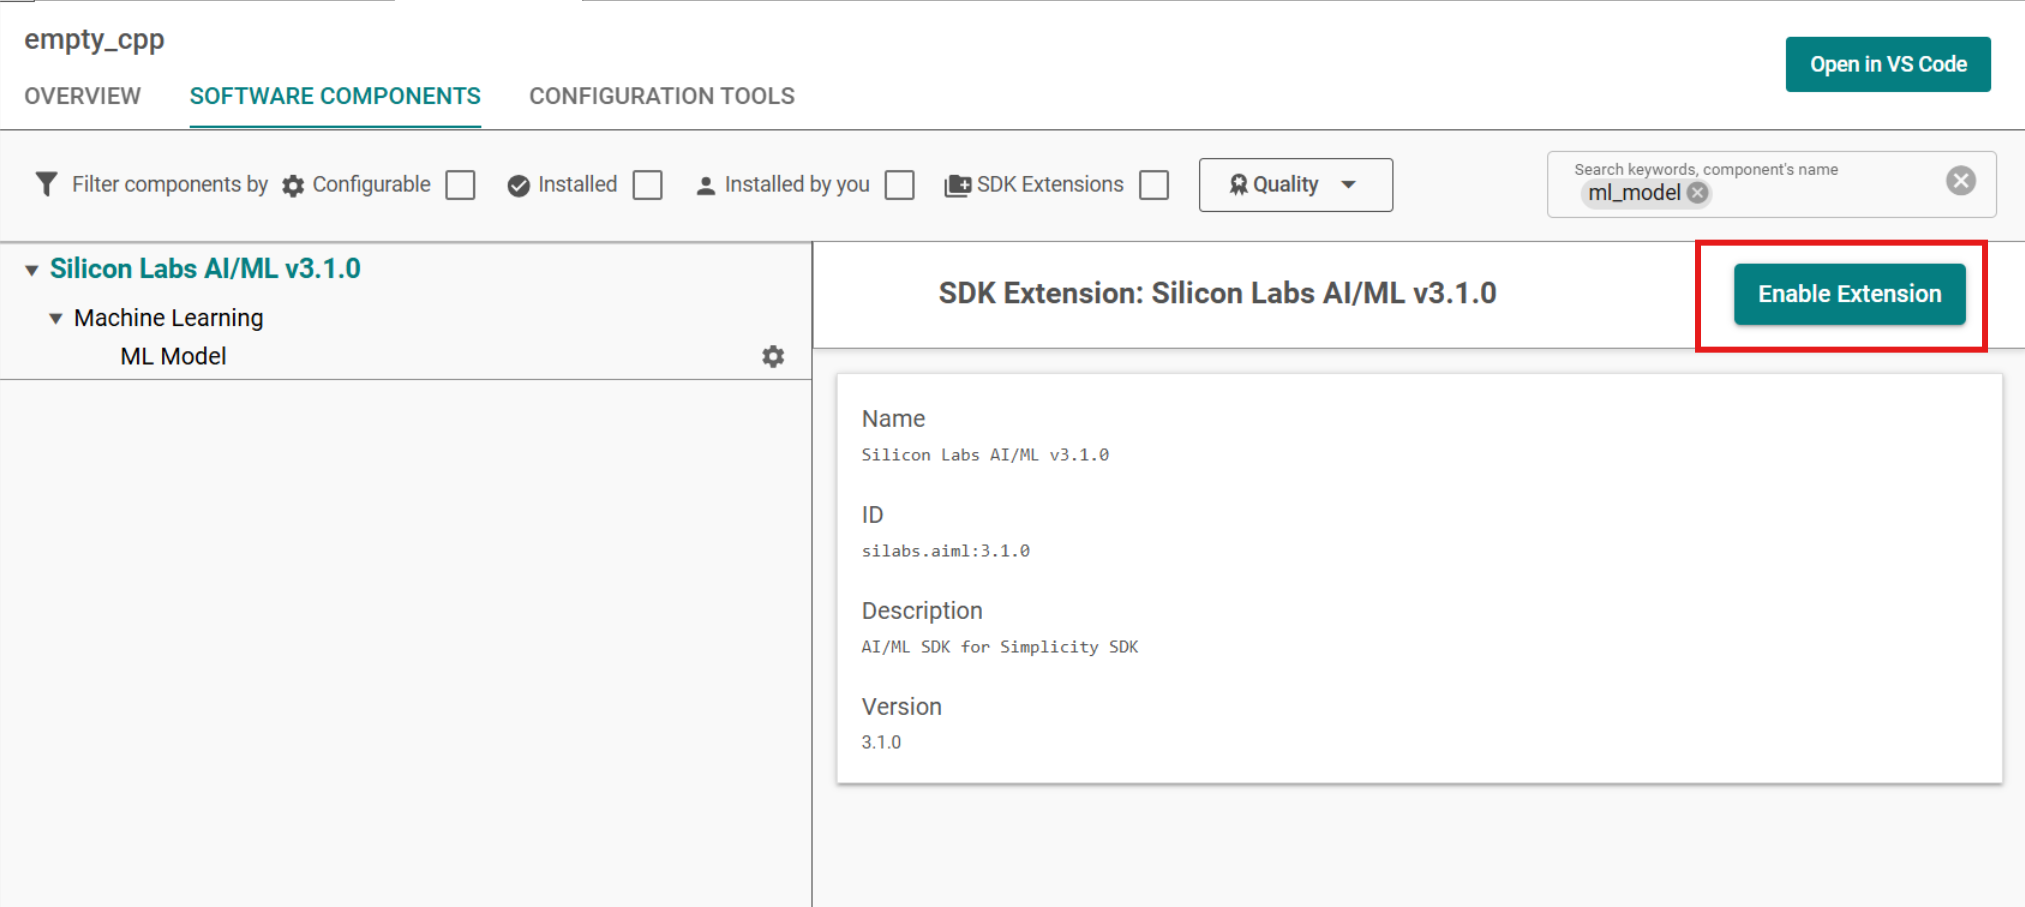
Search for
ml_model.Click on Silicon Labs AI/ML v3.x.x and then click on Enable Extension to enable Silicon Labs AI/ML extension.
Step 4: Install the ML Model Component#
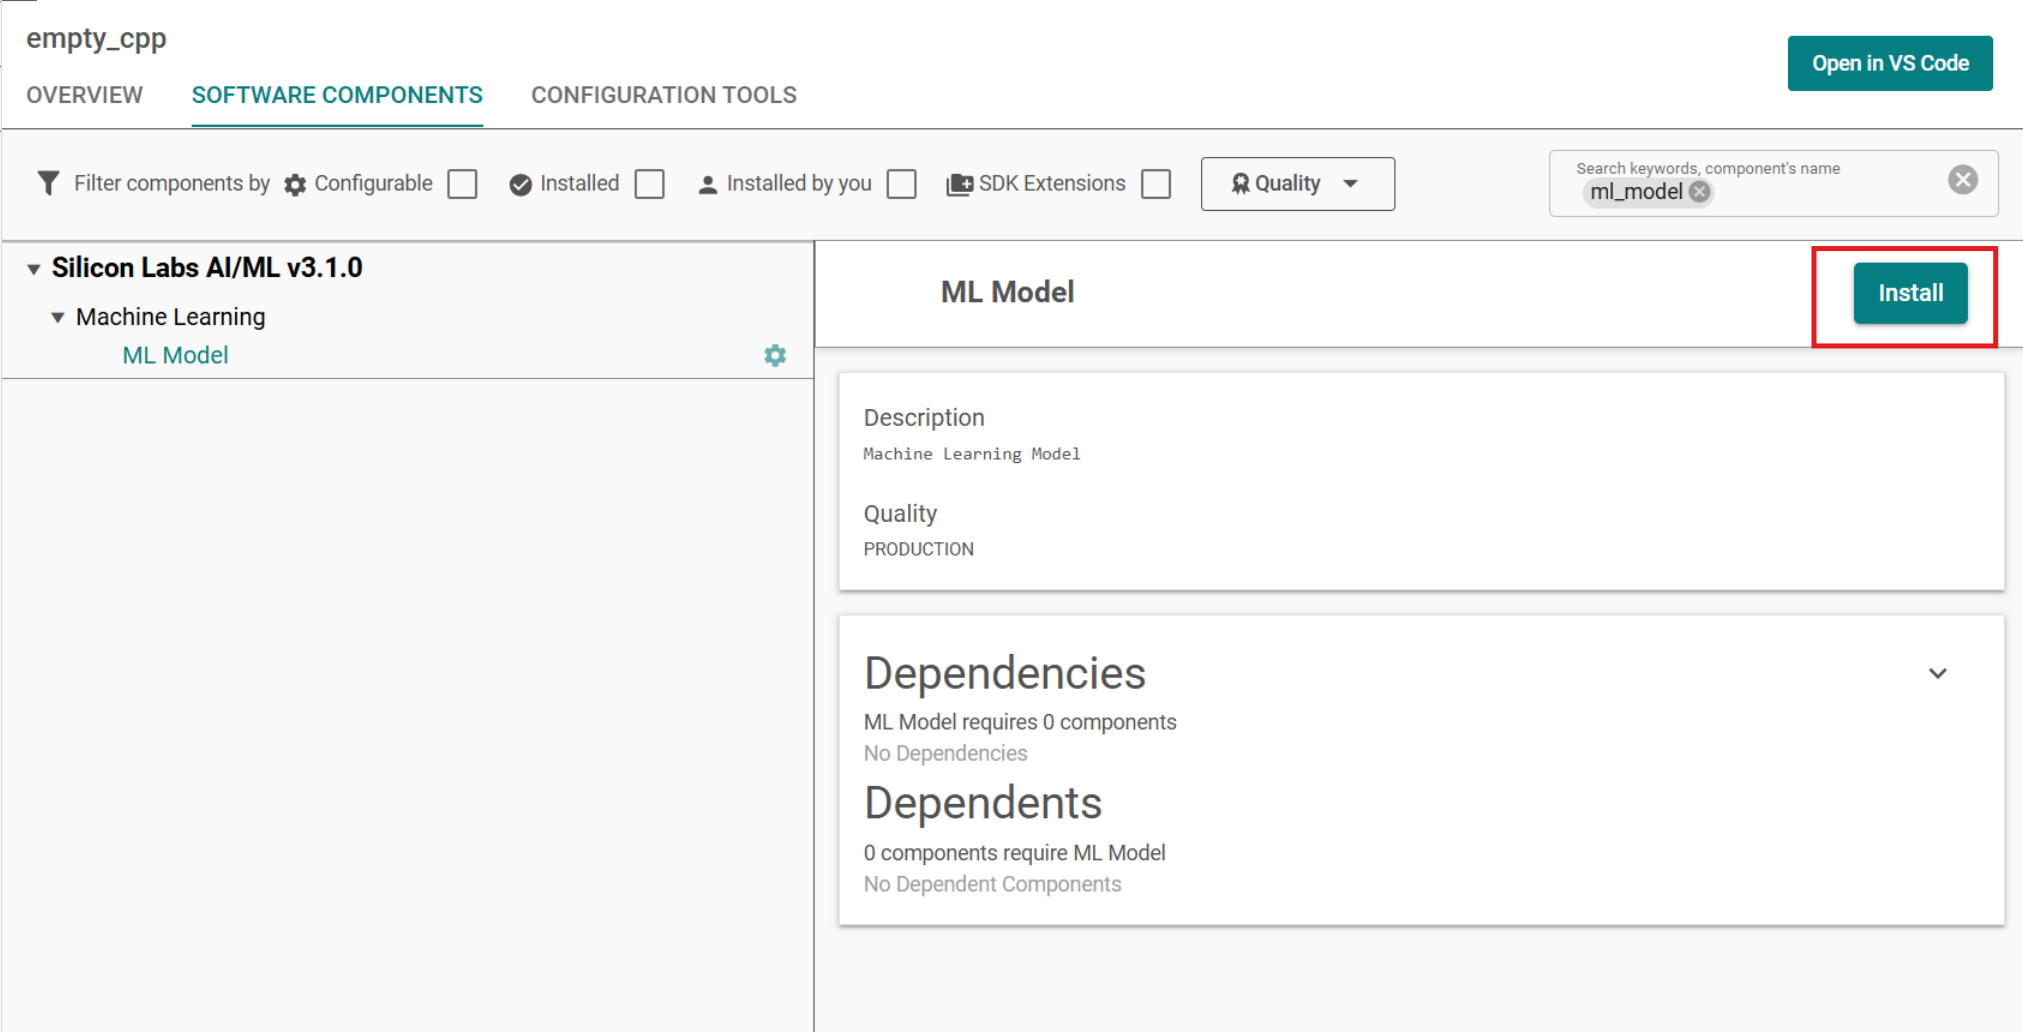
With
ml_modelstill in the search bar, Expand Silicon Labs AI/ML → Machine Learning and select ML ModelClick on Install to install the ML Model component and Create A Component Instance dialog pops up.
Step 5: Name the Component Instance#
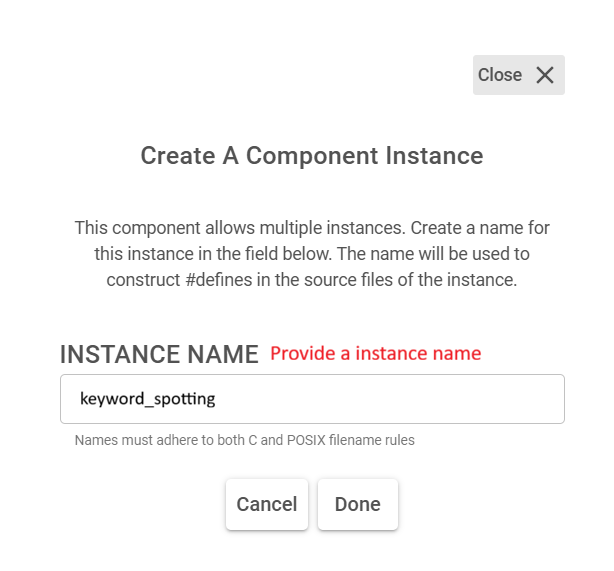
When you click Install, Studio prompts you to create an instance:
Enter a name in INSTANCE NAME (for example
keyword_spottingorblink). Use only valid C/POSIX filename characters — this name ends up in generated#definemacros and handle names such assl_ml_keyword_spotting_model_handle.Click Done. ML Model component is now installed and and a new instance is created.
NOTE: Each
.tflitemodel requires its own ML Model component instance. After the ML Model component is installed, add another instance with a different name (for examplekwsandblink) and repeat Steps 5–7 for each additional model. For initialization and runtime behavior with multiple models, see Multiple-Model Support.
Step 6: Dismiss the Initial Generation Error#
Studio should confirm the component was added. You may also see a generation error like this:
Failed to generate setup apack_aiml.mvp-compiler
ERROR:root:compile: pass a .tflite path as the model argument, or set "model" in your YAML/mlconf config.
This error is expected because the project has not yet been configured with a .tflite file path. Dismiss the dialog and proceed to the next step.

Step 7: Configure the .mlconf File#
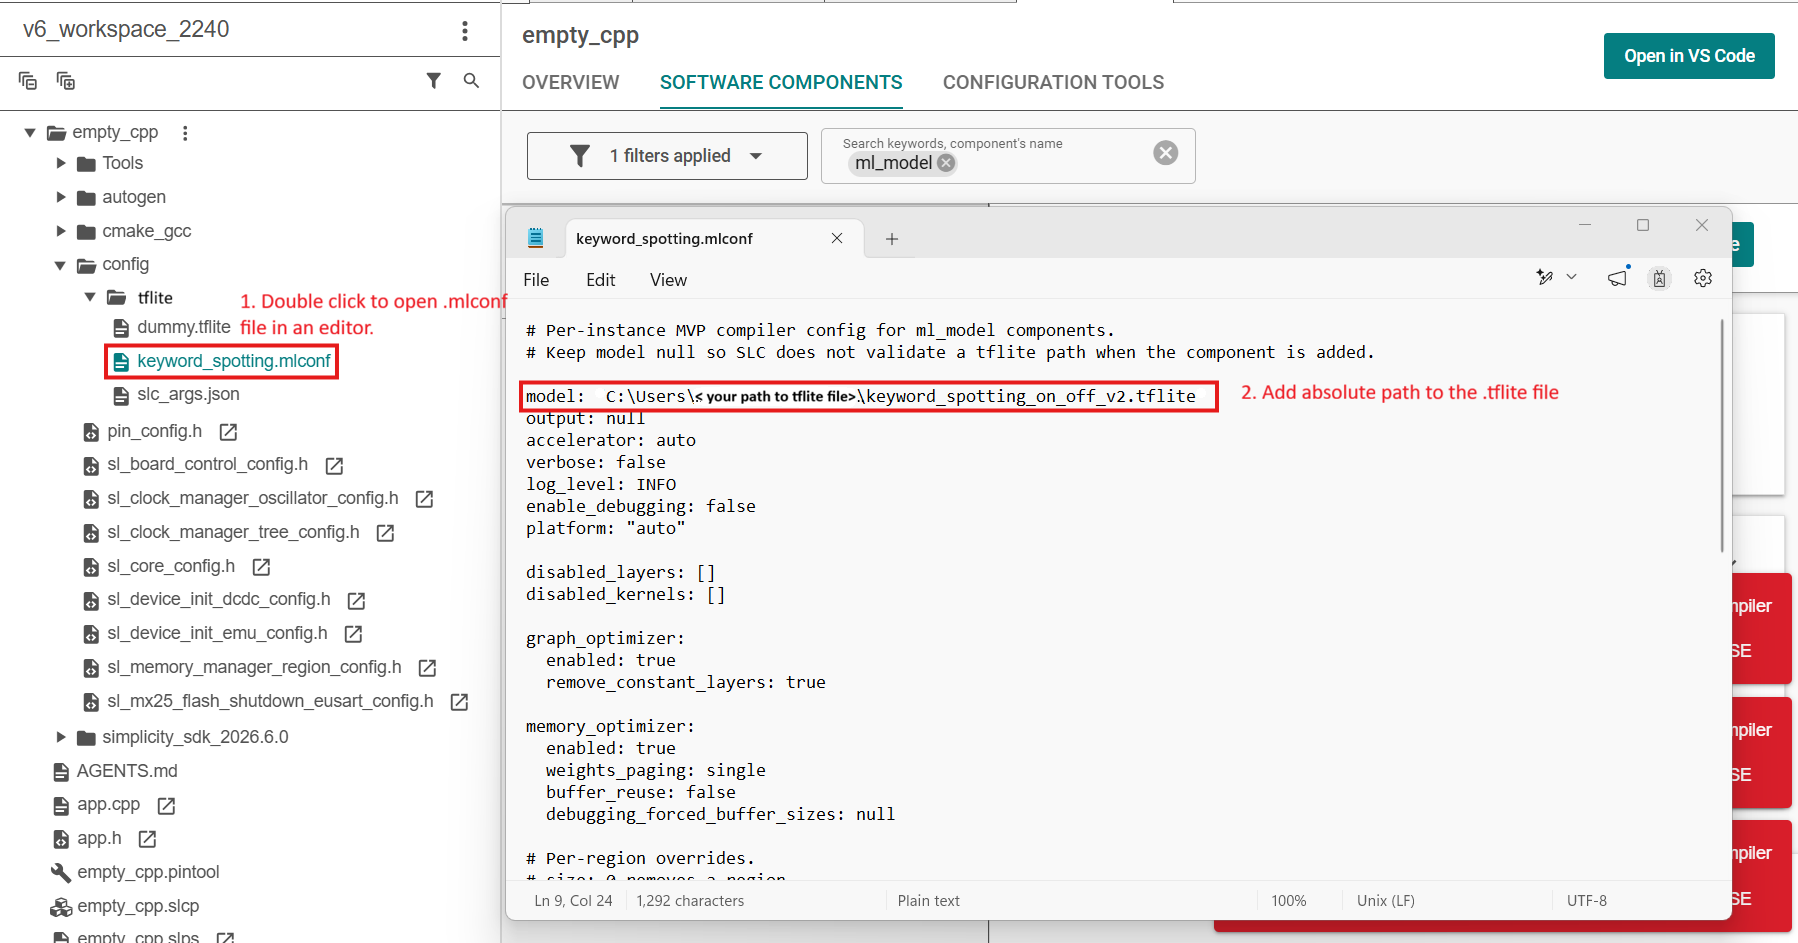
In Project Explorer, open
config/tflite/and double-click your.mlconffile (for examplekeyword_spotting.mlconf).Set
model:to the absolute path of your.tflitefile:model: C:\Users\<username>\Desktop\keyword_spotting_on_off_v2.tfliteSave the file. Studio regenerates the project automatically.
NOTE: A project with more than one model has one
.mlconffile per instance underconfig/tflite/(for examplekeyword_spotting.mlconfandblink.mlconf). Setmodel:in each file to the.tflitepath for that instance.
Step 8: Verify Generated Files#
After generation finishes:
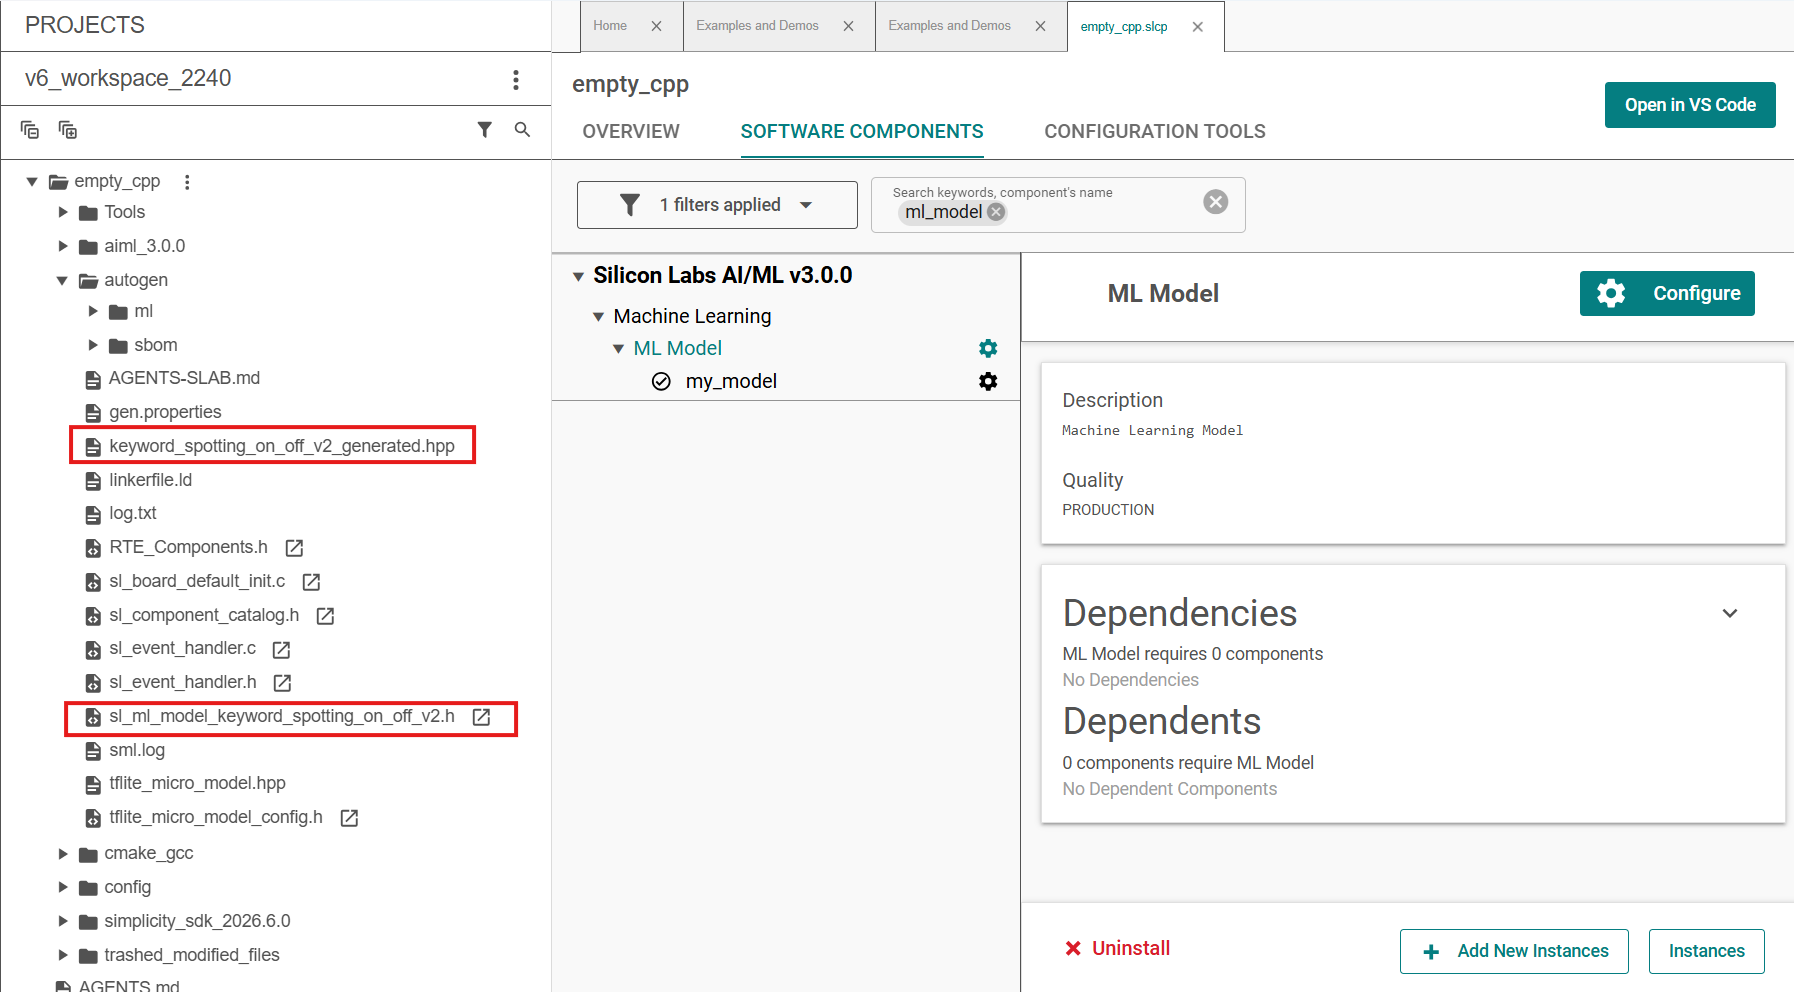
Expand the
autogen/folder in Project Explorer.Check for new headers named after your model, for example:
keyword_spotting_on_off_v2_generated.hppsl_ml_model_keyword_spotting_on_off_v2.h
On the SOFTWARE COMPONENTS tab, confirm your ML Model instance shows a green checkmark.
At project generation, Simplicity Studio runs the MVP Compiler on each model and produces embedded artifacts in autogen/, including:
File | Purpose |
|---|---|
| Pre-built handle for the model (for example |
| Model flatbuffer, opcode resolver, and statically allocated tensor buffers |
| Model-specific parameters when enabled in |
The ML Model component includes the TensorFlow Lite Micro runtime. No automatic model initialization runs at system startup — the application loads the model when it is ready to run inference.
For microphone-based models, also add the Audio Feature Generator (fe_audio) component. See Feature Generators.
NOTE: With multiple model instances,
autogen/contains a separate generated header and handle for each instance (for examplesl_ml_model_kws.handsl_ml_model_blink.h).
Summary#
Step | Action |
|---|---|
1 | Create a Platform - Empty C++ Example project (skip for existing projects) |
2 | Open SOFTWARE COMPONENTS via the project |
3 | Enable the Silicon Labs AI/ML SDK extension |
4 | Install the ML Model component |
5 | Name the component instance (for example |
6 | Dismiss the generation error (no |
7 | Set |
8 | Confirm generated headers in |
Additional Software Components and C++ Build Settings#
Note: Skip this section for Series 2 devices. It applies to SiWx917 projects only.
Ensure the following components are installed in your project.
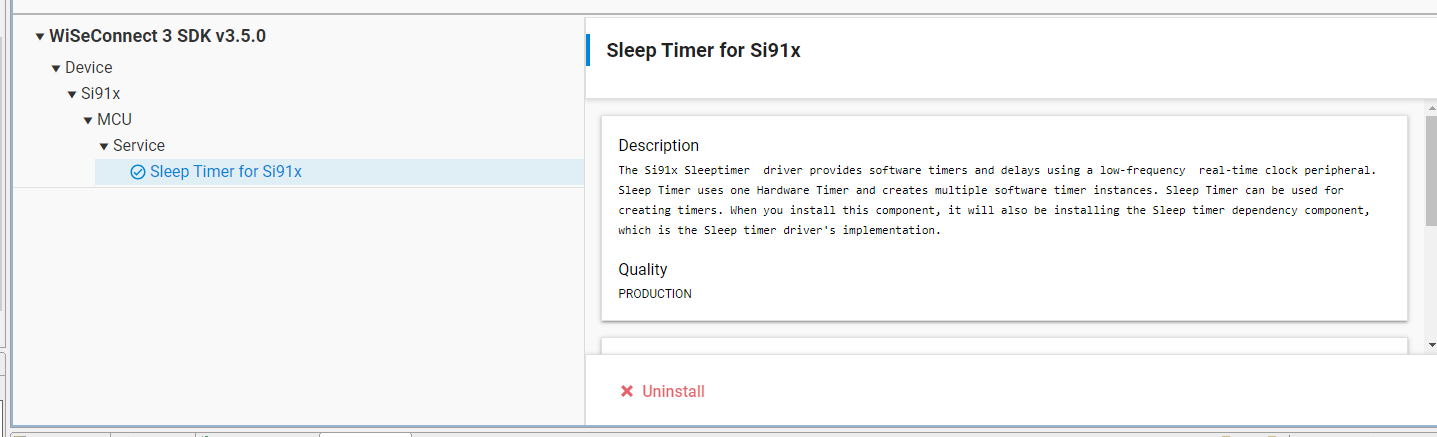
WiseConnect SDK > Device > Si91X > MCU > Service > Power Manager > Sleep Timer for Si91x
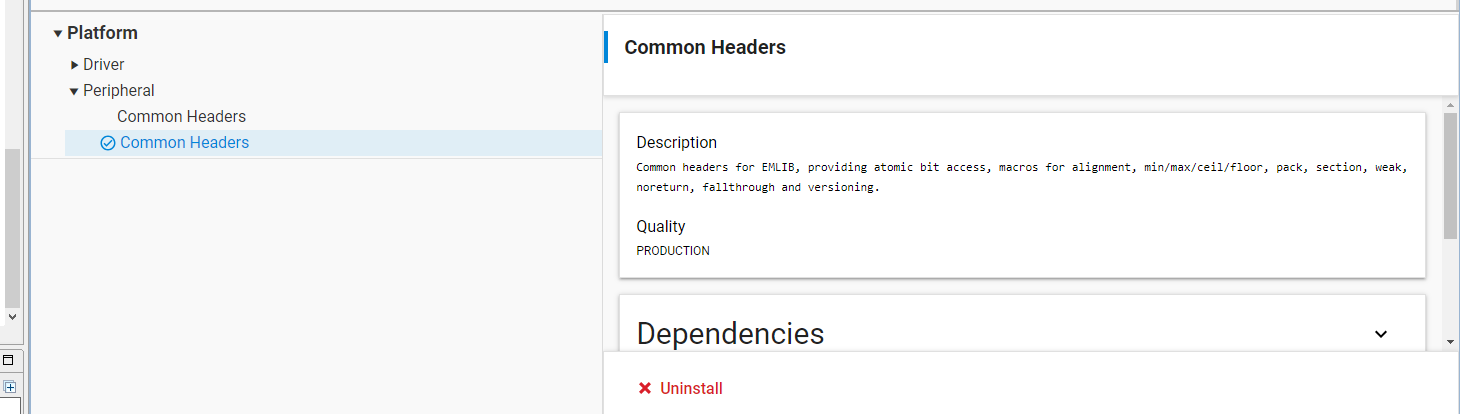
Platform > Peripheral > Common Headers
Update your C++ build settings as follows:
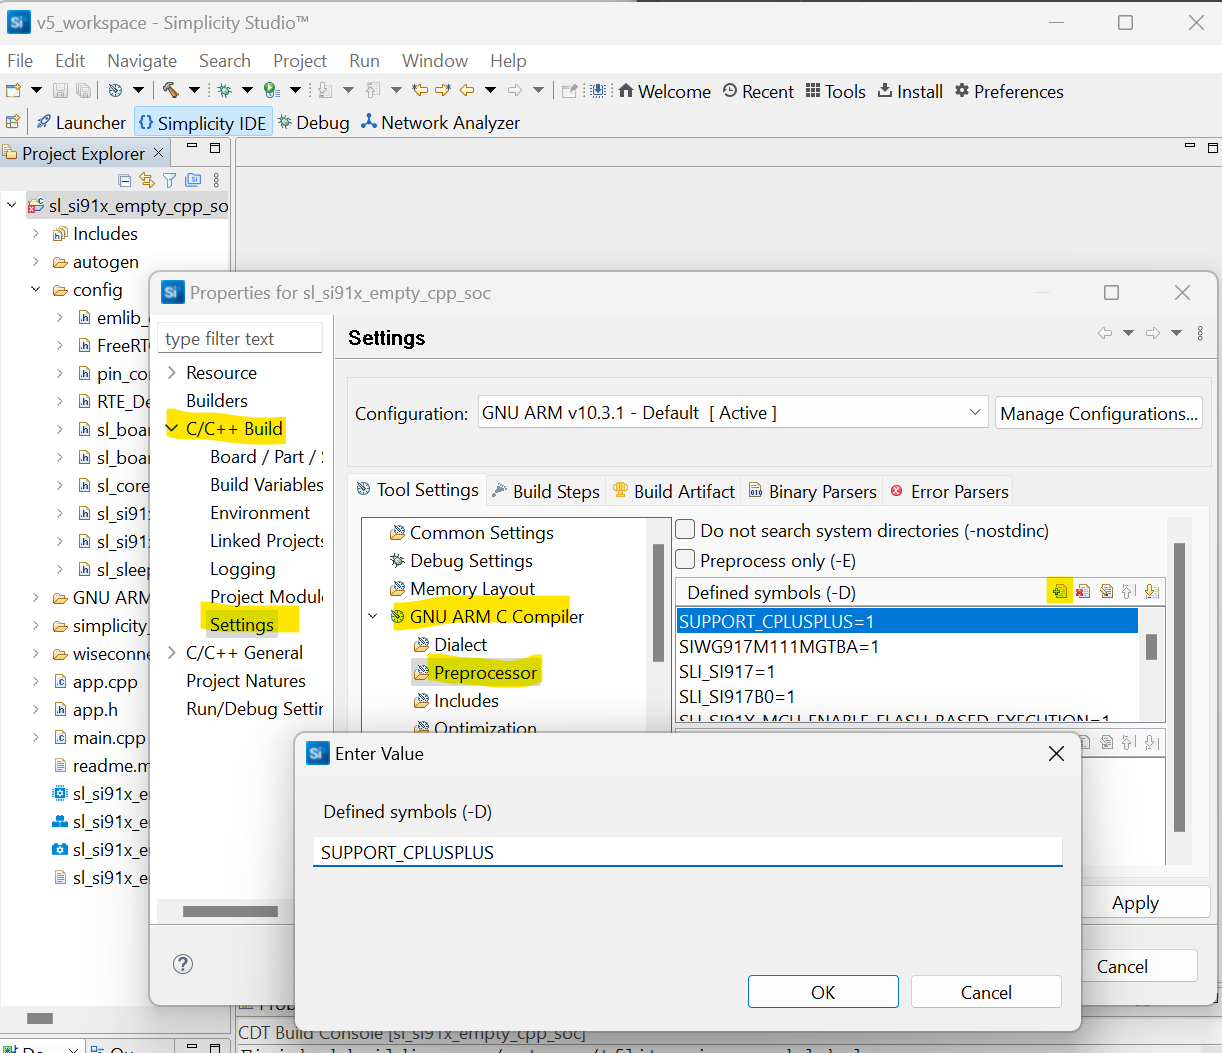
In the C preprocessor defines, add:
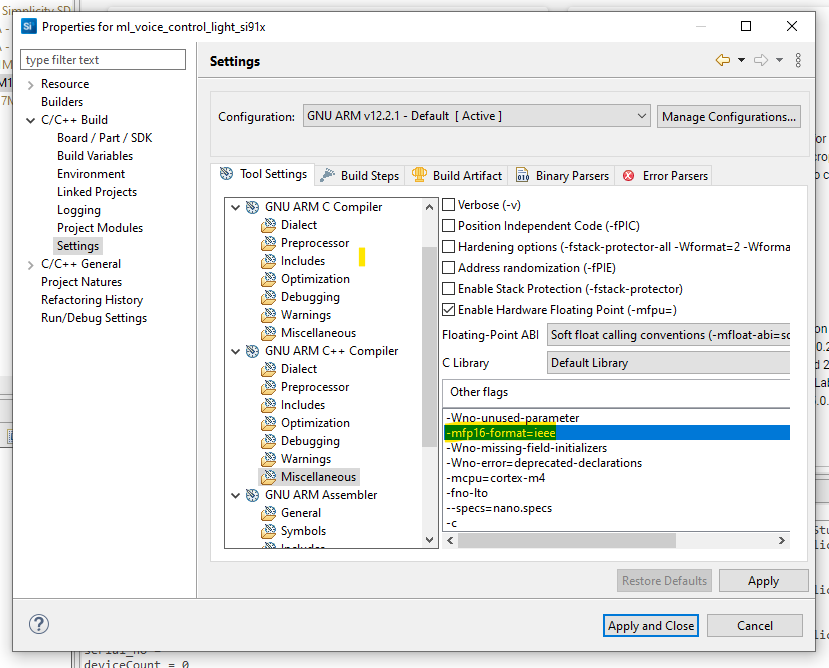
SUPPORT_CPLUSPLUS.In GNU ARM C++ Compiler > Miscellaneous settings, add:
-mfp16-format=ieee.
Alternate method:
You can also add these settings directly to your project's
.slcpfile:Open the
.slcpfile in a text editor.Add
SUPPORT_CPLUSPLUSto thedefinesection for C preprocessor defines. For example:define: - name: SUPPORT_CPLUSPLUS value: 1Add
-mfp16-format=ieeeto thetoolchain_settingssection for C++ compiler flags, for example:toolchain_settings: - option: gcc_compiler_option value: -mfp16-format=ieeeSave the file and regenerate your project to apply the changes.
Troubleshooting#
Issue | What to try |
|---|---|
| Set |
| Enable the AI/ML SDK extension (Step 3). |
Invalid instance name | Use letters, numbers, and underscores only. |
Nothing new in | Double-check the |
Next Steps#
Include the generated headers in your application and follow Machine Learning on Silicon Labs Devices from Scratch to initialize the model and run inference.
Addendum: Interfacing with C Code#
If your project is written in C rather than C++, place the code interfacing with the model APIs into a separate file that exports a C API through an interface header. For this example, a filename app_ml.cpp is assumed that implements the function ml_process_action() with the same content as in the from-scratch guide.
app_ml.h
#ifdef __cplusplus
extern "C" {
#endif
void ml_process_action(void);
#ifdef __cplusplus
}
#endifapp_ml.cpp#
#include "app_ml.h"
#include "sl_ml_model_blink.h"
#include "sl_ml_tflite_micro_model.h"
extern "C" void ml_process_action(void)
{
/* Call sl_ml_model_run() as shown in the from-scratch guide.
Call sl_ml_model_init() from app_init(). */
}app.c#
#include "app_ml.h"
// ...
void app_process_action(void)
{
ml_process_action();
}Addendum: Series 2 to SiWx917 (and vice versa) App Conversion#
If you need to port an application between Series 2 and SiWx917, follow the Additional Software Components and C++ Build Settings section for SiWx917 when required. The ML Model (ml_model) component and sl_ml_model_init() / sl_ml_model_run() workflow is the same on supported boards. Regenerate the project after changing the target device.