Ozone Environment Setup for a SiWx917 SoC Device#
Note:
Ozone debugging support is enabled for SiWx917 Dual flash boards only
Auto detection of SiWx917 SoC device in Ozone is not enabled.
Follow the steps to manually configure the SiWx917 SoC with Latest Ozone Debugger.
Steps to Configure the SiWx917 SoC on the Ozone Debugger#
Update the JlinkDevices.xml and ELF files found in the Matter Artifacts page.
Download the JLinkDevices.xml file and copy it in your Ozone installation path shown in this JLinkDevices folder. If there is no JLinkDevices Folder, create a JLinkDevices folder and copy the JlinkDevices.xml file.
In the
JLinkDevicesfolder, create aDevicesfolder and then create a sub-folder namedSiliconLabs.Download the ELF file (Flash driver) and copy it in the created
SiliconLabsfolder.
Launch Ozone. The SiWx917 Dual Flash SoC device should be visible in the Device field's selection list.
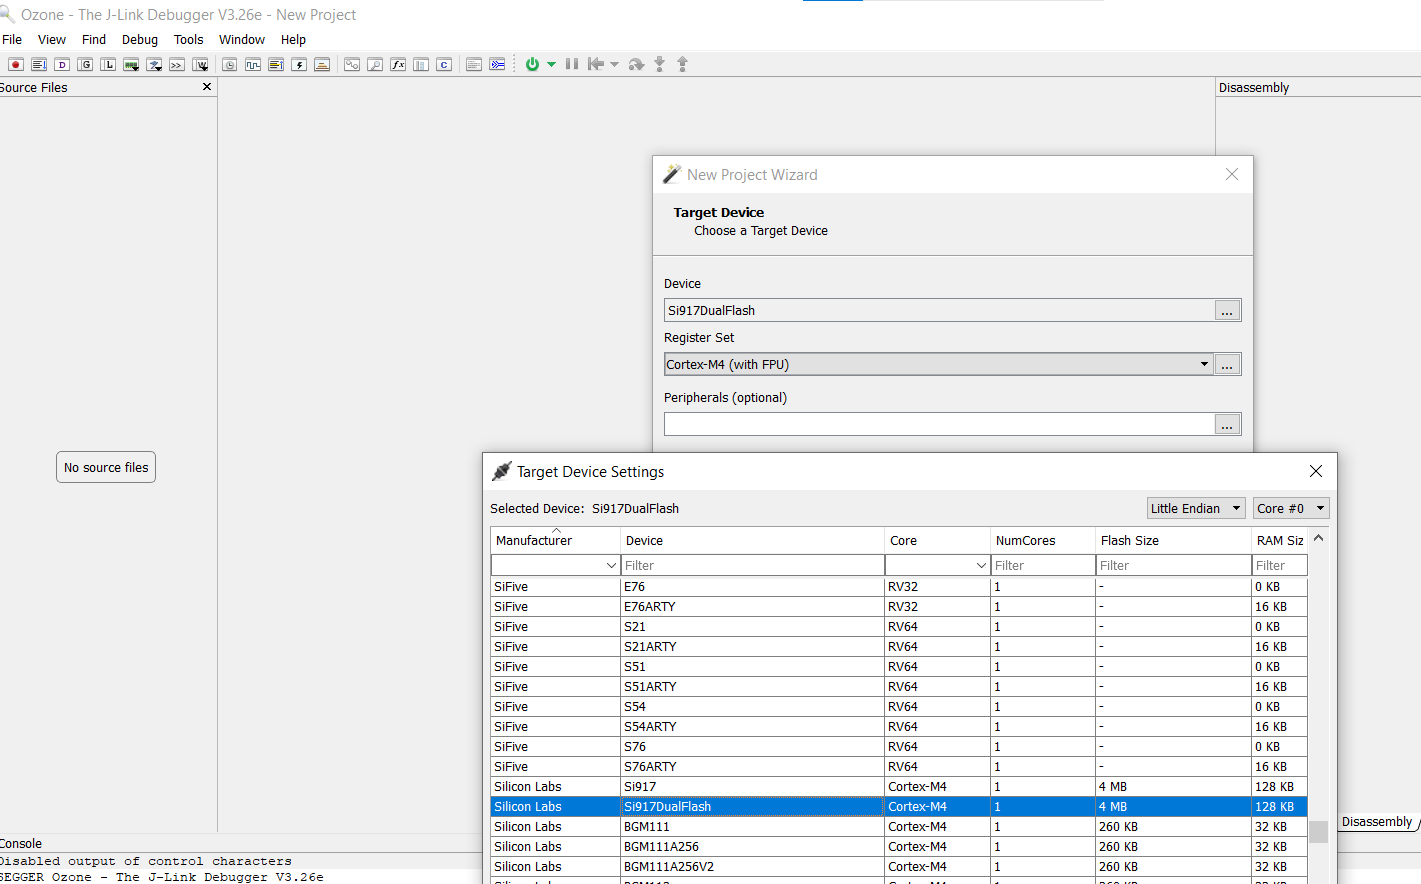
In the New Project Wizard:
Click the three dots (
...) on the Device tab and select the Manufacturer asSilicon Labs.Select the Device as
Si917DualFlash.Click OK.
The Register set tab is populated automatically.
Note: Entering data in the Peripherals tab is optional.
Click Next. A window will be displayed showing the following:
Serial Number: Read from device
Target Interface: JTAG
Speed: 4MHz
Host Interface: USB
One Product in the Emulators connected via USB tab
Select the Product shown in the Emulators connected via USB tab and click Next.
Click the detected Silicon Labs device that gets displayed and click Next.
Click the three dots (
...) on that tab, select Browse and choose the*.outimage you wish to flash and run. Click Next.Make sure the next screen has Initial PC selected as
Read from Base Address Vector Tableand click Finish.A Diagnostics Warning may be displayed about FreeRTOS being detected. Click Continue.
Select Download and Reset Program in the dropdown next to the Power button on the top-left hand corner of the page.
The SiWx917 SoC device will be erased and programmed.
Click Reset Program to main (F4) next to the Play/Pause button on the top-left hand corner of the page.
Note: This will reset the MCU after flashing the application.
Run the image by clicking the Resume/Halt button on the top-left hand corner of the page (or press the F5 key).
Note:
The output of the SiWX917 SoC application will be displayed on the Ozone terminal or J-Link RTT Client.
The RTT Client is provided with Ozone and does not have to be downloaded separately.