Serial Port Communication on the Silicon Labs Platform#
The matter-shell exposes the configuration and the management APIs via the matter command line interface (matter CLI). This interface can be used to change the state of the device.
Hardware Requirements#
To run matter shell on the Silicon Labs Platform, refer to the Hardware Requirements.
Software Requirements#
To run matter shell on the Silicon Labs Platform, refer to the Software Requirements.
Execute Matter Shell on Silicon Labs Platform#
Download and Install Simplicity Studio.
To install the software packages for Simplicity Studio, refer Software Package Installation.
Log in to Simplicity Studio and connect the EFR32MG2x or SiWx917 SOC board to the computer.
Go to the All Products section.
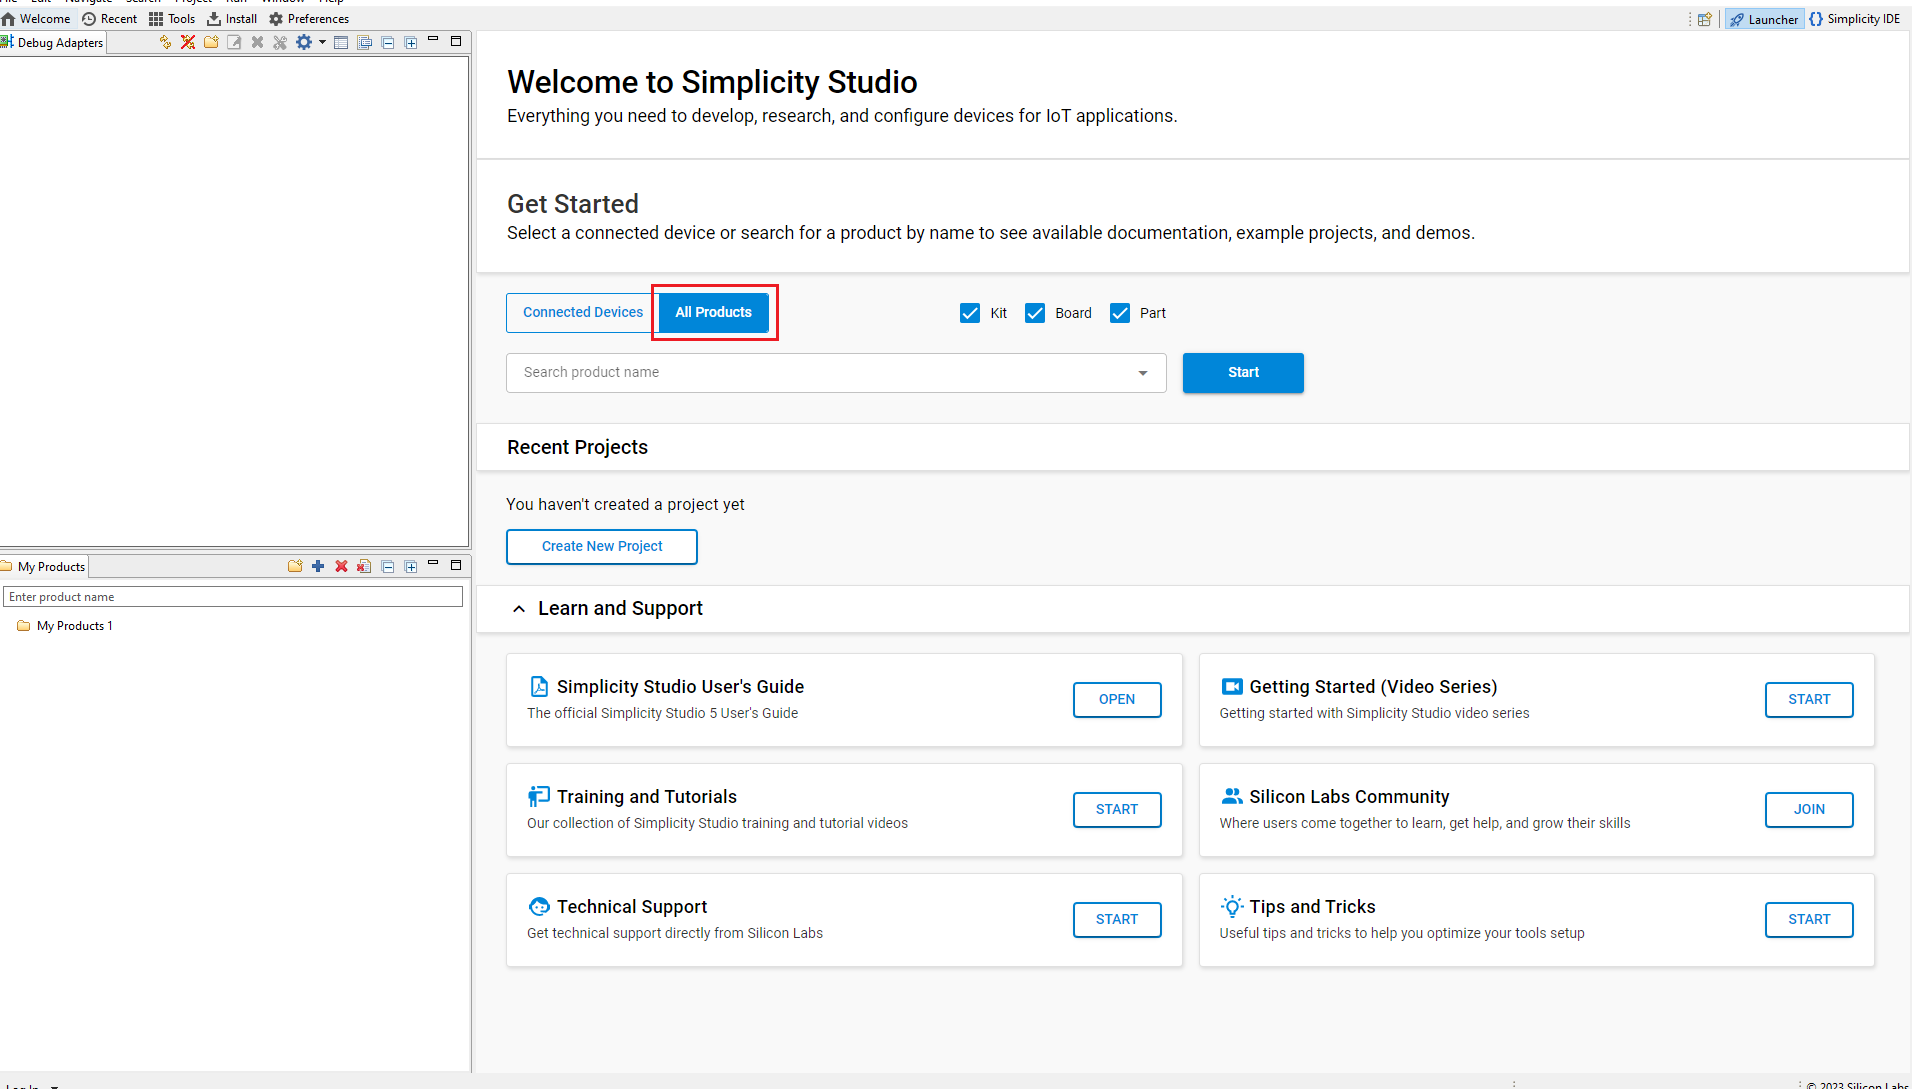
Type and Select the radio board from the displayed list and select Start.
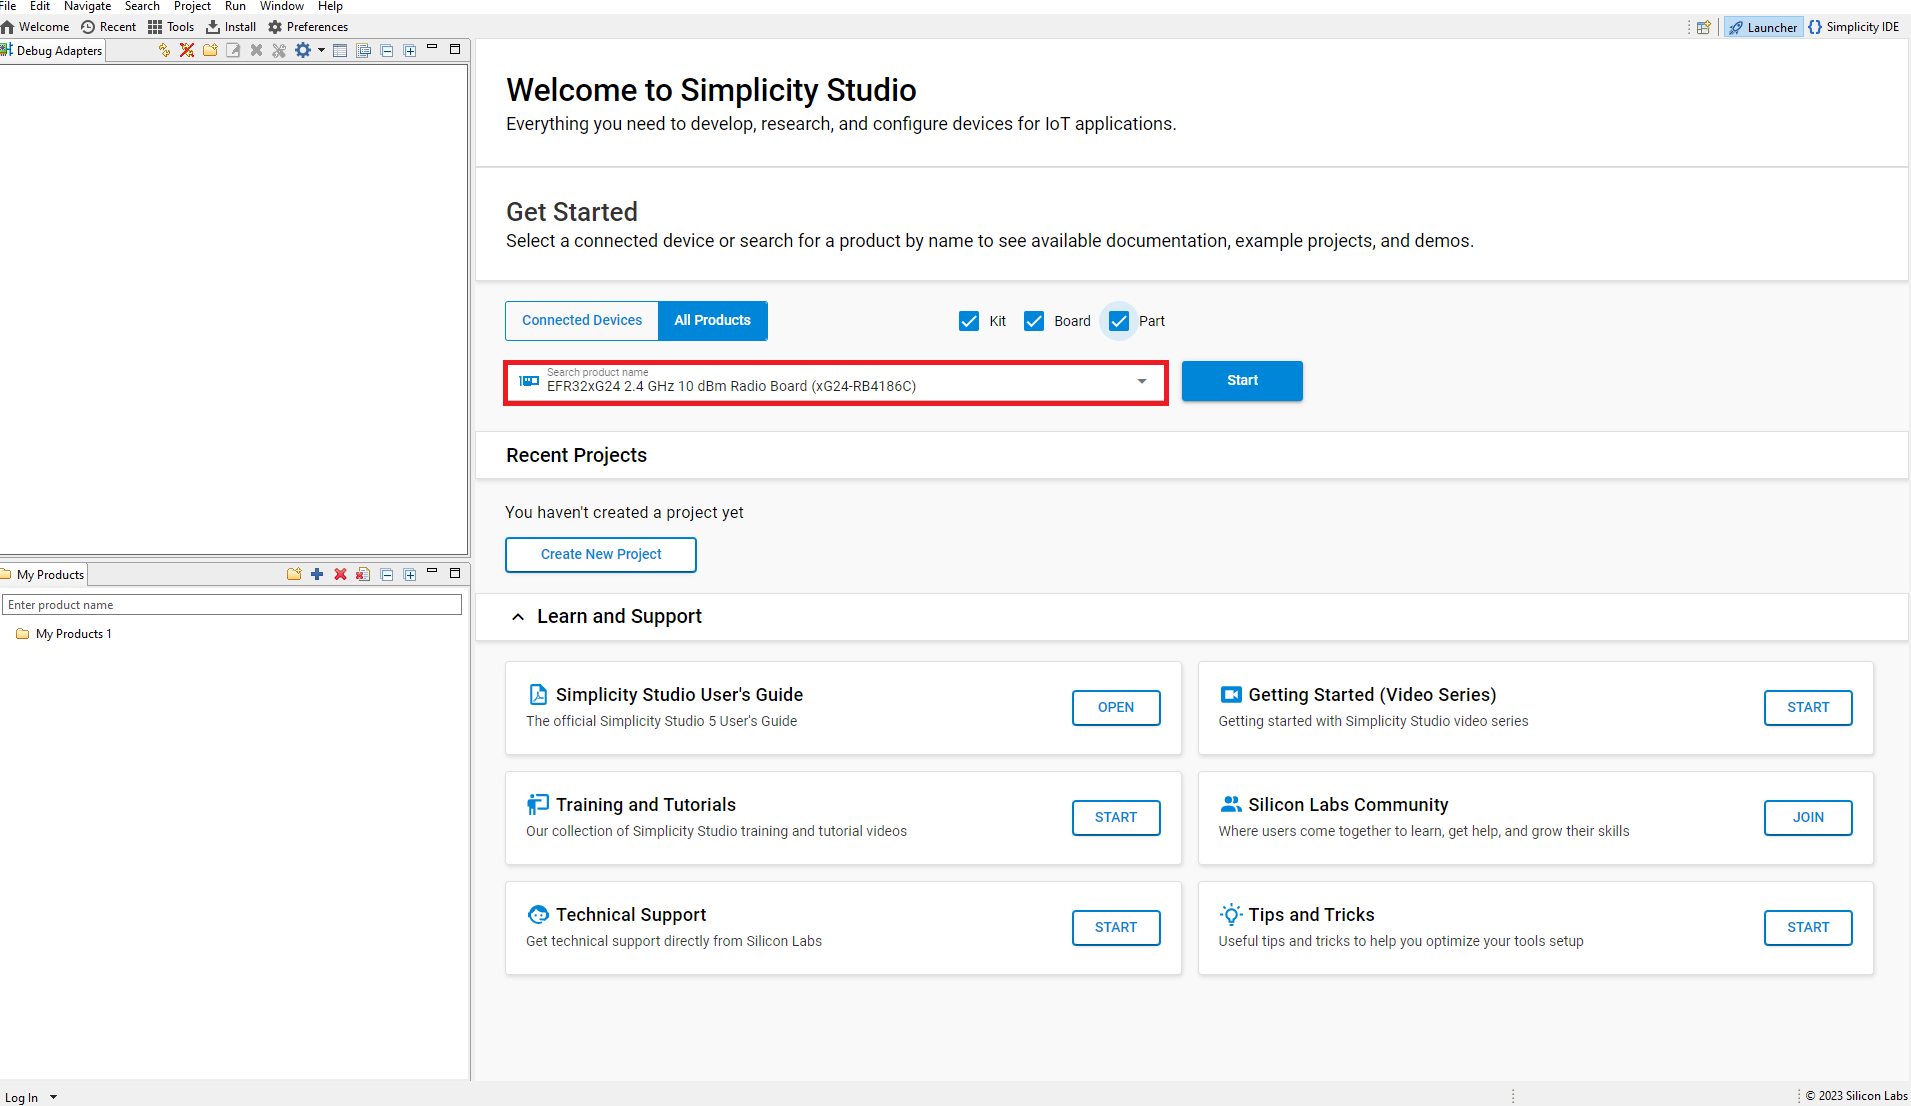
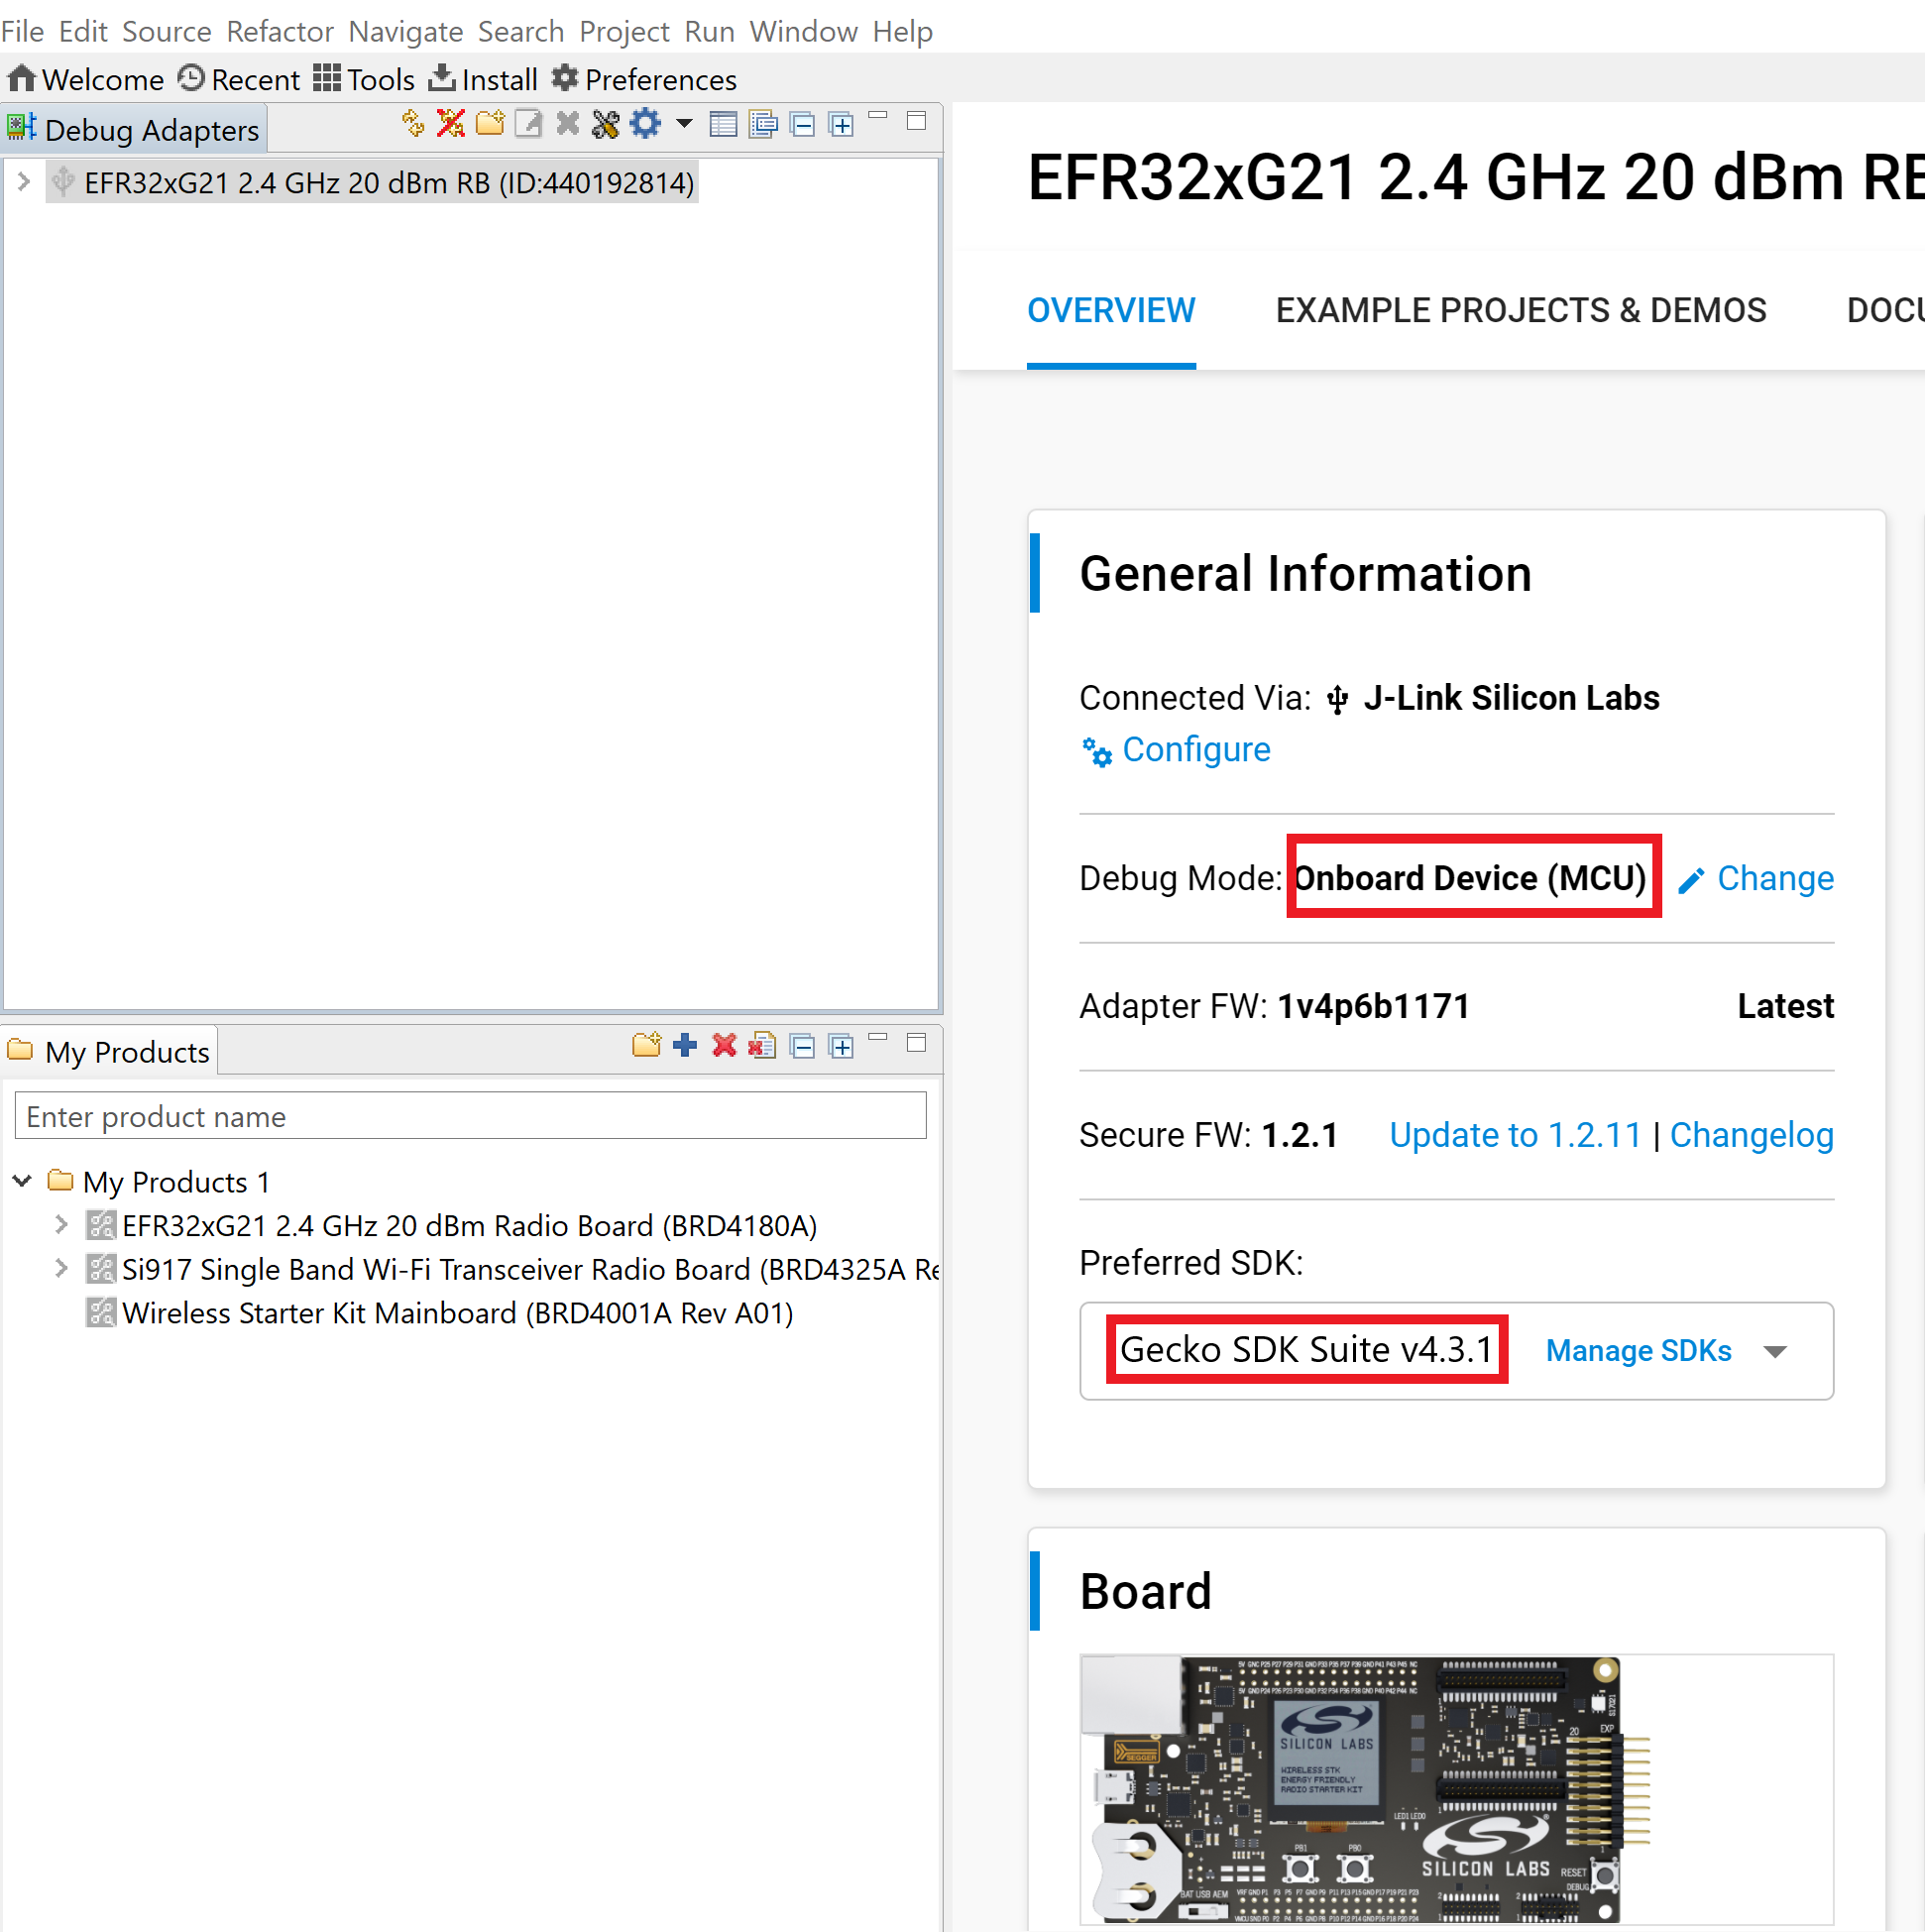
The Launcher page will display the selected radio board's details.

Verify the following in the General Information section:
The Debug Mode is Onboard Device (MCU).
The Preferred SDK is the version you selected earlier.
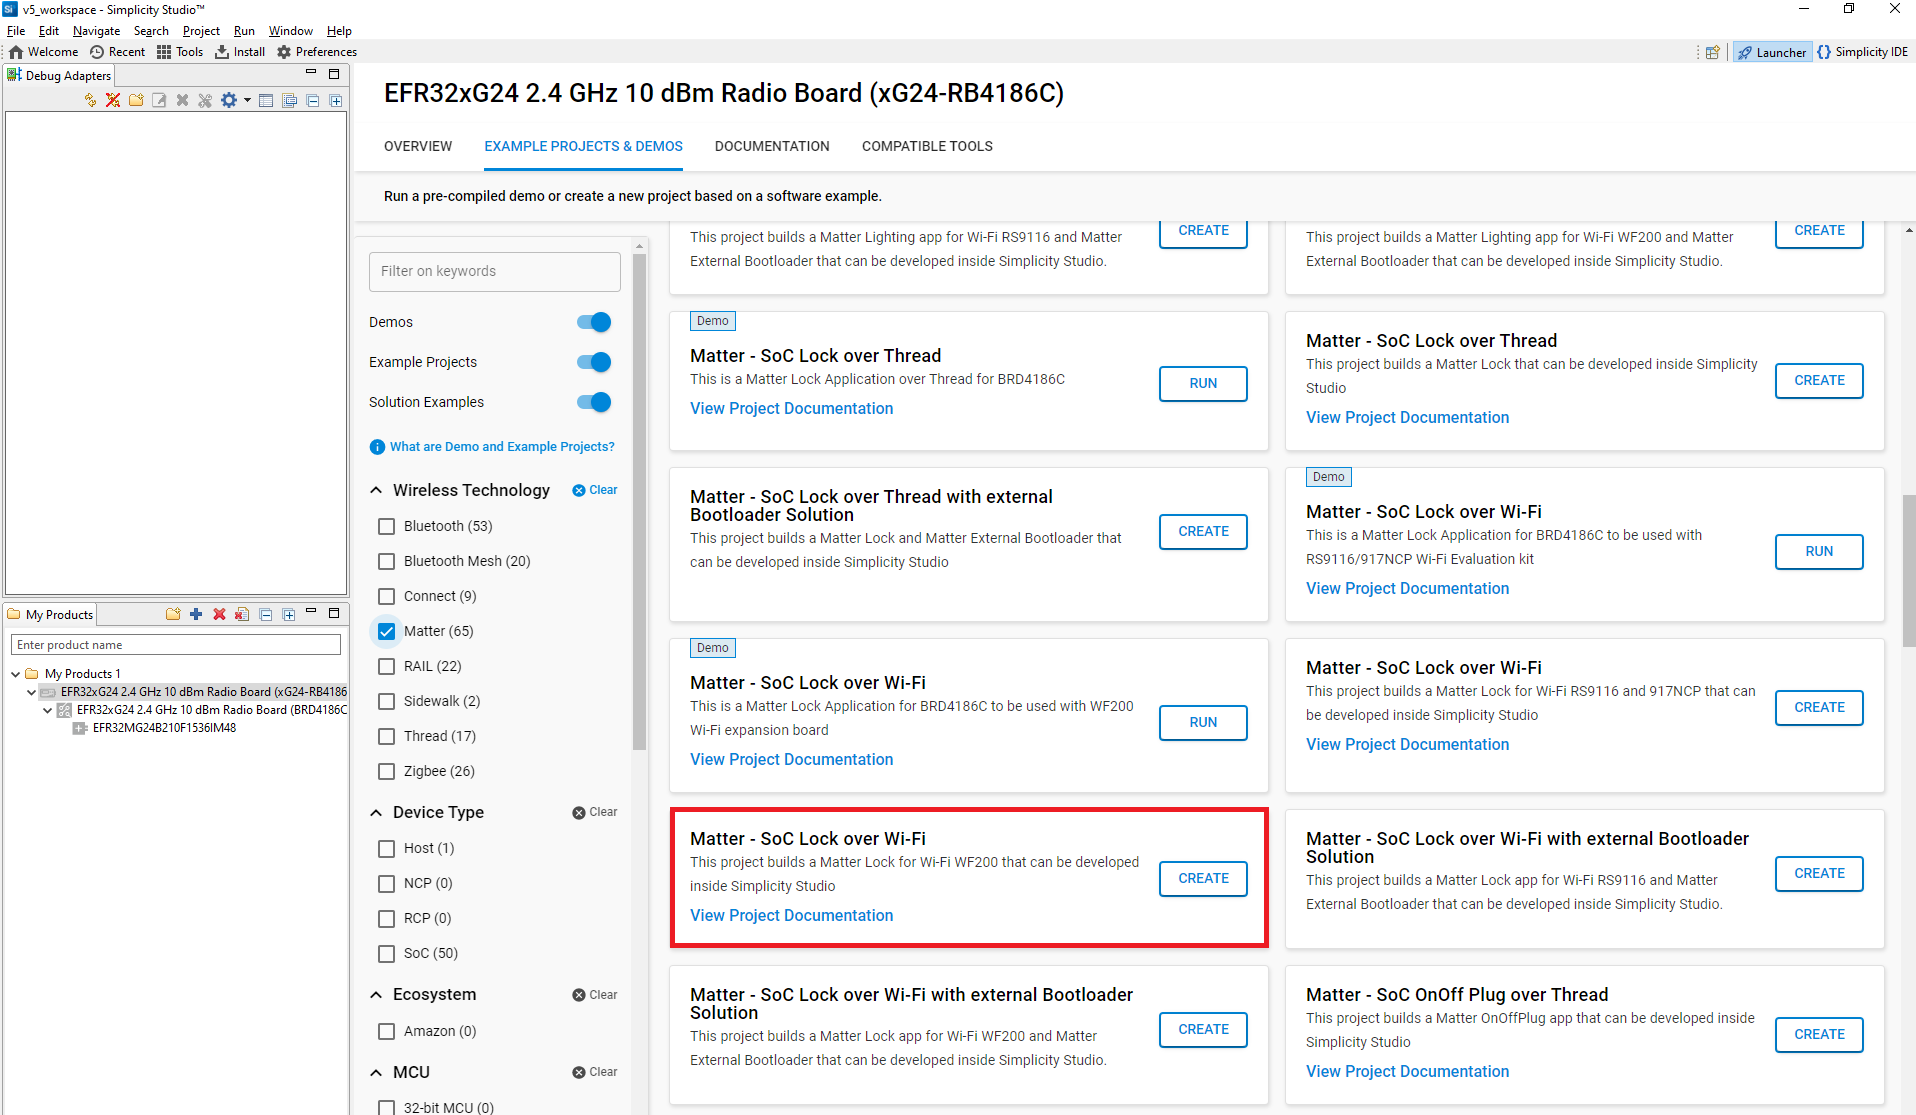
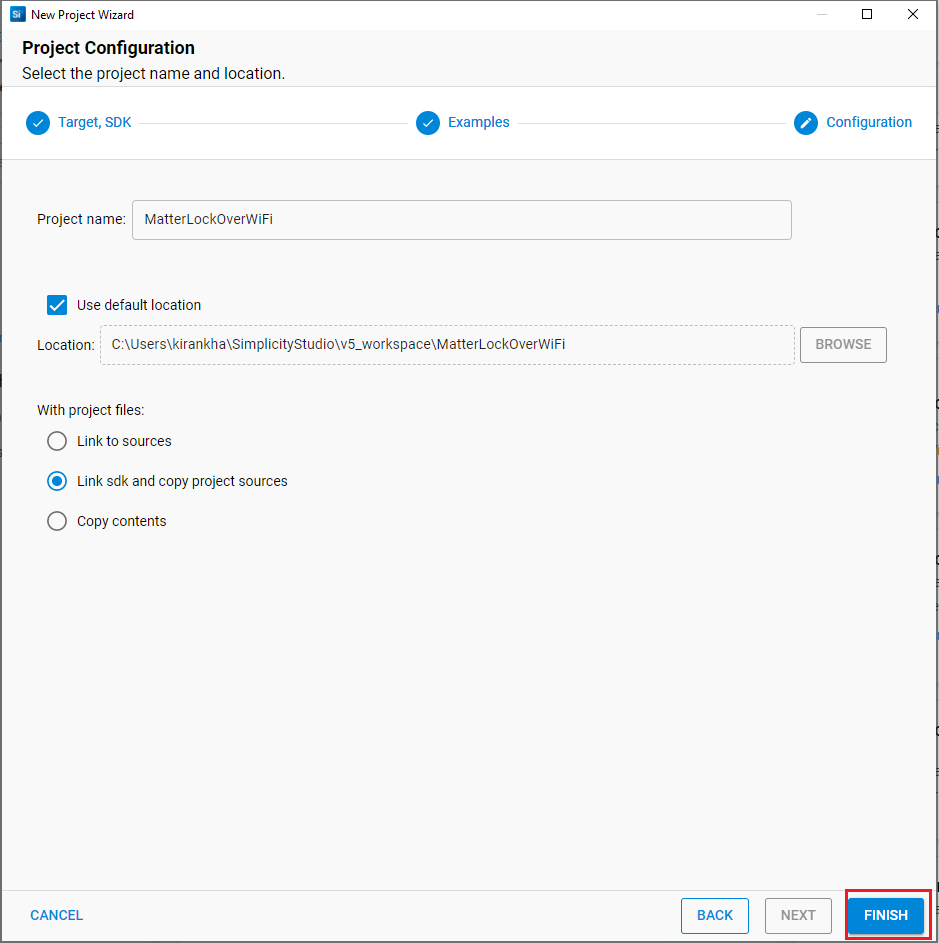
Open the Example Projects and Demos tab and create a project for Matter Lock Application.
In the New Project Wizard window, click Finish.
After creation of project, open the Software Components tab and in search bar type Matter Shell and install it.
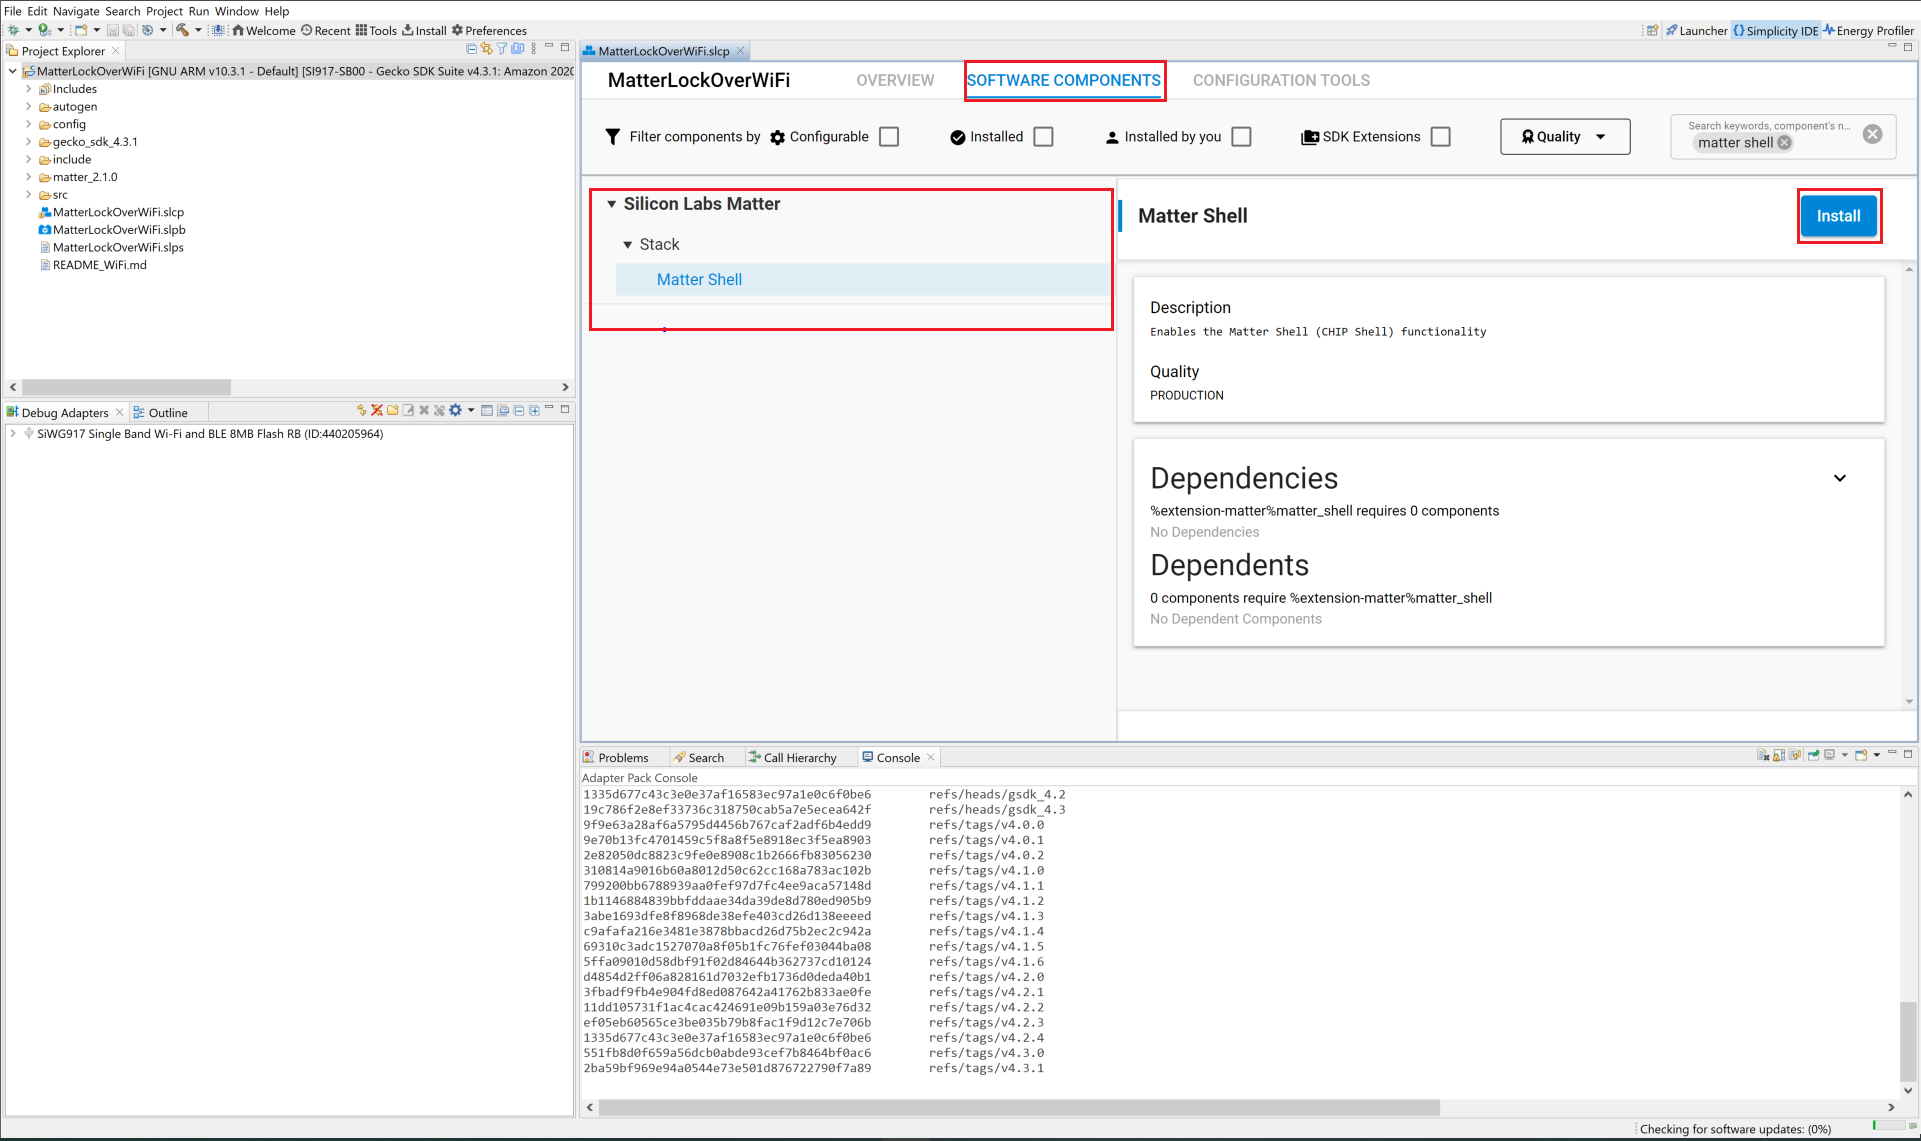
Build the project after enabling Matter Shell component.
After a successful build, commission the device as described in Commission Matter Platform.
For SiWx917 SOC Connect the TTL cables with Radio Board to execute Matter Shell.
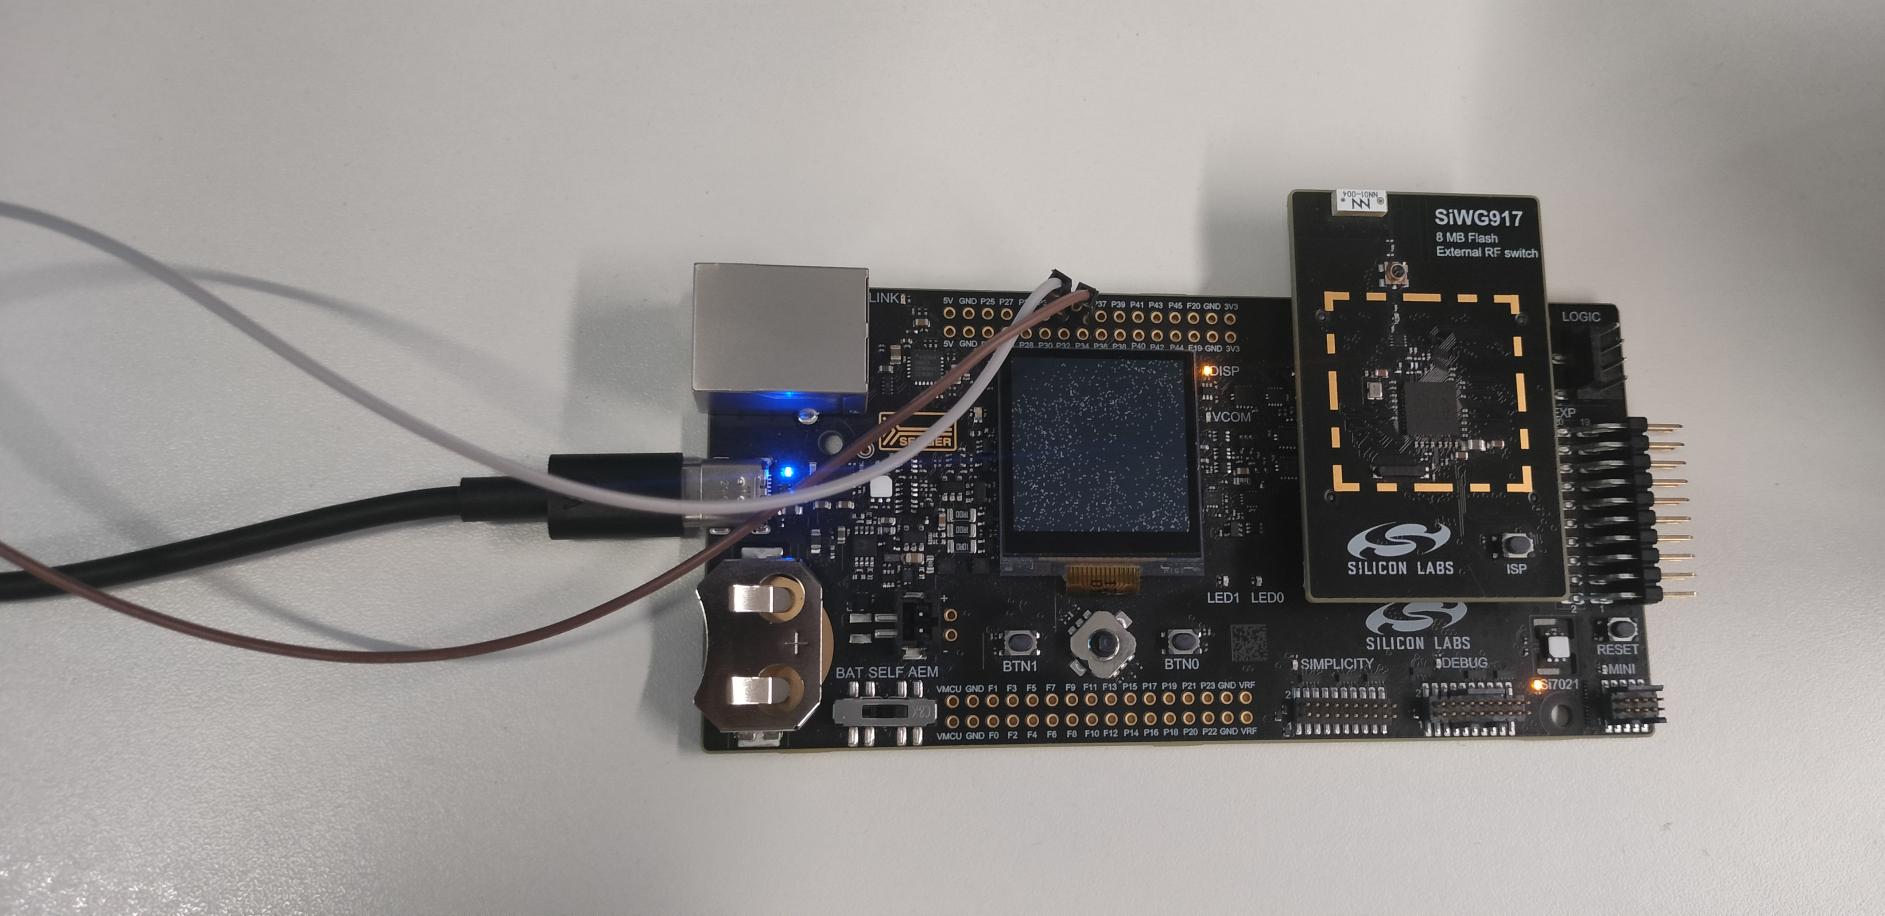
Note:- For EFR32MG2x Devices TTL Cable support is not required.
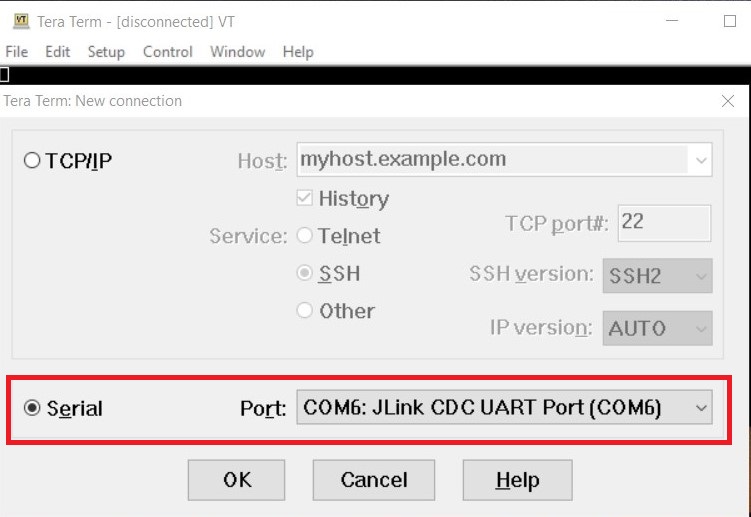
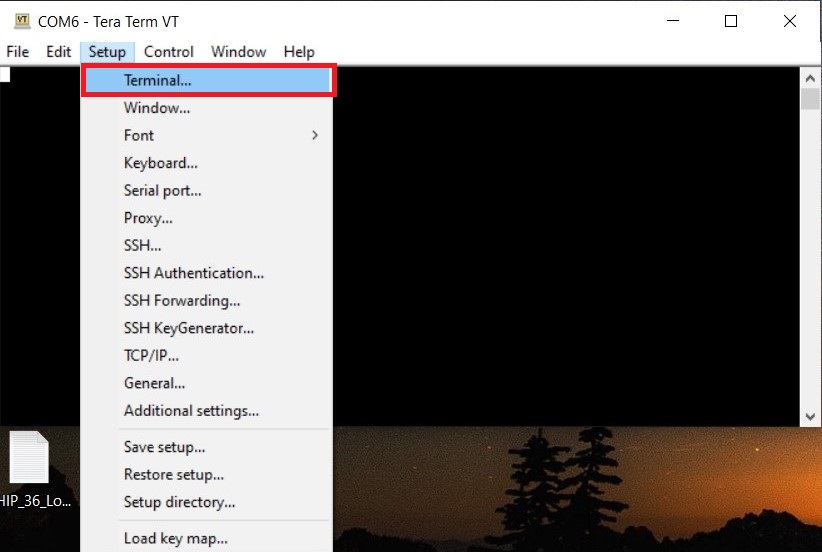
Open Tera Term and under New Connection, under Serial Port, select JLink port and click OK.
Click on Setup from Menu bar and change the value to 115200 under Speed category, then click on New setting.
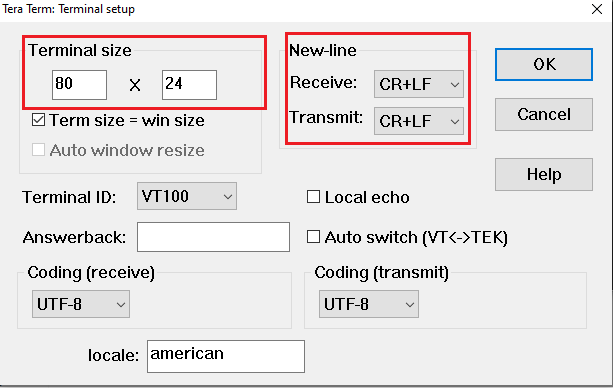
Inside Terminal Set the below values and click OK.
Terminal Size : 80 * 24
New-Line
Receive : CR+LF
Transmit : CR+LF
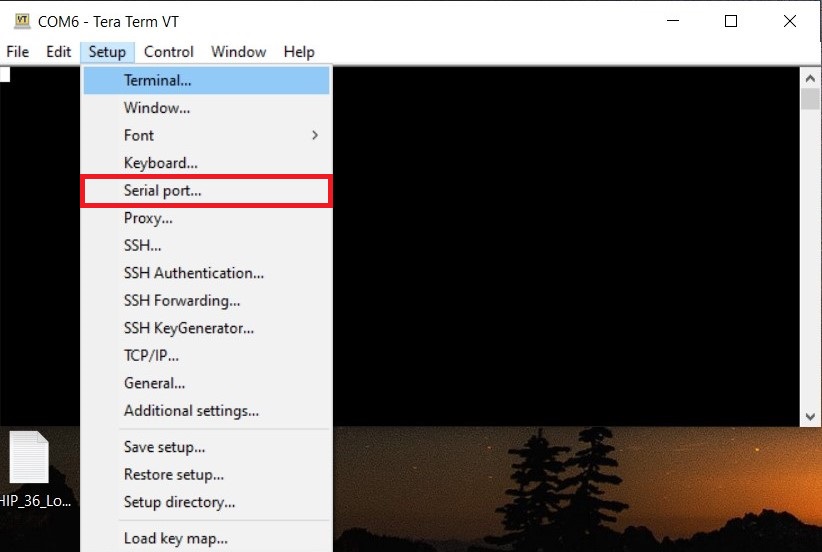
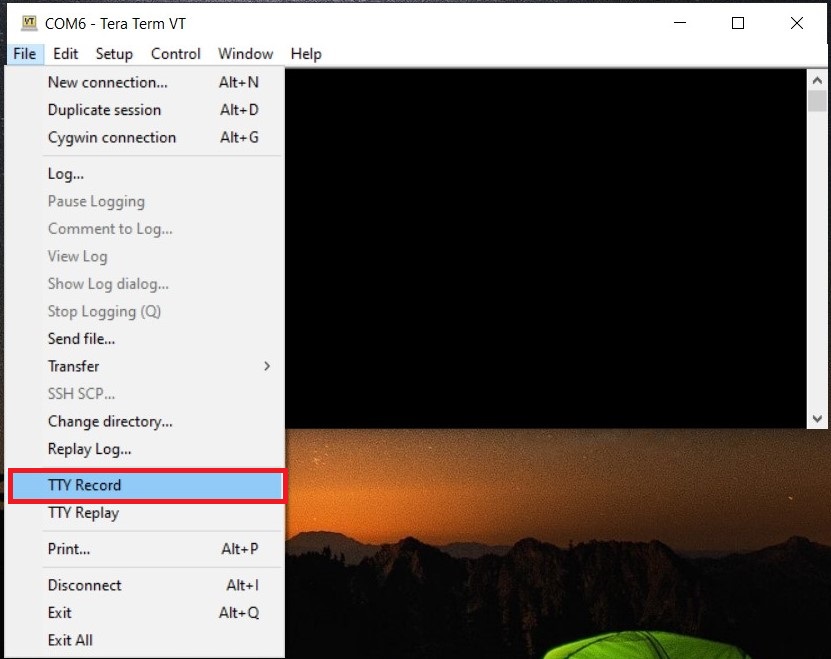
Click on File from Menu bar again, select Serial Port option.
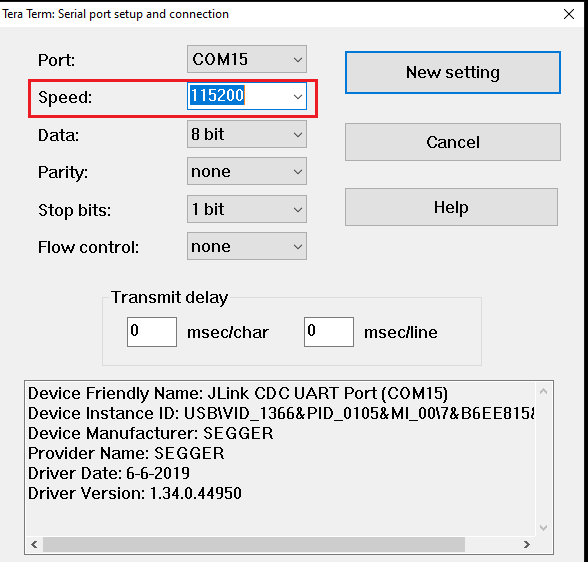
Increase the speed to 115200 and click on New setting.
Click on File from Menu bar, select TTY Record. Create any empty file with extension " .tty " and click on save.
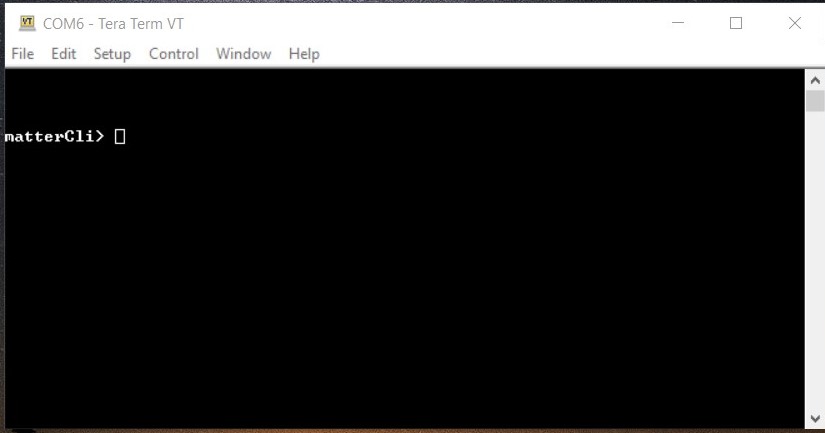
After creating tty file just click on Enter button from Keyboard then it will show you matterCli terminal.
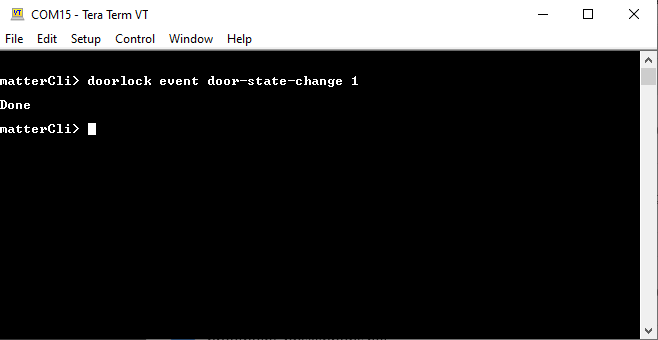
Send any command through matterCli terminal, from the below list of commands:
doorlock event door-state-change "DoorState"
Door State List
DoorOpen = 0
DoorClosed = 1
DoorJammed = 2
DoorForcedOpen = 3
DoorUnspecifiedError = 4
DoorAjar = 5
doorlock event lock-alarm "AlarmCode"
Alarm Code List
LockJammed = 0
LockFactoryReset = 1
LockRadioPowerCycle = 3
WrongCodeEntryLimit = 4
FrontEsceutcheonRemoved = 5
DoorForcedOpen = 6
DoorAjar = 7
ForcedUser = 8
onboardingcodes ble, command will show QR Code.
After changing DoorState and AlarmCode in matterCli, run the commands below using chip-tool on Raspberry PI to verify the event.
To Read Door State
./chip-tool doorlock read-event door-state-change "node_id" "endpoint"
To Read Alarm Code
./chip-tool doorlock read-event door-lock-alarm "node_id" "endpoint"
Note: Type help in matterCli terminal for more information about supported features.