Setting Up AWS Certificates#
AWS IoT Core provides secure, bi-directional communication for Internet-connected devices (such as sensors, actuators, embedded devices, wireless devices, and smart appliances) to connect to the AWS Cloud over MQTT. Refer to AWS IoT Documentation for more details.
Device Registration and Certificate Generation#
Open AWS.
Log in using your AWS credentials.
Go to AWS IoT.
In the left panel, go to Security > Policies and select Create Policy.
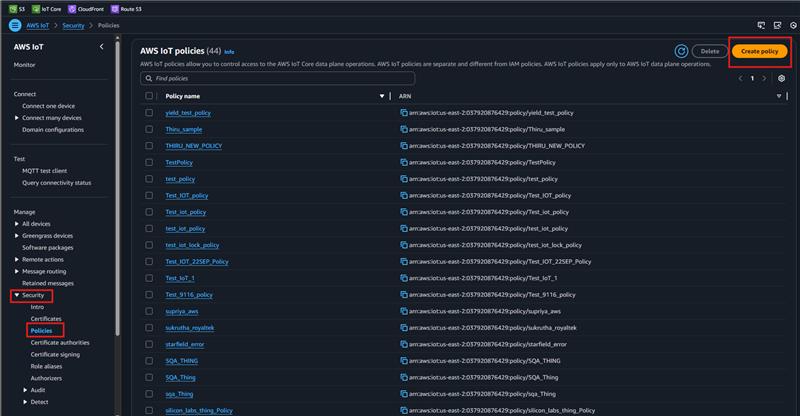
Enter the policy name (e.g.,
MATTER_AWS_POLICY). In the policy statements, select JSON and replace the contents with the JSON provided below:{ "Version": "2012-10-17", "Statement": [ { "Effect": "Allow", "Action": "*", "Resource": "*" } ] }
Once done, select Create.
Create a client CSR certificate and a device key by following the steps in OpenSSL Certificate Creation.
Complete the following steps to create a thing and generate certificates for your Matter application to use in the
MatterAwsNvmCert.cppsource file:Go to All Devices > Things and select Create Things.
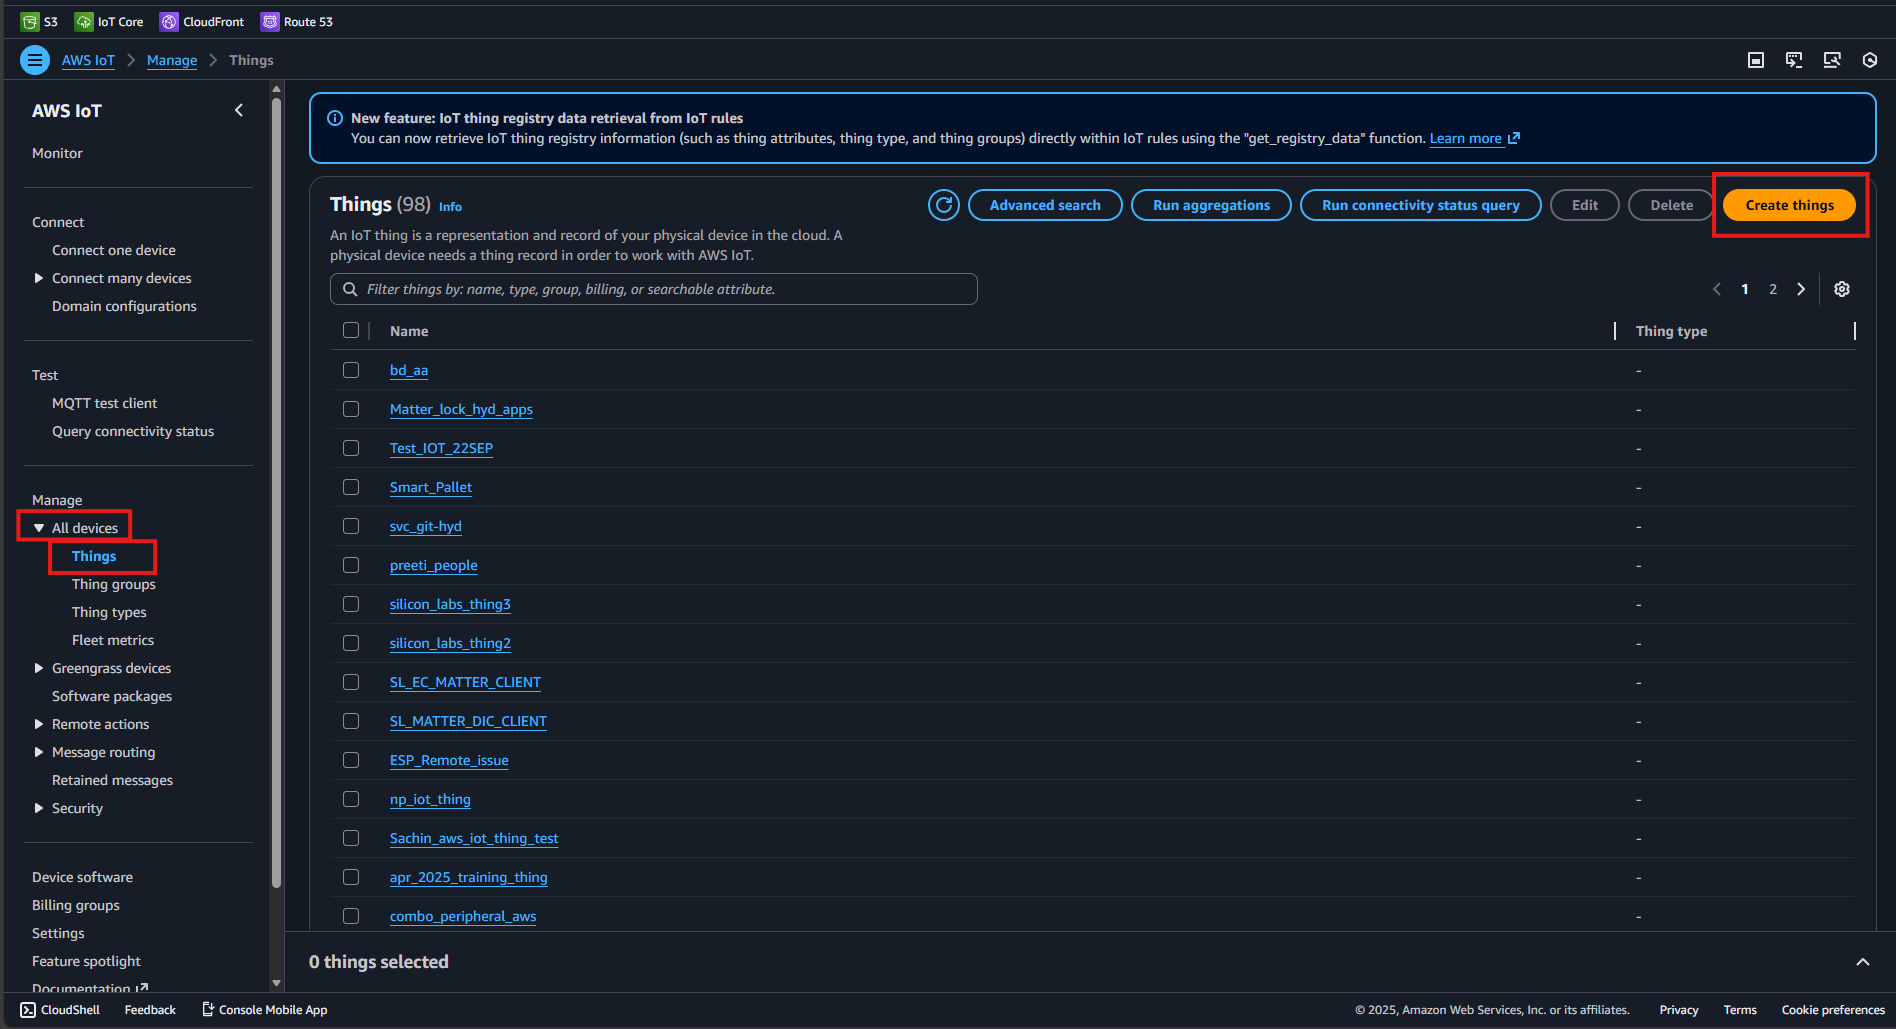
Select Create Single Thing and click Next.
Under Specific thing properties > Thing properties, specify the thing name (this will be the
MATTER_AWS_CLIENT_IDinMatterAwsConfig.h), then click Next.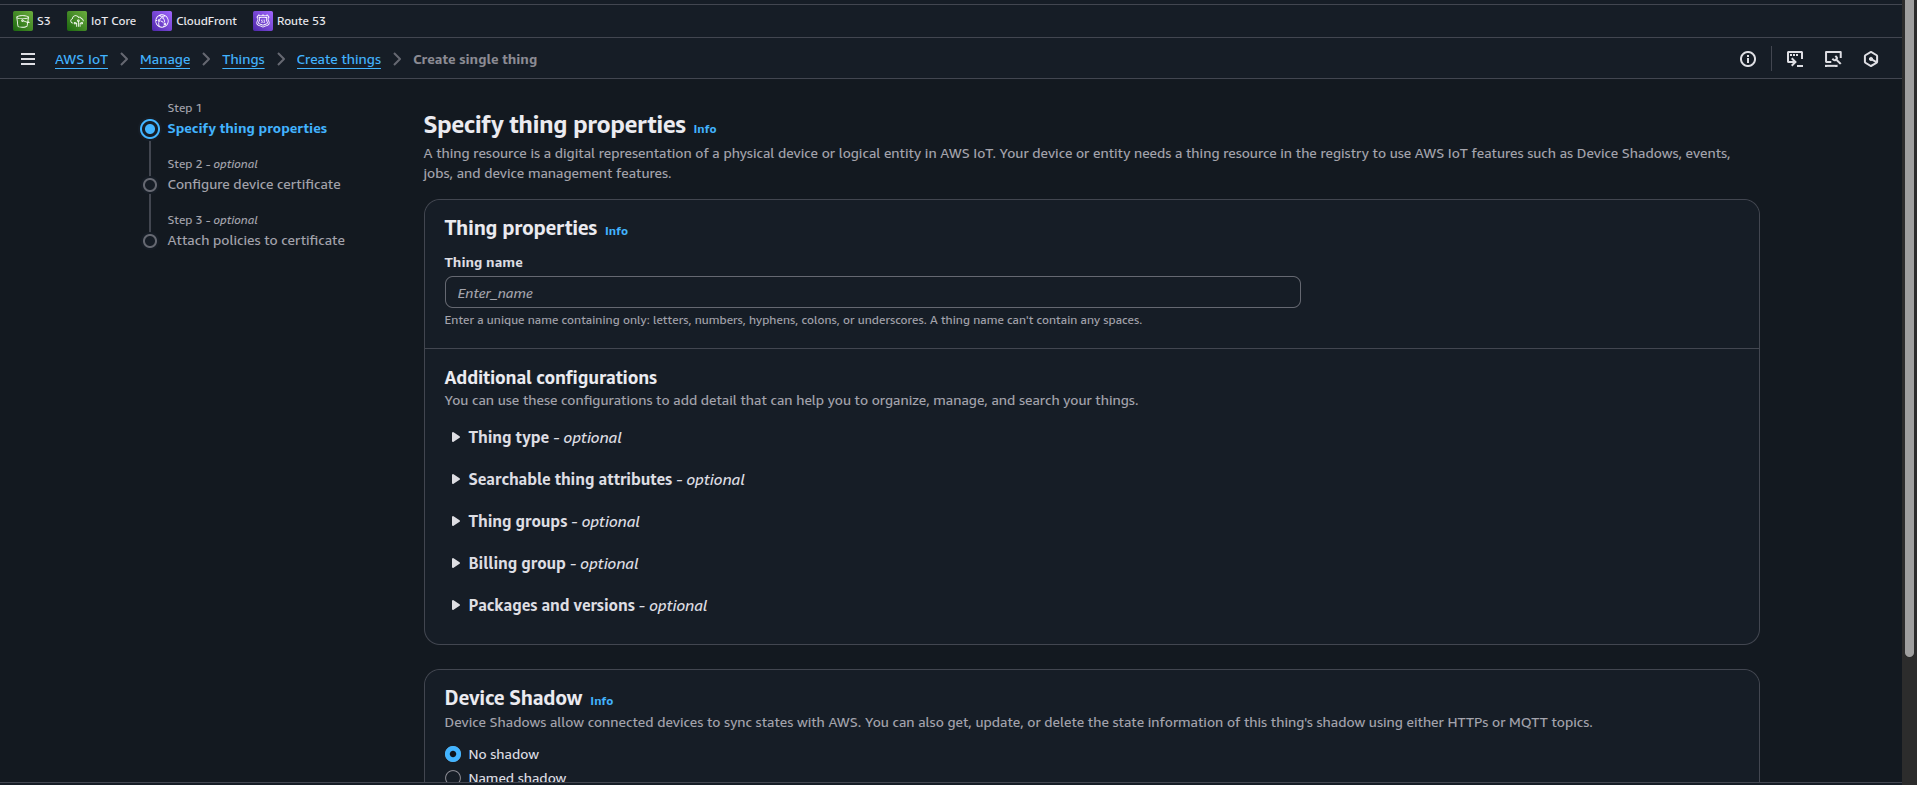
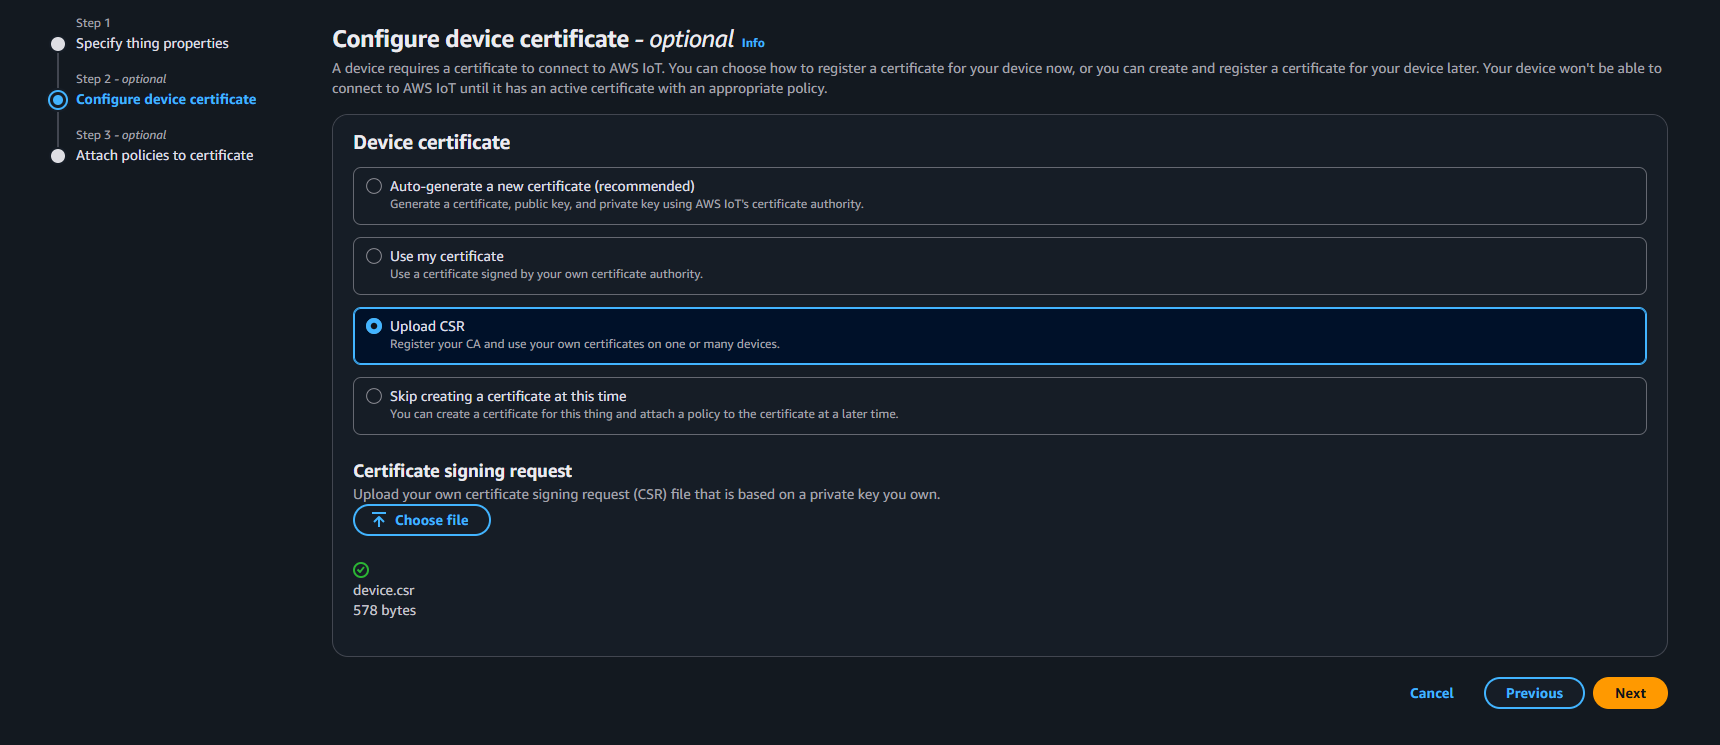
Under Configure device certificate > Device Certificate.
For 917 NCP Dual Stack:
Select Auto-generate a new certificate.
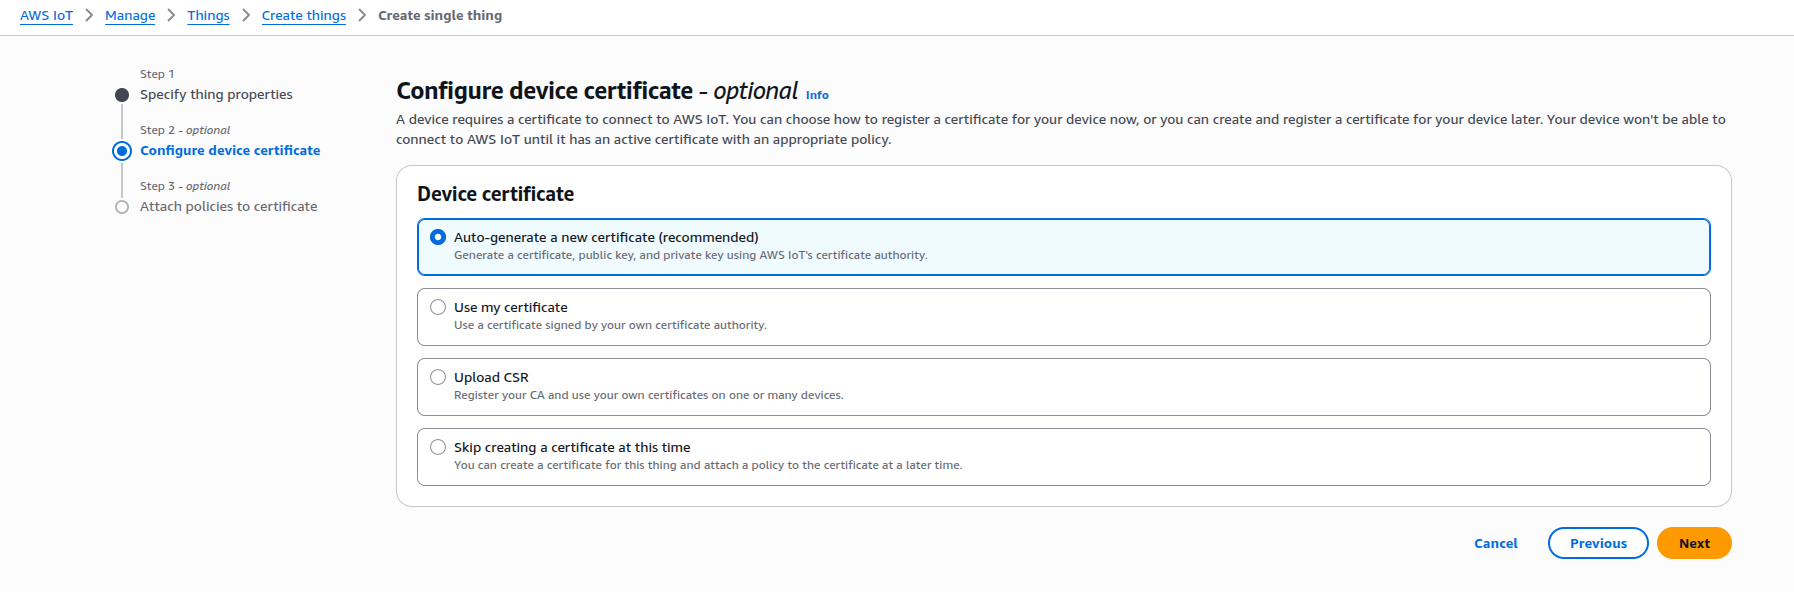
Download the Amazon Root CA1.
Download the Public and Private keys.
Skip Certificate signing request step for 917 NCP Dual Stack.
For 917 NCP and 917 SoC:
Select Upload CSR.
UnderCertificate signing request, click Choose File. (Choose Client CSR generated by Openssl Certificate Creation in Step 6. e.g.,
device.csr).Click Next.
Select the policy (e.g.,
MATTER_AWS_POLICY) created at Step 4.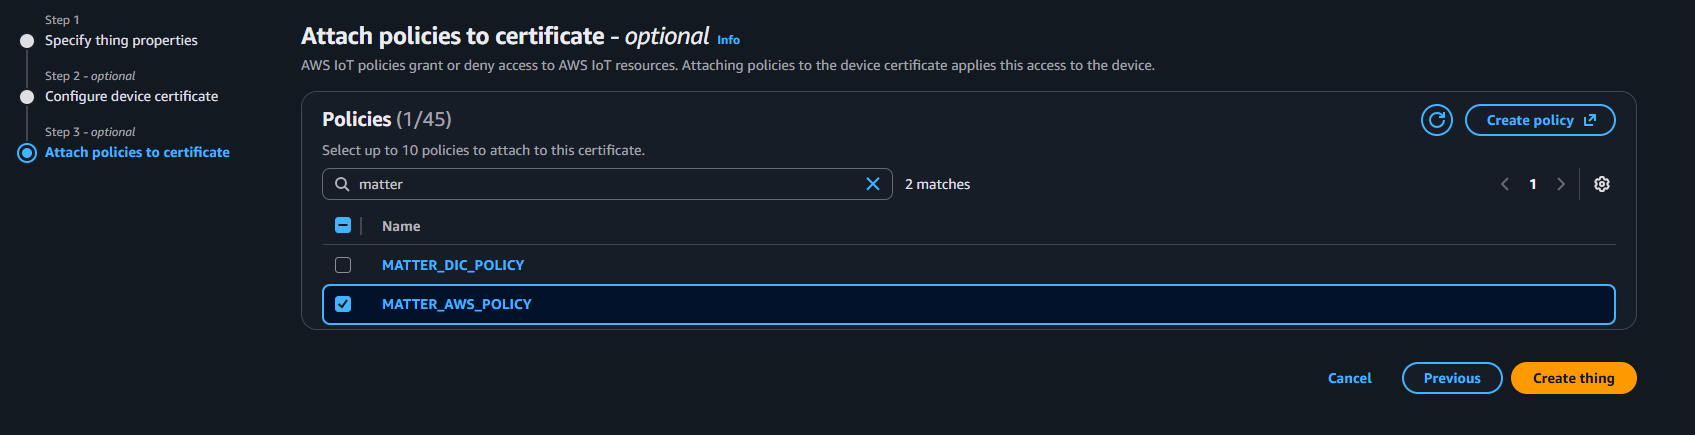
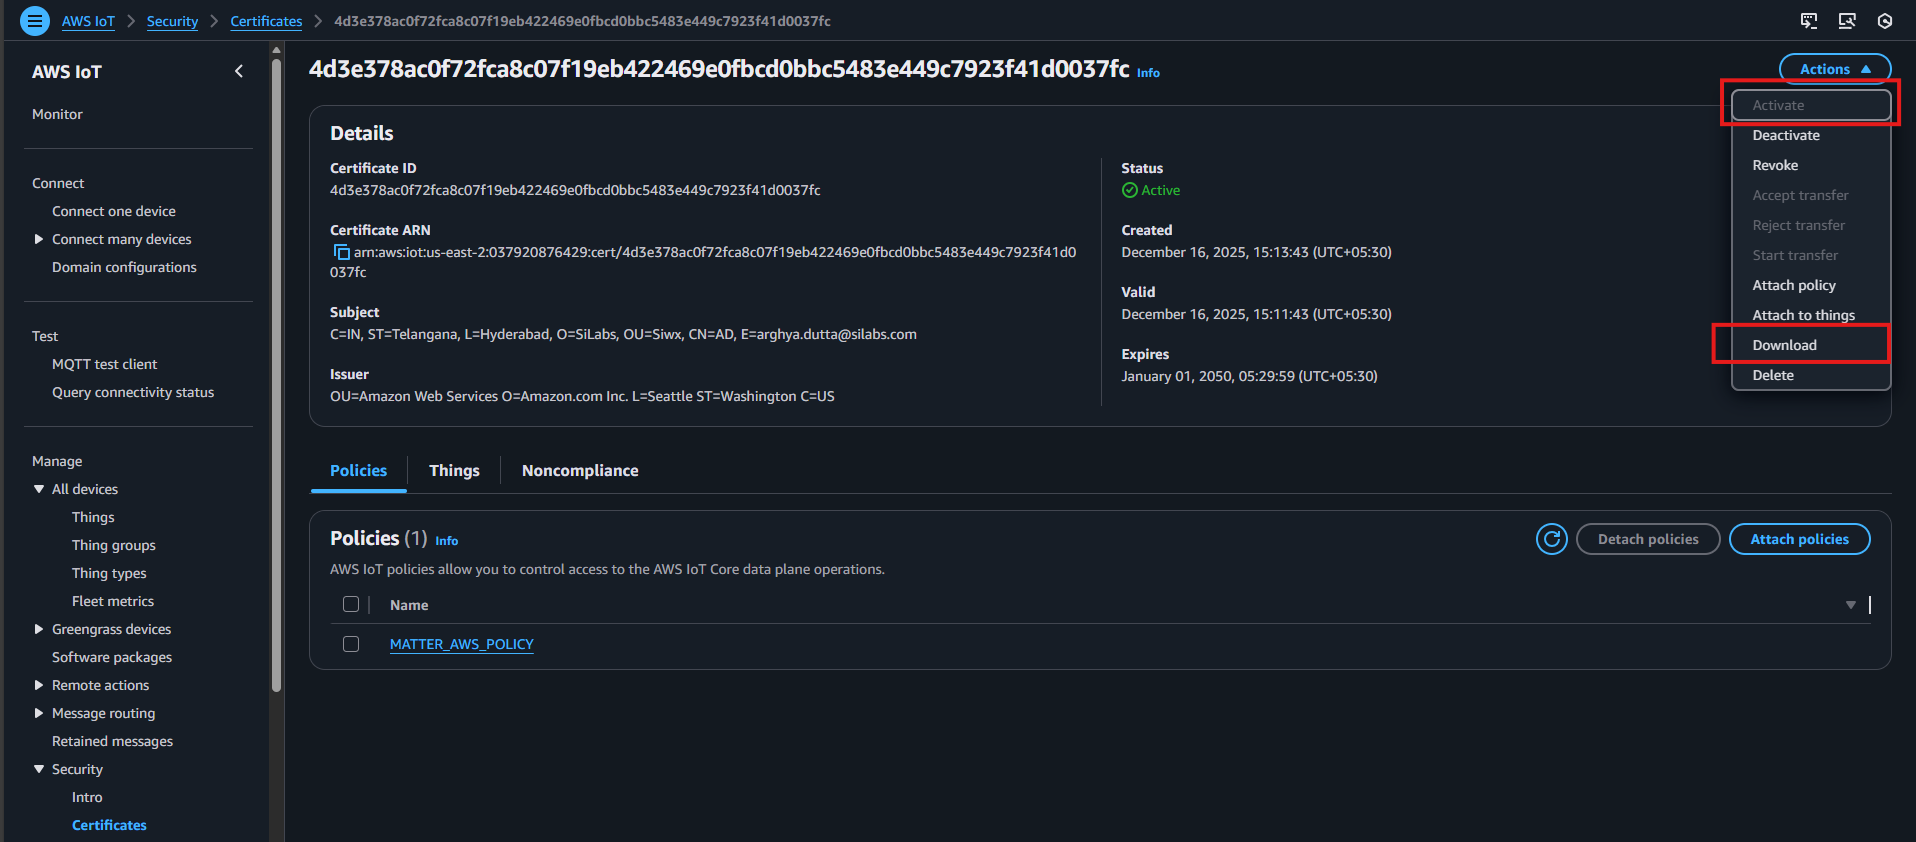
Once the thing is successfully created, click View certificate.

Next:
Activate the certificate.
Download the certificate.
Copy the contents of AWS_CA CERT and add it as CA certificate in
examples/platform/silabs/matter_aws/matter_aws_interface/include/MatterAwsNvmCert.cpp.
Note: In this example, Amazon Root CA3 is used for 917 NCP and 917 Soc, and Amazon Root CA1 is used for 917 Dual Stack.
All the certificate should be added in below format:
char ca_certificate[] = {
"-----BEGIN CERTIFICATE-----\r\n"
"MIIBtjCCAVugAwIBAgITBmyf1XSXNmY/Owua2eiedgPySjAKBggqhkjOPQQDAjA5\r\n"
"MQswCQYDVQQGEwJVUzEPMA0GA1UEChMGQW1hem9uMRkwFwYDVQQDExBBbWF6b24g\r\n"
"Um9vdCBDQSAzMB4XDTE1MDUyNjAwMDAwMFoXDTQwMDUyNjAwMDAwMFowOTELMAkG\r\n"
"A1UEBhMCVVMxDzANBgNVBAoTBkFtYXpvbjEZMBcGA1UEAxMQQW1hem9uIFJvb3Qg\r\n"
"Q0EgMzBZMBMGByqGSM49AgEGCCqGSM49AwEHA0IABCmXp8ZBf8ANm+gBG1bG8lKl\r\n"
"ui2yEujSLtf6ycXYqm0fc4E7O5hrOXwzpcVOho6AF2hiRVd9RFgdszflZwjrZt6j\r\n"
"QjBAMA8GA1UdEwEB/wQFMAMBAf8wDgYDVR0PAQH/BAQDAgGGMB0GA1UdDgQWBBSr\r\n"
"ttvXBp43rDCGB5Fwx5zEGbF4wDAKBggqhkjOPQQDAgNJADBGAiEA4IWSoxe3jfkr\r\n"
"BqWTrBqYaGFy+uGh0PsceGCmQ5nFuMQCIQCcAu/xlJyzlvnrxir4tiz+OpAUFteM\r\n"
"YyRIHN8wfdVoOw==\r\n"
"-----END CERTIFICATE-----\r\n"
};In
MatterAwsNvmCert.cppfile are the following:char ca_certificate[] - Fill it with AWS_CA CERT (mentioned above).
char device_certificate[] - Fill it with Device Certificate downloaded from AWS in Step 7.
char device_key[] - Fill it with Device Key generated in Step 6.
Repeat Step 6 to create a new thing for use in MQTT Explorer, using the certificate generated for MQTT Explorer during OpenSLL certificate creation (e.g.,
explorer.csr). Create a.pemfile from the CA certificate in Step 8 and use it as the server certificate in MQTT Explorer.Note: The thing name must be unique as it will be used as the client ID.