Custom Decoder#
Extend Network Analyzer with custom protocol decoders. A decoder is an Eclipse plug-in that reads raw packet payload bytes and converts them into meaningful, structured fields that Network Analyzer can display. Custom decoders are useful for proprietary or application-specific protocols that the standard Network Analyzer decoders don't fully interpret.
The extension template in the repository is designed for creating custom Network Analyzer payload decoders. Use a custom decoder to:
Inspect proprietary packet formats without manually decoding raw bytes.
Display protocol fields with clear names and values.
Make packet traces easier to debug, review, and share.
Add application-specific protocol knowledge to Network Analyzer.
Network Analyzer supports custom decoders through Eclipse plug-ins. A custom decoder implements the IPayloadDecoder interface and registers with the com.silabs.na.extension.payloadDecoder extension point. After you install the plug-in, Network Analyzer discovers the decoder automatically.
Add a Custom Decoder to Network Analyzer#
Complete these setup, implementation, export, and installation steps to make a custom decoder available in Network Analyzer.
Step 1: Install the Required Eclipse IDE#
Install Eclipse IDE for RCP and RAP Developers from the Eclipse packages page. This version includes the plug-in development tools that you need to build a Network Analyzer extension.
Step 2: Clone and Import the Extension Project#
Clone the Network Analyzer Extension repository:
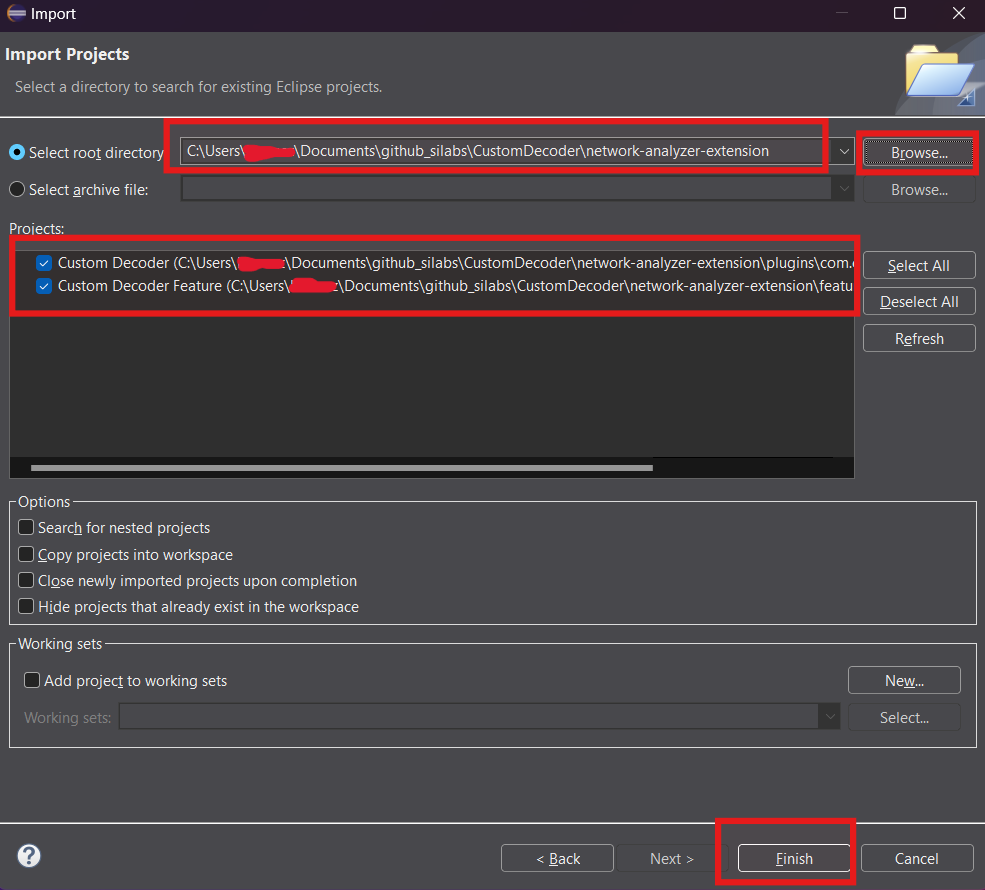
git clone git@github.com:SiliconLabsSoftware/network-analyzer-extension.gitIn Eclipse, select File > Import > General > Existing Projects into Workspace.
Select the
network-analyzer-extensiondirectory, and then finish the import.
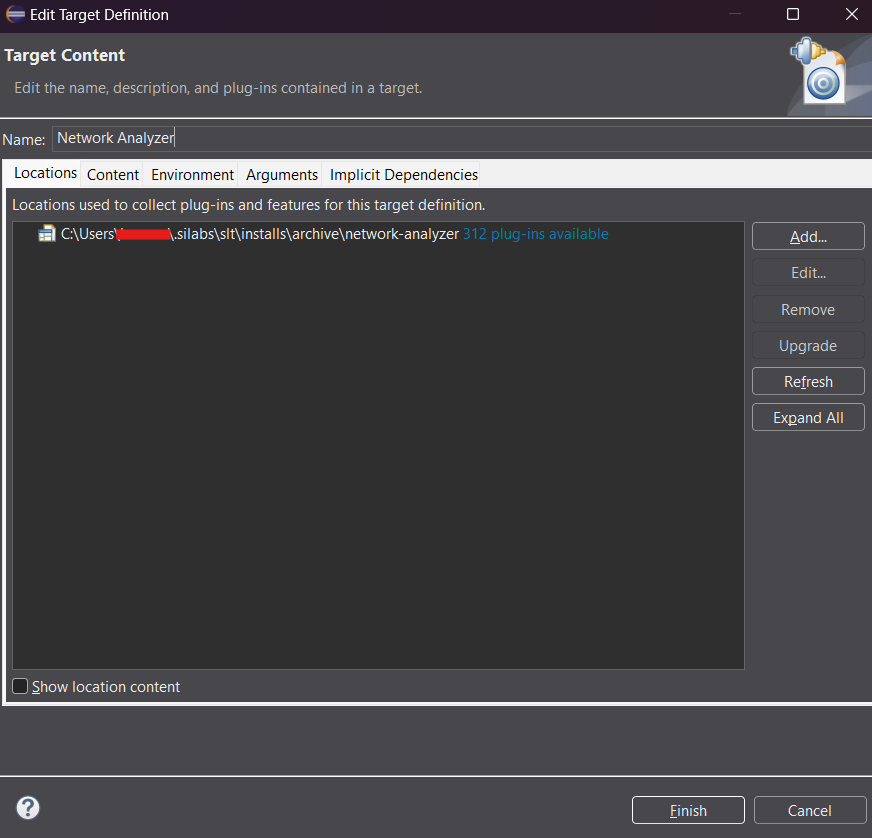
Step 3: Configure the Network Analyzer Target Platform#
In Eclipse, select Window > Preferences > Plug-in Development > Target Platform.
Select Add. Then select Nothing: Start with an empty target definition as the starter target definition.
Browse to the Network Analyzer installation directory. Typical installation paths are:
macOS:
Macintosh HD/Users/USERNAME/.silabs/slt/installs/archive/network-analyzer/Network Analyzer.app/Contents/Eclipse/Windows:
C:\Users\USERNAME\.silabs\slt\installs\archive\network-analyzerLinux:
/opt/network-analyzer/
Note: On macOS, select the
Eclipsefolder inside the.appbundle. The selected directory must contain thepluginsandfeaturesfolders.After you add the target platform, activate it.
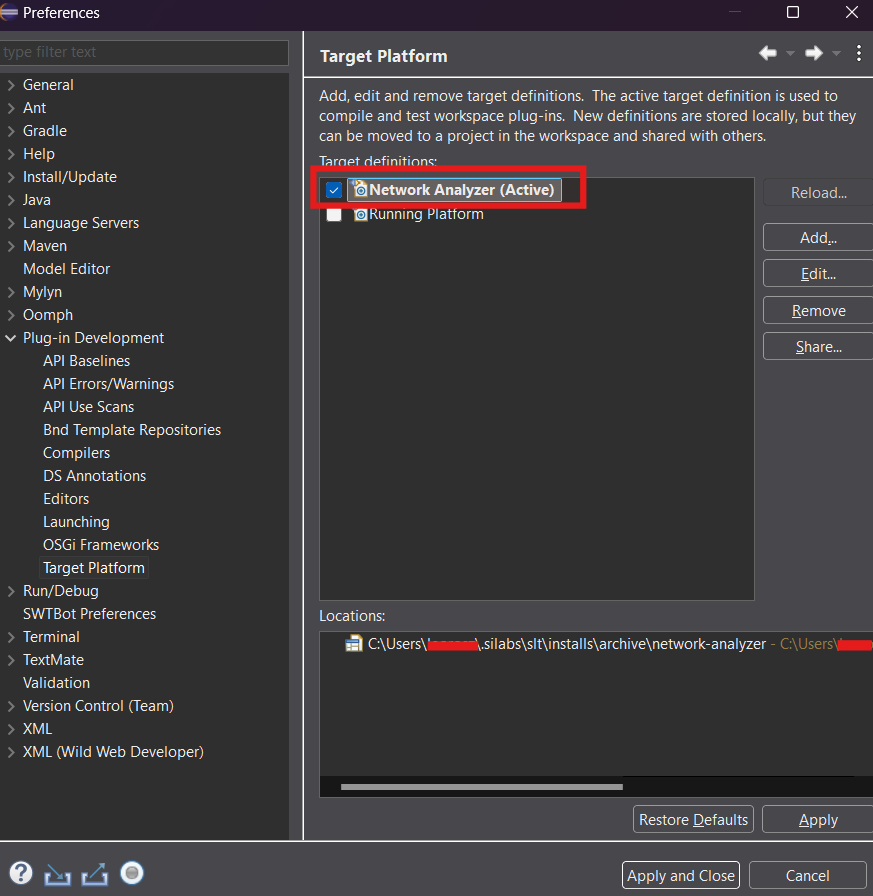
After you add and activate the target platform, project errors should be resolved.
Step 4: Implement the Protocol Decoding Logic#
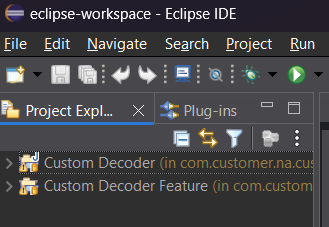
In Eclipse Project Explorer, open the sample decoder in the custom decoder project:
com.customer.na.custom/src/com.customer.na.custom.decoder/CustomPayloadDecoder.java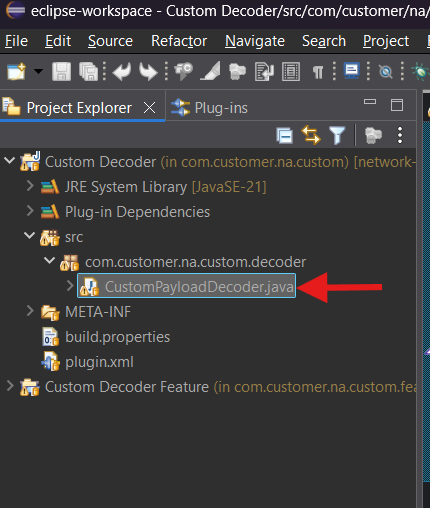
Update the decoder logic for your protocol by modifying these methods:
accept()decode()
Use
accept()to decide whether the decoder should process a packet. Usedecode()to parse the packet payload into fields that Network Analyzer can display.
Step 5: Export the Decoder Plug-In#
In Eclipse, select File > Export > Plug-in Development > Deployable Features.
Select the feature project, choose an export destination, and then finish the export.
Step 6: Install the Decoder in Network Analyzer#
In Network Analyzer, select Help > Install New Software > Add > Local.
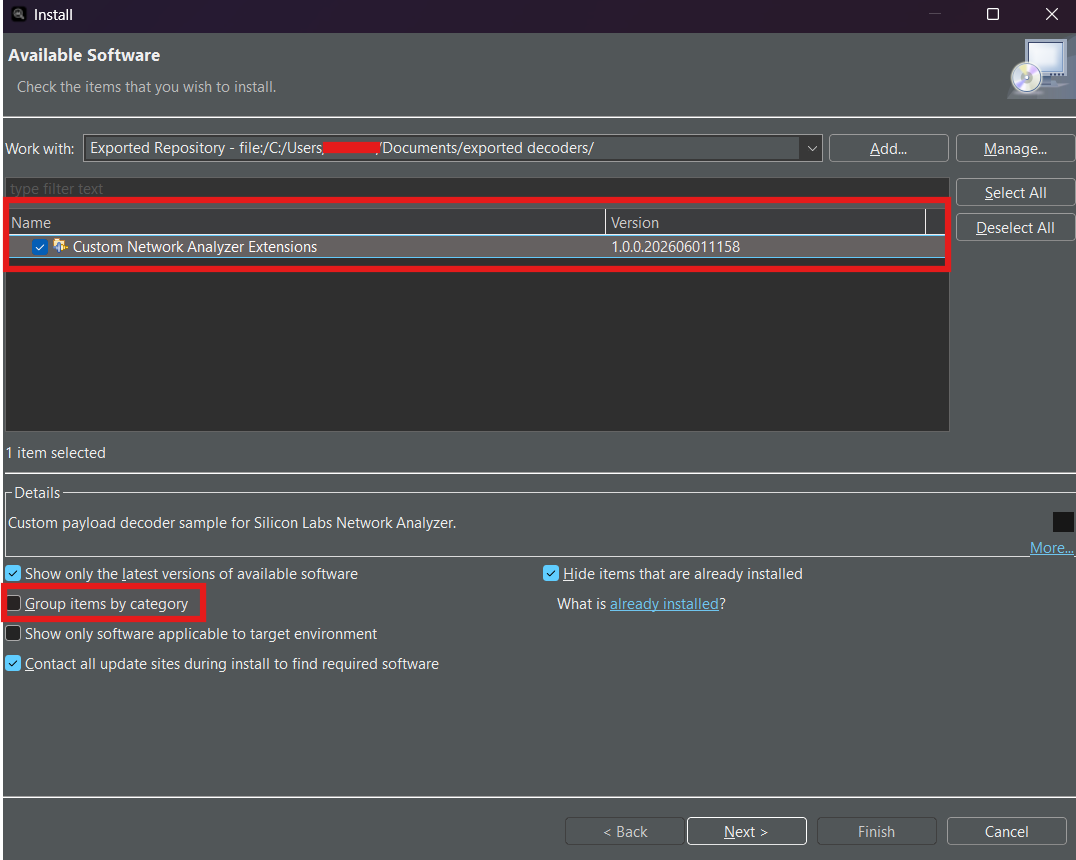
Browse to the export location. Select the folder that contains the generated p2 metadata, including
content.jarandartifacts.jar.If the feature list is empty, clear Group items by category.
Select the feature, continue through the installation wizard, and then restart Network Analyzer when prompted.
Test the Custom Decoder#
After installation, verify that Network Analyzer discovers the decoder and displays the expected fields from the sample capture.
Step 1: Confirm That the Decoder Is Installed#
After Network Analyzer restarts, select Window > Preferences > Network Analyzer > Decoding.
The custom decoder should appear in the decoder list.
Step 2: Open the Example Capture#
Use the docs/custom-decoder-sample.log or docs/custom-decoder-sample.isd sample capture files, which are provided in the repository.
Open the selected file in Network Analyzer. The sample log exercises several decoder cases, including bitmasks, command nibbles, a string tail, a length-prefixed chunk, and an unknown command case with opaqueTail. For more information, see the comments in the sample log file.
Step 3: Enable the Custom Decoder#
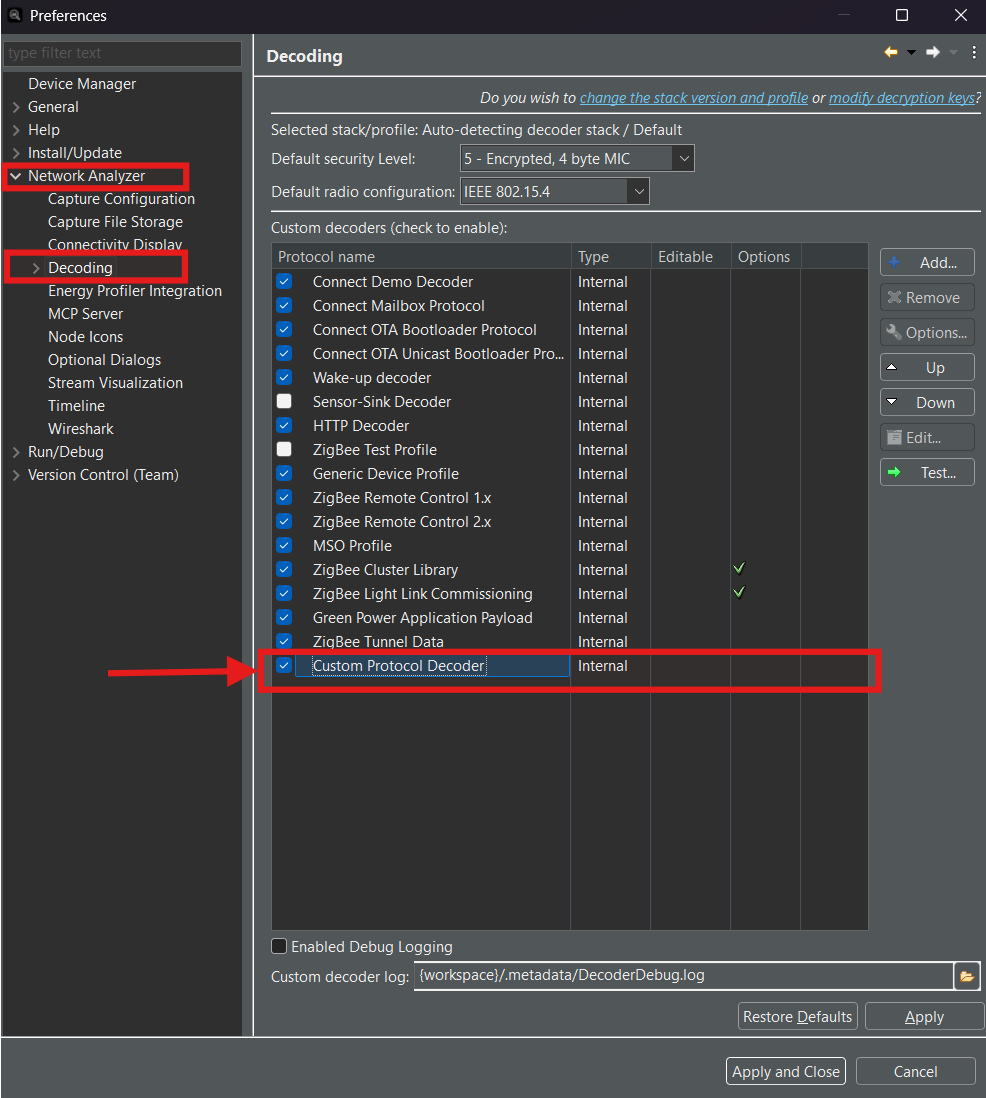
In Network Analyzer, select Window > Preferences > Network Analyzer > Decoding.
Find Custom Protocol Decoder, enable it, and then select Apply or OK.
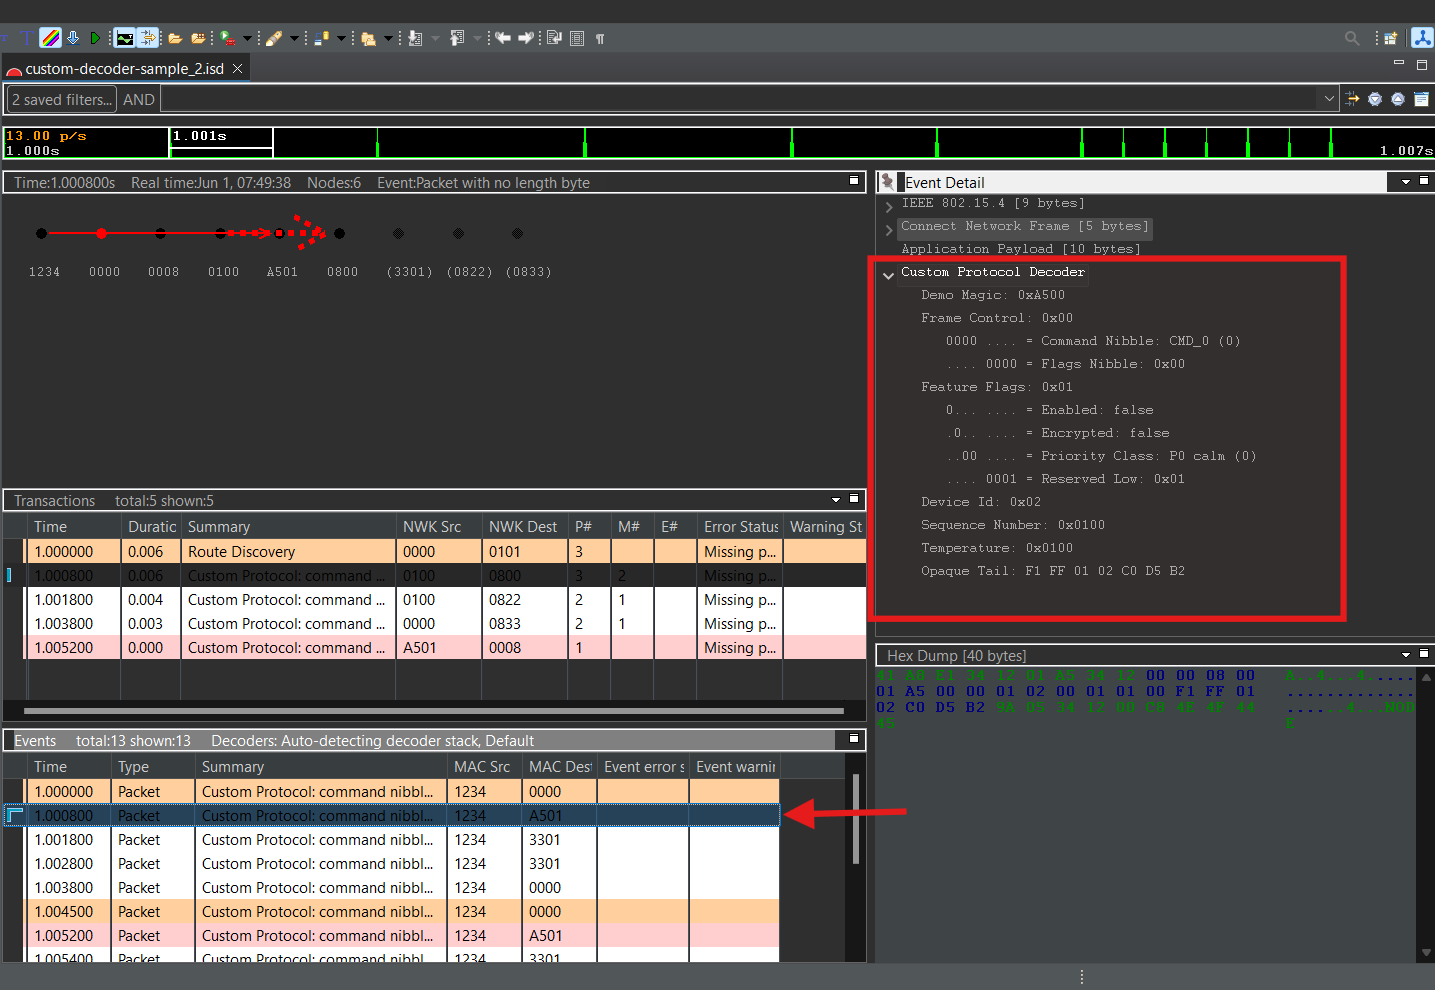
Step 4: Verify Decoded Packet Fields#
Return to the capture view, and then expand a packet. The decoded custom fields should appear under Application Payload or under the custom decoder frame.
For the sample decoder, expected fields include:
demoMagicframeControldeviceIdsequenceNumbertemperature
If these fields are visible, the decoder is installed, enabled, and running successfully.