Appendix A: Examples with Simplicity Studio#
Overview#
The security operations are performed in the Security Settings of Simplicity Studio. This application note uses Simplicity Studio v5.4.0.0. The procedures and pictures may be different on the other version of Simplicity Studio 5.
Right-click the selected debug adapter RB (ID:J-Link serial number) to display the context menu.
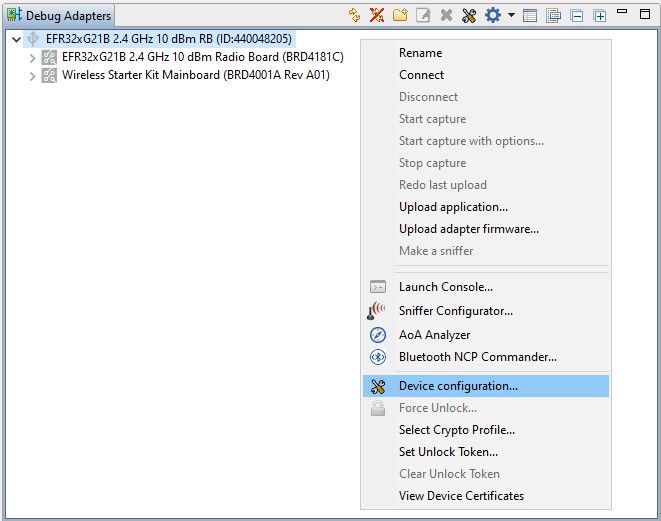
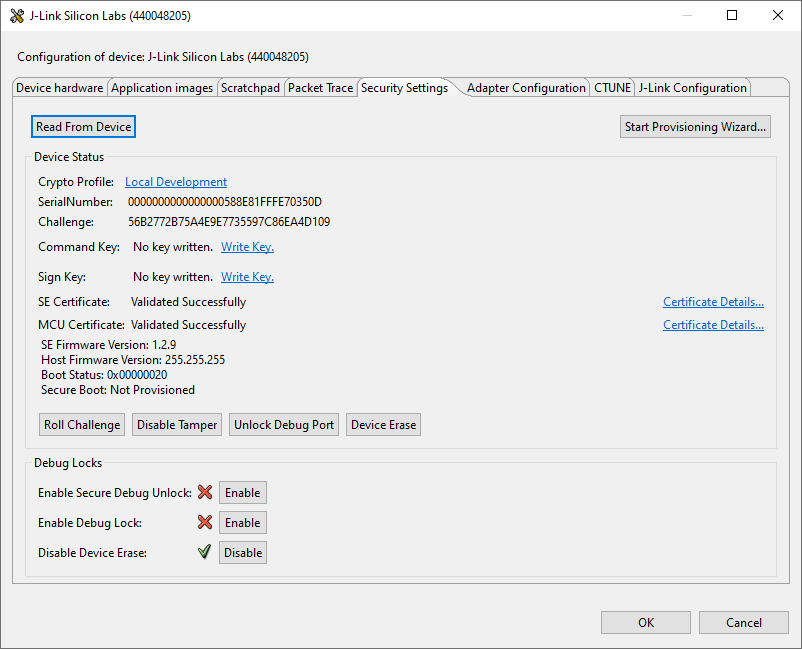
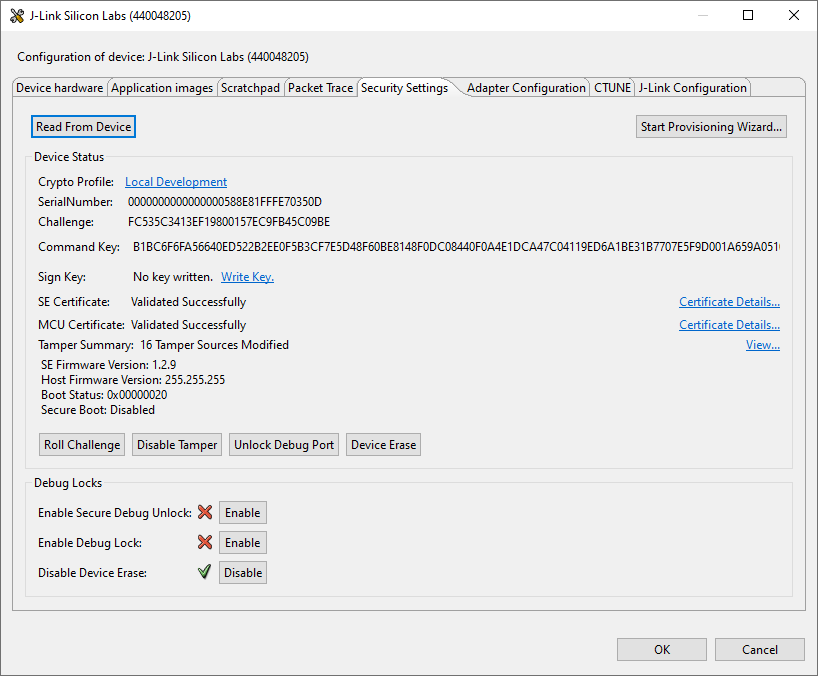
Click Device configuration... to open the Configuration of device: J-Link Silicon Labs (serial number) dialog box. Click the Security Settings tab to get the selected device configuration.
Provision Public Command Key and Tamper Configuration#
This example focuses on provisioning the Public Command Key and tamper configuration. It skips the procedures for provisioning of the Public Sign Key and Secure Boot Enabling.
Run the
util keytotokencommand to convert the Public Command Key file (PEM format) into a text file (command_pubkey.txt).commander util keytotoken command_pubkey.pem --outfile command_pubkey.txtWriting EC tokens to command_pubkey.txt... DONEOpen the Security Settings of the selected device as described in Using Simplicity Studio.
Click [Start Provisioning Wizard...] in the upper right corner to display the Secure Initialization dialog box.
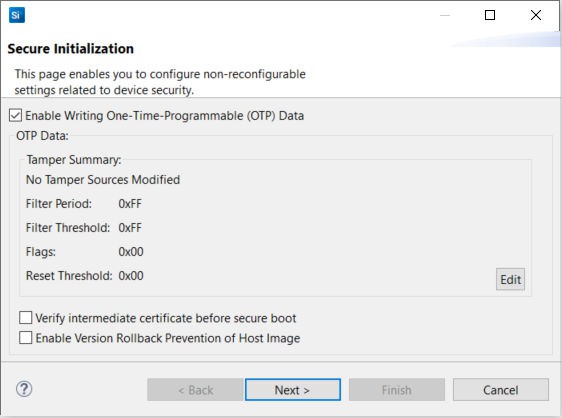
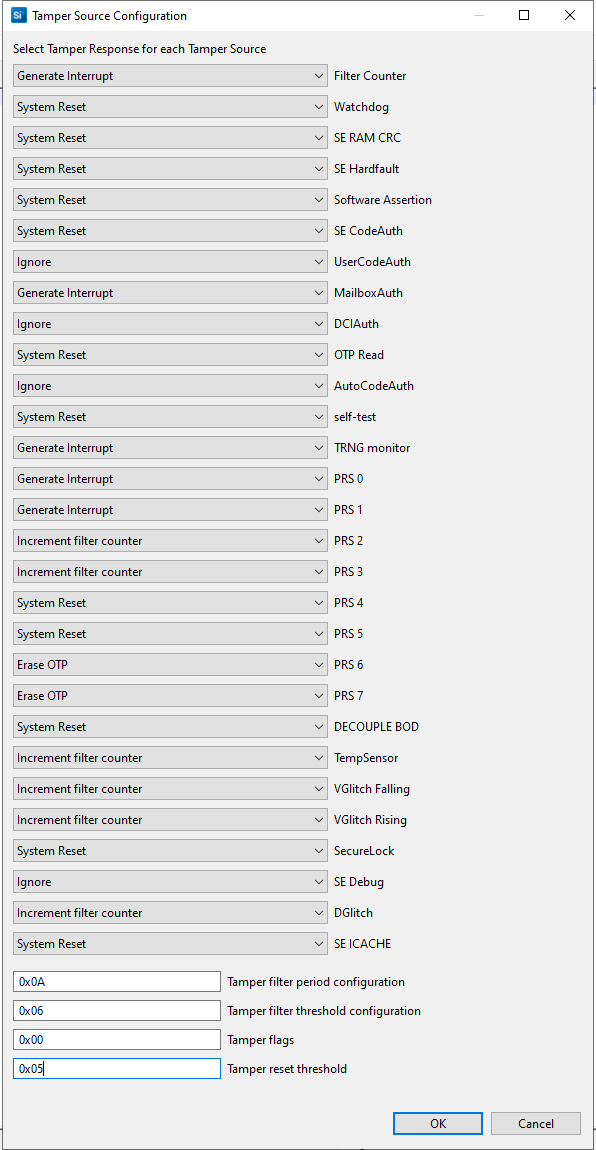
Click [Edit] to open the Tamper Source Configuration dialog box. Use the dropdown menus to modify the default tamper responses to the desired configuration. Click [OK] to exit.
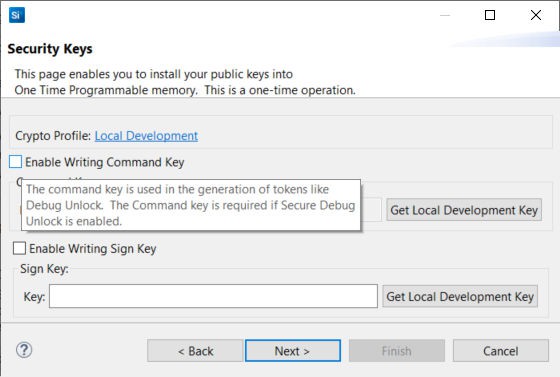
Click [Next >]. The Security Keys dialog box is displayed.
Using a text editor, open the
command_pubkey.txtfile generated in step 1.MFG_SIGNED_BOOTLOADER_KEY_X : B1BC6F6FA56640ED522B2EE0F5B3CF7E5D48F60BE8148F0DC08440F0A4E1DCA4 MFG_SIGNED_BOOTLOADER_KEY_Y : 7C04119ED6A1BE31B7707E5F9D001A659A051003E95E1B936F05C37EA793AD63Check Enable Writing Command Key. Copy the Public Command Key (X-point
B1BC...first, then Y-point7C04...) to the Key: box under Command Key:.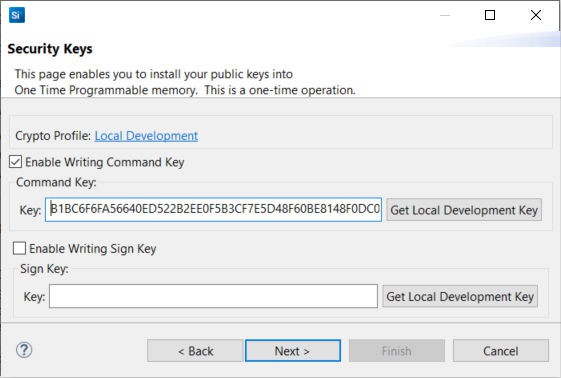
Note: This example does not enable the secure boot (not checking Enable Writing Sign Key option).
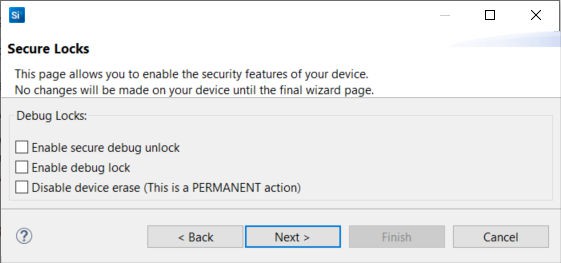
Click [Next >]. The Secure Locks dialog box is displayed. The Debug locks are set by default. Uncheck Enable secure debug unlock and Enable debug lock.
Click [Next >] to display the Summary dialog box. Verify the tamper configuration and Public Command Key in the Provisioning Summary are correct.
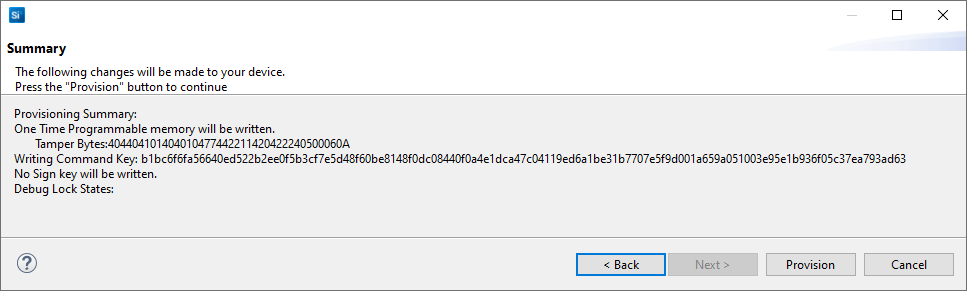
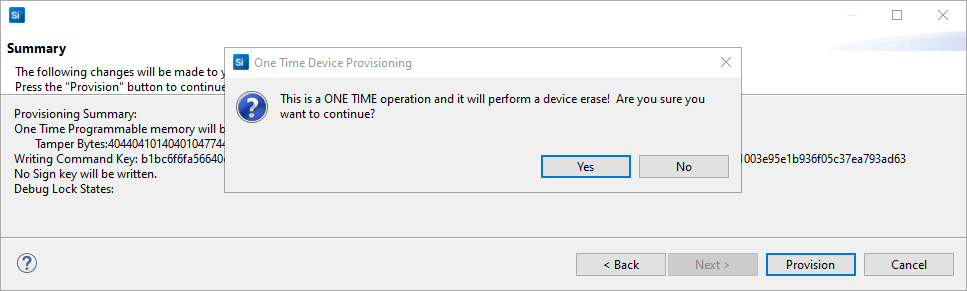
If the information displayed is correct, click [Provision]. Click [Yes] to confirm.
Note: The Public Command Key and tamper configuration cannot be changed once written.
The Provisioning Status is displayed in the Summary dialog box.
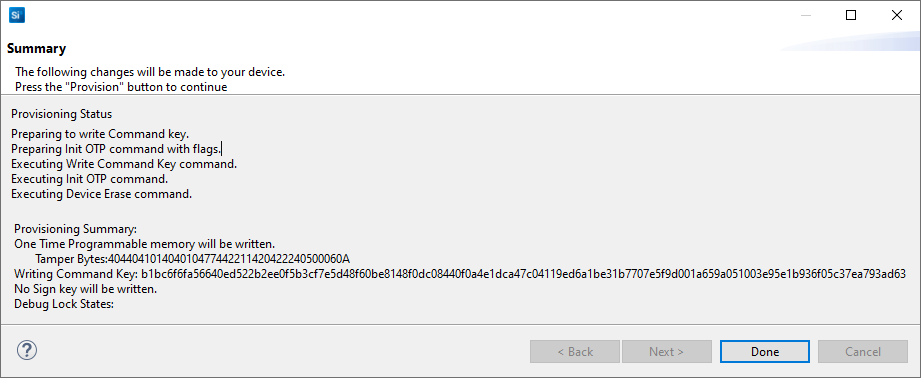
Click [Done] to exit the provisioning process. The device configuration is updated.
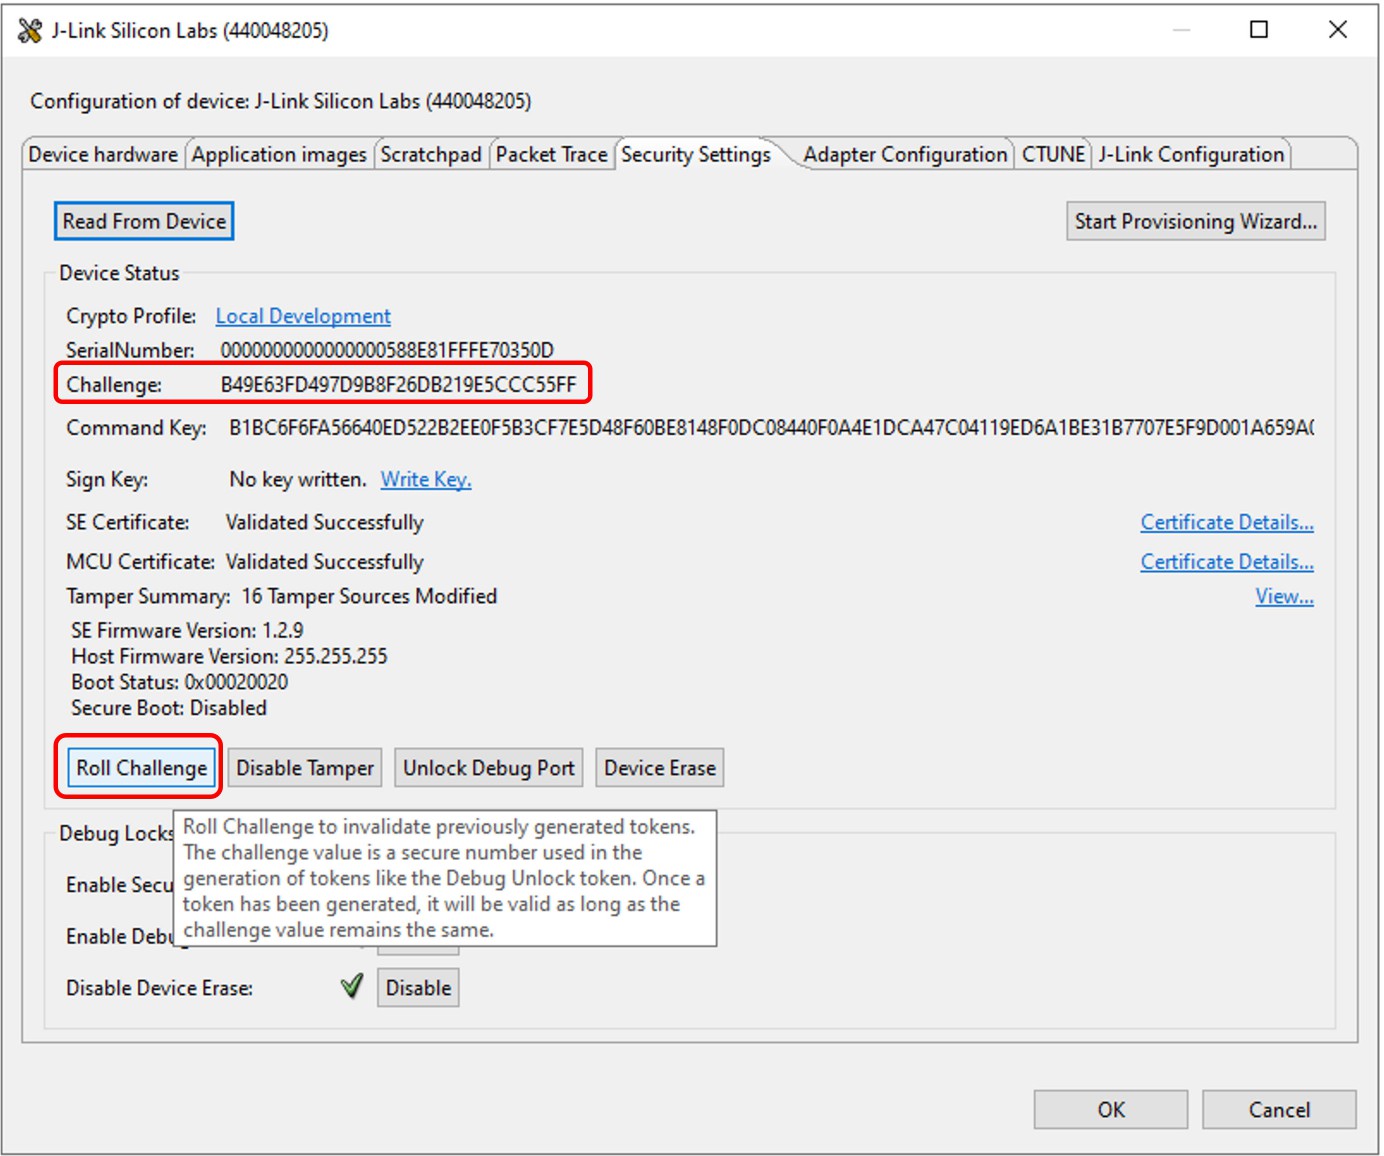
Tamper Disable and Roll Challenge#
Open Security Settings of the selected device as described in Using Simplicity Studio.
Click [Roll Challenge] to generate a new challenge value to invalidate the Disable Tamper Token for tamper disable. Click [OK] to exit.