Build and Installation Instructions for the RCP Images#
Note: The following instructions only apply to RCP images built using Simplicity Studio for a given Simplicity SDK release.
To build an RCP image using the latest OpenThread, follow instructions on the ot-efr32 repo.
Use Precompiled RCP Images#
Silicon Labs has precompiled images available for these boards with their associated image locations. The default precompiled images are configured for UART interface.
Note: By default, the Silicon Labs Simplicity SDK uses Thread protocol version 1.4. A set of prebuilt RCP demo applications are provided with the OpenThread SDK.
Build RCP Images Using Simplicity Studio#
Silicon Labs has sample applications for several standard OpenThread images.
Select ot-rcp as an example for the default RCP image for the OpenThread Border Router over UART interface.
With your target part connected to your computer, open Simplicity Studio's Project tab and select Create New Project.
The Example Project & demos selection dialog opens. Use the Keyword filter to search for ot-rcp as an example for the default RCP image for the OpenThread Border Router. Select it and click Create.
The Project Configuration dialog opens. Rename your project, change the default project file location, and determine if you will link to or copy project files. Note that, if you change any linked resource, it is changed for any other project that references it. Click FINISH.
The Simplicity Project Configurator opens to the OVERVIEW tab. See the online Simplicity Studio 6 Overview for details about the functionality available through the Project Configurator.
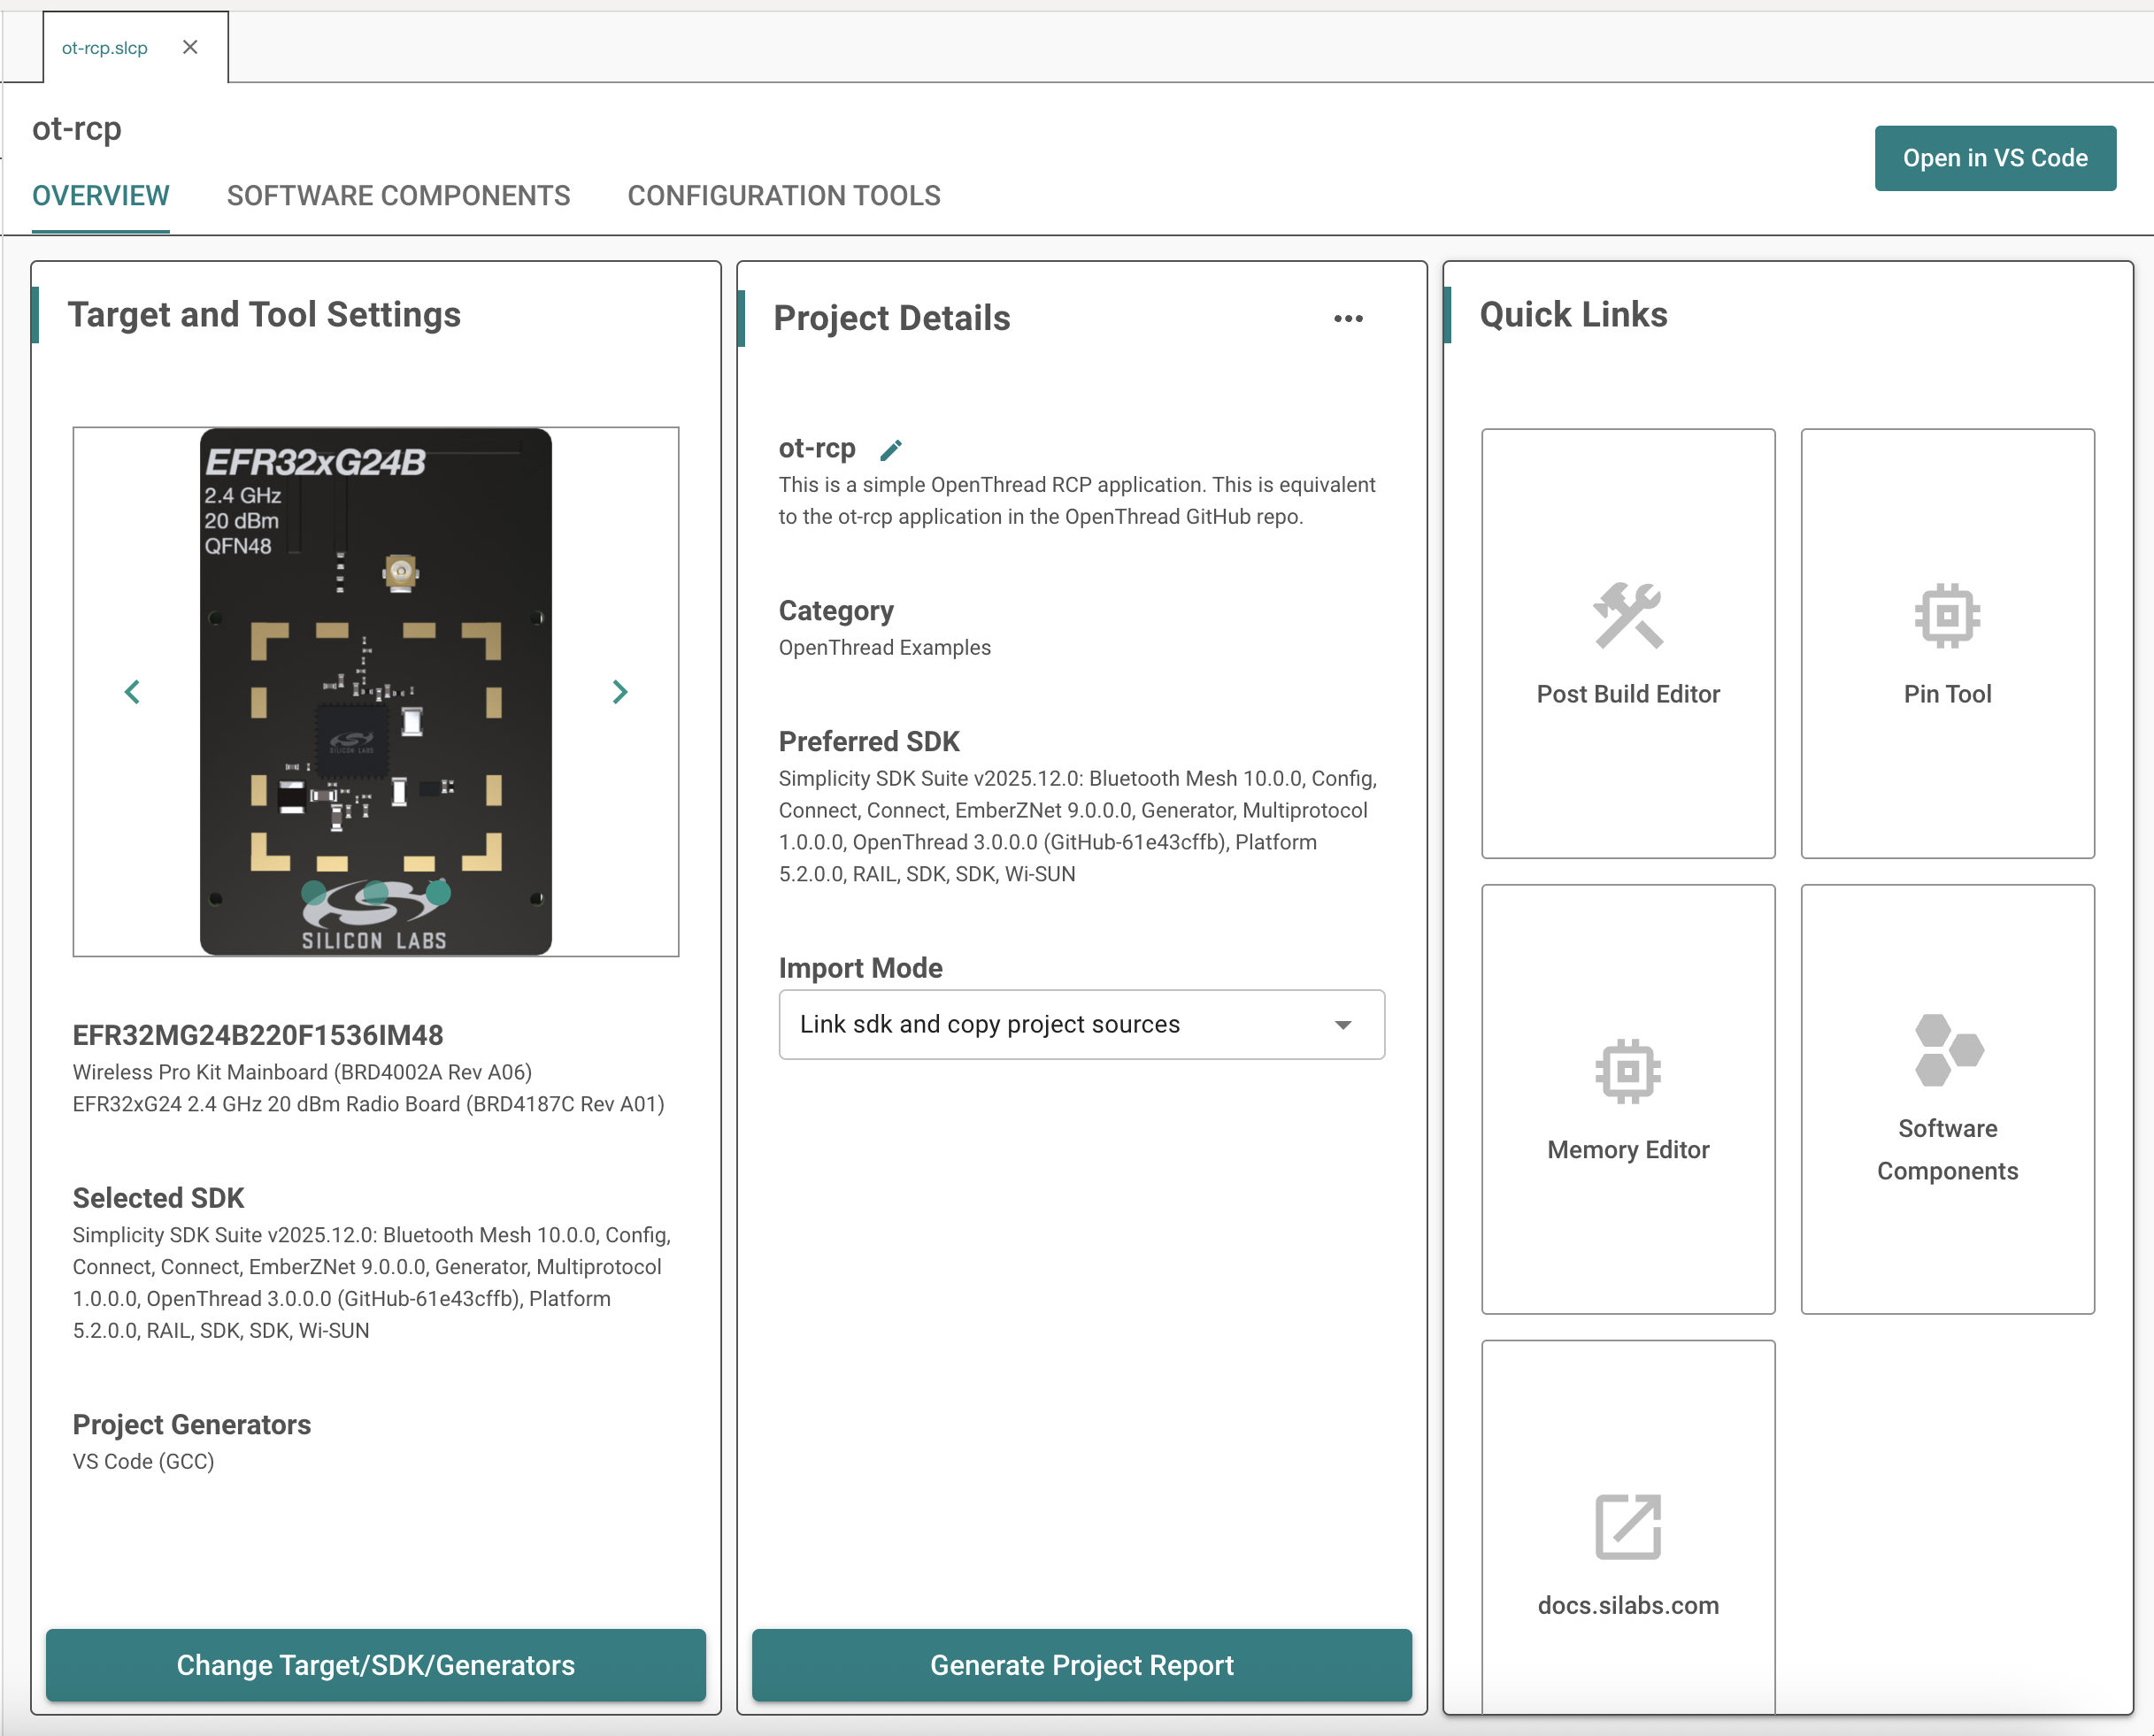
Compile and flash the application image as described in the OpenThread Quick Start Guide.
Configure RCP Image for SPI From Default OT-RCP Application Using Simplicity Studio#
Generate ot-rcp application as described in the previous section steps 1 – 4.
Under the SOFTWARE COMPONENTS tab in your RCP project (.slcp), expand the Services menu. Select vcom under the IO STREAM USART or IO STREAM EUSART component.
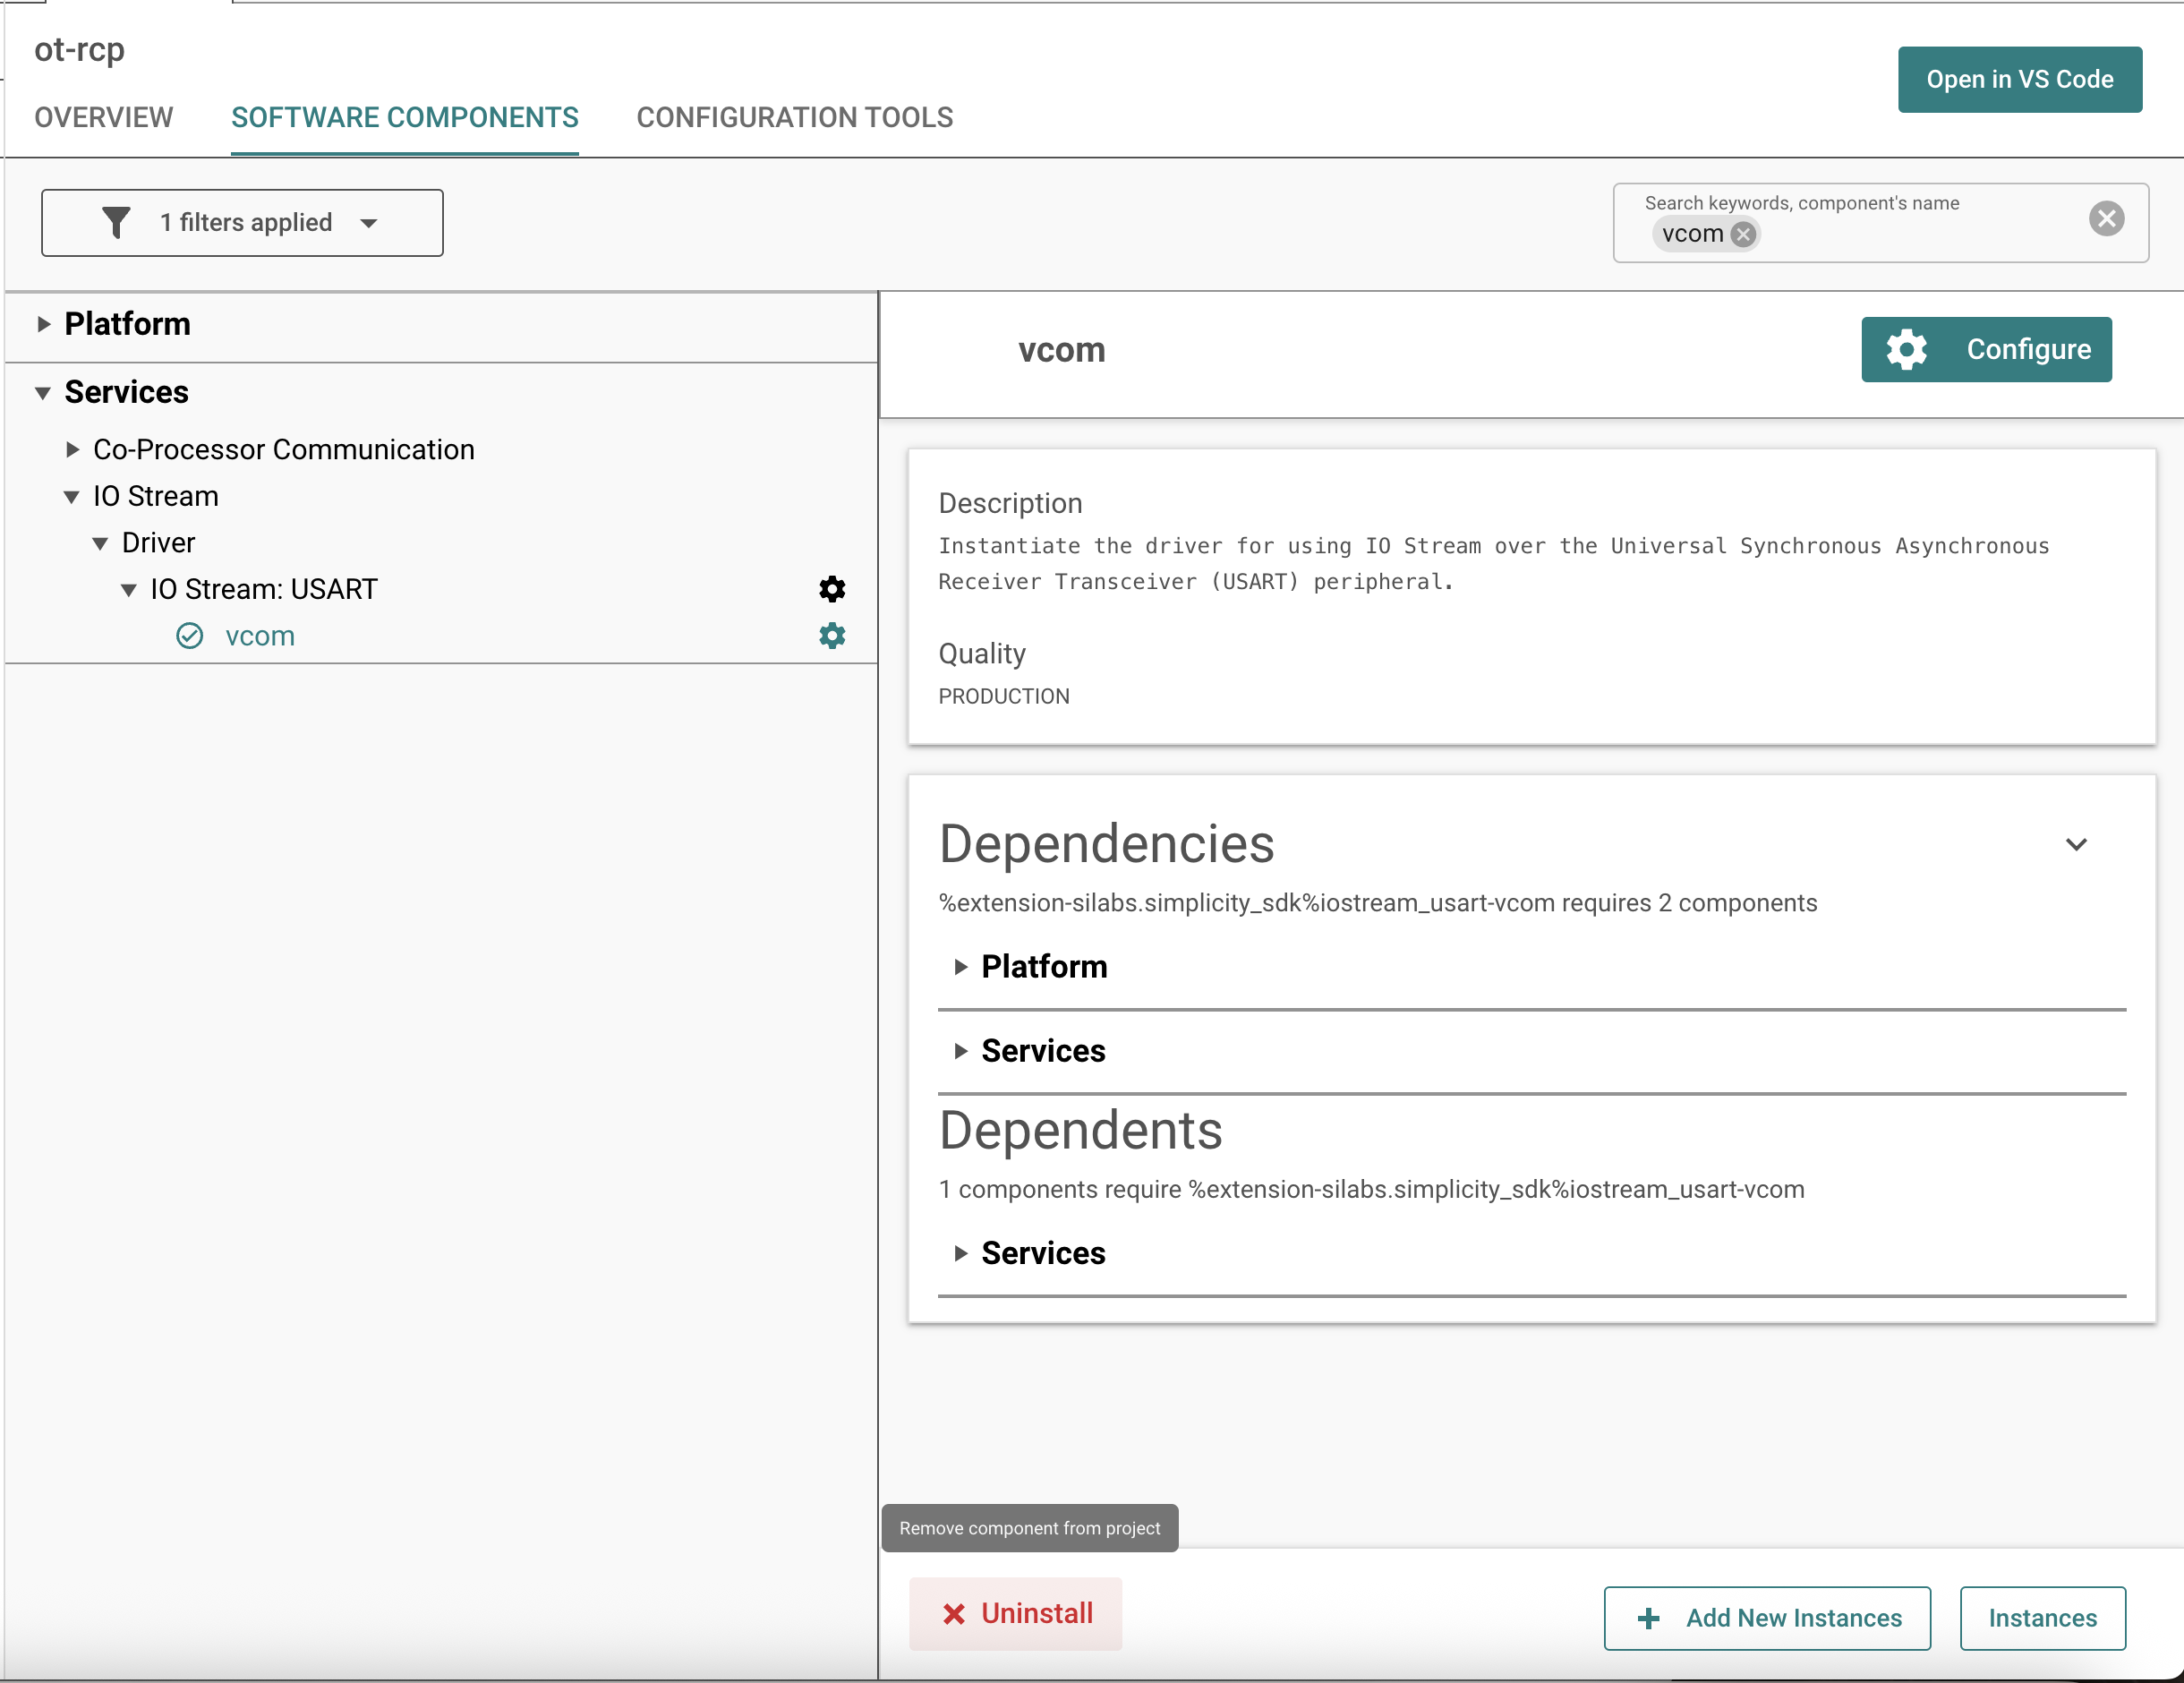
Click Uninstall to remove the component, which uninstalls the IO STREAM component as well.
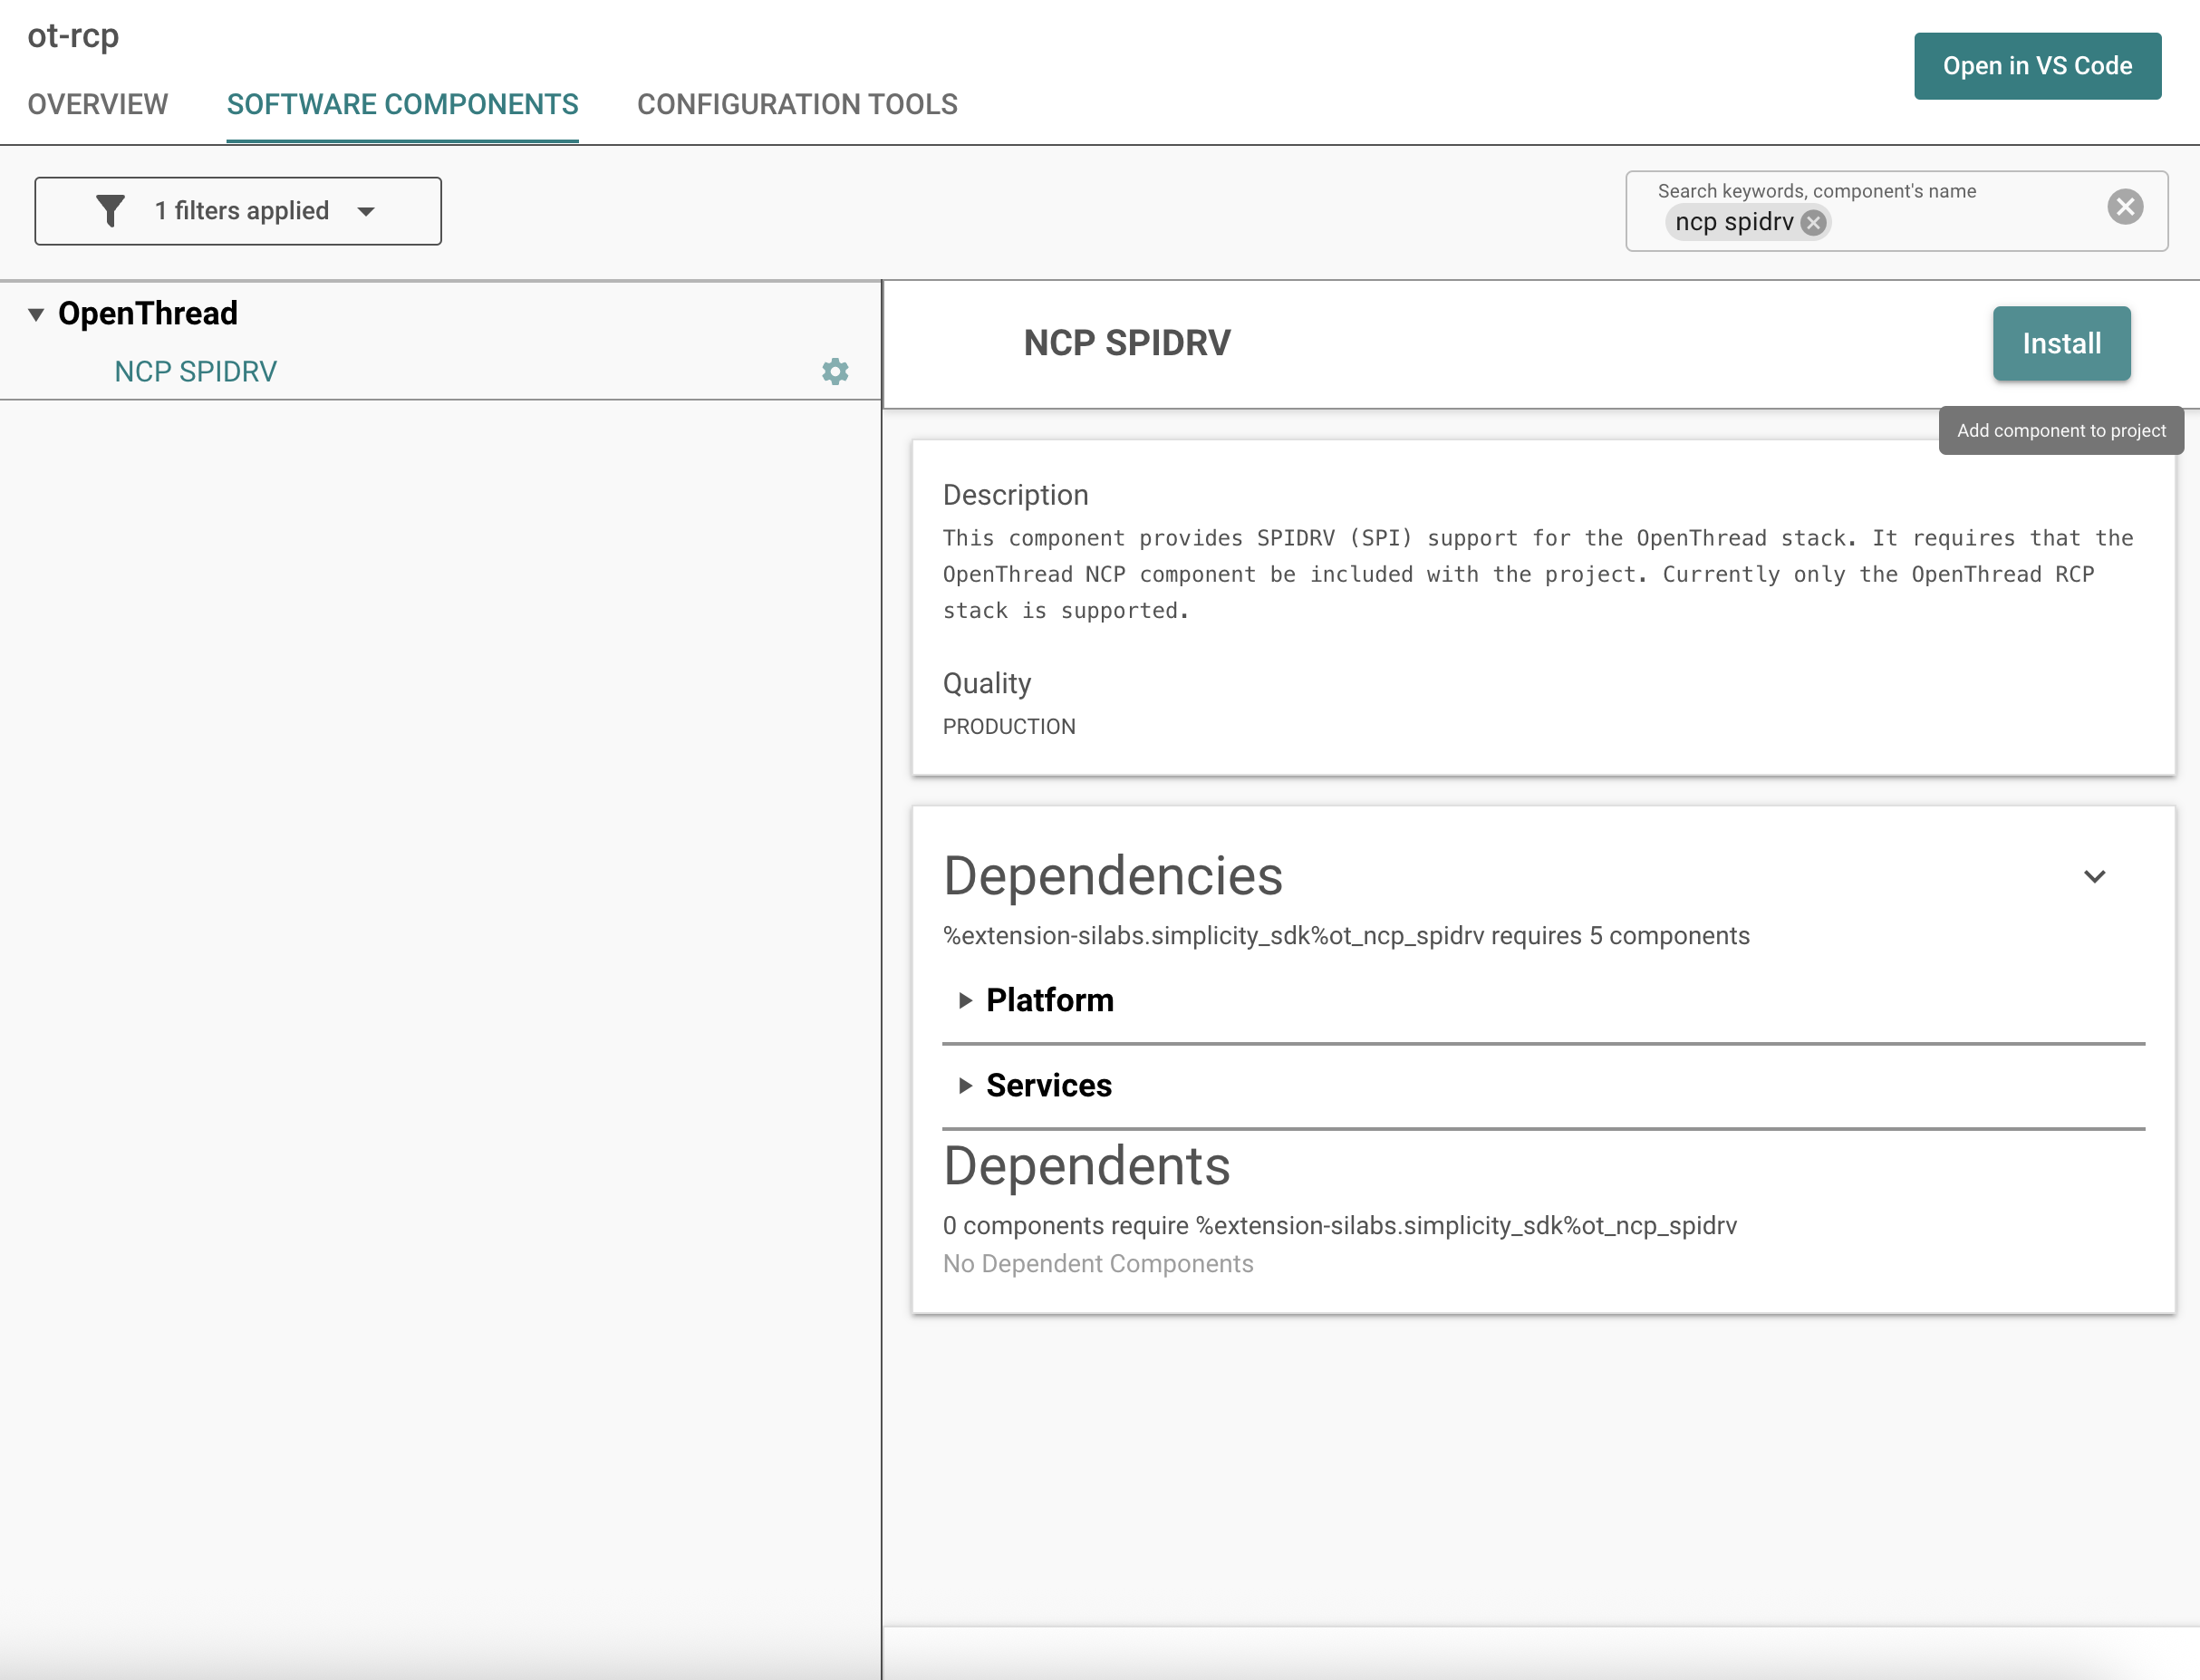
Under the SOFTWARE COMPONENTS tab in your RCP project (.slcp), expand the OpenThread menu. Select the NCP SPIDRV component and click Install.
Compile and flash the application image as described in the OpenThread Quick Start Guide.
Configure OpenThread Options in the RCP Images Using Simplicity Studio#
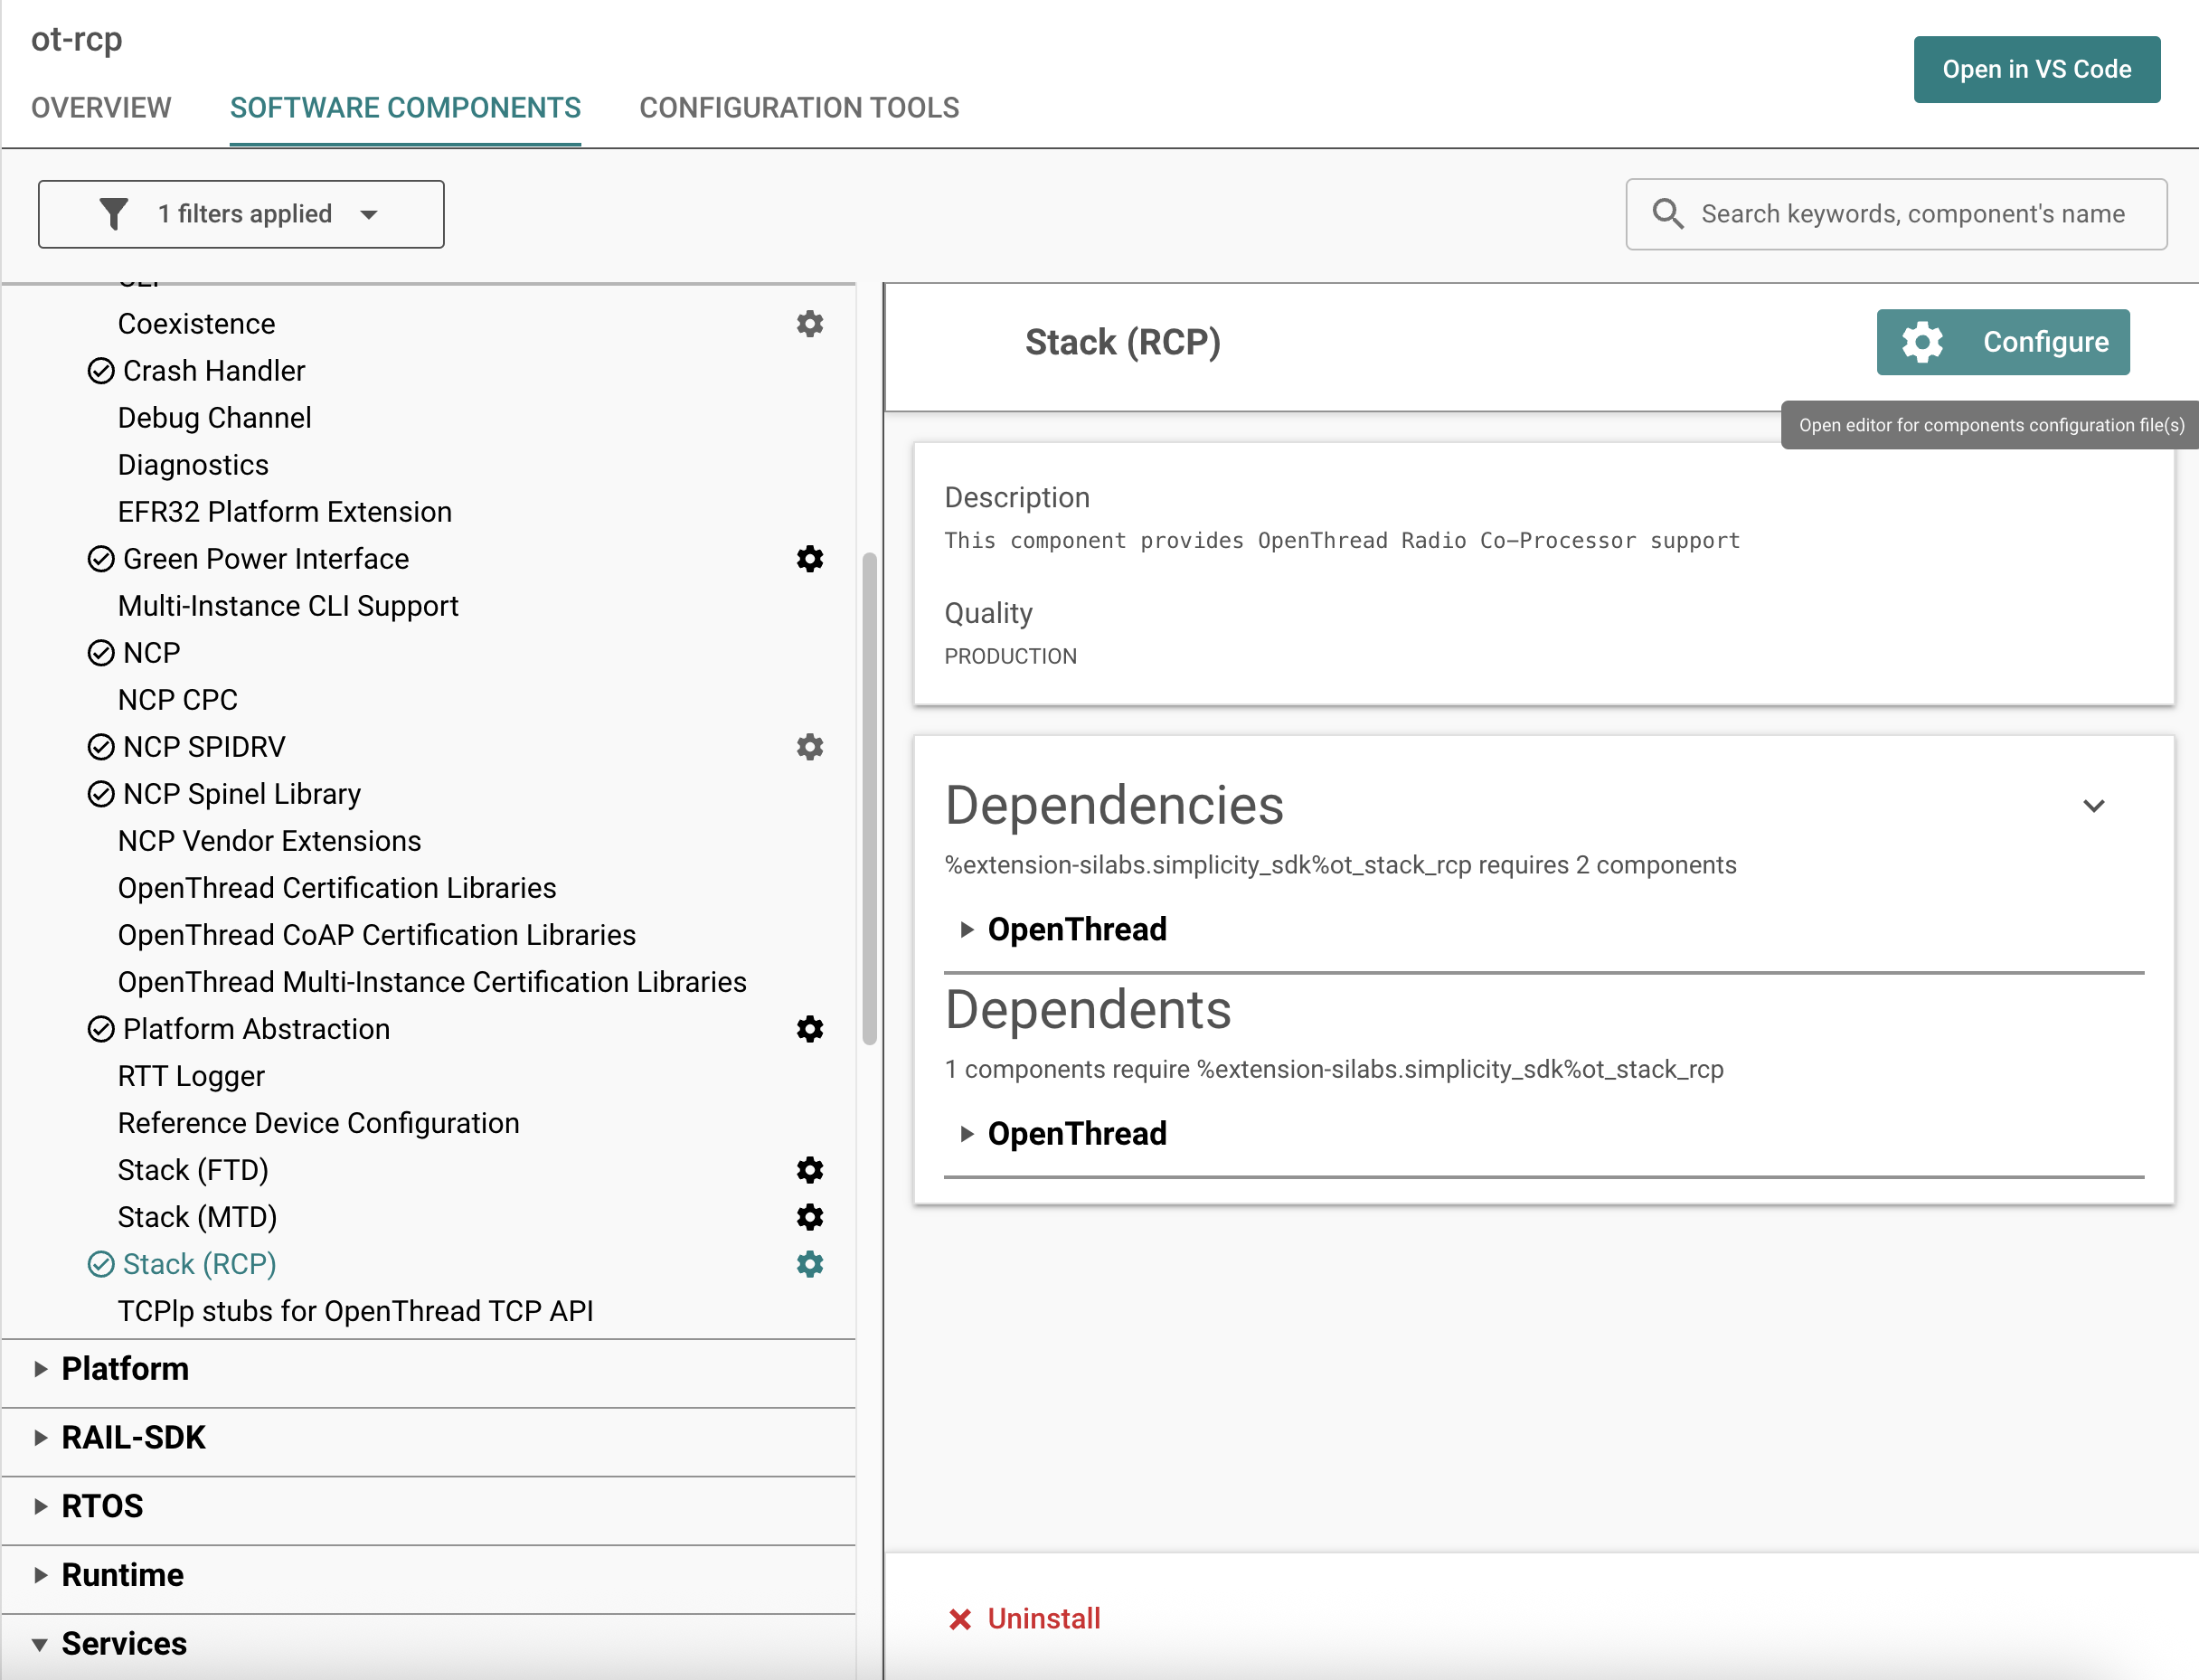
Under the SOFTWARE COMPONENTS tab in your RCP project (.slcp), expand the OpenThread menu. Select Stack (RCP) for an RCP build.
Click Configure to change the settings associated with the OpenThread build.
Note: You can select the Configurable Components and Installed Components checkboxes to filter only those components you can configure successfully.
Configure the various compile-time settings for your RCP project. The various build options are explained in the OpenThread documentation at https://openthread.io/guides/build.
For Coexistence with WiFi configurations, see Zigbee and OpenThread Coexistence with WiFi.