Configuring a Project#
Simplicity Studio® 5 (SSv5)'s AppBuilder provides a tabbed interface. Each tab provides customization options.
General - Configure global values for your application like the Device Name and Generation Directory
ZCL Clusters - Choose the specific combination of clusters to include
Zigbee Stack - Configure stack-specific settings
Printing and CLI - Configure debug printing and CLI options
HAL - Configure bootloader and board header file options, and access the Hardware Configurator tool to manage peripheral configurations
Plugins - Include or exclude plugins, where a plugin is a specific implementation of a cluster or some other functionality
Callbacks - Select from a set of predefined callbacks
Includes - Include any external files into the generated project
Other Options - Configure PHY support, plugin services, and other options
Bluetooth GATT - For use with dynamic multiprotocol applications, provides a direct interface to the GATT configurator
General#
The General tab provides information about the example used as a foundation for the project, and lets you change project level information, such as the toolchain used.
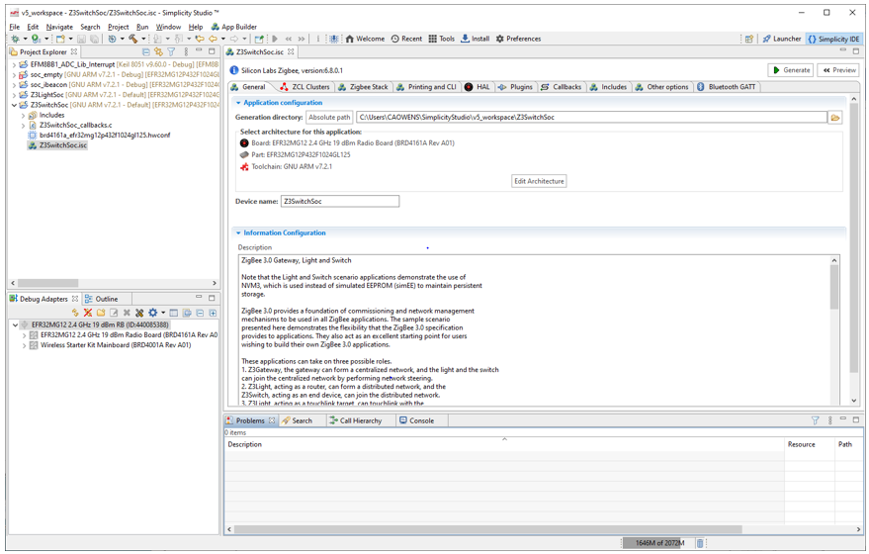
Generation directory shows where project files will be generated. By default this is a <project name> directory in the default SSv5 workspace.
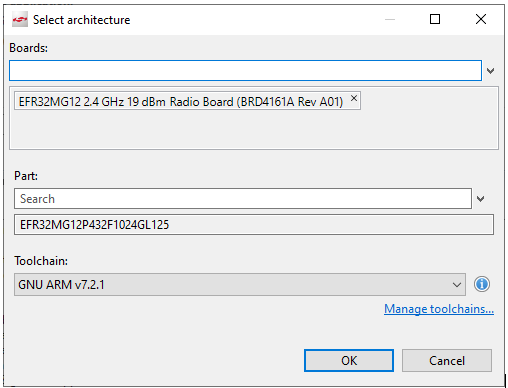
Click Edit Architecture to change the target device or the toolchain.
ZCL Clusters#
The ZCL Clusters tab provides functionality to manage endpoints and their cluster configuration.
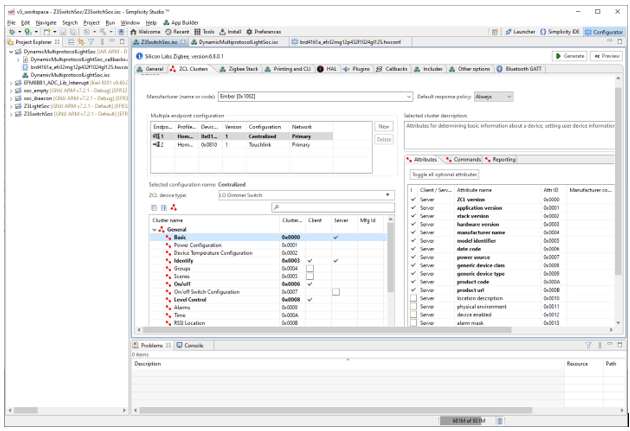
Multiple Endpoint Configuration Table
The Multiple Endpoint Configuration Table allows you to configure the endpoints on your device. Click New to add an endpoint.
Endpoint: Change the endpoint on which your device will be hosted by clicking the number in the Endpoint column. The number field becomes editable. Change the endpoint to any of the valid Zigbee endpoints available.
Configuration: Each endpoint implements a specific configuration. The configuration is not a Zigbee construct. It is a name created for Simplicity Studio AppBuilder so that multiple endpoints that implement the same application can share the metadata associated with that application. This conserves the use of flash within the device. By default, each new endpoint will implement the configuration named "Primary." Change the configuration by selecting the endpoint row and then clicking on the "Configuration" column. A button appears to the right of the Configuration name. Click the button to launch the configuration dialog. Once you have created a new configuration, the application for that configuration can be implemented on as many endpoints as you like without using any more memory on your device for metadata storage. Each endpoint still needs to have its own attribute storage to contain the endpoint-specific values. AppBuilder and the application framework take care of this for you.
Network: By default, the first endpoint belongs to the network named "Primary." When new endpoints are created, they will belong to the same network as the first endpoint. On platforms that support multi-network, you may choose the network for a specific endpoint. New networks can be created and configured in the Zigbee Stack tab.
ZCL Device Type: Select from a set of pre-defined ZCL Device Types. AppBuilder then populates the cluster table with the clusters appropriate to that device type as defined by the Zigbee Cluster Library specification. In addition to these pre-defined device types, you also have the option to create a custom device type. With this option, you can choose from any of the available Zigbee clusters included within the Application Framework.
Cluster Table
The Cluster Table displays which clusters will be included as part of each endpoint type.In the case of a custom device implemented on any endpoint, you have the option to choose the clusters to include and their client/server role.
Attribute Table
When you click a specific cluster, its attributes display in the Attribute Table. Configure the device's behavior by configuring the attributes in this table.
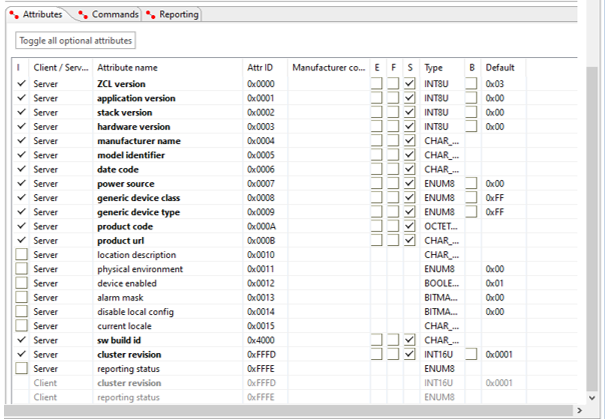
External Attribute storage: By default, all attributes are stored in a RAM buffer provided by the application framework. Storing some attributes may not make sense, however, since they are either already stored somewhere else in the system or are not stored at all but read from some external piece of hardware. In this case you may indicate that the attribute is externally stored. When the application framework needs to interact with the attribute it will use the external attribute callbacks. By implementing these callbacks and marking the attribute as externally stored, the attribute storage is removed from the framework and placed into the domain of the application. The metadata used to represent the attribute on the network is still stored inside the framework so that the framework can respond to ZDO requests and so on.
Persistent attribute storage: By default, all attributes are stored in RAM. As a result, attribute data does not survive a reboot of the device. If you want to maintain state for an attribute across reboots, the attribute must be stored in persistent memory on the device. To store a specific attribute in persistent memory, check the checkbox in the F column.
Singleton attribute storage: Most attributes are stored as a separate value for each endpoint on which they are implemented. This does not make sense for some attributes that may exist across endpoints. For instance, it makes little sense to store multiple copies of the Basic Cluster's ZCL Version since the version pertains to the entire application and not to each individual endpoint. Attribute values may be shared across endpoints by indicating that the attribute is a "singleton."
Bounding attributes to their Min and Max values: By default, the application framework allows you to write any value (within the limits of the size of the attribute) into the attribute table. However, you may request that the application framework reject any attribute value outside the Min and Max defined by the Zigbee specification by checking the checkbox in the B column. The application framework then stores the min and max values for the chosen attribute in the attribute table and rejects any write request, whether from the CLI or an external device, that is outside the attribute value range.
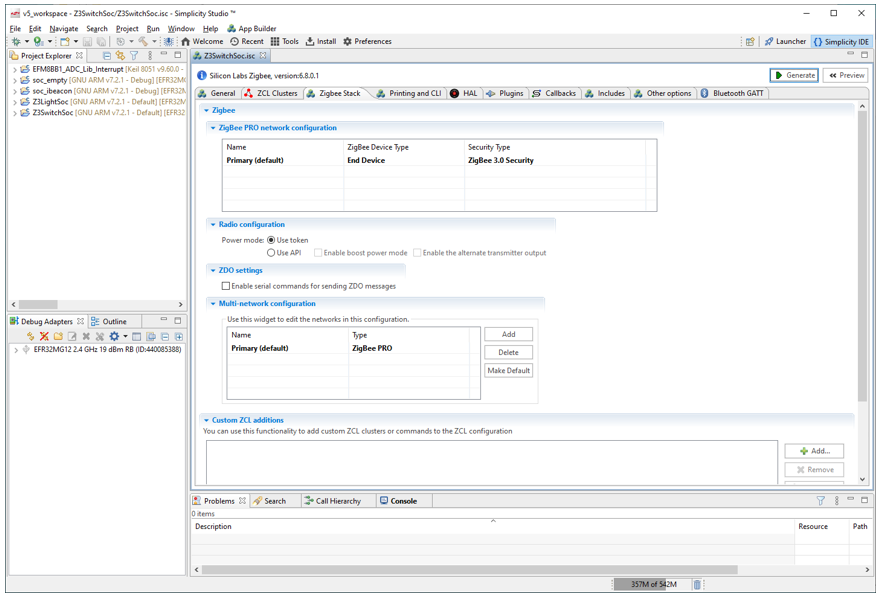
Zigbee Stack#
Here you can configure networks and add custom clusters.
Printing and CLI#
Here you can enable and configure debug printing, and enable/disable CLI functionality.
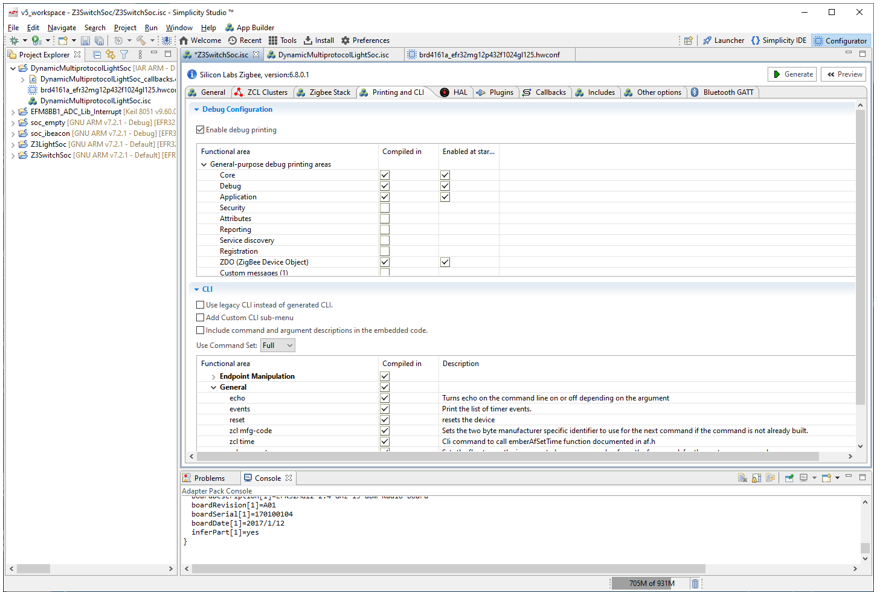
Debug printing
The application framework can output application and stack debug information over the serial port. To choose the information to include in the debug output, select from the serial printing checkboxes. If you are not concerned with debug output, and/or would prefer to conserve the flash and RAM associated with debugging, turn off the serial printing options by deselecting them.
Command Line Interface (CLI) Options
AppBuilder can output either a "Legacy" or "Generated" command line interface.
Use Legacy CLI: If checked, AppBuilder uses the hard coded CLI interface included in the application framework. Otherwise AppBuilder generates a Command Line Interface along with other generated files based on the CLI interface options selected in the CLI configuration window.
Add Custom CLI Sub-menu: Adds the ability to include user-defined CLI commands into the Command Line Interface.
Include Command and ...: Includes a description for each command or argument into the Command Line Interface. Turning this on will increase the size of your application but will make it easier to use the Command Line Interface since all commands will be self-described when a command is not recognized by the application.
Use Command Set: Makes it possible to turn the command line interface on and off and choose a pre-defined subset of the CLI for use in your application
CLI Configuration Table: Select exactly what CLI commands are supported in the application. By default, the Full command line interface command set selects all General commands and all cluster and plugin commands supported by clusters and plugins included in the application.
HAL#
Use the HAL tab to configure hardware-specific options for your device.
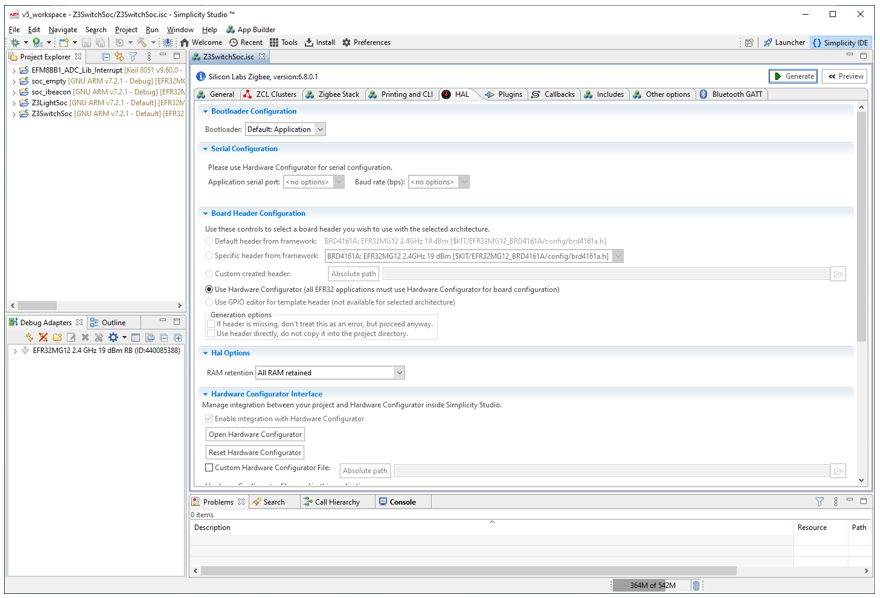
For EFR32 devices, most hardware configuration is done through the Hardware Configurator. Under Hardware Configurator Interface click Open Hardware Configurator.
Bootloader - Select the type of bootloader to use. See UG103.6: Bootloader Fundamentals as a starting point to learn more about bootloaders.
Plugins#
Use the Plugins tab to include, exclude, and configure the functional implementations called plugins.
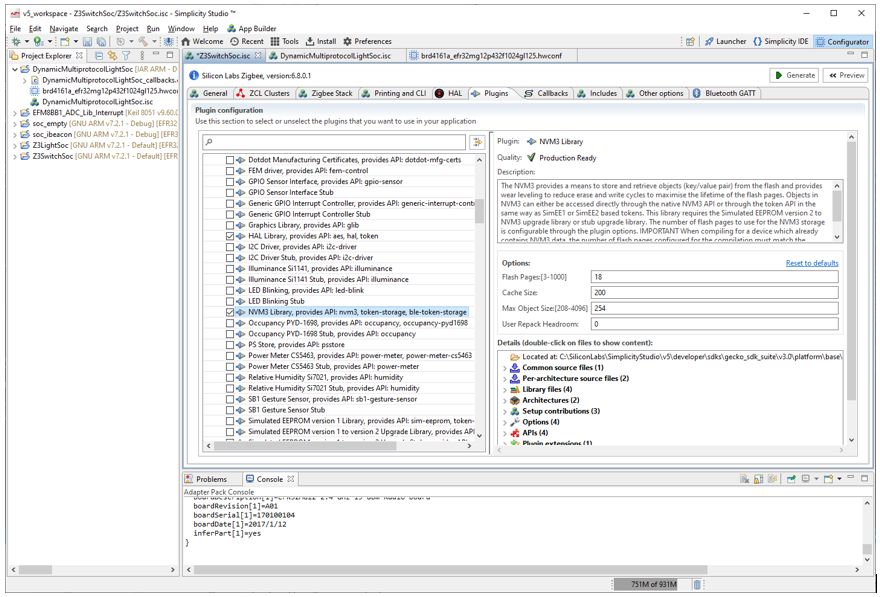
Include/exclude plugins by checking/unchecking them. Select a plugin to see information about it and configurable parameters, if any.
Some plugins provide access to the Hardware Configurator peripheral settings. These plugins have a Hardware Configurator Dependent Options pane. You may need to scroll down in that pane to see all options. Enabling/disabling plugins can also enable and disable Hardware Configurator modules and their dependent peripherals. When a plugin with Hardware Configurator dependencies is enabled/disabled, a pop-up dialog box shows which Hardware Configurator modules and peripherals are being enabled/disabled. Also, when a plugin that shares Hardware Configurator modules/peripherals with another plugin is enabled/disabled, a similar warning shows which peripherals are being affected behind the scenes in the Hardware Configurator. See Configuring Peripherals for information on using the Hardware Configurator directly. For more details on both plugin and tool access, see AN1115: Configuring Peripherals for 32-Bit Devices using Hardware Configurator.
Callbacks#
Use the Callbacks tab to add or remove callbacks, and to see the callbacks that are required by plugins or other code. Select a callback to see its code and other information about it.
Enabled callbacks must be implemented in application code, otherwise you will get linker errors.
Callbacks are grouped into logical sections in the callbacks tab for ease of navigation. Callbacks implemented by an included plugin have the plug symbol. All of the custom application framework callbacks are included in the "Non-cluster related" section. All of the other callbacks are grouped by cluster. Many of the cluster-specific callbacks are intended for command handling.
When a command comes in, it is passed off to a cluster-specific callback for processing. If the callback returns TRUE then the internal handler for that command will not be called. Cluster-related callbacks are also only implemented for those client and server clusters that are included in the application. If a cluster is not included, the application is not expected to parse that cluster's commands. The application framework returns a default response of UNSUPPORTED_COMMAND.
Callback generation: The first time you generate your application from AppBuilder, it automatically generates a callbacks.c file with the name <project name>_callbacks.c. When you regenerate files in the future, AppBuilder protects your generated callbacks file from being overwritten by asking if you want to overwrite it. By default, AppBuilder will not overwrite any previously created callbacks file. If you choose to overwrite the file, AppBuilder backs up the previous version to the file <project name>_callbacks.bak.
Includes#
Use the includes tab to manage information included in the application.
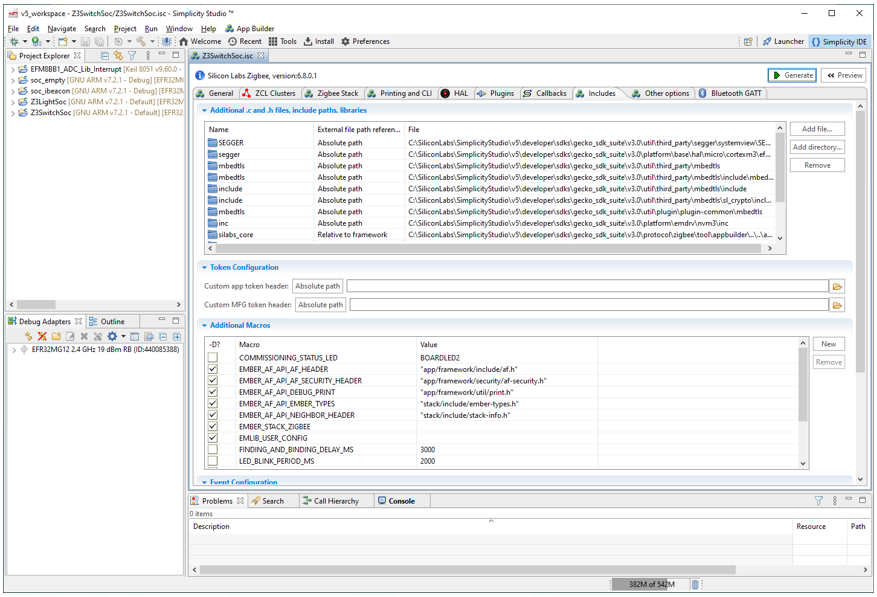
Additional .c and .h files
When you generate a project file from AppBuilder, you often need to modify the project to include your own source files into the application image. This is a problem if the project file needs to be re-generated, since the newly generated project file will overwrite the old one, thereby removing any files that have been included.
Any files that you would like to compile along with your application can be included in the file include table. To include a new file, click New. Navigate to the location of the file you wish to include and click OK. The file will be included inside the generated project file with an absolute path to the location of the file.
Token Configuration
To implement attributes in tokens, the application framework places its own token file into the generated APPLICATION_TOKEN_HEADER #define within the generated project file.
The application framework's token header file, located at app/framework/util/tokens.h, includes a spot where you may place a relative path to your own token header. The token header files are chained off one another with the application framework's token header at the top of the chain. To include your own token header within your application, provide absolute or relative path inside the appropriate Token Configuration path field.
Additional Macros
Much of the configuration for the application framework and the stack is done using macros documented within the API. Any additional macros that you wish to define, either for compile time or for run time, should be provided here.
Compile-time macros should include the "-D" option. These macros will be included in the compiler and linker definition sections in the generated project file. Any macros which do not include the "-D" option will be included in the generated application header file.
Event Configuration
You can include custom application events into the application framework's event system. These events are run in the same manner as the application framework's own events as well as all cluster events implemented by the cluster plugins.
To include a custom event, click Add New. Your custom event will be automatically included in the event configuration section of the generated endpoint_configuration.c file. Stubs for your event function and event control will be generated into the callbacks.c file. You may also change the name of the generated event control value and function to whatever you desire.
For more information on how events work UG391: Zigbee Application Framework Developer’s Guide .
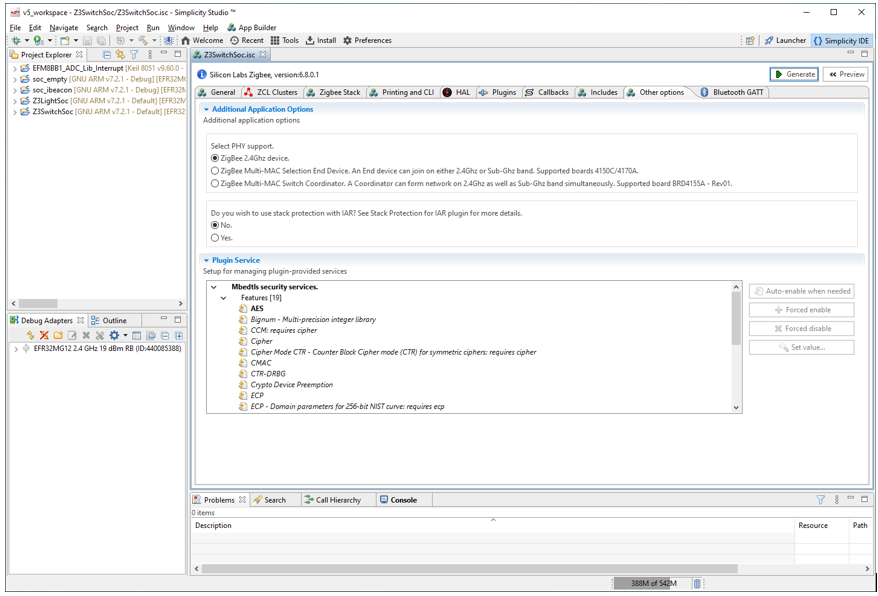
Other Options#
Use the Other Options tab to configure PHY support, stack protection, and to manage plugin-provided services.
Bluetooth GATT#
For Dynamic Multiprotocol applications, use the Bluetooth GATT tab to configure the GATT database for the Bluetooth application.
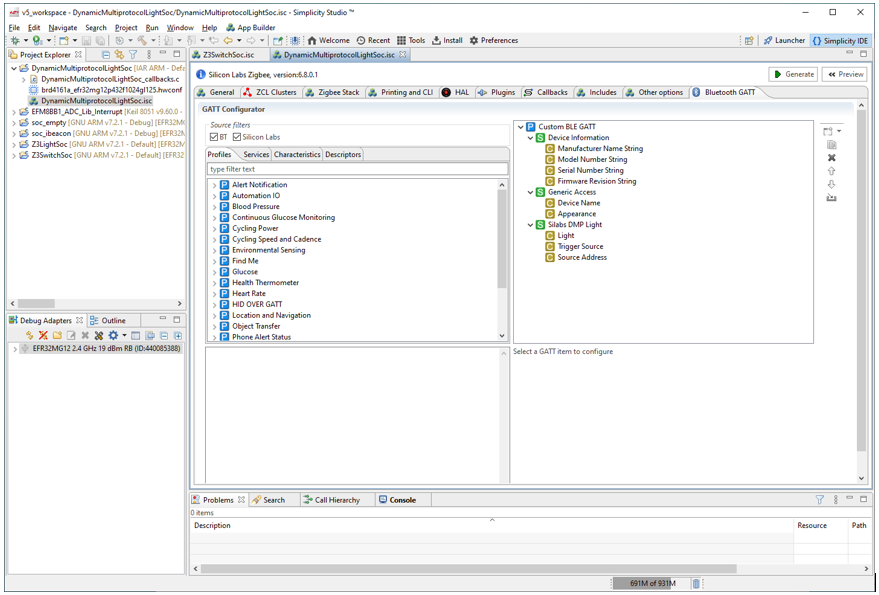
For more information about Bluetooth GATT database configuration see UG365: GATT Configurator User's Guide for Bluetooth SDK v2.x.