Using Wireshark#
Beginning with version 5.5.0, Simplicity Studio® 5 (SSv5) supports live interaction between the application running on a Silicon Labs device and the Wireshark packet analyzer. Windows/Mac users can download Wireshark from https://www.wireshark.org/download.html. Linux users can find instructions at https://www.wireshark.org/docs/wsug_html_chunked/ChBuildInstallUnixInstallBins.html.
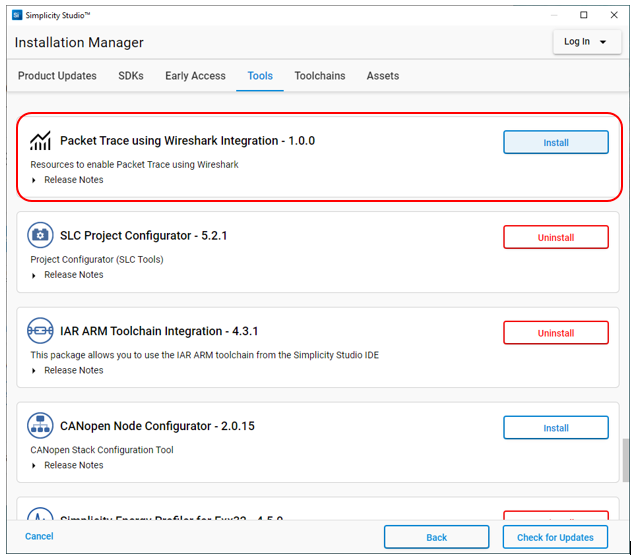
If you installed the GSDK in an earlier version of Simplicity Studio, click Install on the toolbar. Click Manage Installed Packages and go to the Tools tab. Find the "Packet Trace Using Wireshark Integration" tool and click Install.
Make sure that debug output is enabled in your project, if it is available. This is enabled by default in most GSDK examples and demos.
Build and flash the project to your device. If you are working in Simplicity Studio, do not start a debug session to build and flash the project, but rather build it and then flash the binary separately.
In Simplicity Studio's Debug Adapters view, select one or more devices and right-click one of the devices. Two Wireshark options are available, 'Start Wireshark Data Source' and 'Start Wireshark Data Source with Options'.
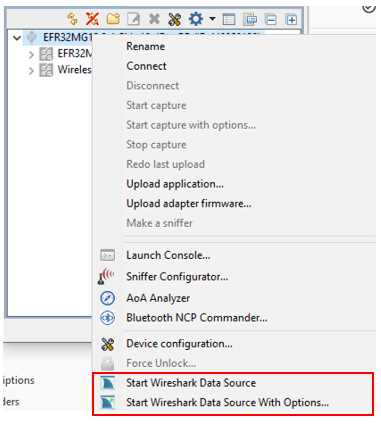
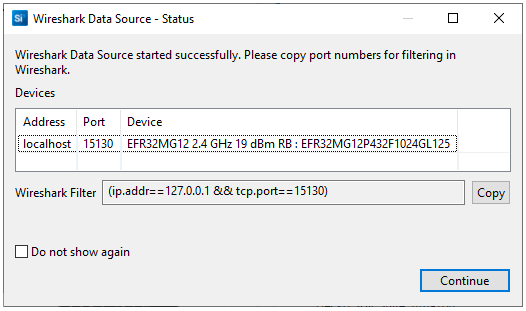
Start Wireshark Data Source: If all selected devices are connected through a network, the Wireshark Data Source starts. Devices connected by USB use the application Silink to communicate with the network. The network ports that Silink uses are assigned dynamically and are different on each launch. Knowing the port numbers can be useful when filtering captured packets by TCP port using Wireshark's display filters functionality. If you select at least one device connected by USB, a dialog is presented showing the device's IP address and port number.
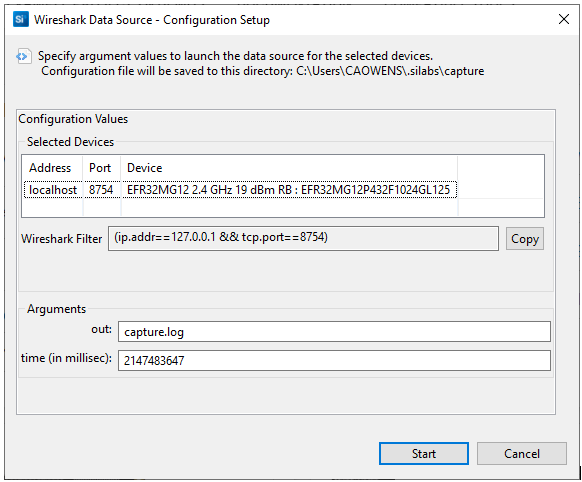
Start Wireshark Data Source with Options: A dialog is displayed in which you can configure the output log name and the capture duration in milliseconds. It also shows the IP address and port number.
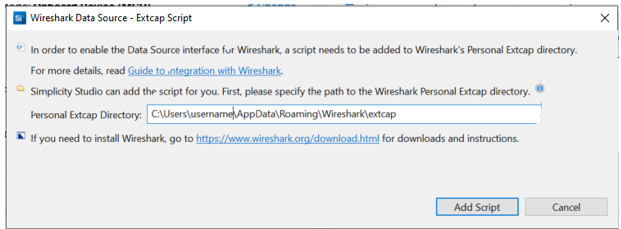
When Wireshark Data Source starts, Simplicity Studio writes a script to Wireshark’s Personal Extcap directory. If this fails, a dialog where you can specify the target location is displayed. To find the location, launch Wireshark, select Help > About Wireshark, and go to the Folders tab.
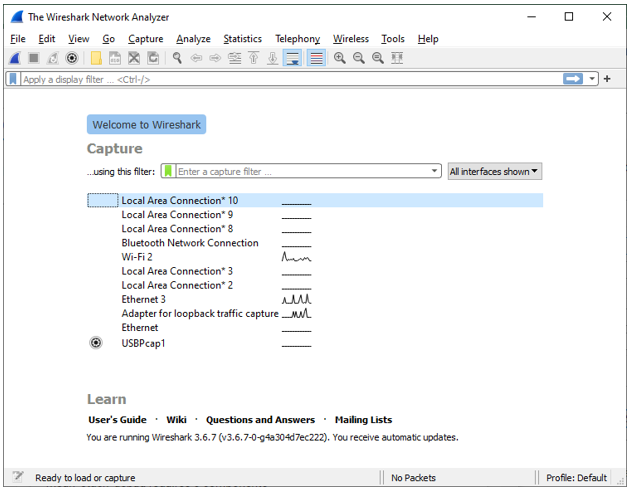
After the Wireshark Data Source starts successfully, Simplicity Studio launches Wireshark automatically, and locks the device. In the Wireshark startup dialog, select a network interface to use and configure the capture and display filters. If the device is connected by USB, select the 'loopback' network interface. For networked devices, try Wi-Fi or Ethernet. See the Wireshark documentation for details on using Wireshark.
Note: Wireshark is launched as a child process of Simplicity Studio. If you close Simplicity Studio, Wireshark also closes.
After you have completed the packet analysis, in Simplicity Studio right-click any of the devices connected to Wireshark, and click 'Stop Wireshark Data Source'. This stops Wireshark Data Source for all connected devices.
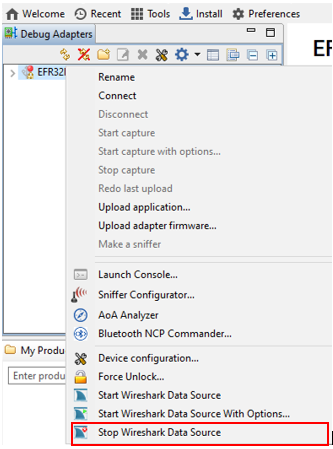
Note: Stopping Wireshark Data Source does not close Wireshark and closing Wireshark does not stop Wireshark Data Source.