


Custom Board Project Creation#
Use one of the following workflows to develop applications for a custom board:
Create a device-compatible project by using a board-independent Empty sample application.
Retarget an example project created for a Silicon Labs development board to a device on your custom board.
Create a Device-Compatible Project#
The simplest approach is to create a project directly for the target device used on your custom board.
When you create the project, select the target device.
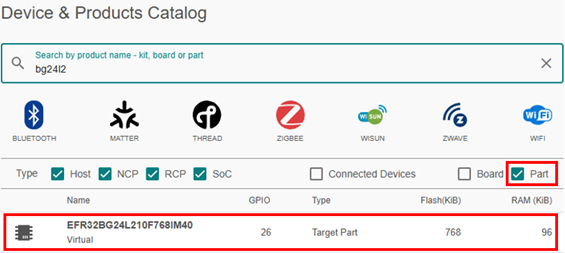
Then select one of the board-independent Empty sample applications provided by the Simplicity SDK, such as:
Bluetooth - SoC Empty
Empty C Project
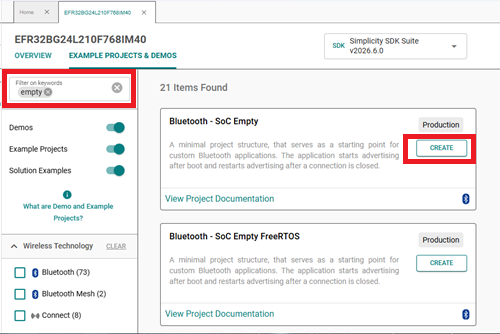
This approach creates a project that is already configured for the selected device, including:
Memory layout
Clock configuration
Available peripherals
Device-specific constraints
The project should build successfully without additional modifications. You can then add any additional configurations required for your custom board and application.
Retarget an Example Project#
If an existing example project closely matches your application, create a project for a Silicon Labs development board, such as a Radio Board or Explorer Kit, that uses a device similar to the target part on your custom board. Then retarget it to the device on your custom board.
This workflow lets you reuse existing software components, peripheral configurations, and application code from a Silicon Labs example.
1. Add a Device#
You do not need a physical board to set up your project with this workflow. You can search for and add Silicon Labs development boards or devices in Simplicity Studio even if no physical board is connected.
Silicon Labs development boards commonly use higher-resource device variants. When retargeting to another device in the same family, verify differences in memory, pins, peripherals, security features, and other device-specific capabilities.
For custom boards that use devices within the same device family, the retargeting workflow supports transitions between superset and subset devices.
To add a device:
On the DEVICES page, select Add Device(s).
In the Search field, enter the device or board name. Make sure the Board and Part check boxes are selected.
If no boards match, delete the last character to broaden the search.
If no matches still appear, select a more general device family instead of one tied to a specific wireless protocol.
Select the device or board from the Device & Products Catalog.
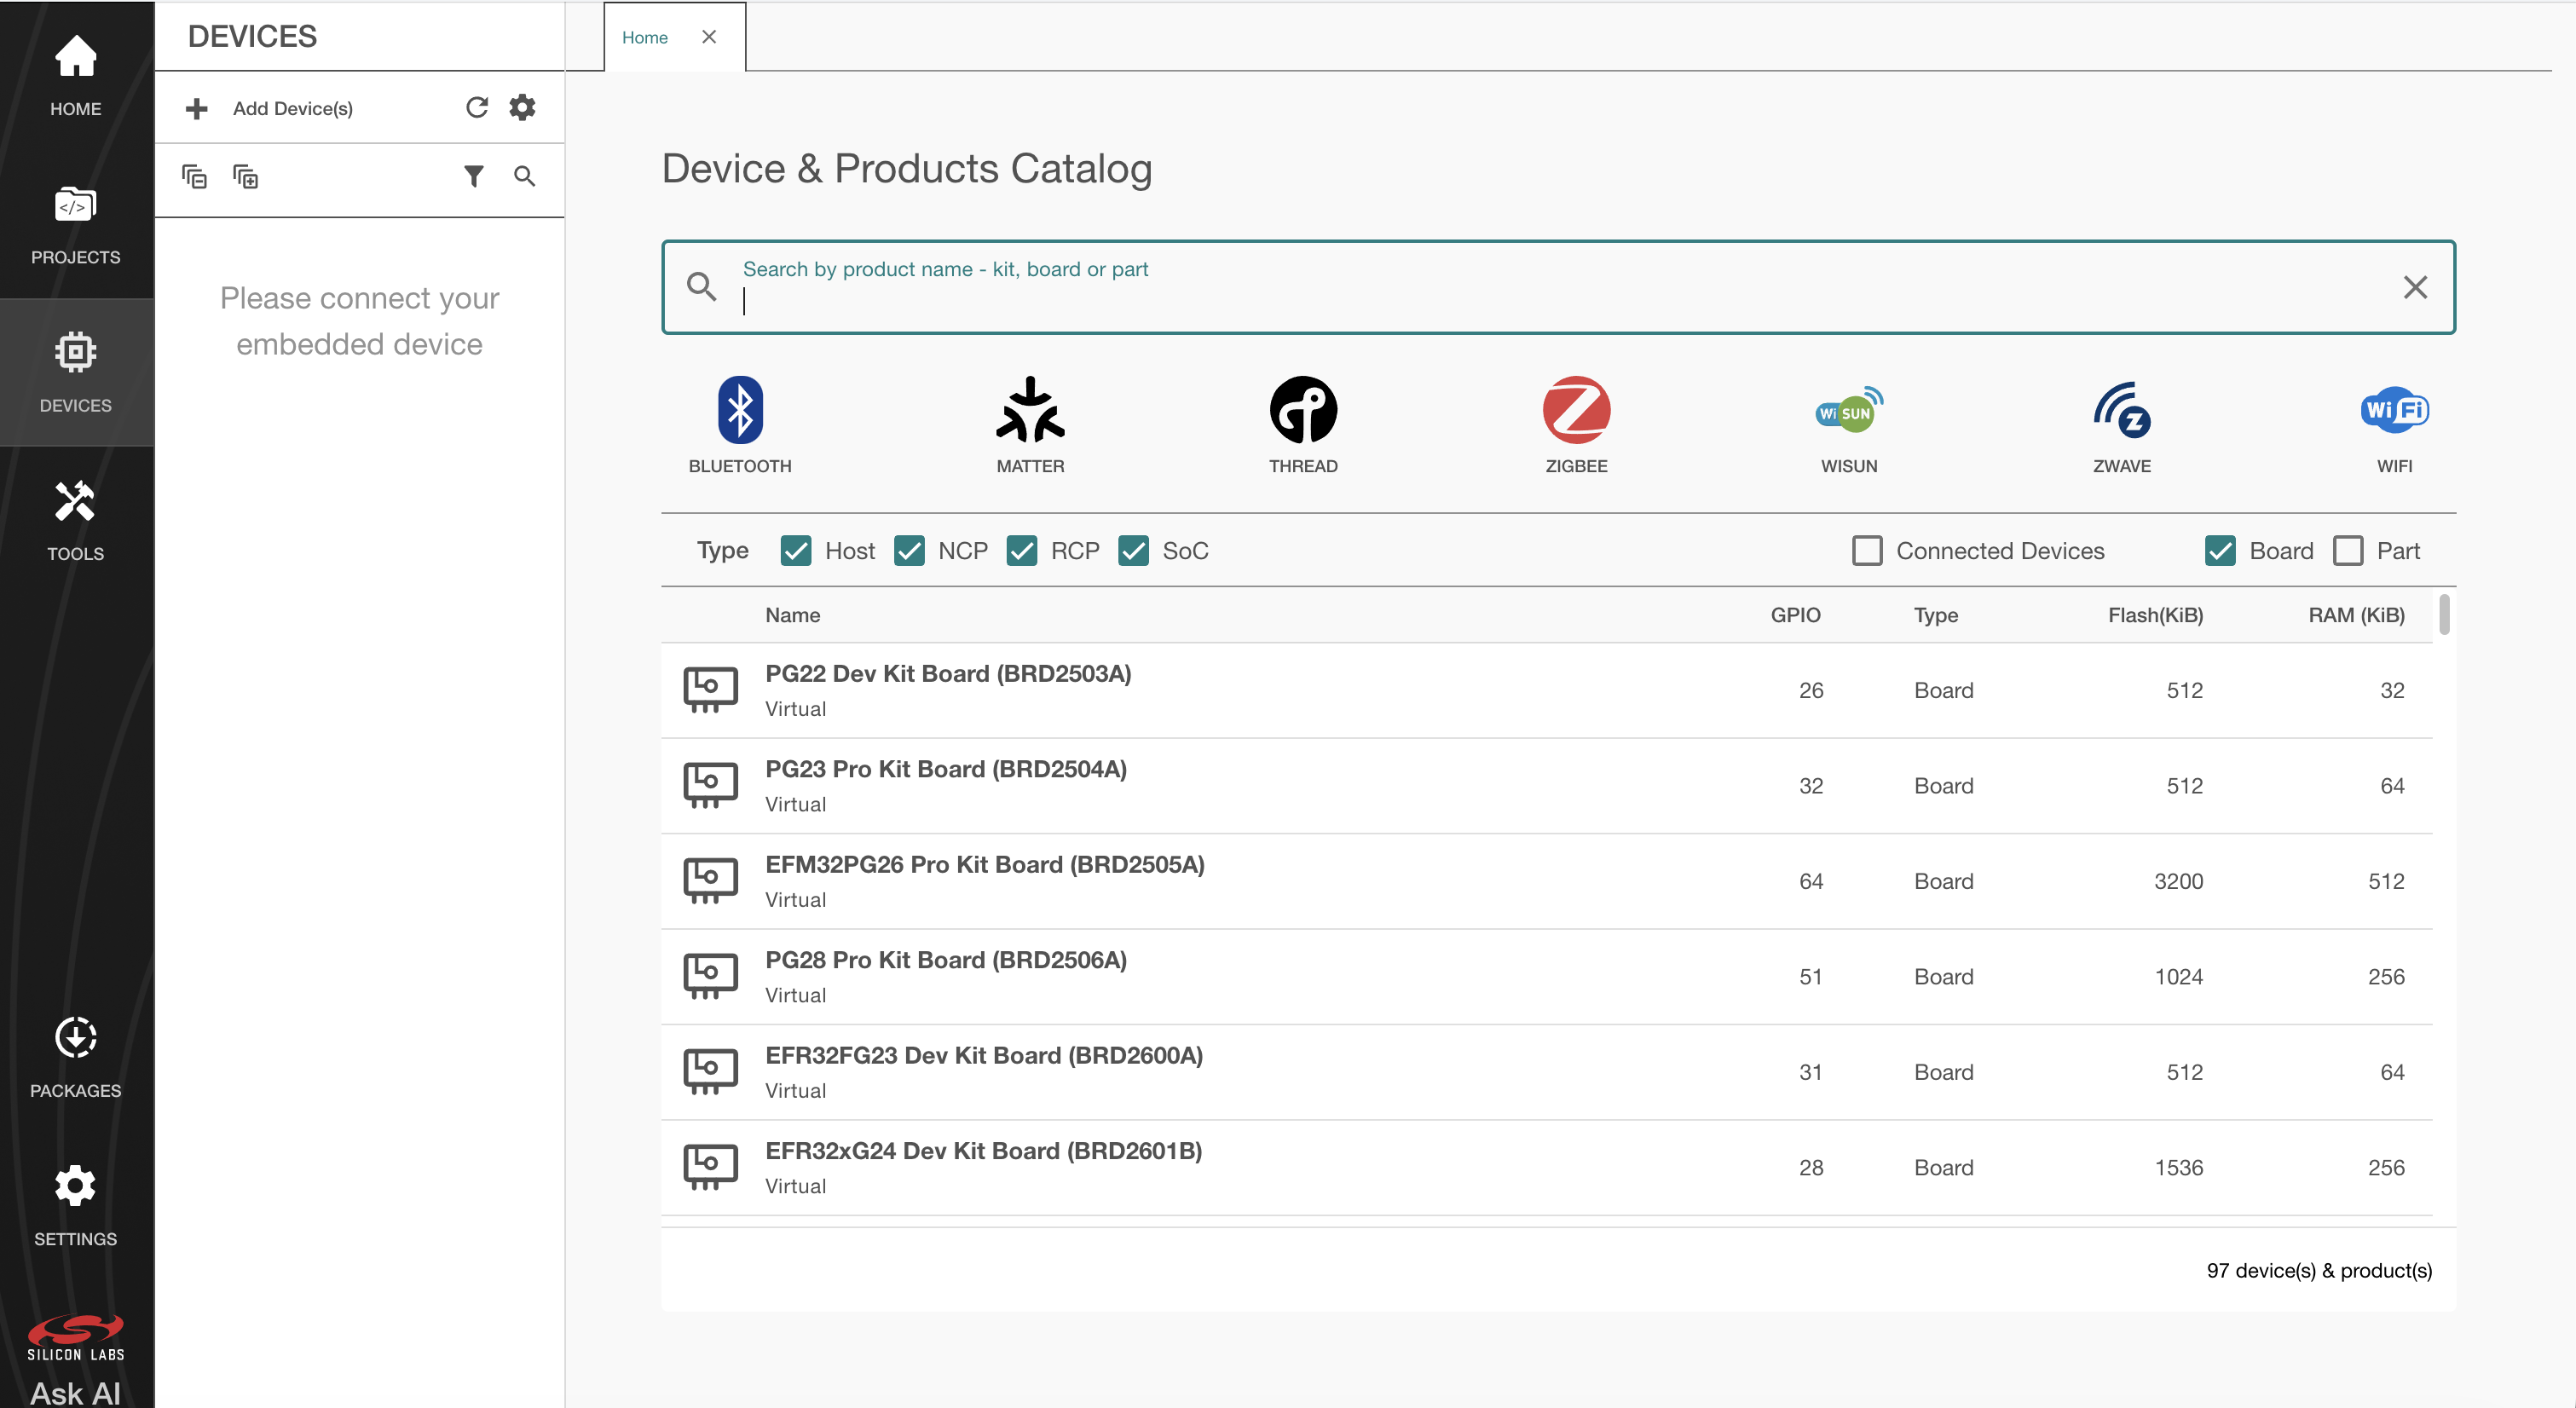
The selected device is added to the Device tree, and a device profile tab opens.
2. Create an Example Project#
After you add a device:
Select the board in the Device tree.
Open the Example Projects & Demos tab to view example projects for that board. If few examples are listed, select a different board.
Use filters to narrow the results.
Select CREATE for a project that closely matches the application you are developing or that uses similar peripherals.
Review the project documentation before you continue.
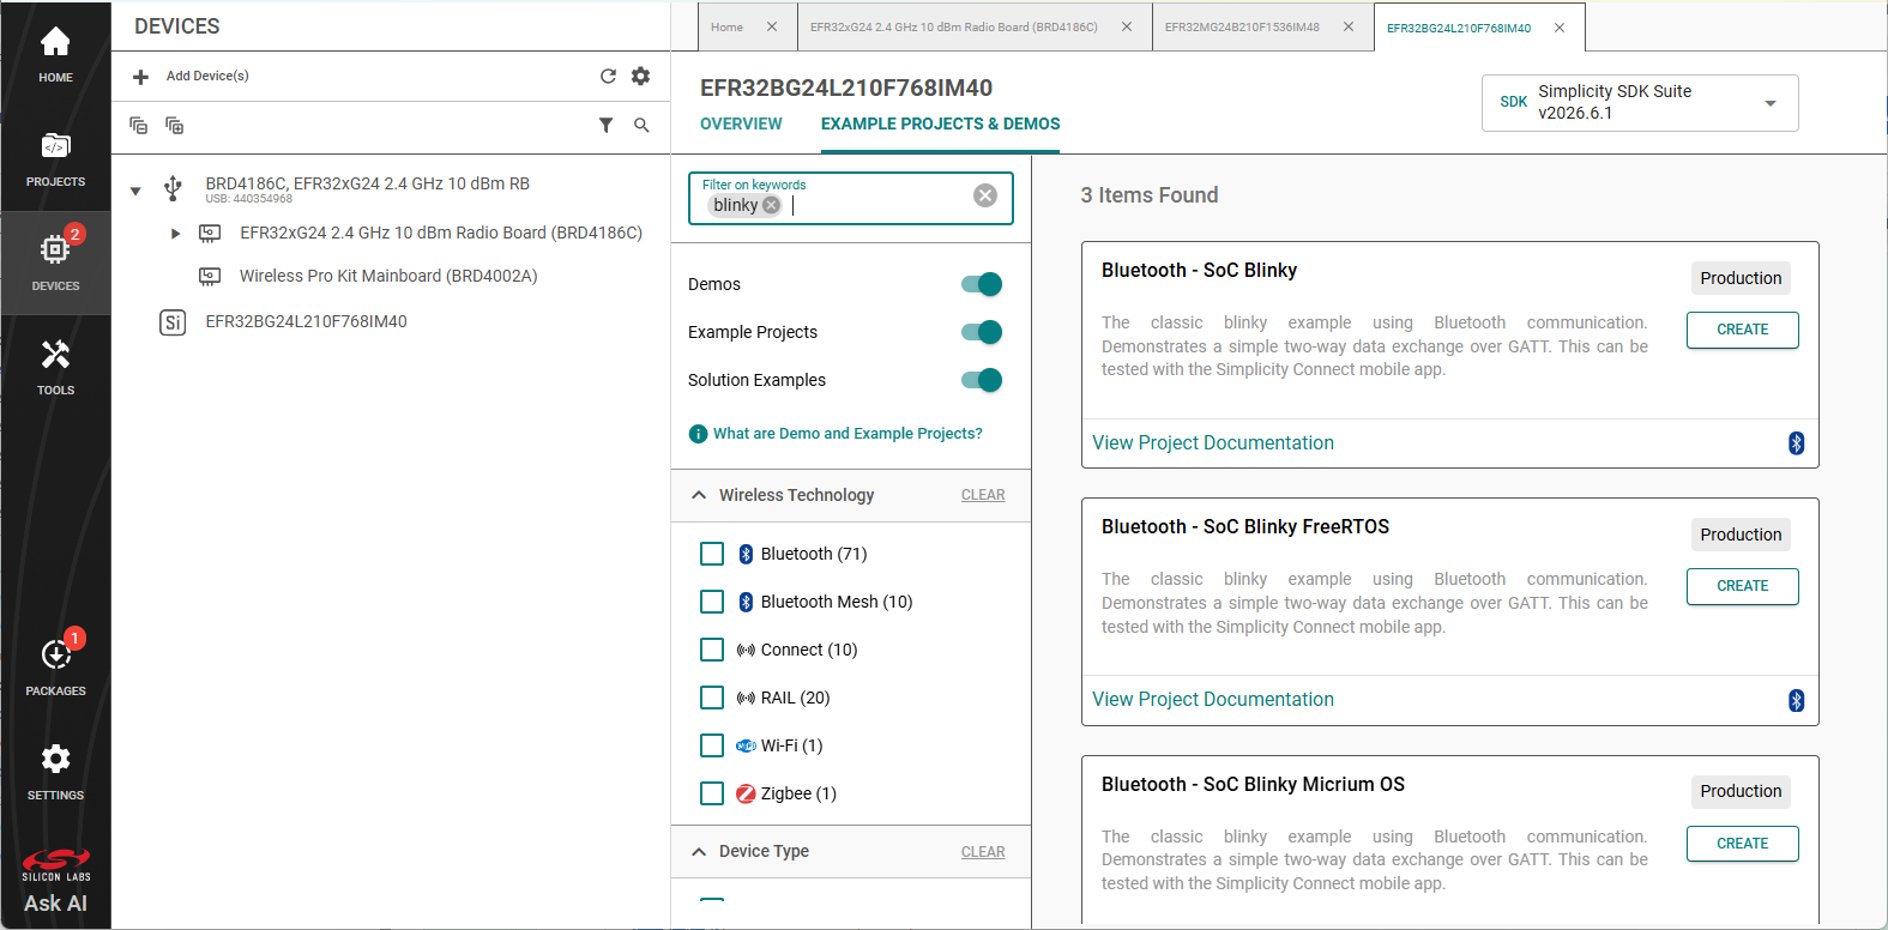
After you create the project, make sure it builds successfully in Visual Studio Code (VS Code) before you retarget it.
3. Retarget the Project#
Although you can retarget at any time, retarget early to help minimize rework, especially if the target part does not have the same resources, such as pins or peripherals, as the part on the original board.
Retargeting requires you to remove the board and select the actual target part from the Project Configurator (.slcp file). This process includes two separate save operations: one after you remove the board and another after you set the target part.
To retarget the project:
In Simplicity Studio, select Projects.
For your project, open the Overview tab and locate the Target and Tool Settings card.
Select Change Target/SDK/Generators.
Enter
custom boardin the Boards Search or Select field.In the Part Search or Select field, start entering the target part, and then select it from the drop-down list. Remove any listed boards by selecting the small x next to each board.
Select Save.
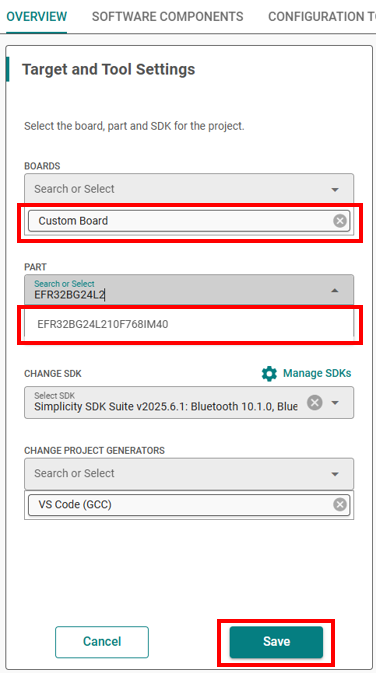
The project is regenerated for the selected device.
When you retarget from a Silicon Labs development board, Project Configurator preserves board configurations, software components, and drivers, such as LEDs, buttons, High-Frequency Crystal Oscillator (HFXO), Low-Frequency Crystal Oscillator (LFXO), radio frequency (RF) front-end, and sensors, from the original board. You do not need to manually create a Board Support Package (BSP) by using the Pin Tool, provided that the custom board pin configuration matches the Silicon Labs board.
If the pin configuration differs, for example if an LED is assigned to a different pin, update the configuration in the Pin Tool based on your custom board schematics.
4. Resolve Configuration Issues#
After you retarget the project, review it for configuration mismatches.
Pin Assignments: Update pin definitions to match the custom board schematic.
Hardware Resources: When you retarget to a target device with the same hardware features, such as peripherals, power modes, and memory, the configuration from the original example is retained. If the target device lacks peripherals or features that the original example uses, remove or replace unsupported components to prevent build failures.
Memory Configuration: Project Configurator automatically updates the linker configuration to reflect memory changes.
After you resolve any configuration issues, generate a Project Configuration Report. This report summarizes installed board components and helps verify the project setup.