Project Configurator#
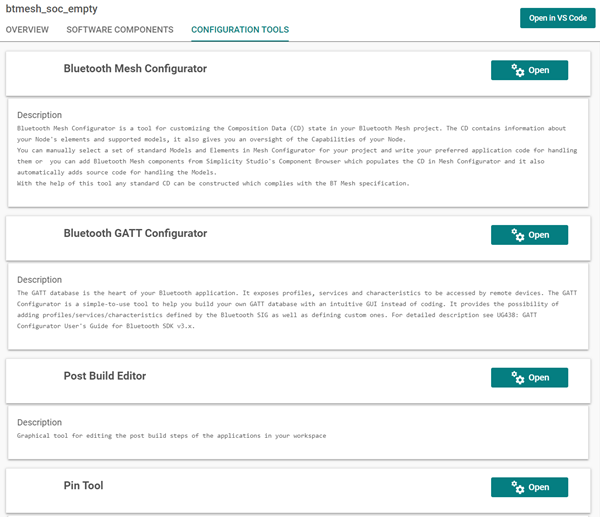
When you create a component-based project (.slcp), the Project Configurator automatically opens the OVERVIEW tab. The SOFTWARE COMPONENTS tab provides access to a library of software components and their configuration functions. The CONFIGURATION TOOLS tab provides quick access to project-specific tools.
To open the Project Configurator for an existing project, double-click the <project>.slcp file in the Project view.
Overview Tab#
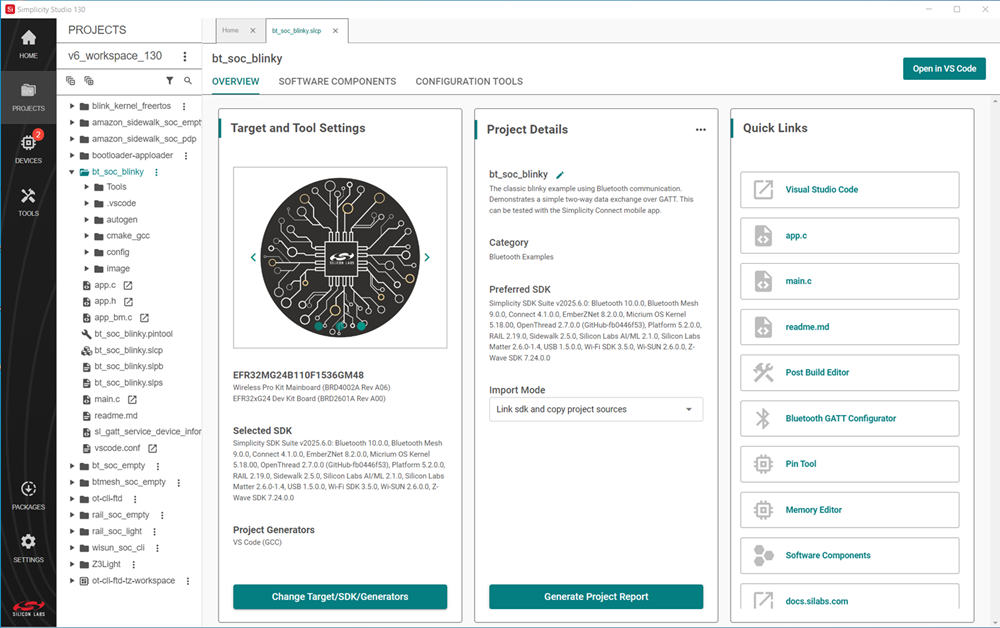
The OVERVIEW tab contains three cards:
Target and Tool Settings, where you can change the target device, SDK version, project generators, and supported toolchains.
Project Details, where you can rename the project, change the import mode, generate a project report, and, in rare cases, force project generation.
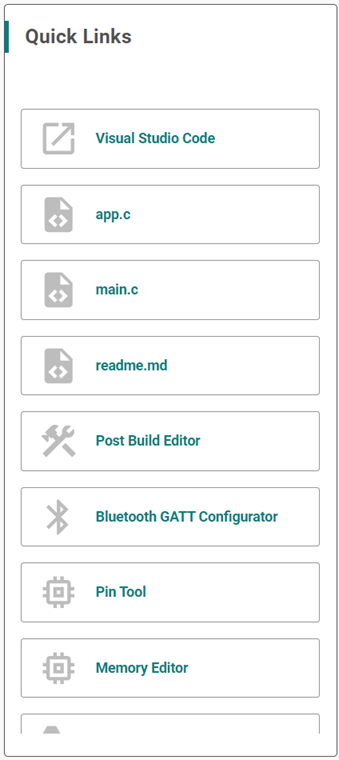
Quick Links, which provides shortcuts to commonly used tools and source files.
Target and Tool Settings#
Click Change Target/SDK/Generators to change the target device, SDK version, project generators, or supported toolchains used by the project. Changes made in this dialog do not take effect until the project is saved.
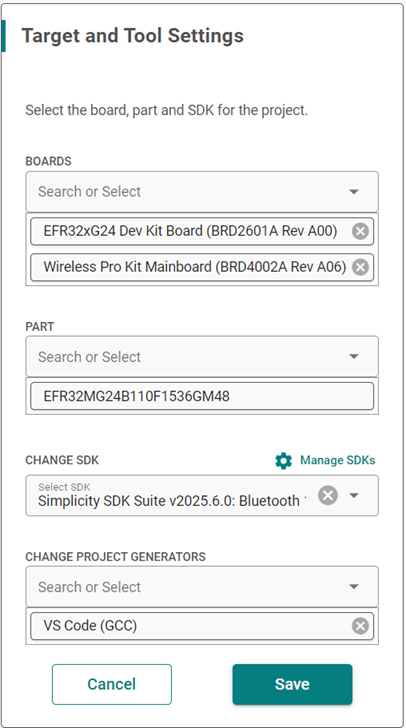
Search for target hardware using a part number. Selecting a different part replaces the currently selected part. Alternatively, remove the existing part and then add a new one.
If multiple Simplicity SDK versions are installed, you can select the version to use for the project. If an expected version is not listed, click Manage SDKs to open SDK Preferences.
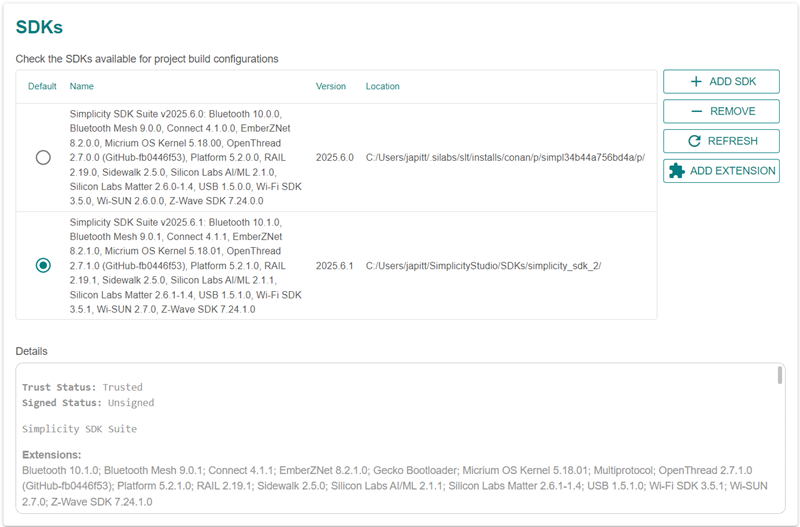
Use SDK Preferences to search for SDKs that may be installed outside Simplicity Studio 6. If multiple SDK protocols are installed within the same Simplicity SDK version, such as Bluetooth and Zigbee, you cannot switch between protocols. You can only select among available Simplicity SDK versions.
Project Configurator can generate project files for multiple development environments and toolchains. Available generators vary based on the selected SDK, target device, and installed toolchains.
Supported generators include:
IAR EWARM (IAR)
Makefile (GCC)
VS Code (GCC)
VS Code (LLVM)
CMake (GCC/IAR/LLVM)
The available generators and default selection vary depending on the SDK, target device, and toolchain support available when the project is created.
You can use Change Target/SDK/Generators to switch between supported project generators and toolchains for an existing project. For example, when supported by the selected SDK and target device, you can switch a project between GCC-based and LLVM-based generation options. After saving the project, Project Configurator regenerates the project files using the selected generator and toolchain.
The preferred IDE can be configured from Settings > IDE Preferences.
Project Details#
Project details include a description of the example on which the project is based, the example category, the SDK versions included in the currently selected Simplicity SDK version, and the import mode.
From this card, you can:
Edit the project name.
Change the import mode.
Generate a Project Report.
Force project generation, if necessary.
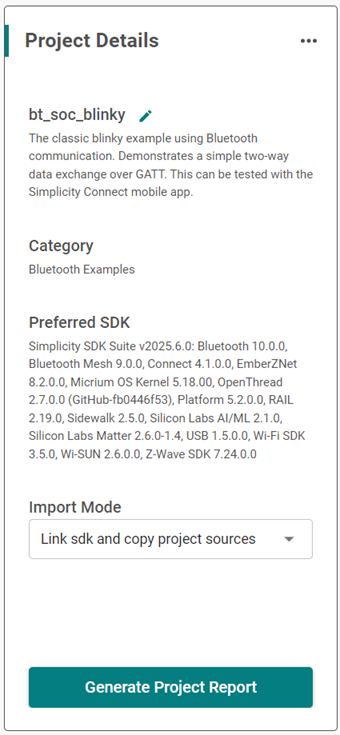
Click the edit icon to modify the project name.
The import mode determines which resources are copied into the project and which resources are linked. If you change the import mode, the change is automatically saved and the project files are regenerated.
Link to sources means that all project and SDK resources are linked. Only generated files are saved with the project.
Link SDK and copy project sources (default) means that all example project source files are copied, but SDK libraries are linked. If you update the SDK and regenerate the project files, the project changes accordingly.
Copy contents means that all resources are copied into the project. You can update the SDK or load an updated example project without affecting the project.
Generate Project Report creates a PDF, available through a link immediately above the control, that includes:
Target hardware device information
Target hardware device pin mappings
Target SDK information
Software extensions used in the build
Installed application, utility, and platform software components
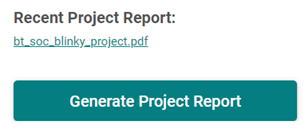
Force Generation, available from the ... menu, is used only in rare cases when automatic generation is not triggered, typically because of changes made outside Simplicity Studio 6. Force Generation runs all available generators, including project generation, radio configuration, GATT generation, and other project-specific generation tasks.
Quick Links#
Quick Links provides shortcuts to tools and other resources commonly used while developing a project. The available links vary depending on the protocol and target device. For example, a Connect project includes a Radio Configurator quick link.
Software Components Tab#
Projects are configured by installing and uninstalling software components and configuring installed components. The SOFTWARE COMPONENTS tab displays component categories on the left and details for the selected component on the right.
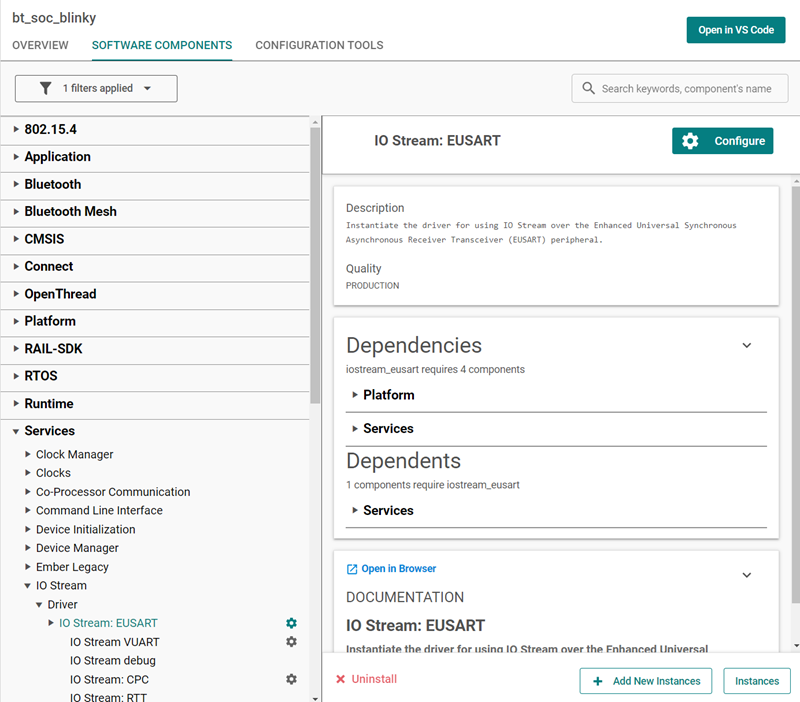
Several filters and a keyword search help you explore available component categories. Components for all installed SDKs are displayed.
Expand a component category or subcategory to view individual components. Select a component to view its details. Components included in the original project or installed by the user are marked with a checkmark (1) and can be uninstalled. Configurable components are identified by a gear icon (2). A configurable component must be installed before its configuration can be modified.
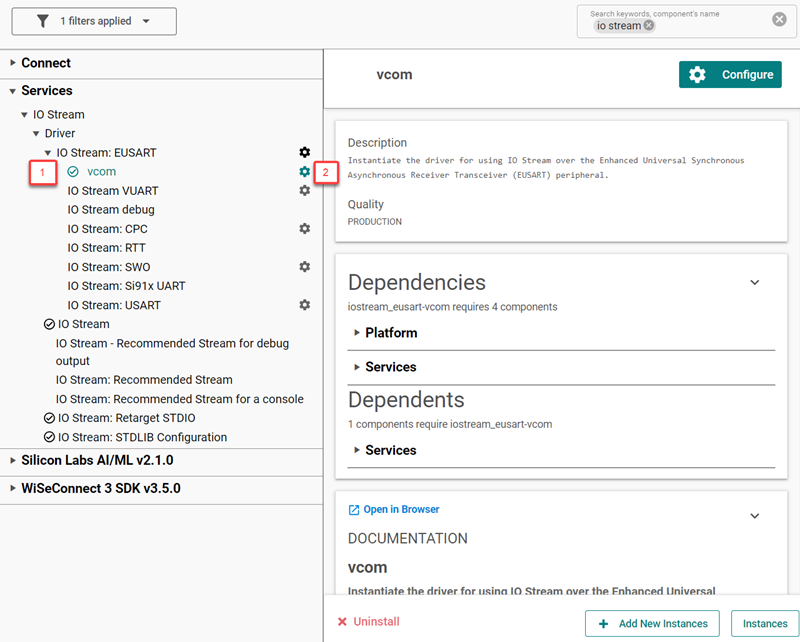
For any component, you can view:
Component dependencies
Components that depend on it
Additional documentation, when available
When you install a component, the installation process:
Copies the corresponding SDK files from the SDK folder into the project folder.
Copies all dependencies of the selected component into the project folder.
Adds new include directories to the project settings.
Copies configuration files into the
/configfolder.Modifies the corresponding autogenerated files in the autogen folder to integrate the component into the application.
Additionally, initialization-type software components implement initialization code for a component by using the corresponding configuration file as input. Some software components fully integrate into the application and perform a specific task without requiring additional code. Other components provide APIs that can be used by the application.
Configuration Tools Tab#
The CONFIGURATION TOOLS tab provides an easy way to open a tool whose tab is not currently open. The tab displays tools that are relevant to the current project type. For example, a Bluetooth Mesh project displays several tools, while an OpenThread project might display only the Pin Tool.
Click Open on a tool card to open the tool in a separate tab.