The following are the troubleshooting steps to follow for different scenarios mentioned below.
Troubleshoot Demo Run#
Error code: 0x10003 is displayed in logs indicating Wi-Fi initialization failure.
This is observed when SiWx917 SoC MBR upgrade is done but SiWx917 connectivity firmware is not updated. Update SiWx917 connectivity firmware to the latest. See the Update the SiWx917 connectivity firmware section.
SiWx917 SoC wakes up from sleep after few seconds of putting it in low-power mode.
Try upgrading the SiWx917 connectivity firmware to the latest. See Update the SiWx917 connectivity firmware section.
Error code: 0x10016 is displayed in logs indicating Wi-Fi connection failure.
This is observed when WiSeConnect 3 SDK compatible SiWx917 connectivity firmware is not programmed. Update SiWx917 connectivity firmware. See the Update the SiWx917 connectivity firmware section.
Liquid crystal display (LCD) output appears distorted while powering on the SiWx917 SoC radio board
Reset the radio board a few times. This is a known issue
If you need further assistance, capture additional logs by following the instructions in the Enable Additional Logs section and share the logs with Silicon Labs Support.
Troubleshoot a Board Detection Failure#
If Simplicity Studio does not detect your radio board, try the following:
In the Debug Adapters pane, Click the Refresh button (having an icon of two looping arrows).
Press the RESET button on the WPK board.
Power-cycle your device by disconnecting and reconnecting the USB cable.
Troubleshoot a Firmware Update Failure#
If the firmware update fails, try one of the following solutions then retry the firmware update:
Toggle the power switch towards AEM (Advanced Energy Monitoring) on the WPK board, or
Perform the following sequence of steps:
Press and hold the ISP button on the radio board.
Press and release the RESET button on the WPK board.
Release the ISP button on the radio board.
In the Flash section in step 5 above, click Erase chip.
The flash will be erased.
Press the RESET button on the WPK again.
If studio fails to detect your board, see the Troubleshoot a Board Detection Failure section.
If the Connectivity FW is shown as Unknown, hold the ISP button and press the RESET button two times.
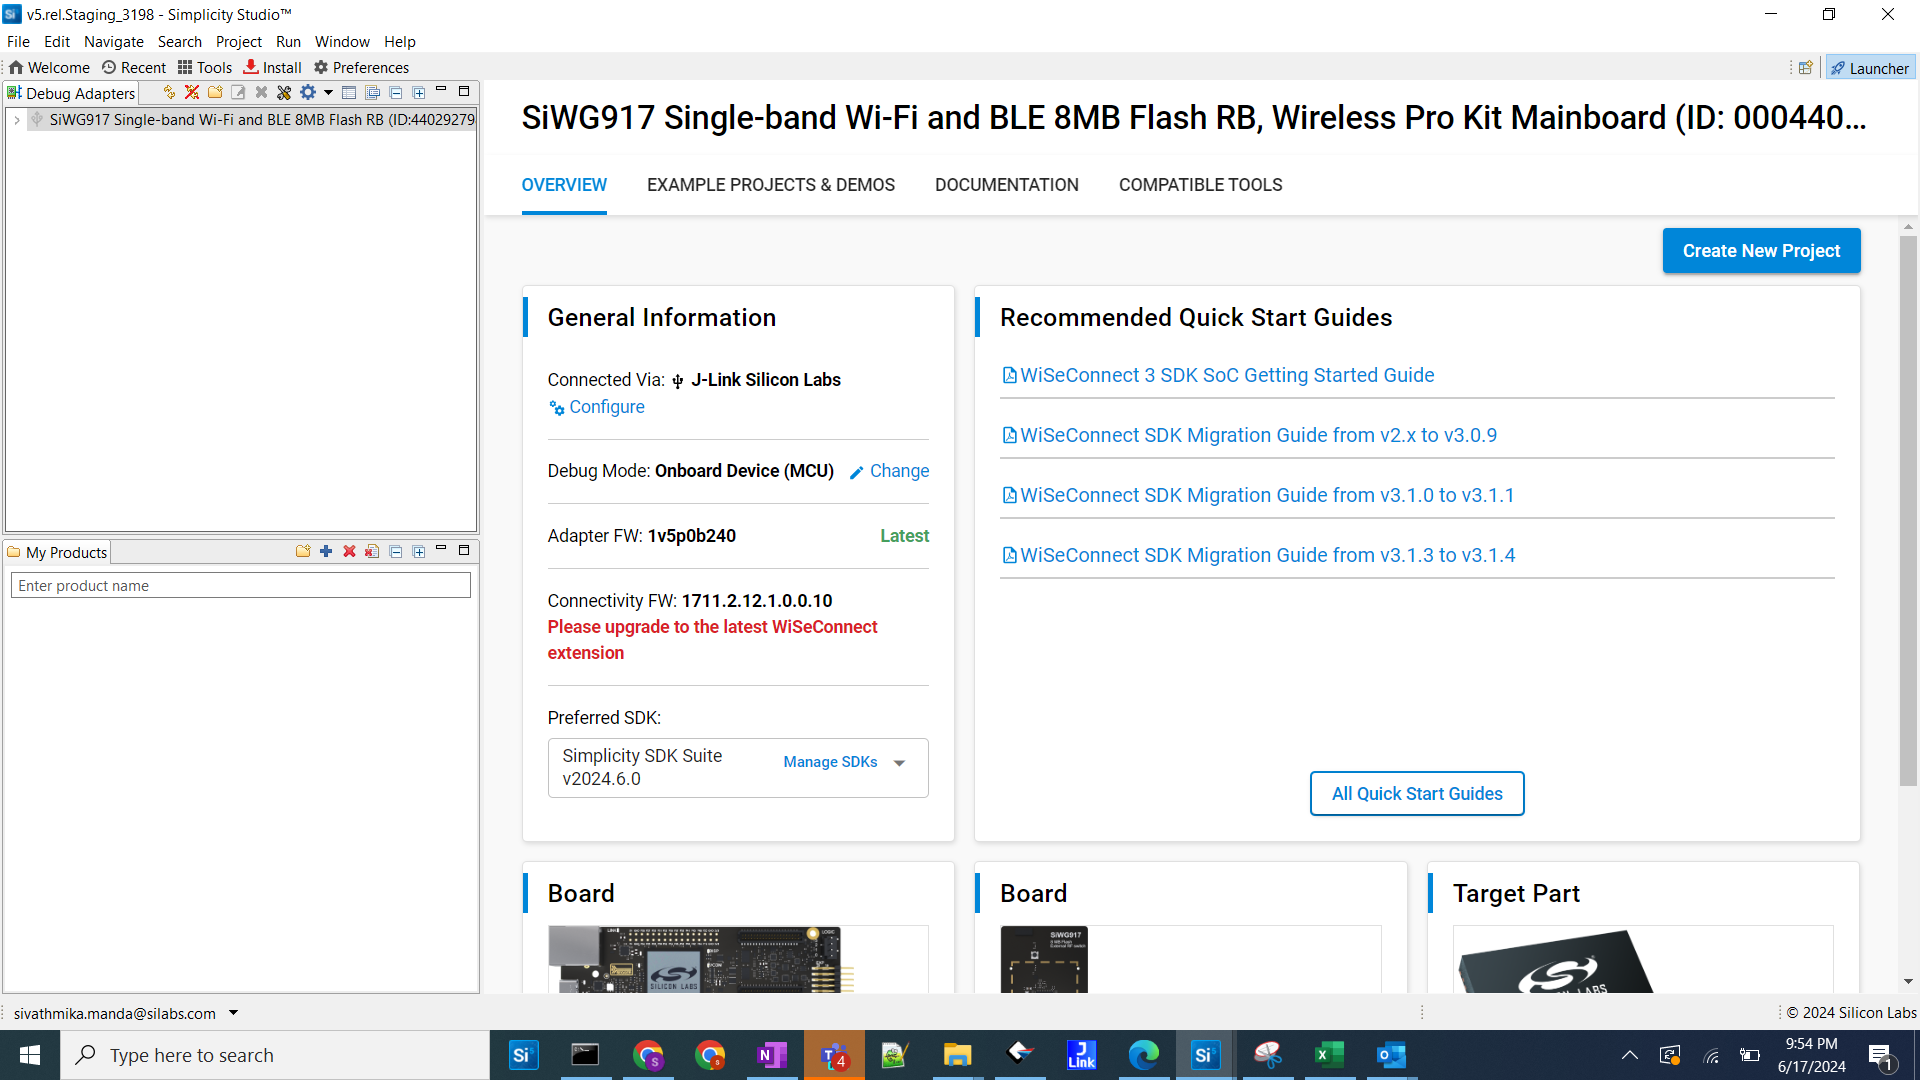
If a message is shown next to Connectivity FW prompting you to upgrade to the latest WiSeConnect extension, it means that you have an older WiSeConnect 3 extension version that requires an older connectivity firmware version than that present on your connected SiWx917 part.
Note: If you wish to use an older WiSeConnect 3 extension version and downgrade your SiWx917 connectivity firmware to that required by the extension, you may follow the firmware update instructions using Simplicity Commander.
Complete the following steps:
The Connectivity FW field will then display one of the following:
The "Latest" label indicating that the connected SiWX917 part now has the firmware version required for your installed extension and no further action is required, or
The Update to xxxx option indicating that the connected SiWx917 part now has an older firmware version than that required for your installed extension. You may click this option and follow the firmware update instructions using Simplicity Studio Launcher:
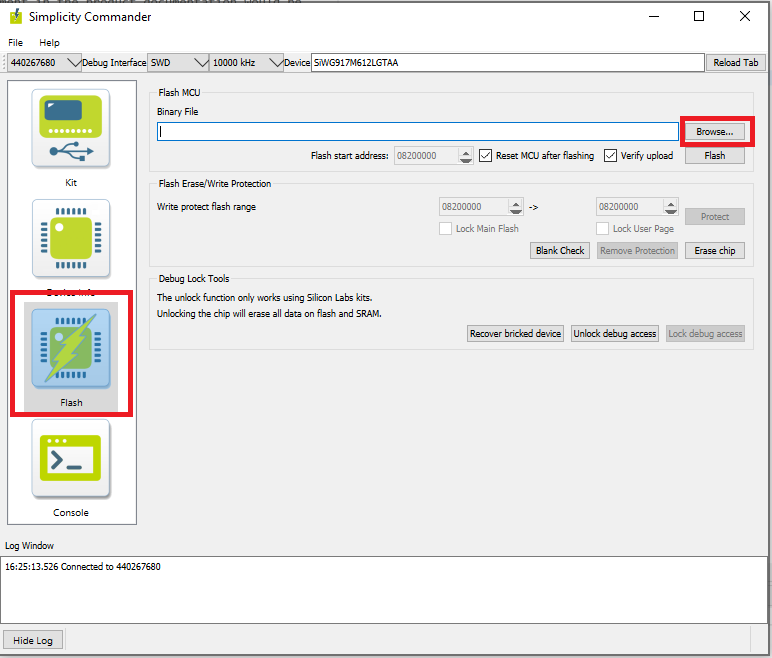
If the firmware update fails and Device is shown as Cortex M4 in the Flash tab as shown below, follow the steps below to verify and update your Simplicity Commander tool:
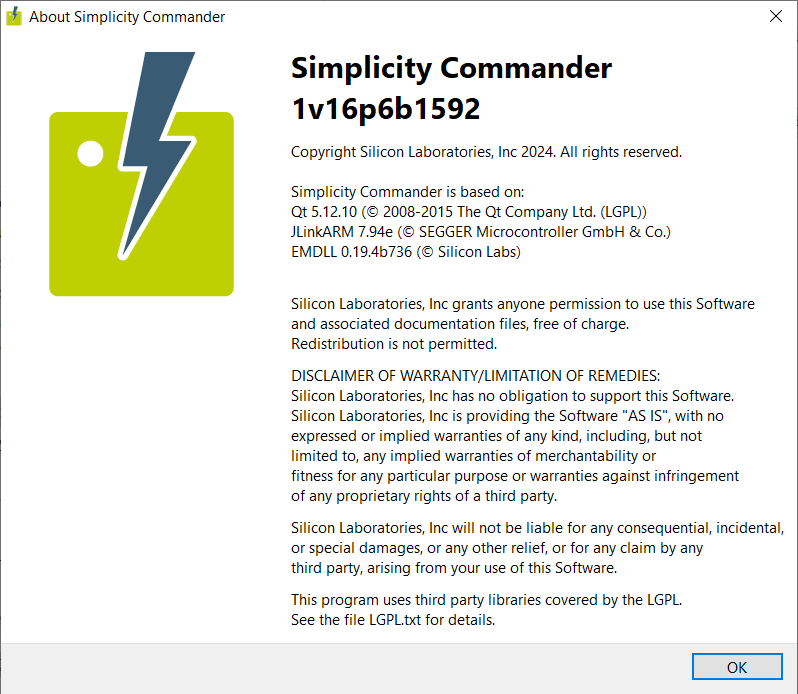
Select Help > About Simplicity Commander from the Simplicity Commander menu.
Verify that the version is 1v16p6b1592 or later. Note that the first digit represents the major version number, v is preceded by the minor version number, p by the patch number, and b by the build number. So for example, 1v16p6v1592 is the same as 1.16.6.1592.
If the version is earlier than that mentioned above, download and install the latest Simplicity Commander version.
Troubleshoot an Application Build#
For Toolchain errors
Try upgrading GNU ARM toolchain version to v12.2.1 for SiSDK (formerly GSDK) versions v4.4.0 onnwards. See the GNU ARM v12.2.1 Toolchain section.
Troubleshoot an Application Flash Failure#
The application may fail to flash for one of the following reasons:
Error code 102 appears in the logs indicating that the bootloader flash API is not responding due to the ISP mode being enabled. Try the following steps:
Press and hold the ISP button on the radio board.
Press and release the RESET button on the base board.
Release the ISP button on the radio board.
Retry flashing the application.
"Could not connect debugger. Could not connect to target device" is displayed in the logs, indicating that the application processor is in a low power state with no flash access. Try the same steps as those described above for error 102.
Error code 108 is displayed in the logs, indicating that the RPS file being submitted is corrupted. Try the following steps:
Method 1:
To resolve this issue, you need to replace the existing RPS file. To reload it, follow these steps:Open Simplicity Commander from the top toolbar.
Select the kit.
Click on the "Flash" option in the interface.
Erase the kit by clicking the "Erase" button on the interface.
Choose the correct RPS file and flash it.
Attempt to re-run the program.
Method 2: Checksum verification failure occurs when there is a mismatch in the bit size within the RPS file.
To resolve this issue, you need to increase the size of the binary file. One method to achieve this is by adding log/print statements in the application code.
Error code: 0x10016 is displayed in logs indicating Wi-Fi connection failure.
This is observed when WiSeConnect 3 SDK compatible SiWx917 connectivity firmware is not programmed. Update SiWx917 connectivity firmware. See the Update the SiWx917 connectivity firmware section.
Unknown reason - try re-launching Simplicity Studio.
For additional tips, see the Troubleshoot Firmware Update Failure section. Follow the suggested steps and then, instead of retrying the connectivity firmware update, retry flashing the application.
Troubleshoot an Application Run Failure#
Liquid crystal display (LCD) output appears distorted while powering on the SiWx917 SoC radio board
Reset the radio board a few times. This is a known issue
Troubleshoot an Application Debug Failure#
The application may fail to enter the debug mode due to one of the following reasons:
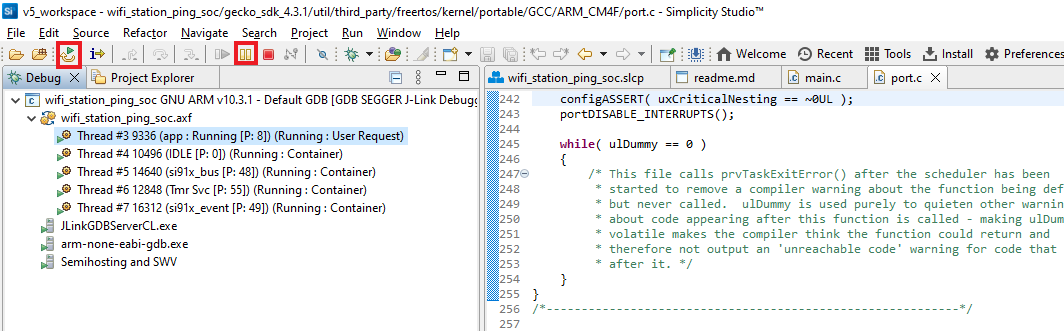
Studio failed to halt execution at the
main()function. Perform the following steps before trying again:Click the Suspend button (having a pause button icon).
Click the Reset button (having an icon of a play button with an arrow underneath).
Retry debugging the application.
For additional tips, see the Troubleshoot an Application Flash Failure section. Follow the suggested steps and then, instead of retrying the flashing of the application, retry debugging the application.