Firmware Update Images and Bootloader#
General Information#
The guide assumes that the user is running Simplicity Studio V5.6.4.0, which at the time of writing this document is the latest version available.
Note: Detailed information regarding bootloaders for the 800 series is available here and here
Before going further into this guide, it is important to know a few files and locations that are crucial in following the subsequent steps.
Default Locations#
Default Simplicity Studio Installation Location:
C:\SiliconLabs\SimplicityStudio\v5Default SDK Installation Location:
C:\Users\{Username}\SimplicityStudio\SDKsDefault Workspace Location:
C:\Users\{Username}\SimplicityStudio\v5_workspaceOTA gbl file 255 version - for purposes of this exercise, let it be the zwave_soc_switch_on_off file. (zwave_soc_switch_on_off_BRD4204D_v255.gbl).
Sample gbl files location:
{SDK Installation Location}\gecko_sdk_4.1.0\protocol\zwave\Apps\bin\gblSample encryption keys - (sample_sign.key, sample_sign.key.pub, sample_sign.key-tokens.txt, sample_encrypt.key)
Sample keys location:
{SDK Installation Location}\gecko_sdk\protocol\z-wave\platform\SiliconLabs\PAL\BootLoader\sample-keysBootloader image files: ota-EFR32ZG23_BRD4204D-crc.s37
Bootloader location:
{Simplicity Studio Installation Location}\offline\com.silabs.sdk.stack.super_4.0.1\protocol\z-wave\Apps\binCommander utility location:
{Simplicity Studio Installation Location}\developer\adapter_packs\commanderSample project location:
{Default Workspace Location}\zwave_soc_switch_on_off\
Note: The above paths are customizable by the user and as such must be adapted if they are different from the default paths given above.
For the Series 800#
Download the bootloader image files. This is done by running the sample demo in Simplicity Studio. This will download the bootloader images to disk.
Create an example project using the same project above as a template.
Build the project in SimplicityStudio and generate the hex files.
Erase device:
commander.exe device masserase -s 440049475Reset device:
commander.exe device reset -s 440049475Flash the appropriate OTA bootloader image â for purposes of this exercise, let it be eval board BRD4204:
commander.exe flash {bootloader location}\ota-EFR32ZG23_BRD4204D-crc.s37 -s 440049475Flash initial device firmware built in step 3:
commander.exe flash "{sample project location}\zwave_soc_switch_on_off.hex" --address 0x0 -s 440049475Flash the encryption keys:
commander.exe flash --tokengroup znet --tokenfile sample_encrypt.key --tokenfile sample_sign.keytokens.txt -s 440049475Reset device:
commander.exe device reset -s 440049475Connect a controller or a device running a controller firmware to the PC and start the PC controller application.
Include the node into the network and make sure the device is visible.
In the PC controller application initiate the OTA update using the OTA gbl file mentioned in the prerequisites.
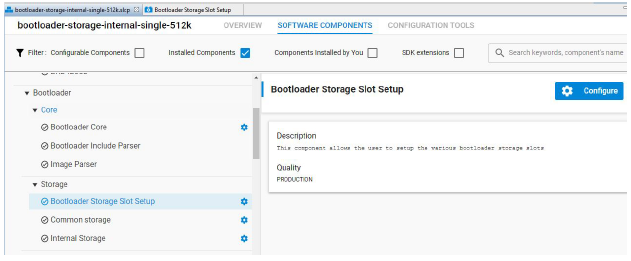
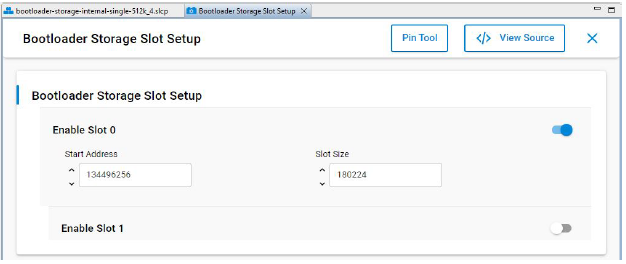
Bootloader configuration#
The bootloader resides at the start address 0x08000000 of the main flash and a fixed space of 24KB is reserved for this. Z-Wave applications will start from address 0x08006000. The bootloader must be flashed first before the Z-Wave sample application is flashed. It is also possible to combine the bootloader and the Z-Wave application into a single image. *One can use the pre-built bootloader images available in Simplicity Studio or build a bootloader image by themselves using the bootloader sample applications in Simplicity Studio. * When building the bootloader, the OTA image storage information must be configured according to subsequent images. Importantly, this storage slot (slot0), start address and size must not be changed.
The postbuild.sh script available in the Simplicity Studio project for Z-Wave sample applications can be used as an example to combine the bootloader and the Z-Wave application into a single image. This script also contains a reference example for generating the OTA images.
Linker Script for the 800 Series#
The Z-Wave sample applications that are available in Simplicity Studio contain linker scripts that have been tuned to accommodate the OTA image-related configuration as well. It is recommended not to modify this linker script when developing applications.
Bootloader Compression for 800 Series
The bootloader compression type used for OTA is lzma compression. The corresponding component name to be selected in the studio is bootloader_compression_lzma.
Application Upgrade Version
The studio component bootloader_app_upgrade_version has to be selected for checking the application version during upgrades.
Erase and Read Manufacturing Tokens for the 800 Series#
There is a dedicated space in the flash memory where the Manufacturing Tokens data can be stored. This area can be written once during firmware running. To save the new region, the flash must be erased before.
Read token frequency:
commander tokendump --tokengroup znet --token MFG_ZWAVE_COUNTRY_FREQ
Write token frequency:
commander flash --tokengroup znet --token MFG_ZWAVE_COUNTRY_FREQ:0xFF
0xFF means this area is erased.