Programming and Executing the Demos, Connecting them in a Z-Wave Network#
This section covers programming and executing the demos, in addition to connecting Them in a Z-Wave network.
Programming the Controller Device#
The Z-Wave PC Controller is an application for communicating with Z-Wave and Z-Wave Long Range nodes, like switches and sensors, through a device running Serial API connected to a USB port on the PC.
The PC Controller is often used in the development of a new Z-Wave end-device. The device can be included in the PC Controller, which can then be used to test its functionality by sending it various commands.
This quick start guide will only cover the very basics of this tool. Refer to the manual, INS13114 - Instruction, Z-Wave PC Based Controller v5 User Guide, to learn about all the features of this tool.
To program one of the Thunderboards with the Serial API demo application:
Start by connecting the Thunderboard via the USB port to your computer.
Start Simplicity Studio and, on the Launcher landing page, wait until Simplicity Studio detects your device.
When it is finished, select the board from the connected devices and click Start. See Connecting to Z-Wave Thunderboard in Simplicity Studio.
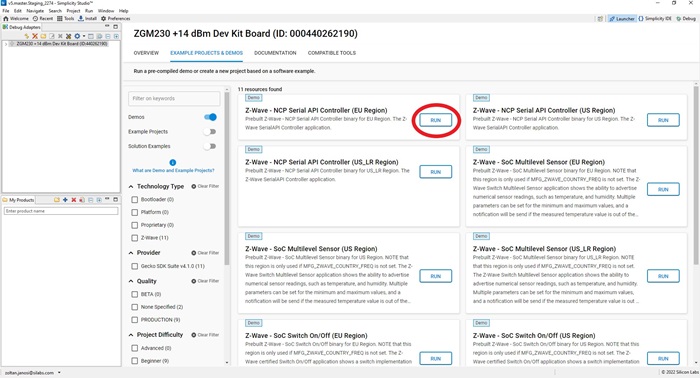
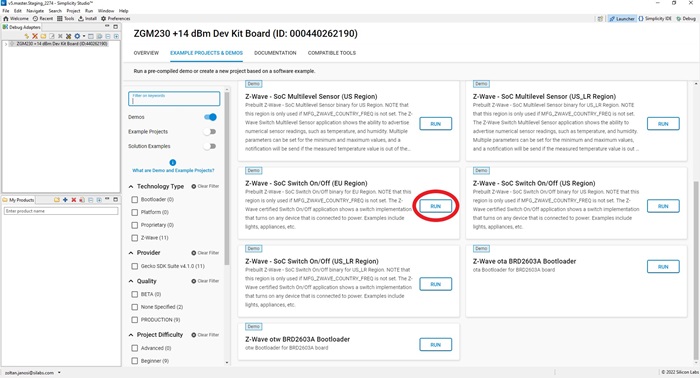
In the device overview page, click the EXAMPLES PROJECTS & DEMOS tab, unfilter Examples and Solutions, look for the Z-Wave - NCP Serial API Controller demo application, and program the one that corresponds to your region using the RUN button.
Run the Z-Wave PC Controller by clicking on the Tools icon on the toolbar. In the Tools dialog, click Z-Wave PC Controller.
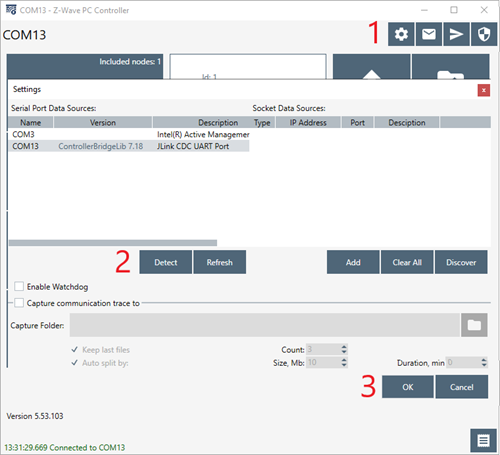
To connect to the device, open PC Controller and click the Settings icon. Select the correct COM port. Use the Detect button if you are unsure about the correct port.
In the PC Controller’s Network Management menu, you should see the device detected as controller and added to the network.

Programming the End-Device#
Now that you have a working Z-Wave controller device, you can program a second Thunderboard as an end-device.
Programming the Bootloader#
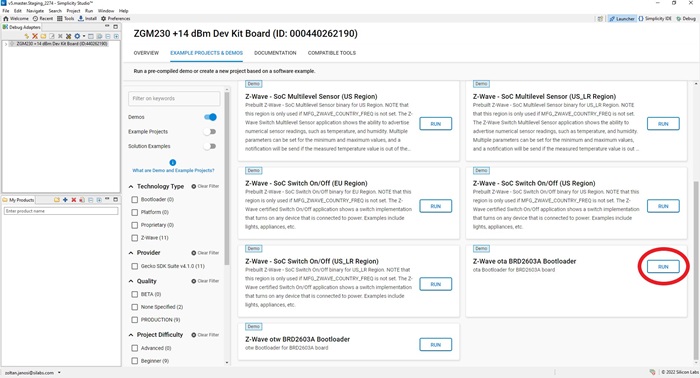
The Z-Wave example applications require the presence of the Gecko Bootloader on the end-device. To program the demo bootloader, look for Z-Wave OTA Bootloader in the Simplicity Studio device overview EXAMPLE PROJECTS & DEMOS tab, and click RUN.
Programming Switch On/Off Demo#
After programming the Bootloader, using the same user interface in Studio device overview Example Projects & Demos tab, program the Switch On/Off demo by clicking on RUN. Make sure to use the same region variant as the Serial API you selected previously.
Network Inclusion#
To be able to control the end-device remotely, you have to include it into a Z-Wave network first.
Connect both programmed boards to the PC via USB.
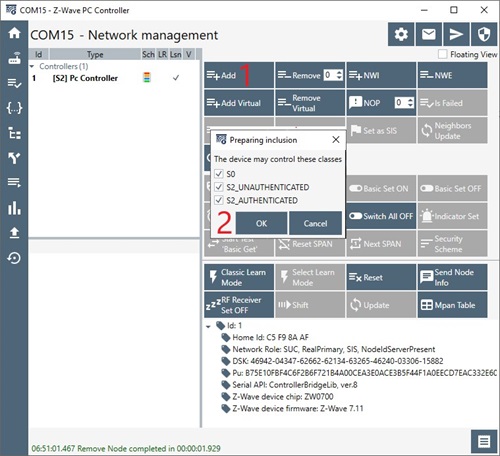
Using the controller device in the PC Controller application, on the Network Management view, click Add.
Press BTN1 on the end-device board to enable Learn Mode.
In the Preparing Inclusion dialog, click OK.
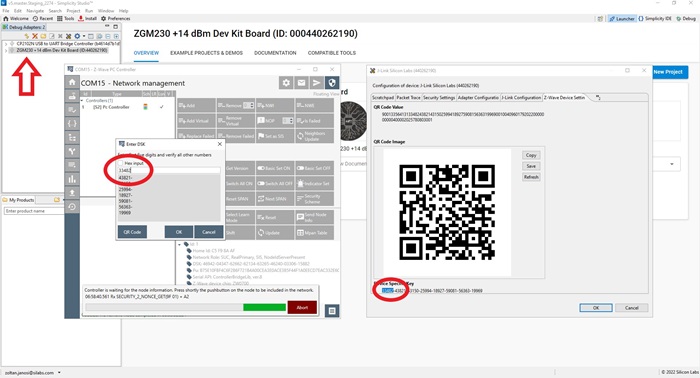
All the demo applications implement Z-Wave S2 security. The S2 DSK (Device Specific Key) is used to authenticate the included device before exchanging the network keys. The PC Controller will require you the enter first five digits of the Device Specific Key. To find the DSK, right click on the device in Simplicity Studio Debug Adapters list and select Device Configuration. Then in the dialog, click the Z-Wave Device Settings tab. Enter the DSK and click OK.
Using the SwitchOnOff Demo Application#
The Z-Wave certified Switch On/Off application shows a switch implementation that turns on any device that is connected to power. Examples include lights, appliances, etc.
Usage of the application:
Press BTN0 to toggle LED0 On or OFF
Press BTN1 to enable LEARN mode
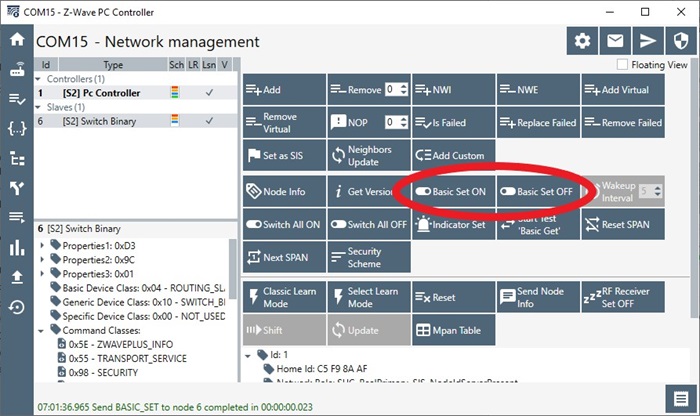
You can control the device’s Switch functionality from the PC Controller, which will toggle LED0, by using Basic Set ON and Basic Set OFF buttons.