NCP Host Development#
This section introduces the Bluetooth NCP Commander tool, which can be used to send BGAPI commands from a graphical user interface. It then walks through the process of building the PC Host examples provided in the Bluetooth SDK. And finally, it describes using Python for host side development.
Bluetooth NCP Commander#
Bluetooth NCP Commander is an easy-to-use tool that can be used for testing different stack features, by sending BGAPI commands to the target device. The tool has two versions: a version built into Simplicity Studio, which makes it easy to connect to your development kit and start testing, and a standalone version to test a board in an environment where Simplicity Studio cannot be installed, or if you want to test a custom board that can be accessed on UART interface, but not through a Simplicity Studio supported debug adapter using VCOM.
Built-in Version#
To open the built-in Bluetooth NCP Commander, select the target board in the Debug Adapters view, and check that the preferred SDK is set to Gecko SDK Suite vn.n.n. Select the Compatible Tools tab, and click Launch next to Bluetooth NCP Commander.

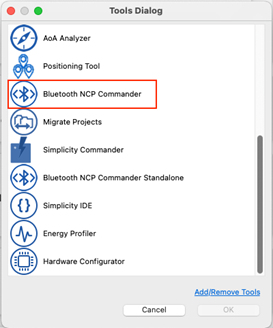
Alternatively, you can open the built-in Bluetooth NCP Commander from the Tools menu.
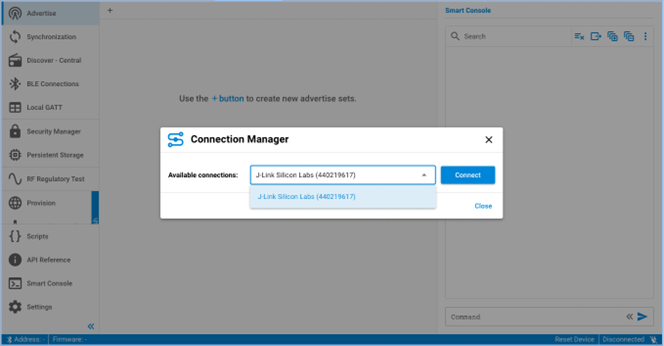
Select the target device, and click Connect.
Standalone Version#
To open the standalone tool, navigate to C:\SiliconLabs\SimplicityStudio\v5\developer\adapter_packs\ncp_commander, and start NcpCommander.exe.
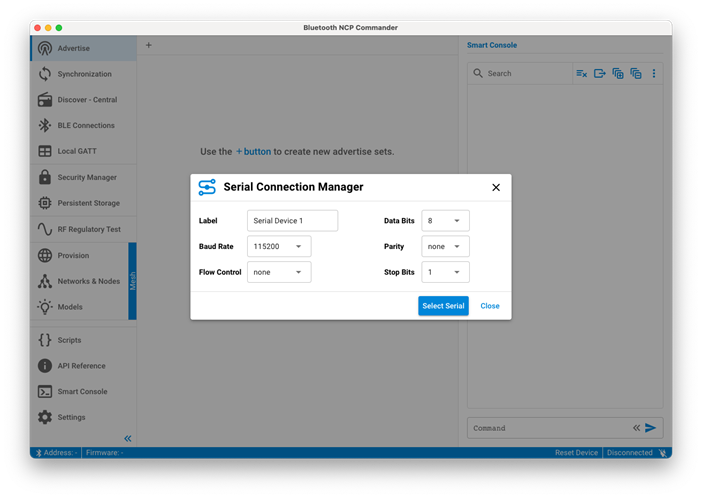
In the standalone tool, provide the UART interface settings, and then select the COM port on which the device can be accessed.
Bluetooth NCP Commander Functions#
The following procedure covers most NCP Commander functions.
After the device is connected, you should see the result of the
sl_bt_system_get_identity_addresscommand displayed in green: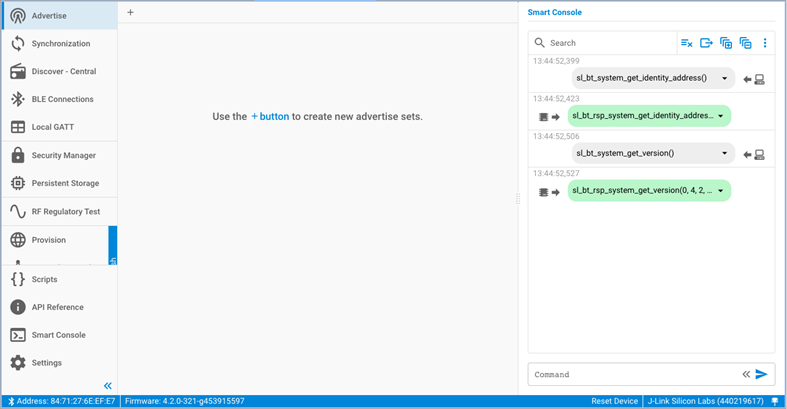
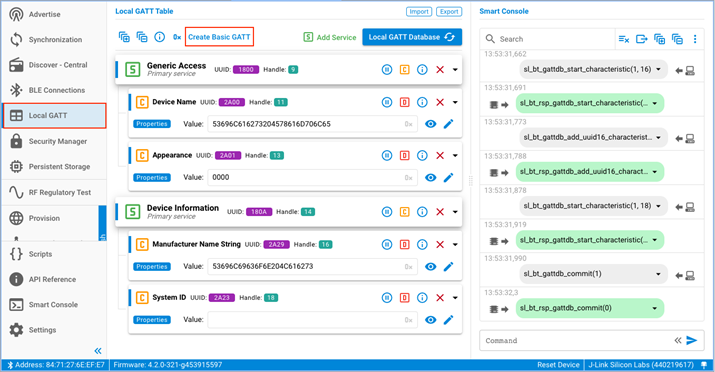
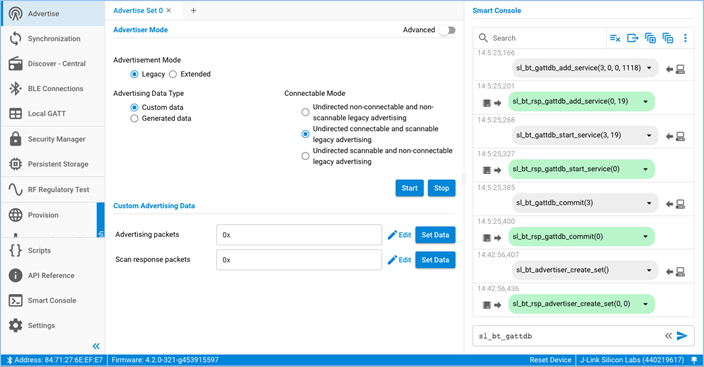
Unlike SoC examples, the NCP demo does not have a built-in GATT database. It expects the host to build the GATT database using the dynamic GATT database BGAPI commands. To create a basic GATT database, select the Local GATT menu, and click Create Basic GATT. This triggers a series of BGAPI commands that will build a basic database. You can modify this GATT database as you want. You can also change the device name here by changing the value of the Device Name characteristic.
To extend the database with new services, characteristics, and descriptors, click Add Service. You can then add new characteristics for the service.
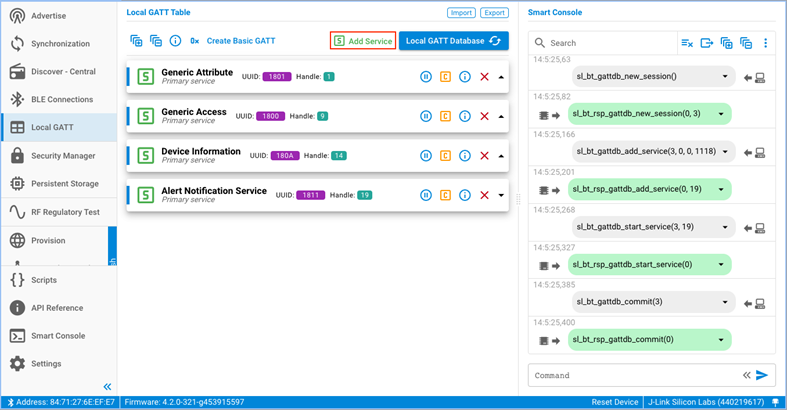
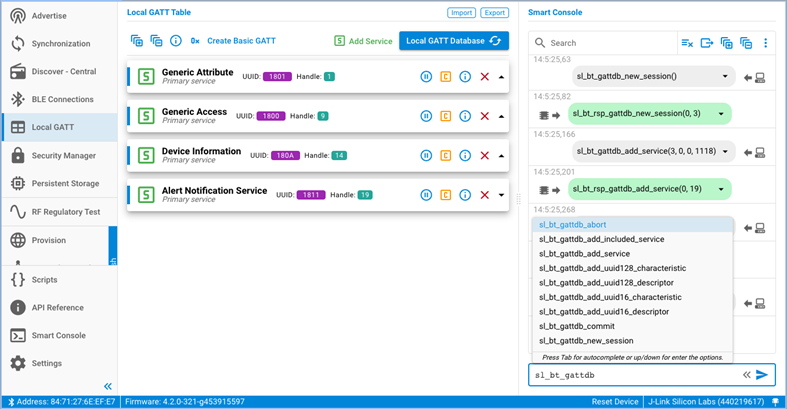
To read out the GATT database from the device, click Local GATT Database. The smart console also supports API calls for creating entries.
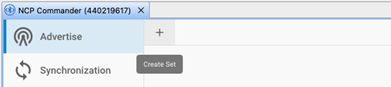
To start advertising your device so that other devices can discover it and connect to it, in the Advertise menu click '+' (Create Set) to create an advertiser set.
To populate the advertisement payload with the device name, set the Advertising Data Type to Generated data and click Start to start advertising.
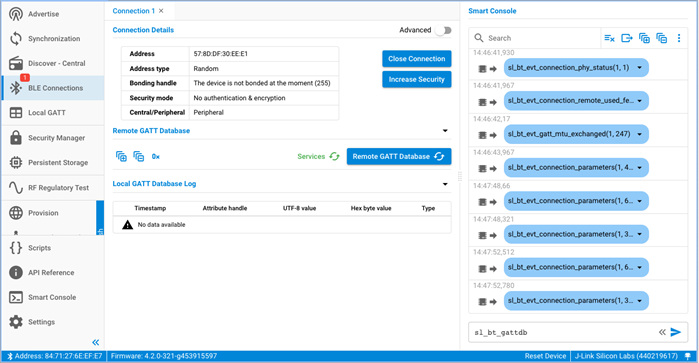
When advertising, the NCP target example accepts Bluetooth connections. If you connect to the mainboard or with another central device (for example with your phone), you can see the events and commands on the log.
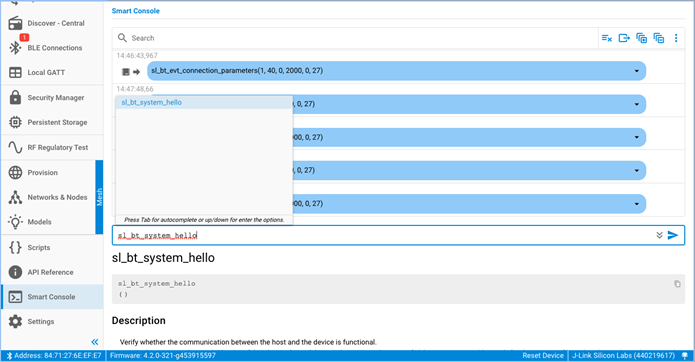
You can also issue commands manually. For example, you can issue the 'system hello' command at any time to verify that communication between the host and the device is working. The Smart Console provides auto-completion and documentation for the possible commands. To open/close the documentation, click the arrows at the right side of the input field.
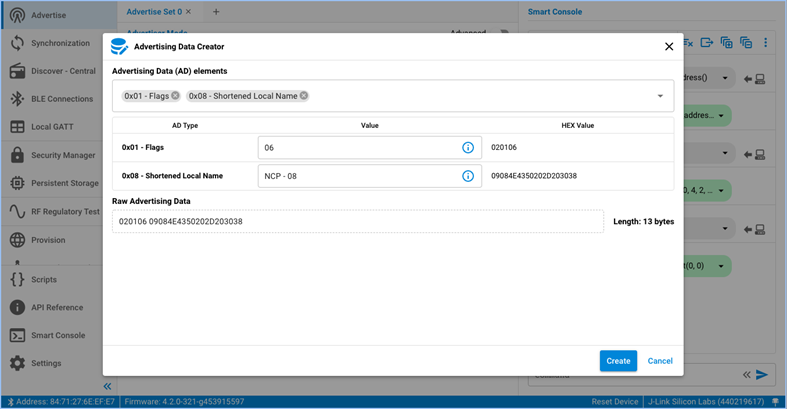
To create periodic advertisement sets, select Advertisement mode: Periodic. To set the content of the packet, use the Edit option next to "Periodic Advertising Packets".
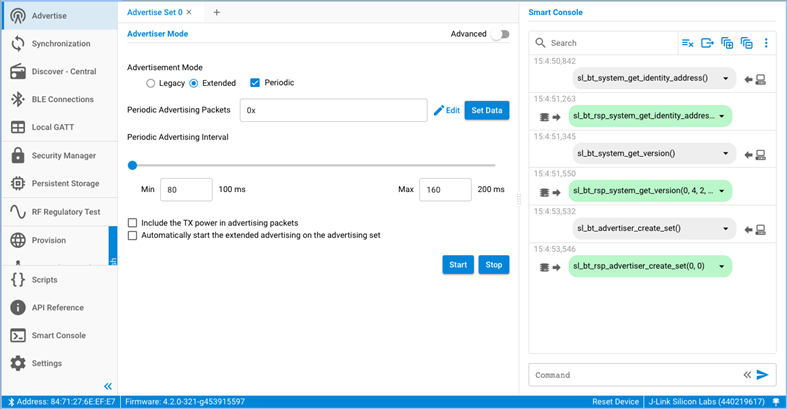
This opens a new dialog where you can edit the contents of the package. Click Set Data after the data is edited.
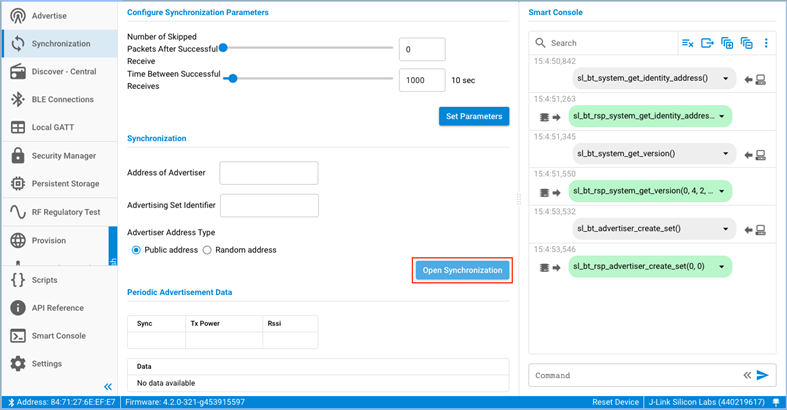
It is also possible to synchronize to periodic advertisement trains. To do this, click Synchronization on the left menu, input the Advertiser Address and advertising Set identifier, and click Open Synchronization.
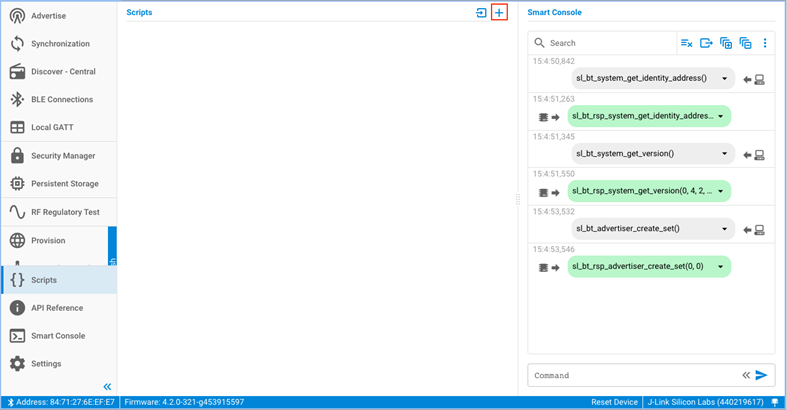
NCP Commander also provides a simple scripting feature. You can create or import an existing script with the controls on the top right corner. You can use any BGAPI commands in the script, but there are no additional features, such as branching or error handling.
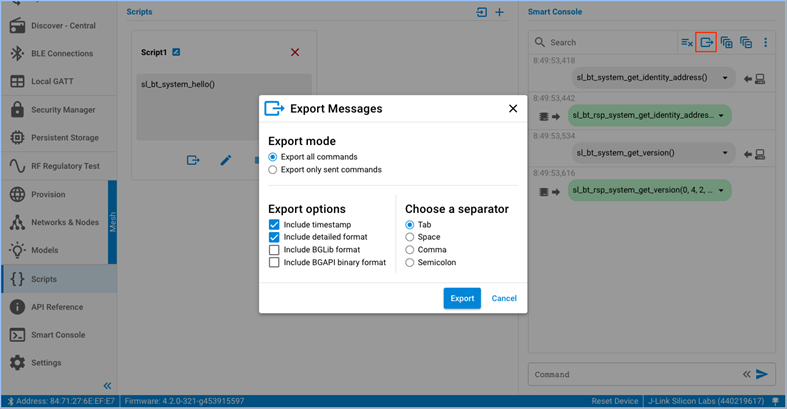
You can export the commands sent in the Smart console with the Export control. This saves the sent commands to a file that can be imported back as a script. You can also export the raw script using the Export button under the editor.
Host Provisioner with Bluetooth NCP Commander#
Bluetooth NCP Commander also supports Bluetooth mesh features. You can issue Bluetooth mesh commands manually in the command box of Smart Console or use the host provisioner feature from the left menu. You can use the feature to provision and configure mesh nodes and to manage mesh networks rather than using a Bluetooth Mesh mobile application.
To use the Bluetooth Mesh features, create, build, and flash the device with an NCP example supporting Mesh features. Otherwise, the provisioner initialization attempt returns SL_STATUS_NOT_SUPPORTED (0x000f).

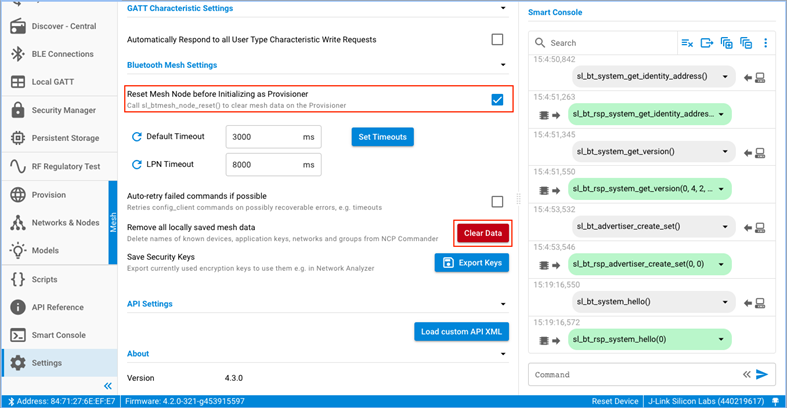
In Settings, if the Reset Mesh Node before Initializing as Provisioner option is enabled, the host provisioner does a factory reset (the node_reset command) on the NCP target device before initializing the node. Clicking Clear Data next to Remove all locally saved mesh data removes the network and application keys that were configured during initialization.
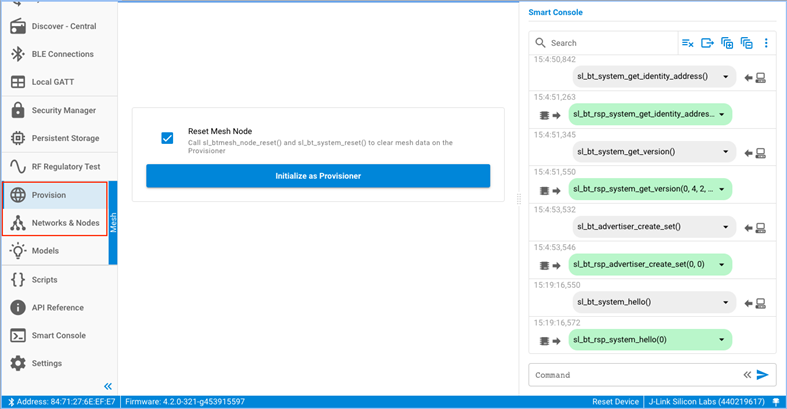
To start using the host provisioner, select either Provision or Networks & Nodes on the left menu, and click Initialize as Provisioner.
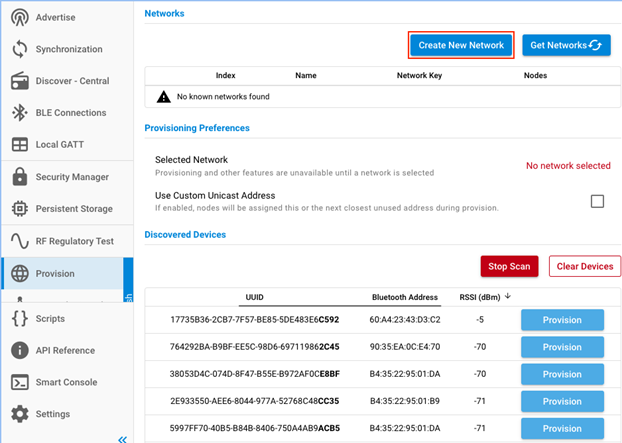
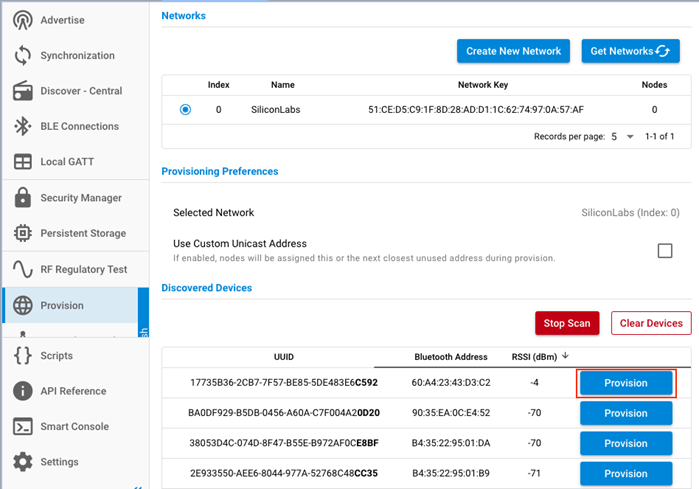
To provision devices, select Provision on the left menu and click Start Scan in the right panel. The devices that are transmitting unprovisioned beacons are shown in the Discovered Devices section. If you do not have a network from a previous configuration or have reset the provisioner node, you must create a new network with Create New Network.
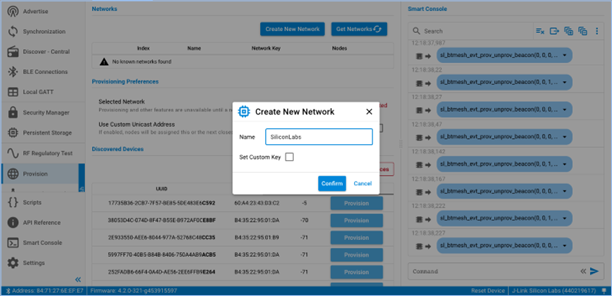
Enter the name of the new network and click Confirm.
Click Provision next to the device you want to provision.
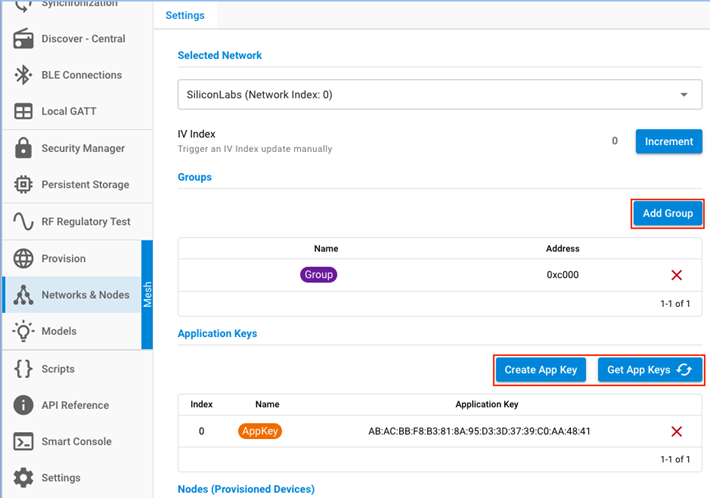
Before configuring devices, you may need to create application keys and groups. Application keys, groups, and other network settings can be managed in the Settings tab of the Networks & Nodes menu item. To create an application key, click Create App Key, name the key, and click Confirm. You can create as many application keys as you need. If you have created any application keys before, you can click Get App Keys to retrieve them. To create a group, click Add Group, name the group, and click Confirm. You can create as many groups as you need.
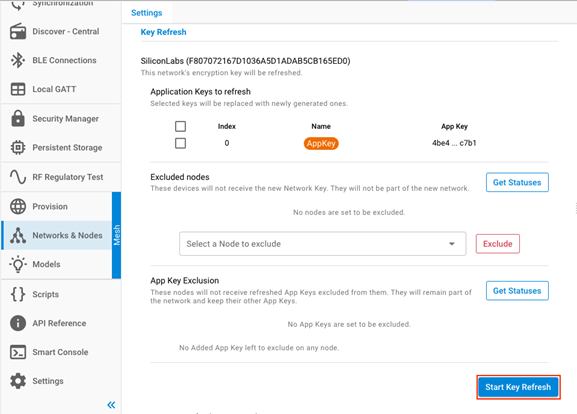
In the same tab, you can induce a full network-wide key refresh or exclude nodes.
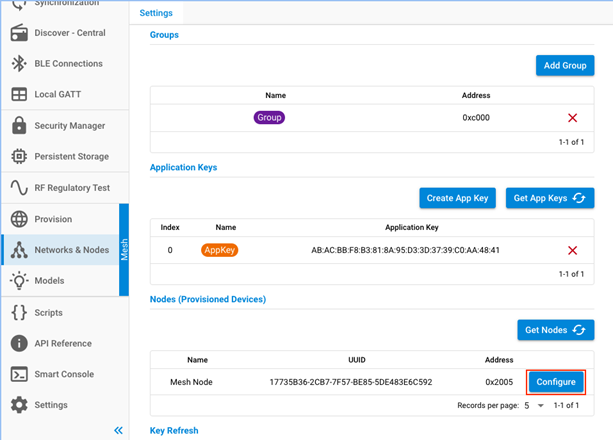
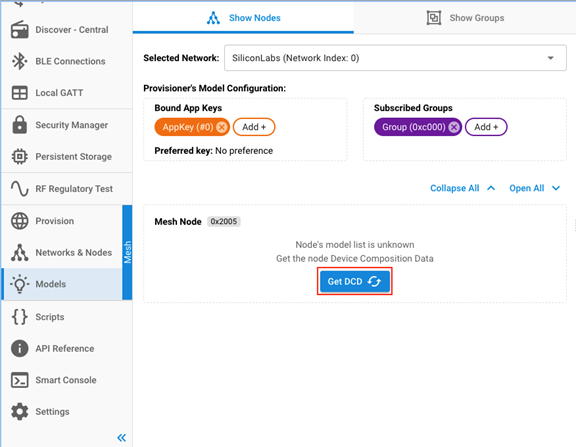
To configure a provisioned device, select Networks & Nodes on the left menu. The devices you provisioned are shown in the Nodes (Provisioned Devices) section of the Settings tab. Click Configure and a Mesh Node tab opens in which you can configure the device.
In the Application Keys section of the Mesh Node tab, select an application key from the drop-down list and then click Add.
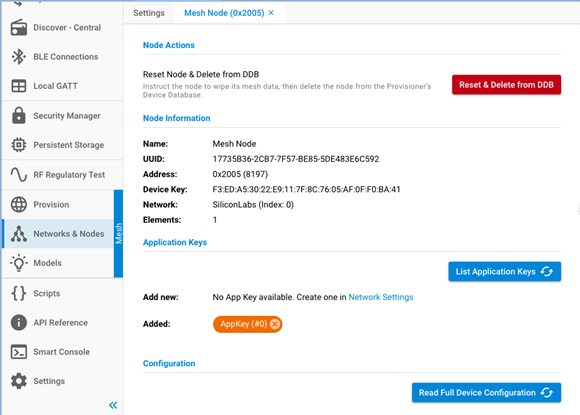
Click Get DCD to configure all the Models available on your node(s), bind to app keys, set publishing or subscription to groups, fine tune parameters, and so on.
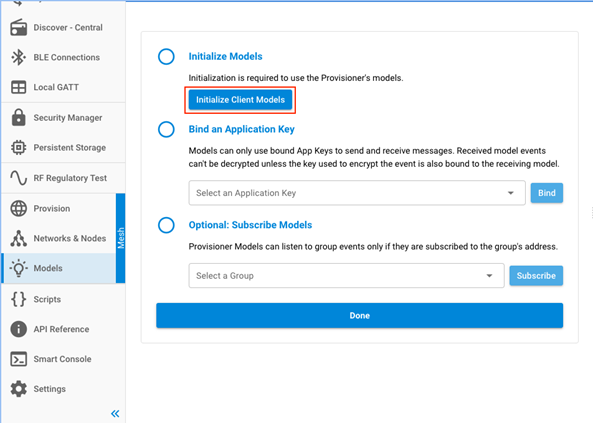
To configure the Provisioner, the Models must first be initialized using Initialize Client Models.
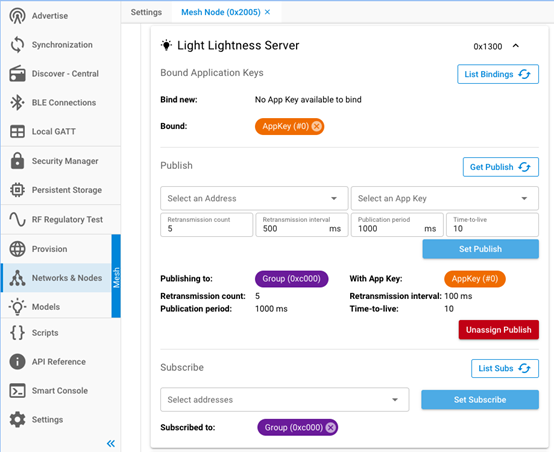
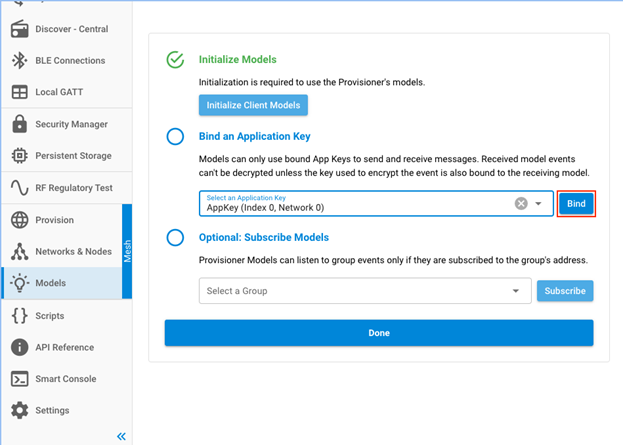
The Application Key must be bound to the Models in order for them to decrypt received messages. Press Bind.
To subscribe the Models to the messages of the recently created Group (optional), select the chosen Group from the dropdown and click Subscribe.

When configuration is complete, click Done. The Show Nodes tab is displayed, where you can Get DCD of the provisioned Node(s).
After listing, you can Get or Set the Server states of the Node(s).
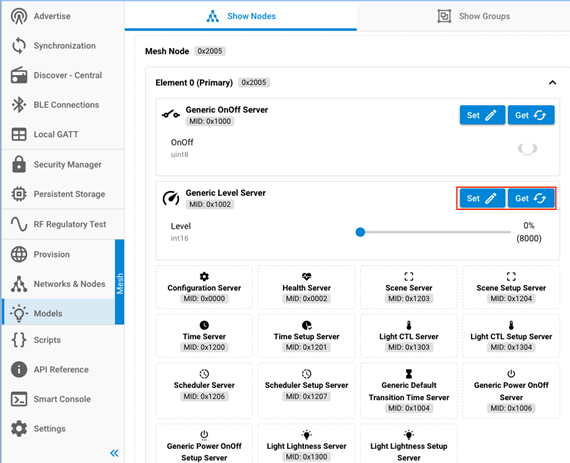
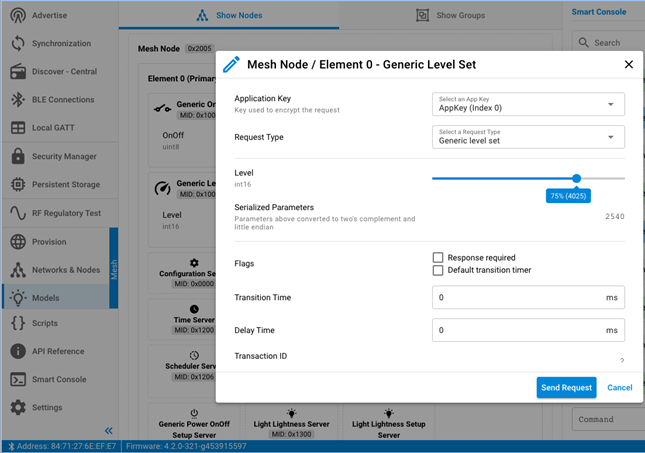
Click Set to set the current state of the selected Server of the selected Node.
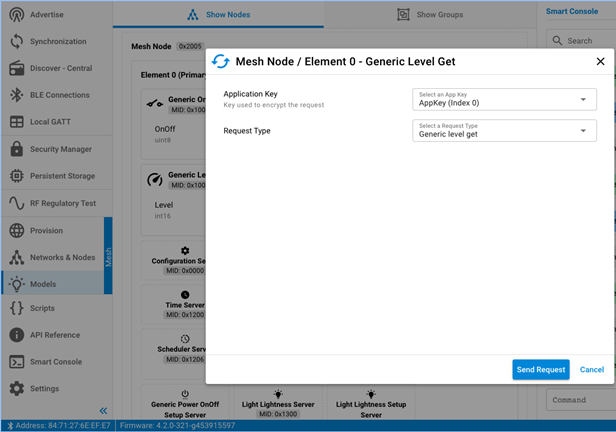
Click Get to get the current state of the selected Server of the selected Node.
On the Show Groups tab, you can Set or Get the Server Model(s) states on a Group level.

Building the NCP Host Examples on Windows#
The Silicon Labs v3.x Bluetooth SDK contains a generic NCP Host example project for the PC. This example can be compiled on Windows or any POSIX OS. This section goes through the build process on Windows.
Note: The host example projects in the SDK use the dynamic GATT database feature. They are to be used with the Bluetooth – NCP target application.
To build the examples properly, the MSYS2 development toolchain must be installed on your PC. Download MSYS2 at MSYS2.
After MSYS2 is installed, update the package database as described at MSYS2.
Start MSYS2 bash and install mingw-64 with the following command:
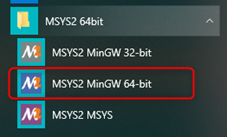
pacman -S make mingw-w64-x86_64-gccClose MSYS2 and start MSYS2 MinGW 64-bit.
Change to the NCP Host example folder, where <version> varies by SDK version:
cd c:\SiliconLabs\SimplicityStudio\v5\developer\sdks\gecko_sdk_suite\v3.x\app\bluetooth\example_host\bt_host_empty\or
cd c:\Users\<username>\SimplicityStudio\SDKs\gecko_sdk\appCreate an export of the example with the command
make export. After the project files are exported, the export directory will be a working directory that is completely detached from the SDK but has the same folder structure inside. The benefit of using an export is that changes in the (config) files during development will not affect the SDK content, and multiple instances can coexist, for example for testing different variants. You can also usemake export EXPORT_DIR=/my/custom/export/pathto export the example to a custom directory.Within the export folder navigate to the /app/bluetooth/example_host/bt_host_empty folder.
If you want to add any service/characteristic to the GATT database, edit the /config/btconf/gatt_configuration.btconf file. Edit it either with a text editor or drag-and-drop the file onto Simplicity Studio to edit it with the GATT Configurator. Do not forget to save the file after editing.
Generate GATT database source files from the .btconf file by running
make gattdb(in the /bt_host_empty folder). Note: The generator script requires installing Python 3 and the Jinja2 package by callingpip install jinja2.Build the exported project with the command:
make. (Run it in the /bt_host_empty folder, where you can find the makefile).The build output is created in a new exe folder. Go to this folder with
cd exe, and then runbt_host_empty.exe. The COM port and the IP address of the target are passed as command line parameters. The COM port should be the same as the one used by the JLink CDC UART Port, as shown in NCP Host Development. To see how to pass the different parameters, first run the exe with the-h(help) switch..\bt_host_empty.exe -hOnce the UART connection with the device is established, you should see the following:

Now you can connect to the device over Bluetooth.
Using Python for Host Side Development#
You can also implement a host application using Python. A Python package is available at PyBGAPI. This package parses the API description file of the Bluetooth SDK and makes it possible to issue BGAPI commands and get BGAPI events in the Python environment. See the referred website for further documentation.