Configuring a Device for an Untrusted Manufacturing Environment Example#
This example will show how to order a custom part that is secure from the moment it leaves Silicon Labs. It has secure boot, secure debug lock, and encrypted upgrades enabled so that an untrusted contract manufacturer cannot access the debug port or upload un- signed and/or unencrypted applications.
This example uses an EFR32MG21B, which is a Secure Vault High part. Secure Vault Base or Mid parts do not have the same customization options, so some sections of this example will not be applicable to such devices.
CPMS#
This section provides detailed information on starting a new custom part in CPMS and configuring the debug lock and Secure Boot.
In a browser, open CPMS at https://console.silabs.com/cpms.
Log in using your www.silabs.com account credentials.
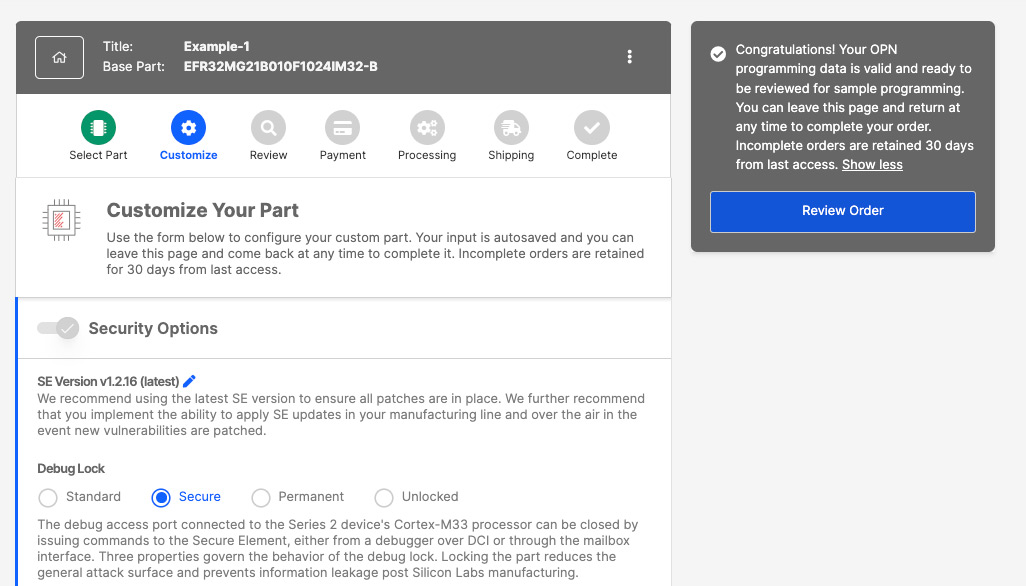
Give your sample order a name and select the part to be customized.
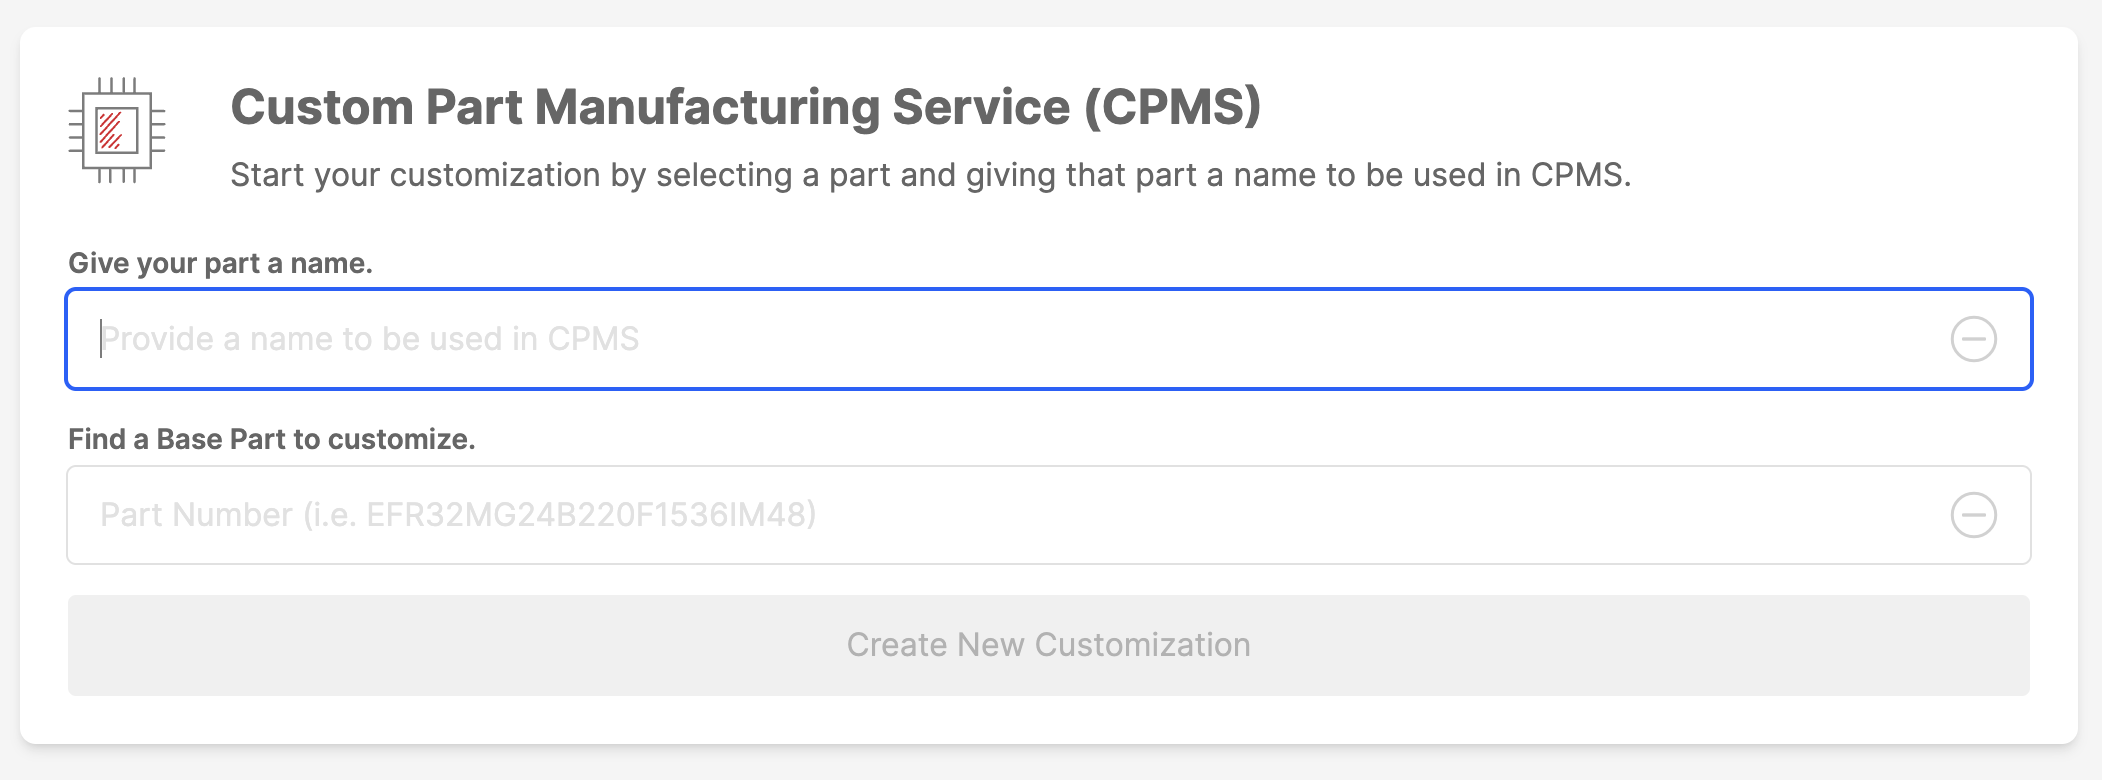
a. Name: Enter Example-1. This name will be used within CPMS to help differentiate between custom devices.
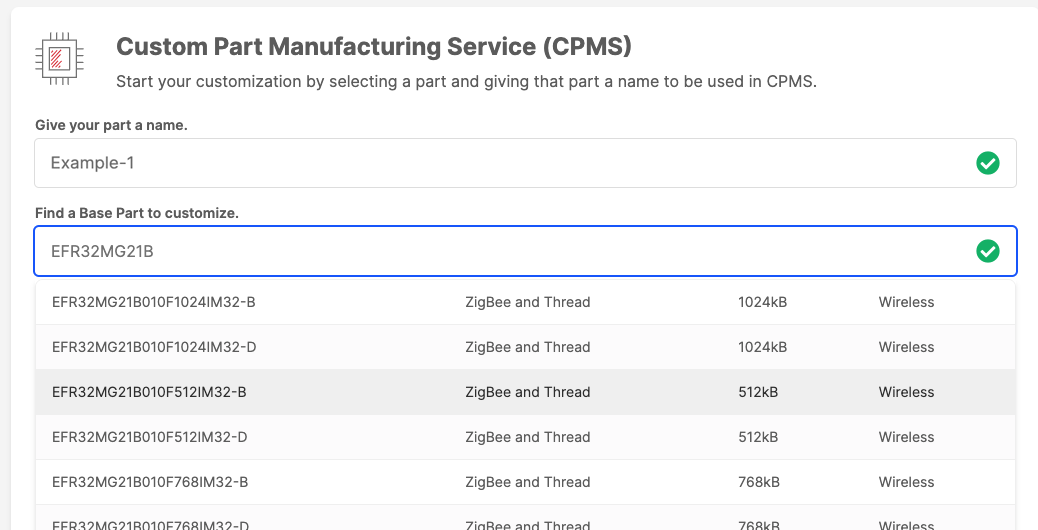
b. Part: Select any Secure Vault Mid or High part. In this example, select the part EFR32MG21B010F1024IM32-B. As you begin to type your part, the list will filter the part list based on your entry.

c. Once you have successfully entered a name for your order and selected the part to be customized, the Create New Customization button is enabled. You can begin to customize this part for your sample order.
Click Create New Customization. This takes you to the part customization page. Change the following configurations (configurations not listed can be left as the default):
a. Debug Lock: Select Secure.
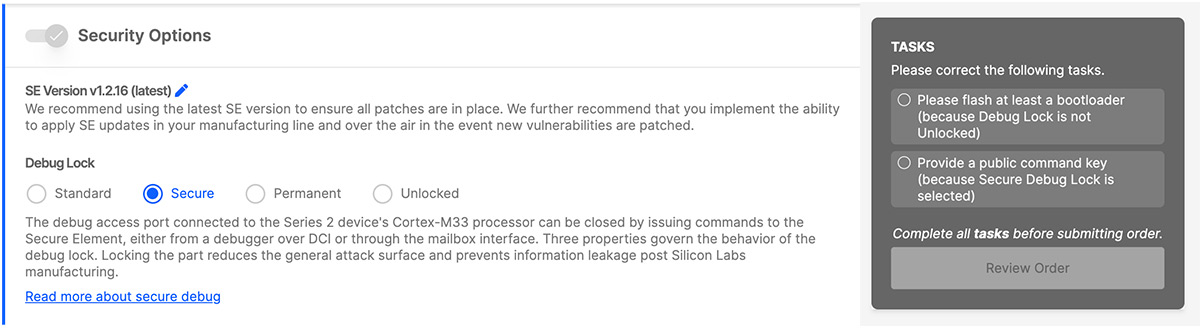
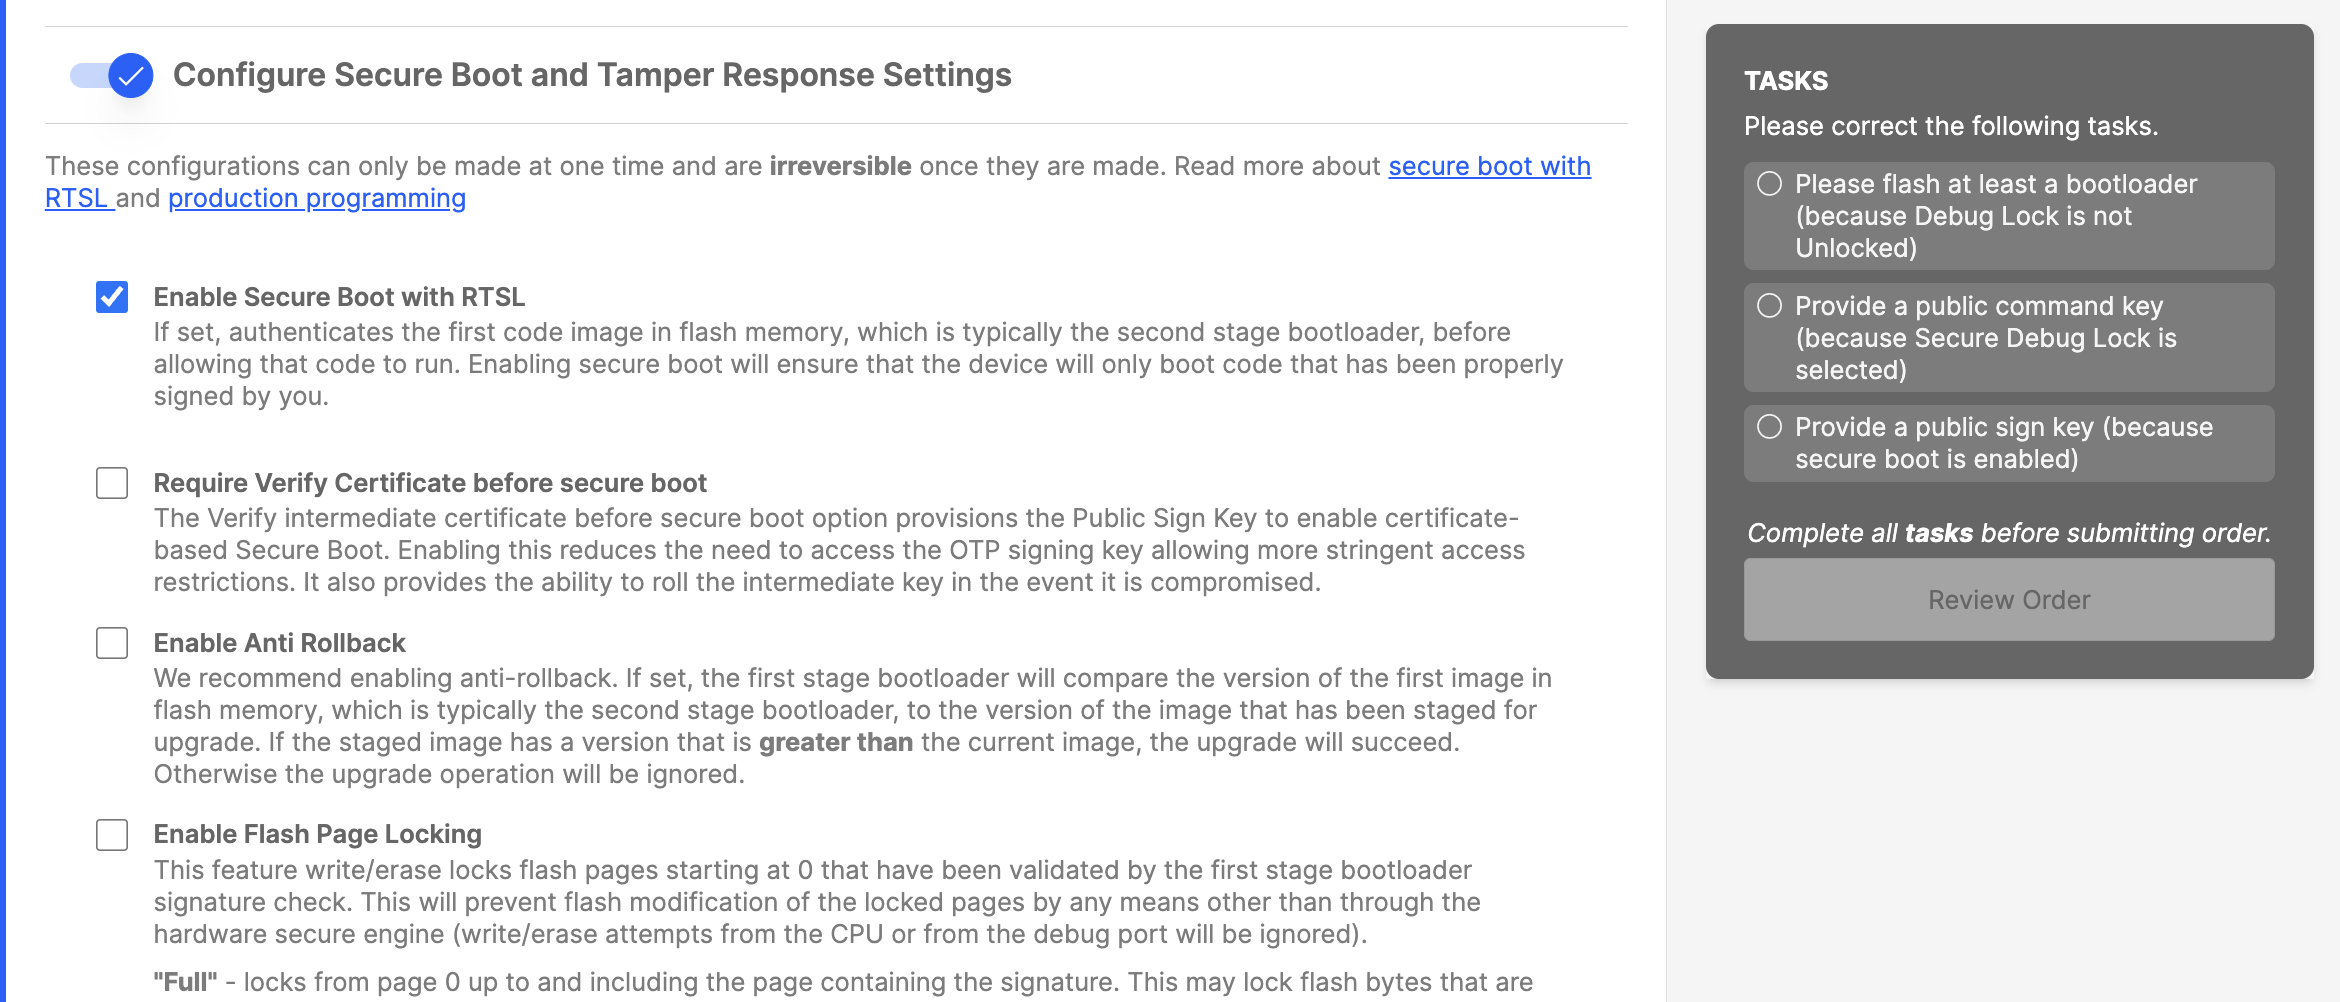
b. Configure Secure Boot, Flash Lock, and Tamper Settings: On. Turn off Require Verify Certificate before secure boot, since this example will not use certificates.
c. Before you enter the keys and images, you need to generate them. This is covered in the following sections.
Generating the Application#
Follow the instructions below to generate and configure an application.
Open Simplicity Studio.
In the Launcher view, click EXAMPLE PROJECTS & DEMOS.
Search for blink, and select the Platform - Blink Bare-metal project.
Click Finish.
There should now be a
blink_baremetalproject open in the Simplicity IDE view. Openblink_baremetal.slcp.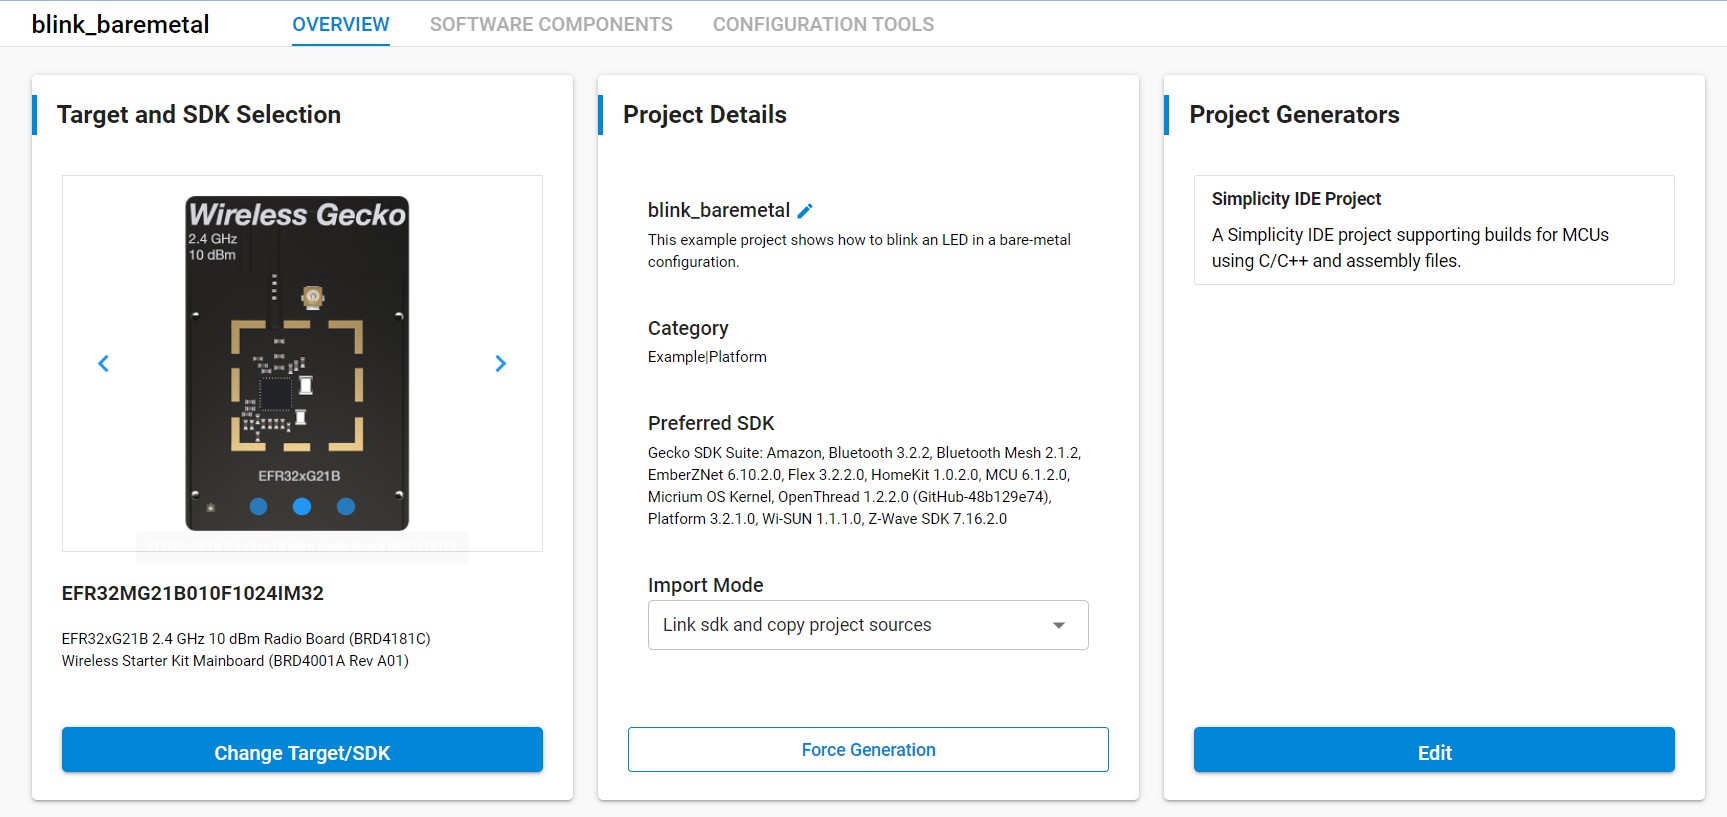
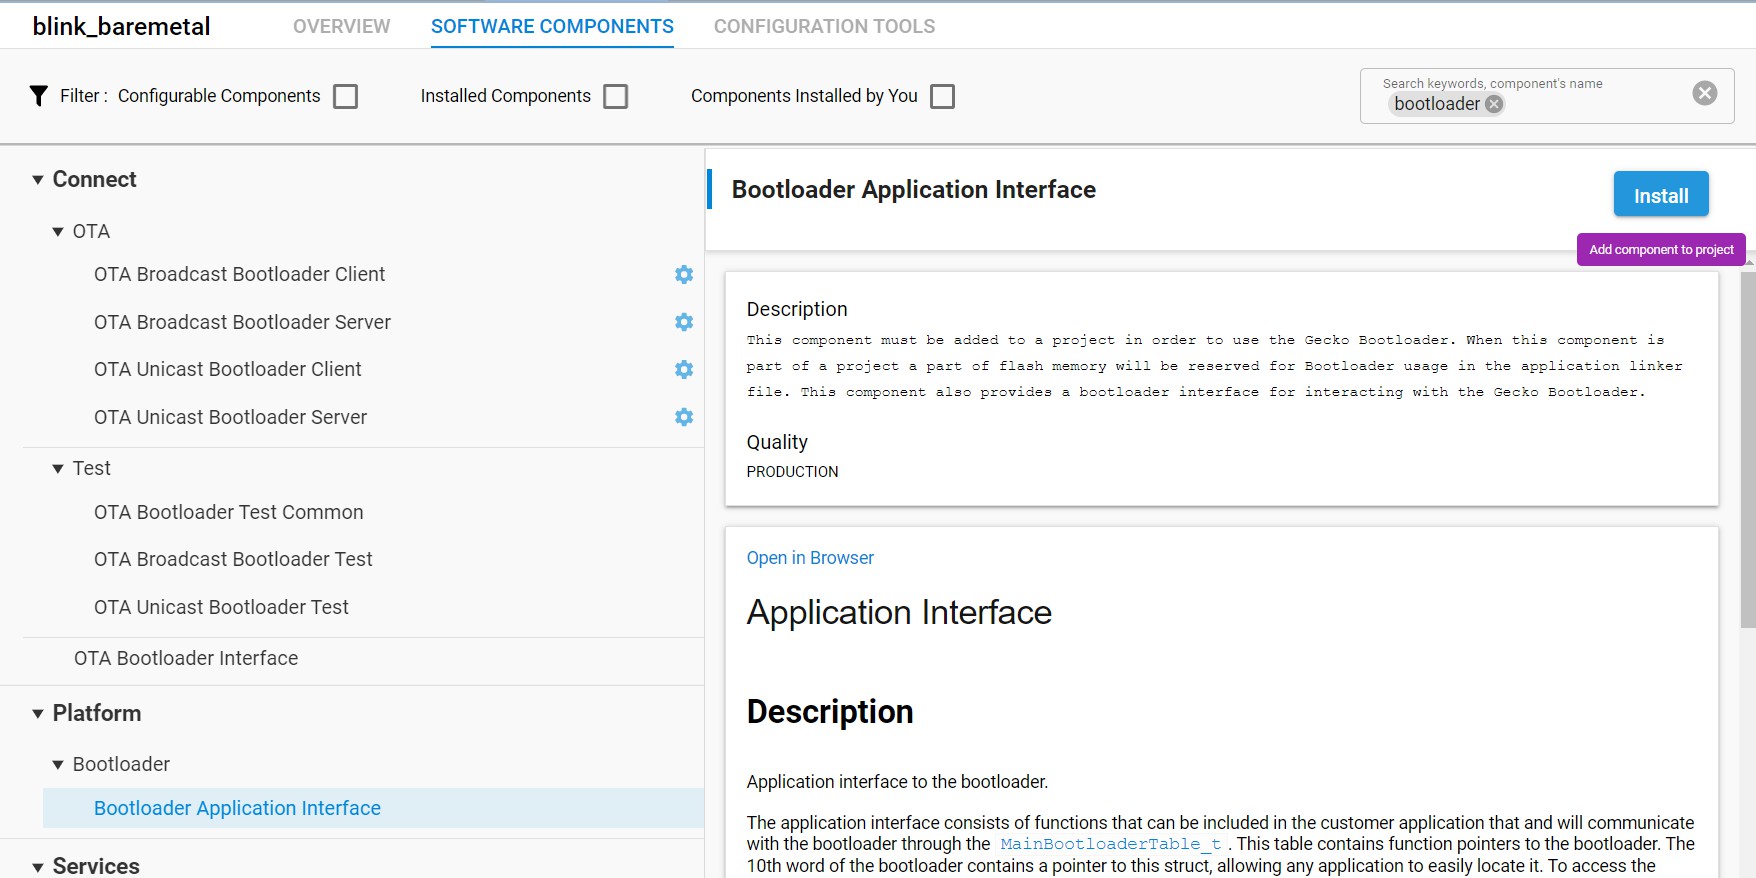
Click on the SOFTWARE COMPONENTS tab.
In the Search bar, search for bootloader.
Click Platform > Bootloader > Bootloader Application Interface, and click Install.
The application image will need an application_properties.c file as shown below to enable secure boot. The
.certpointer is set to NULL to disable the application certificate option. The signatureType and signatureLocation fields are filled by Simplicity Commander when signing the application image using the convert command.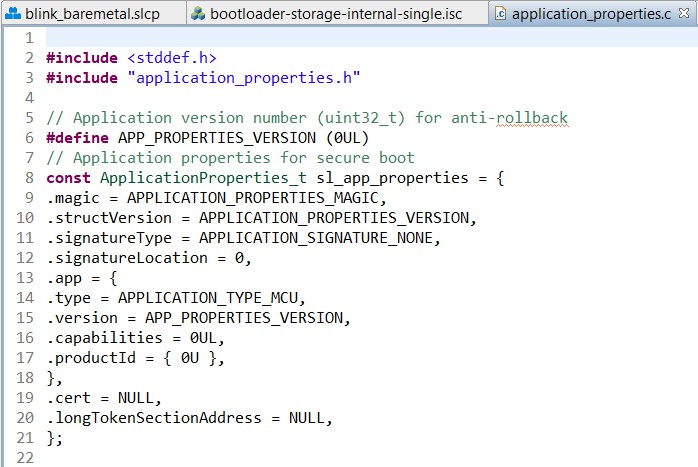
Now that the configuration is set, "Build" the project. This will generate binaries for the project.

Generating the Bootloader#
Follow the steps below to generate and configure a bootloader.
Now go back to the Launcher and search for bootloader.
Locate and Create the Internal Storage Bootloader (single image on 1MB device) example.
Open bootloader-storage-internal-single.slcp.
Click the Software Components tab, search for Bootloader Core and then click Configure.
Click Require encrypted firmware upgrade files and Enable Secure Boot.
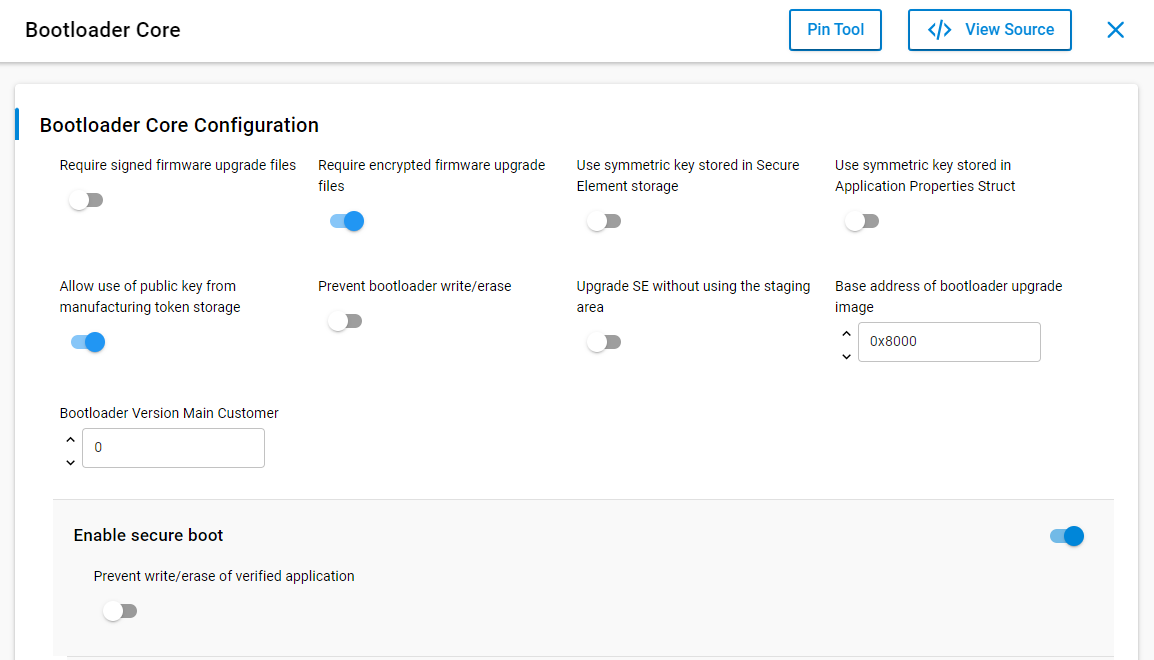
Build the project (if the build button is greyed out, you may need to click on the project in the Project Explorer).
Generating the Sign Key, the Command Key, and the OTA Decryption Key#
Enabling secure boot and secure debug requires importing public keys. Ideally, these keys would be generated and managed by an HSM. This example will use Commander.
Create a sign key pair for secure boot.
commander util genkey --type ecc-p256 --privkey cpms-sign-priv.pem -- pubkey cpms-sign-pub.pemGenerating ECC P256 key pair… Writing private key file in PEM format to cpms-sign-priv.pem Writing public key file in PEM format to cpms-sign-pub.pem DONECreate a command key pair for secure debug:
commander util genkey --type ecc-p256 --privkey cpms-cmd-priv.pem -- pubkey cpms-cmd-pub.pemGenerating ECC P256 key pair… Writing private key file in PEM format to cpms-cmd-priv.pem Writing public key file in PEM format to cpms-cmd-pub.pem DONECreate an OTA decryption/encryption key for GBL upgrades:
commander util genkey --type aes-ccm --outfile cpms-gbl.txtUsing Windows’ Cryptographic random number generator DONE
Signing and Merging the Application and Bootloader Images#
We now need to prepare our application and bootloader for CPMS. First, we need to sign the images. Then, since CPMS requires the firmware image to be in one file, we need to merge the signed hex files. We will do this using the Simplicity Commander command line interface.
Open a terminal and navigate to your Simplicity Studio workspace.
Sign the bootloader:
commander convert internal-storage-bootloader-single.hex --secureboot --keyfile cpms-sign-priv.pem --outfile cpms-btl-signed.hexParsing file internal-storage-bootloader-single.hex… Found Application Properties at 0x000024a8 Writing Application Properties signature pointer to point to 0x000025e0 Setting signature type in Application Properties: 0x00000001 Image SHA256: ca36debc860cdb720aabe9fdd37dc730172fe34571aedc452b52f9ef5a824264 R = 3E8E58AF660F769FE25E9262E6899188B61716723352367F0EC96DF6C7133B20 S = 5C36A7B3124F320C9B9B56B80D2F1A1D8B3593BC008E11B50015E3BEE4638537 Writing to cpms-btl-signed.hex DONEThis will create the cpms-btl-signed.hex signed image file in your workspace.
Sign the application:
commander convert blink_baremetal.hex --secureboot --keyfile cpms-sign-priv.pem --outfile cpms-app-signed.hexParsing file blink_baremetal.hex… Found Application Properties at 0x000061bc Writing Application Properties signature pointer to point to 0x000064d8 Setting signature type in Application Properties: 0x00000001 Image SHA256: 030b8cdb43e7666b1a015ada8a658a96169be086177548b692a385edb5840295 R = 0C64B8EC9FEFD081EFEBF08E0744A13CA606BD654C1A6B108AF2F5C06AECD5A1 S = CA9DE6279F50C86CD317365FD98380D097D90764A9EDEFE06623FE9126763844 Writing to cpms-app-signed.hex DONEThis will create the cpms-app-signed.hex signed image file in your workspace.
Merge the signed hex files:
commander convert cpms-app-signed.hex cpms-btl-signed.hex -o cpms-merged.hexParsing file cpms-app-signed.hex… Parsing file cpms-btl-sgined.hex… Writing to cpms-merged.hex… DONEThis will create cpms-merged.hex in your workspace.
Programming the Keys and Flash Memory#
This section describes how to upload the public sign key and the merged signed hex file.
In CPMS, return to the Standard Security Keys section.
Click the blue upload button in the Public Sign Key field. In the file explorer pop-up, find and select the cpms-sign-pub.pem file.

Click the blue upload button in the Public Command Key field. In the file explorer pop-up, find and select the cpms-cmd-pub.pem file.
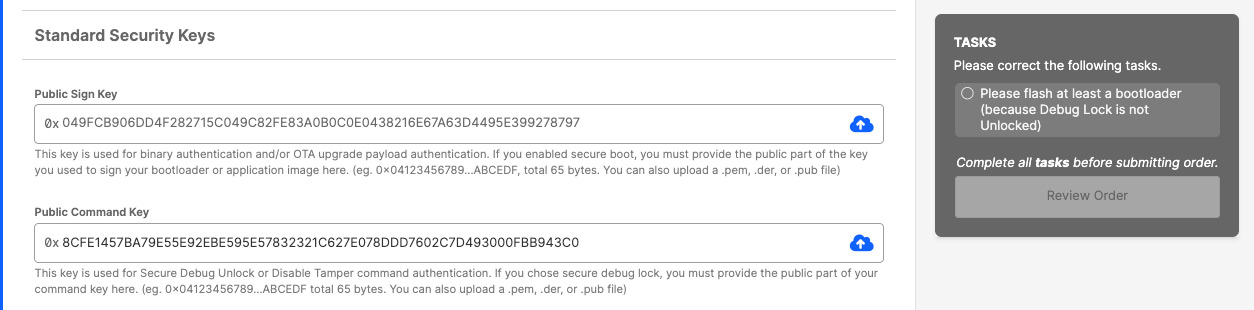
For the OTA Decryption Key, copy the key value (in hex) from cpms-gbl.txt into the OTA Decryption Key field.

Scroll down to the Flash Programming section.
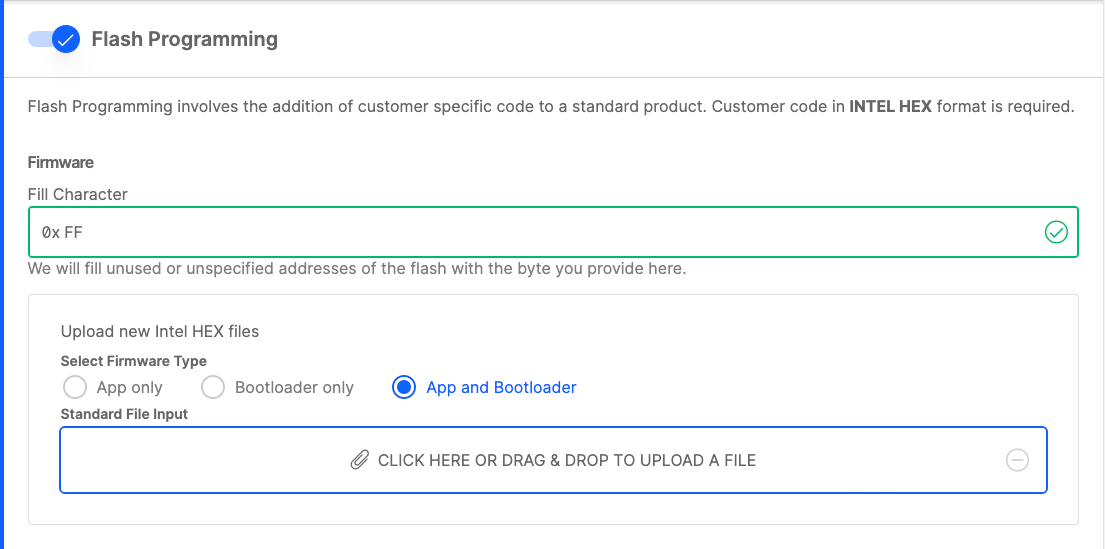
Click CLICK HERE OR DRAG DROP TO UPLOAD A FILE.
Navigate to your workspace. On Windows this will be in C:/Users/<username>/SimplicityStudio/v5_workspace.
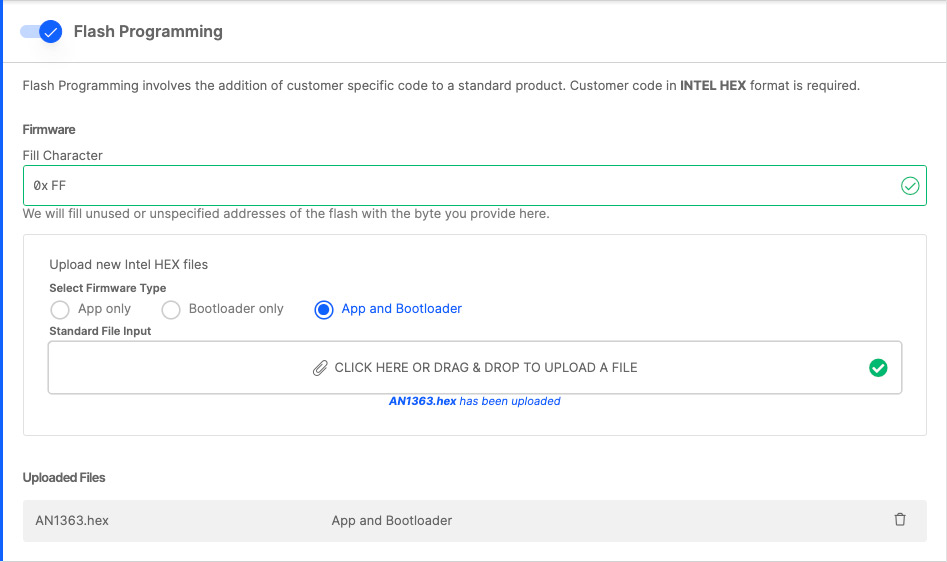
Select cpms-merged.hex and click Open. CPMS only accepts Intel Hex files for firmware images.
You should now be able to see the binary added to your customization in CPMS.
Scroll to the top of the page, and click Review Order.
You can now review the pricing for the custom part and the security configurations you've entered.