Google Ecosystem Setup and Demo Execution#
Hardware Requirements#
For the hardware required for the Google Nest Hub Ecosystem, refer to the Ecosystem overview Prerequisites section.
Software Requirements#
Google Account
Google Home App with Beta Version
Set Up Google Home and Android Smartphone#
Google Matter Early Access Program (EAP)#
The Google Matter Early Access Program is a partnership between Google and silicon providers who support Matter development. This partnership allows for faster onboarding of new devices into Matter and Thread by lowering the bar for starting with development of a new Matter-based product.
The Google Matter Early Access Program is run through the Google Developer Center.
The Matter-focused portion of the Google Developer Center is located here.
The Google Matter Early Access Program is located here.
Note: Until the public preview, access to this page is reserved to those allowed in by the Google Partner engineering team.
Prerequisites for Google Setup#
To run the Google Ecosystem demo, you will need both Google and a Matter device. You will also need Google Nest Hub 2nd Generation and an Android phone (at least a Pixel 5 is recommended) that can run at least Android 8 (8.1, API Level 27) or newer and has Bluetooth LE capability.
Instructions for Setting Up EAP#
Once you have access, you will need to set up the Nest Hub 2nd Gen and Android phone with the Google Home app using the same Google Account that is used to access the EAP website.
If you have set up the Nest Hub 2nd Gen with the correct Google account, you will receive the OTA update to the Beta version within 24 hours. You can verify this by going to Device information > Technical information > Update Channel and the channel should read "matter-dev-current-beta-channel".
Set Up the Android Phone#
Follow these instructions to set up the Android phone with the necessary applications:
Create a Matter Integration in the Google Developer Console#
Follow these instructions to create a Matter integration in the Google Developer Console.
After completing these steps, you should be ready to build your Matter accessory device.
Matter Integration Setup in the Developer Console#
Once you have created a home in your Android smartphone, add your Nest Hub to that home.
After this, on a browser on your PC go to this to create a project: https://developers.home.google.com/matter
Click Console at the top of the page.
On the next page, click Create a Project.
Give your project a name and click Create a new project.
On the next page click Add Matter integration.
On the next page click Next: Develop.
Click Next: Setup.
Set up the fields on this page as shown:
Product name: Light
Device type: light
Vendor ID (VID): Test VID
Test VID: 0xFFF1
Product ID (PID): 0x8005
Product ID options for Matter devices are as follows:
Light-Switch: 0x8004
Light: 0x8005
Lock: 0x8006
Thermostat: 0x800E
Window Covering: 0x8010
Click Save & Continue.
On the next page click Save.
You will now see a Matter integration for device type light in your console.
You have now completed setting up the following:
Your home in the Google home app in your Android smartphone
A project in your Google developer console
A matter integration for the light device type
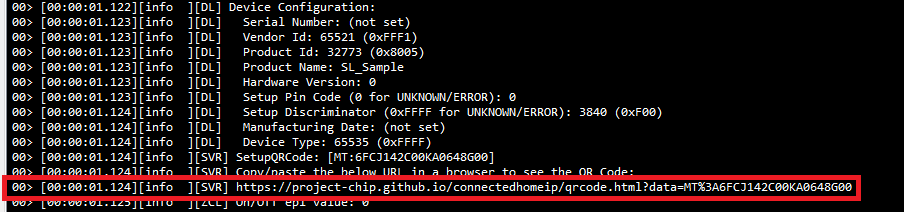
Having finished the above, the only step left to have your setup ready is to open a QR code webpage for the light device type in your PC. A QR Code link will be present in Device configuration section of logs. Copy the link and paste it in google chrome so you will be able to QR Code.
Matter Demo Execution using Google Home#
Commission Matter Device through Google Home App#
Refer Getting Started Overview Guide for setting up a Silicon Labs Matter Accessory Device.
Connect Board to a Computer
For Wi-Fi NCP Mode Boards see Connect EFR32 Board to computer
For Wi-Fi SOC Mode Boards see Connect SiWx917 SOC to Computer
Flash the bootloader binary for your device along with the application (for example, lighting, lock, thermostat, window covering, or light-switch) using Simplicity Commander.
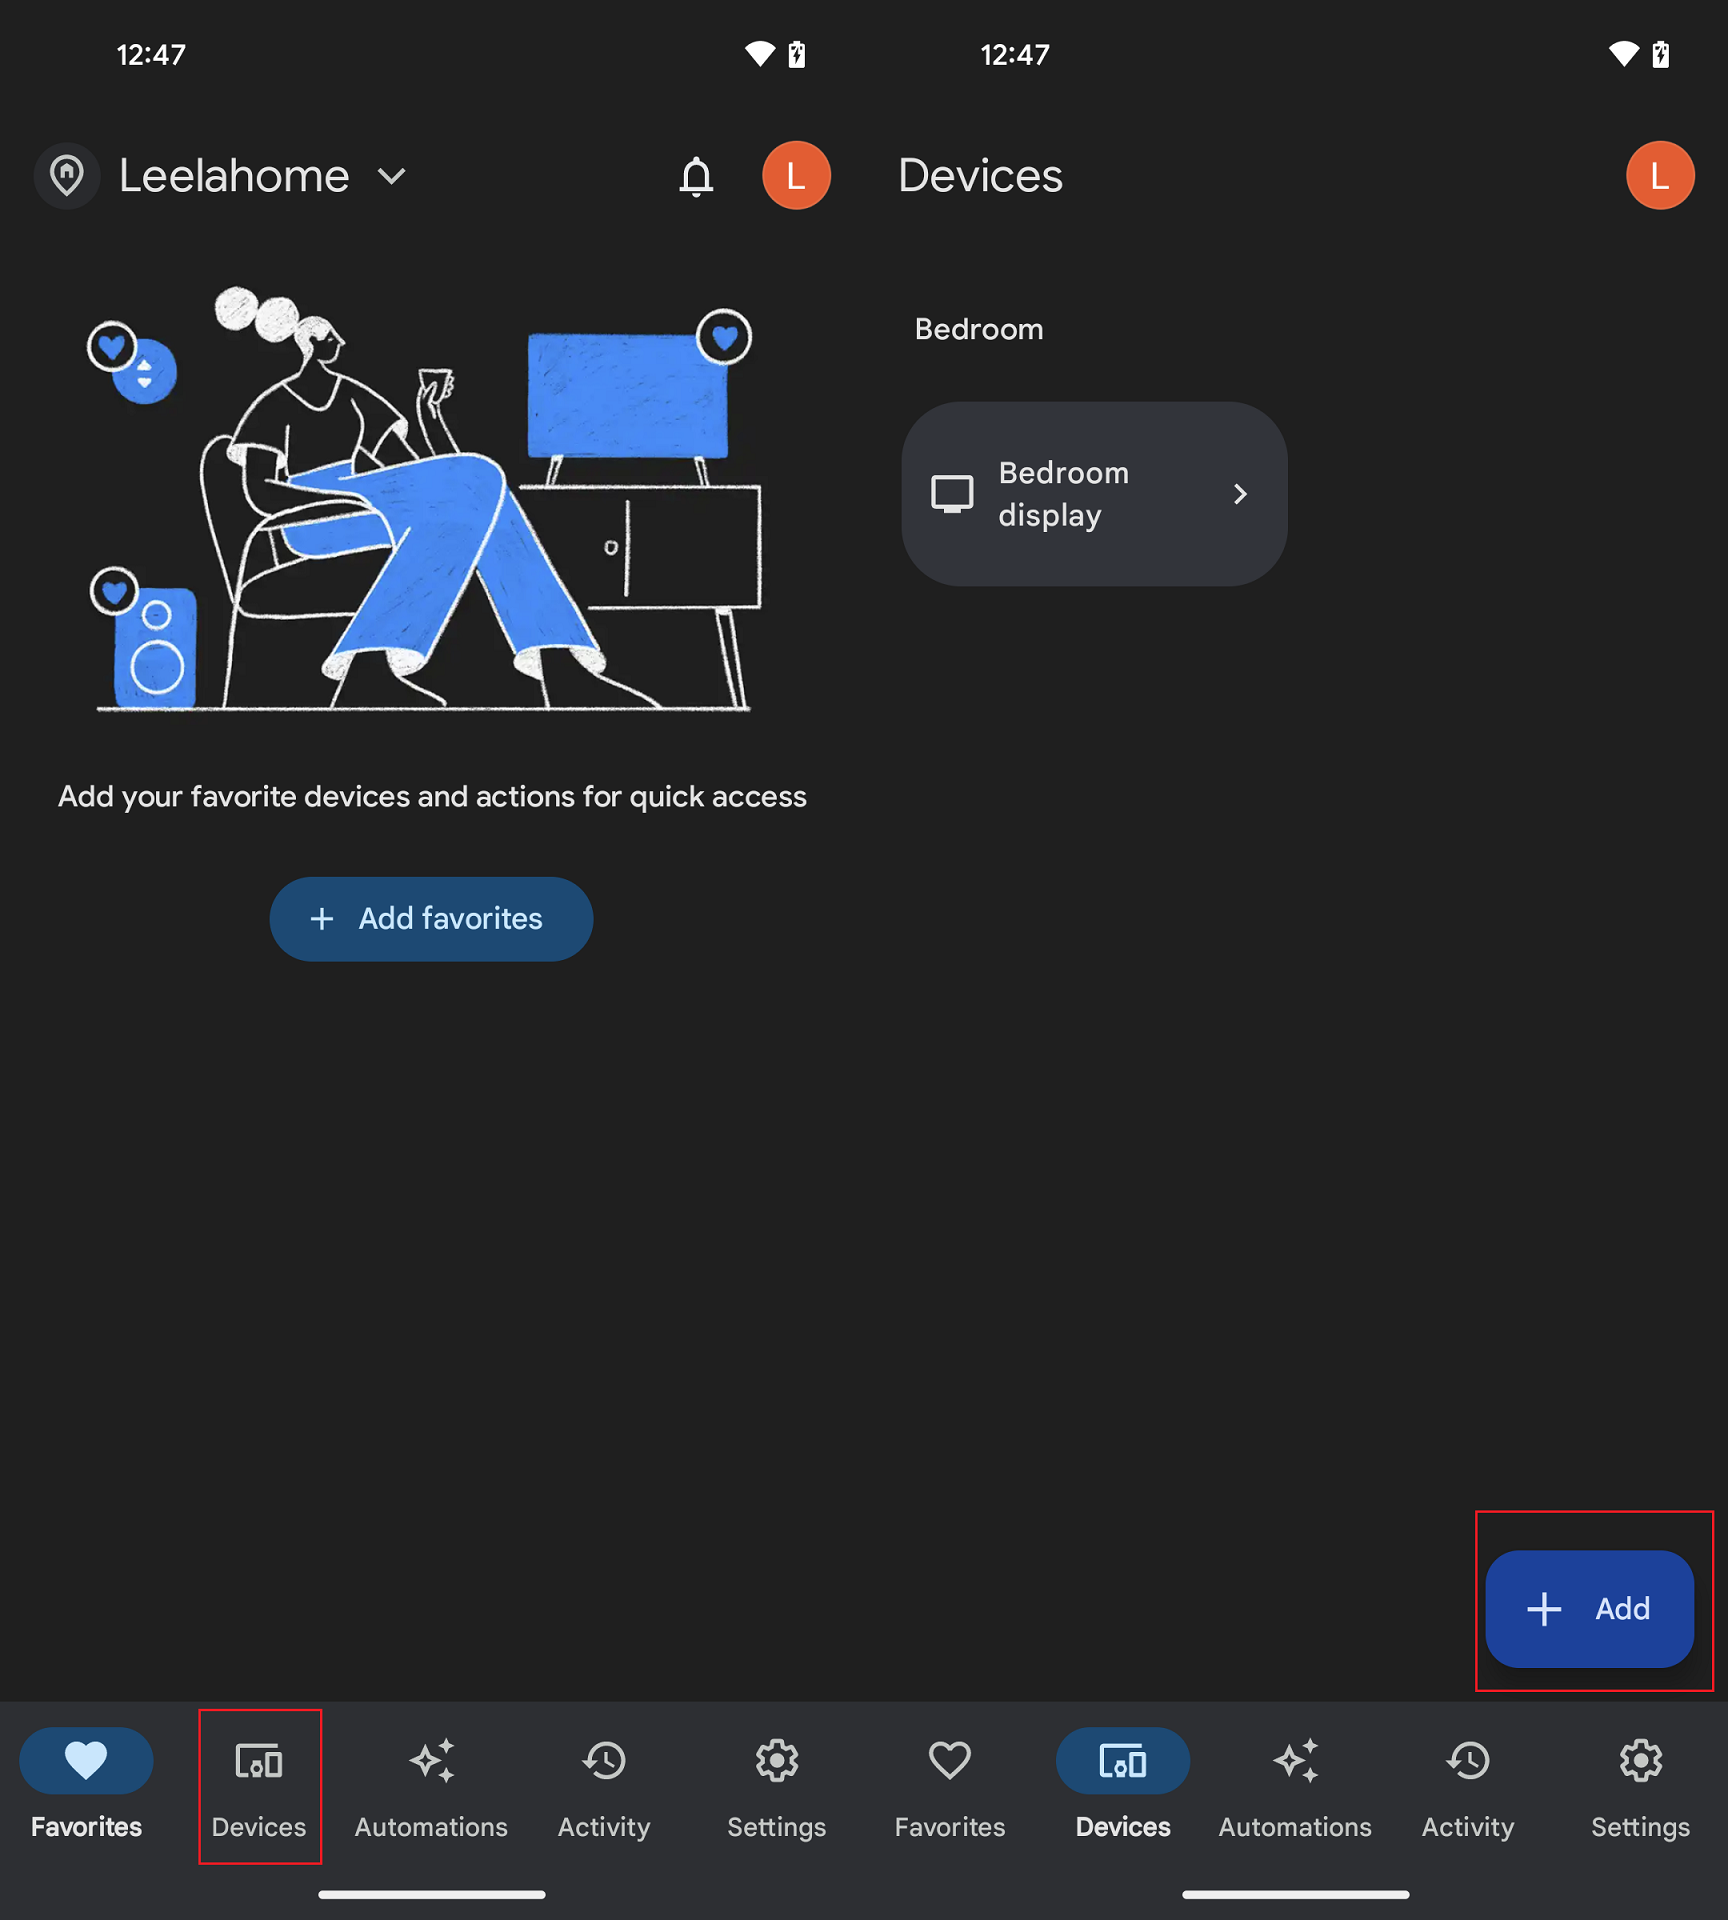
Open the Google Home app on your phone.
Click Devices Section and click Add.
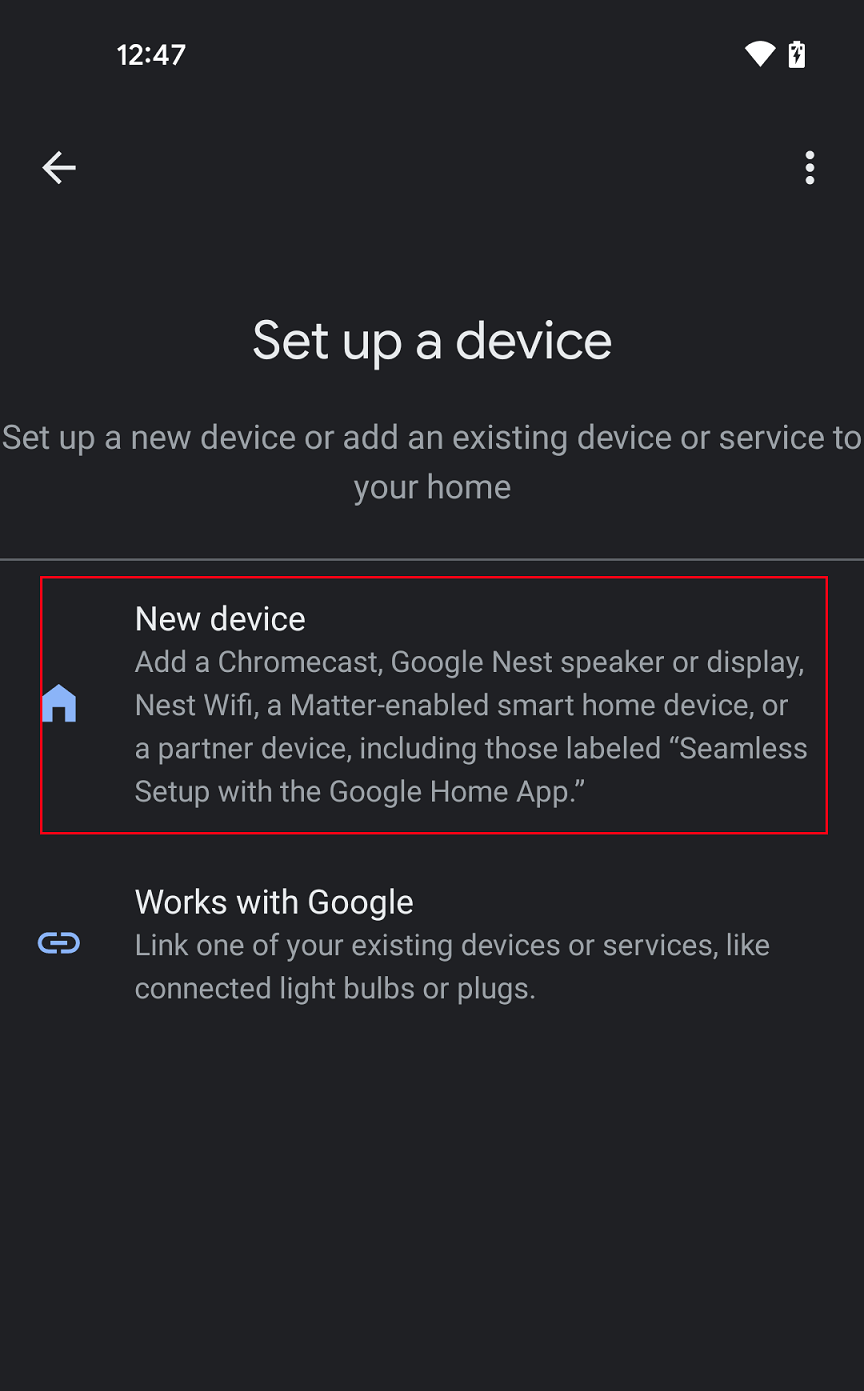
In the Set Up Device window, tap to select the New Device option.
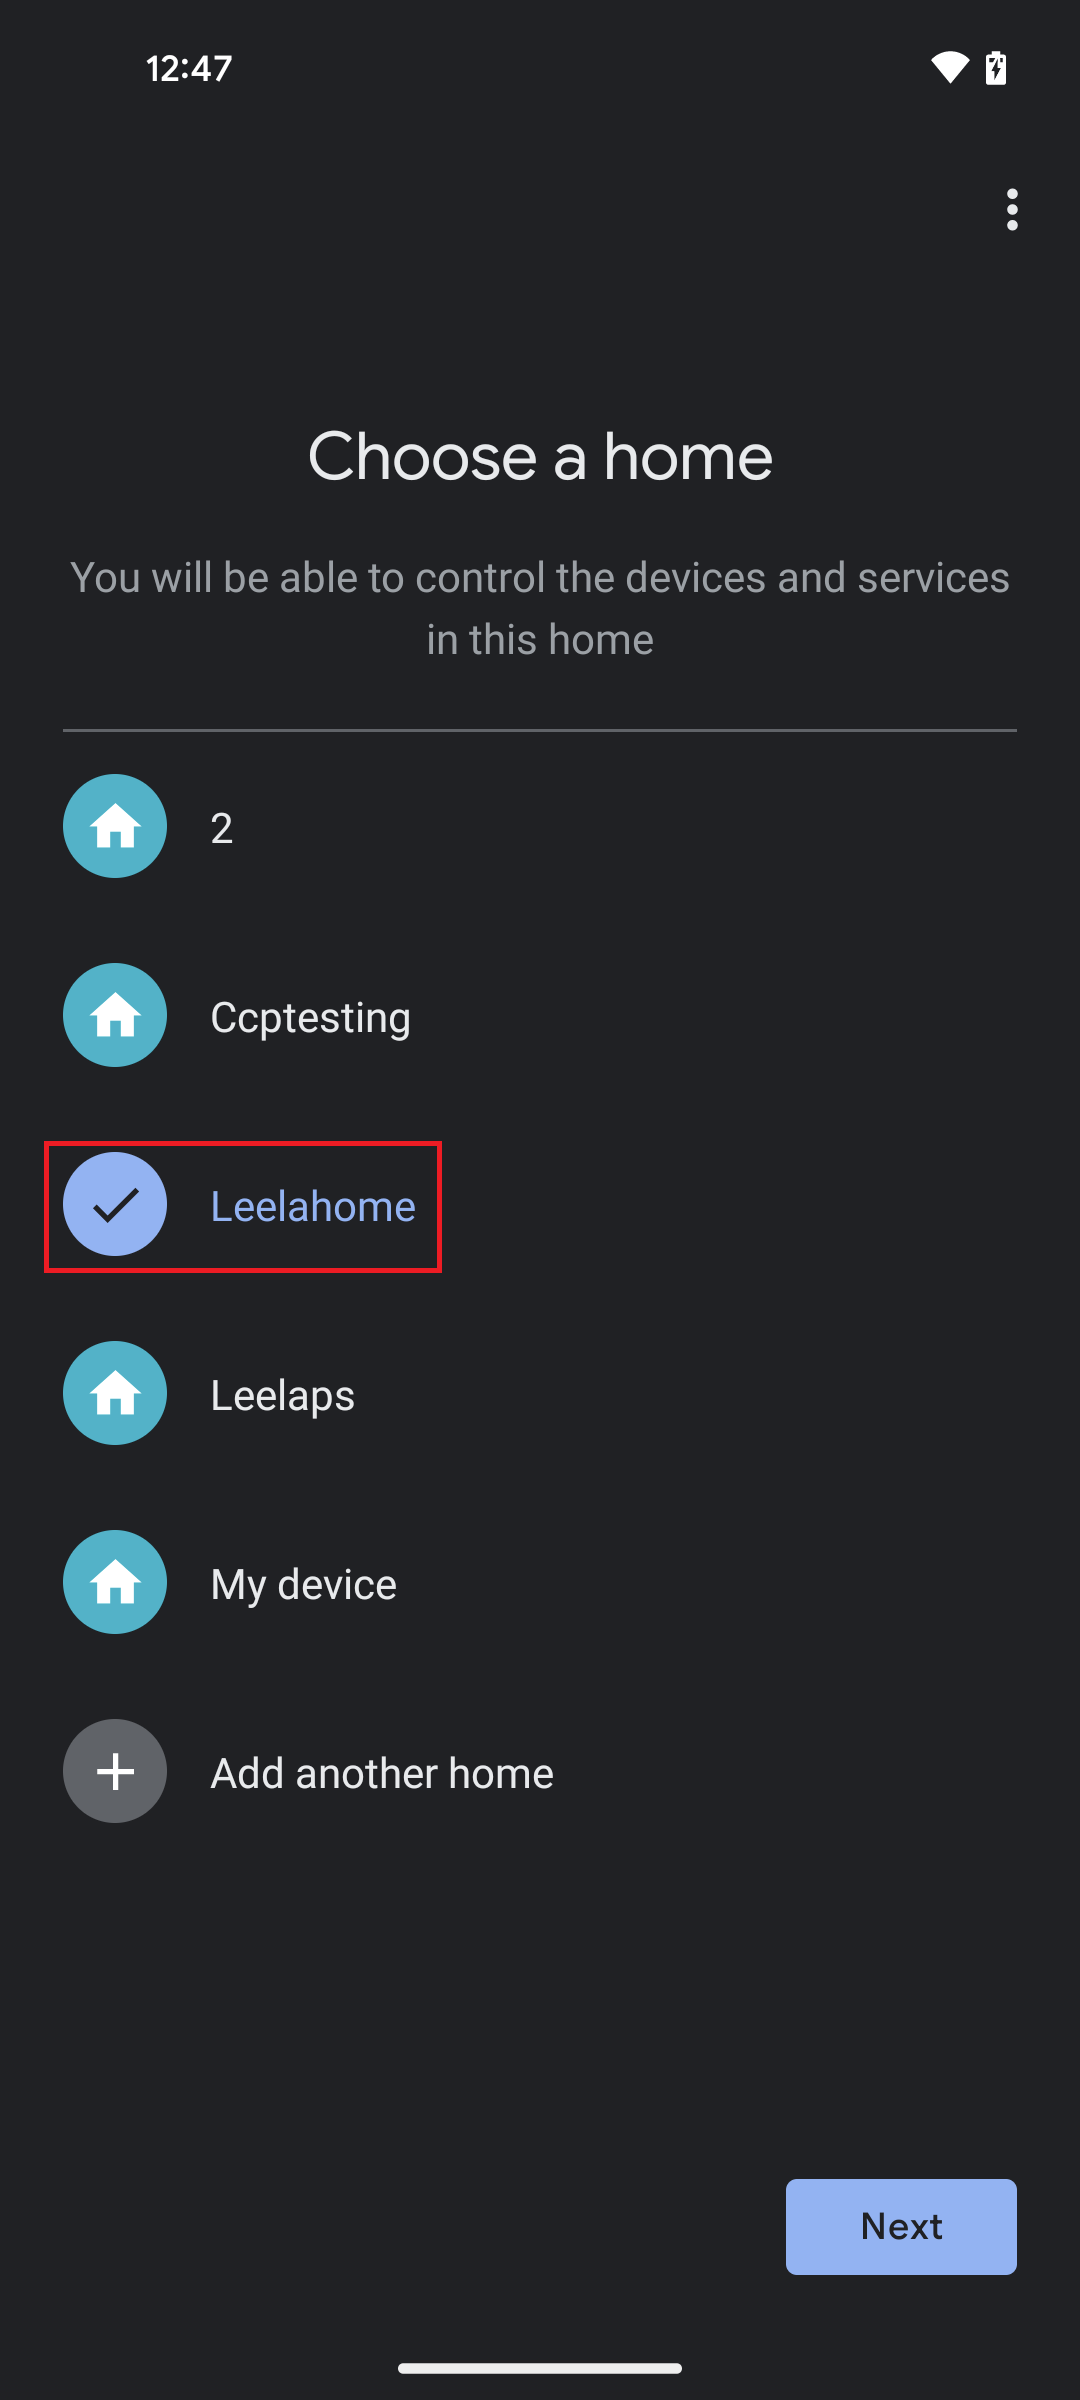
In the Choose Home Section select your home and click next.
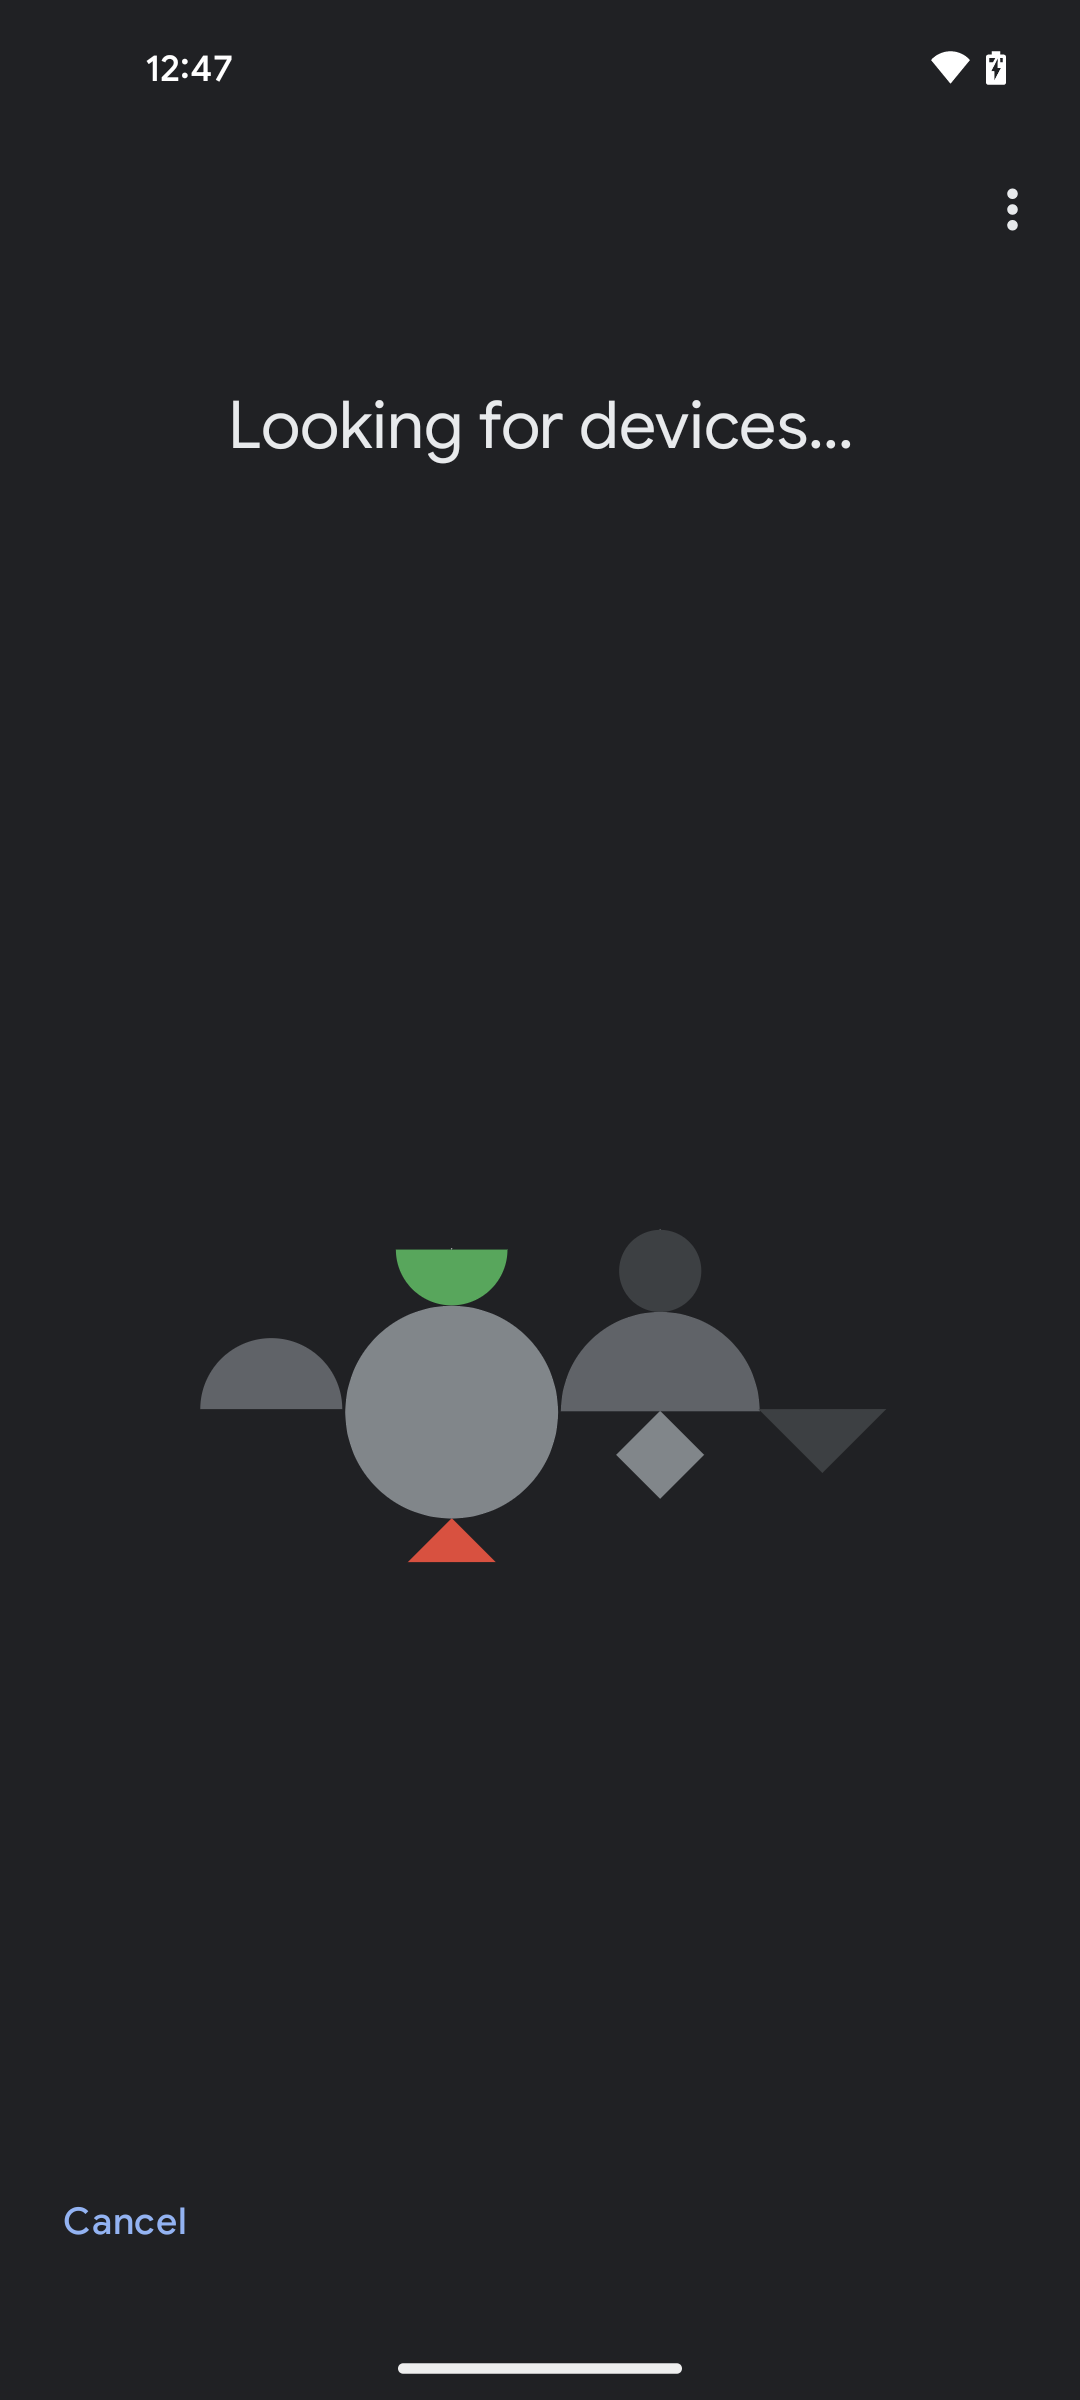
The Google Home App searches for a nearby Matter device.
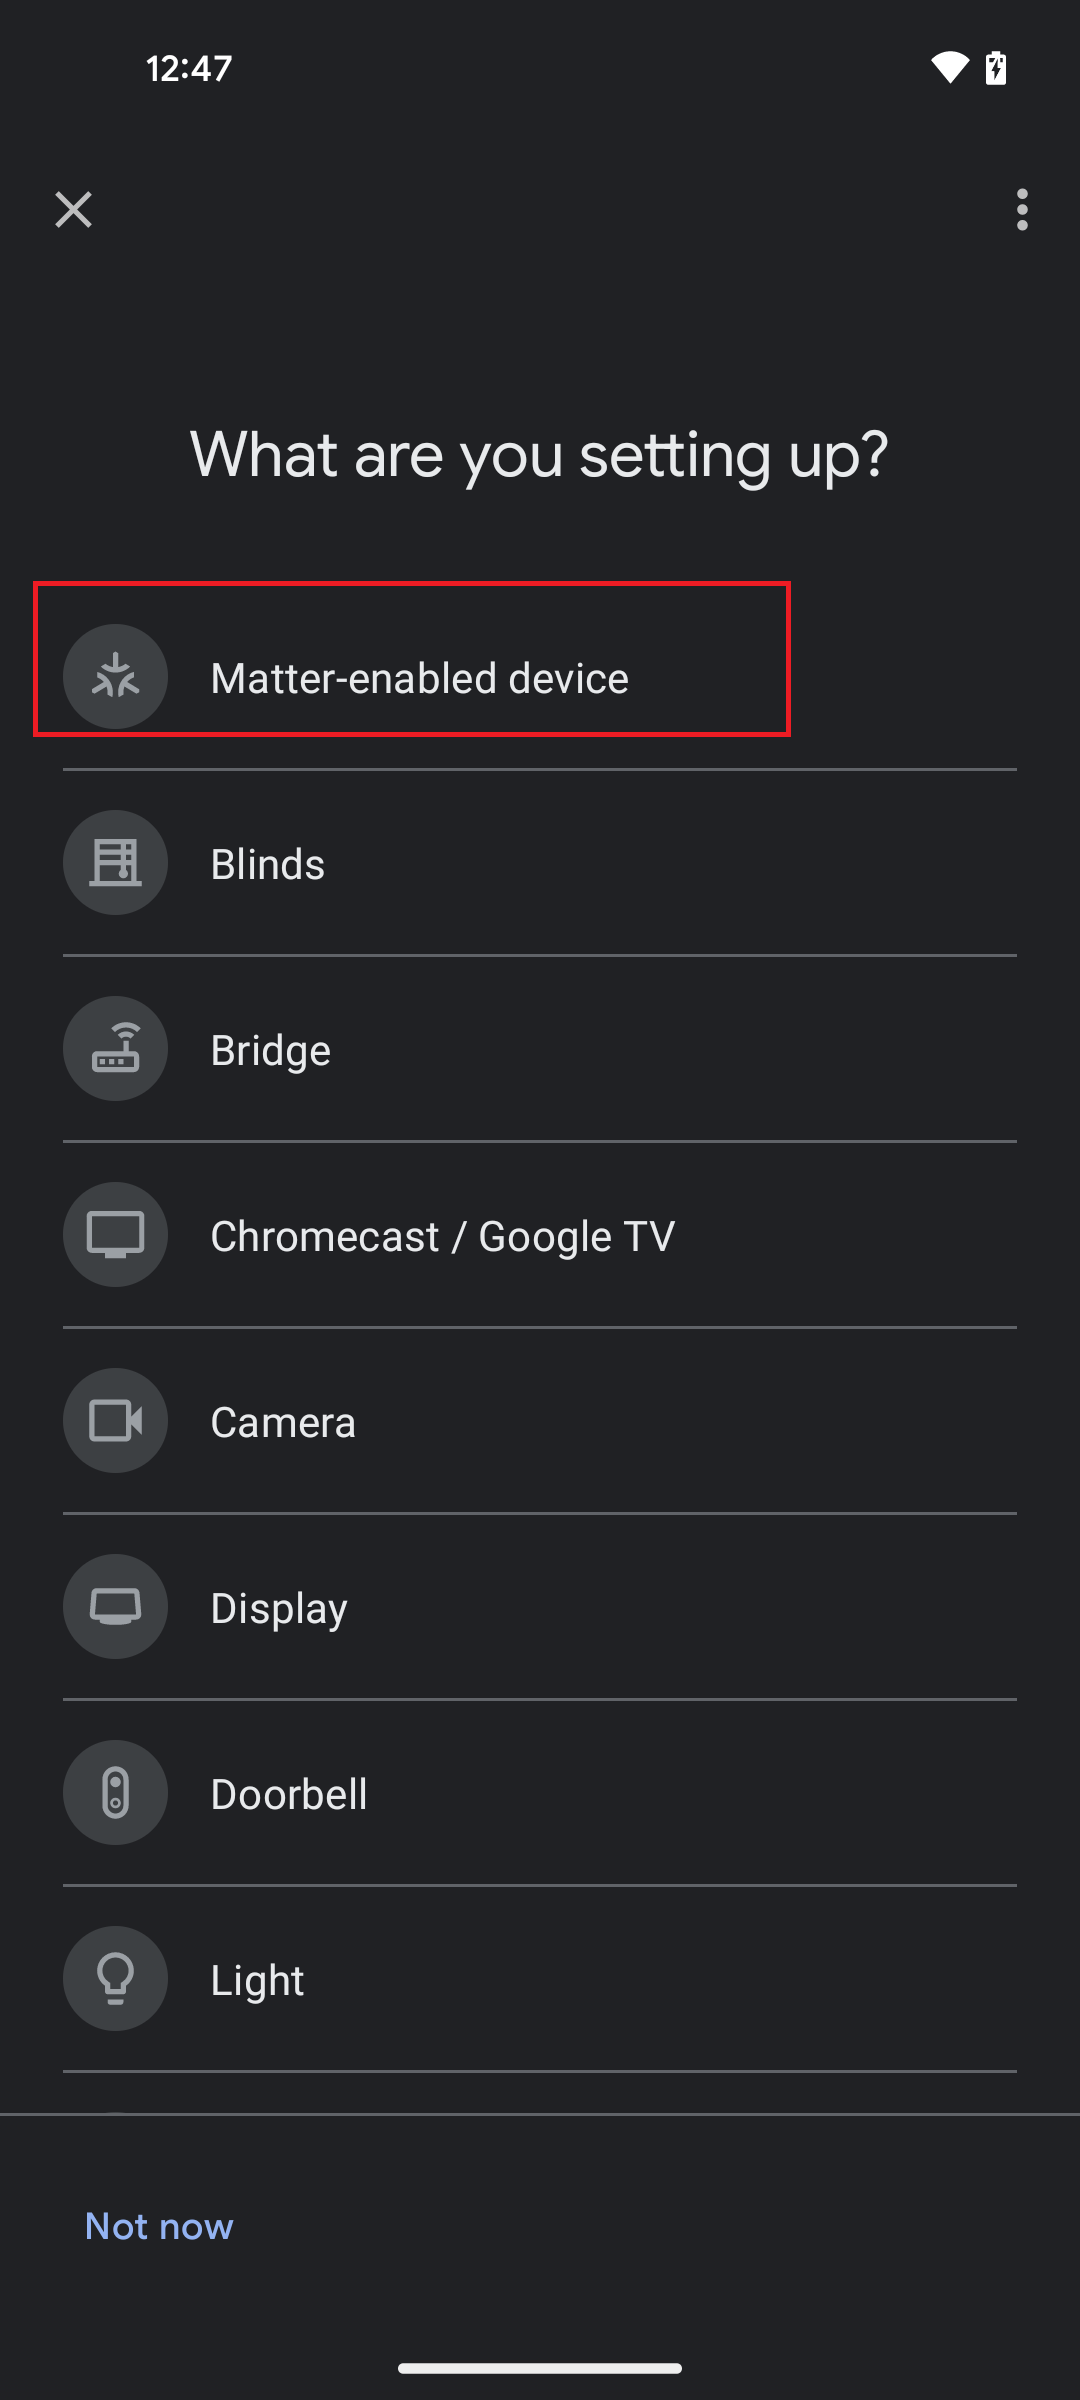
If the device is found, click the Application which you flashed on the device, such as Light or Lock.
If the device is not found, tap Matter Enabled Device.
Once the Google Home app has found the device, it will ask you to scan its QR code.
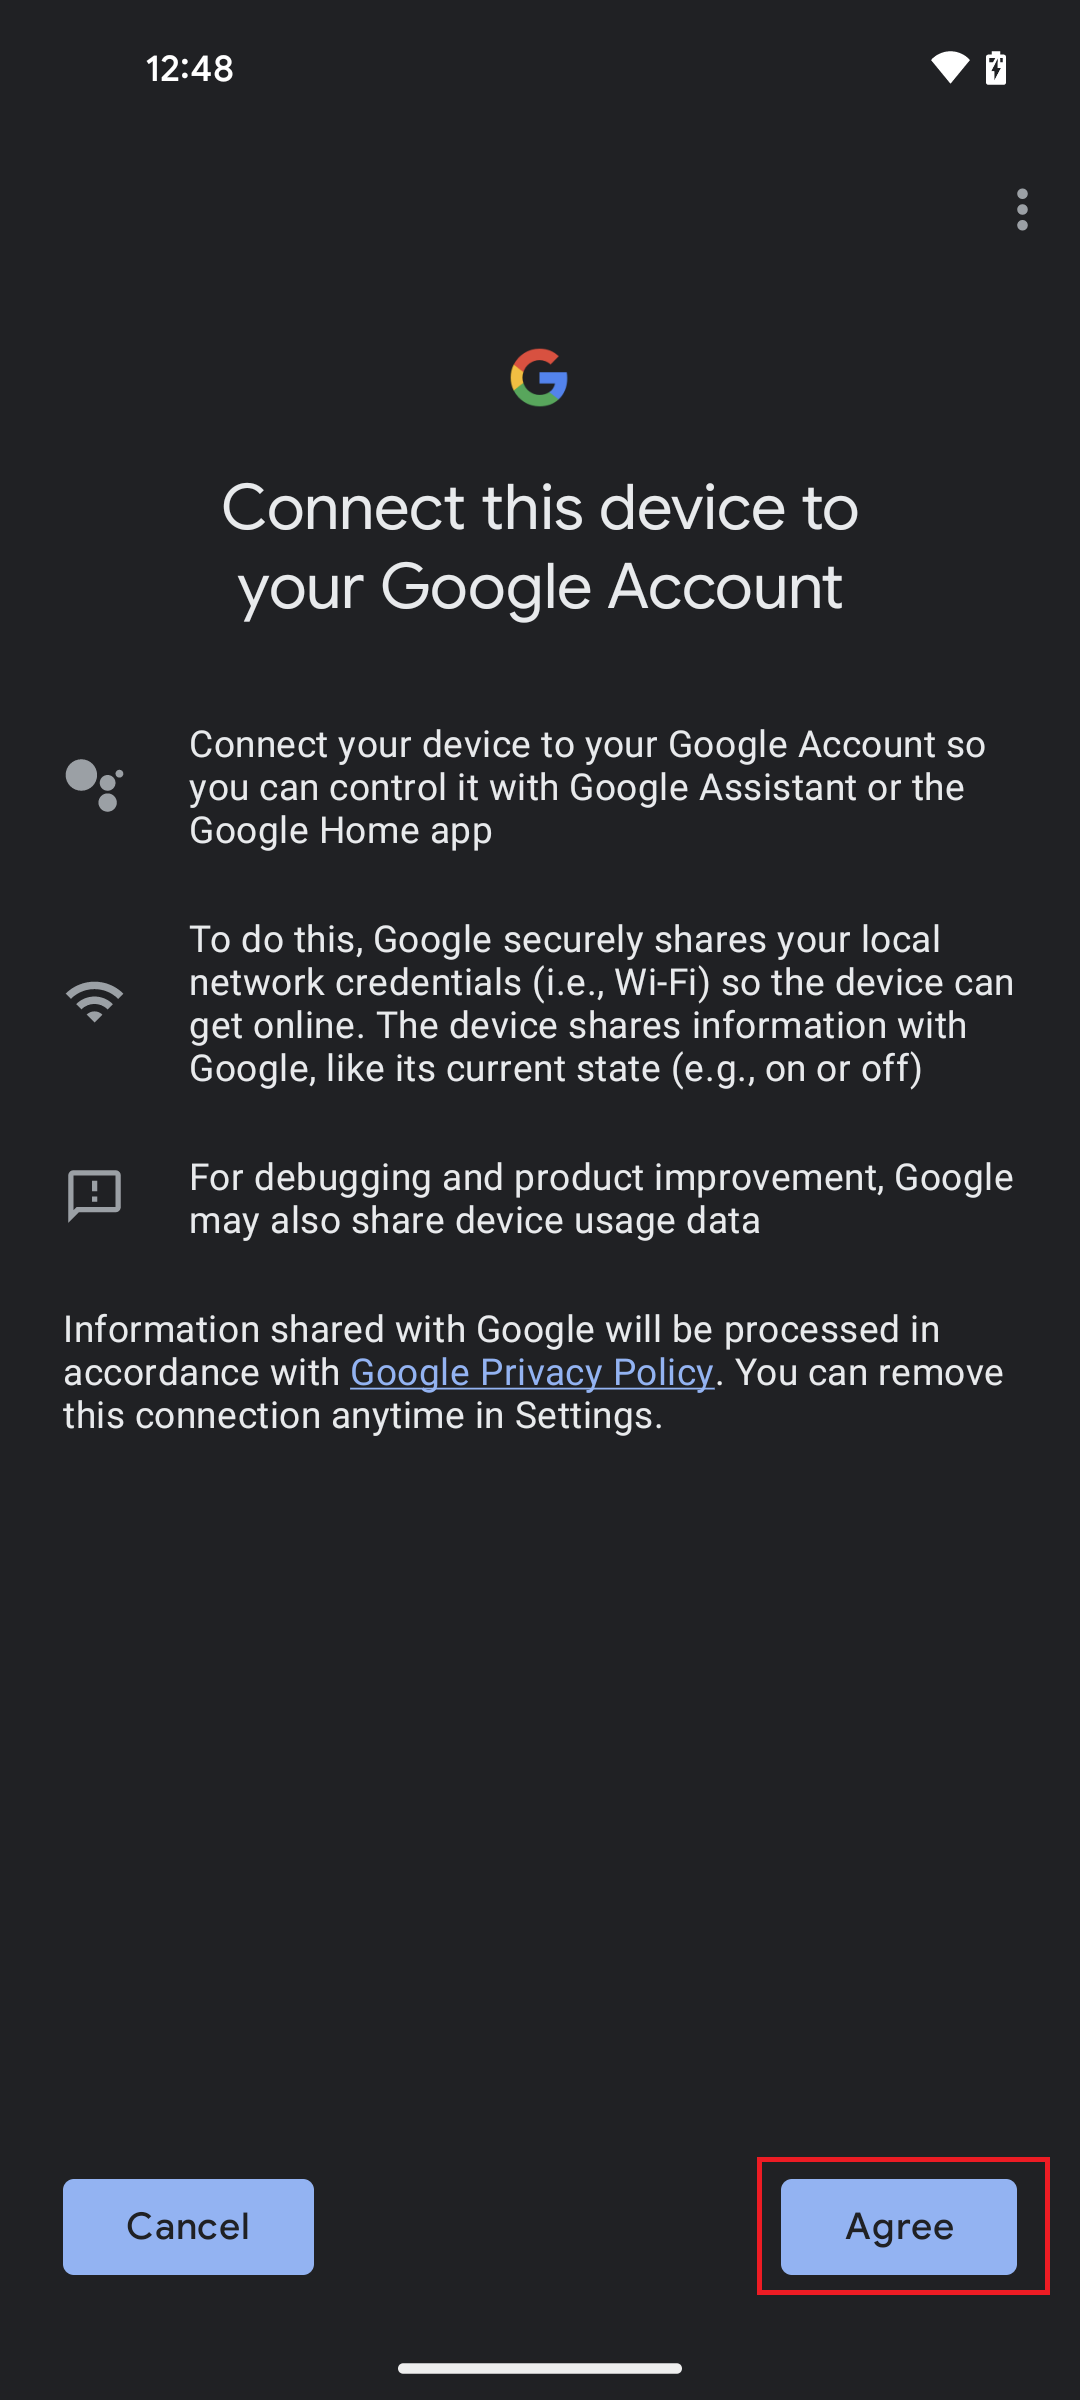
Google Home app asks if you want to connect this device to your Google account. Tap I agree.
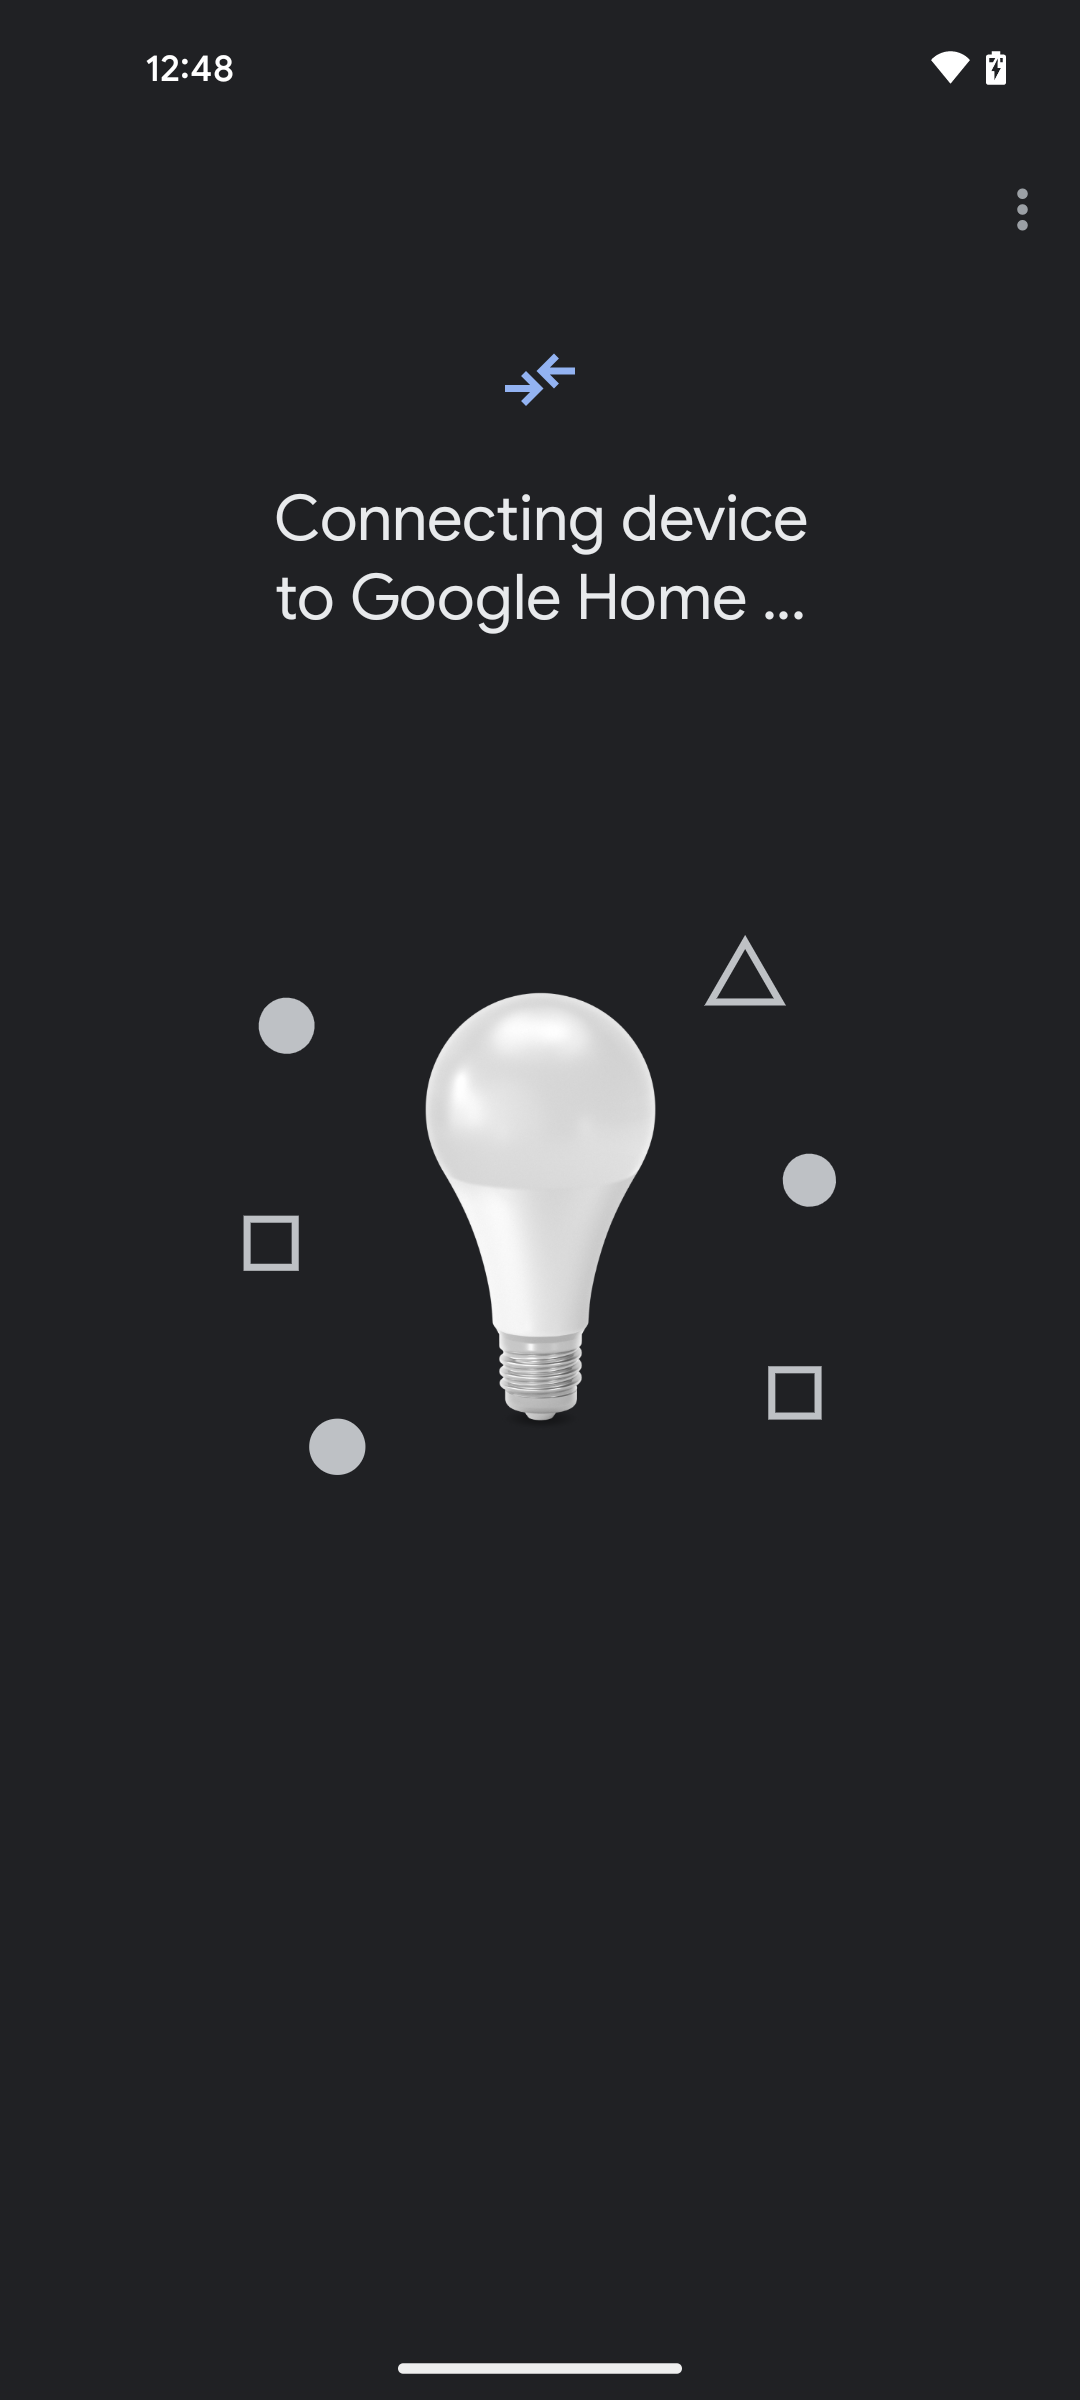
The Google Home app now starts commission the device with Bluetooth LE.
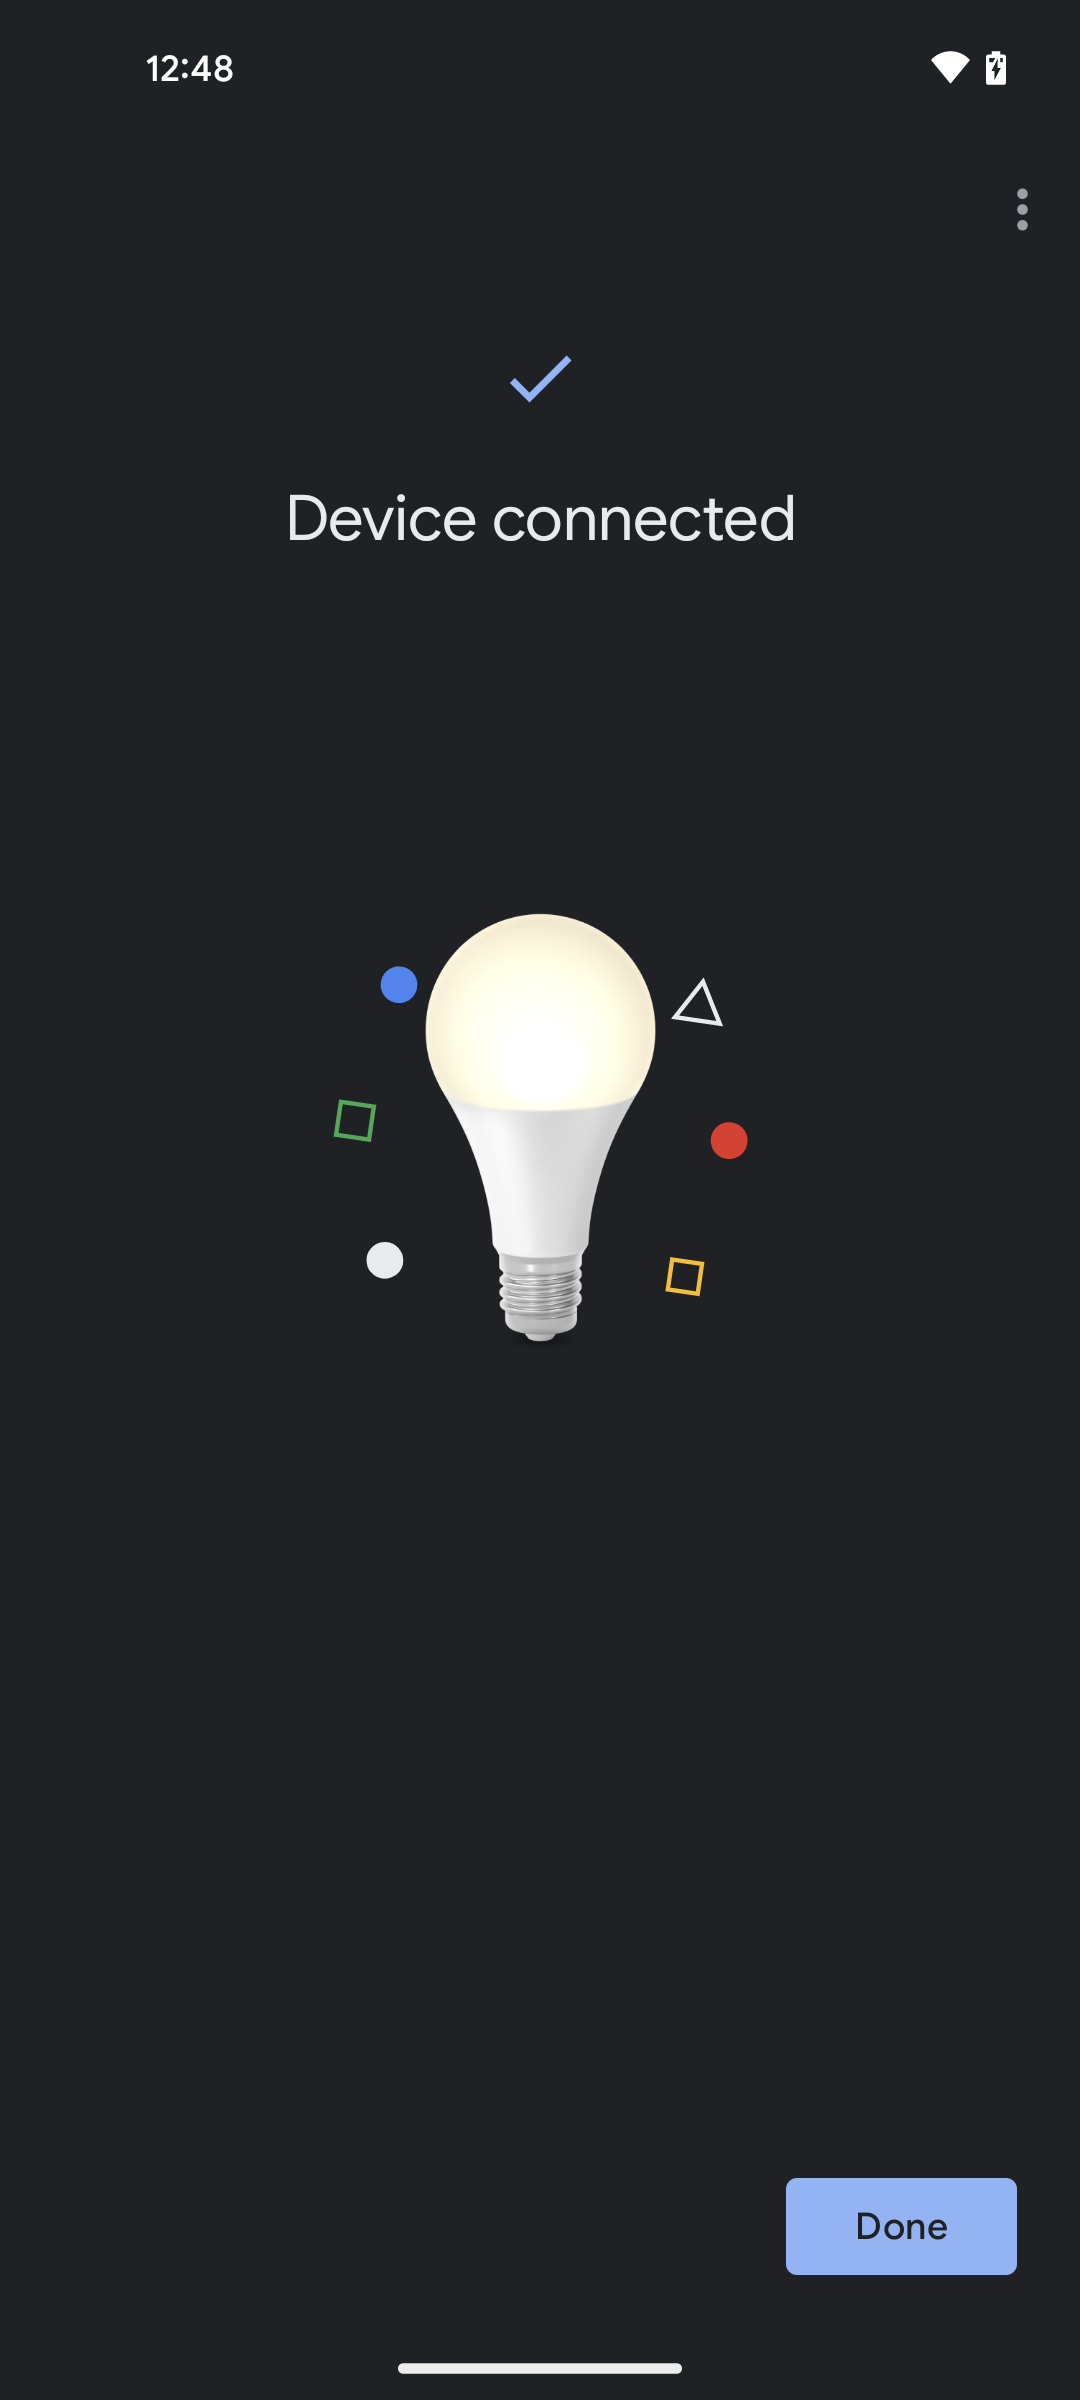
Once you see the 'Device connected' message, tap Done.
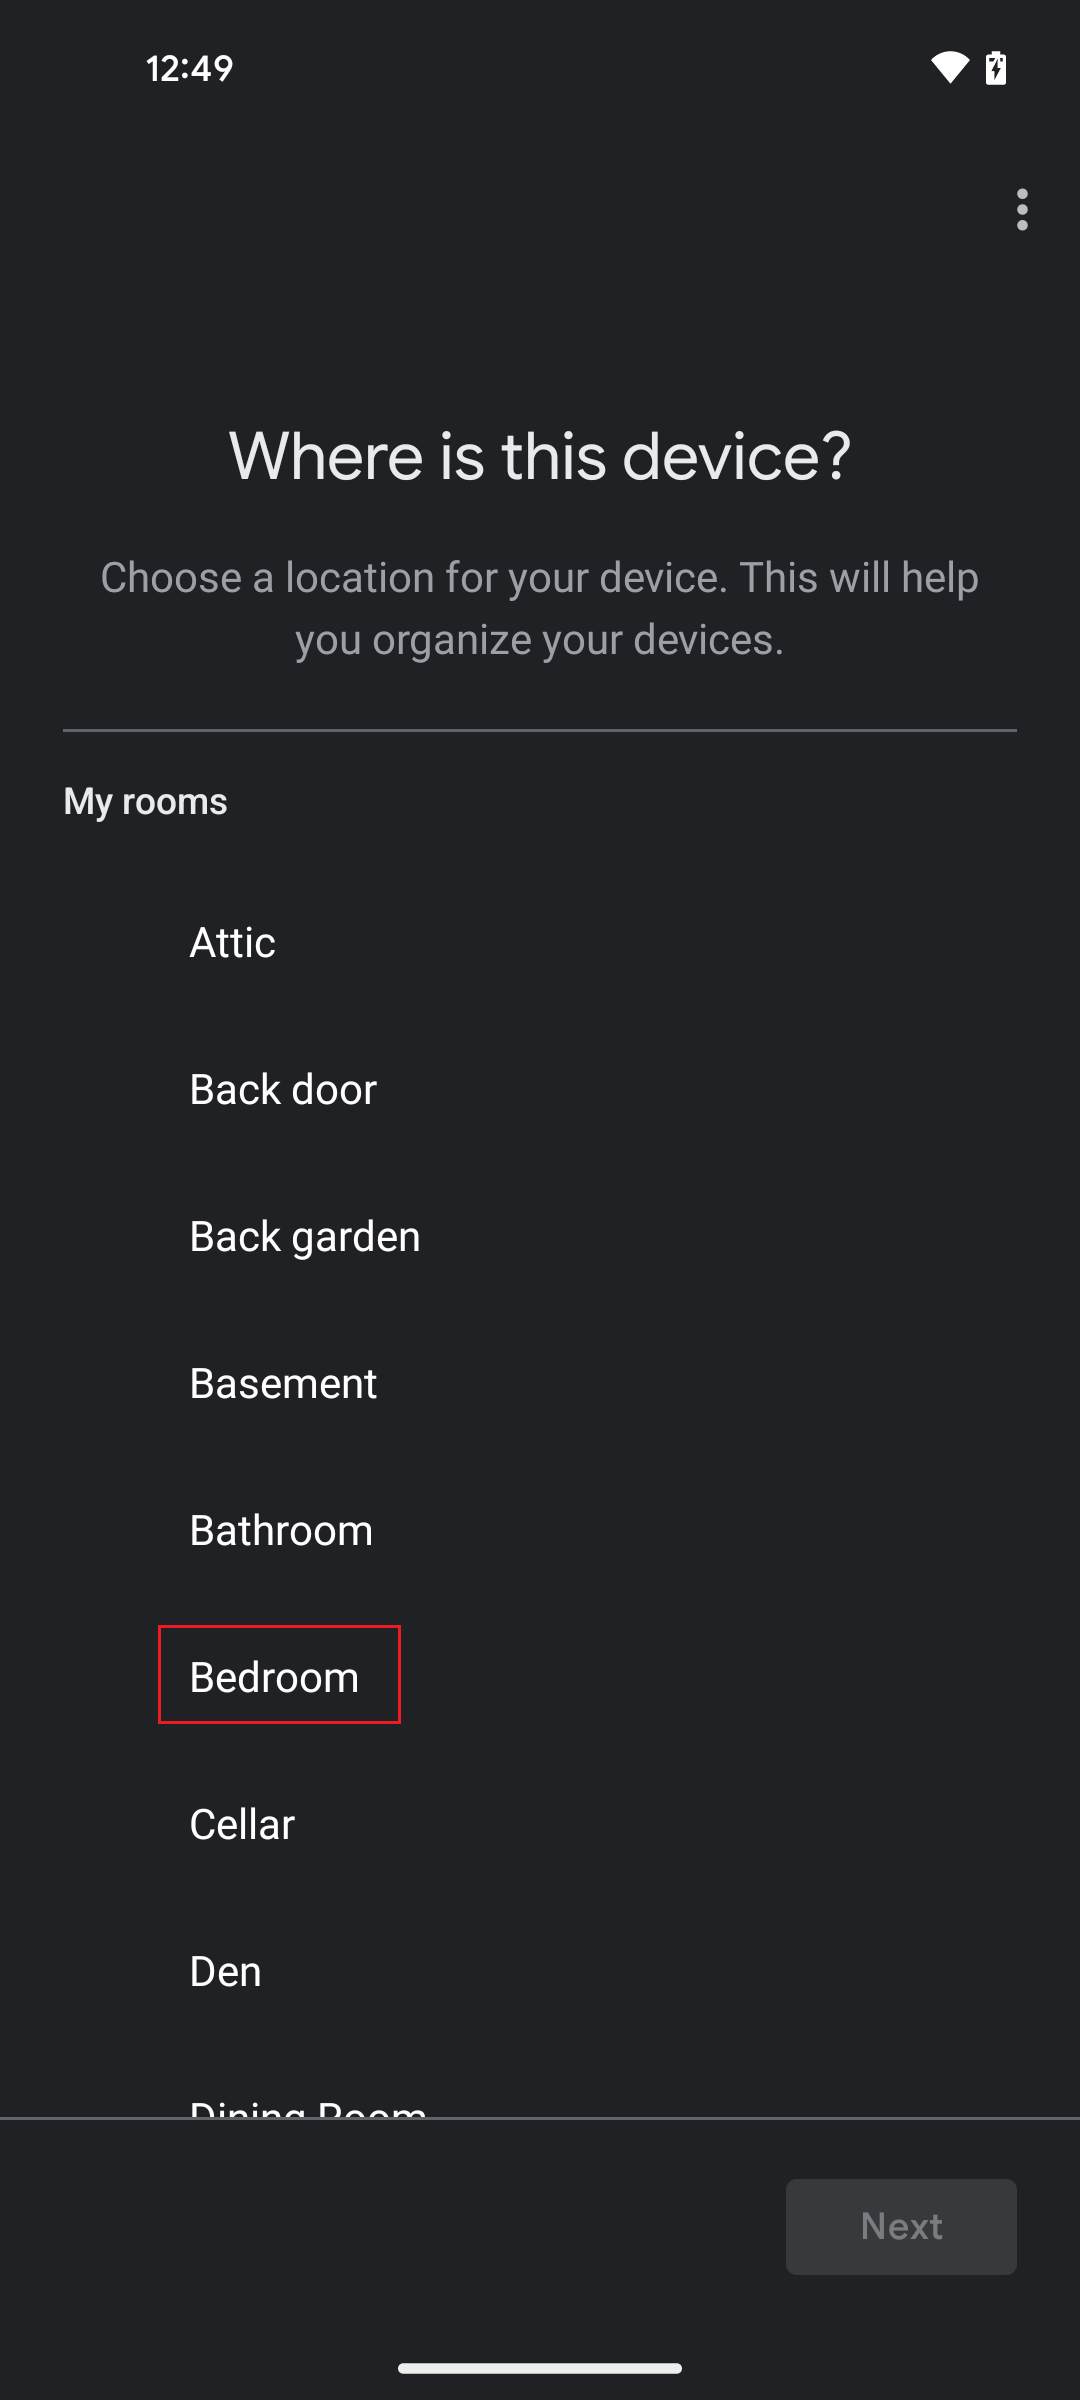
The Google Home App now asks you to select a Room where you want to keep the Application. You can select any room from the list and click Next.
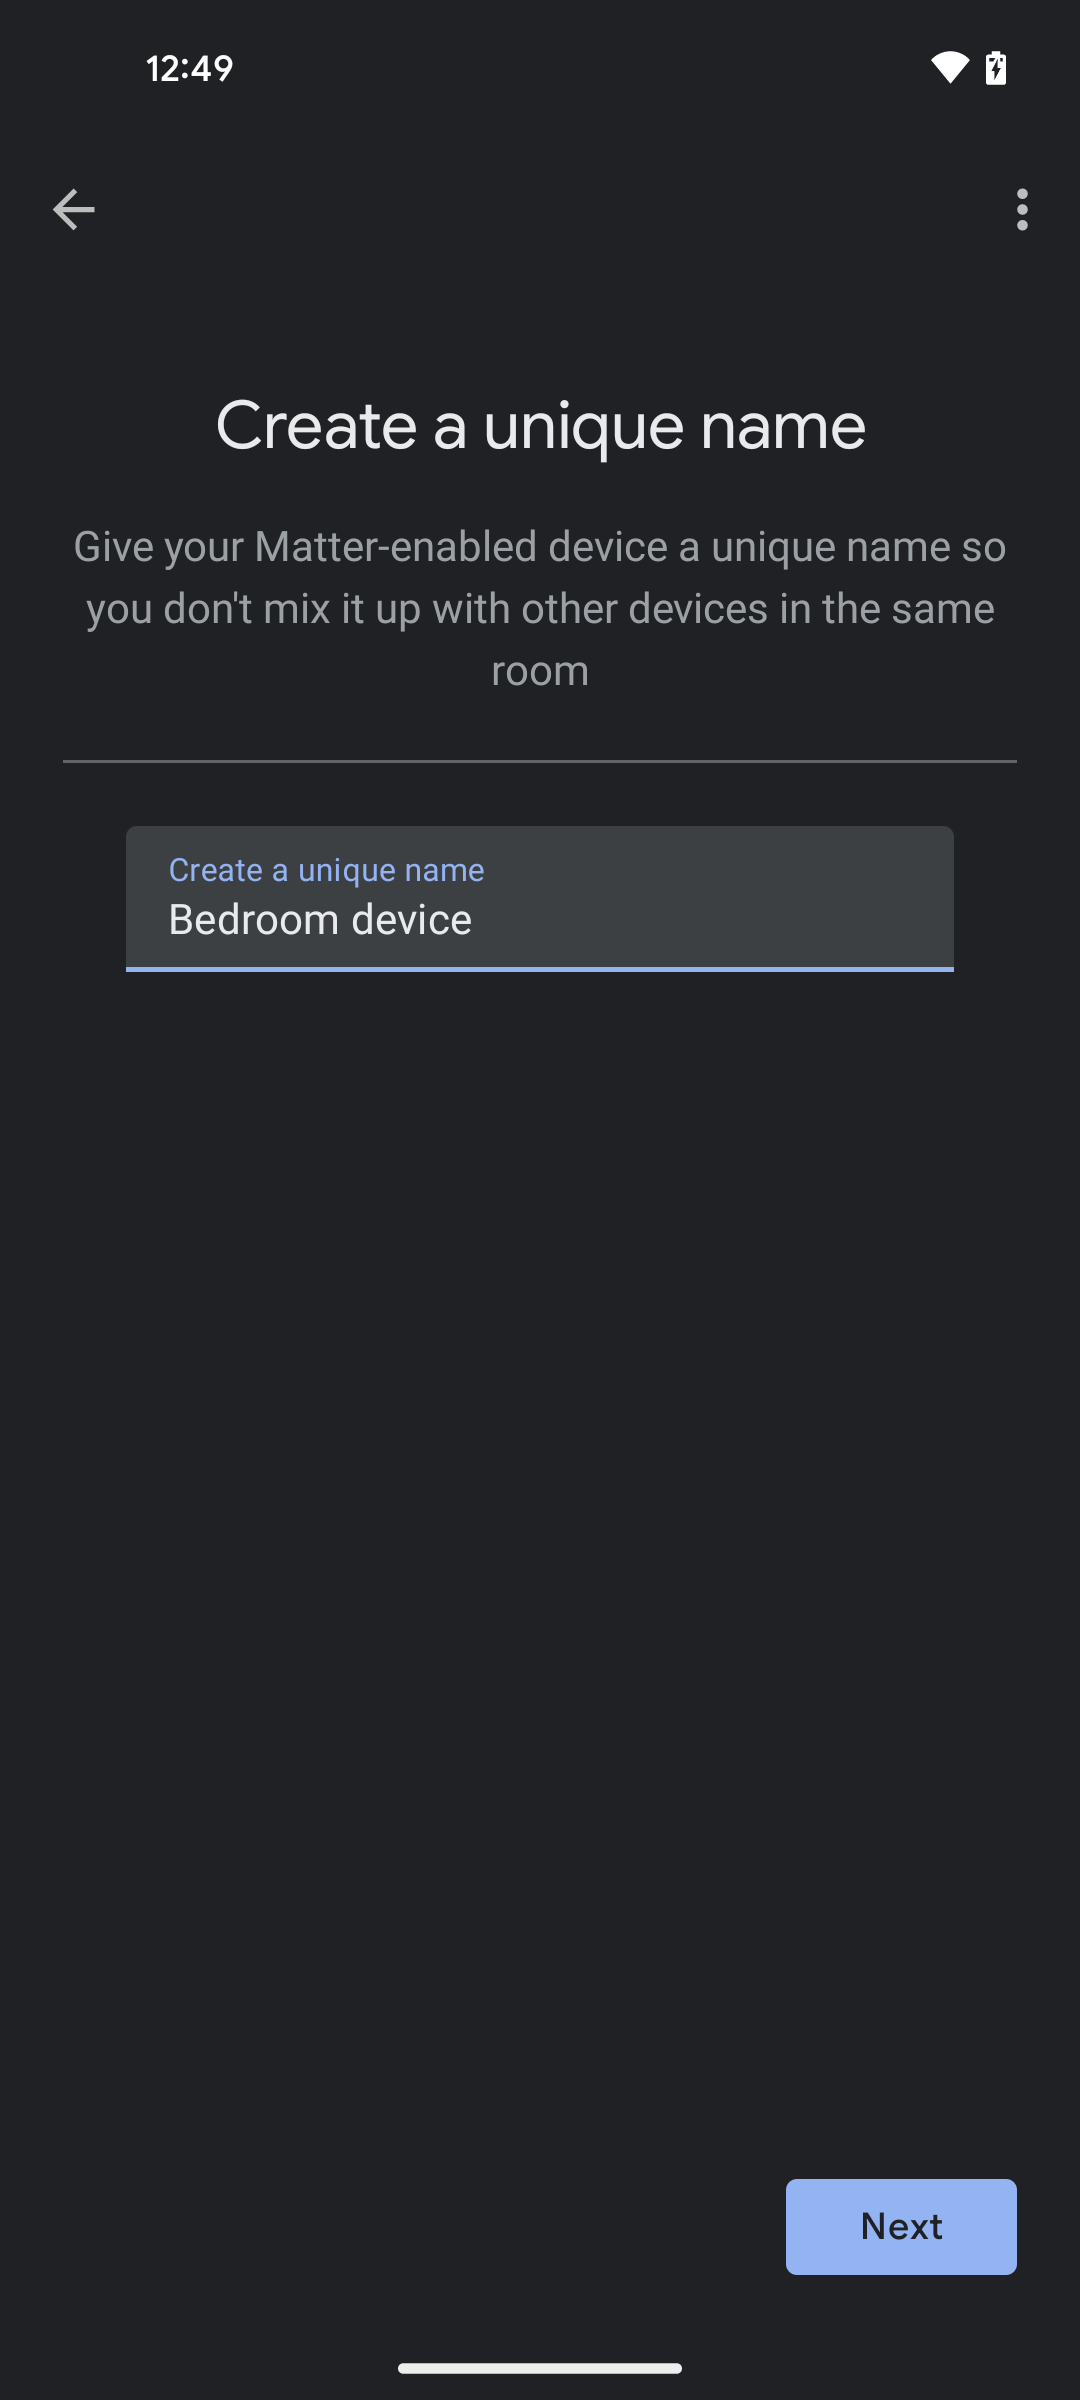
At the prompt to create a unique name for the application (For Example: Light, Lock), create any name to identify the application and click Next.
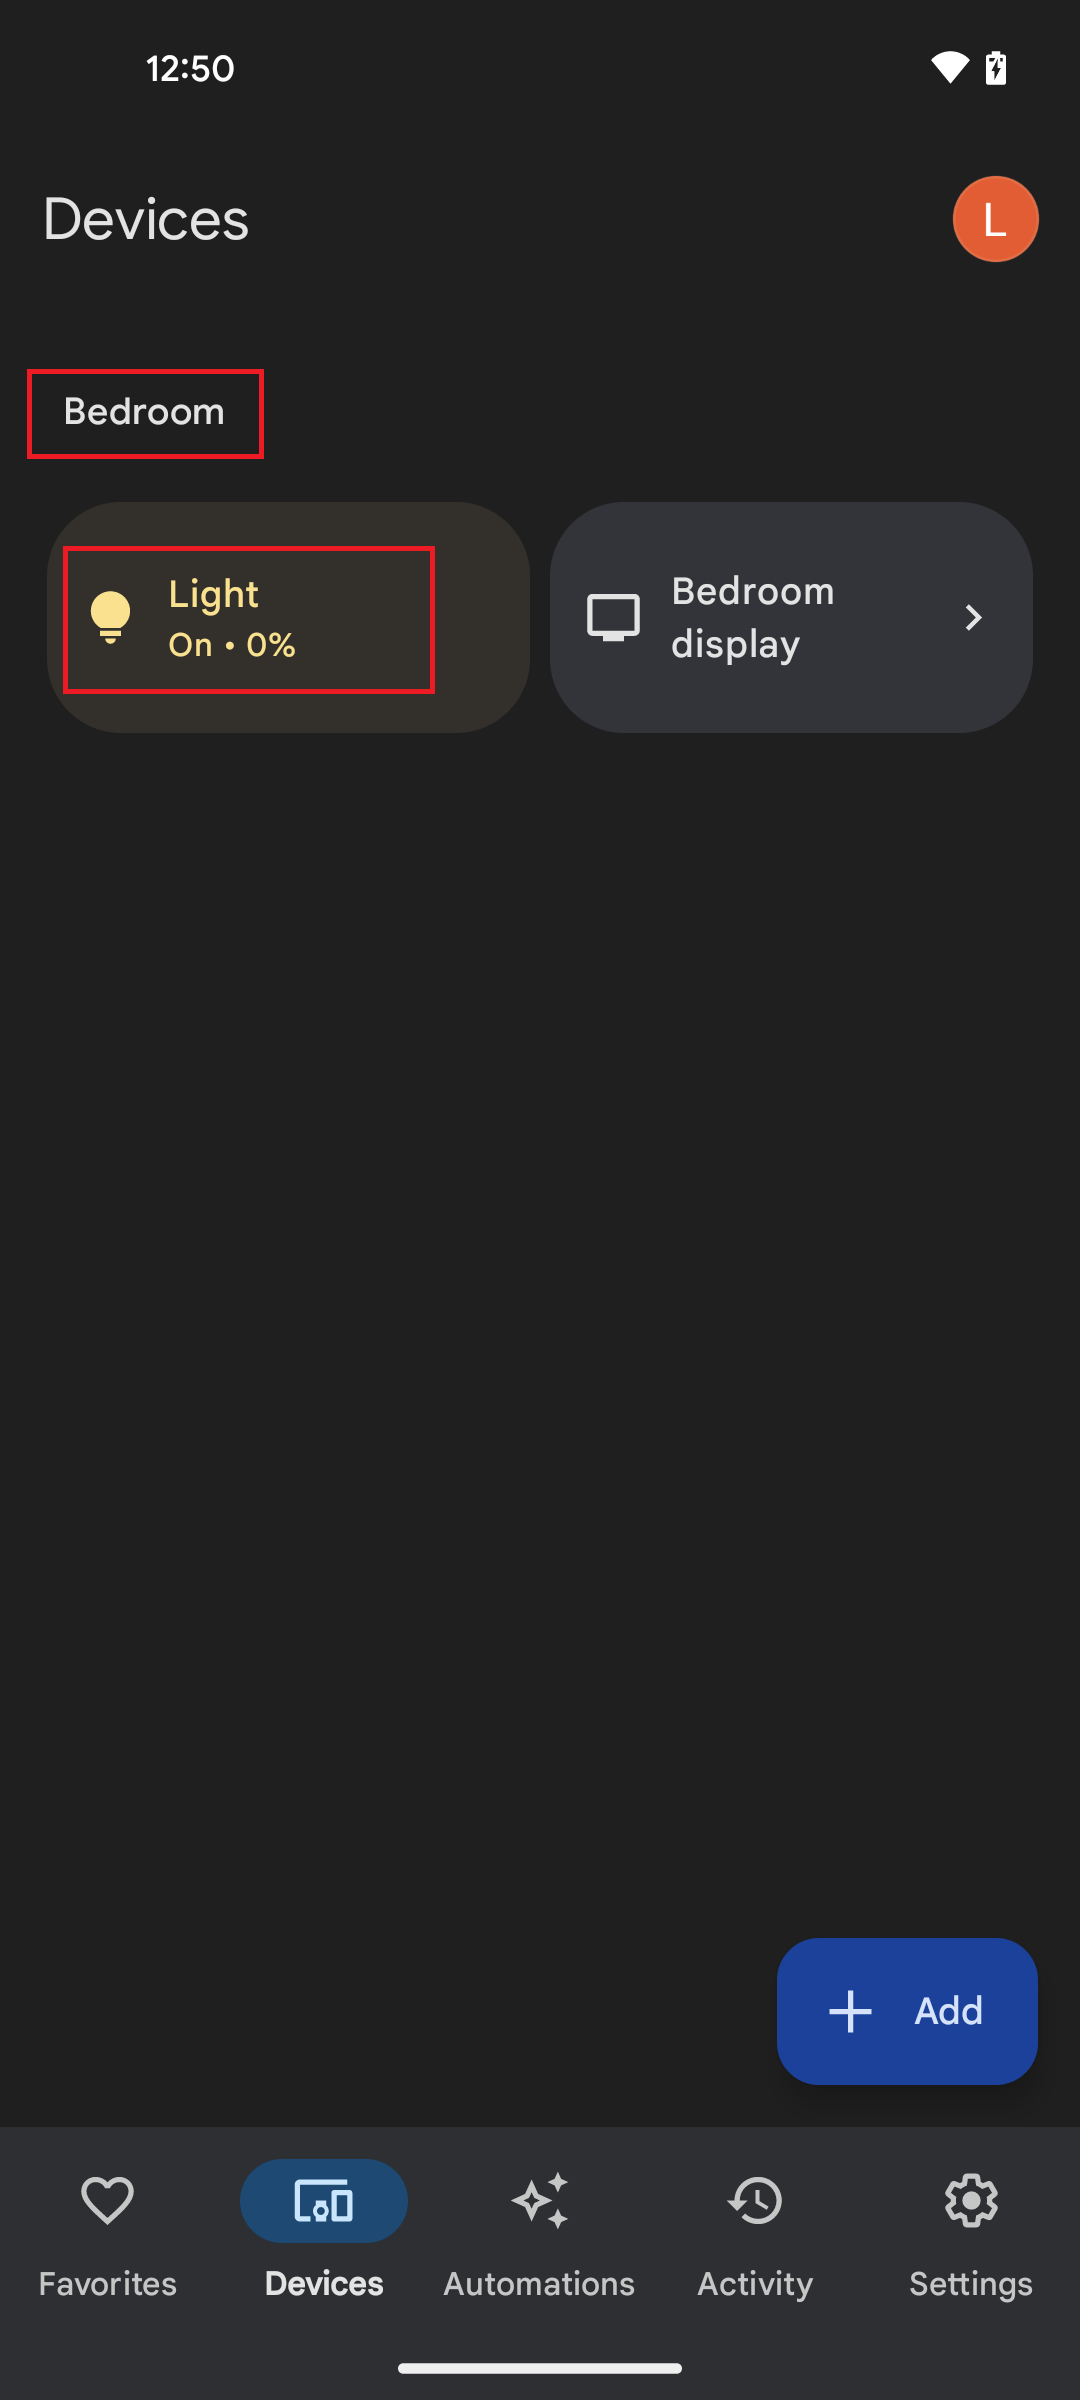
You will now see your device (for example, Light) shown as being connected to your Google account and added to your selected Room at Step 15.
Control the Light via Google Home App#
In the Google Home app, you will now be able to tap your light to turn it ON and OFF.
You can control the light by giving a voice command (for example, 'Ok Google! Turn ON Light') and through the app user interface.
You will see the LED1 on your WSTK board turned on or off depending on the command you enter.
Deleting Matter Application from Google Home#
Press and hold Matter Application for detailed view.
Click Setting on the top right corner.
Select the Remove device option.
At the 'Unlink all Matter apps & services from device', select Unlink.