Running Simplicity Studio#
Simplicity Studio 5 and Flex SDK v 3.x introduced a number of new features and enhancements. This chapter describes how to use Simplicity Studio 5 and Flex SDK v3.x as well as the older Simplicity Studio 4 and Flex SDK 2.x for testing.
Before beginning, you should have installed Simplicity Studio and the Flex SDK according to the instructions in the relevant quick-start guide: QSG138: Proprietary Flex SDK v2.x Quick Start Guide or Proprietary Flex SDK v3.x Quick Start Guide.
Before running RAILtest in either version, the test target must be configured according to the following instructions:
To start, set up an EFR32 development kit radio board with a mainboard for Wireless Starter Kits (WSTK). Once you have installed all the required software you can connect your EFR32 development kit hardware to your PC using a mini-USB cable. Make sure the 3-way power switch in the bottom left is set to AEM.
If you want to connect to your WSTK over Ethernet, plug in an Ethernet cable as well at this time. The IP address will be printed to the LCD screen during startup of the WSTK but may be lost when the app starts. To see this again, reboot the WSTK and press the reset button for several seconds to prevent the EFR32 from loading its application.
Select RAILtest Application#
Start Project In Simplicity Studio 6#
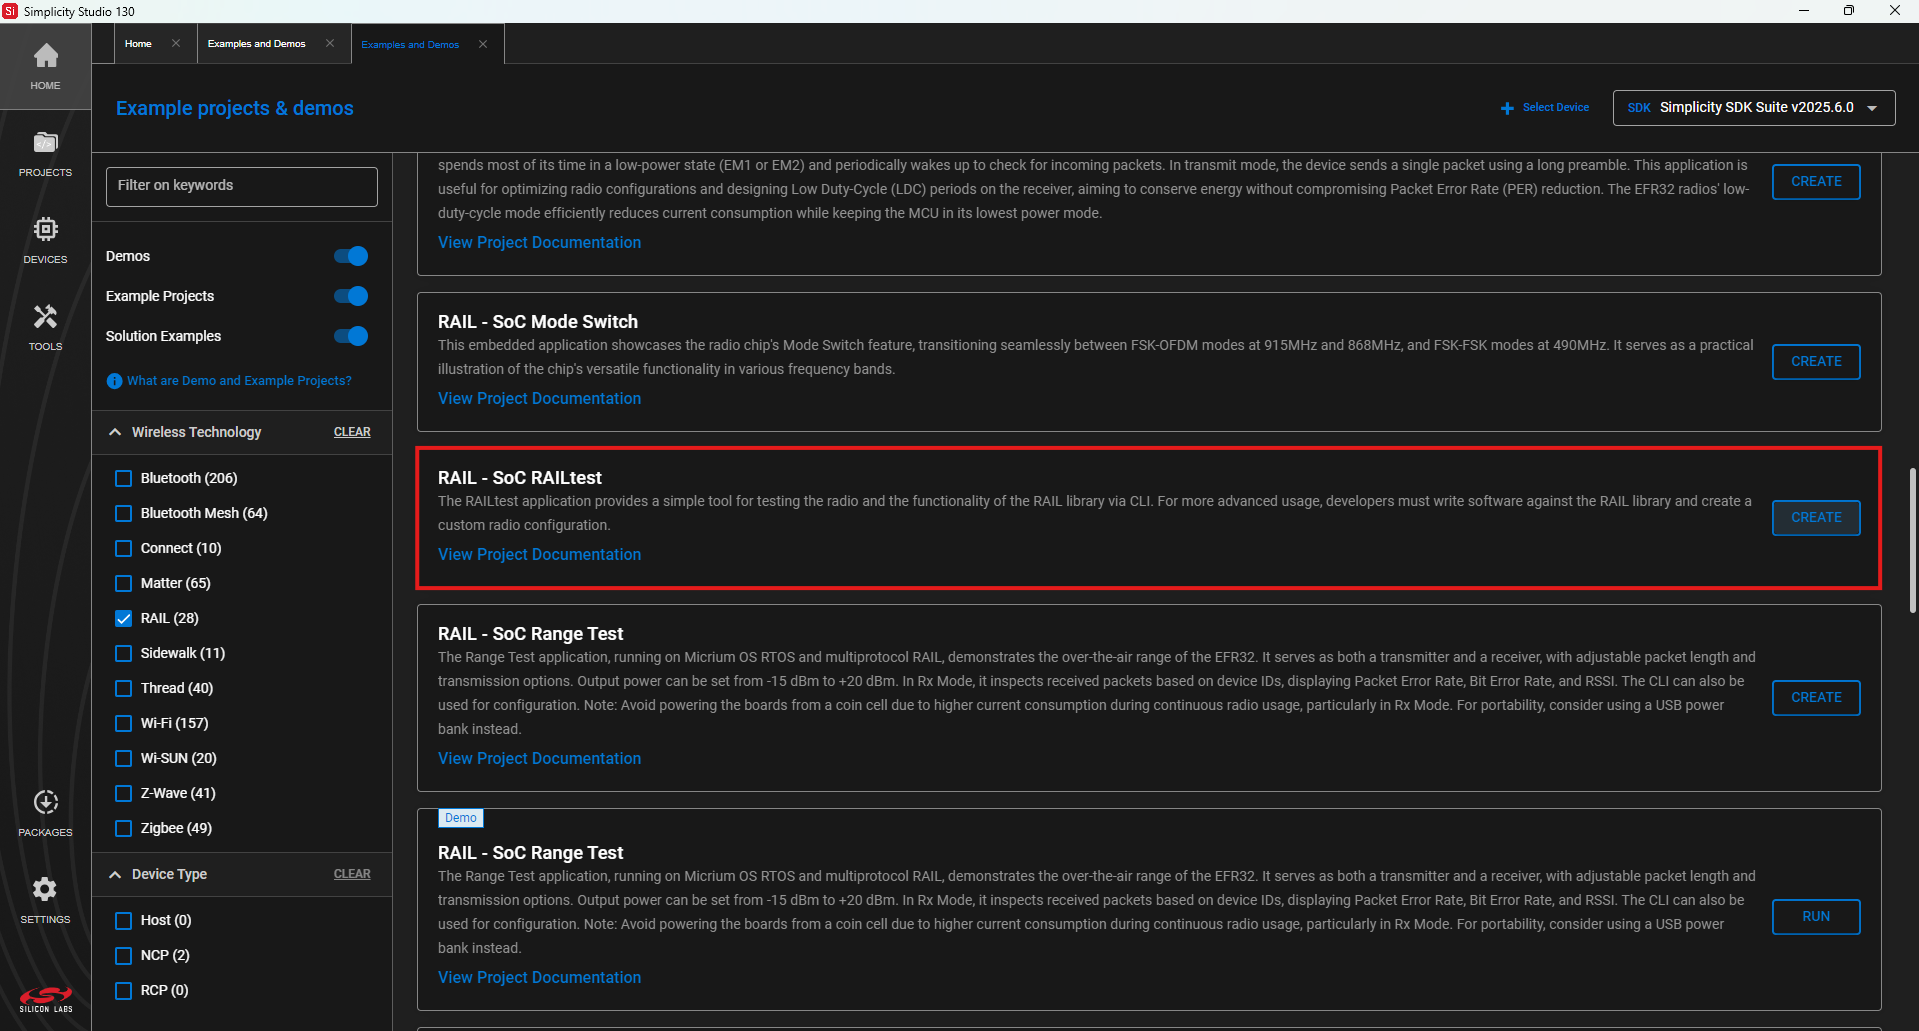
When Simplicity Studio 6 opens, select RAIL in the sliding menu under Start A New Project.
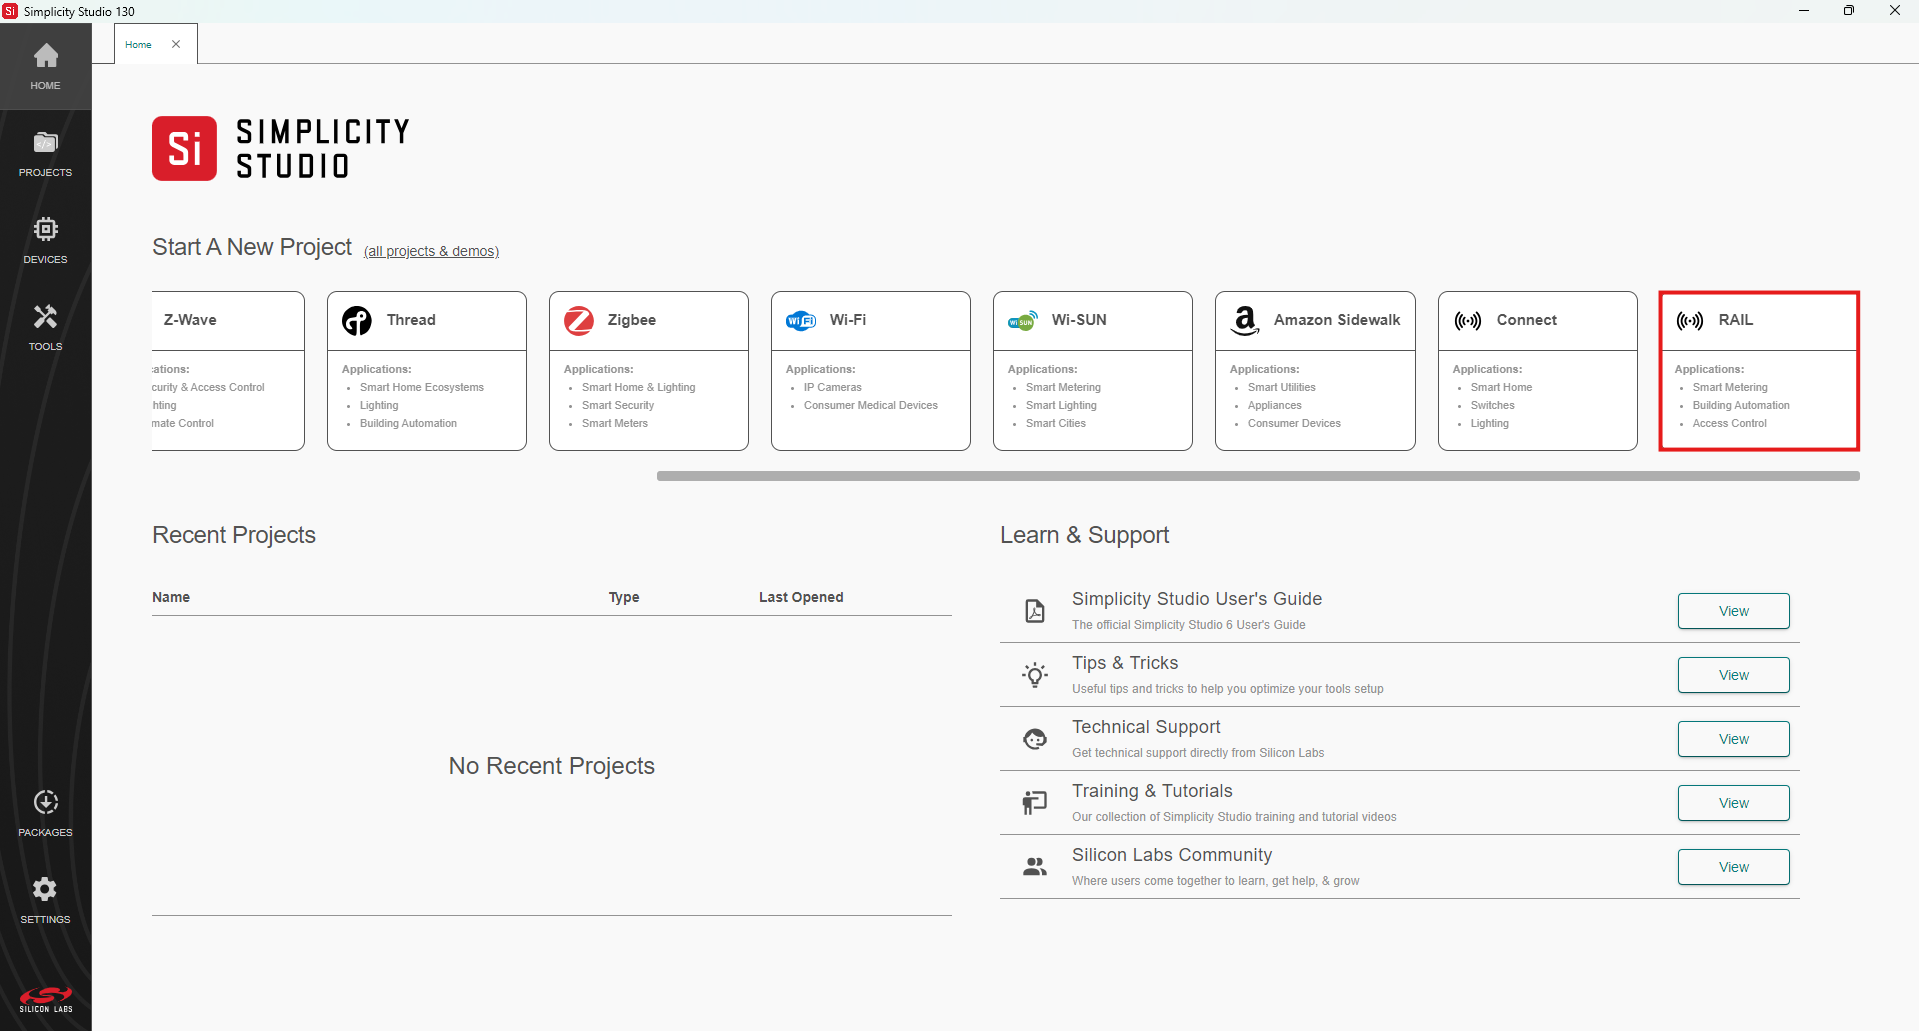
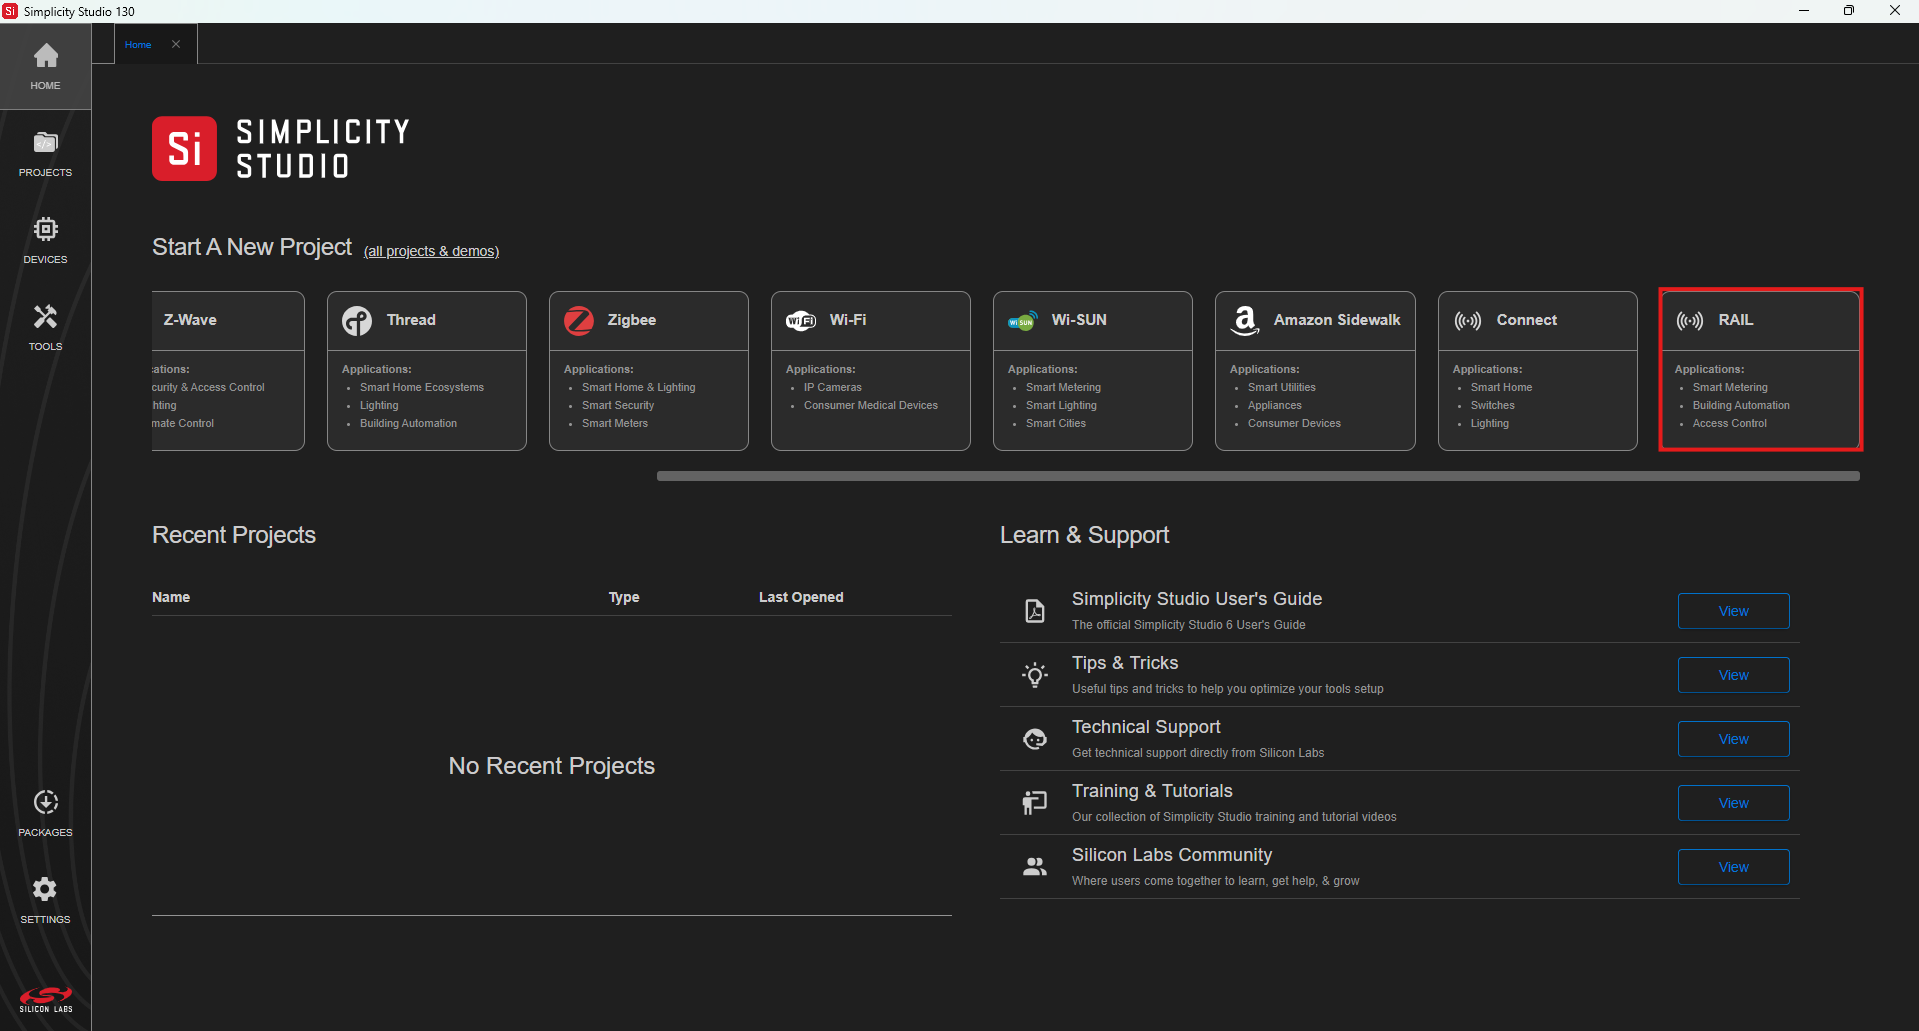
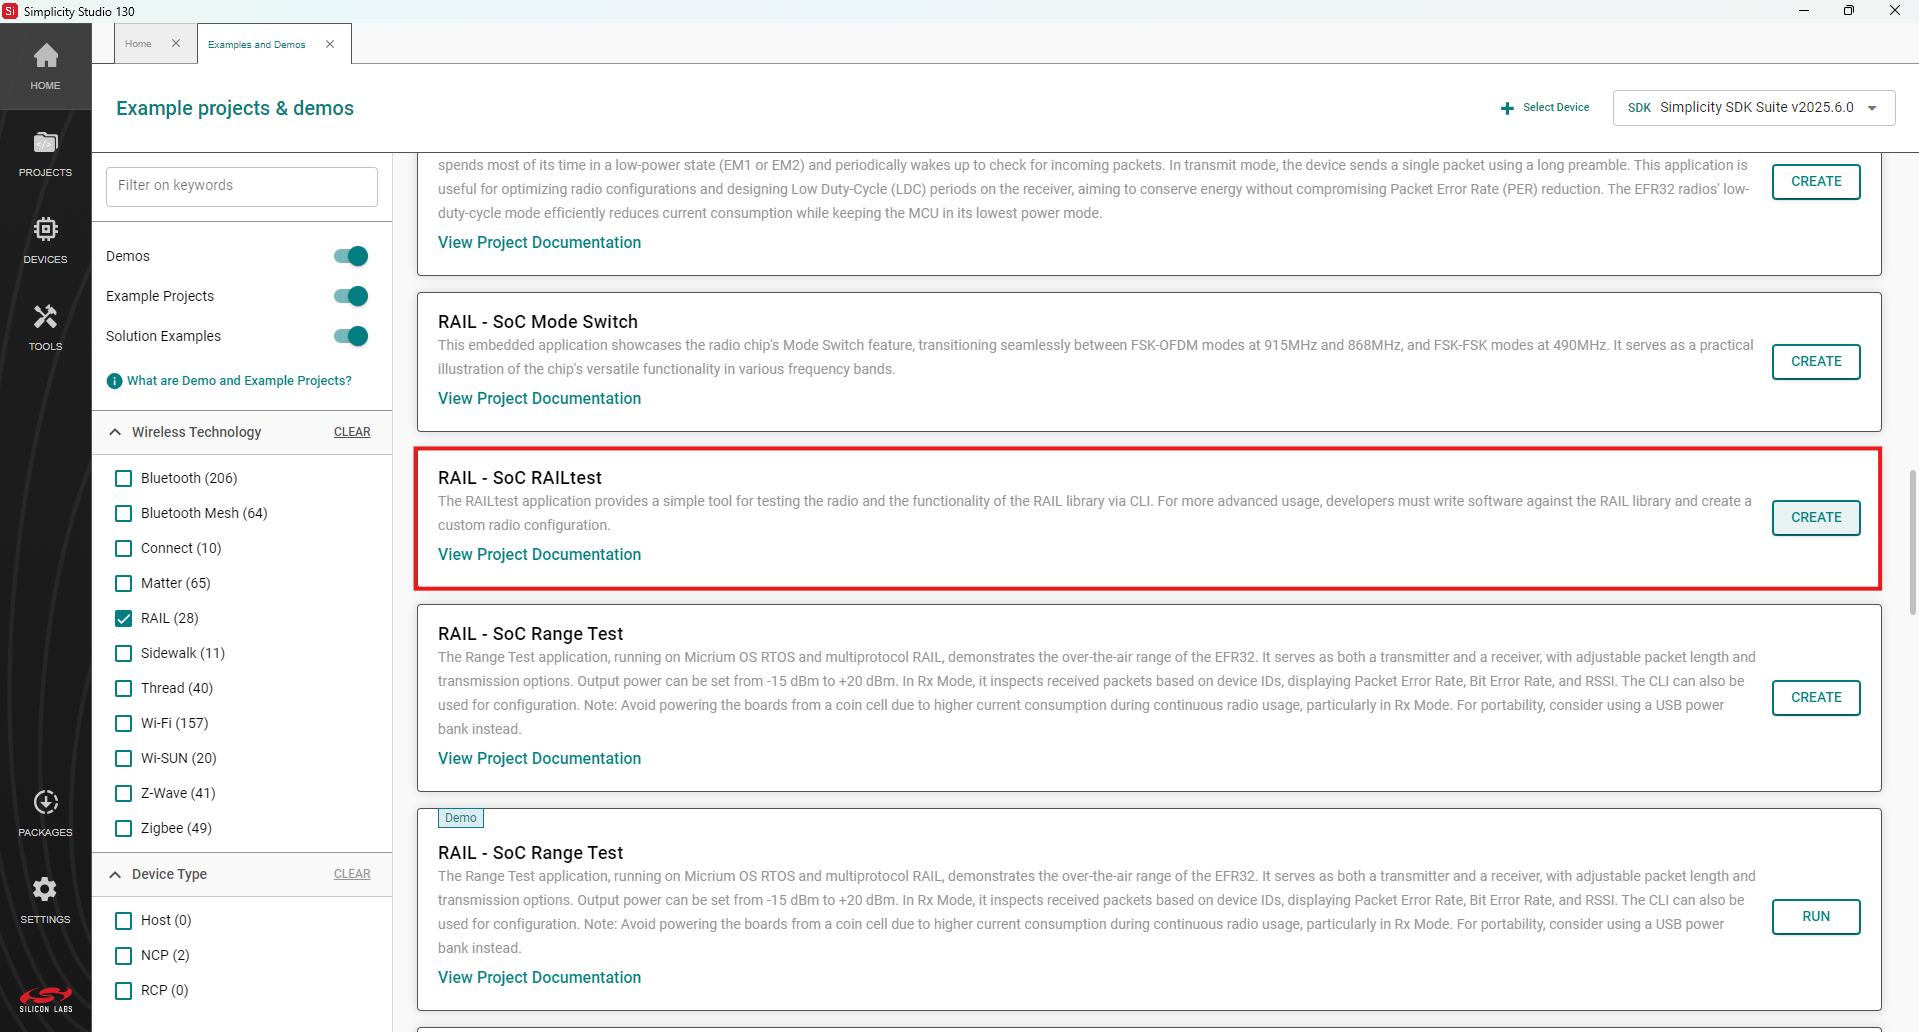
Scroll down to find RAIL - SoC RAILtest and click CREATE.
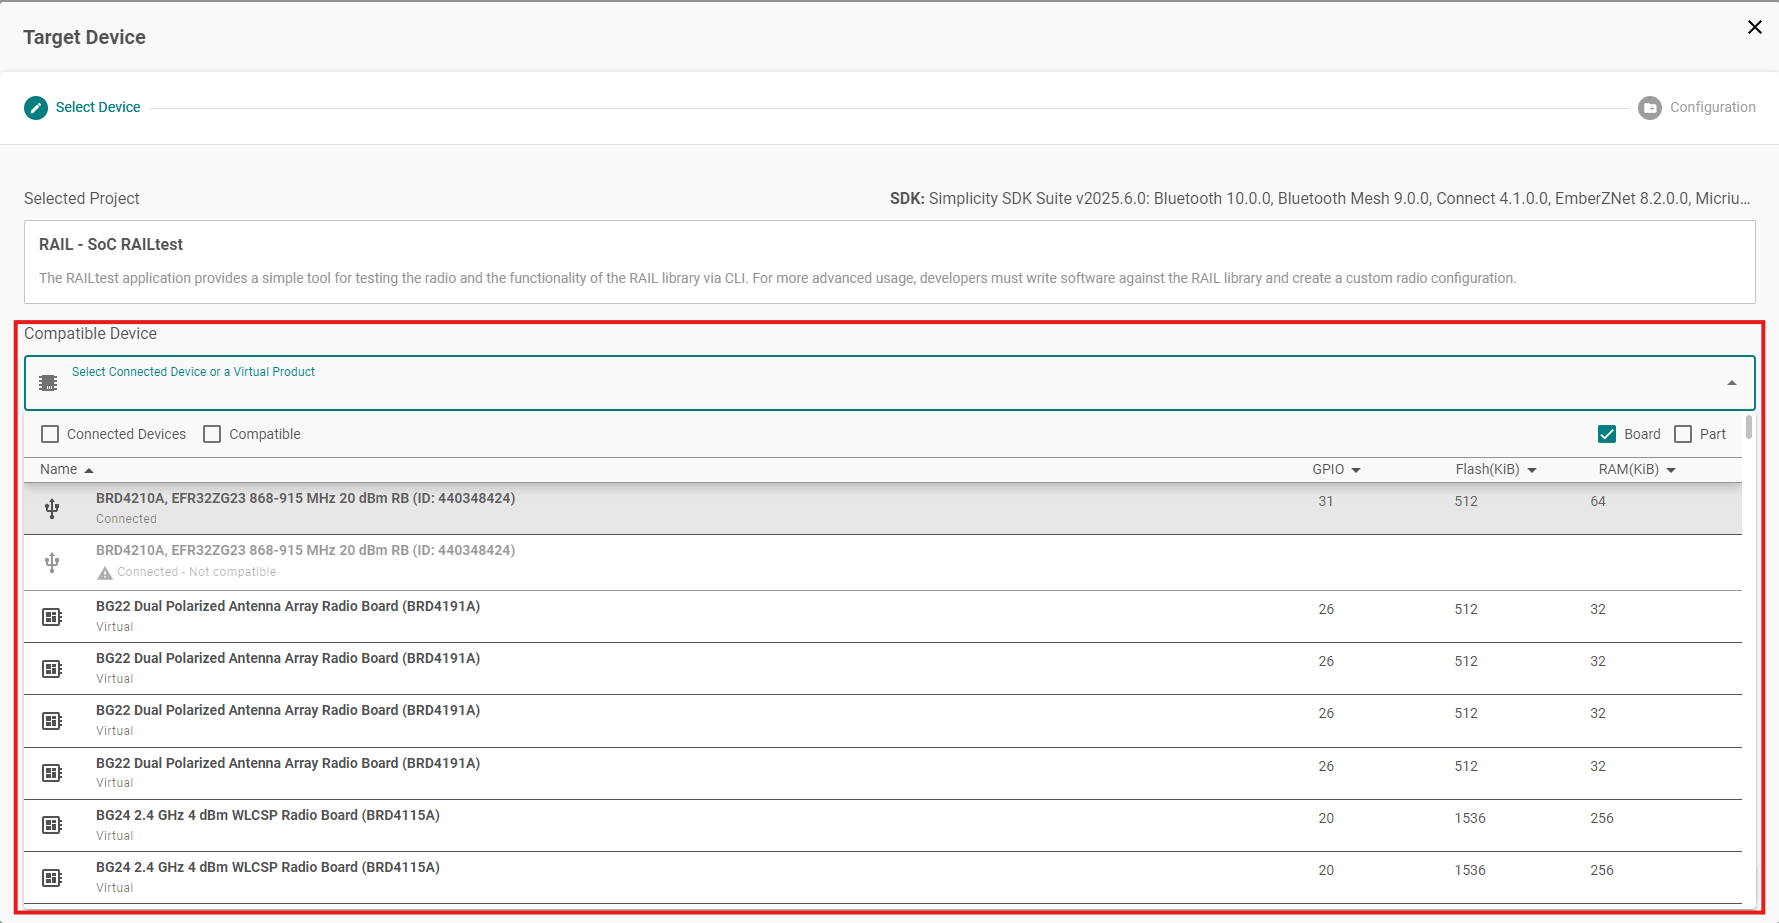
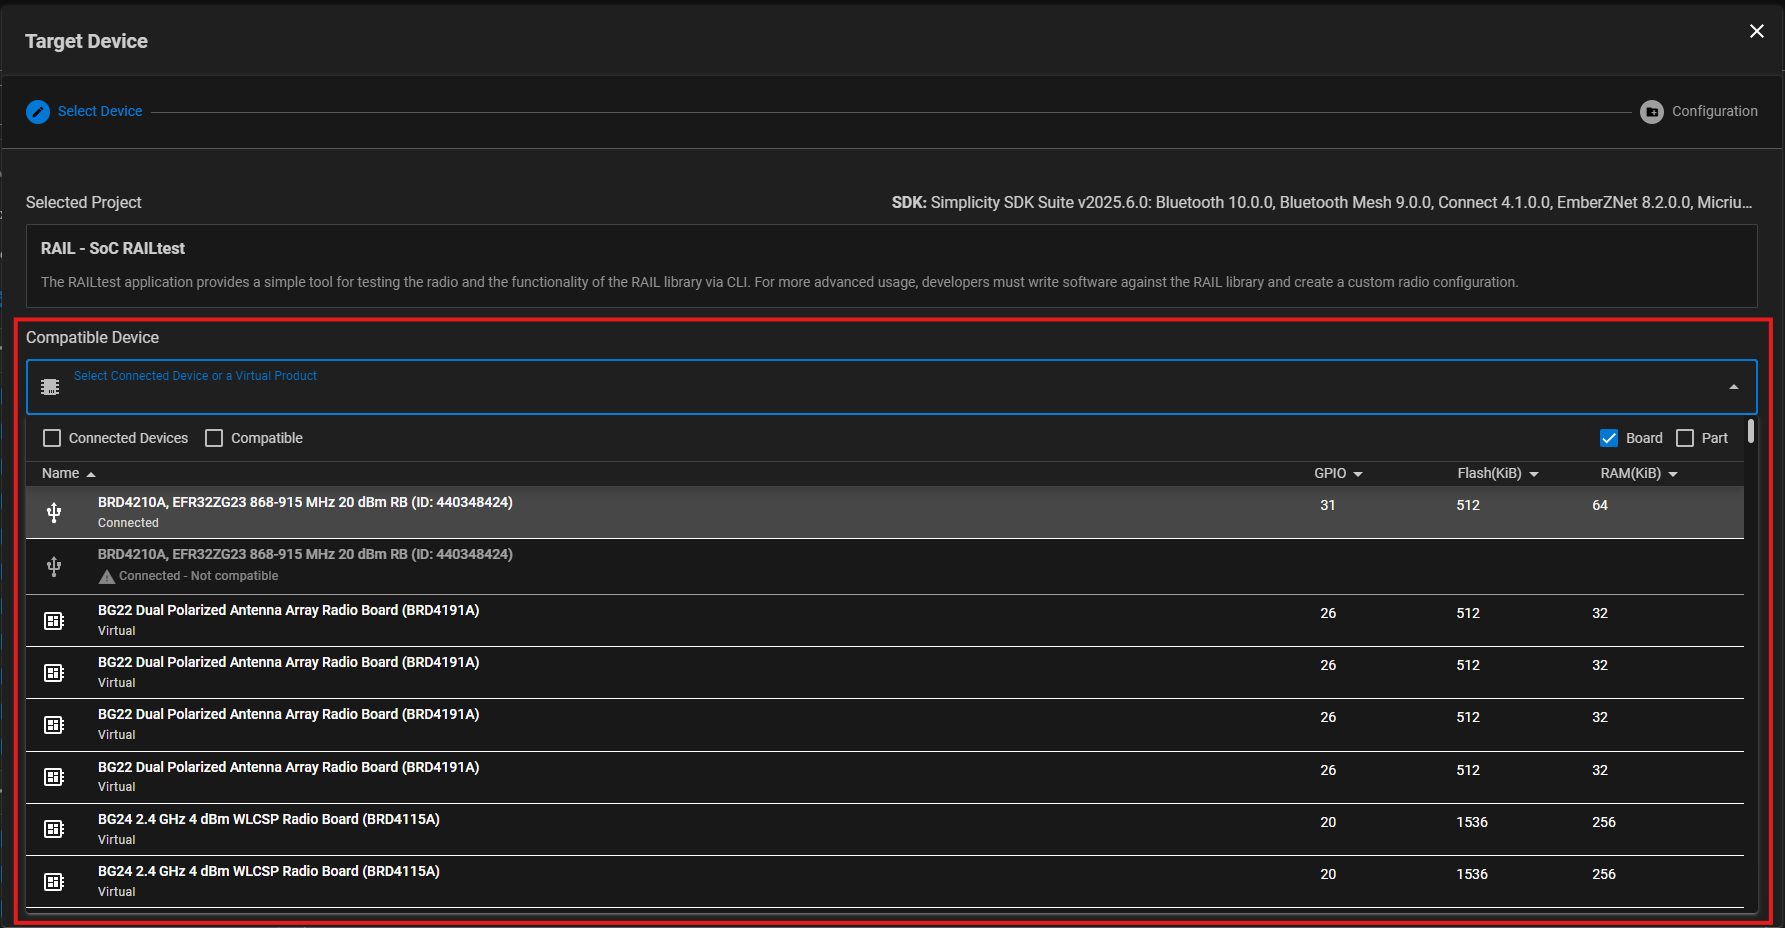
Choose a target device (Connected or Virtual) and click Next. If you have more than one device connected, select based on the serial number. After connecting the WSTK to the PC, the Start Screen on the LCD shows the device's serial number.
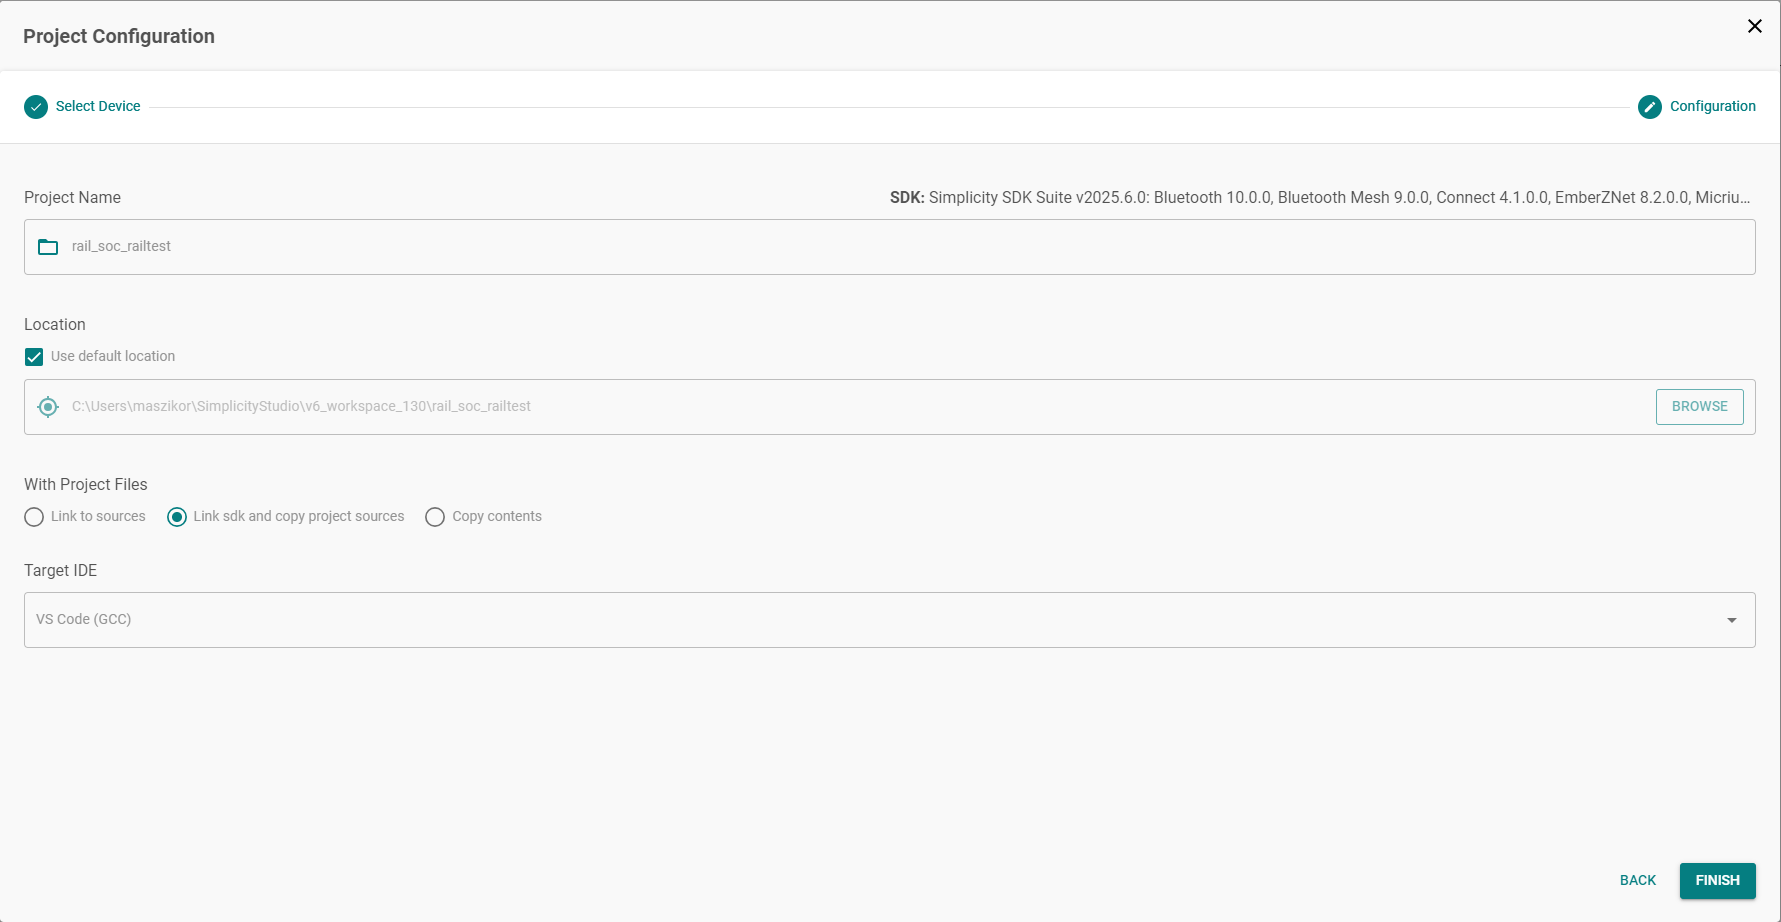
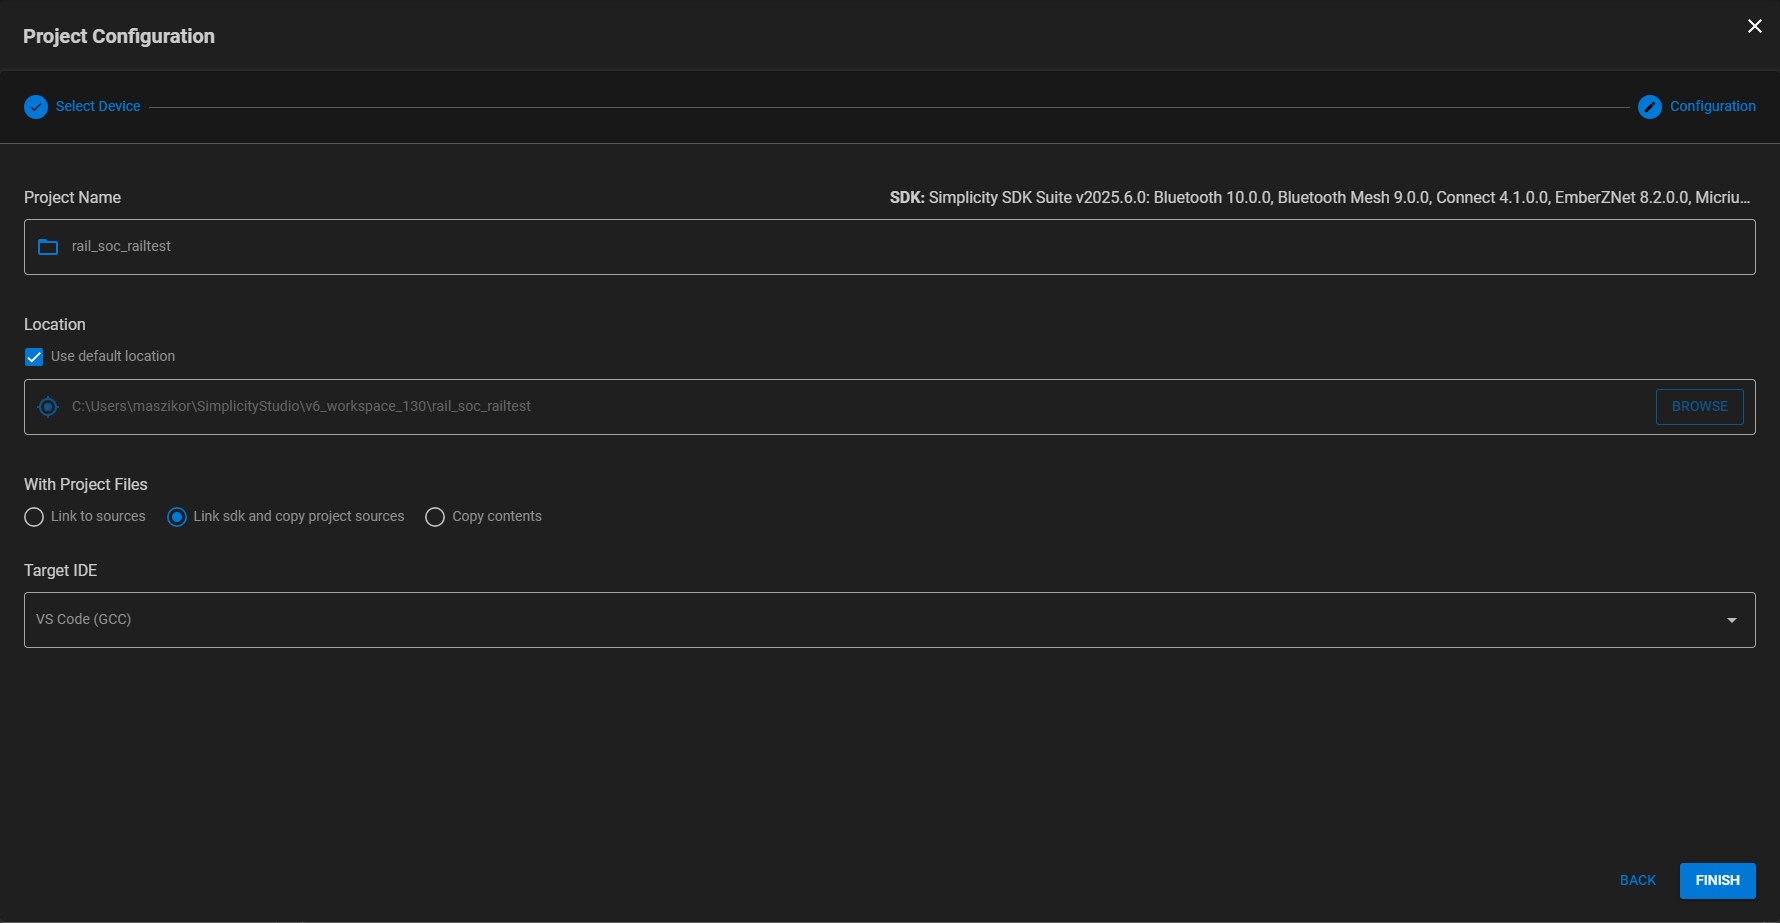
Rename the project and/or change the location or Target IDE, if desired. Click Finish.
Start Project In Simplicity Studio 5#
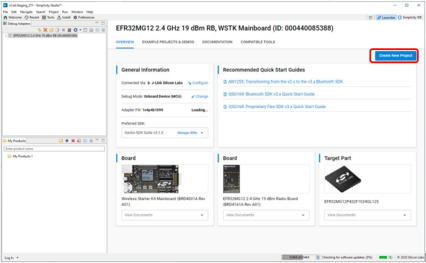
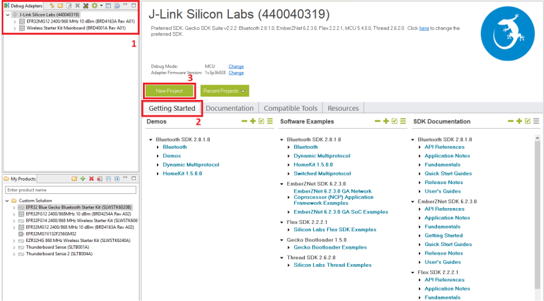
When Simplicity Studio 5 opens, select the target in the Debug Adapters view. If you have more than one device connected, select based on the serial number. After connecting the WSTK to the PC, the Start Screen on the LCD shows the device's serial number.
Click the OVERVIEW tab if it is not already selected.
Click Create New Project.
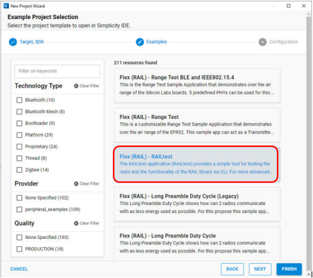
Select the Flex (RAIL) - RAILtest application, and click Next. You can use keywords or filters to find the application.
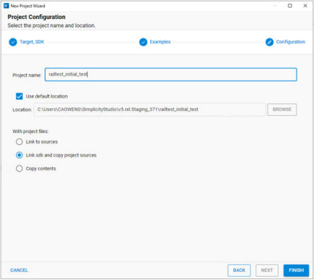
Rename the project and/or change the location, if desired. Click Finish.
Start Project In Simplicity Studio 4#
When Simplicity Studio 4 opens, select the target in the Debug Adapters view. If you have more than one device connected, select based on the serial number. After connecting the WSTK to the PC, the Start Screen on the LCD shows the device's serial number.
In the Launcher (default) perspective, if it is not already selected, click the Getting Started tab.
Click New Project.
Select Silicon Labs Flex SDK as the application type.
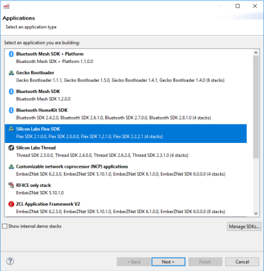
Click Next.
Select the Flex SDK version you would like to use (preferably the latest one).
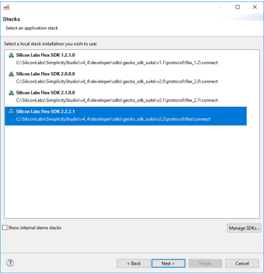
Click Next.
Select the RAIL: RAILTEST application.
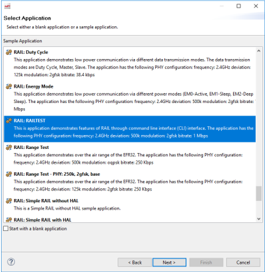
Click Next.
In the Project Configuration dialog, specify a location for your application.
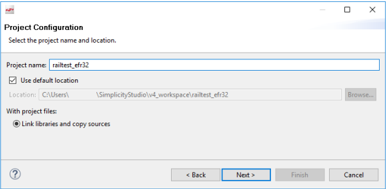
Note: the location must be on the same Windows partition as the stack.
Specify a name for your application.
Click Next.
The Project Setup dialog shows the various build configurations available. Check one of the initial build configuration to include in the project. (You can edit these later through the 'Manage Configurations' command.)
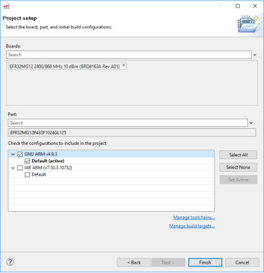
Click Finish.
Note: You must have a Toolchain and Build target selected and configured for the Finish control to enable. If you do not see Finish enabled, check your Toolchains and Build targets by clicking the links at the bottom of the dialog.
Configure and Generate the Application#
Configure and Generate In Simplicity Studio 6#
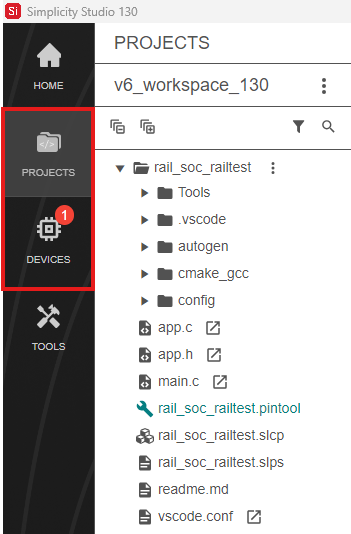
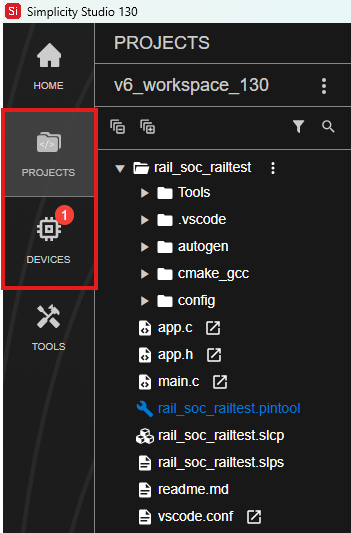
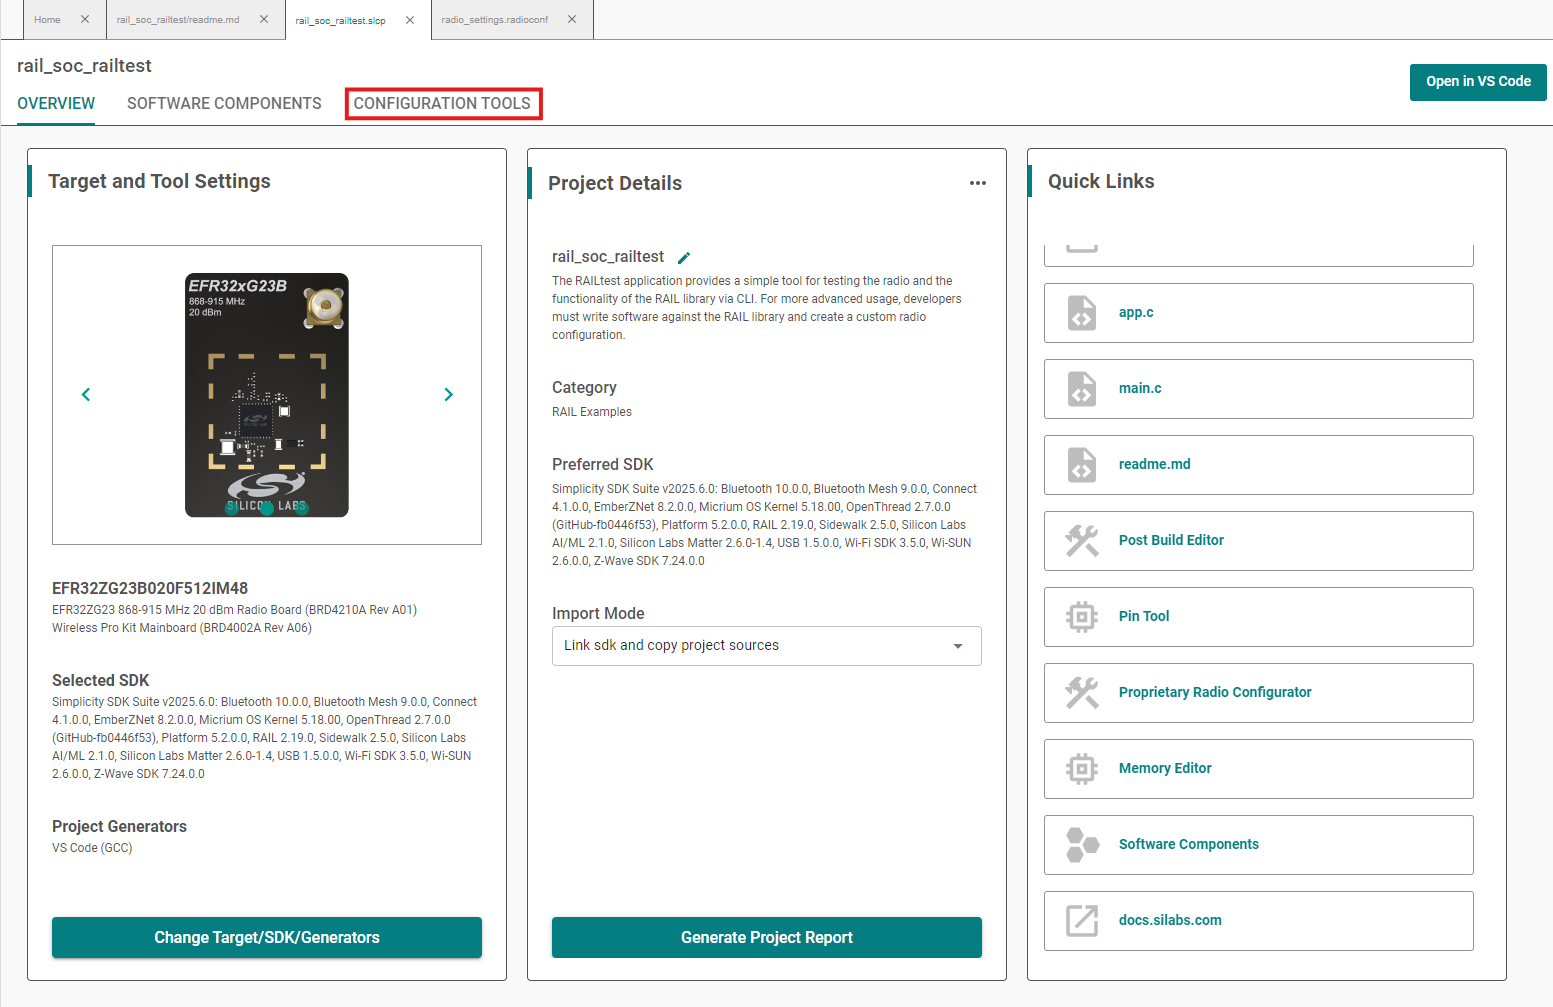
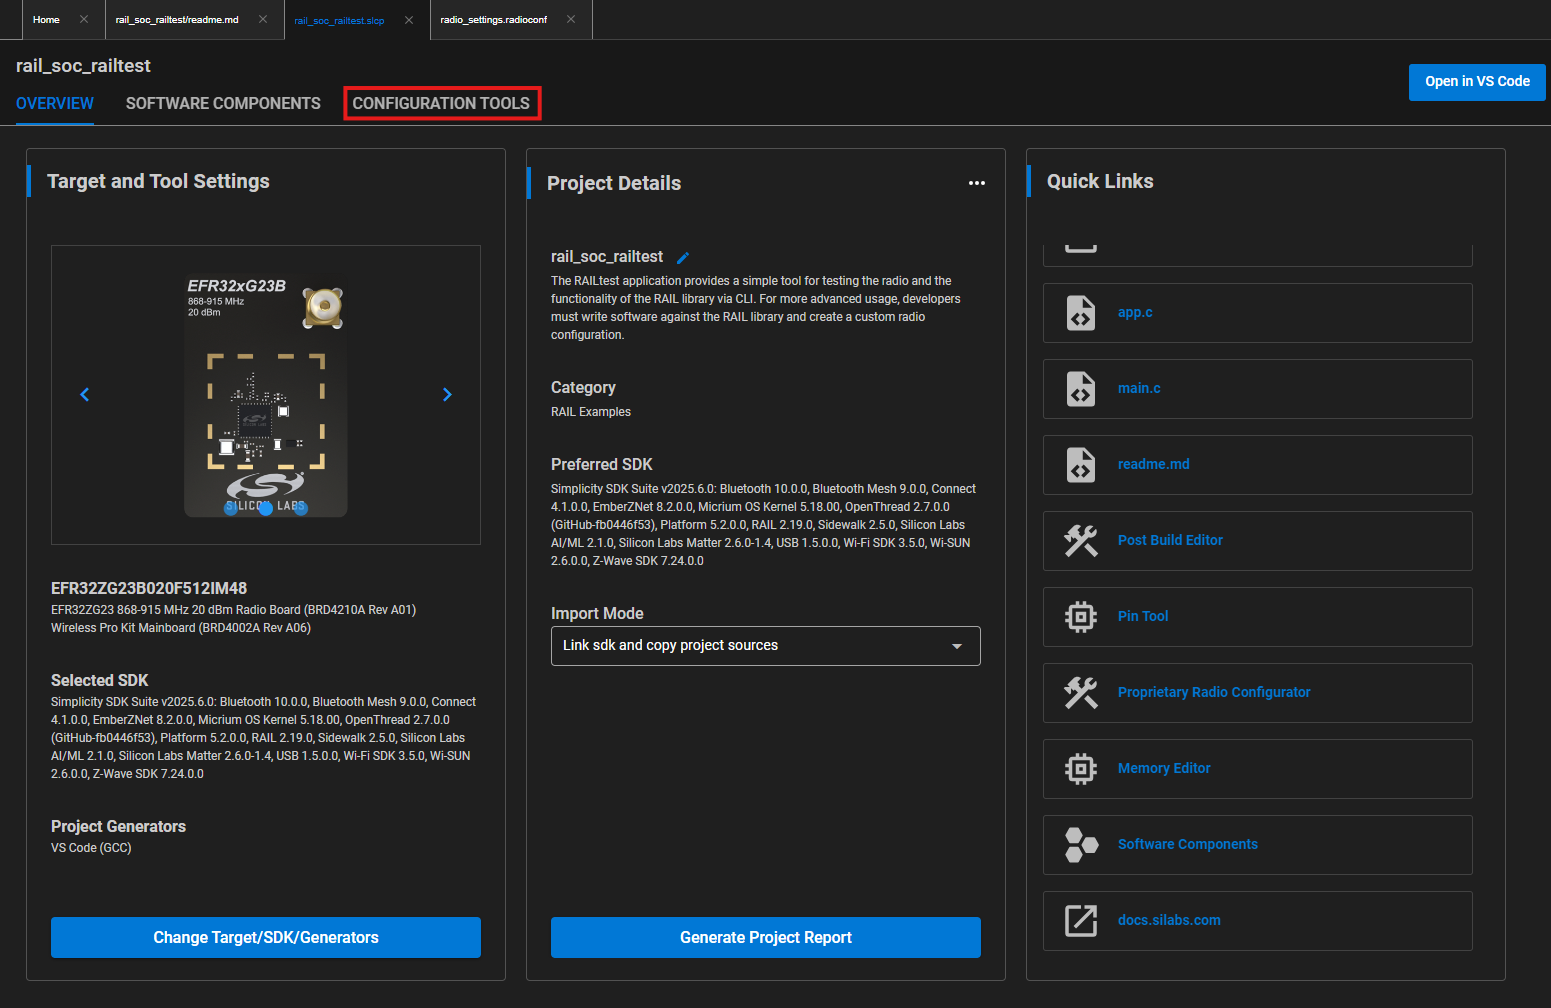
After creating the project, the Simplicity IDE perspective opens. The project explorer view is on the left side, opened by clicking on PROJECTS. It contains all the files for the opened projects. Connected devices can also be managed on the left side under DEVICES. By default the project's <project_name>.slcp and radio_settings.radioconf files are already opened. The project is defined in the .slcp file.
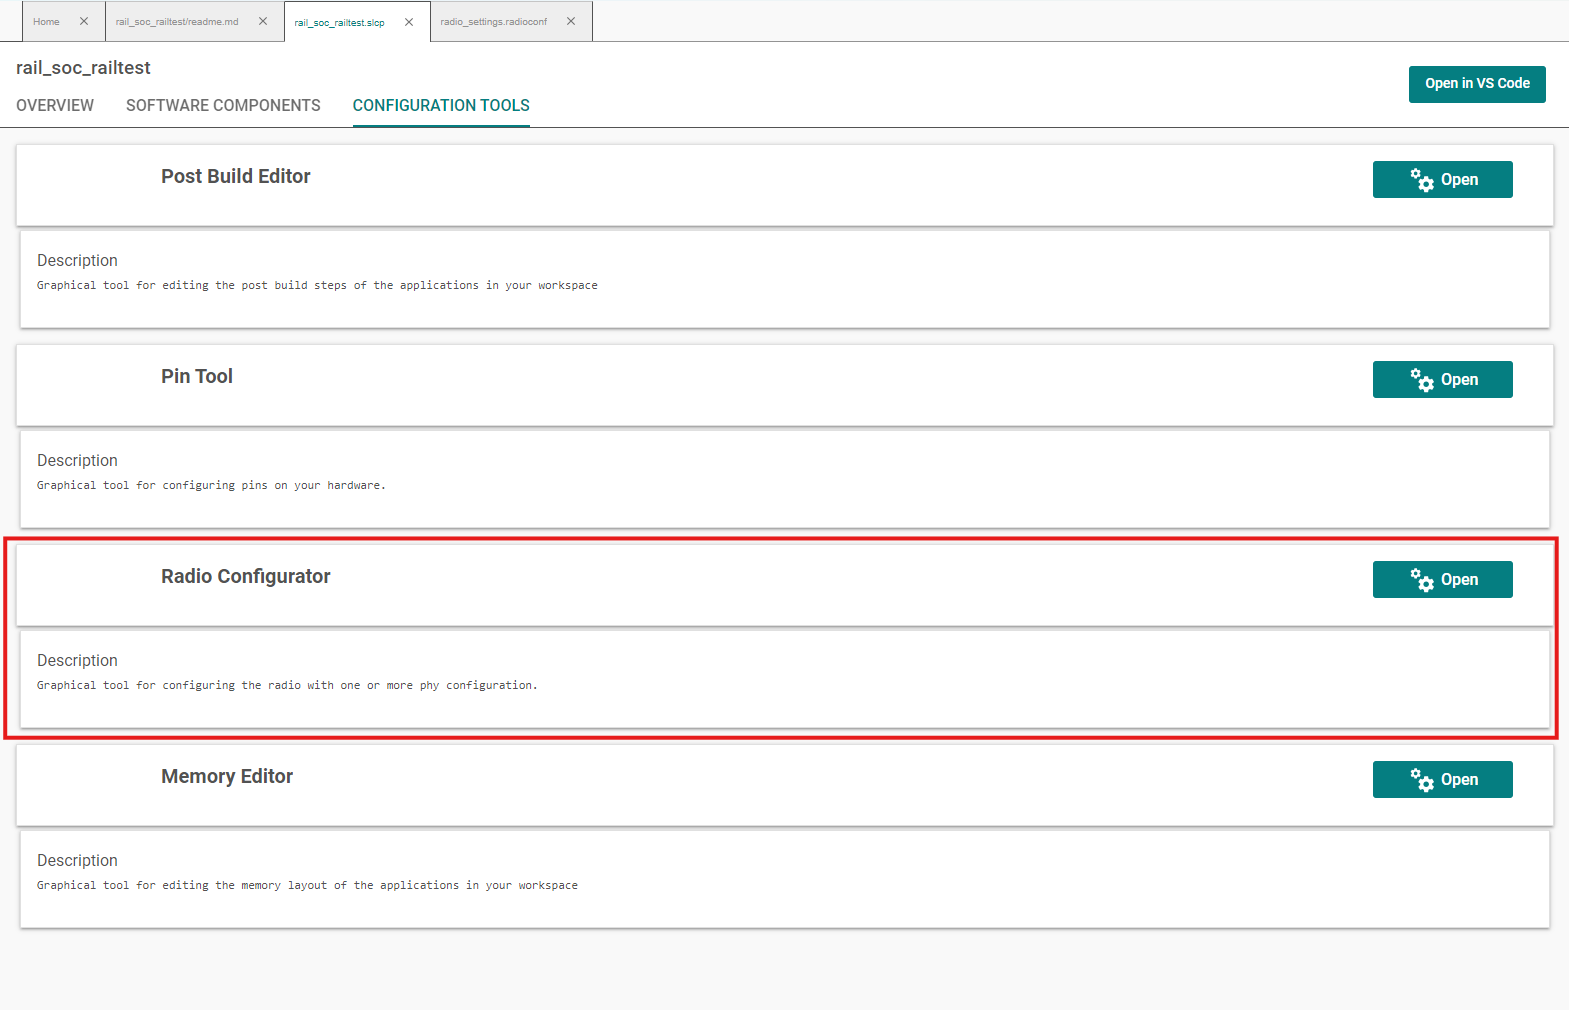
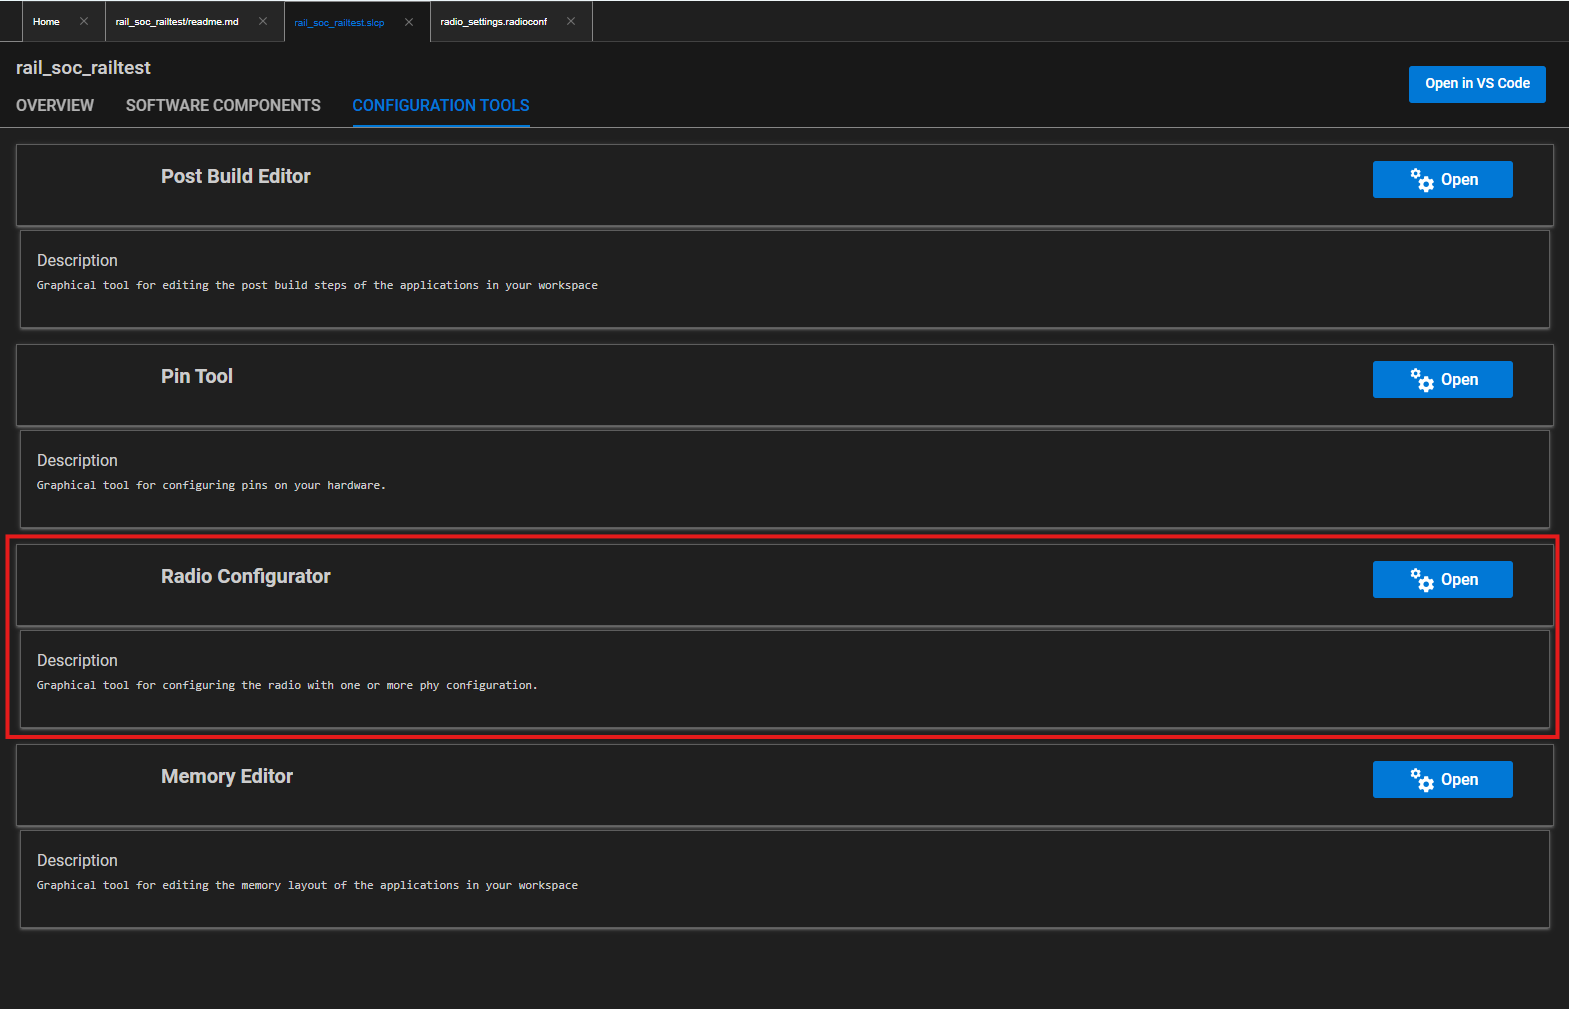
If the Radio Configurator is not open, on the project .slcp tab click the CONFIGURATION TOOLS tab, and click Open on the Radio Configurator card.
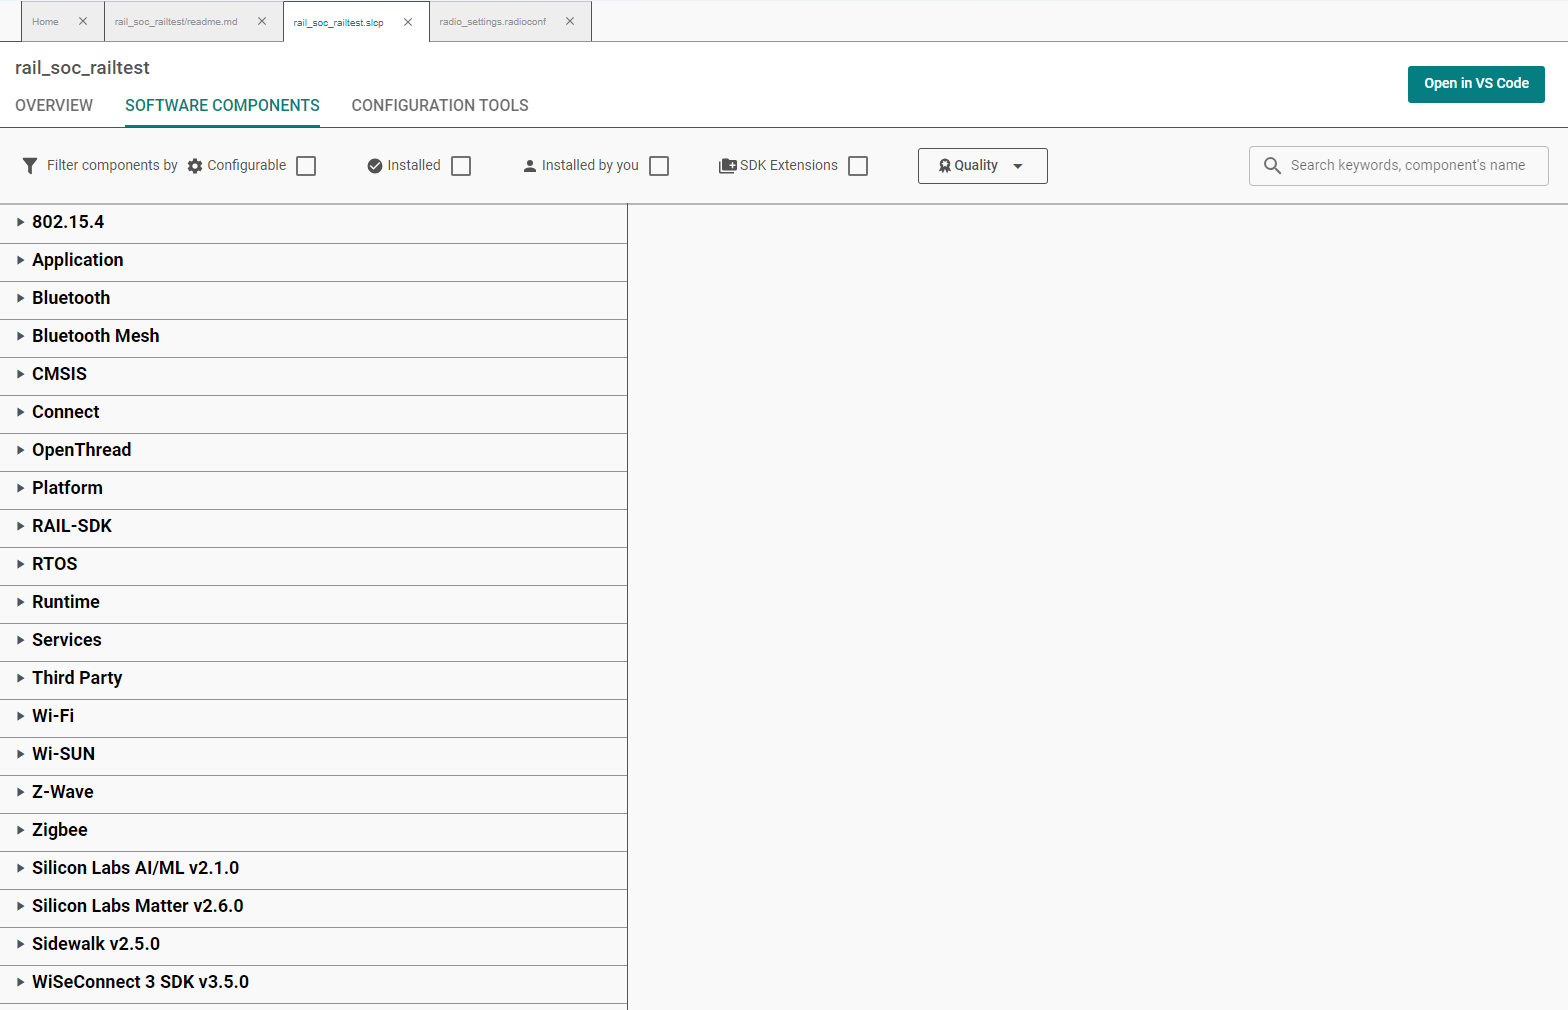
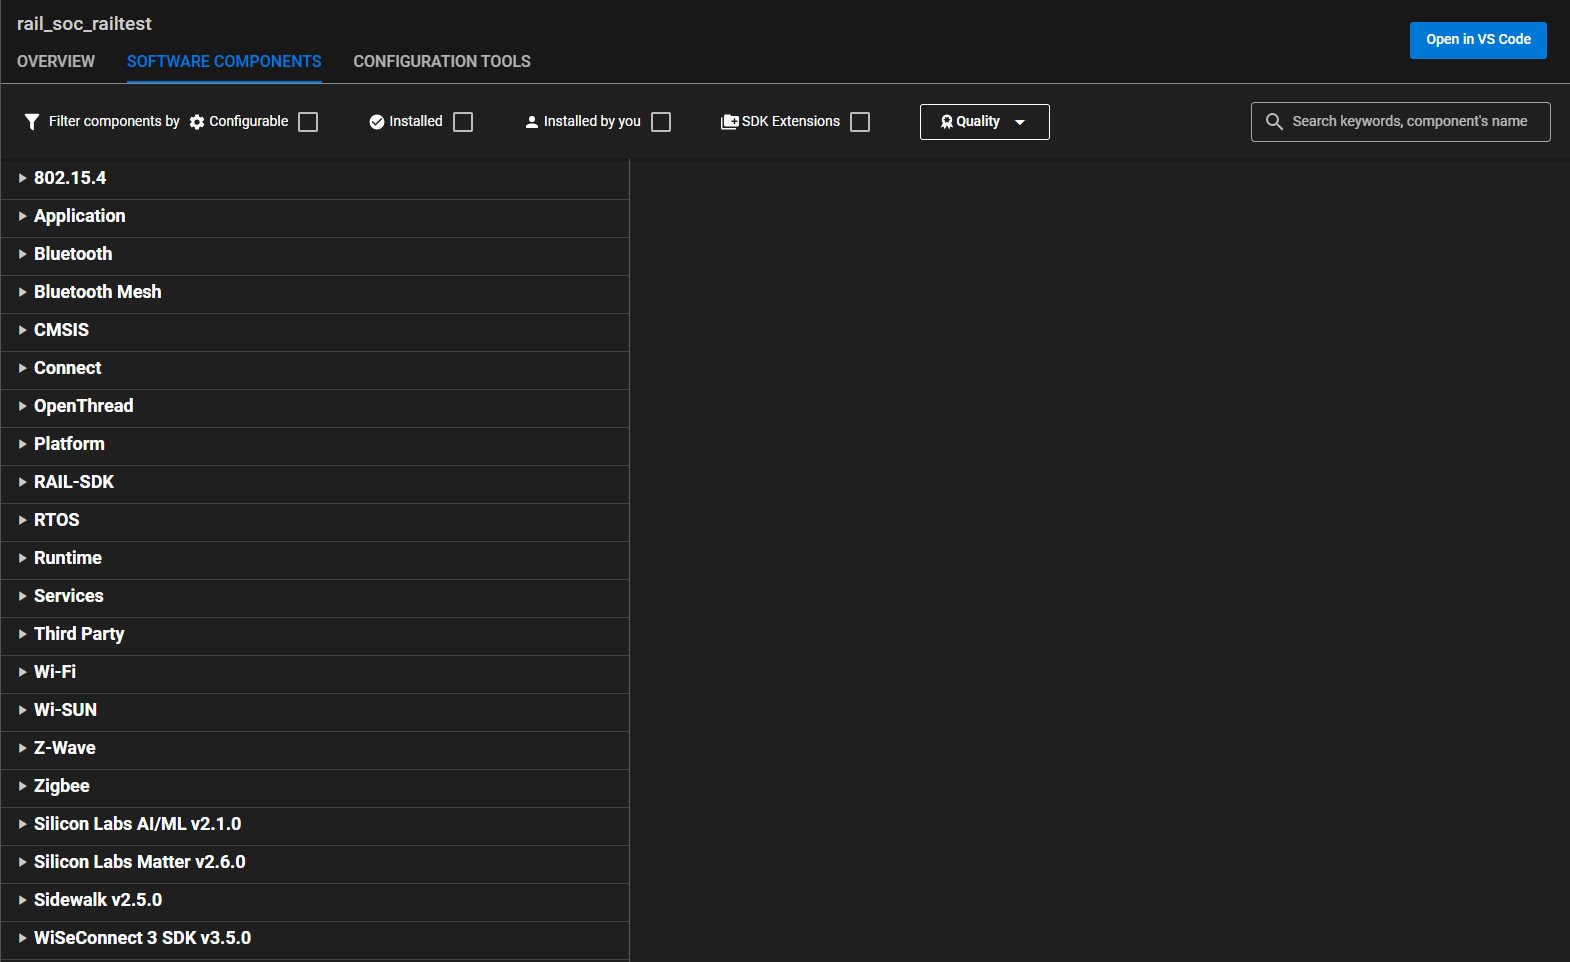
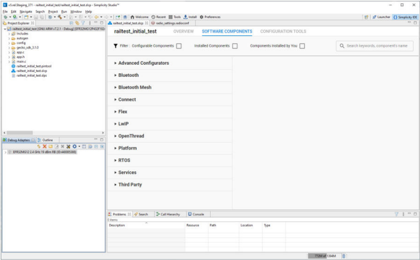
Projects are configured by installing and uninstalling components, and configuring installed components. The SOFTWARE COMPONENTS tab displays categories of components on the left, and details about the selected component on the right. Several filters as well as a keyword search are available to help you explore the various component categories.
Simplicity Studio 6 disables buttons, LEDs and the LCD display in the RAILtest application by default. These features help the user to interact with RAILtest application and are enabled by default in older versions of Simplicity Studio. To enable these features, you may install the following software components: Button 0 (as btn0), Button 1 (as btn1), LED 0 (as led0), LED 1 (as led1) and RAILtest Graphics.
Note: Feature availability may differ on different boards.
These components are in the following component categories:
Platform > Driver > Simple Button > btn0 and btn1
Platform > Driver > Simple LED > led0 and led1
Platform > Radio > RAILtest, Graphics
Note: These may install more than one dependency, depending on their function.
For example, to install a Simple Button:
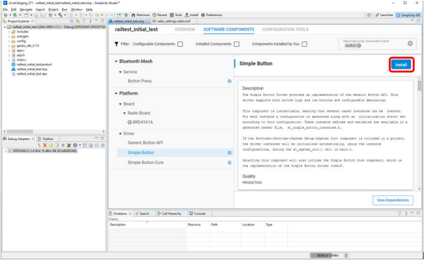
On the SOFTWARE COMPONENTS tab, enter button in the search field in the top right corner.
Select the Simple Button component and click Install.
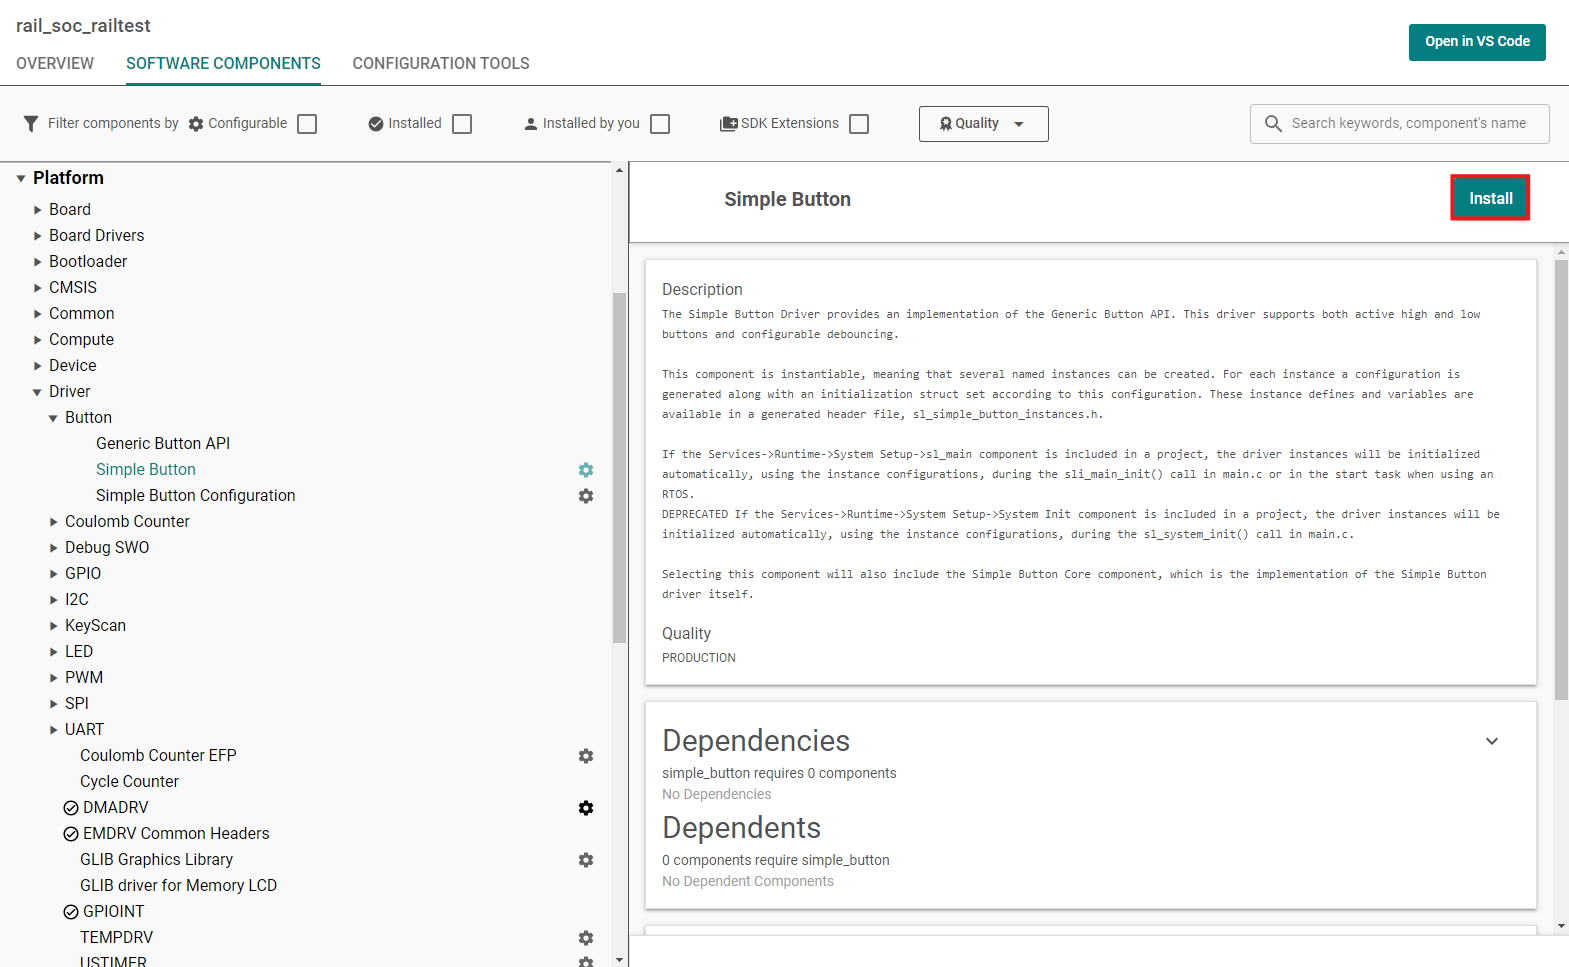
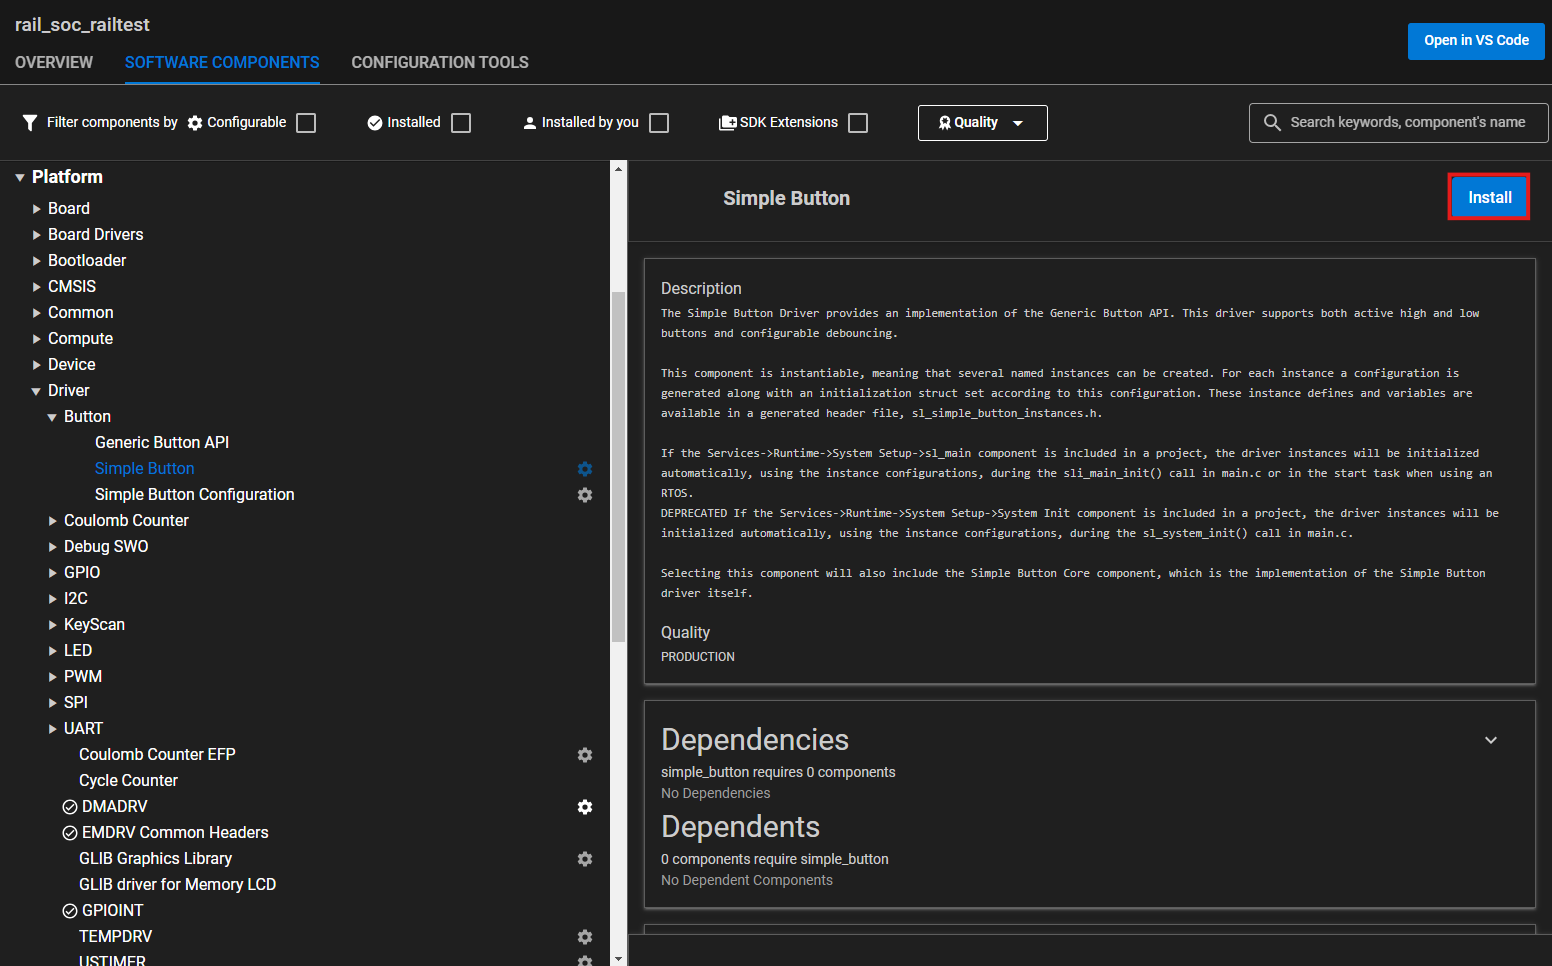
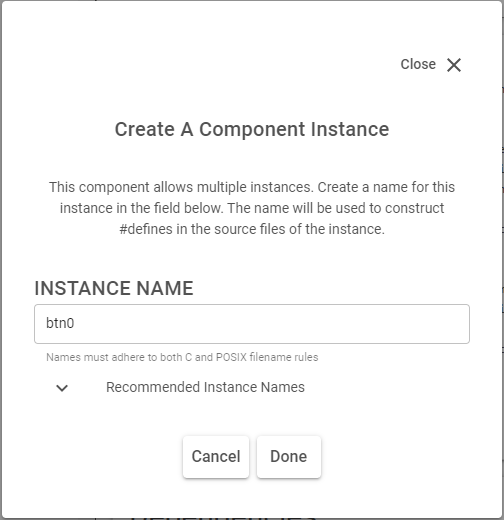
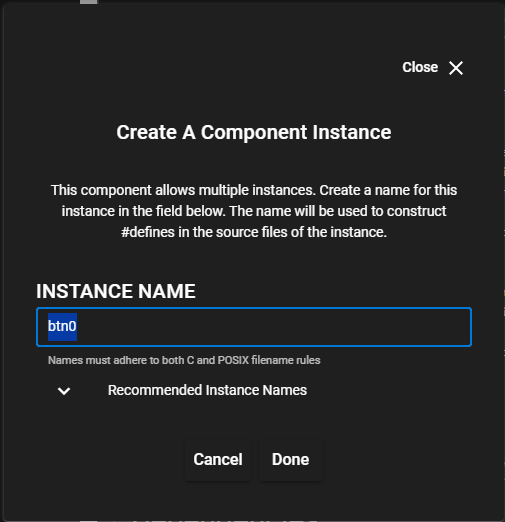
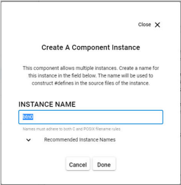
Name the component instance, then click Done.
Project files autogenerate as you add, remove, or configure components.
Configure and Generate In Simplicity Studio 5#
After creating the project, the Simplicity IDE perspective opens. You can switch between Simplicity IDE and Launcher perspectives using the controls in the top right corner. The project explorer view is on the top left. It contains all the files for the opened projects. By default the project's <project_name>.slcp and radio_settings.radioconf files are already opened. The project is defined in the .slcp file. These two files replace Simplicity Studio 4's .isc extension file.
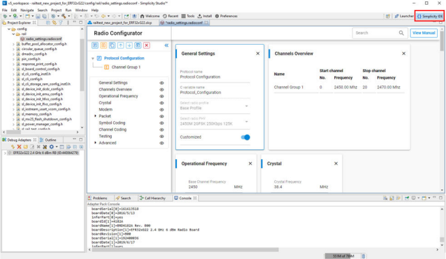
If the Radio Configurator is not open, on the project .slcp tab click the CONFIGURATION TOOLS tab, and click Open on the Radio Configurator card. See Proprietary Radio Configurator Guide for more information.

Projects are configured by installing and uninstalling components, and configuring installed components. The SOFTWARE COMPONENTS tab displays categories of components on the left, and details about the selected component on the right. Several filters as well as a keyword search are available to help you explore the various component categories.
Simplicity Studio 5 disables buttons, LEDs and the LCD display in the RAILtest application by default. These features help the user to interact with RAILtest application and are enabled by default in older versions of Simplicity Studio. To enable these features, you may install the following software components: Button 0 (as btn0), Button 1 (as btn1), LED 0 (as led0), LED 1 (as led1) and RAILtest Graphics.
Note: Feature availability may differ on different boards.
These components are in the following component categories:
Platform > Driver > Simple Button > btn0 and btn1
Platform > Driver > Simple LED > led0 and led1
Platform > Radio > RAILtest, Graphics
Note: These may install more than one dependency, depending on their function.
For example, to install a Simple Button:
On the SOFTWARE COMPONENTS tab, enter button in the search field in the top right corner.
Select the Simple Button component and click Install.
Name the component instance, then click Done.
Project files autogenerate as you add, remove, or configure components.
Configure and Generate in Simplicity Studio 4#
When you finish creating your sample application, an Application Builder General tab opens.
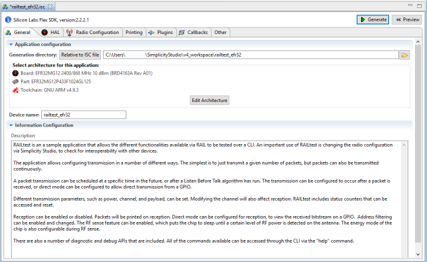
In the General tab, if the architecture parameters shown for MCU and Radio and Board Type are not correct for your target device, click Edit Architecture to change the parameters. In general, the initial configuration settings for sample applications should be correct.
The RAIL application framework allows you to modify the PHY configuration for the application. Select the Radio Configuration tab to modify the PHY configuration for your application. For more information on how to set the modem parameters, please refer to AN971: EFR32 Radio Configurator User's Guide.
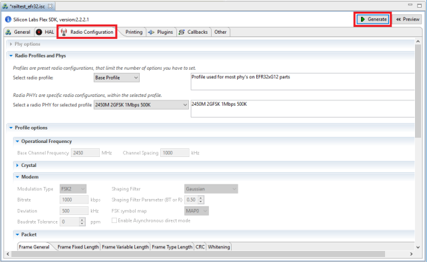
Click Generate in the upper right corner of the Application Builder window. Note that whenever the Build Configuration has been changed, you have to click Generate again.
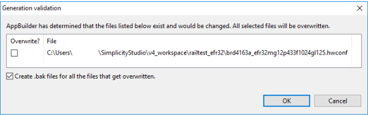
Select if you want to overwrite any of the existing files. Click OK.
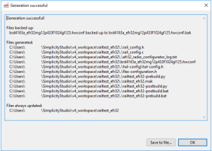
The next dialog shows the generated files. Click OK to continue.
Build the Application#
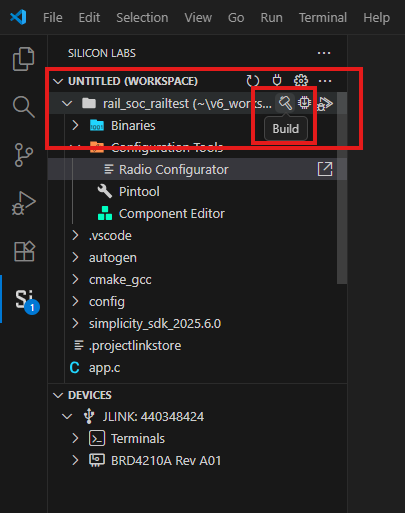
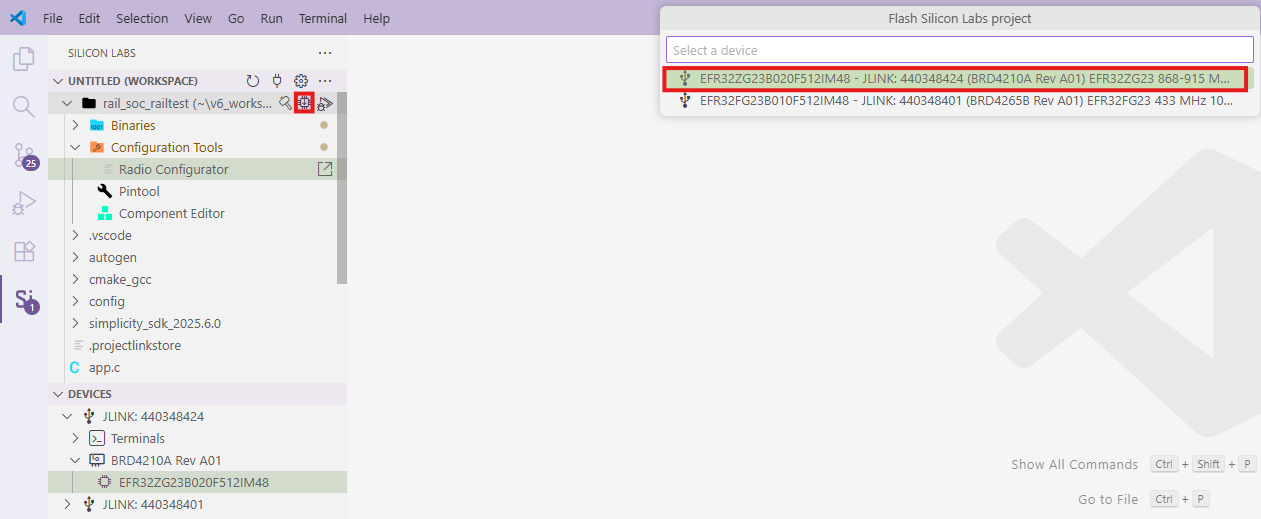
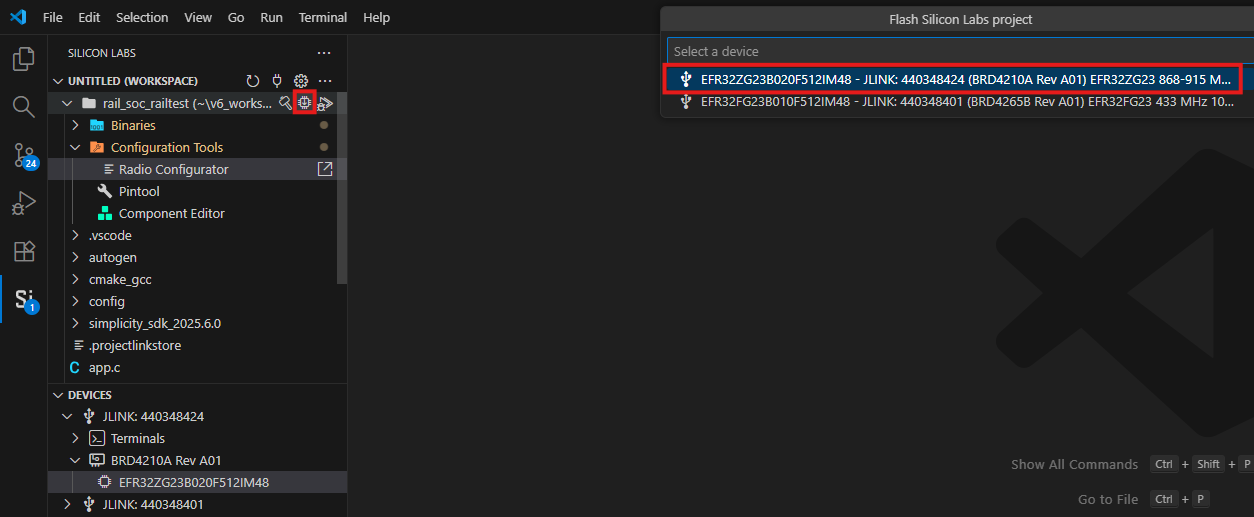
In Simplicity Studio 6, the Visual Studio Extension is used to build applications. On the project folder, click Build (the hammer icon)
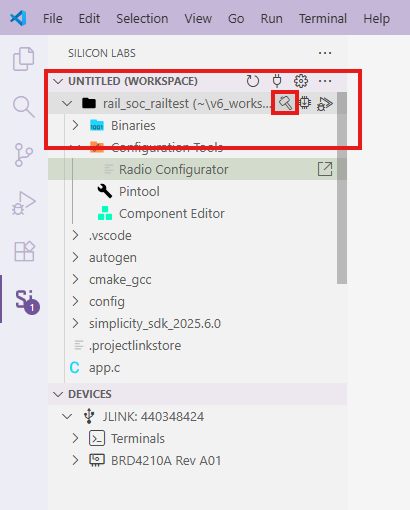
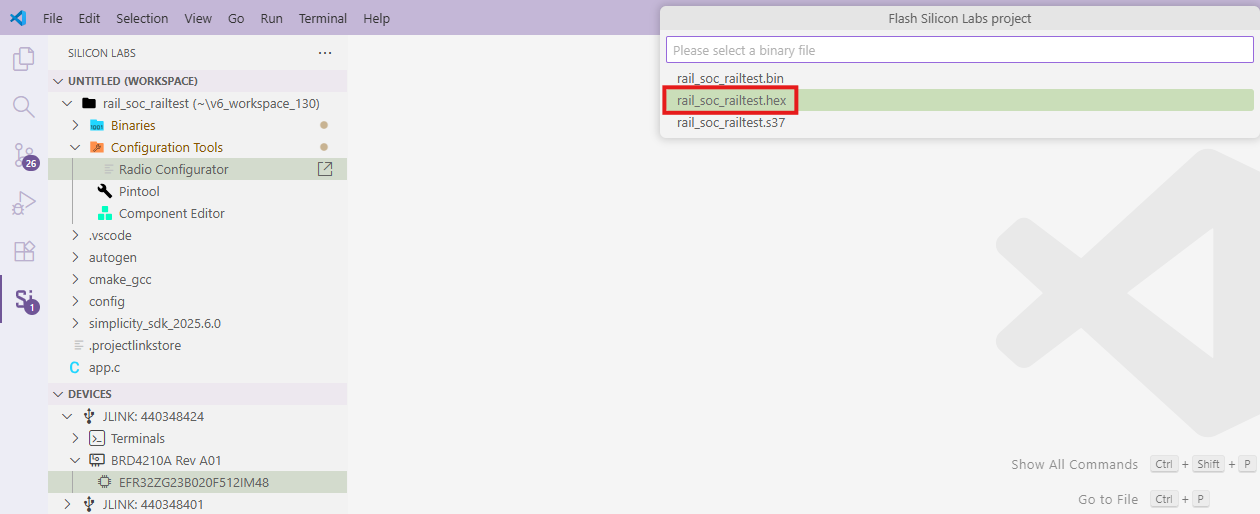
To flash the built program to the target device, click Flash and chosse the target board and binary file.

In Simplicity Studio 5, either right-click the .slcp file in the Project Explorer view and click Build, or with the project open, click Build (hammer icon) in the toolbar.
In Simplicity Studio 4, double-click on app_main.c in the Project Explorer view to open it in the editor. Click Build (hammer icon) in the toolbar.
Wait until the build process is finished.
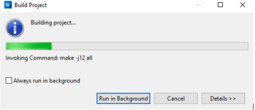
Verify that the project has built without any error in the Console view at the bottom of the Simplicity IDE or in Visual Studio Code.
Load the Binary onto your Device/Flash Programming#
If a full erase is not necessary, click Debug (bug icon) in the menu bar. This flashes the project into the board if it was successfully built. This will only update the program memory.
Once the project is flashed, the board can be started by clicking Resume in the menu bar.
Alternatively:
In the Debug Adapters perspective, select the target device.
With the device selected, open the Flash Programmer through the Launcher perspective's Compatible Tools tab or by clicking Flash Programmer (chip icon) in the Simplicity IDE menu bar.
The Flash Programmer opens. Select the file type.
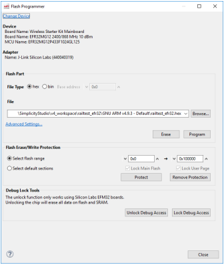
Navigate to the .bin or .hex image you wish to upload.
Click Erase to make sure that any previous bootloader or other non-volatile data is erased before your new image is uploaded.
Click Program to program the flash.
You will be notified once the upload is complete.
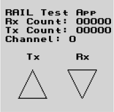
After starting the demo, the screen shows three parameters: Rx Count, Tx Count, and Channel Number.
Serial Port Communication#
The RAILtest application should be accessed using a standard serial port terminal. The default version uses the WSTK's built-in serial port to provide access to this, so do not attempt to connect directly to the UART GPIOs.
The serial port can be accessed using Ethernet or USB. Both provide the same level of functionality so it is completely up to you what to use.
For USB, plug the device into your computer and find the Virtual COM port that is created. It will show up as a "JLink CDC UART Port" in the Device Manager. The Virtual COM port should work with any UART settings, but the physical UART is configured by default for 115200 8-N-1 if you want to match that. For UART-based communication, you can use any terminal emulator program that supports serial port communication, like TeraTerm or PuTTY.
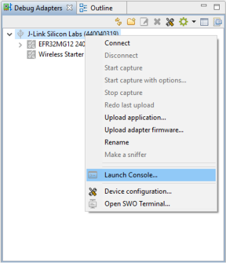
Simplicity Studio contains a built-in terminal as well. To run it, right-click on the device on the Debug Adapters view and click Launch Console. The RAILtest API should be accessible from the Serial 1 port.
For Ethernet, use a telnet client to connect to port 4901 on the WSTK. You can use a program like PuTTY for this or the standard command line telnet client.
Console View#
Once the RAILtest application is loaded onto the EFR32 you can interact with the RAILtest application using the Command Line Interface.
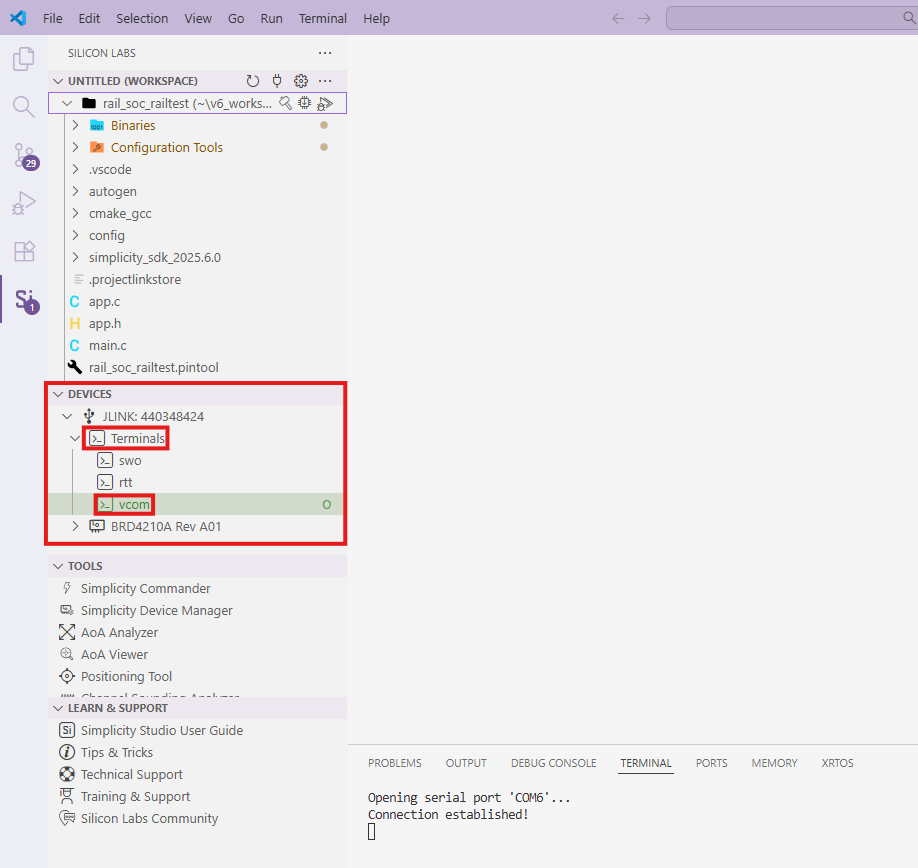
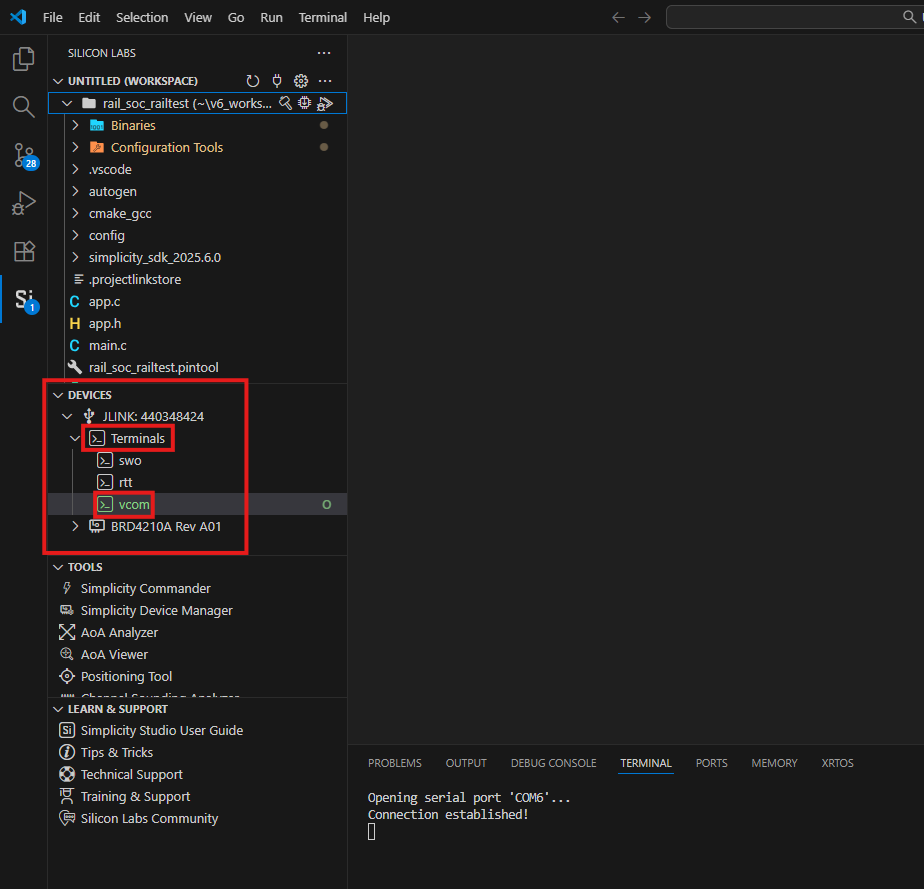
If you use Simplicity Studio 6, you can connect via console using Visual Studio Code. In the Extension, under DEVICES, you can choose your connected device. In Terminal, you can find vcom and there you can communicate with the board.
In Simplicity Studio 4 and 5, the Console View will give you a CLI interface in Simplicity Studio's Network Analyzer Perspective so that you can interact directly with the RAILtest application.
Right-click the device in the Debug Adapters view.
Select Connect (if you are not already connected) and then Launch Console. To get a prompt on the Console Serial 1 tab, press Enter.