


Install Simplicity AI SDK for Codex on Windows#
Install and configure the Simplicity AI SDK for Codex in Visual Studio Code on Windows.
Prerequisites#
Before you begin, ensure that you have:
A supported version of Windows
Visual Studio Code with the Codex extension enabled
Access to the Simplicity AI SDK release that you are installing, such as Beta 1
Install the Silicon Labs Visual Studio Code Extension#
In Visual Studio Code, install the latest release of the Silicon Labs Visual Studio Code extension from the Extension Marketplace.
Download the Installer#
Download Simplicity Installer from the Simplicity Studio® website.
Run the Installer#
In File Explorer, open the downloaded archive, and then double-click SimplicityInstaller-Setup-<version>.exe.
Full Install#
Select Full Install.
Select Install.
Wait for the installation to finish. The time required depends on your network speed.
When the installation is complete, close the installer. You do not need to open Simplicity Studio.
Note: The installer downloads the Simplicity AI SDK tools and skills, copies the skills into the Visual Studio Code global skills location, automatically configures
config.tomlfor Codex, and appends the newly downloaded tools.
Advanced Install#
Select Advanced Install.
Select Install.
Wait for the installation to finish. The time required depends on your network speed.
When the installation is complete, close the installer. You do not need to open Simplicity Studio.
Note: The installer downloads the Simplicity AI SDK tools and skills, copies the skills into the Visual Studio Code global skills location, automatically configures
config.tomlfor Codex, and appends the newly downloaded tools.
Verify the Simplicity AI SDK Installation in Codex#
Open Visual Studio Code.
Open the Codex chat window by selecting the Toggle Chat or Toggle Secondary Sidebar icon.
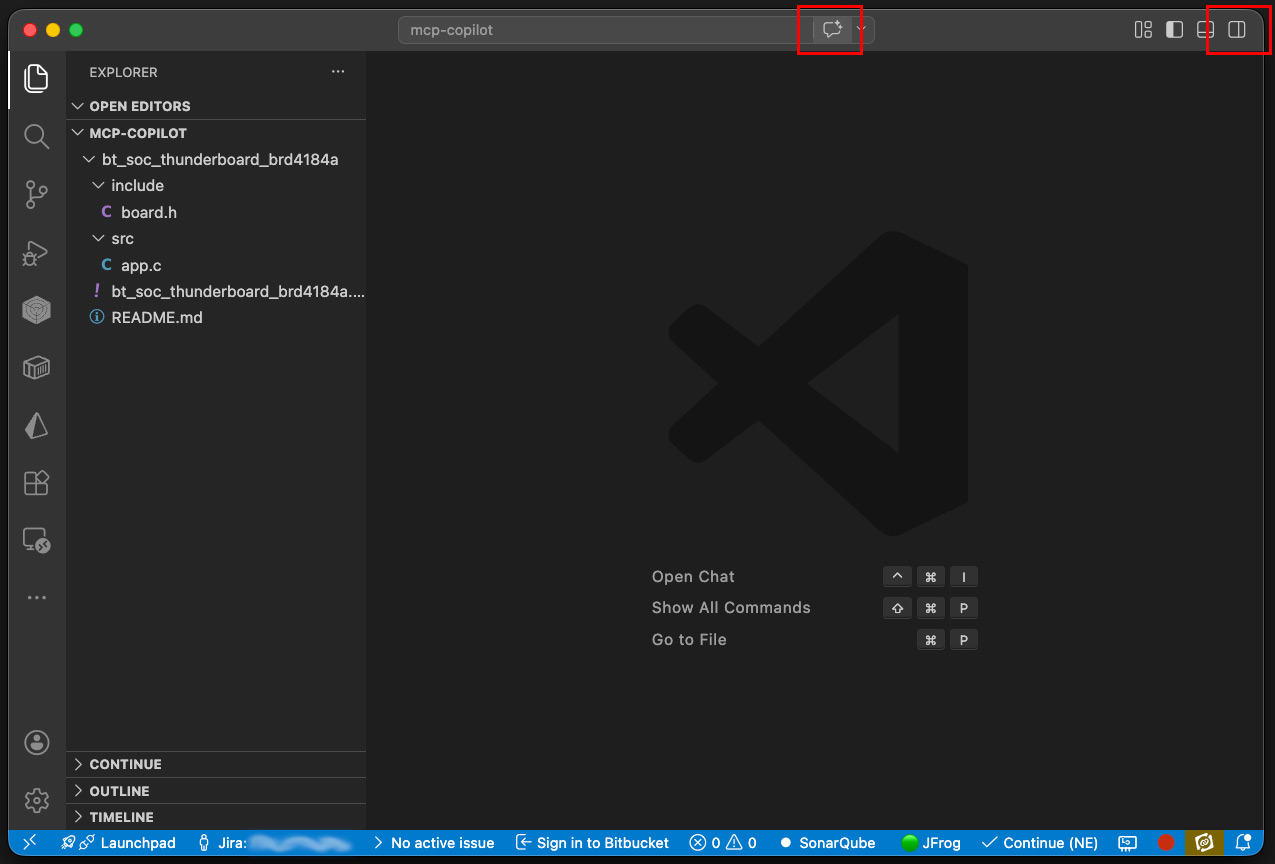
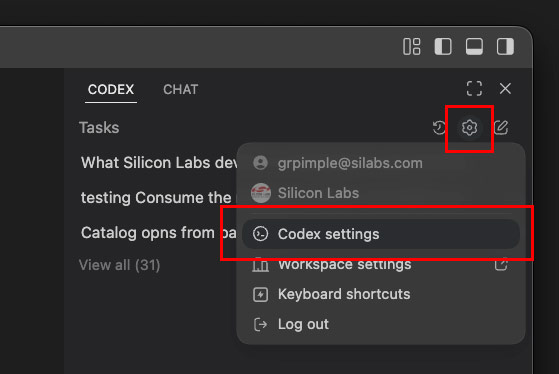
In the Codex chat window, select the gear icon, and then select Codex Settings.
Select MCP Servers and confirm that the following Model Context Protocol (MCP) servers appear.
silabs-ai-sdk-helperssilabs-build-toolsilabs-gdb-mcpsilabs-knowledge-basesilabs-tool-locator
Servers are usually enabled by default.
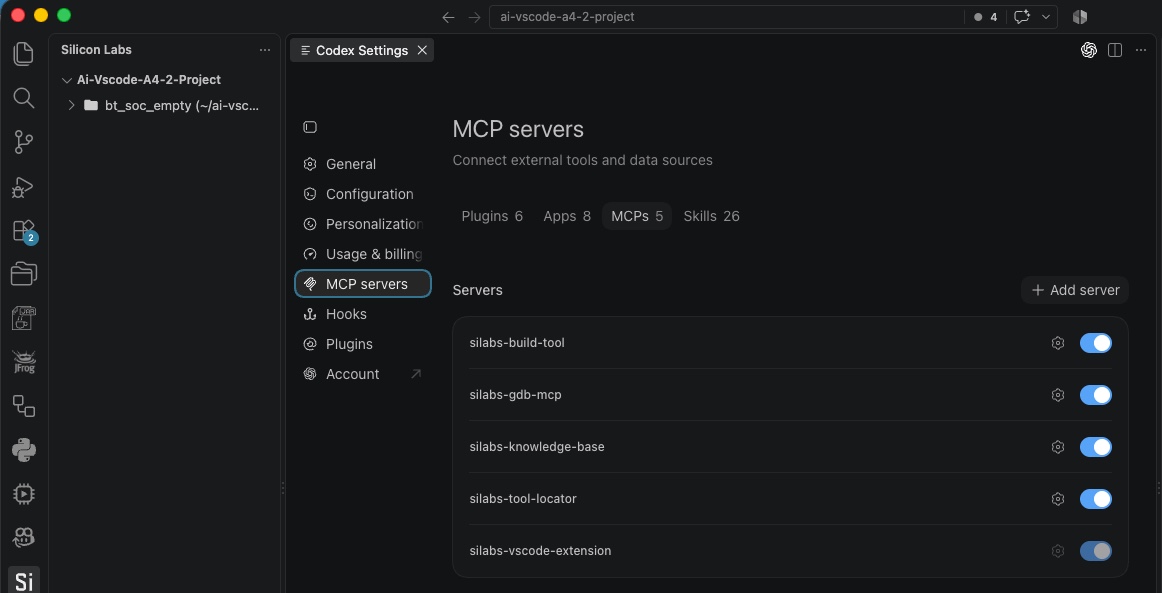
Note: If these MCP servers are not listed, repeat the installation steps and confirm that you installed the MCP servers with Simplicity Installer.
Reference: Installer-Generated MCP Entries#
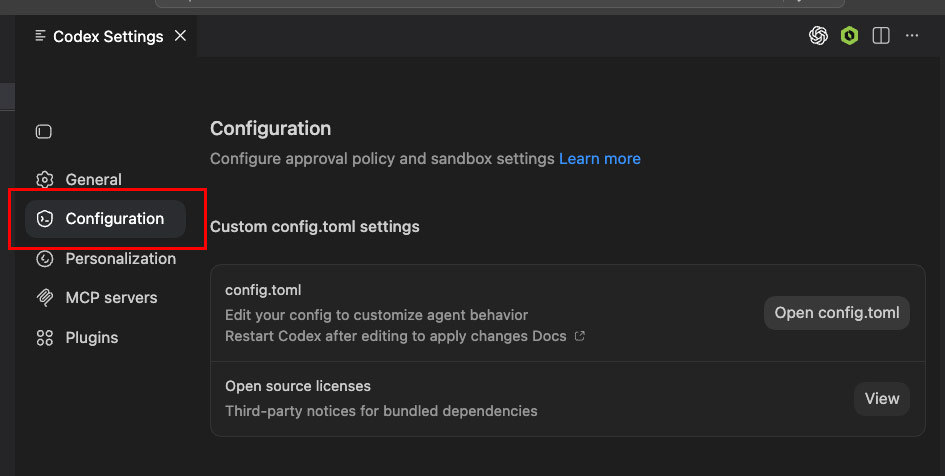
The installer writes these MCP server entries to %USERPROFILE%\.codex\config.toml. Use the following sample to confirm your configuration or to restore an entry if automatic registration fails.
Copy only the MCP server tables into your current config.toml. Replace <RootPath> with your user profile directory, such as C:\Users\<user>. Do not replace the entire file to avoid losing other Codex settings.
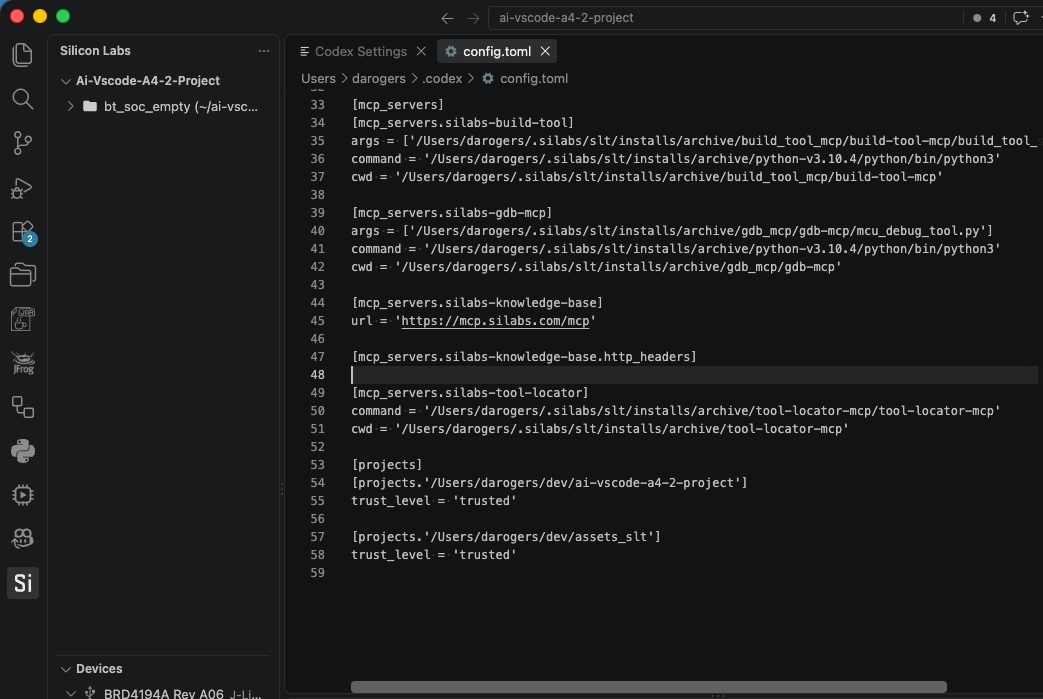
[mcp_servers.silabs-ai-sdk-helpers]
command = "<RootPath>\\.silabs\\slt\\installs\\archive\\python-v3.10.4\\python\\python.exe"
args = ["<RootPath>\\.silabs\\slt\\installs\\archive\\ai_sdk_local_helpers\\ai_sdk_local_helpers.py"]
cwd = "<RootPath>\\.silabs\\slt\\installs\\archive\\ai_sdk_local_helpers"
[mcp_servers.silabs-build-tool]
command = "<RootPath>\\.silabs\\slt\\installs\\archive\\python-v3.10.4\\python\\python.exe"
args = ["<RootPath>\\.silabs\\slt\\installs\\archive\\build_tool_mcp\\build-tool-mcp\\build_tool_server.py"]
cwd = "<RootPath>\\.silabs\\slt\\installs\\archive\\build_tool_mcp\\build-tool-mcp"
[mcp_servers.silabs-gdb-mcp]
command = "<RootPath>\\.silabs\\slt\\installs\\archive\\python-v3.10.4\\python\\python.exe"
args = ["<RootPath>\\.silabs\\slt\\installs\\archive\\gdb_mcp\\gdb-mcp\\mcu_debug_tool.py"]
cwd = "<RootPath>\\.silabs\\slt\\installs\\archive\\gdb_mcp\\gdb-mcp"
[mcp_servers.silabs-knowledge-base]
url = "https://mcp.silabs.com/mcp"
[mcp_servers.silabs-knowledge-base.http_headers]
Authorization = "Bearer <token>"
[mcp_servers.silabs-tool-locator]
command = "<RootPath>\\.silabs\\slt\\installs\\archive\\tool-locator-mcp\\tool-locator-mcp.exe"
cwd = "<RootPath>\\.silabs\\slt\\installs\\archive\\tool-locator-mcp"Note: The bundled Python version can change between releases. In
<RootPath>\.silabs\slt\installs\archive, find the installedpython-v<version>folder and use its name in thecommandpaths.
Post-Installation Smoke Test#
Confirm that Simplicity SDK is installed and that the Codex agent can detect it.
After all MCP servers are enabled, enter the following in agent chat:
What SiSDK version do I have installed?Confirm that the response is similar to the following:
Simplicity SDK: version 2026.6.1
Note: The chat prompt uses
SiSDKas the literal query text. In documentation prose, refer to the product as Simplicity SDK.
Select Your Language Model#
Select your preferred large language model (LLM) in the chat interface.
Note: Do not use automatic model selection. Manually selecting an LLM typically provides better performance and more consistent results. Choose a capable model with a sufficient context window for the task.
Troubleshooting#
Verify that Simplicity SDK 2026.6.1 is installed with Simplicity Installer.
If the chat session does not use MCP tools, confirm that Codex is in Agent mode.
If automatic registration fails, add the missing entries from Reference: Installer-Generated MCP Entries to
%USERPROFILE%\.codex\config.toml.If a project does not start on the device after you build and flash it, verify that you are using the correct bootloader.
Confirm that workspace folder permissions allow you to create and modify files.
Confirm that the selected LLM has a sufficient context window for the task.