Flashing#
Simplicity Studio® 5 (SSv5) offers several ways to load (flash) a firmware image to your device.
With the Debug button (see Debug build and flash)
Through the debug adapter's context menu, Upload Application... selection
Using the Flash Programmer tool
See your SDK's quick start guide for more stack-specific information about building and flashing.
Upload Application#
This option is useful if you want to load a bootloader image and an application image in a single step. To use this option, you will need to know the radio board part number (shown in the Debug Adapters view), and the location and name of the binary image you wish to load. The default workspace locations are:
Windows 10 workspace: C:\Users\<user>\SimplicityStudio Mac workspace: /Users/<user>/SimplicityStudio
In the Debug Adapters view, right-click the adapter (top line) and select Upload Application... from the debug adapter context menu.

The Application Image Upload dialog is displayed.

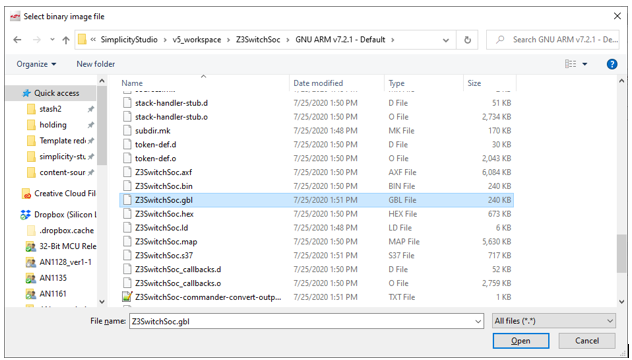
Browse to the project directory, go to the directory corresponding to the compiler toolchain, and select an image file. This example uses the .GBL file, as it assumes you are also loading a Gecko Bootloader image. (Start with UG103.6: Bootloader Fundamentals if you are not familiar with bootloaders.) Click Open.
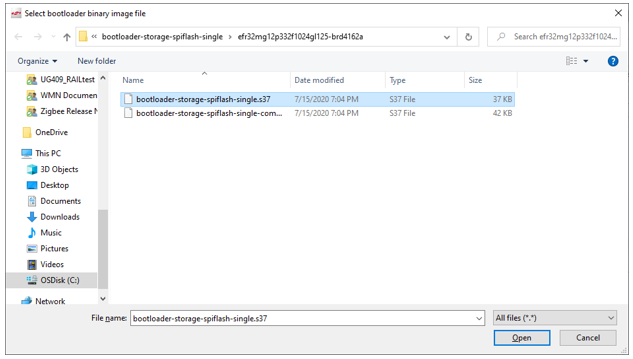
Check Bootloader image, then browse to the folder containing a prebuilt bootloader image. Images are located in the Simplicity Studio platform bootloader folder under sample apps. In this case open the SPI Flash Single folder, for example:
C:\SiliconLabs\SimplicityStudio\<version>\developer\sdks\gecko_sdk_suite\<version>\platform\bootloader\sample-apps\bootloader-storage-spiflash-single
Open the folder that corresponds to your board and part number and select the .s37 file, for example:
efr32mg12p332f1024gl125-brd4162a\bootloader-storage-spiflash-single-combined.s37
Click Open.
Now that both the application image and the bootloader are selected, check Erase Chip, to make sure that the main flash block is erased before your new image is uploaded. New users will typically always check this.
The After uploading options are Run (begin executing the code immediately) and Halt (wait for an event, such as a debugger to connect or manual initiation of a boot sequence). During initial development you will typically leave this set to Run.
The Flash options determine the storage location, and are Internal and External SPI. Leave the option set to Internal.
The completed dialog should resemble the following:
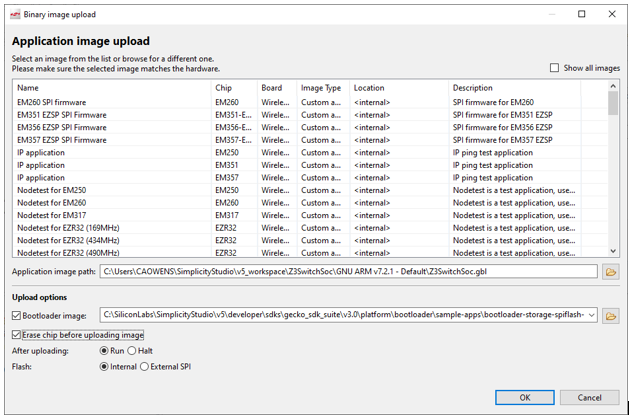
Click OK.
Flash Programmer#
The Flash Programmer is a tool that provides a number of options for use when flashing images to a device. Select the Flash Programmer from the Tools button on the toolbar. Some perspectives have a button specifically for the Flash Programmer.

The Flash Programmer provides basic flash and erase functionality, but also allows you to lock parts of memory and enable or disable debug access.
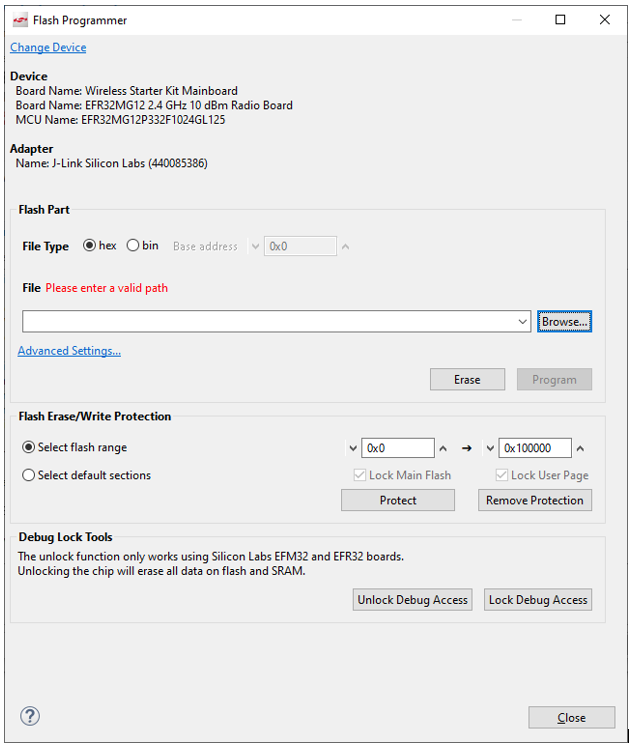
Flash Part
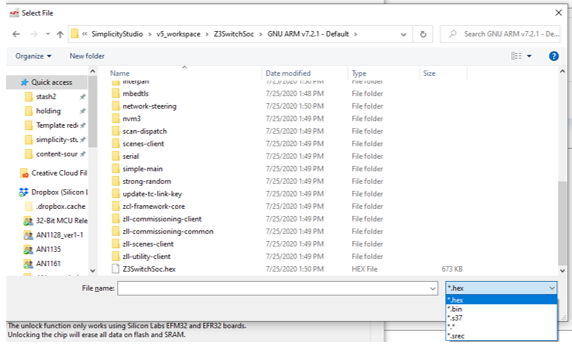
The Flash Programmer is configured to facilitate flashing .hex or .bin files.
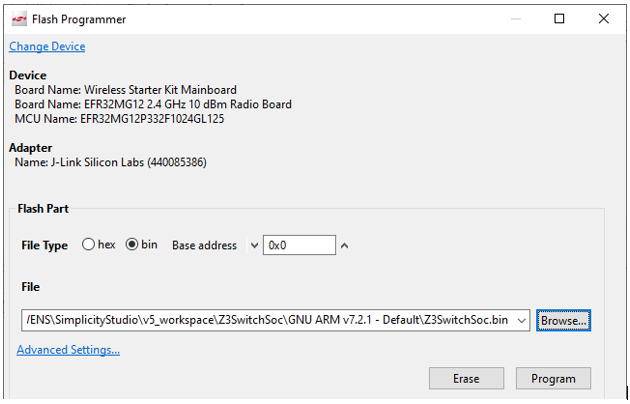
To flash an image, browse to the image location. Note that the images you see are filtered by the extension drop-down to the right of the file name field.
Click Open and then click Program to flash the image.
By default, the Erase function erases the main page. Click Advanced Settings to change what is erased.
Finally, if you have more than one device connected, click Change Device to select the target.
Flash Erase/Write Protection
Use these functions to protect or remove protection from a custom range, or default pages.
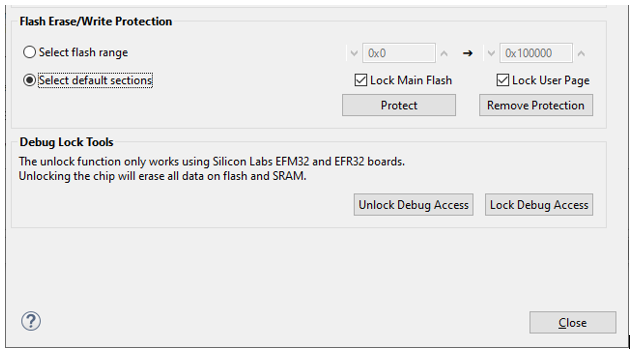
Debug Lock Tools
Use these functions to unlock or lock debug access.