View a Device#
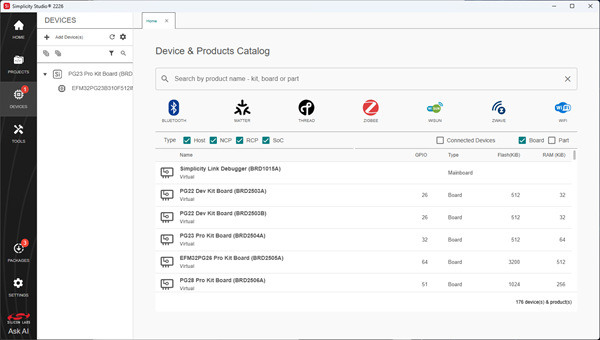
The DEVICES page provides a unified view of connected, selected, and custom devices. Devices appear in a single tree view to the left and are identified by icons, labels, and hierarchy.
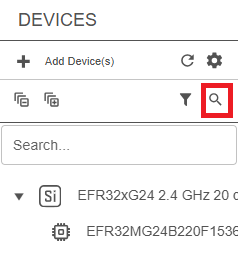
The Device tree includes tools for adding devices, refreshing the device list, filtering device types, expanding or collapsing the tree, and searching for devices by name, serial number, IP address, or target part. Connected devices are automatically detected when supported hardware is connected to the computer. You can also manually select devices for project creation and evaluation without requiring physical hardware.
When you select a device in the Device tree, device-specific tools, examples, and configuration options are displayed.
From the DEVICES page, you can:
View the profile of a selected device.
Configure a device.
View and run demos and sample projects.
Create a project.
View SDKs associated with the device.
Access documentation for a selected device.
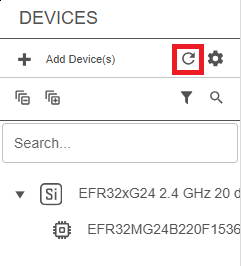
Use the toolbar at the top of the Device tree to manage the device list. For example, select Refresh Connected Devices to rescan for connected hardware.
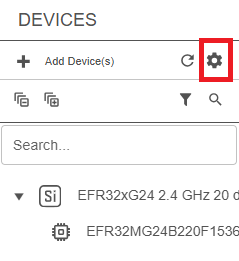
Select Settings in the toolbar to open the Device Manager, where you can view the settings or configure your device.
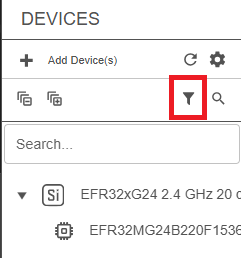
Select Filter Devices to show or hide device categories, such as USB, Ethernet, or Virtual devices.
Select Search and enter a device name, serial number, IP address, or target part to locate a specific device in the Device tree.
View a Device Profile#
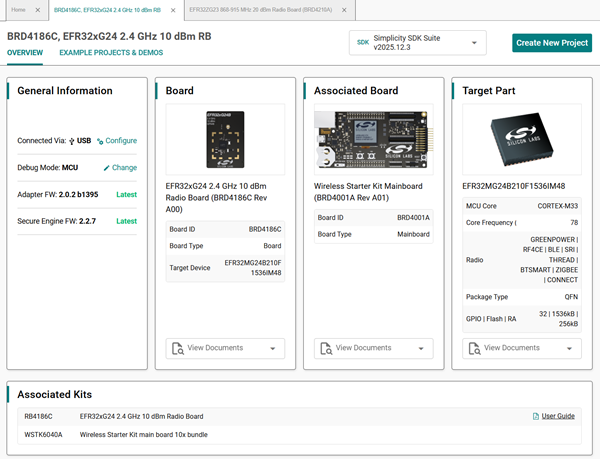
In the Device tree, select a device to open its profile in a separate tab on the right side of the page.
The device profile displays the device name, available SDKs associated with the device, and the Create New Project button. The Device & Products Catalog remains available on the Home tab. To return to the catalog, click the Home tab.
Each device profile includes the following tabs:
OVERVIEW – Displays general device information and available resources.
EXAMPLE PROJECTS & DEMOS – Provides sample applications, demos, and project templates for the selected device.
Note: The Create New Project button is not displayed when the EXAMPLE PROJECTS & DEMOS tab is selected.
Select Create New Project to open the EXAMPLE PROJECTS & DEMOS tab, where you can browse available sample projects and demos for the selected device.
Note: In earlier versions of Simplicity Studio, documentation links appeared on the DOCUMENTATION tab. In the current version, use the Ask AI icon in the lower-left corner to open the Silicon Labs Docs AI widget on docs.silabs.com to access documentation.
OVERVIEW Tab#
The OVERVIEW tab displays high-level details about the connected or selected device.
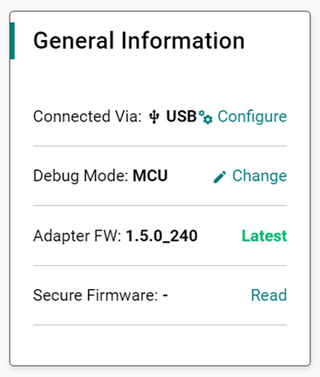
General Information Panel#
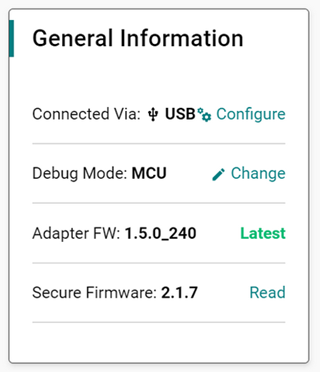
The General Information panel displays information about your device, such as the type of connection, the debug mode, adapter firmware version, and the secure firmware version.
Connected Via: Displays how the board is connected.
Debug Mode: Controls the interface to the Wireless Pro Kit Mainboard onboard debugger. Changing the debug mode opens Device Manager so that you can update the adapter configuration. See the respective section in Device Manager for the debug modes supported below:
Onboard Device (MCU) (default): The debugger built into the development board is connected to the on-board target device.
External Debugger (IN): An external debugger is connected to the device on the development board.
External Device (OUT): The on-board debugger is configured to connect to an external device such as custom hardware.
External Device (MINI): The on-board debugger is configured to connect to an external device such as your custom hardware using the dedicated mini-Simplicity connector.
For more information about supported debug modes, see your kit's user guide.
Adapter FW: Displays the firmware version running on the debug controller of your Silicon Labs development kit and indicates whether an update is available. Silicon Labs strongly recommends updating adapter firmware to the latest version. The changelog includes the firmware release notes. When you update adapter firmware, Simplicity Studio asks you to confirm the update before proceeding. When the firmware is current, the interface displays Latest.
Secure FW: The Secure Engine firmware can be updated, and Silicon Labs periodically releases updates to fix bugs and address vulnerabilities. These updates are distributed through Simplicity Studio. Select Update to x.x.x next to the Secure FW version to start the update. Simplicity Studio displays the current and available Secure Engine firmware versions and guides you through the update process. For more information about checking the Secure Engine firmware version and locating the latest firmware images, see the production programming guides and application notes, including AN1222: Production Programming of Series 2 Devices.
When Configure or Change appears next to an item, you can select it to open Device Manager and update the device settings.
When you select Read next to Secure Firmware, the following warning message appears:
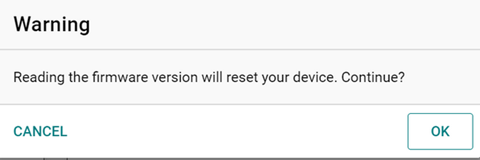
Select OK to reset the device and display the version of the secure firmware in the General Information panel. To cancel the operation, select CANCEL.
Board and Target Part Panels#
Review the Board and Target Part panels for details about the device. Each board and target part appears in a separate pane.
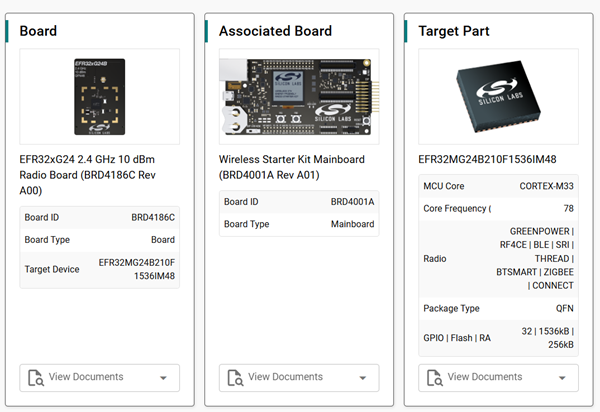
The main Board panel includes information about the board ID, board type, and target device.
The Associated Board panel appears if the device has an attached board, such as a radio board.
The Target Part panel provides details about the chip or module fitted to the board.
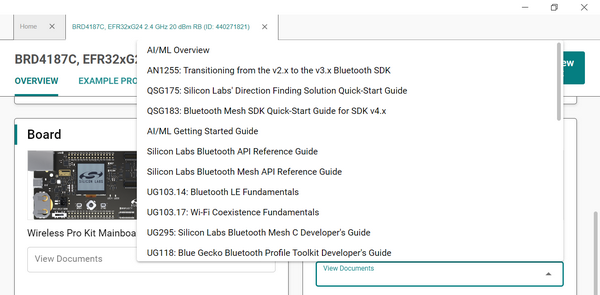
To view related documentation, select the drop-down list below the image of a board or target part, and then select a document to open it.
Associated Kits Panel#
The Associated Kits panel displays any kits associated with the selected board and provides links to relevant documentation.
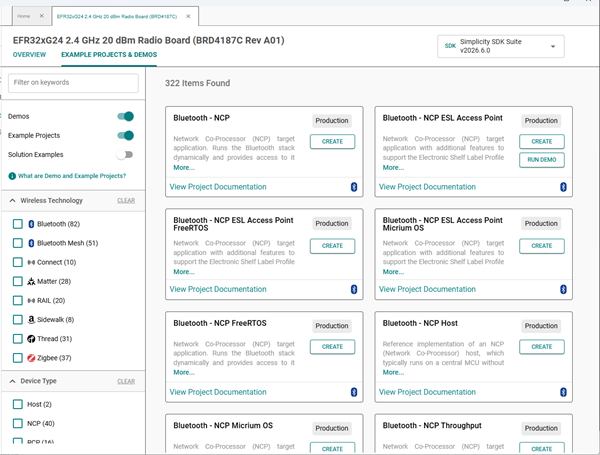
EXAMPLE PROJECTS & DEMOS Tab#
On this tab, you can view resources for your device, such as example projects, demos, and solutions.
Example projects are templates you can use to start new IDE projects. When you create an example project, the example source and project files are copied into a new project. This lets you explore and reuse the example source code with full edit, compile, and run capabilities.
Demos are precompiled software examples. When you run a demo, the precompiled binary is programmed (flashed) into a connected kit. This lets you quickly explore the run-time capabilities of the hardware and software.
Solutions are a collection of dependent IDE projects that you can debug and build together. Creating a solution example adds multiple example projects and configures the required project dependencies. Solutions let you explore, edit, and debug an entire embedded solution from the bootloader to the application and any libraries in between.
Find Resources#
You can narrow your search for resources in the EXAMPLE PROJECTS & DEMOS tab in several ways:
In the upper-left corner of the tab, enter keywords in the Filter on keywords field and use the toggles to enable or disable project types. A toggle is green when the project type is enabled and white when it is disabled. In the following example, Demos and Solution Examples are enabled, and Example Projects is disabled.
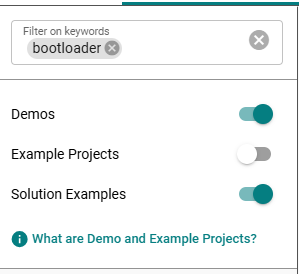
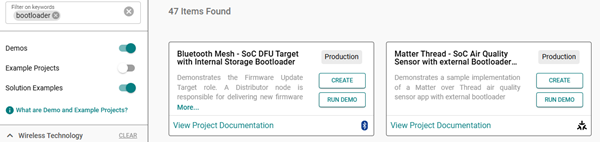
The filtered resources appear to the right of the device profile.
You can enter multiple keywords in the Filter on keywords field. To remove a keyword, click the X at the right of the term. To clear all keywords, click the X at the right of the Filter on keywords field.
Expand or collapse the categories on the left side of the device profile, below the toggles, by selecting the arrow next to the category name:
Wireless Technology
Device Type
Ecosystem
MCU
Capability
Project Difficulty
Quality
Provider
When a category is expanded, the arrow points up. When a category is collapsed, the arrow points down.
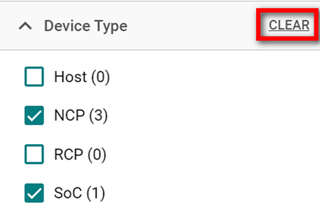
In the following example, the Wireless Technology category is collapsed, and the Device Type category is expanded. The number in parentheses next to each item in a category indicates how many resources are available for your device.
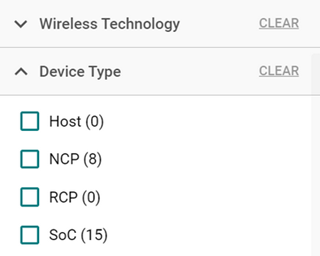
Each category contains items with check boxes next to their names. Select one or more items by selecting the corresponding check box. A check mark indicates that the item is selected.
The resources that match your selected items appear to the right of the device profile.
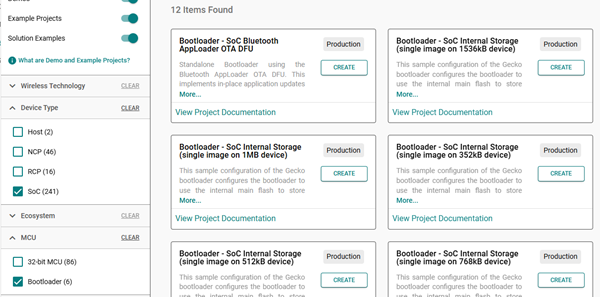
Deselect an item by clicking again to remove the check mark. If you want to remove all the check marks, click CLEAR to the right of the category.
Work with Resources#
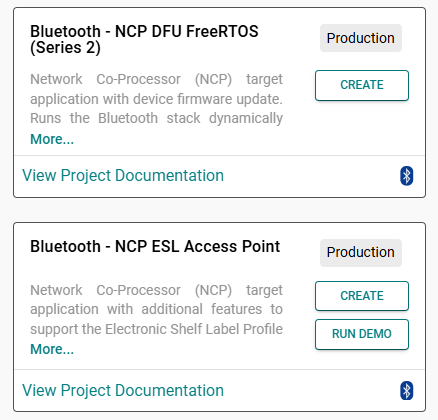
Available resources display as tiles to the right of the device profile. Each tile includes the following information:
Resource name
Available action (CREATE or RUN DEMO)
Resource quality (evaluation, experimental, demo, internal, or production)
Brief resource description
Link to the project documentation
Technology indicator icon
You can create projects from example projects and solution examples by selecting CREATE. To run a demo, select RUN DEMO.
When you select CREATE, the Project Configuration window opens, where you can create a project based on the selected resource. For more information, see the Projects Guide.