Add WiSeConnect™ SDK v3.x to Your Application#
Prerequisites#
Your host application must contain the CMSIS-RTOS2 API and an RTOS library.
As an example, for STM32F411RE™ (hereafter referred to as STM32), let us consider a sample Keil µVision project host application project (Sample_STM32_project) created using STM32CubeMX tool. By default, the STM32CubeMX provides the CMSIS-RTOS2 API ported onto FreeRTOS library. This implementation is present at path: <STM32 project>\Middlewares\Third_Party\FreeRTOS\Source
Follow the below sequence of steps to port WiSeConnect™ SDK v3.x (hereafter referred to as SDK v3.x) to your host MCU application.
Prepare Project for Porting#
The initial step in porting is to integrate the SDK v3.x into your host application. The SDK v3.x depends on few header and c source files present in the Silicon Labs Gecko SDK (hereafter referred to as GSDK). Therefore, it is necessary to integrate the required files from GSDK as well as SDK v3.x for developing an SiWx917 application using a host platform.
Create a new folder or a directory in the host platform project’s root directory or any convenient location in the project.
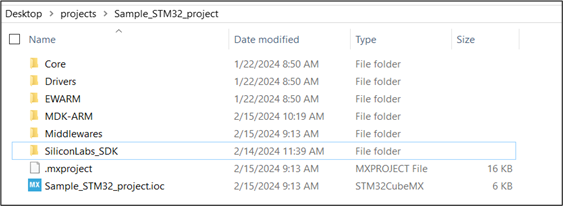
For example, let us consider a sample STM32 Keil µVision project (Sample_STM32_project) created using the STM32CubeMX tool. In this case, create a directory, say
SiliconLabs_SDKin the sample project’s root directory.
Within
SiliconLabs_SDK, create two sub-directories for GSDK and SDK v3.x.For STM32 project, two sub-directories with names
GSDKandWSDKare created.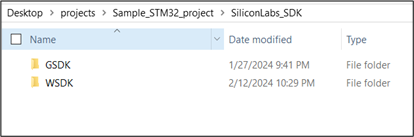
Add Code from Gecko SDK (GSDK)#
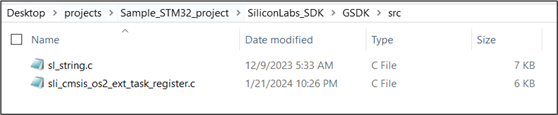
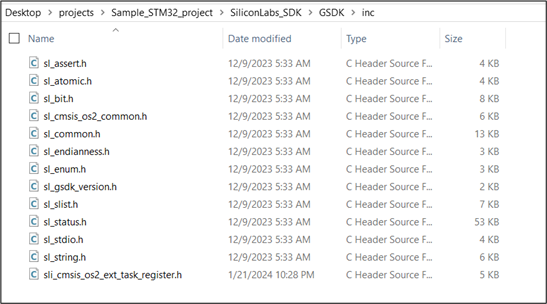
The required c source files sl_string.c and sli_cmsis_os2_ext_task_register.c from GSDK are present at path: <gecko_sdk>/platform/common/src. The required header files from GSDK are present at path: <gecko_sdk>/platform/common/inc. Add these c source files and header files from the GSDK to the newly created directory.
In case of STM32F411RE, the required c source files are added at GSDK/src folder and header files are added at GSDK/inc as shown below.
Add Code from WiSeConnect SDK v3.x#
It is not required to add all the files and folders present in the SDK v3.x to your project. The SDK v3.x contains the SiWx917 features such as Wi-Fi, BLE, application layer protocols etc., and their implementations organized into components. This benefits the user to add only the required files and folders associated with the respective feature from the components folder to their host MCU application project.
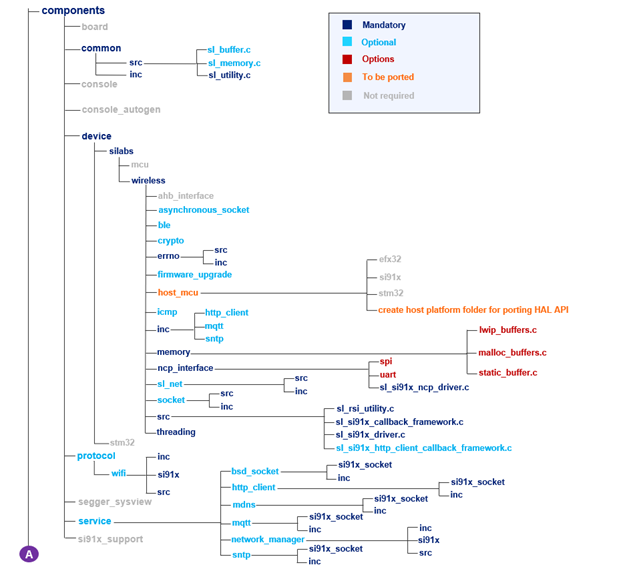
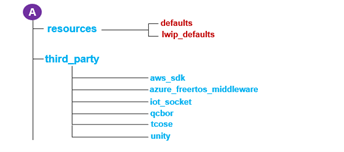
The following figure shows the hierarchy of files and folders present in the components and resources folders of SDK v3.x.
The entities (component/ c source file / header file/folder) that are marked “Mandatory” must be added to your application project.
The entities that are marked "Optional” can be added based on the features your application requires. For example, if your application requires HTTP Client functionality, then the
http_clientfolder from/components/serviceshould be added to your application project.The entities that are marked “Options” imply that any of the available options (marked in red) can be chosen while adding “Mandatory” or "Optional” entities. For example, the “memory” used by SDK v3.x can be static or malloc (dynamic memory allocation) or lwip buffers. lwip buffers can be used only when using LWIP network stack.
The entities that are marked “Not required” need not be added. The
board,console,console_autogen,segger_sysview, andsi91x_supportfolders are related to SiWx917 SoC and Simplicity Studio IDE. These need not be added if you are using a non-silicon Labs host MCU and IDE.The
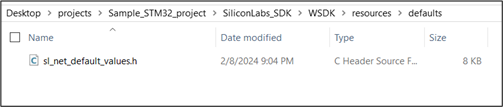
socketcomponent present atcomponents/device/silabs/si91x/wirelessis mandatory when your application needs socket-based data transfers.Adding the resources folder is optional. The resources folder contains the default values required by the SDK v3.x. These default values (sl_net_default_values.h) should be added to your project only when you wish to use the network_management component in your application project.
The
sl_netcomponent should be added when usingnetwork_managementAPI.
The files and folders that are to be added entirely depends on the application requirements. For instance, consider a simple example application where the SiWx917 as a Wi-Fi client must connect to a Wi-Fi network, send application data to a TCP Server and then should be set in connected sleep mode. This SiWx917 application requires the wifi and asynchronous_socket / socket / bsd_socket components. In this case, let us choose the bsd_socket and network_manager entities from service folder. At this point, add the complete folders or only those required as per your choice.
For STM32 project, copy the required entities from components and resources folders to WSDK directory. From components folder, add the required files/folders from common, device, protocol, service entities. As network_manager requires resources folder, add sl_net_default_values.h header files present at resources/defaults/.


Configure the Project#
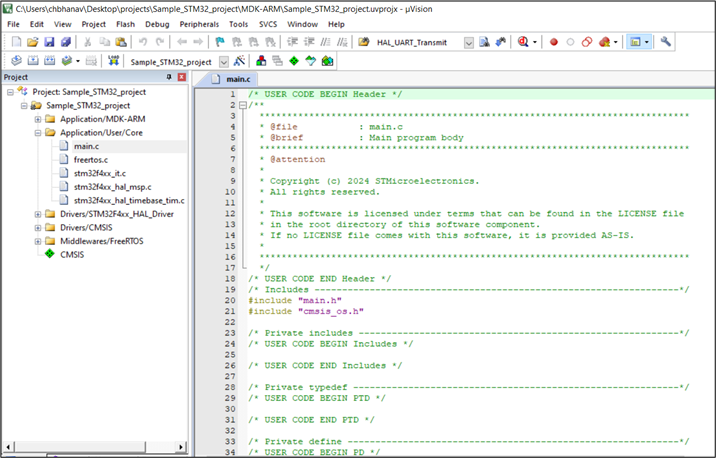
Import the project into the IDE.
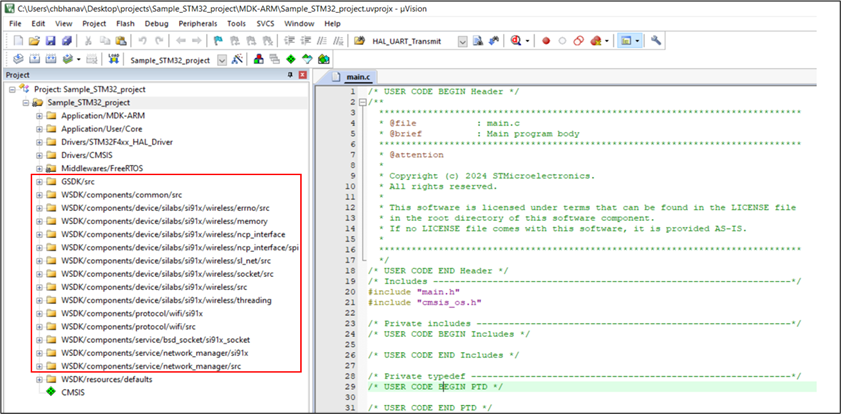
For STM32, the Sample_STM32_project is imported into Keil µVision IDE. For MDK-ARM tool chain, it is mandatory to enable the preprocessor symbol: “__Keil”.
The next step is to add the required files and folders from GSDK and SDK v3.x to your application project. Organize the files and folders as per SDK v3.x structure. Ensure to include the respective header files present in the mandatory folders.
For STM32 project, the required files and folders are added to the project as shown below: