Getting Started with WiSeConnect™ SDK v3.x in SoC Mode#
This guide describes how to get started with running the out-of-box demo for the SiWx91x™ chipset family using the WiSeConnect™ SDK v3.x in System-on-chip (SoC) mode, where both the application and the connectivity stack run on the SiWx91x chipset.
Note: If you wish to develop an application, you may skip this page and go to one of the following guides:
Developing with ICs (with custom boards)
Check Prerequisites#
Hardware#
Wi-Fi Access Point (802.11 ax/b/g/n)
BRD4002A - Si-MB4002A Wireless Pro Kit Mainboard (hereafter referred to as WPK board).
One of the following SoC boards (hereafter referred to as the SiWx917 board):
BRD4338A - SiWx917 Wi-Fi 6 and Bluetooth LE 8MB Flash Radio Board
BRD4342A - SiWx917 Wi-Fi 6 and Bluetooth LE 8MB Flash + 8MB ext PSRAM Radio Board
BRD4343A - SiWG917Y Module Wi-Fi 6 and Bluetooth LE 8MB Flash RF-Pin Radio Board
BRD2605A - SiWG917 Dev Kit Board
USB power source (for e.g., a computer)
Type C USB cable compatible with the USB power source (for e.g., type C to type A in case of a computer with a type A USB port).
Android smartphone or iPhone
Note: The following pro kits come with the BRD4002A and specific SiWx917 boards mentioned above:
SiWx917-PK6031A - SiWx917 Wi-Fi 6 and Bluetooth LE 8MB Flash Pro-Kit (BRD4002A + BRD4338A)
Software#
Silicon Labs Simplicity Connect App (formerly EFR Connect App) for Android or iPhone
Run the Demo#
The out-of-box demo is pre-flashed on your SiWx917 board.
In this demo, you use the the Silicon Labs Simplicity Connect App (formerly EFR Connect App) to connect to your SiWx91x device over Bluetooth Low Energy (BLE), commission your SiWx91x device to a Wi-Fi network, and exchange data with your SiWx91x device.
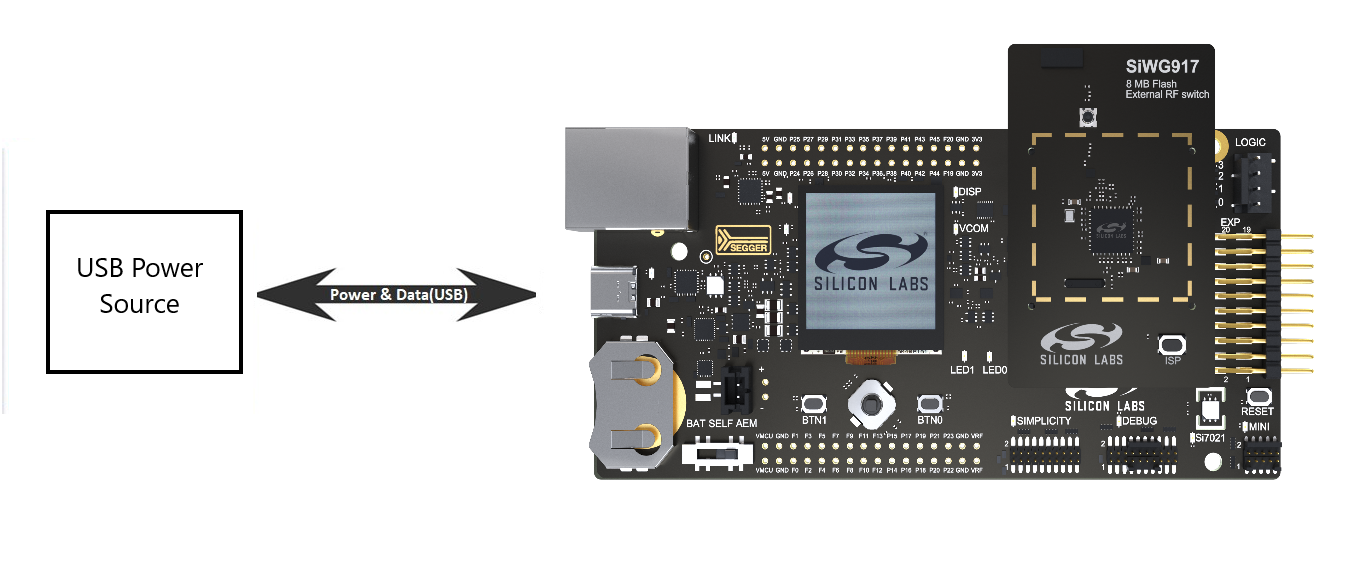
Plug the SiWx917 board into the board connectors of the WPK board as shown below.
Power on the WPK board by connecting it to a USB power source such as a computer.
Note: If you have an older SiWx917 SoC board, you may not have the out-of-box demo pre-flashed on your board. To confirm, check for messages on the board's liquid crystal display (LCD) screen when you plug the board into a power source.
Wireless interface initialized successfully BLE advertising started Device name: BLE_CONFIGURATORIf the expected messages don't appear, follow the instructions in the Run the Demo with Simplicity Studio section.
Run the demo by following the instructions in the README page of the out-of-box-demo example in the WiSeConnect SDK v3.x github repo starting from the Run the Application section.
Note: See the troubleshoot demo run section in case of any issues while running the application.
Run the Demo with Simplicity Studio#
If the expected messages do not appear on plugging in your board, follow the instructions in this section to run the demo.
Note: If you wish to avoid installing Simplicity Studio, you may follow the instructions in the Run the Demo with Simplicity Commander section.
Update the SiWx917 connectivity firmware. Note that you must update your connectivity firmware to a compatible version before proceeding further.
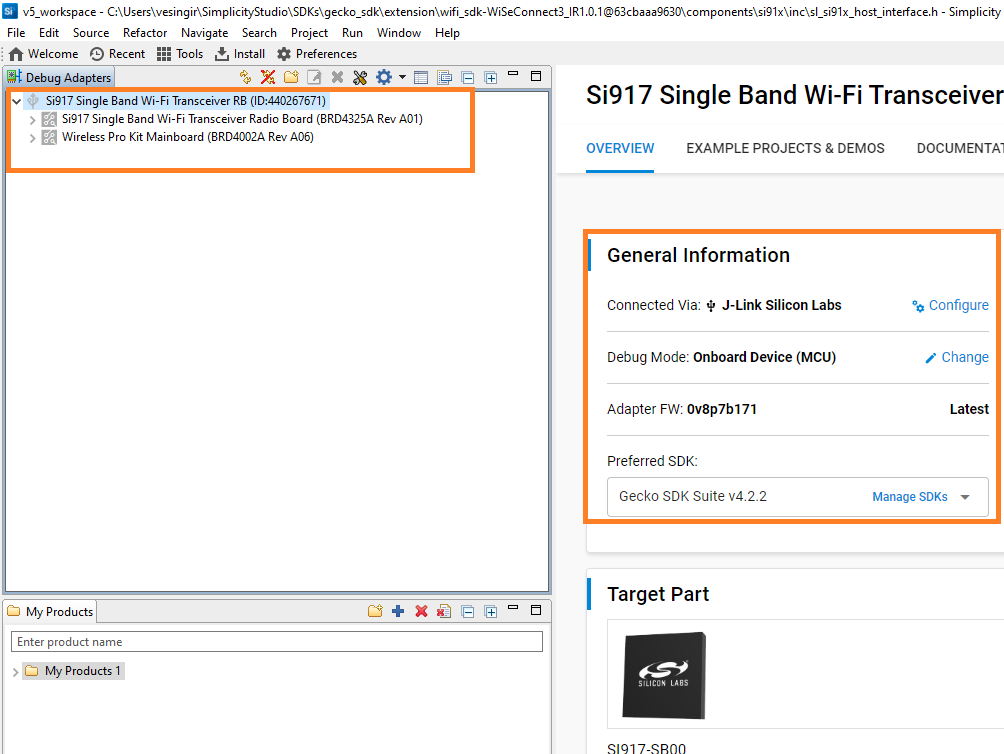
Go to the Debug Adapters section.
Select your SiWx917 board from the displayed list.
The Launcher page will display the selected radio board's details.
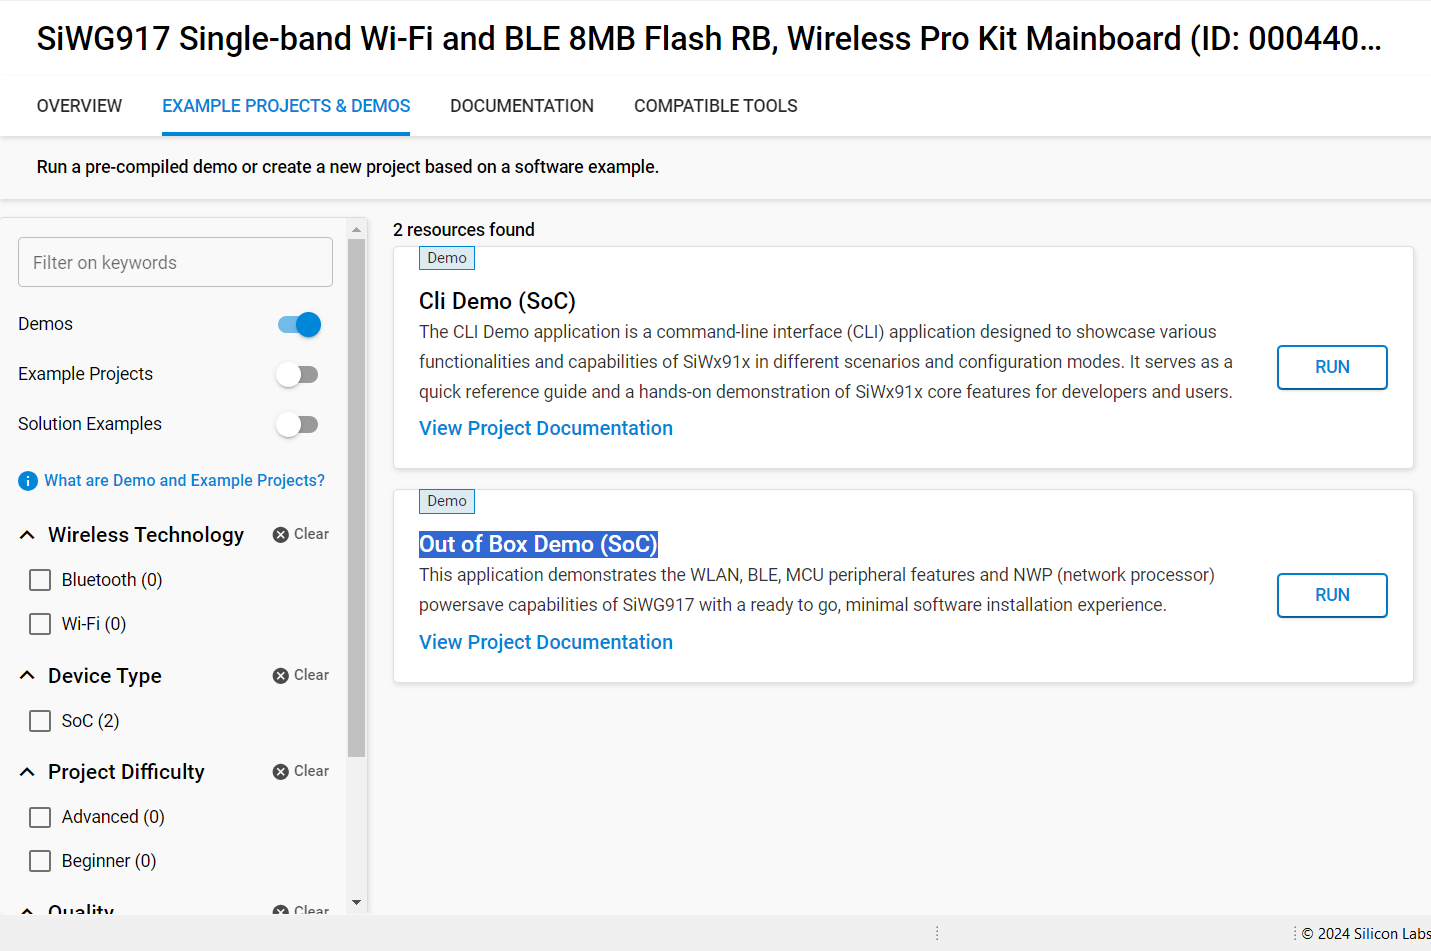
Select the EXAMPLE PROJECTS AND DEMOS tab.
Select the Demos filter.
Click RUN for the Out of Box Demo (SoC).
Run the demo by following the instructions in the README page of the out-of-box-demo example in the WiSeConnect SDK v3.x github repo starting from the Run the Application section.
Note: See the troubleshoot demo run section in case of any issues while running the application.
Run the Demo with Simplicity Commander#
If the expected messages do not appear on plugging in your board and you do not have Simplicity Studio installed, follow the instructions in this section to run the demo.
Download the Out of Box Demo binary for your board.
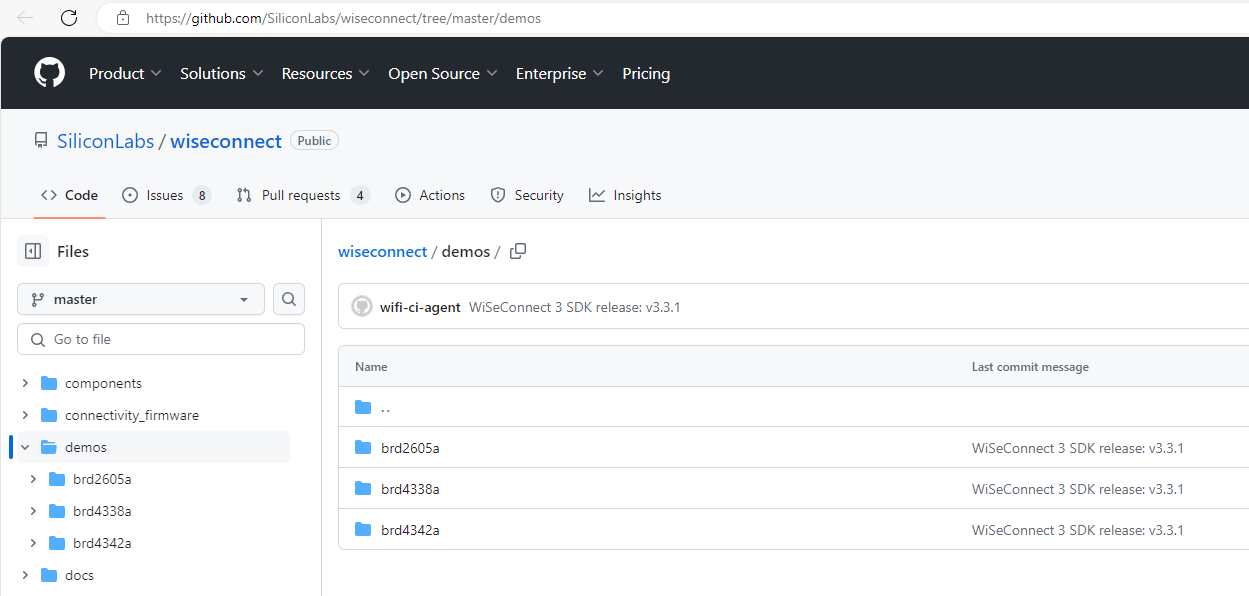
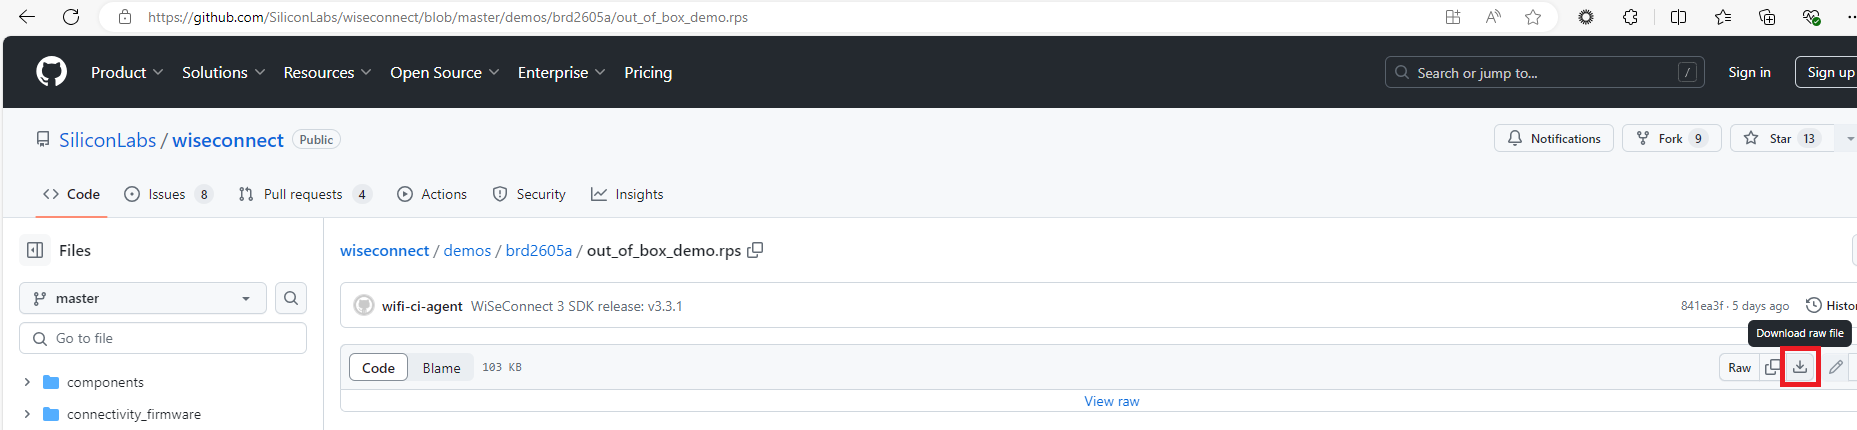
Open the demos folder in the WiSeConnect SDK v3.x Github repo.
Click on the folder for your respective board.
Click on
out_of_box_demo.rpsClick on the download button to download the file.
Download Simplicity Commander and extract the downloaded archive. For example, the downloaded archive will be named SimplicityCommander-Windows.zip on Windows.
Extract the commander_xxx archive present in the root folder of the Simplicity Commander archive extracted in the previous step (for example, Commander_win32_x64_1v16p10b1648 on Windows). In this example, 16 is the minor version, 10 is the patch version, and 1648 is the build number of the Simplicity Commander version downloaded.
Navigate to the Simplicity Commander sub-folder under the commander_xxx archive extracted in the previous step.
Double-click
commander.exeto open Simplicity Commander.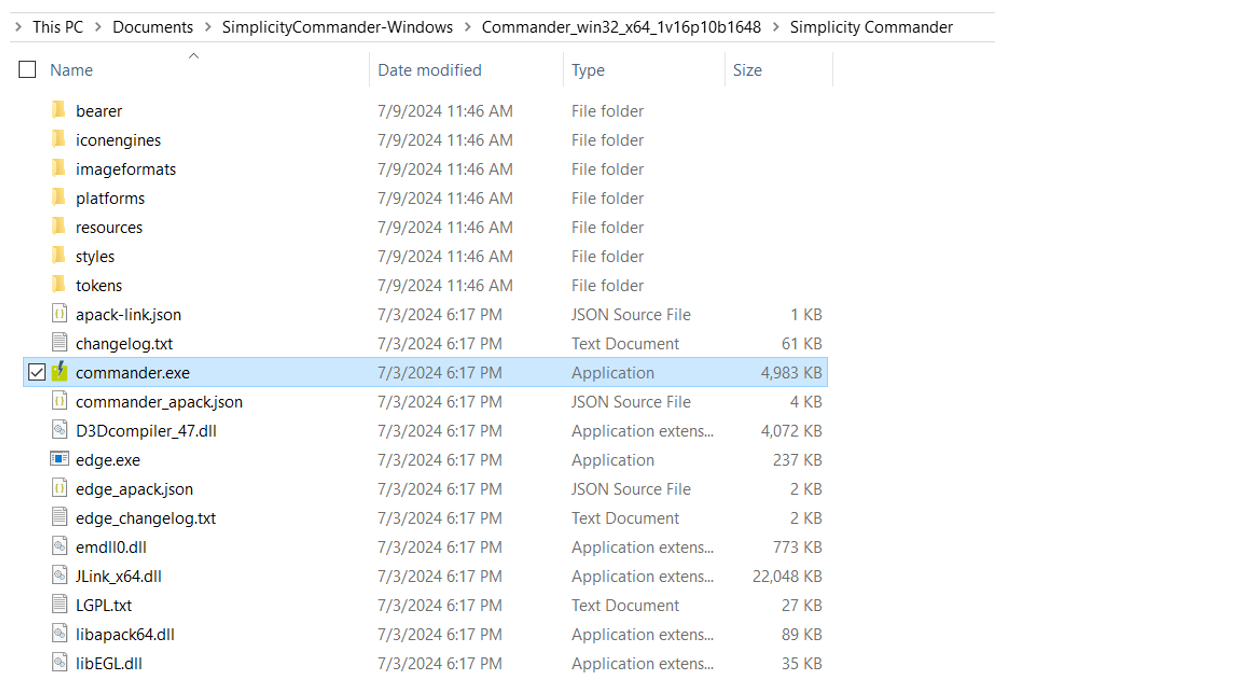
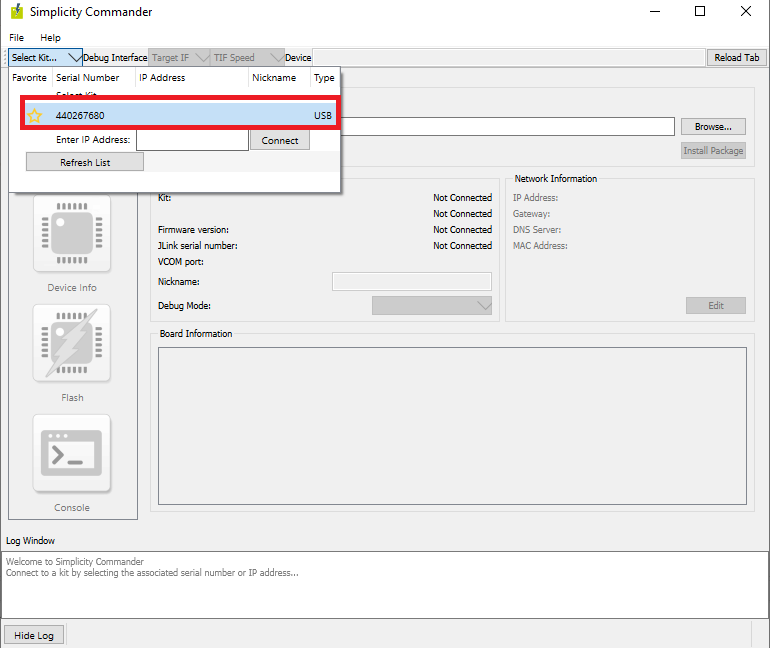
In the Simplicity Commander window, click Select Kit and choose your radio board.
In the navigation pane, go to the Flash section.
Click Browse next to the Binary File field.
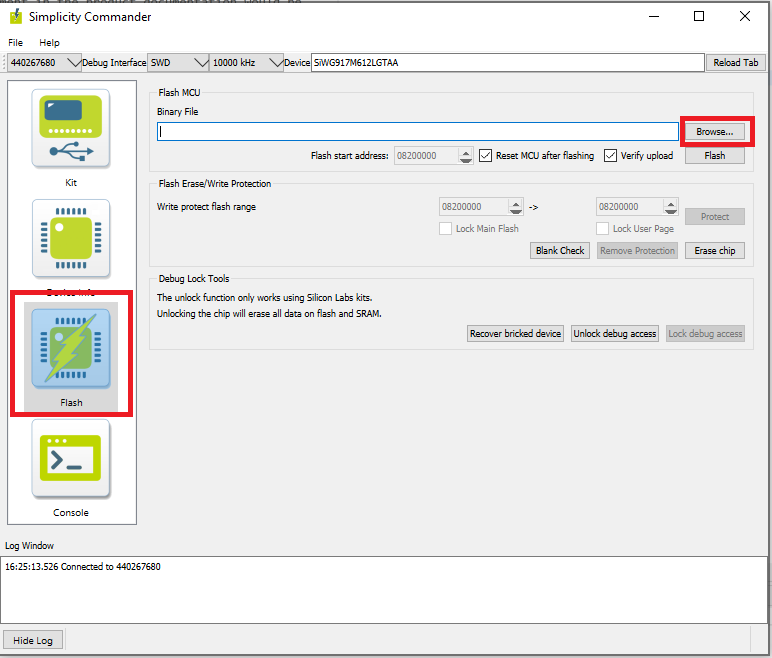
Locate and select the out-of-box demo binary you downloaded in step 1 above.
Click Flash.
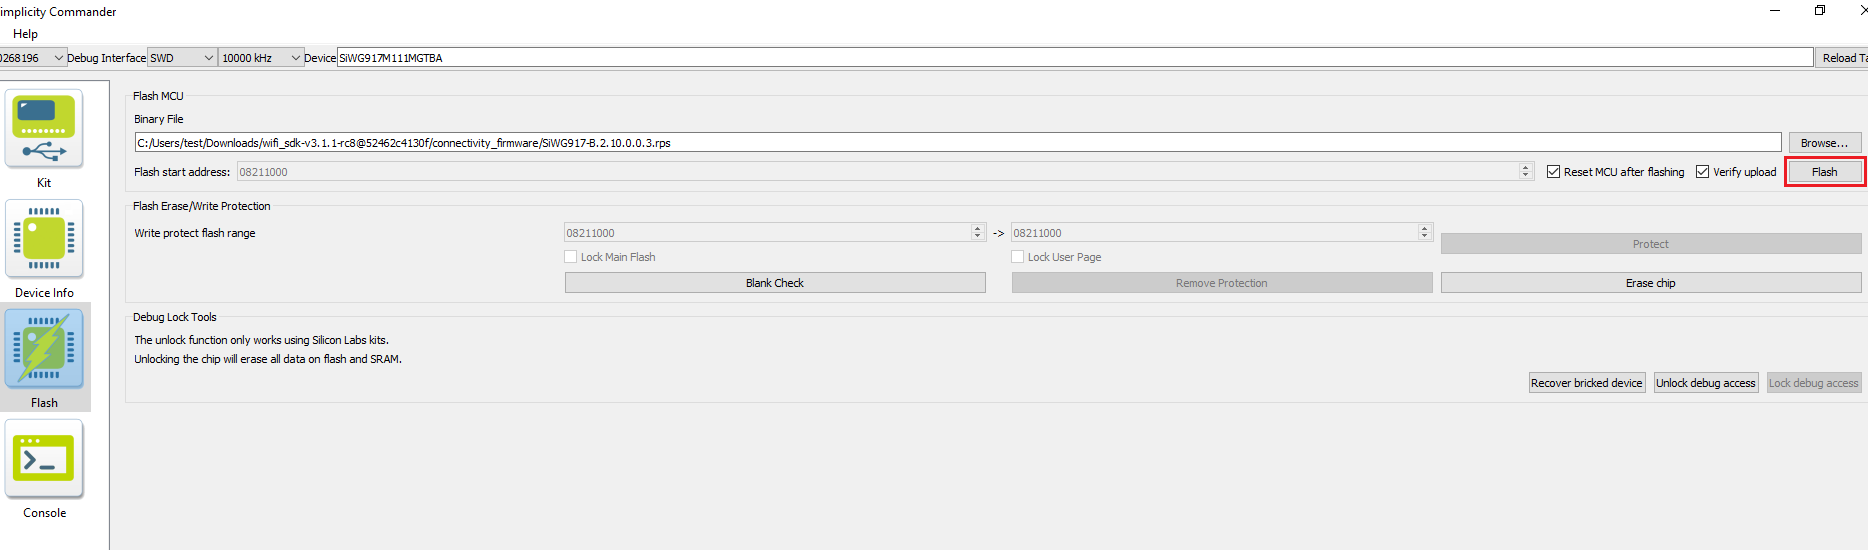
The firmware will be flashed and the Log Window will display the message: "Flashing completed successfully!"
Note: See the troubleshoot a firmware update failure section in case of failure in updating the firmware.
Run the demo by following the instructions in the README page of the out-of-box-demo example in the WiSeConnect SDK v3.x github repo starting from the Run the Application section.
Note: See the troubleshoot demo run section in case of any issues while running the application.