Upgrading the SDK version in the existing project#
In this method, we should import the already existing application project into the workspace and upgrade the WiSeConnect SDK extension attached to the project using Simplicity Studio.
Get the new WiSeConnect SDK to your local system.
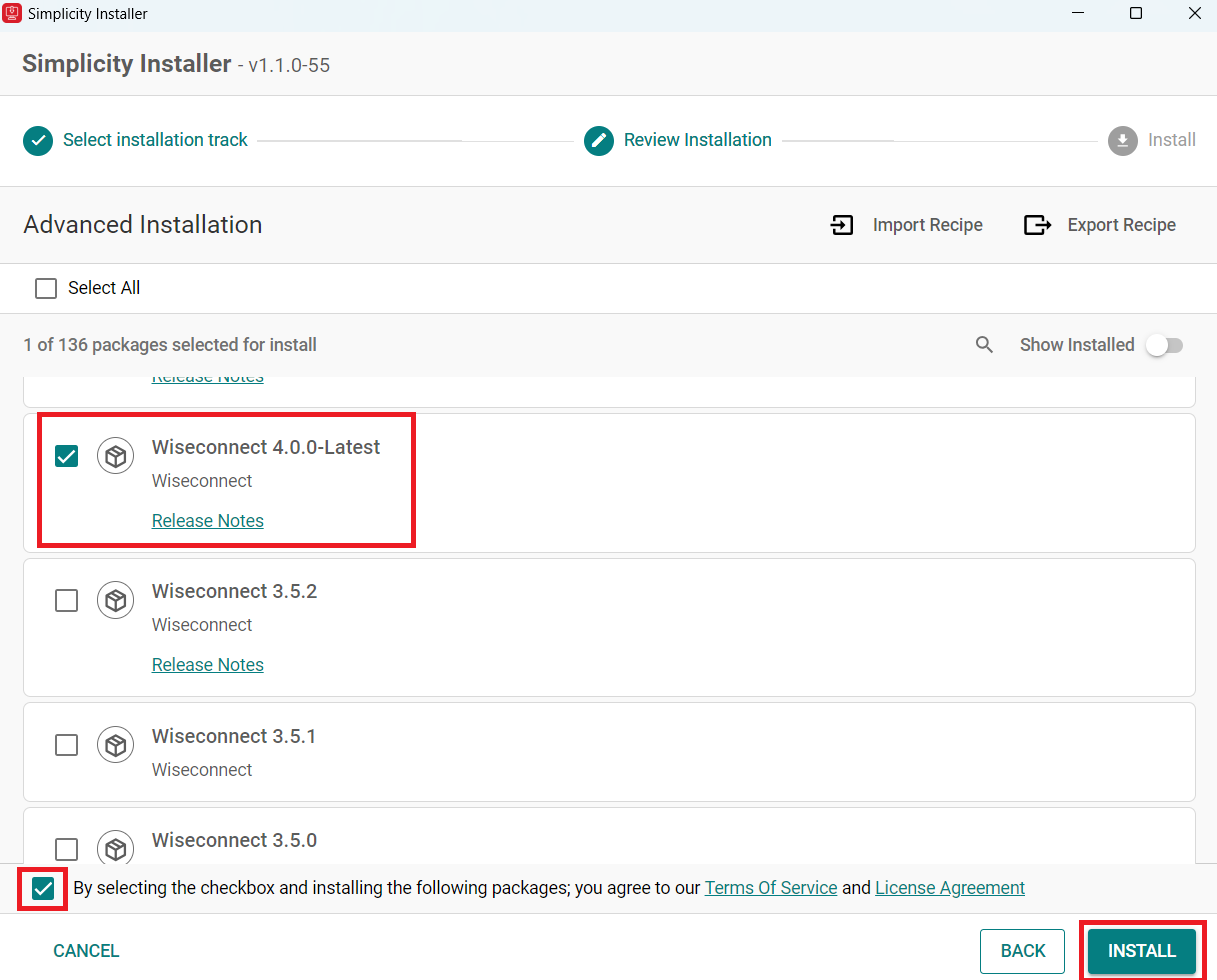
a. Open Simplicity Installer and navigate to INSTALLATION WIZARD > ADVANCED, select the latest version SiSDK and WiSeConnect extension, click on INSTALL.
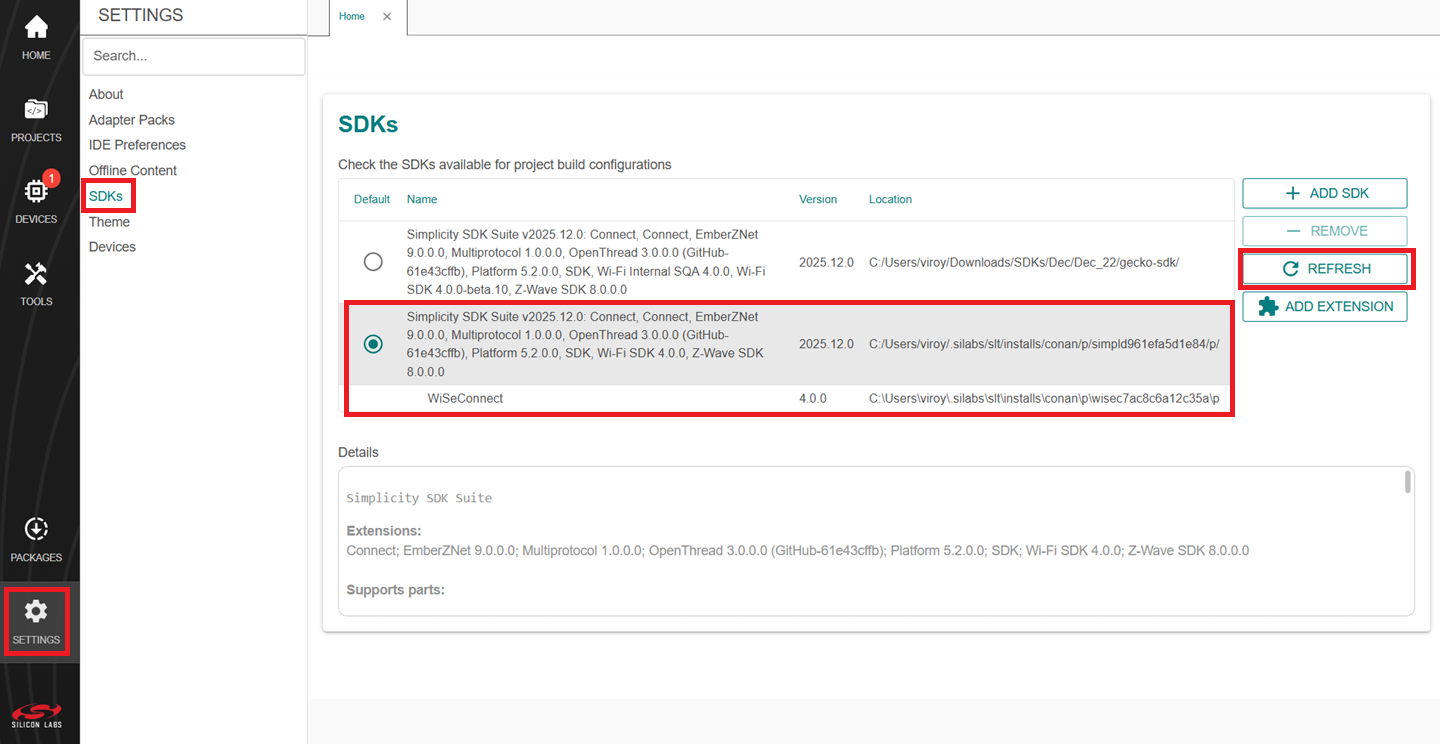
b. After the installation is successful, open Simplicity Studio and navigate to SETTINGS > SDKs, ensure the newly installed GSDK and WiSeConnect SDK combination is enabled. (It is preferred to disable the older version SDKs)
Import the existing project.
a. Browse to the project directory from File > Import, select
<project_name>.slsfile to import the project.Note: While importing the project use the same project name as before to avoid conflicts.Once the project is successfully imported, open
<project_name>.slcpfile.If only the latest SDK is present in the preferences, follow section Project Migration with only latest SDK in preferences to migrate the project. Else If the .slcp file is opened properly, follow section Project Migration with multiple SDKs in preferences to migrate the project with multiple SDKs in preferences.
Project Migration with only latest SDK in preferences#
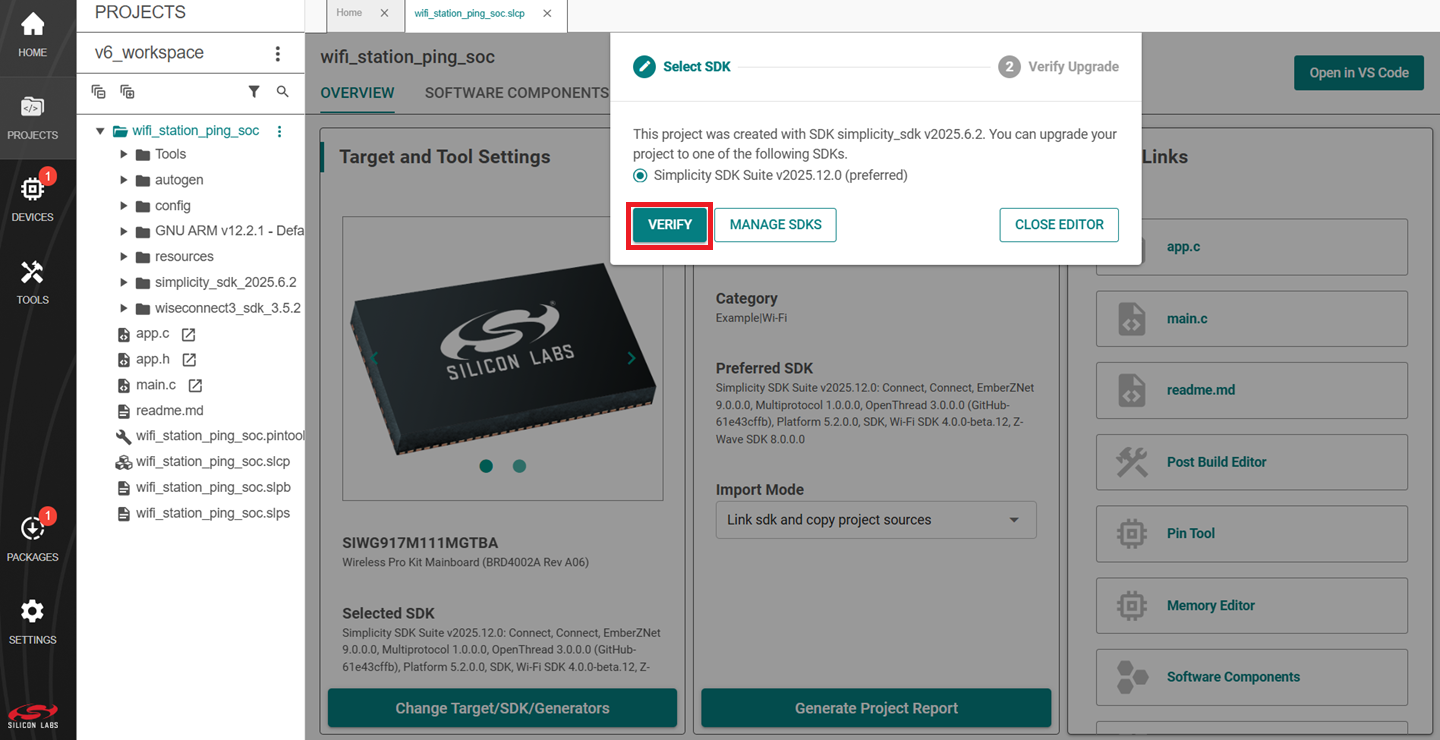
If a prompt appears, follow the steps below to migrate the project.
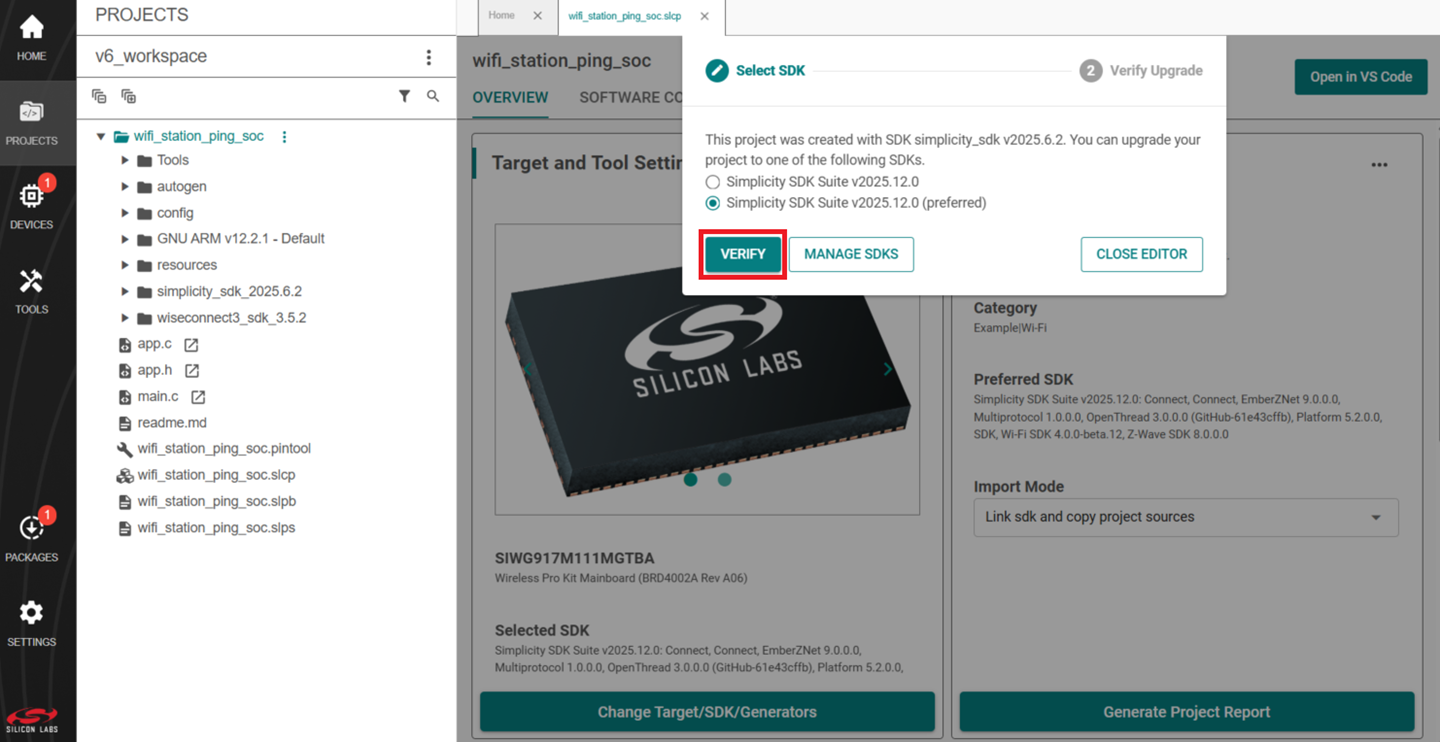
In the visible prompt, click VERIFY.
Note: If the project upgradation prompt is not seen, make sure only the latest SDK is enabled in the SDK Preferences.
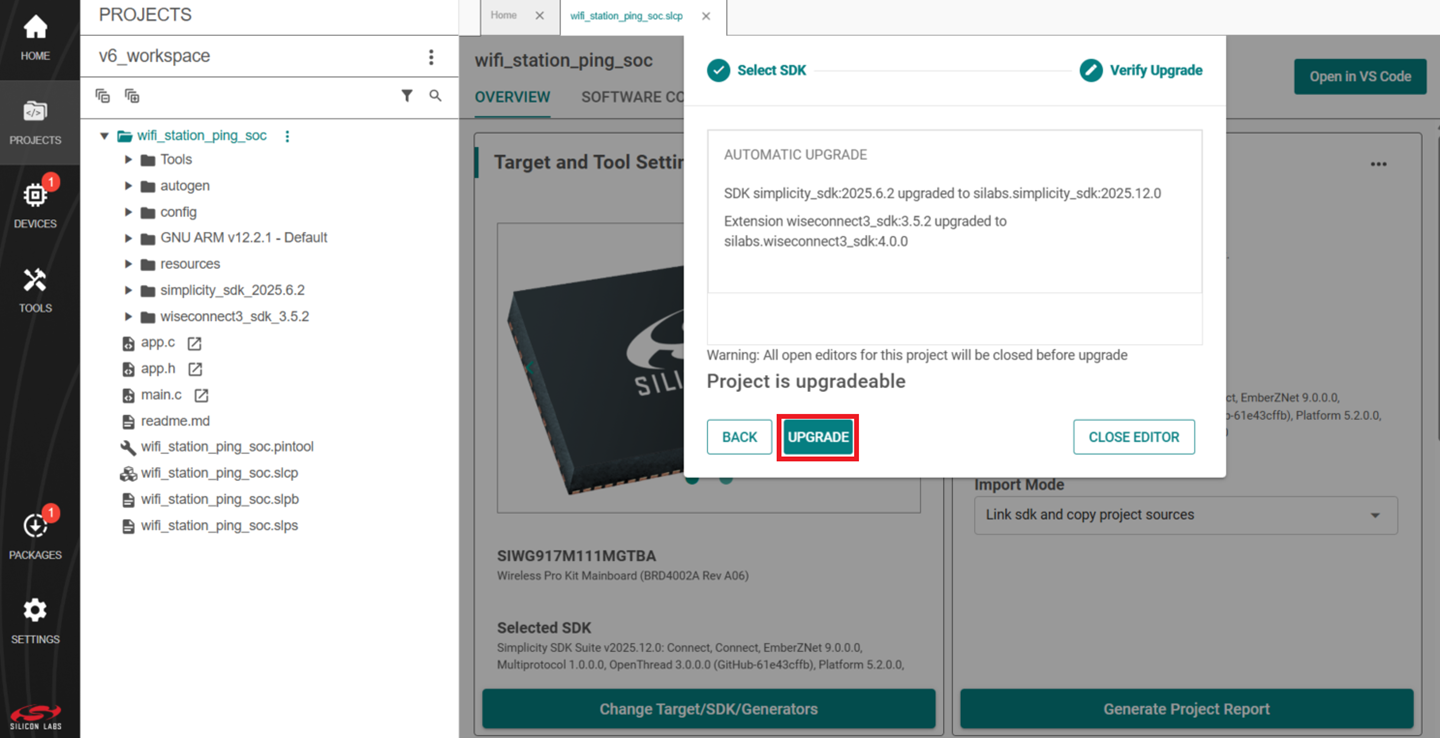
Once the compatibility is verified, click on UPGRADE for upgrading the project to the selected SDK.

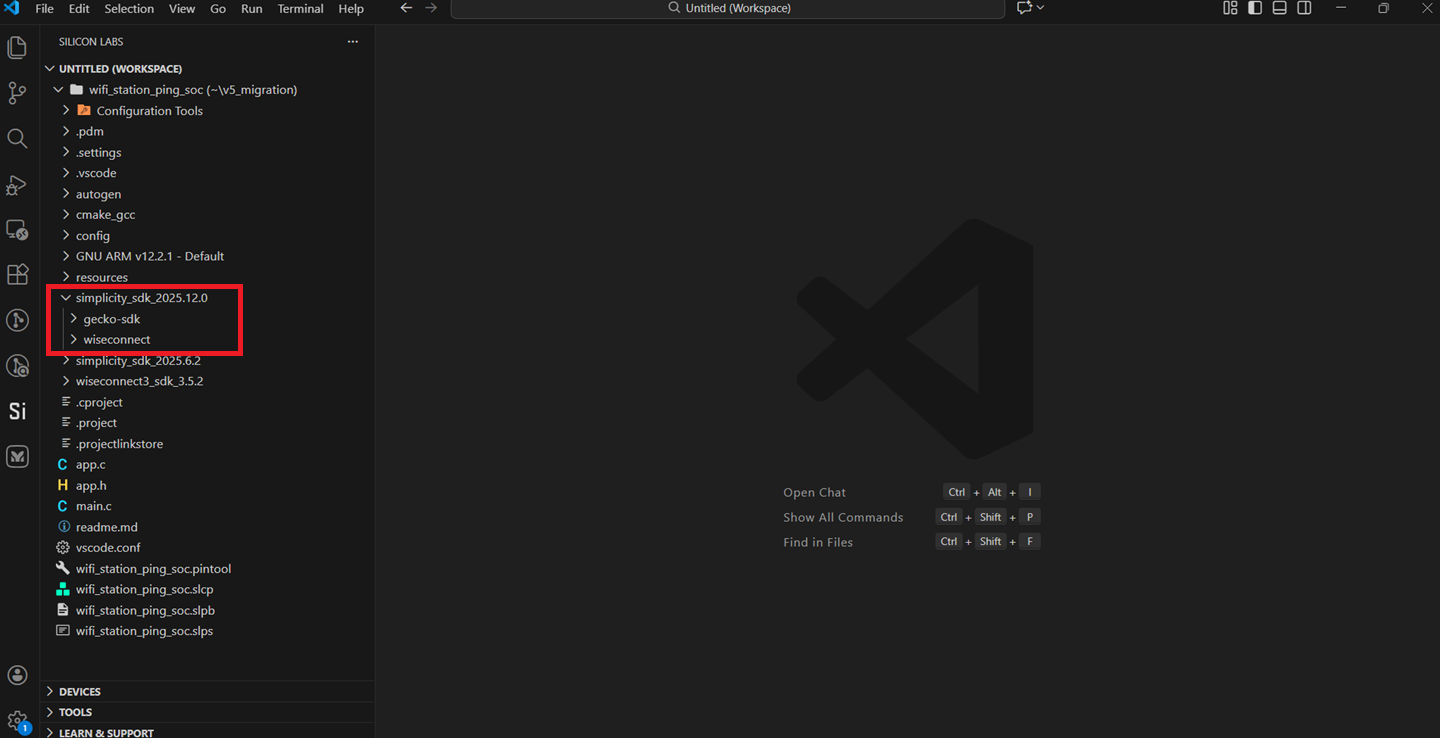
After upgrading, the latest WiSeConnect SDK version can be seen in the project pane in Simplicity Studio VS Code IDE.
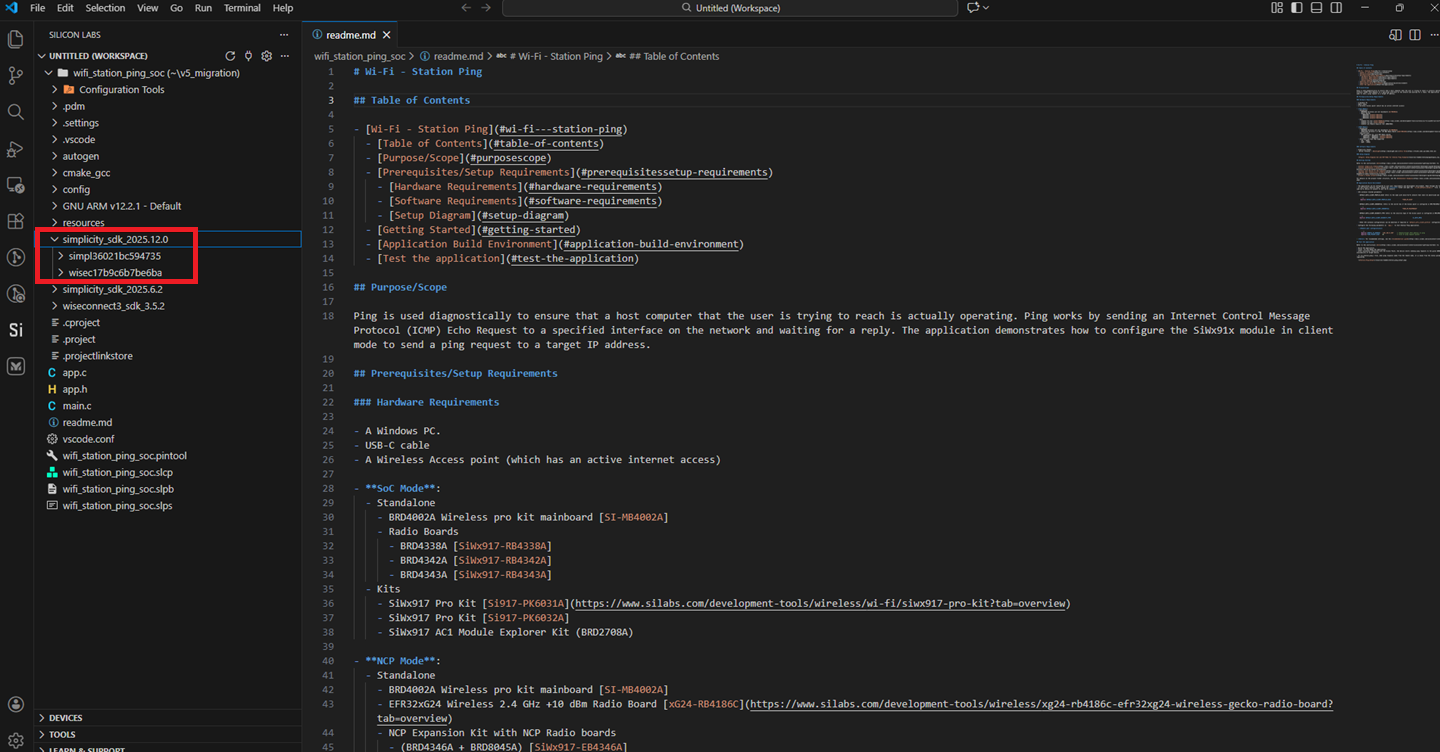
Restore the /autogen and /config files.
a. During migration, contents of
<project>/autogen/,<project>/config/and<wiseconnect3_sdk_x.x.x>folders are replaced with the new SDK files. The old project files are moved to trashed_modified_files folder (this folder is excluded from build, and can be used as a migration reference).b. To preserve the functionality, merge the project related file changes from the existing project (with old SDK) to the newly migrated project.
c. There can be newly added files and changes in the existing files. It is recommended to compare both the old and new
configandautogenfolders and incorporate necessary changes from the old project files.Note: Step-5 is crucial to restore all the peripheral pin mappings and configurations needed for the successful project migration.#
Build and run the project as usual.
Note: After upgrading the project, the WiSeConnect extension version displayed in Simplicity Studio may still show the previous version number. This is a known Studio UI issue and does not affect the success of the project upgrade.
Project Migration with multiple SDKs in preferences#
If a prompt appears, select the SDK of choice and click VERIFY
Once the compatibility is verified, click on UPGRADE for upgrading the project to the selected SDK.
After upgrading, the latest WiSeConnect SDK version can be seen in the project pane in Simplicity Studio VS Code IDE.
Restore the /autogen and /config files.
a. During migration, contents of
<project>/autogen/,<project>/config/and<wiseconnect3_sdk_x.x.x>folders are replaced with the new SDK files. The old project files are moved to trashed_modified_files folder (this folder is excluded from build, and can be used as a migration reference).b. To preserve the functionality, merge the project related file changes from the existing project (with old SDK) to the newly migrated project.
c. There can be newly added files and changes in the existing files. It is recommended to compare both the old and new
configandautogenfolders and incorporate necessary changes from the old project files.Note: Step-6 is crucial to restore all the pin mappings and configurations needed for the successful project migration.#
Build and run the project as usual.
Note: After upgrading the project, the WiSeConnect extension version displayed in Simplicity Studio may still show the previous version number. This is a known Studio UI issue and does not affect the success of the project upgrade.
Note:#
Some projects contain custom folders (other than the WiSeConnect SDK), which results in compilation errors after project migration, such as undefined or undeclared macros, functions, or variables. You need to resolve these issues manually.
API and predefined terminology changes across SDKs are documented in the migration guide. Refer to this guide for understanding and resolving any further issues in the project.
General Source Control Information for Project Configurator Projects:#
File/Folder | Purpose |
|---|---|
.slcp, .slps and .pintool | The main Project Configurator files |
config | Contains the configuration header files for all of the software components used in the project. Changes in these header files are reflected in the Project Configurator and vice versa. |
autogen | Contains files created by the Project Configurator based on the installed software components and the files in the |