Application Development in Simplicity Studio#
Starting Application Development#
Developing a Bluetooth application consists of two main steps: defining the GATT database structure and defining the event handlers for events such as connection_opened, connection_closed, and so on.
More Demos and Examples lists the various examples available in the SDK. The most common starting point for application development is the SoC Empty example. This project contains a simple GATT database (including the Generic Access service, Device Information service, and OTA service) and a while loop that handles some events raised by the stack. You can extend both the GATT database and the event handlers of this example according to your needs.
Note: Beginning with Bluetooth SDK version 2.7.0.0, all devices must be loaded with the Gecko Bootloader as well as the application. While you are getting started, the easiest way to do this is to load any of the precompiled demo images that come with the bootloader configured as part of the image. When you flash your application it overwrites the demo application, but the bootloader remains. Subsequently you may wish to build your own bootloader, as described in UG266: Silicon Labs Gecko Bootloader User’s Guide for GSDK 3.2 and Lower or UG489: Silicon Labs Gecko Bootloader User’s Guide for GSDK 4.0 and Higher.
New Project creation is done through three dialogs:
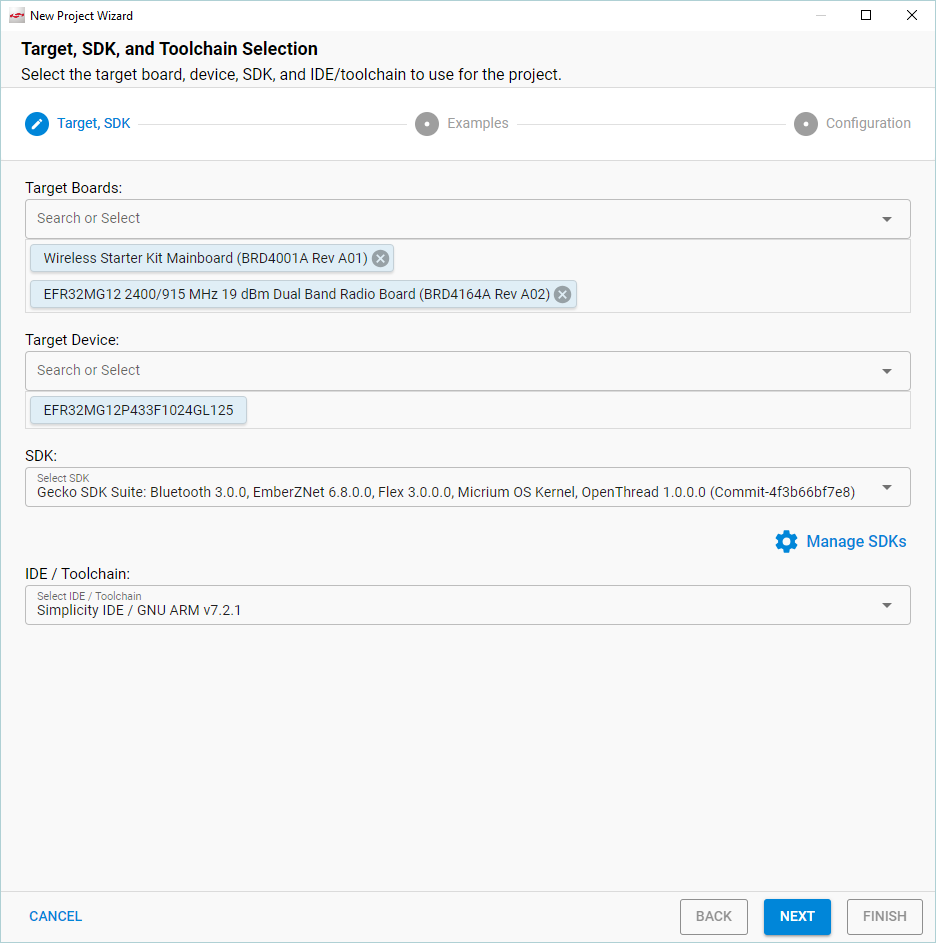
Target, SDK, and Toolchain
Examples

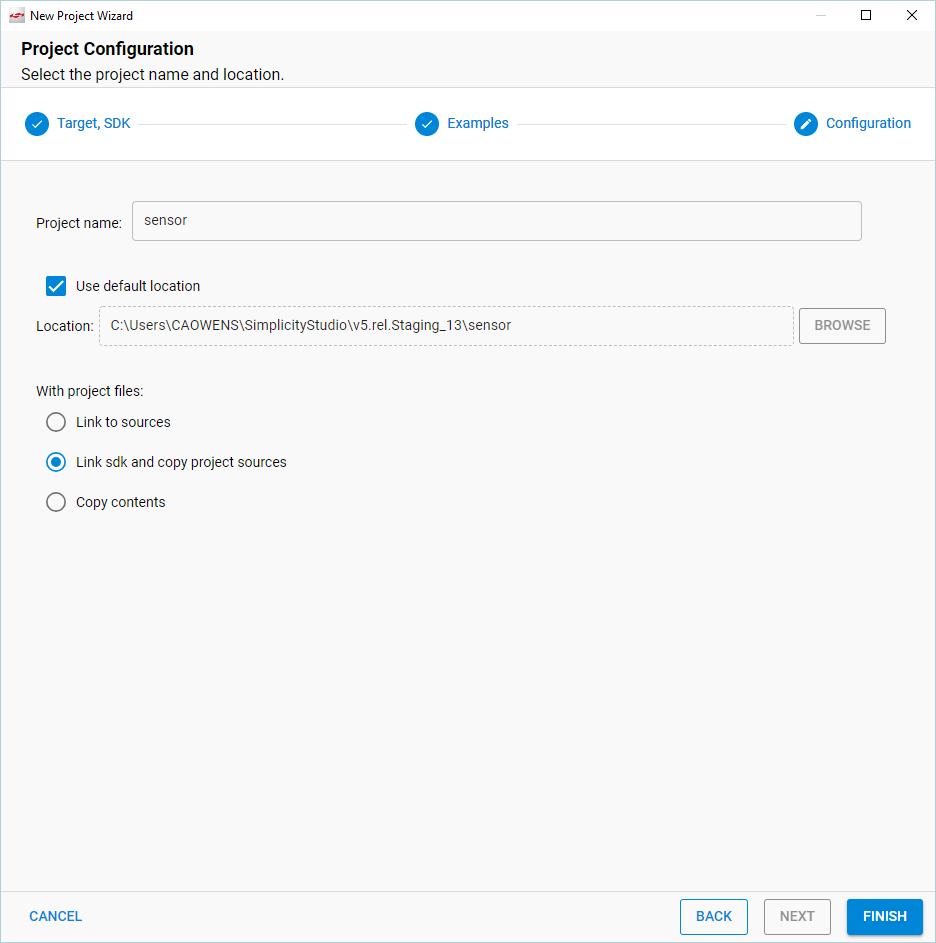
Configuration
An indicator at the top of the dialog shows you where you are.

You can start a project from different locations in the Launcher Perspective, as described in the Simplicity Studio 5 User's Guide. While you are getting started, we suggest starting from the File menu, as that takes you through all three of the above dialogs.
Select New >> Silicon Labs Project Wizard.
Review your SDK and toolchain. If you wish to use IAR instead of GCC, be sure to change it here. Once you have created a project it is difficult to change toolchains. Click NEXT.
On the Example Project Selection dialog, filter on Bluetooth and select Bluetooth - SoC Empty. Click NEXT.
On the Project Configuration dialog, rename your project if you wish. Note that if you change any linked resource, it is changed for any other project that references it. While you are getting started the default choice to include project files but link to the SDK is best. Click FINISH. If the example has documentation, the project opens on a readme tab. Note that a Simplicity IDE perspective control is now included in the upper right of the screen.
GATT Database#
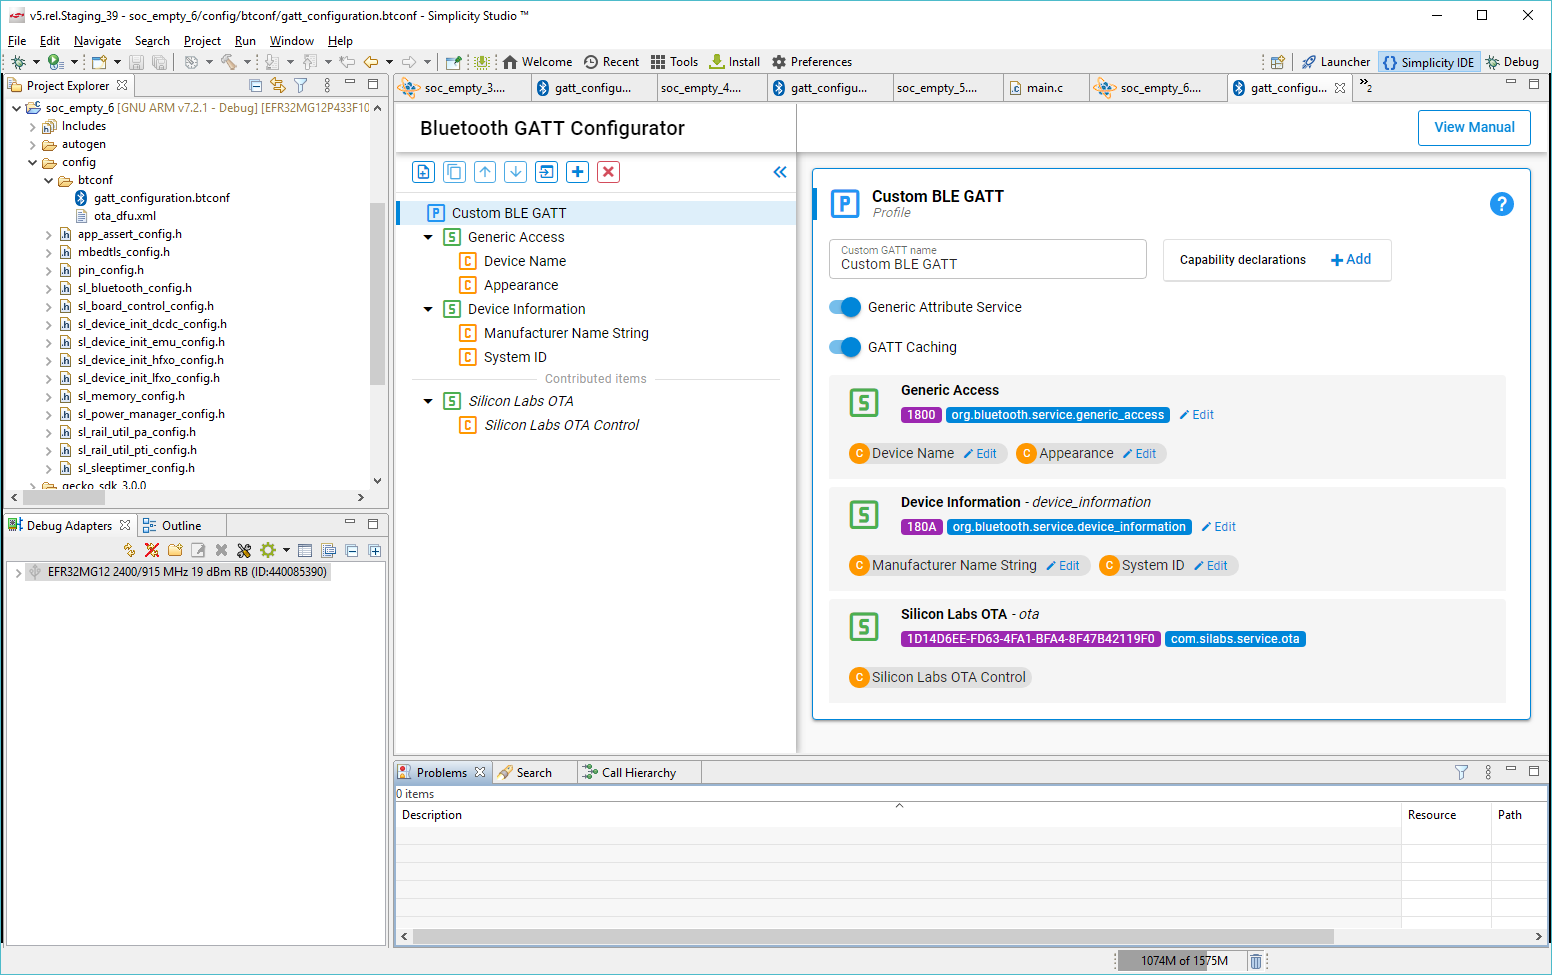
A visual GATT Configurator is available on the gatt_configuration.btconf tab when you create the project, to help you create your own GATT database with a few clicks.
You can create your own database at this point, or return to it later either by double-clicking the gatt_configuration.btconf file under your project in Project Explorer, or through the Project Configurator’s Advanced > GATT Configurator component. For more information, see section The GATT Configurator.
A reference for each characteristic is generated and defined in gatt_db.h. You can use this reference in your code to read / write the values of the characteristics in the local GATT database with sl_bt_gatt_server_read_attribute_value() / sl_bt_gatt_server_write_attribute_value() commands.
You can also build the GATT database from the application using the GATT database API. In this case you need to install the Dynamic GATT Database software component on the Project Configurator Software Components tab.
You will find the event handlers in the main loop in app.c. You can extend this list with further event handlers. The full list of events – and stack commands – can be found in the Bluetooth Stack API Reference.
Component Configuration#
Bluetooth SDK v3.x projects are based on a Gecko Platform component-based architecture. Software features and functions can be installed and configured through Simplicity Studio’s Component Editor. When you install a component, the installation process will:
Copy the corresponding SDK files from the SDK folder into the project folder.
Copy all the dependencies of the given component into the project folder.
Add new include directories to the project settings.
Copy the configurations files into the /config folder.
Modify the corresponding auto-generated files to integrate the component into the application.
Additionally, “init” type software components will implement the initialization code for a given component, utilizing their corresponding configuration file as input.
Some software components (like OTA DFU) will fully integrate into the application to perform a specific task without the need of any additional code, while other components provide an API to be used in the application.
Note: All EFR32 parts have a unique RSSI offset. In addition, board, antenna and enclosure design can also impact RSSI. When creating a new project, install the RAIL Utility, RSSI component. This feature includes the default RSSI Offset Silicon Labs has measured for each part. This offset can be modified if necessary, after RF testing of your complete product.
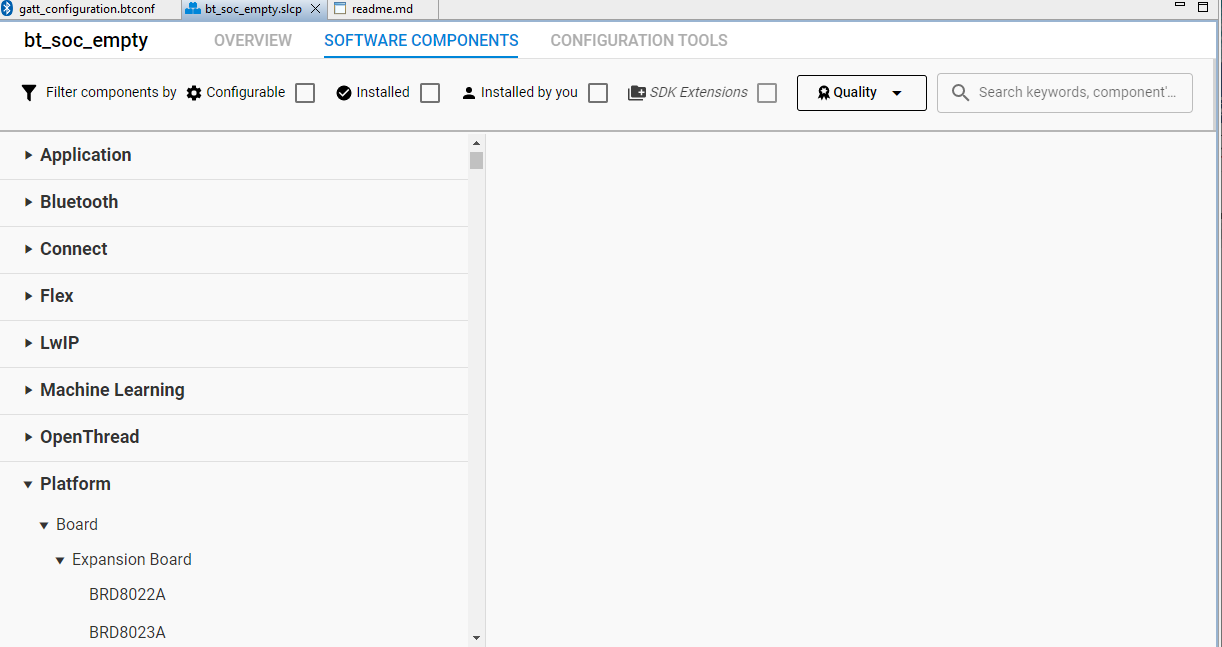
To see the component library, click the <project-name>.slcp tab of your project, and click Software Components. A number of filters as well as a keyword search are available to help you explore the various component categories. Note that components for all SDKs are presented.
Components installed in the project are checked (1) and can be uninstalled. Configurable components are indicated by a gear symbol (2).
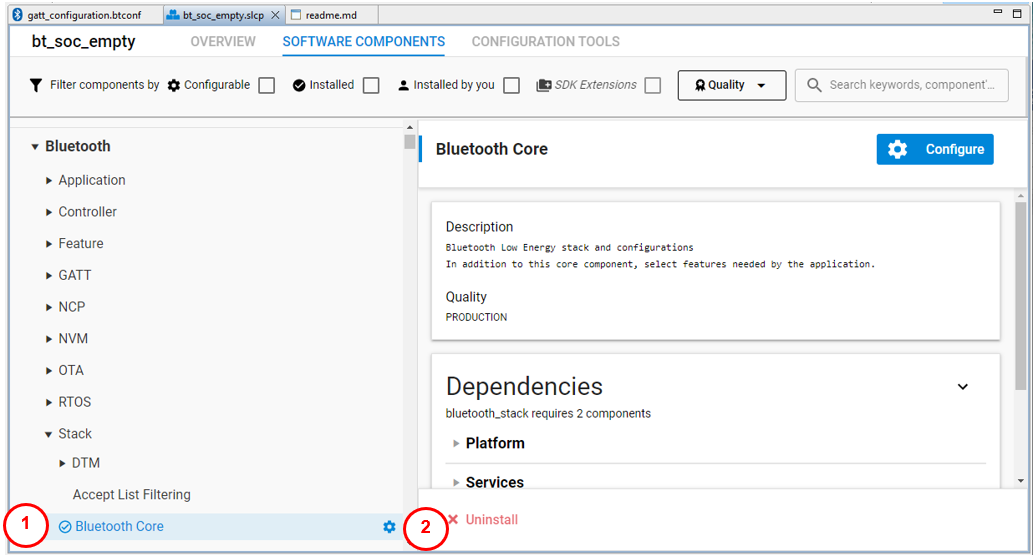
Click Configure to open the Component Editor and see a configurable component’s parameters.
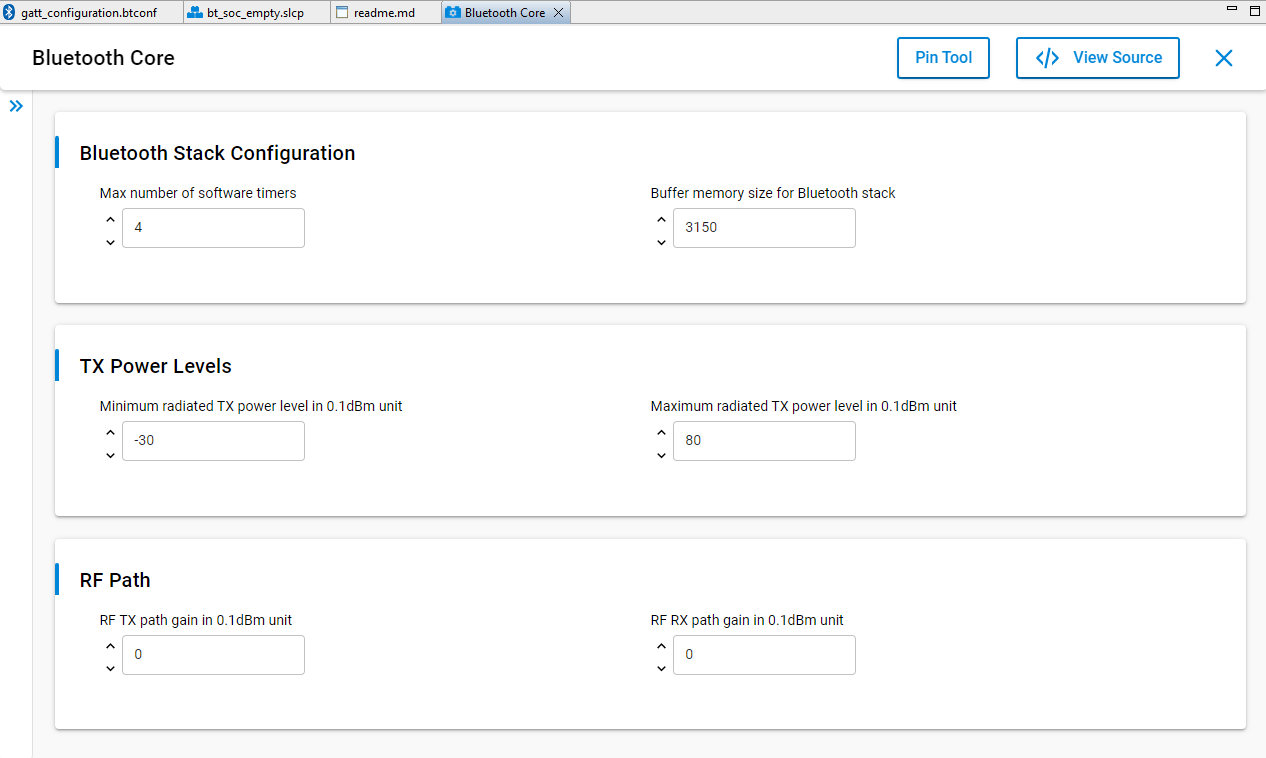
As you change component configurations, your changes are automatically saved and project files are automatically generated. You can see generation progress in the lower right corner of the Simplicity IDE. Wait until generation is complete before building the application image.

Building and Flashing#
To build and debug your project click Debug (bug icon) on the Simplicity IDE It will build and download your project and open up the Debug perspective. Click Play (next to Debug) to start running you project on the device.

Enabling Field Updates#
Deploying new firmware for devices in the field can be done by UART DFU (Device Firmware Update) or, for SoC applications, OTA DFU. For more information on each of these methods refer to AN1086: Using the Gecko Bootloader with the Silicon Labs Bluetooth Applications.
Development Tools#
The GATT Configurator#
Every Bluetooth connection has a GATT client and a GATT server. The server holds a GATT database: a collection of Characteristics that can be read and written by the client. The Characteristics are grouped into Services, and the group of Services determines a Bluetooth Profile.
If you are implementing a GATT server (typically on the peripheral device), you have to define a GATT database structure. Clients (typically the central device) can also have a GATT database, even if no device will query it, so you can keep the default database structure in your code. This structure can either be designed in runtime using the dynamic GATT API or in compile-time using the GATT Configurator. For an SoC application, implementing a static GATT database with the GATT Configurator is recommended, because it ensures faster startup and lower memory consumption than you can achieve with dynamic GATT configuration.
The GATT Configurator is a simple-to-use tool to help you build your own GATT database. A list of project Profiles/Services/Characteristics/Descriptors is shown on the left and details about the selected item is shown on the right. An options menu is provided above the Profiles list.
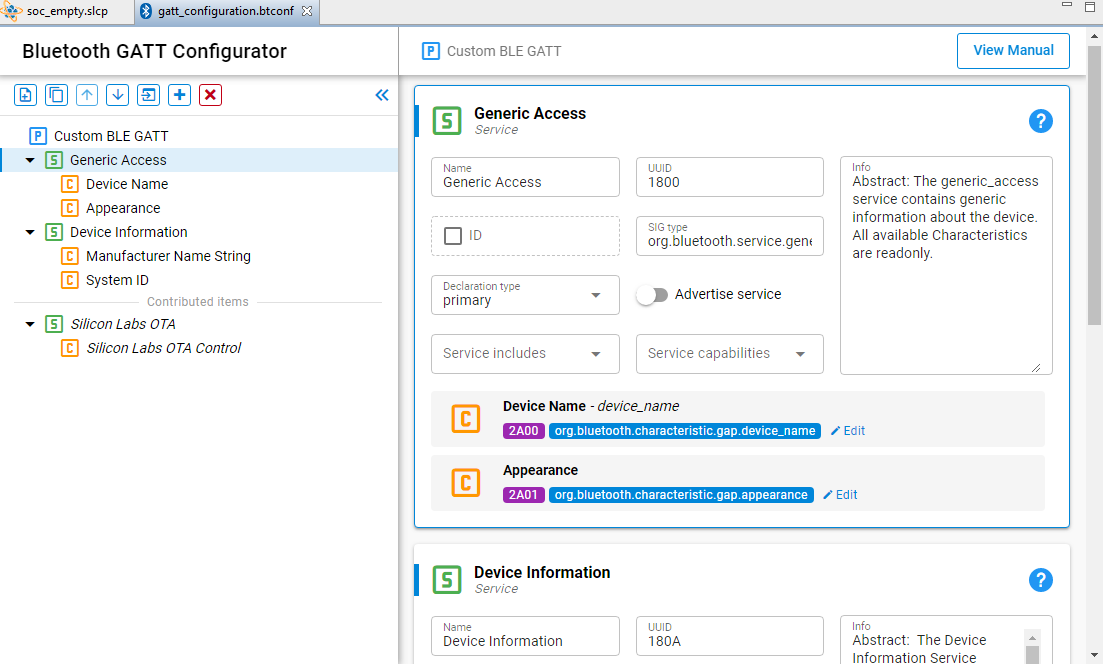
The GATT Configurator menu is:
![]()
![]()
Add an item.
Duplicate the selected item.
Move the selected item up.
Move the selected item down.
Import a GATT database.
Add Predefined.
Delete the selected item.
To add a custom service, click the Profile (Custom BLE GATT), and then click Add (1). To add a custom characteristic, select a service and then click Add (1). To add a predefined service/characteristic click Add Predefined (6). To learn more about the configurator see UG438: GATT Configurator User’s Guide for Bluetooth SDK v3.x.
You can find a detailed description of any Profile/Service/Characteristic/Descriptor on https://www.bluetooth.com/specifications/gatt.
Characteristics are generally complex structures of fields. If you want to know what fields a characteristic has, visit https://www.bluetooth.com/specifications/gatt/characteristics.
The Pin Tool#
Simplicity Studio 5 offers a Pin Tool that allows you to easily configure new peripherals or change the properties of existing ones. In the Project Configurator SOFTWARE COMPONENTS tab, expand the Advanced Configurators group and open the Pin Tool. The graphical view differs based on the chip.

The pin, function, and peripheral tabs in the configuration pane provide different modes of access. A search function also provided.
Use the Pin Tool to modify the pin configuration of the device. Software components control behavior in the project but must be associated with a peripheral, and generally need pin or function assignments. These pin or function assignments are most easily edited in the Component Editor for that component. The Pin Tool allows you to assign functions to pins. On all three dialogs, click EDIT next to a software component to go directly to the Component Editor for that component. Click NEW to go to the Project Configurator's SOFTWARE COMPONENTS tab, where you can install a component in the project so that it can be selected in the dialog.
For more information see the Simplicity Studio 5 User's Guide Pin Tool section.
Multi-Node Energy Profiler#
Multi-Node Energy profiler is an add-on tool, with which you can easily measure the energy consumption of your device in runtime. You can easily find peak and average consumption, and check for sleep mode current.
Note: The SDK sample apps for EFR32BG22 enable EM2 debug (see init_mcu.c), which adds current consumption overhead compared to the datasheet values.
To profile the current project, click Tools in the menu bar and select Energy Profiler or right-click on the <project>.slcp file in the Project Explorer view and select Profile as / Simplicity Energy Profiler target. This automatically builds your project, uploads it to the device, and starts Energy Profiler. A new Energy Profiler perspective appears, shown in the following figure.
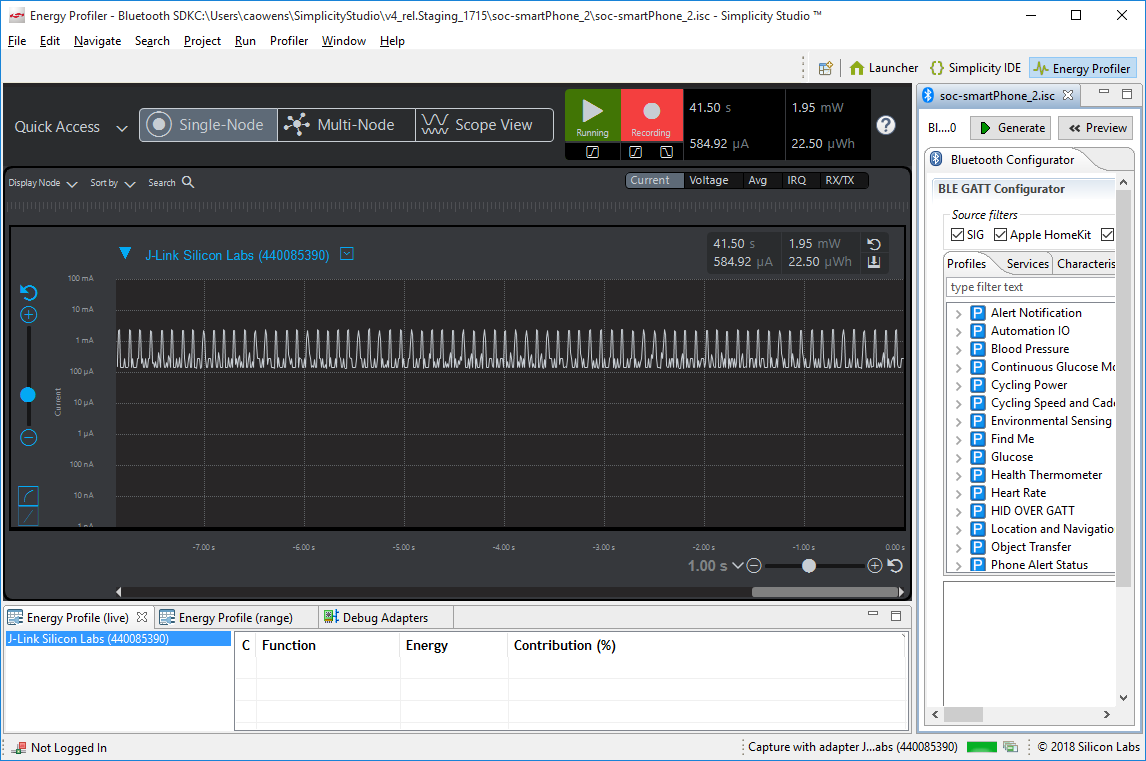
See UG343: Multi-Node Energy Profiler User’s Guide for details on how to use this tool. You can switch easily between Simplicity IDE and Energy Profiler perspectives using the Perspective buttons in the upper right corner of your current perspective.

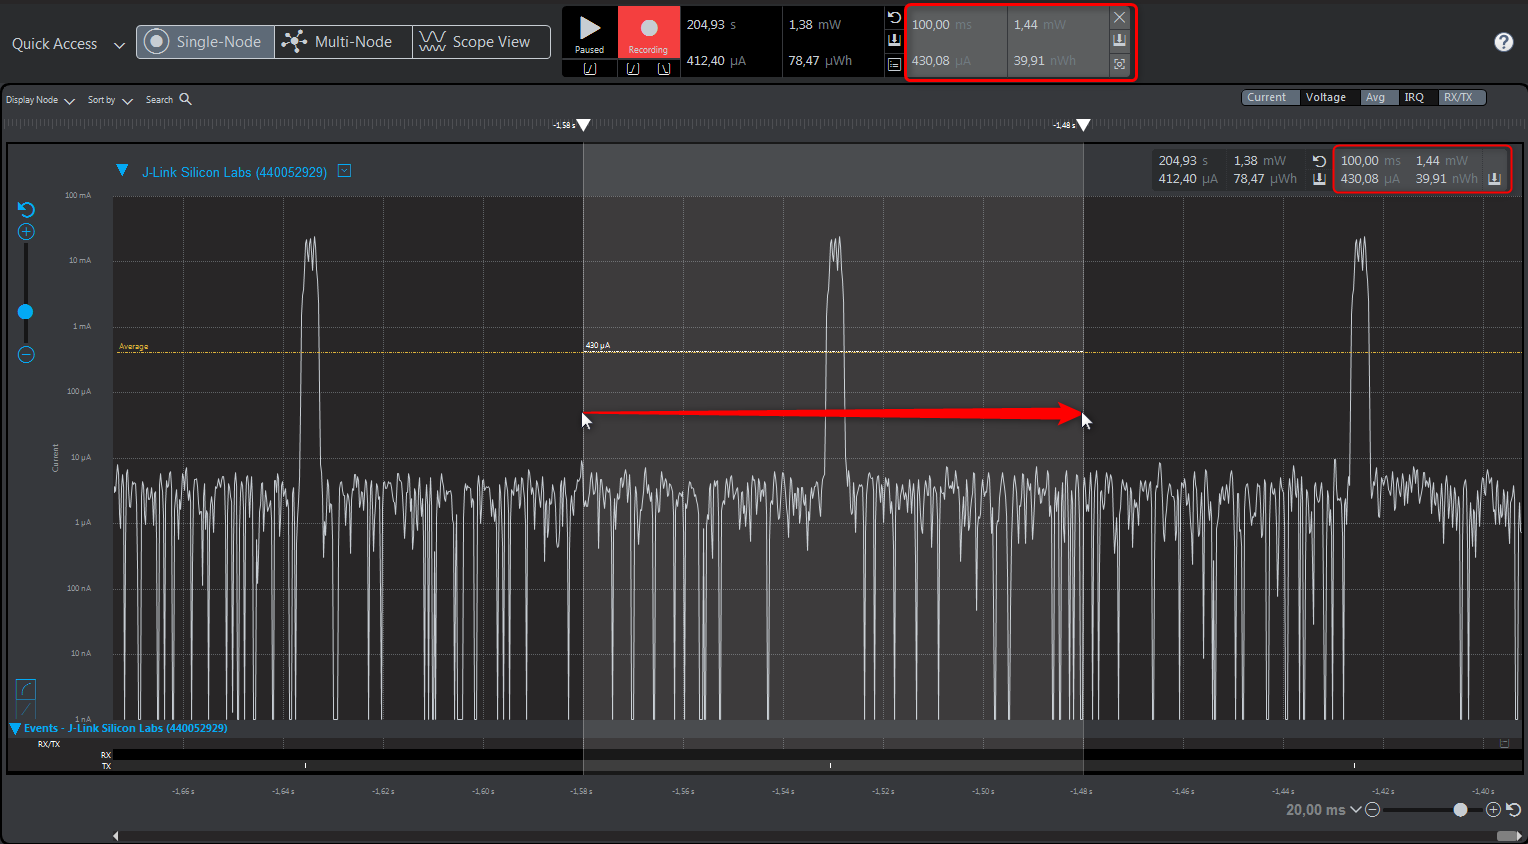
You can see peaks in the energy consumption diagram. Pause profiling by clicking Play, click one of the peaks, and zoom in with time axis (y-axis) zoom until you see three distinguishable peaks. These represent the three advertisement packets sent on the three advertisement channels. You can also see the three corresponding Tx events in the Rx/Tx bar below, provided that you enabled Rx/Tx view in the upper right corner. Note that the maximum consumption may now be greater than it appeared on the diagram before you zoomed in. This is because in zoomed-out mode, the displayed values are averaged. If you need exact values, always zoom in.
To measure average consumption, simply click and drag your mouse over a time interval. A new window appears in the upper right corner showing consumption information for the given interval. Bluetooth communication typically has a periodicity: the advertisement or the connection interval. It is recommended to measure average over an advertisement or connection interval to obtain a proper average consumption. Overall average is measured as well, but this is influenced by transient events.
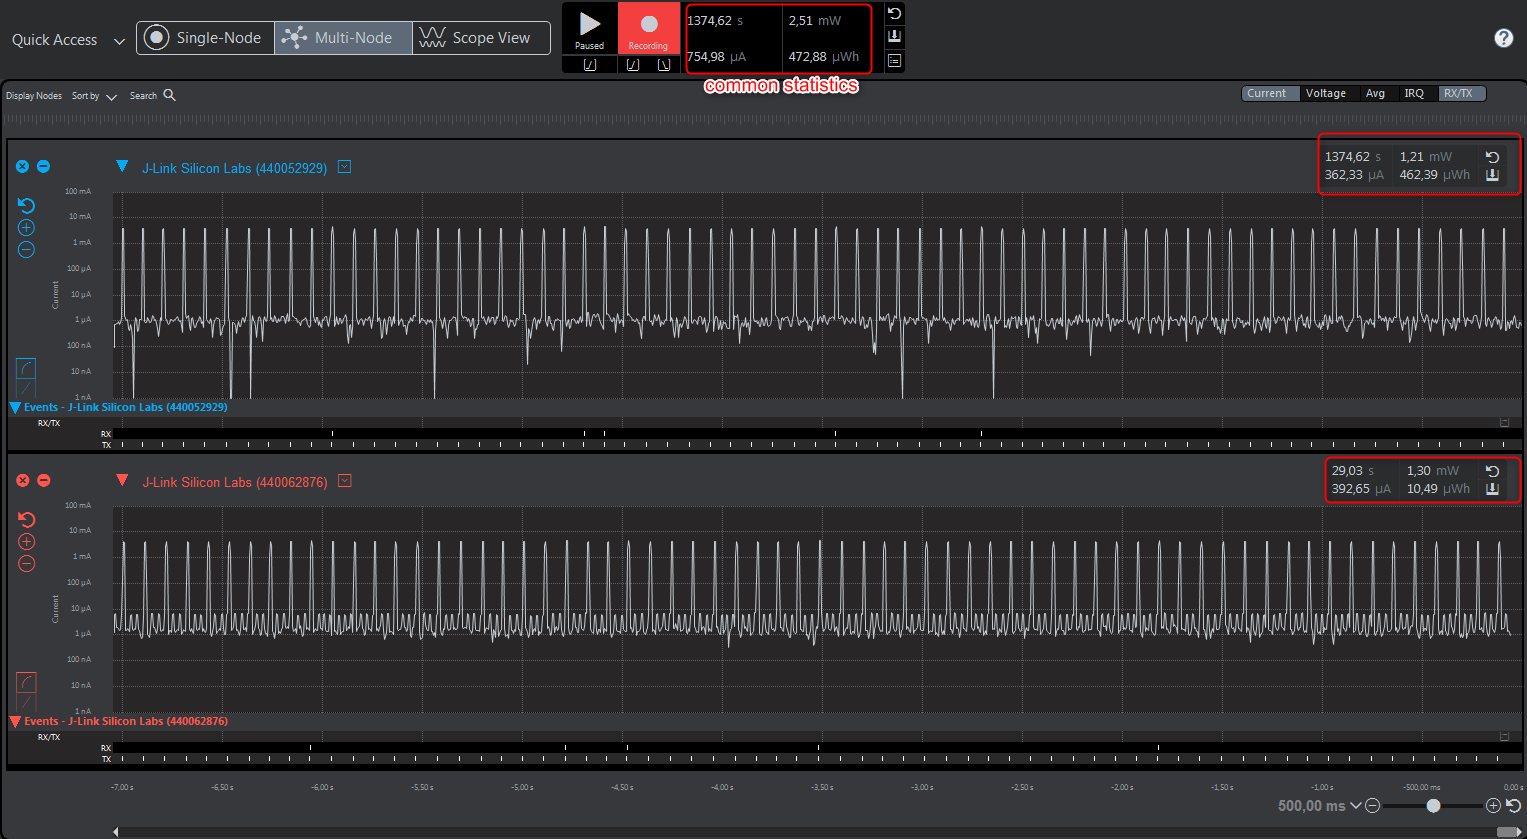
Multi-node Energy Profiler is also able to simultaneously measure the consumption of multiple devices. To start measuring a new device click the Quick Access menu (upper left corner) and select Start Energy Capture. To stop measuring, click the Quick Access menu, and select End/Save session.
To learn more about how to use this tool, see the Simplicity Studio 5 User's Guide.
Network Analyzer#
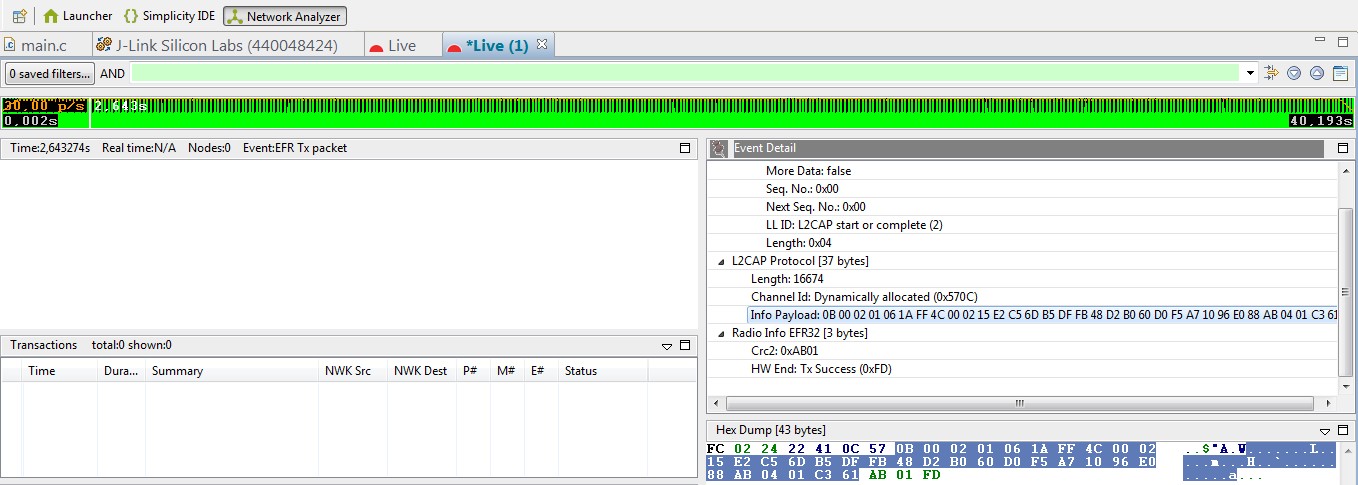
Silicon Labs Network Analyzer is a free-of-charge packet capture and debugging tool that can be used to debug Bluetooth connectivity between Wireless Geckos and other Bluetooth devices. It significantly accelerates the network and application development process with graphical views of network traffic, activity, and duration.
The Packet Trace application captures the packets directly from the Packet Trace Interface (PTI) available on the Wireless Gecko SoCs and modules. It therefore provides a more accurate capture of the packets compared to air-based capture.
See AN1317: Using Network Analyzer with Bluetooth® Mesh and Low Energy for more information.
Simplicity Commander#
Simplicity Commander is a simple flashing tool, which can be used to flash firmware images, erase flash, lock and unlock debug access, and write-protect flash pages via the J-Link interface. Both GUI and CLI (Command Line Interface) are available. See UG162: Simplicity Commander Reference Guide for more information.

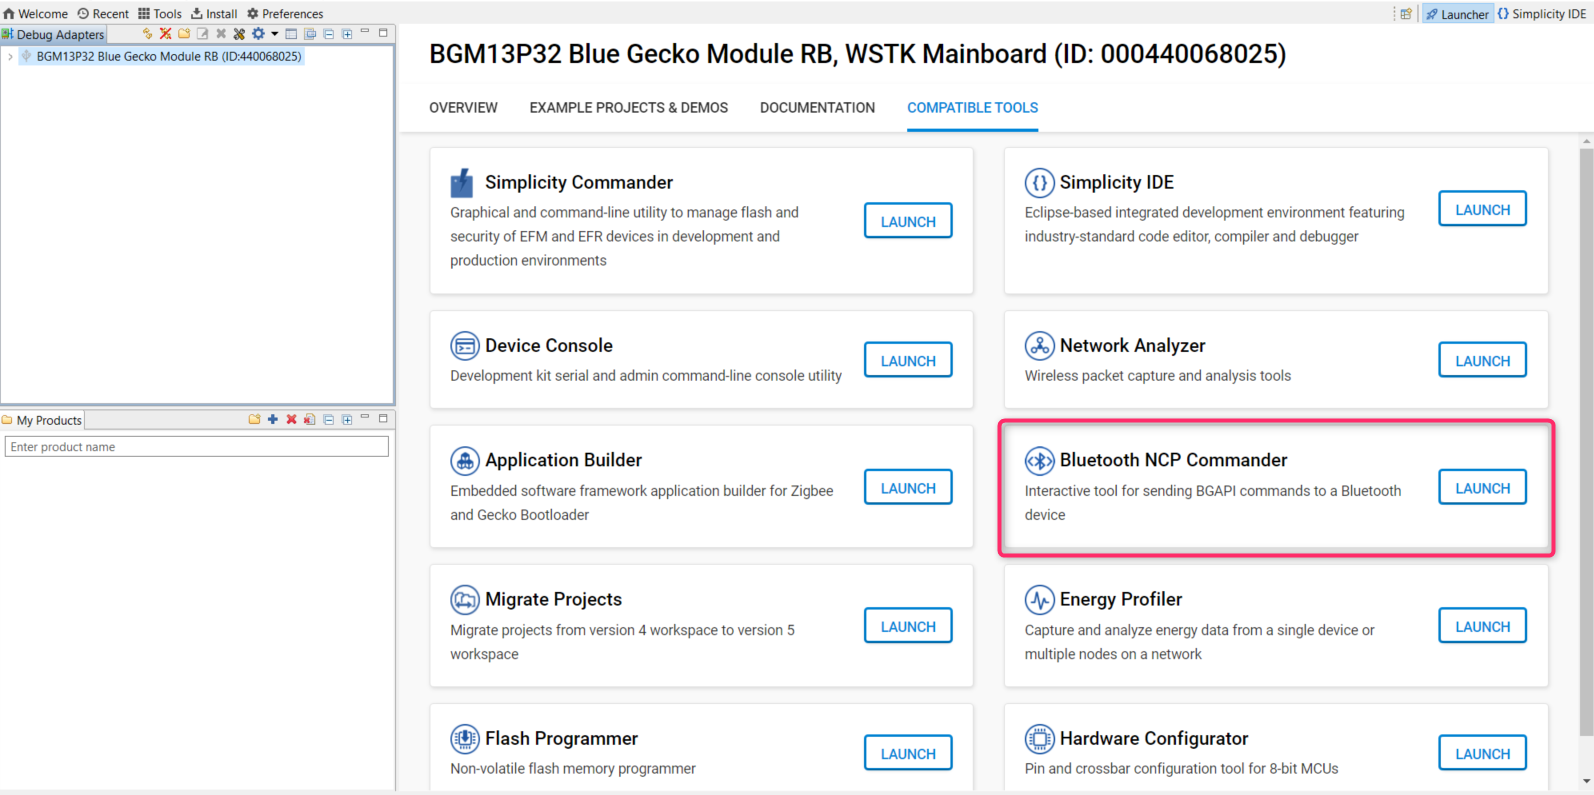
Bluetooth NCP Commander#
The Bluetooth NCP Commander application can be used to test and evaluate Bluetooth SoCs and modules, and it can be used to control the Bluetooth hardware using the BGAPI Serial Protocol (NCP) over a Serial/UART interface. It also supports building a GATT database dynamically on the target device. See AN1259: Using the Silicon Labs v3.x Bluetooth® Stack in Network Co-Processor Mode for more information.
Bluetooth NCP Commander is also available as a standalone application, located in:
C:\SiliconLabs\SimplicityStudio\v5\developer\adapter_packs\ncp_commander
To find the standalone version on MAC, find Simplicity Studio, right-click and select Show Package Content. The NCP commander can be found under:
developer\adapter_packs\ncp_commander
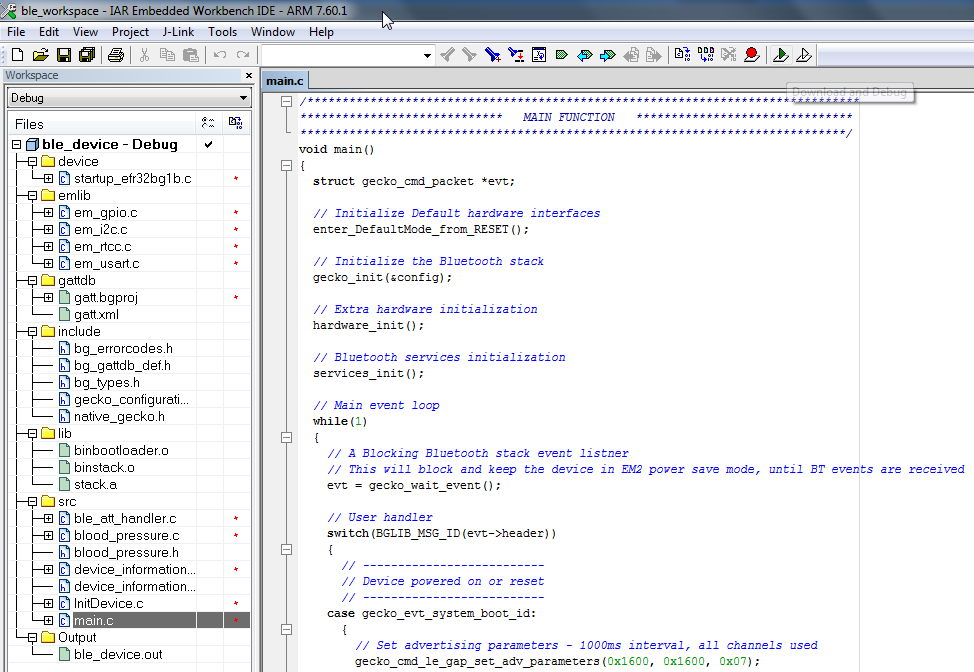
IAR Embedded Workbench#
IAR’s Embedded Workbench can also be used as an IDE for developing and debugging Bluetooth applications. You must use the version of IAR that is compatible with the SDK version. See the SDK's release notes for compatible version information.