Pin Tool#
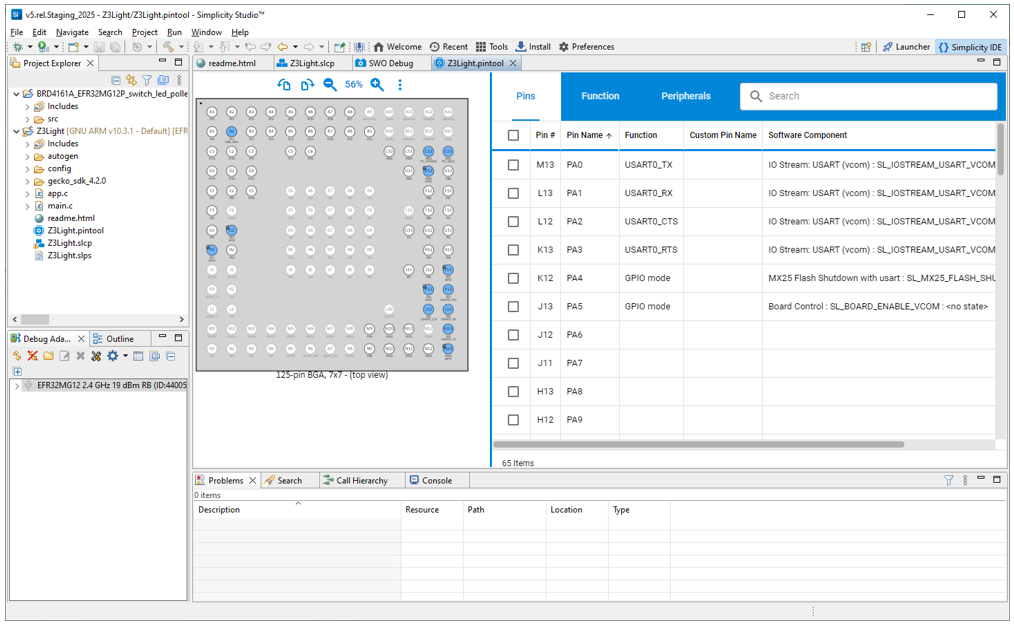
Simplicity Studio® 5 (SSv5) offers a Pin tool that allows you to easily configure new peripherals or change the properties of existing ones. In the Project Configurator, open the CONFIGURATION TOOLS tab and open the Pin Tool. Alternatively, double-click the file <project>.pintool in the Project Explorer view. The graphical view differs based on the chip.
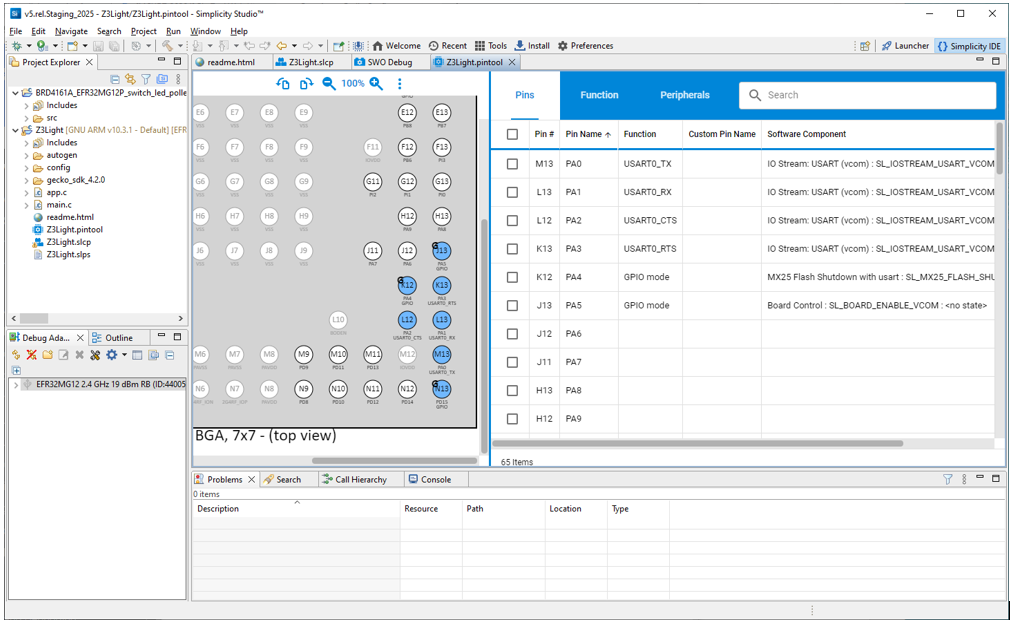
For more complex layouts, you can use the zoom controls above the graphic to see detail and the rotate controls to rotate the image.
Right-click anywhere on the image or click the Additional Functions icon in the upper right of the image to open a menu where you can:
Save Diagram as Picture: Saves the graphic as a .png file
Module Configuration Report: Produces an .htm file showing modules with signals assigned to pins. If a module has a signal assigned to a pin, the module and signal/pin assignment appear in the report.
Pin Configuration Report: Produces an .htm file showing all the user modifiable pins of the chip and the current signal assignment, if any.
Click a pin on the graphic to select it. The corresponding row is checked in the right pane's tabbed interface.
The pin, function, and peripheral tabs in the configuration pane provide different modes of access. A search function also provided
Modifying Pin Configurations#
Use the Pin Tool to modify the pin configuration of the device. Software components control behavior in the project but must be associated with a peripheral, and generally need pin or function assignments. These pin or function assignments are most easily edited in the Component Editor for that component. The Pin Tool allows you to assign functions to pins. On all three dialogs, click EDIT next to a software component to go directly to the Component Editor for that component. Click NEW to go to the Project Configurator's SOFTWARE COMPONENTS tab, where you can install a component in the project so that it can be selected in the dialog.
When you are finished with the configuration, click APPLY or APPLY AND CLOSE to save changes. Configuration code changes are automatically generated.
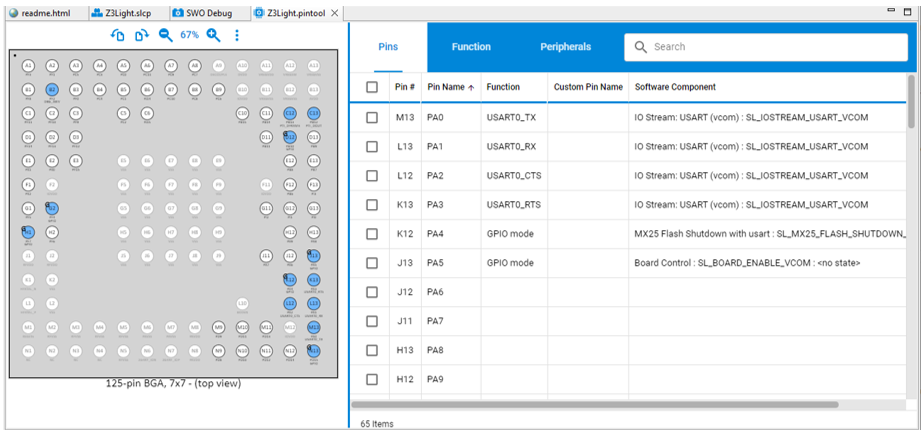
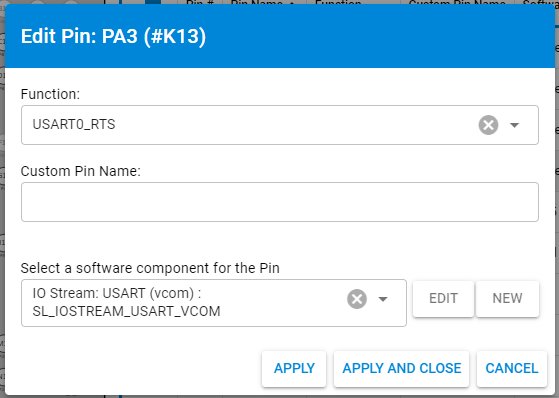
The Pins Tab#
Click on any pin's row to open the Edit Pin dialog.
The function assigned to the pin: To apply a function or change a function, drop down the function list and select.
The Custom Pin Name (optional): Add or edit the custom pin name.
The Software Component: The component associated with the function is shown.
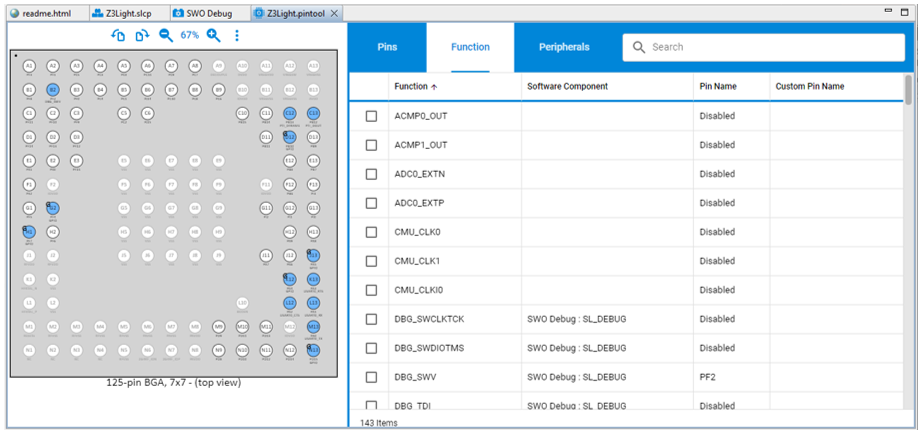
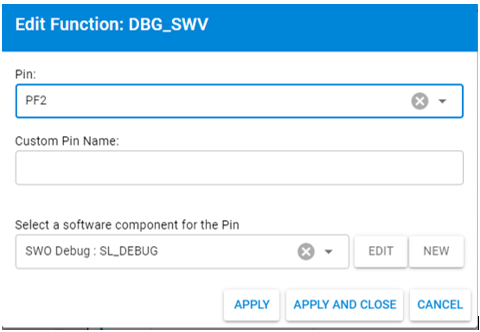
The Functions Tab#
Click on any function's row to open the Edit Function dialog.
The pin to which the function is assigned: Select a pin, or disable.
The Custom Pin Name (optional): Add or edit the custom pin name.
The Software Component: The component associated with the function is shown. A pin must be selected.
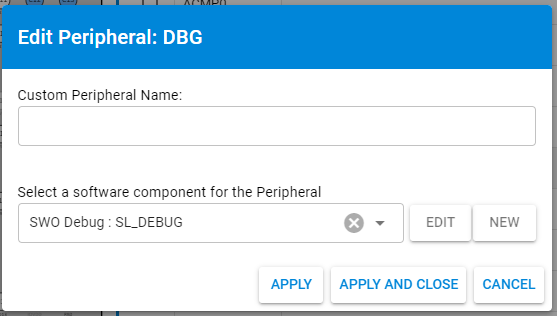
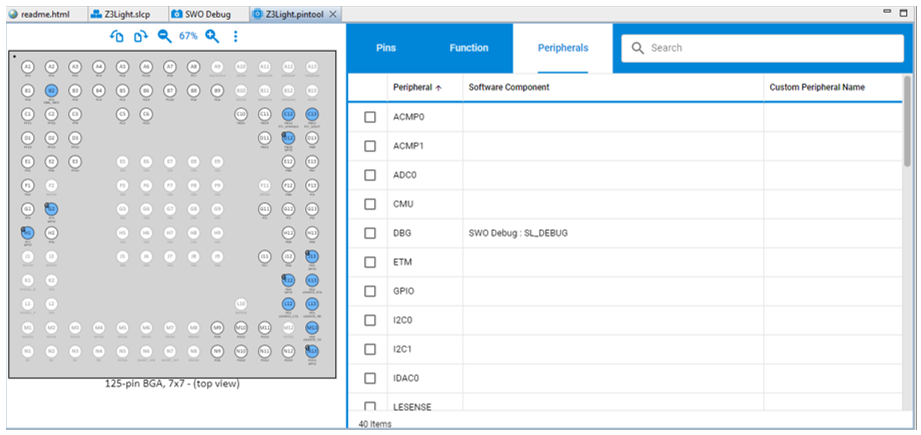
The Peripherals Tab#
Click on any peripheral's row to open the Edit Peripherals dialog.
The Custom Peripheral Name: Add or edit the custom peripheral name.
The Software Component: The component associated with the peripheral.