Co-Processor Configuration#
Silicon Labs offers many different multiprotocol configurations (Multiprotocol RCP, Zigbee NCP with OT RCP, etc.). Depending on your multiprotocol configuration, you will need to choose the correct radio image for the EFR32 device.
EFR32 Co-processor Setup: Using Pre-Compiled Images#
Simplicity Studio has precompiled demo's of NCP / RCP projects for certain boards along with sample projects. First make sure you have the latest SDK installed in Simplicity Studio.
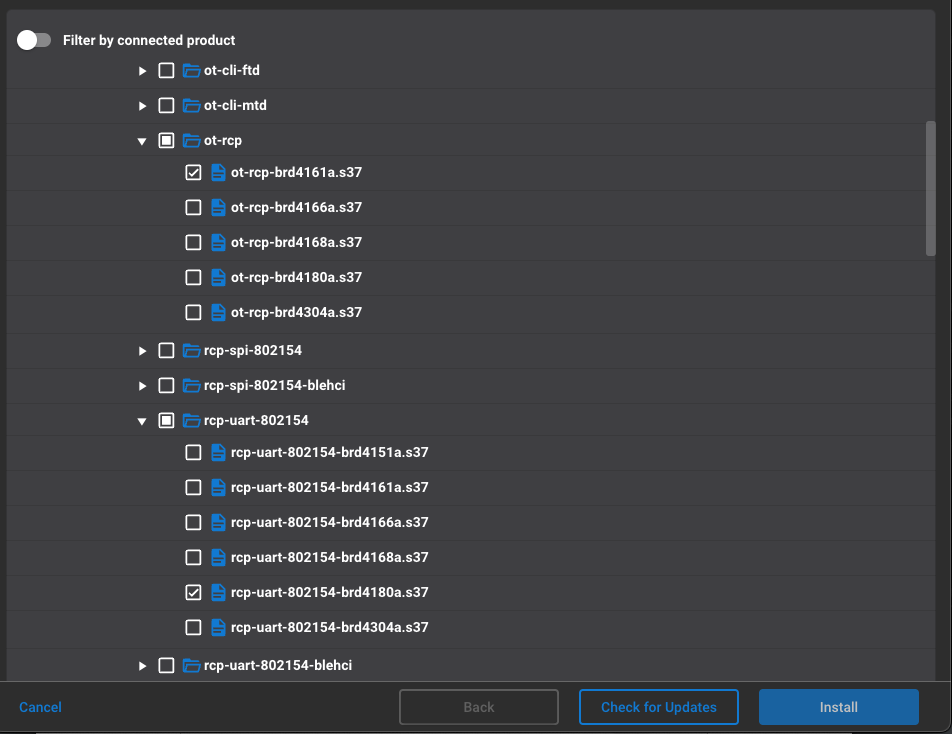
On the toolbar, click Install. In the resulting Installation Manager dialog, click Manage installed packages.
On the Assets tab, turn off Filter by connected product. Expand the target release and browse for the file; for example
protocol\openthread\demos\rcp-uart-802154.Select the .s37 file compatible with your board and click Install.

EFR32 Co-processor Setup: Building Radio Image#
To build a co-processor image for any board in Simplicity Studio 6, navigate to the Projects panel and select Create New Project.
On the Example Project Selection, type concurrent as the keyword filter to find RCP projects and dynamic and NCP as the keywords to filter the DMP NCP projects.
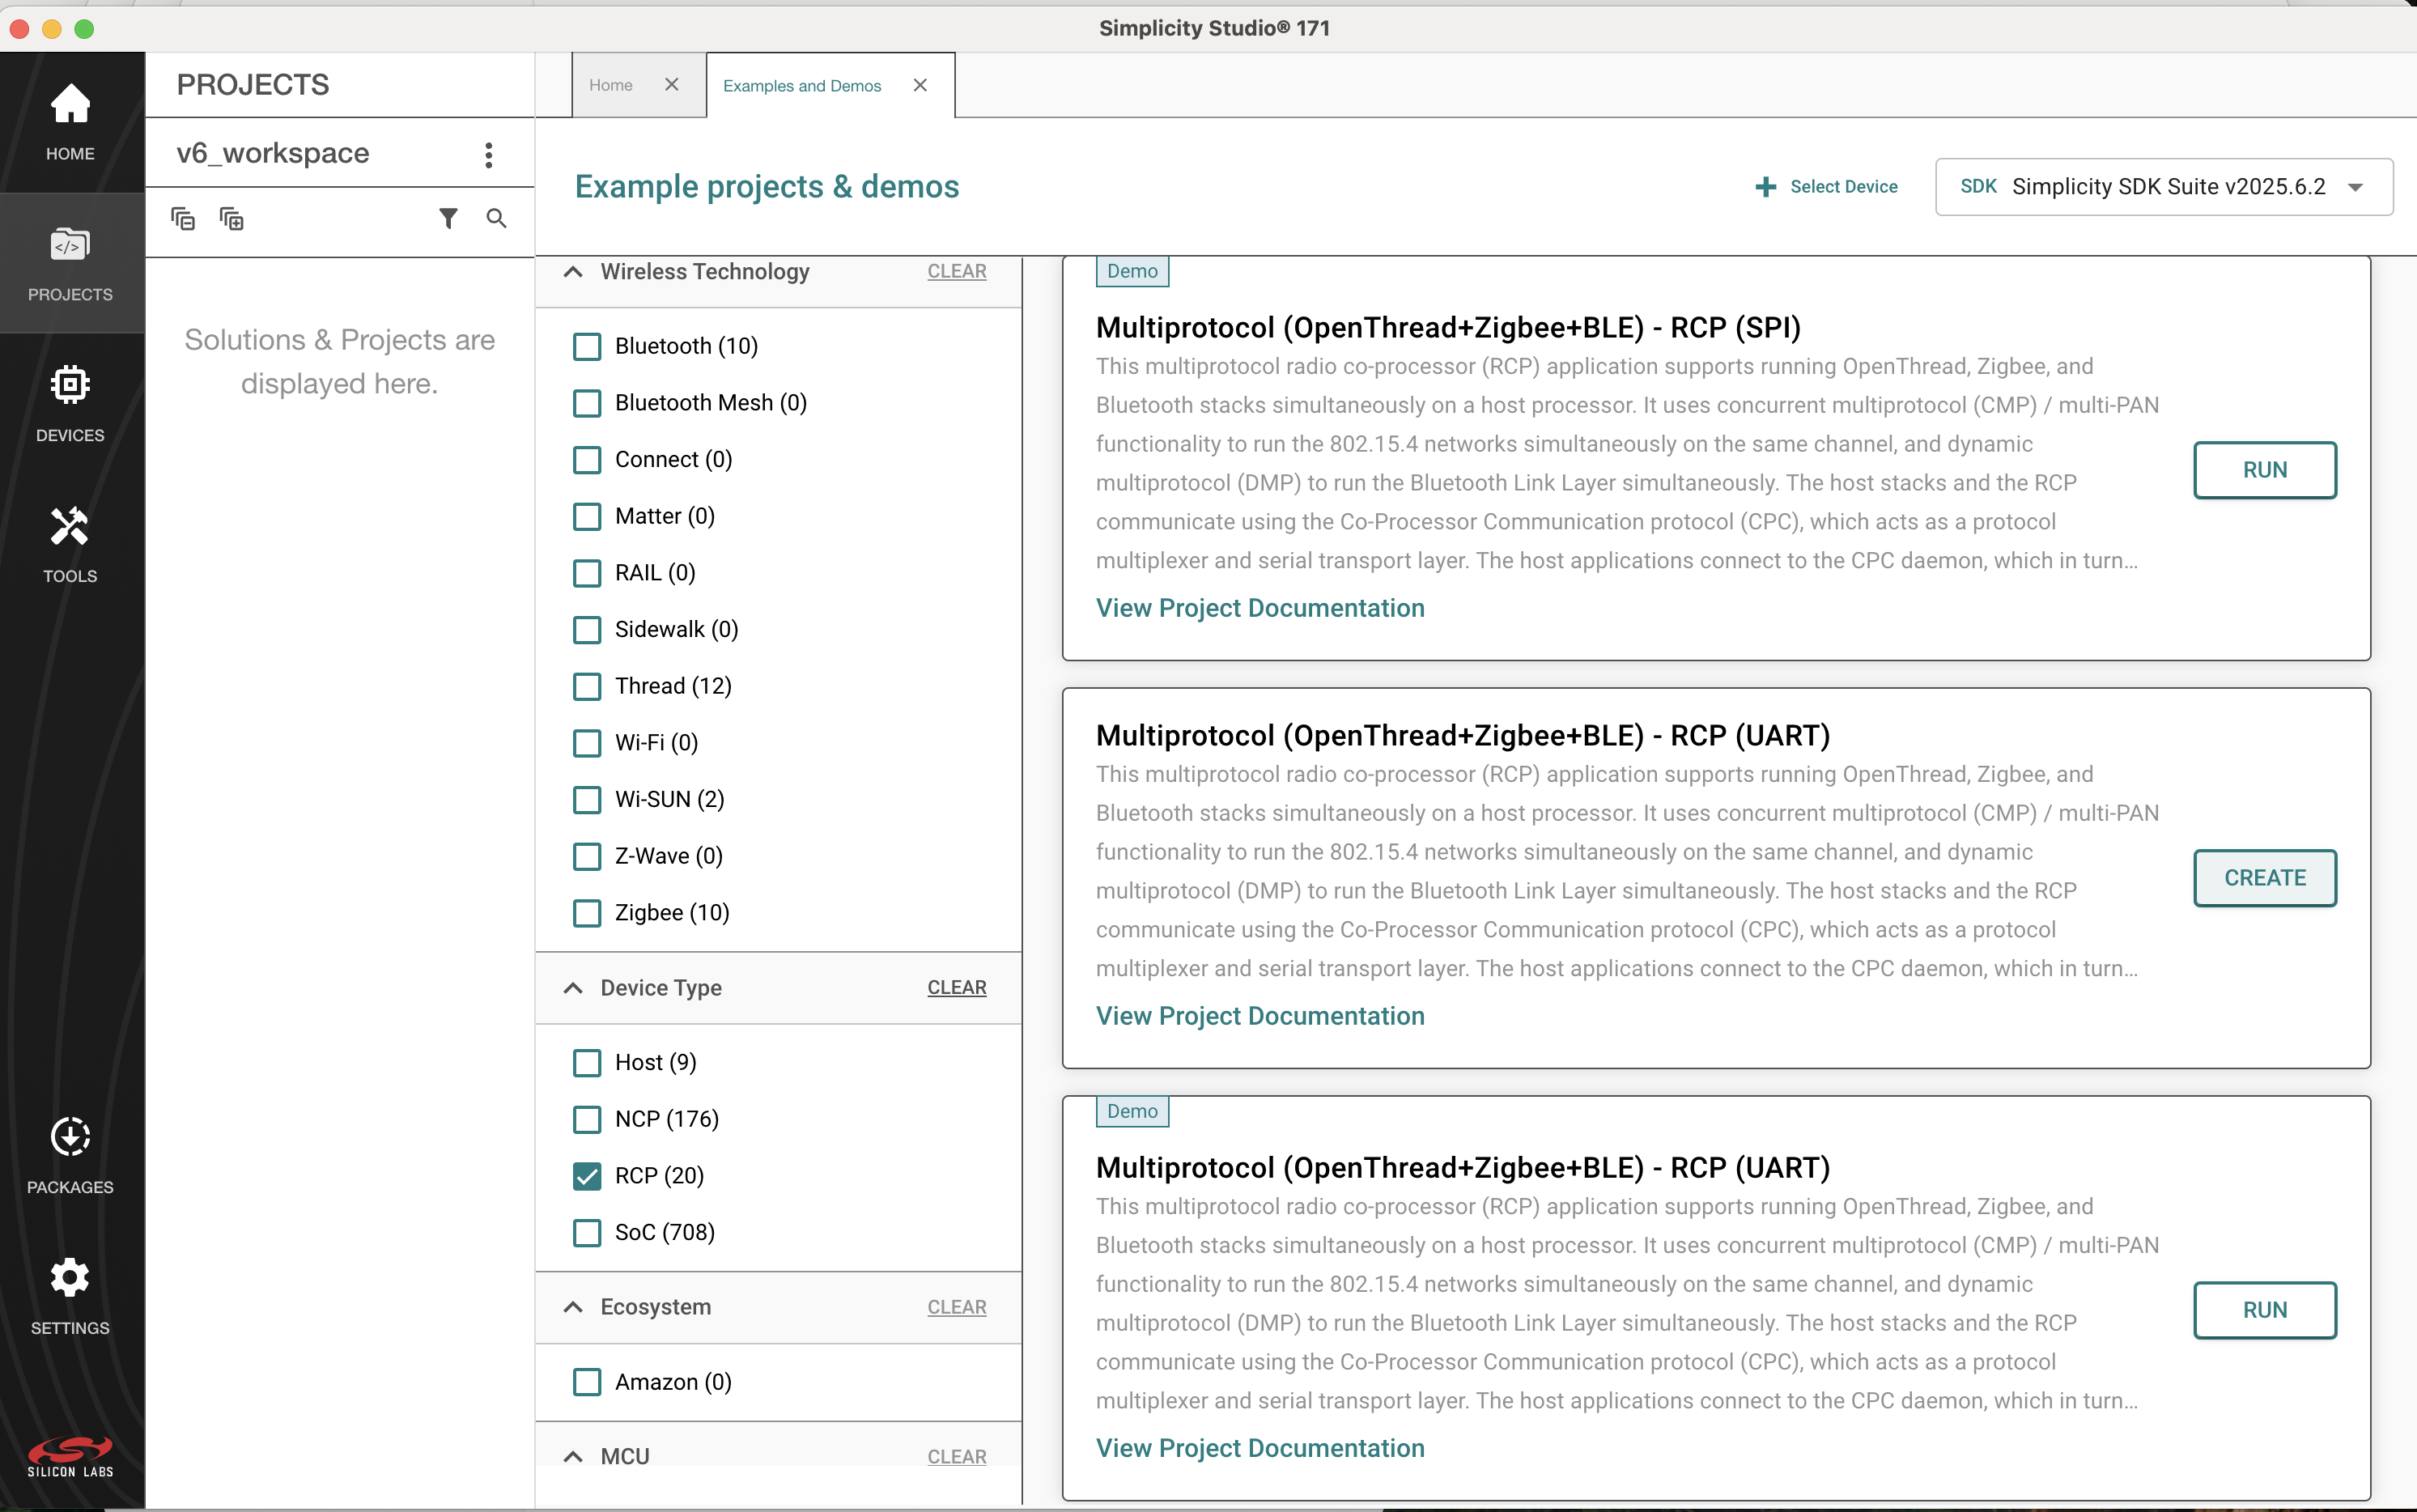

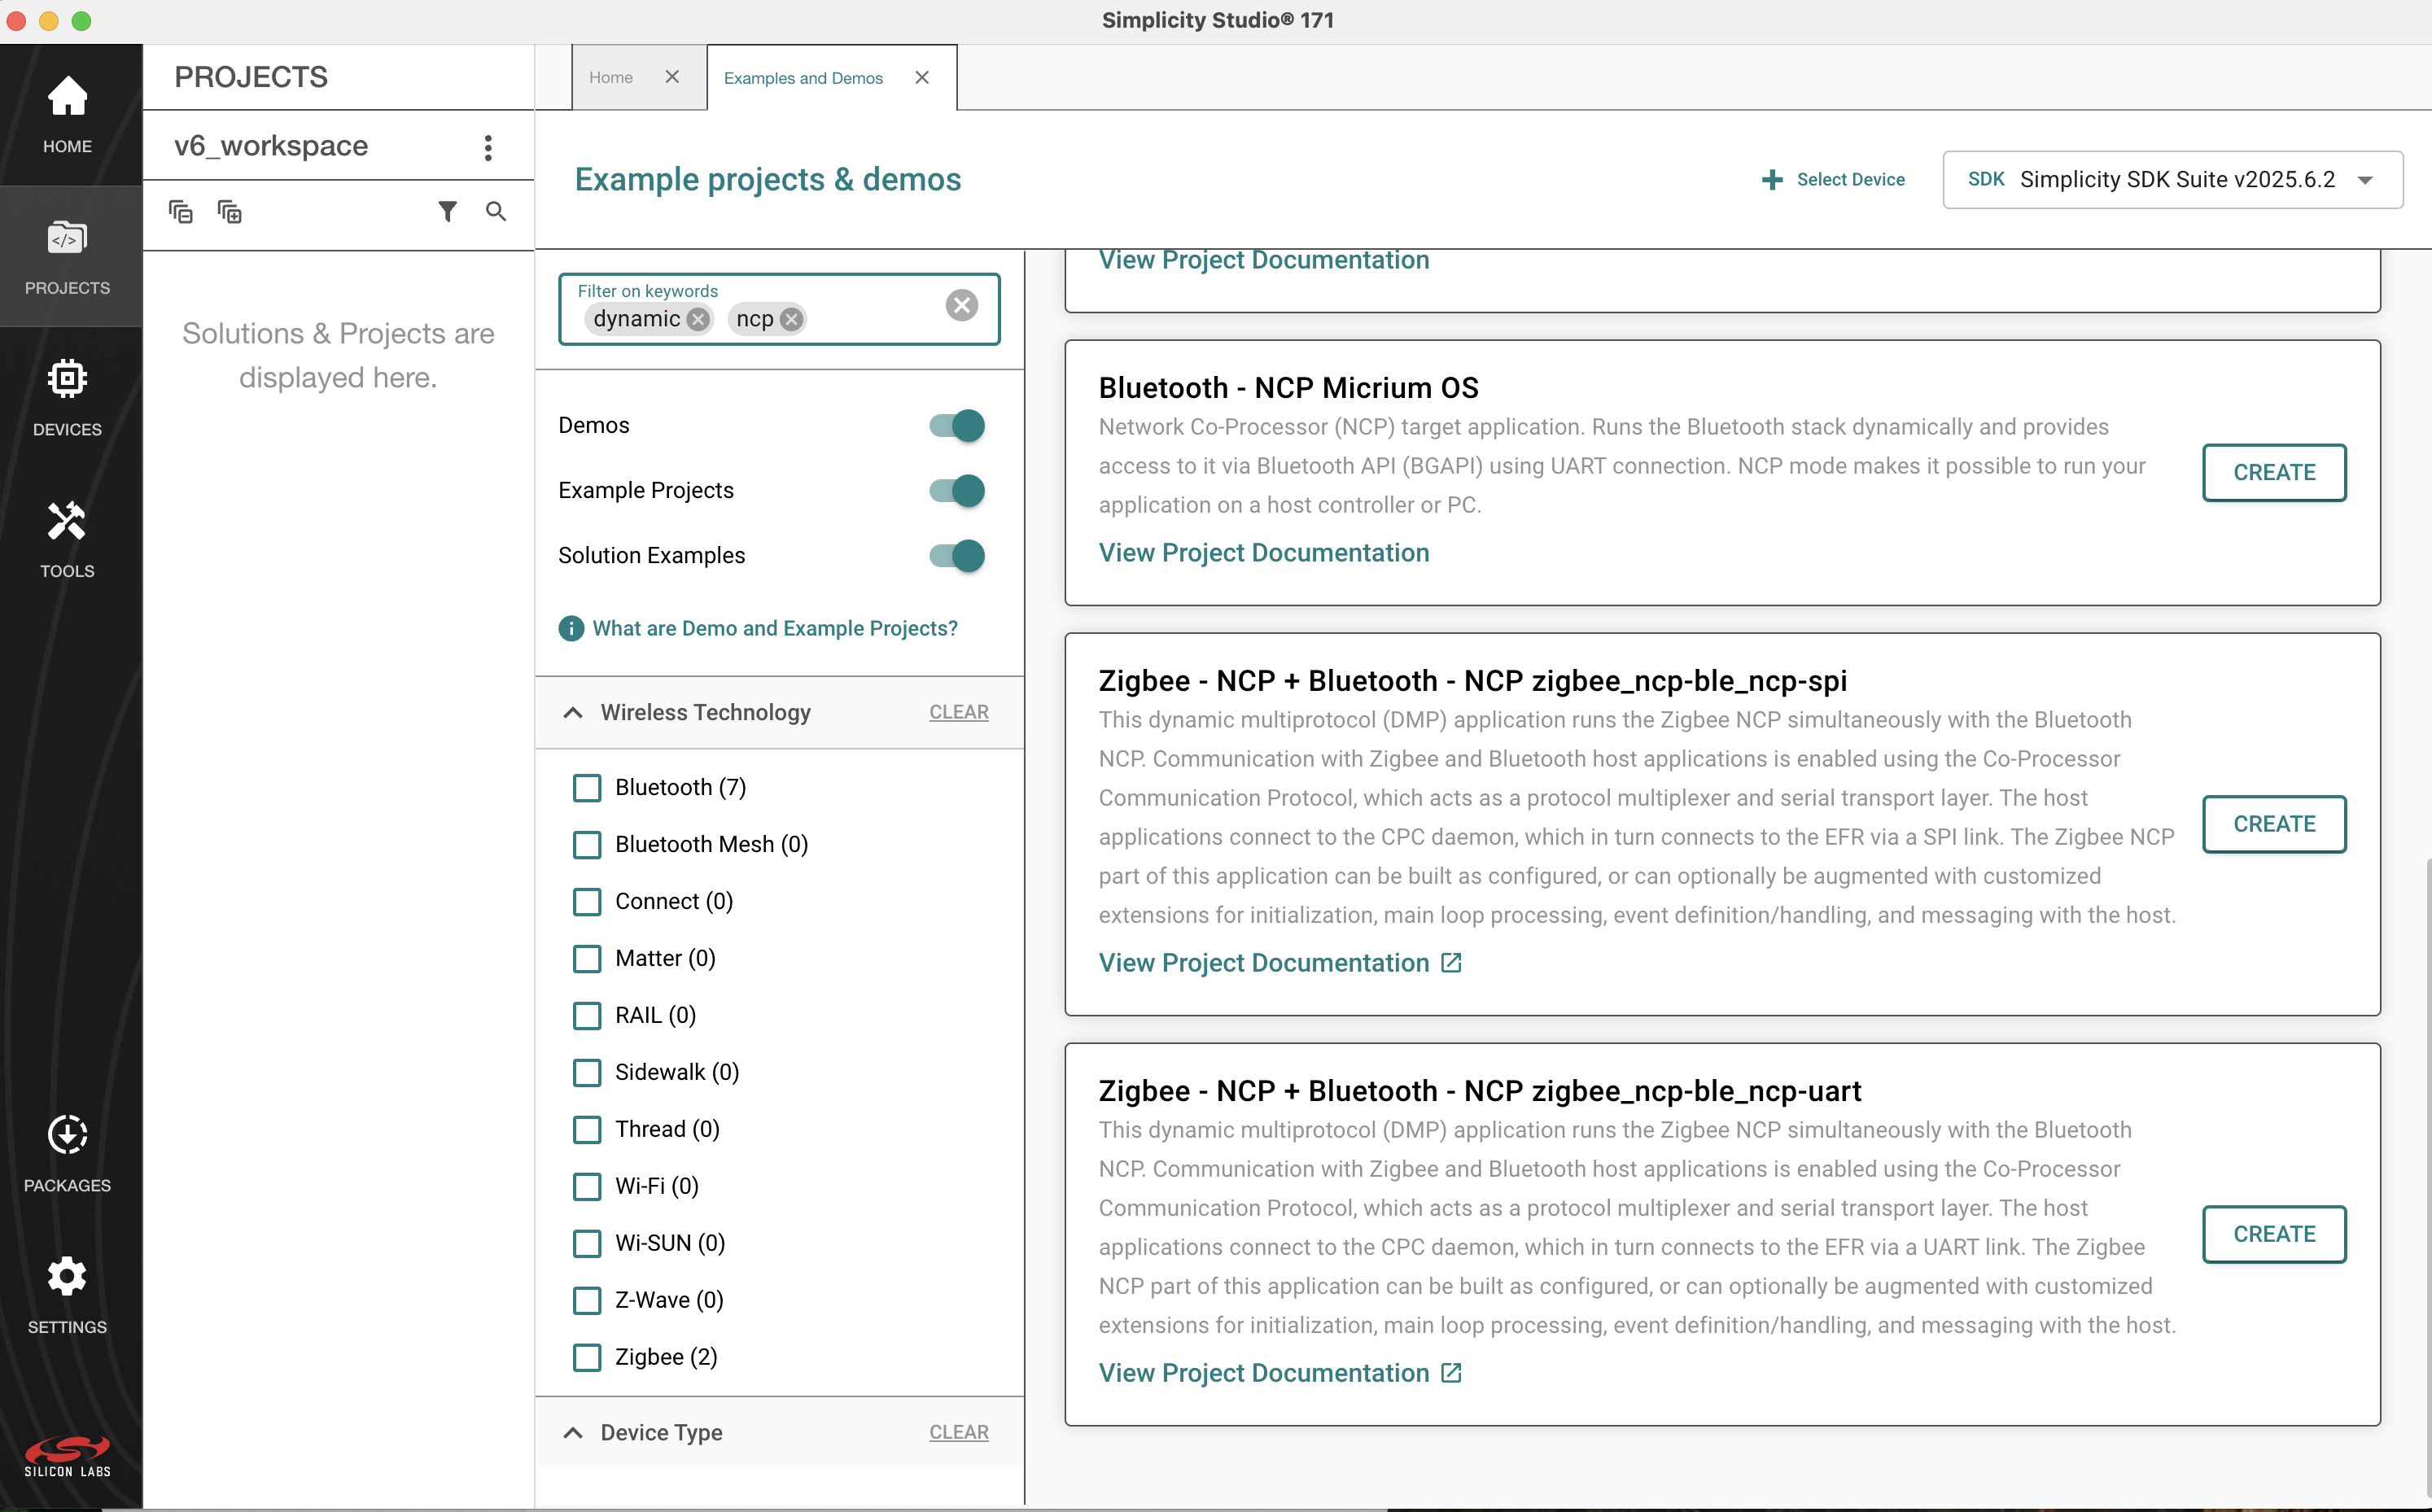

From the list of projects, select the appropriate image depending on the desired combination of protocols, and depending on whether your physical link is UART or SPI.
Click Create and select which device you will be using. Then select finish.
At this stage your project will have been generated. Since this is a local instance of the RCP Project you have the flexibility to configure the project to your exact specifications.
Once configured, right click on the project and select Open in IDE. The project should open up in VS Code. You can then click the build Icon to build the project. Once built, flash the project onto the board using Simplicity Commander. For more information, see the Simplicity Commander Reference Guide.
Note: Multiprotocol, Multi-PAN and CPC support for the RCP is currently only available in Silicon Lab's SDK and not in the OpenThread GitHub repo.
Build the Bootloader for Co-Processor#
For your application to boot, make sure that you have a bootloader flashed onto the co-processor. Users can create a bootloader project in Simplicity Studio by creating a new project and searching for the project: Internal Storage Bootloader. Once the project is generated, users can build the Bootloader Application and flash it onto the RCP.
Co-Processor CPC Security Configuration#
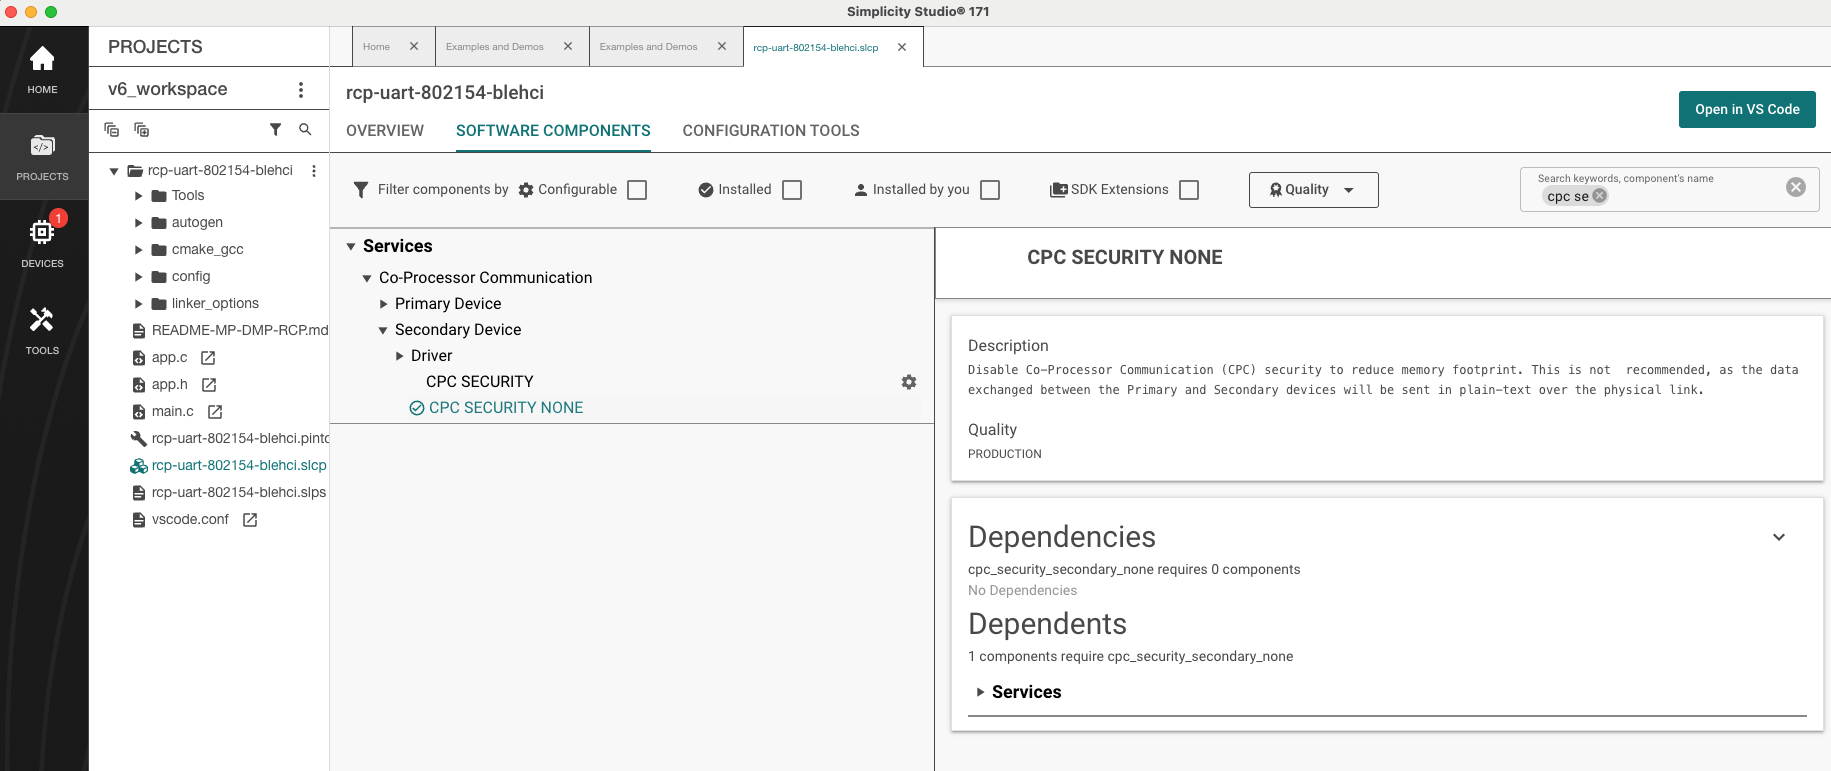
If you are using a radio image with CPC, it is important to check the CPC Security setting to make sure it matches that set in cpcd.conf. By default, CPC Security is enabled and is recommended for production. However, in development it may be easier to have this security parameter disabled. To modify this parameter, go to your SLCP File and search for CPC Security component. If you would like to turn off CPC Security, uninstall the CPC SECURITY component and install CPC SECURITY NONE.

Configure SPI RCP#
Your RCP should have the Internal Storage Bootloader flashed onto the device. There is an example project: rcp-spi-802154-blehci project that is configured already for SPI communication.
In your co-processor application project, if you open the SLCP file and navigate to the CPC Secondary - SPI(USART) component, you should be able to manually configure your co-processor SPI pinout.
To verify that the SPI configuration is configured properly and match the bootloader configuration, you can check the Pin Tool of the rcp-spi-802154-blehci project. The following image show an example pinout of rcp-spi-802154-blehci project using a BRD4180B:


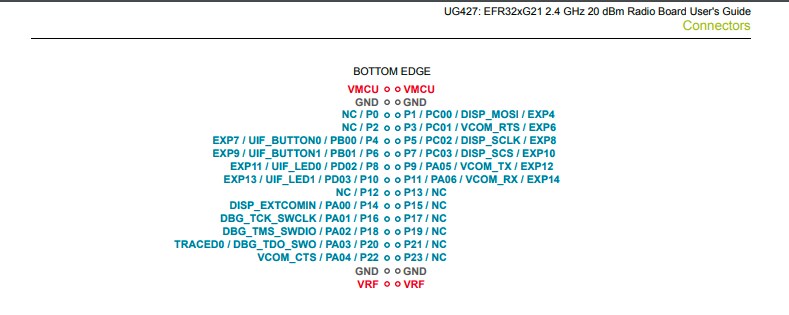
Furthermore, in the EFR User Guide, you can look for the pinout diagram. Below, the User Guide for BRD4180B (EFR32MG21) shows the direct mappings of the radio pins to that of the WPK EXP headers. This can be useful in cases where you are manually wiring the WPK Expansion headers to your host.

Zigbee Child Configuration for Multiprotocol (CMP) Builds#
In CMP configurations where Zigbee and OpenThread run together, the Zigbee child count must remain consistent between the Zigbee host and the RCP builds. If the Zigbee application changes its default child configuration, the same update must be applied to the RCP build, as this value is not synchronized automatically.
