


BLE Scan View#
The Scan view provides tools for BLE firmware application development. It consists of three subviews: Scanner, RSSI Graph, and Active Connections. Together, these tools allow you to scan for, connect to, and interact with BLE devices.
Scanner#
Scanner is the default view. It allows you to discover and explore nearby BLE devices. Key features include:
Scan for BLE devices
Sort the list by the RSSI
Filter devices to narrow down the scan results
Label favorite devices to place them on the top of the list
Inspect advertising data
Connect to a specific device
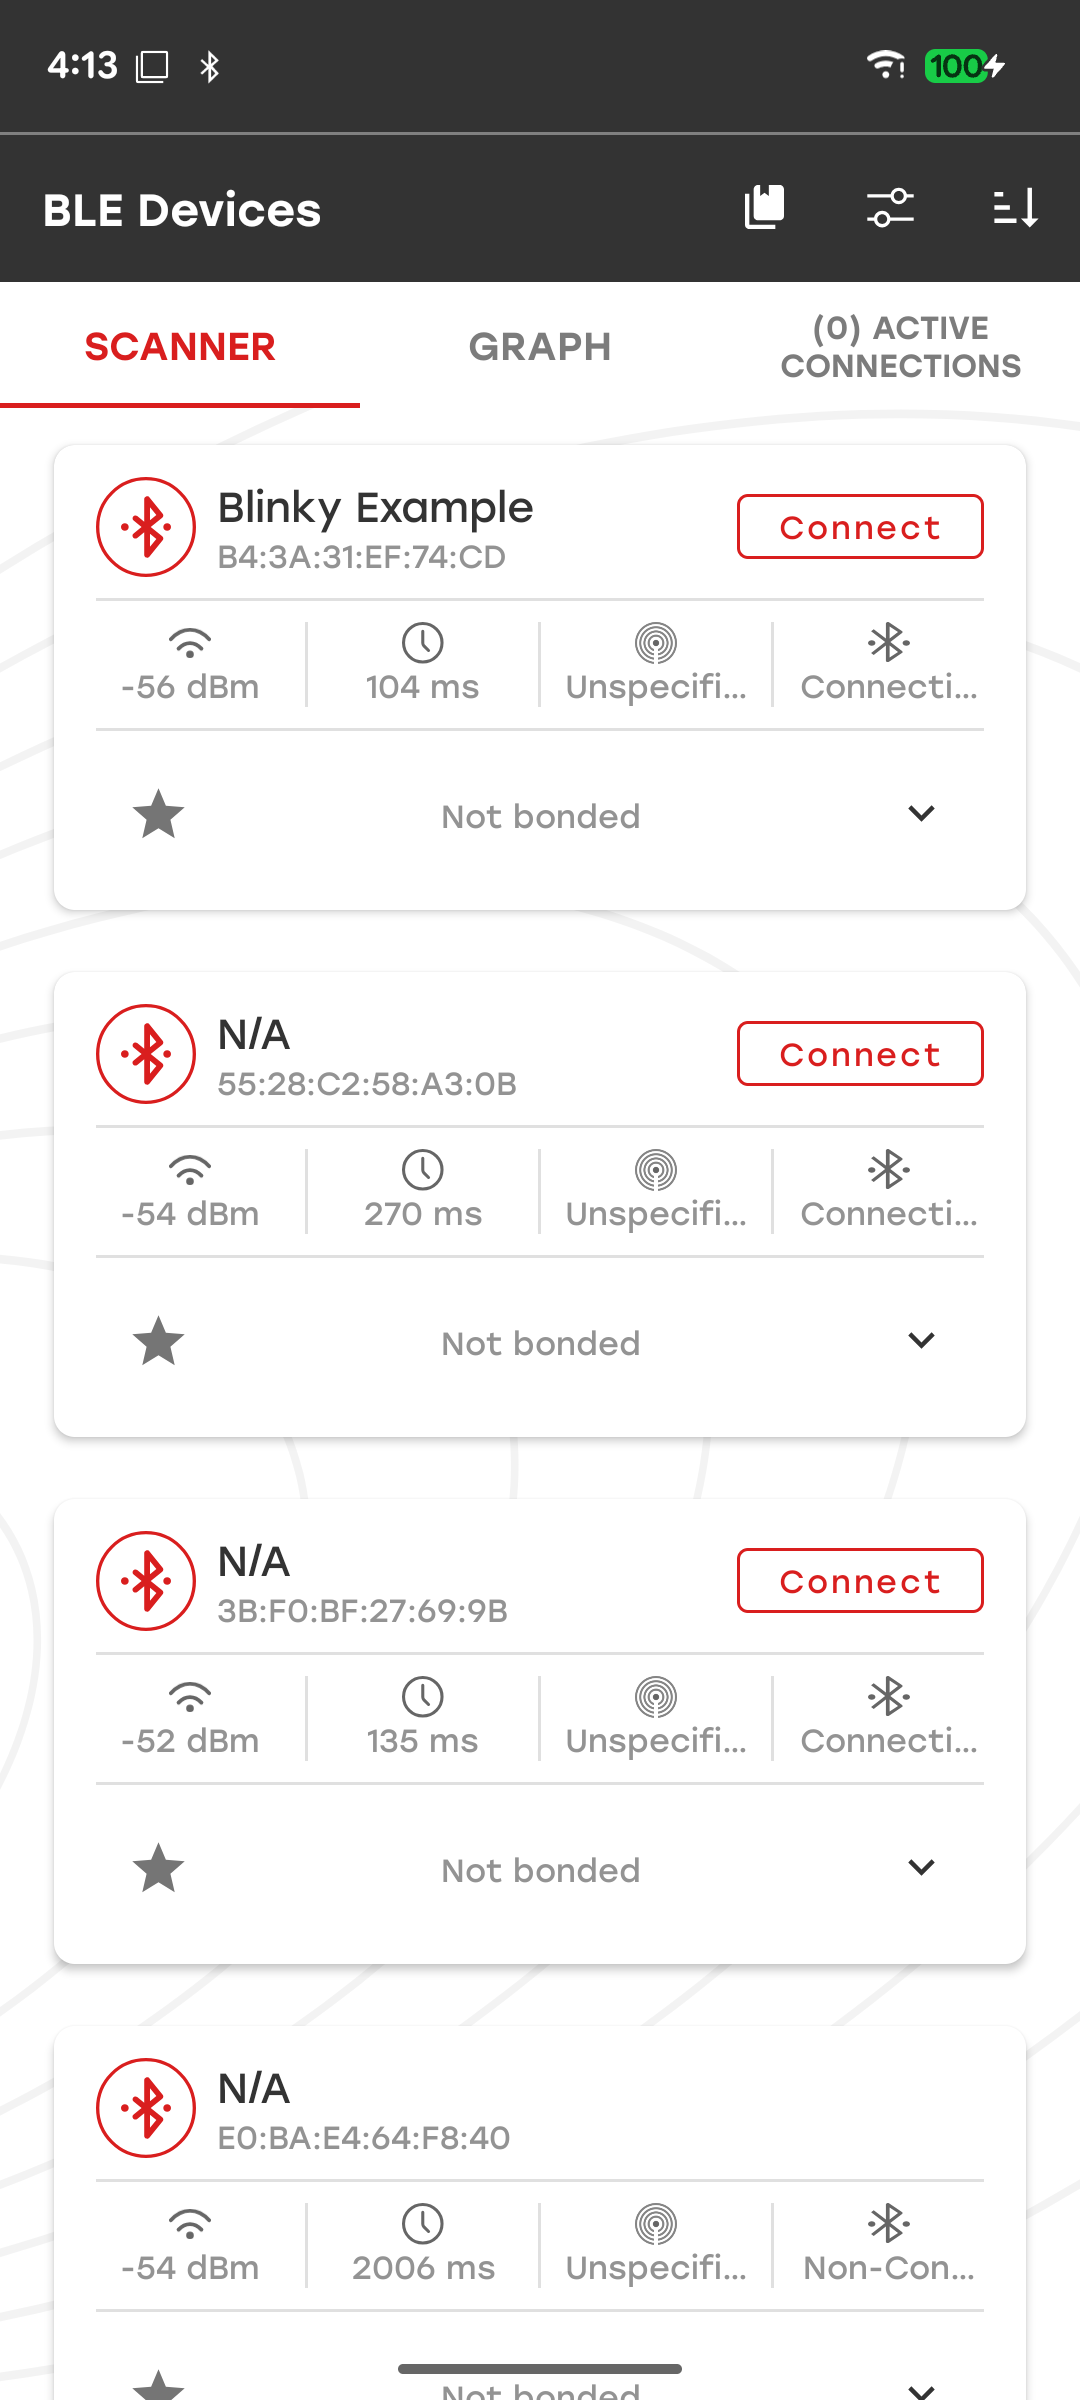
Start and Stop Scanning#
You can control when scanning starts and stops. The app automatically starts or stops scanning in the following situations:
Opening Scanner view starts scanning
Connecting to a device stops scanning
Refreshing the list automatically starts scanning if it was stopped
Locking the screen automatically stops scanning
Scanning continues until you select Stop Scanning in the lower-right corner or exit the Scan view. Starting or stopping a scan does not clear the device list. If you resume scanning with an existing device list, newly discovered devices are added to the list.
To refresh the device list, exit and reopen the Scan view, or pull down and release the device list. Pulling down the device list also starts scanning if scanning is stopped.
Device Cards#
Each device discovered by the app is represented by a card that contains information about the device. The following image shows the main elements of a device card.
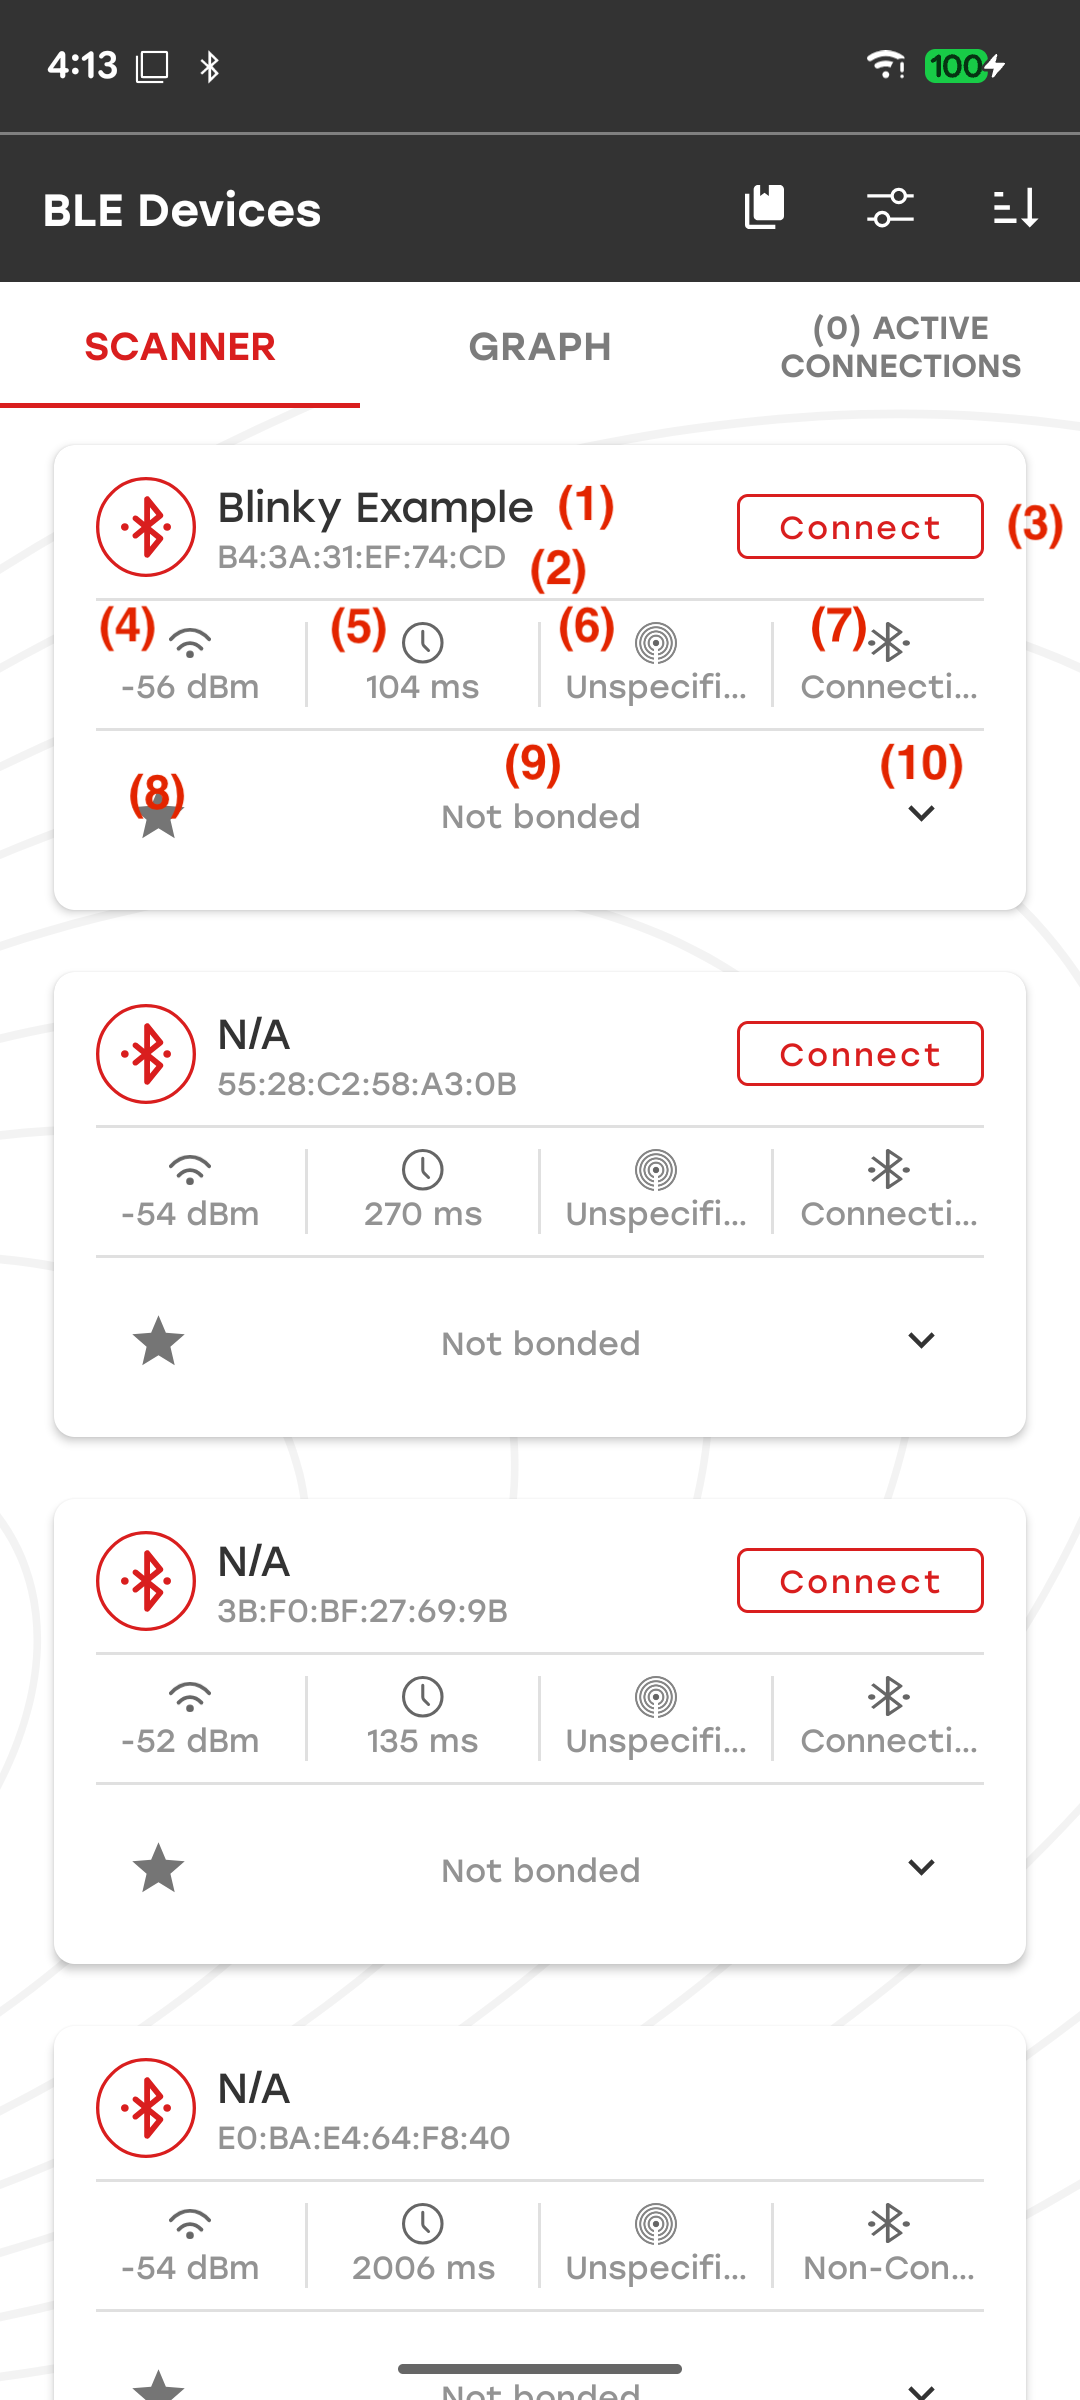
Device name: Name included in the advertisement through either the Complete Local Name AD type (
0x09) or Shortened Local Name AD type (0x08). If the device name is not included in the advertisement or scan response packet, the app displays N/A.Bluetooth address: Bluetooth address of the device.
Note: On iOS, the Bluetooth address is not accessible to the application.
Connect: Available if the advertisement is connectable.
RSSI: Received Signal Strength Indicator.
Advertising interval: Advertising interval of the device.
Beacon type: Known beacon format, such as iBeacon, Eddystone, or AltBeacon. If the app does not identify a known beacon format, it displays Unspecified.
Advertisement type: Connectable or non-connectable.
Favorite: Indicates whether the device is marked as a favorite. Select the star to add or remove the device from favorites.
Bonding status: Indicates the bonding status of the device.
Note: Bonding status is not available on iOS because of system limitations.
Expand: Displays the advertising data.
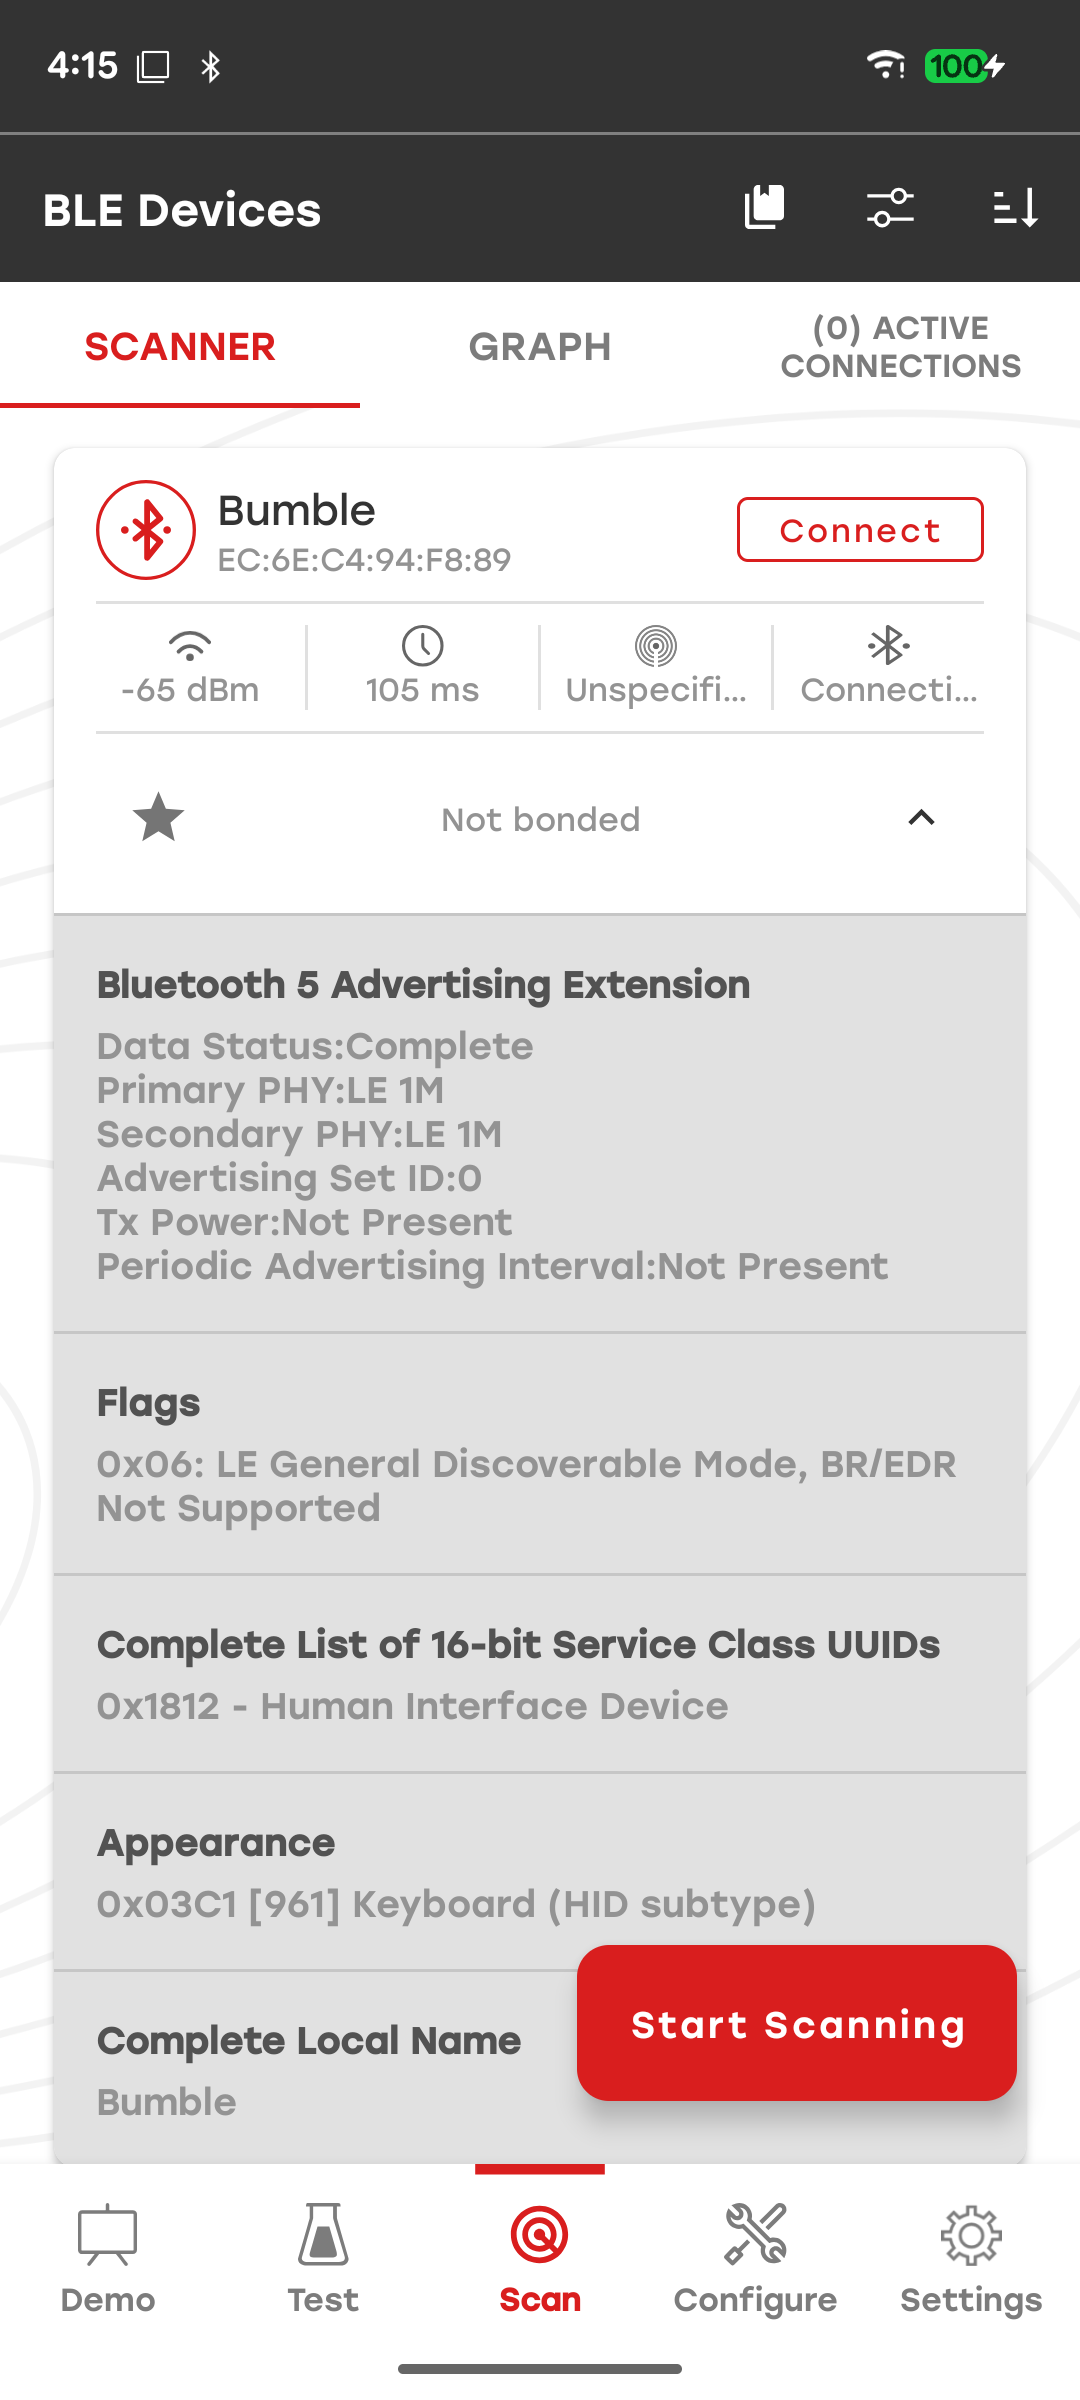
Expand a device card to view details about its advertising data. Each row displays an advertising data type included in the advertisement packet.
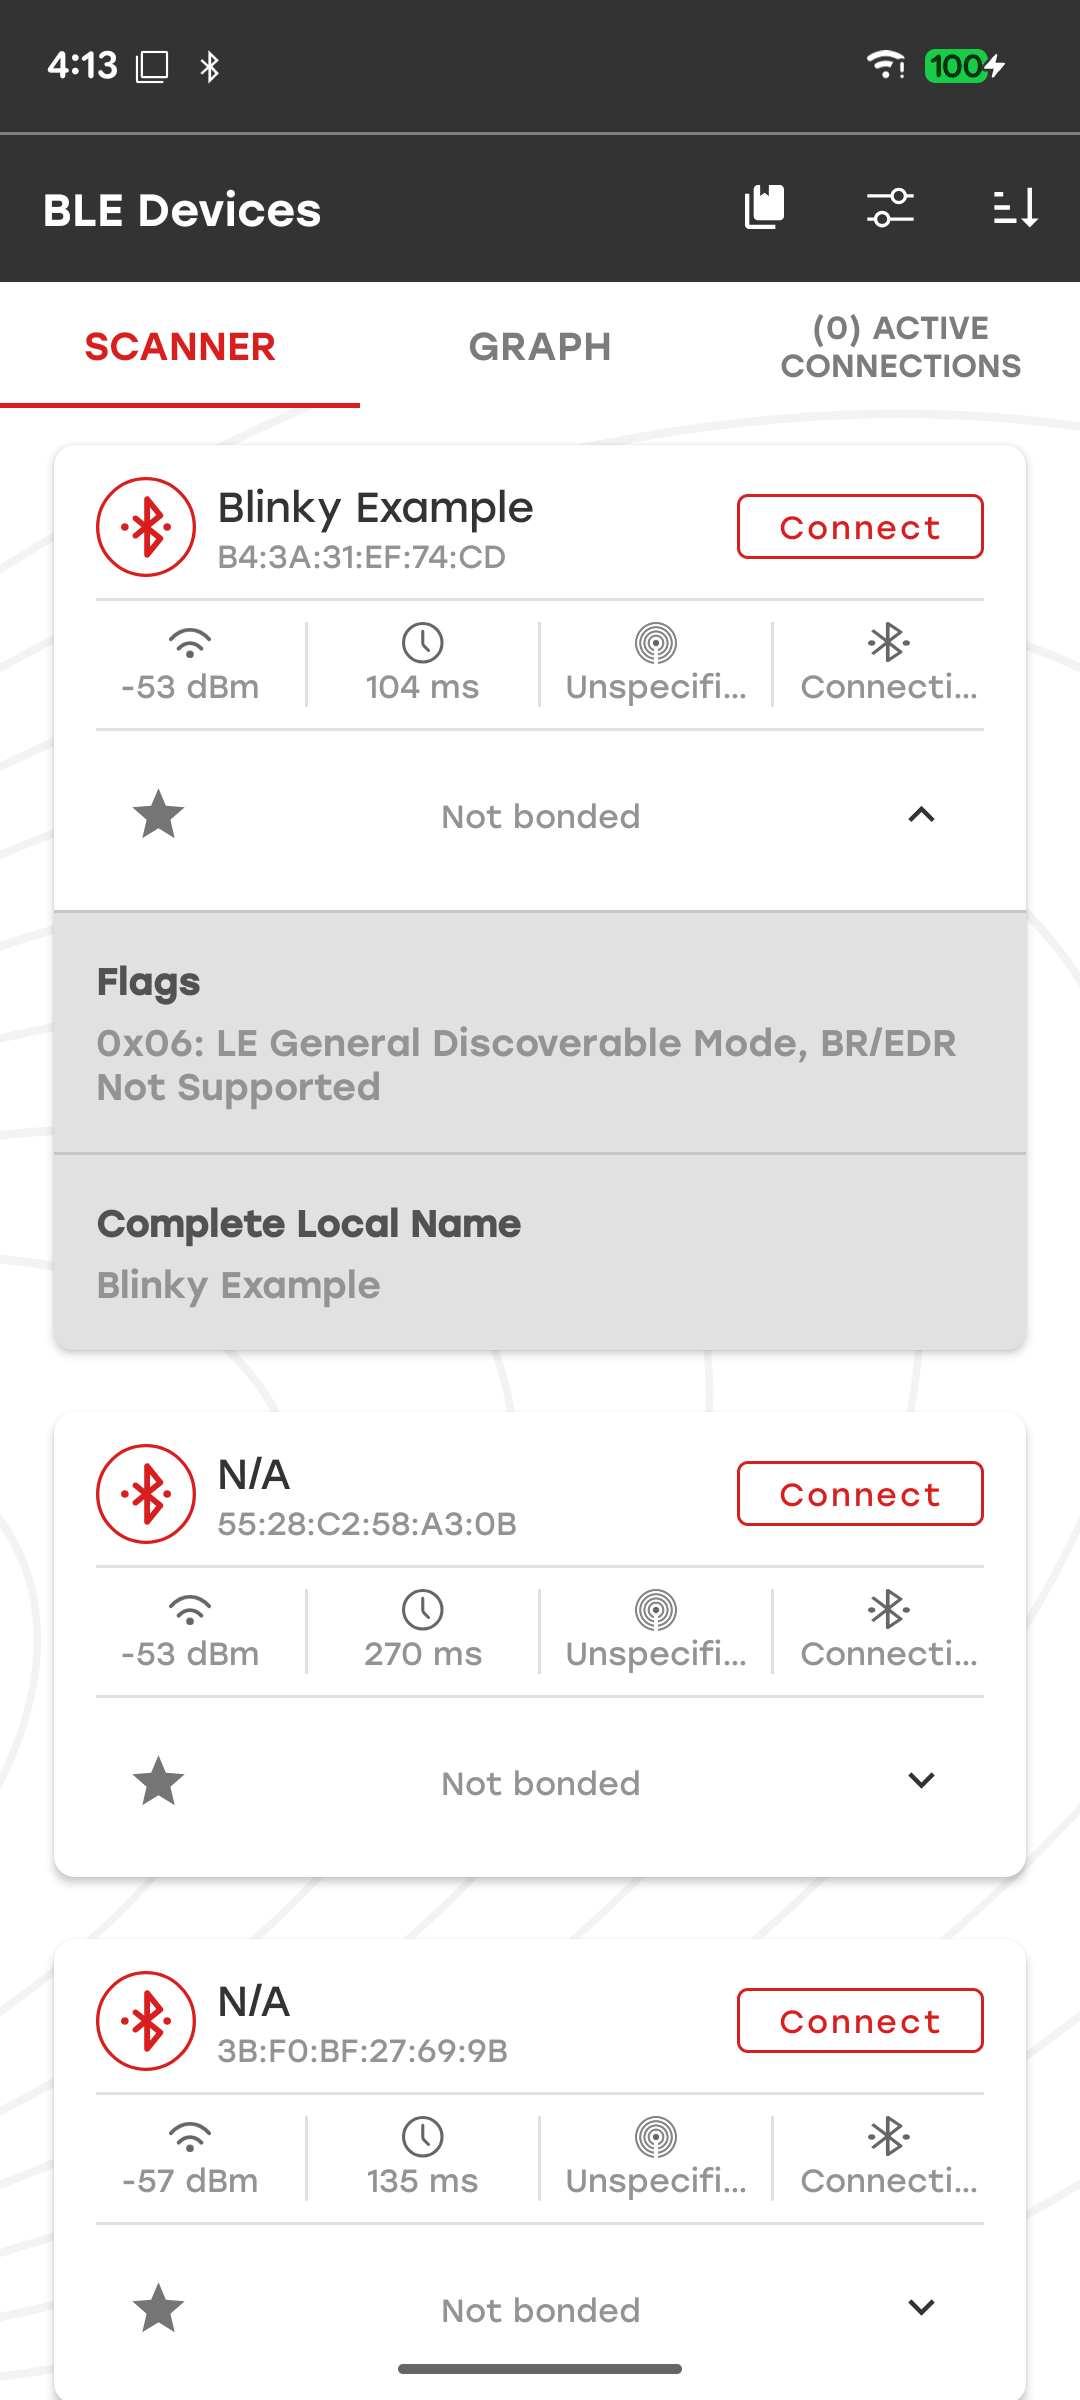
If the advertisement uses a known beacon format, the app also parses the data according to that beacon format. The following image shows details from an iBeacon advertisement generated by the Bluetooth - SoC iBeacon sample application running on an EFR32BG22 kit.
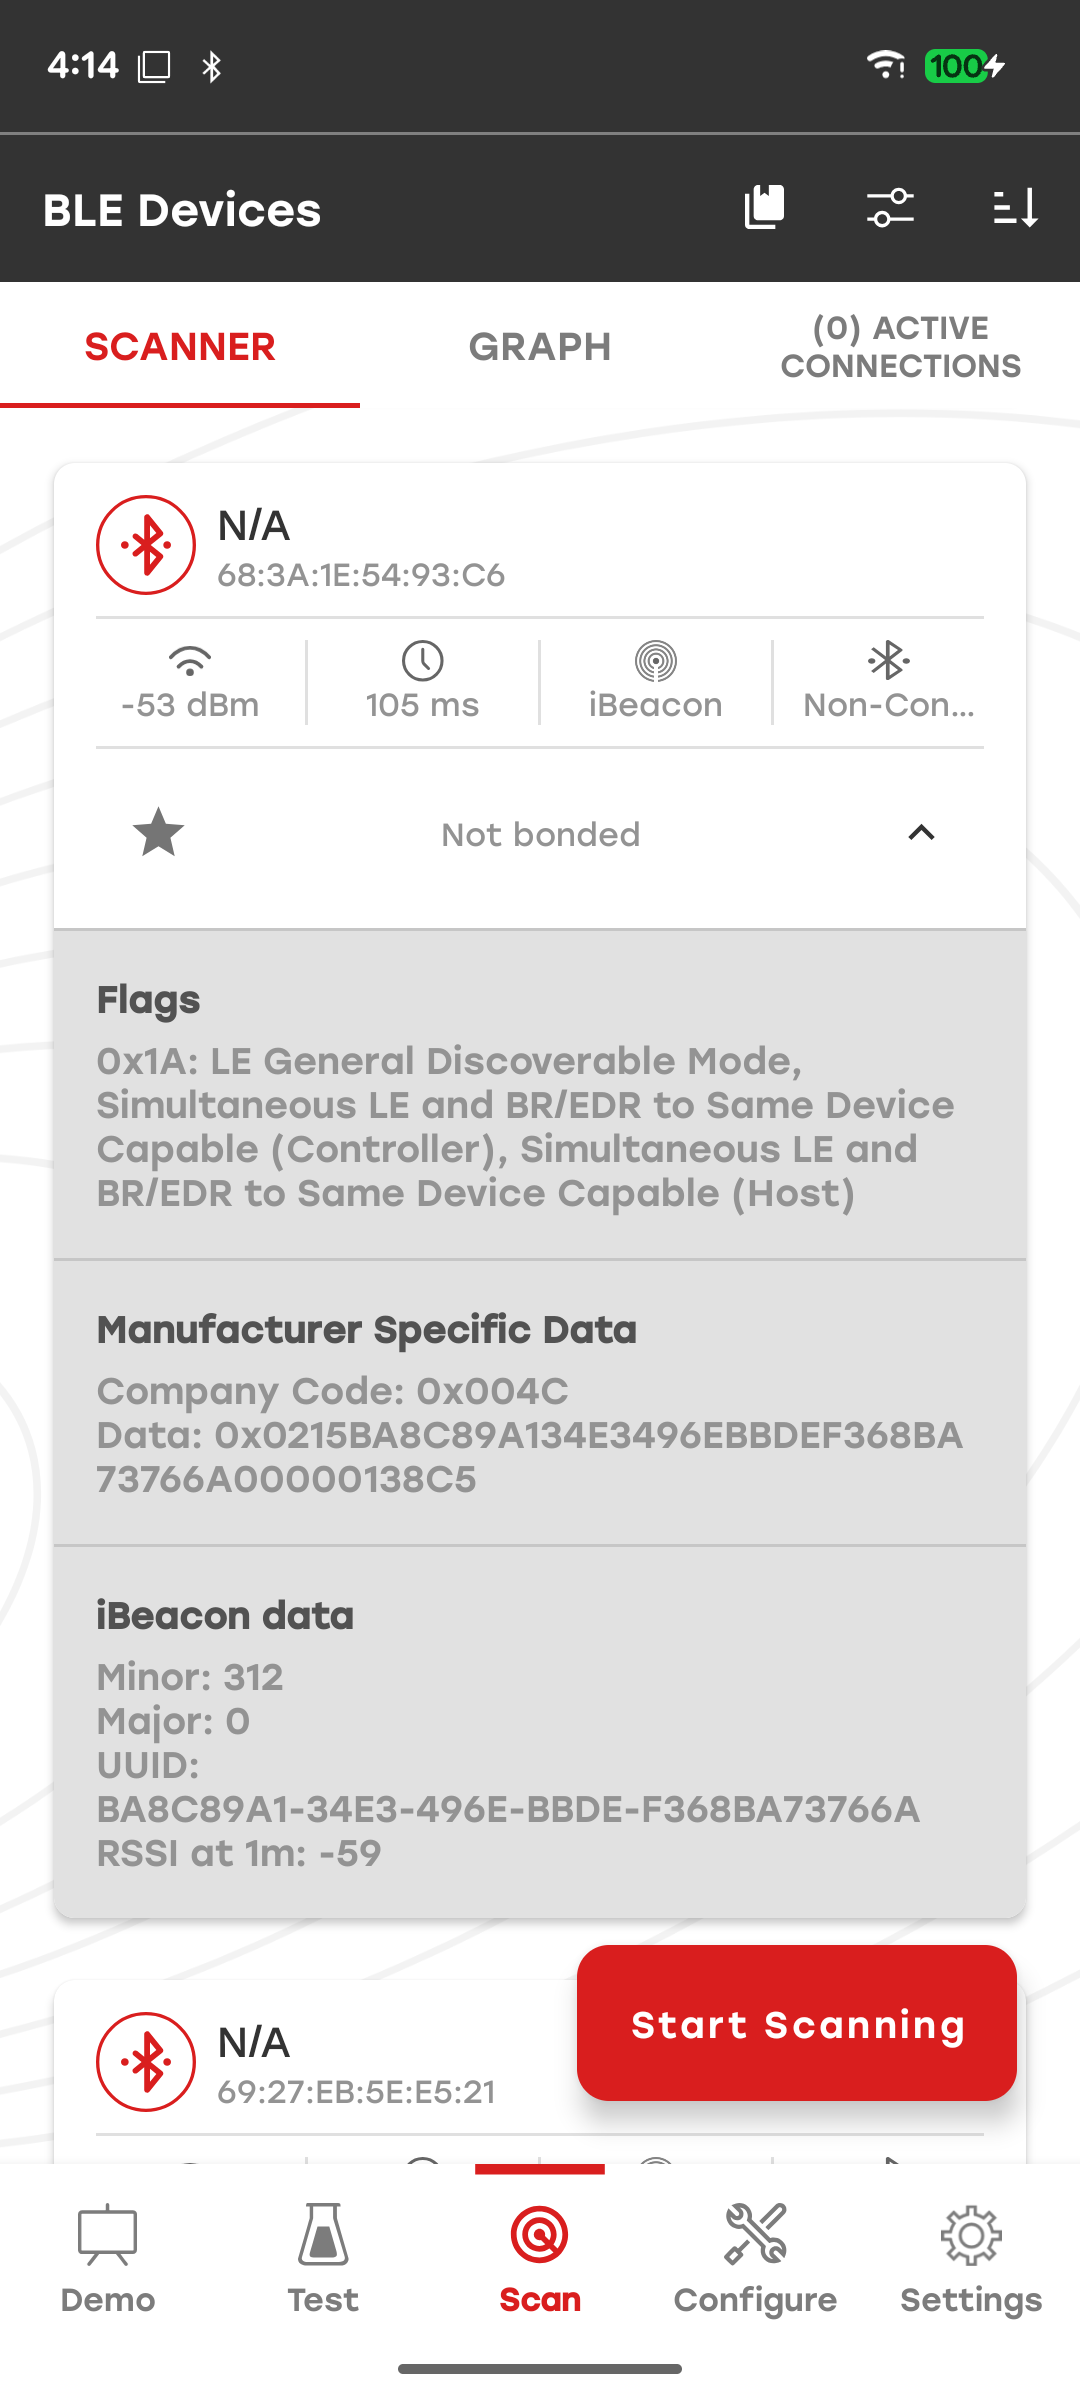
Simplicity Connect also supports extended advertising if the mobile device supports it. When a device sends extended advertising data, the app displays this information in the advertisement details.
Filter#
Use the filter to narrow the scan results based on specific criteria. Tap the Filter icon in the upper-right corner to open the filter view.
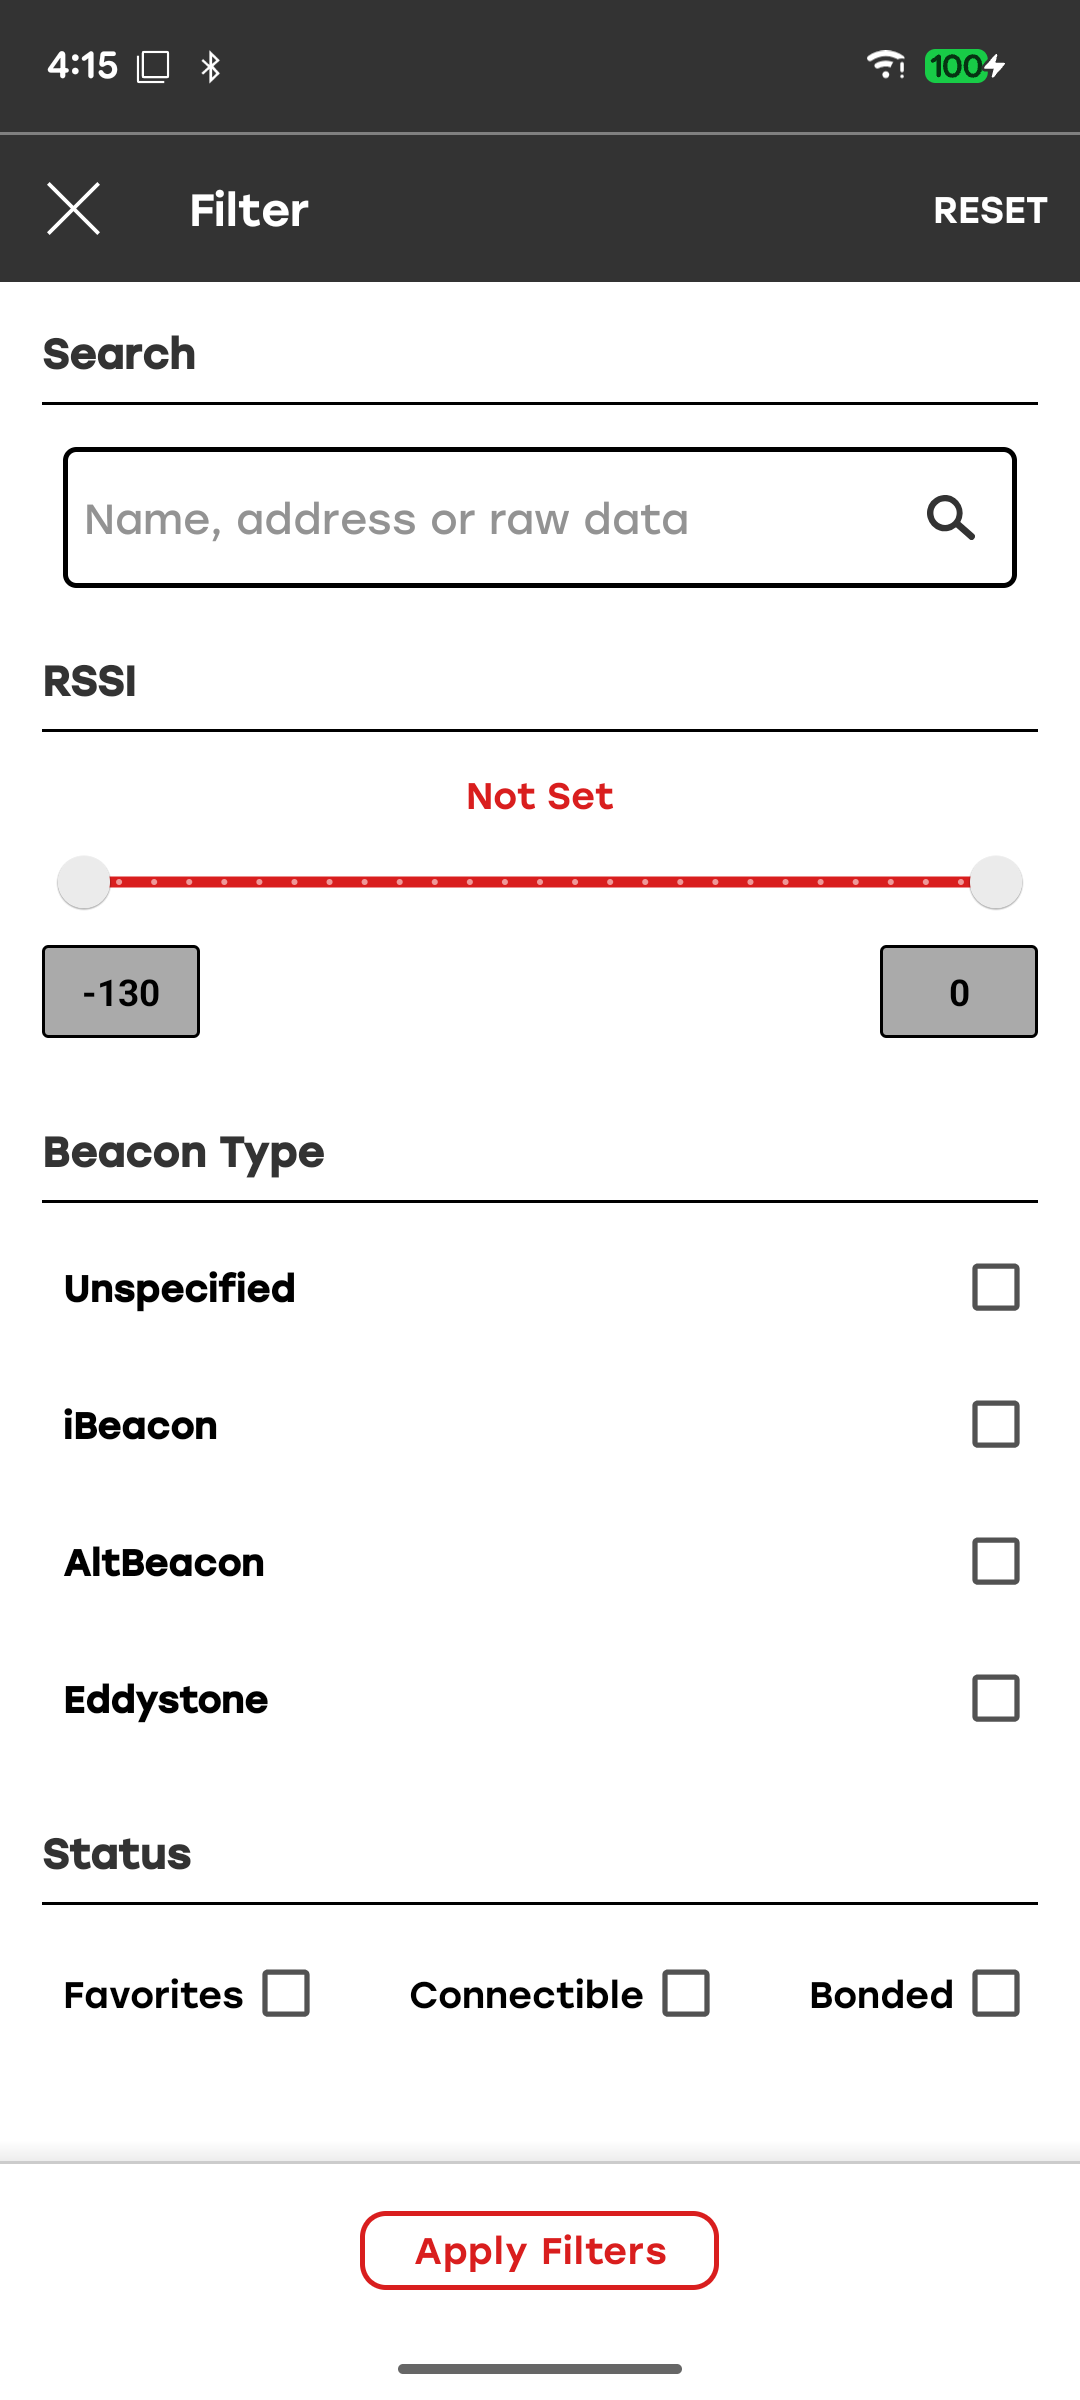
You can filter devices by the following criteria:
Device name, Bluetooth address, or raw advertising data. You can enter the Bluetooth address with or without colons.
Note: On iOS, Simplicity Connect supports filtering only by device name because the iOS Bluetooth stack does not provide the Bluetooth address or raw advertising data to the application.
RSSI above a given value so that you can limit results by signal strength threshold.
Beacon type: iBeacon, Altbeacon, Eddystone or Unspecified (none of the other three).
Only favorites
Only connectable
Only bonded.
Note: Filtering by bonded devices is not available on iOS because of system limitations.
To apply the rules, tap Apply Filters. The filter is applied to the list of devices regardless of whether scanning is on-going or not. The X icon in the upper left corner closes the filter view without applying the new filtering rules. Tapping Reset clears all the filter parameters.
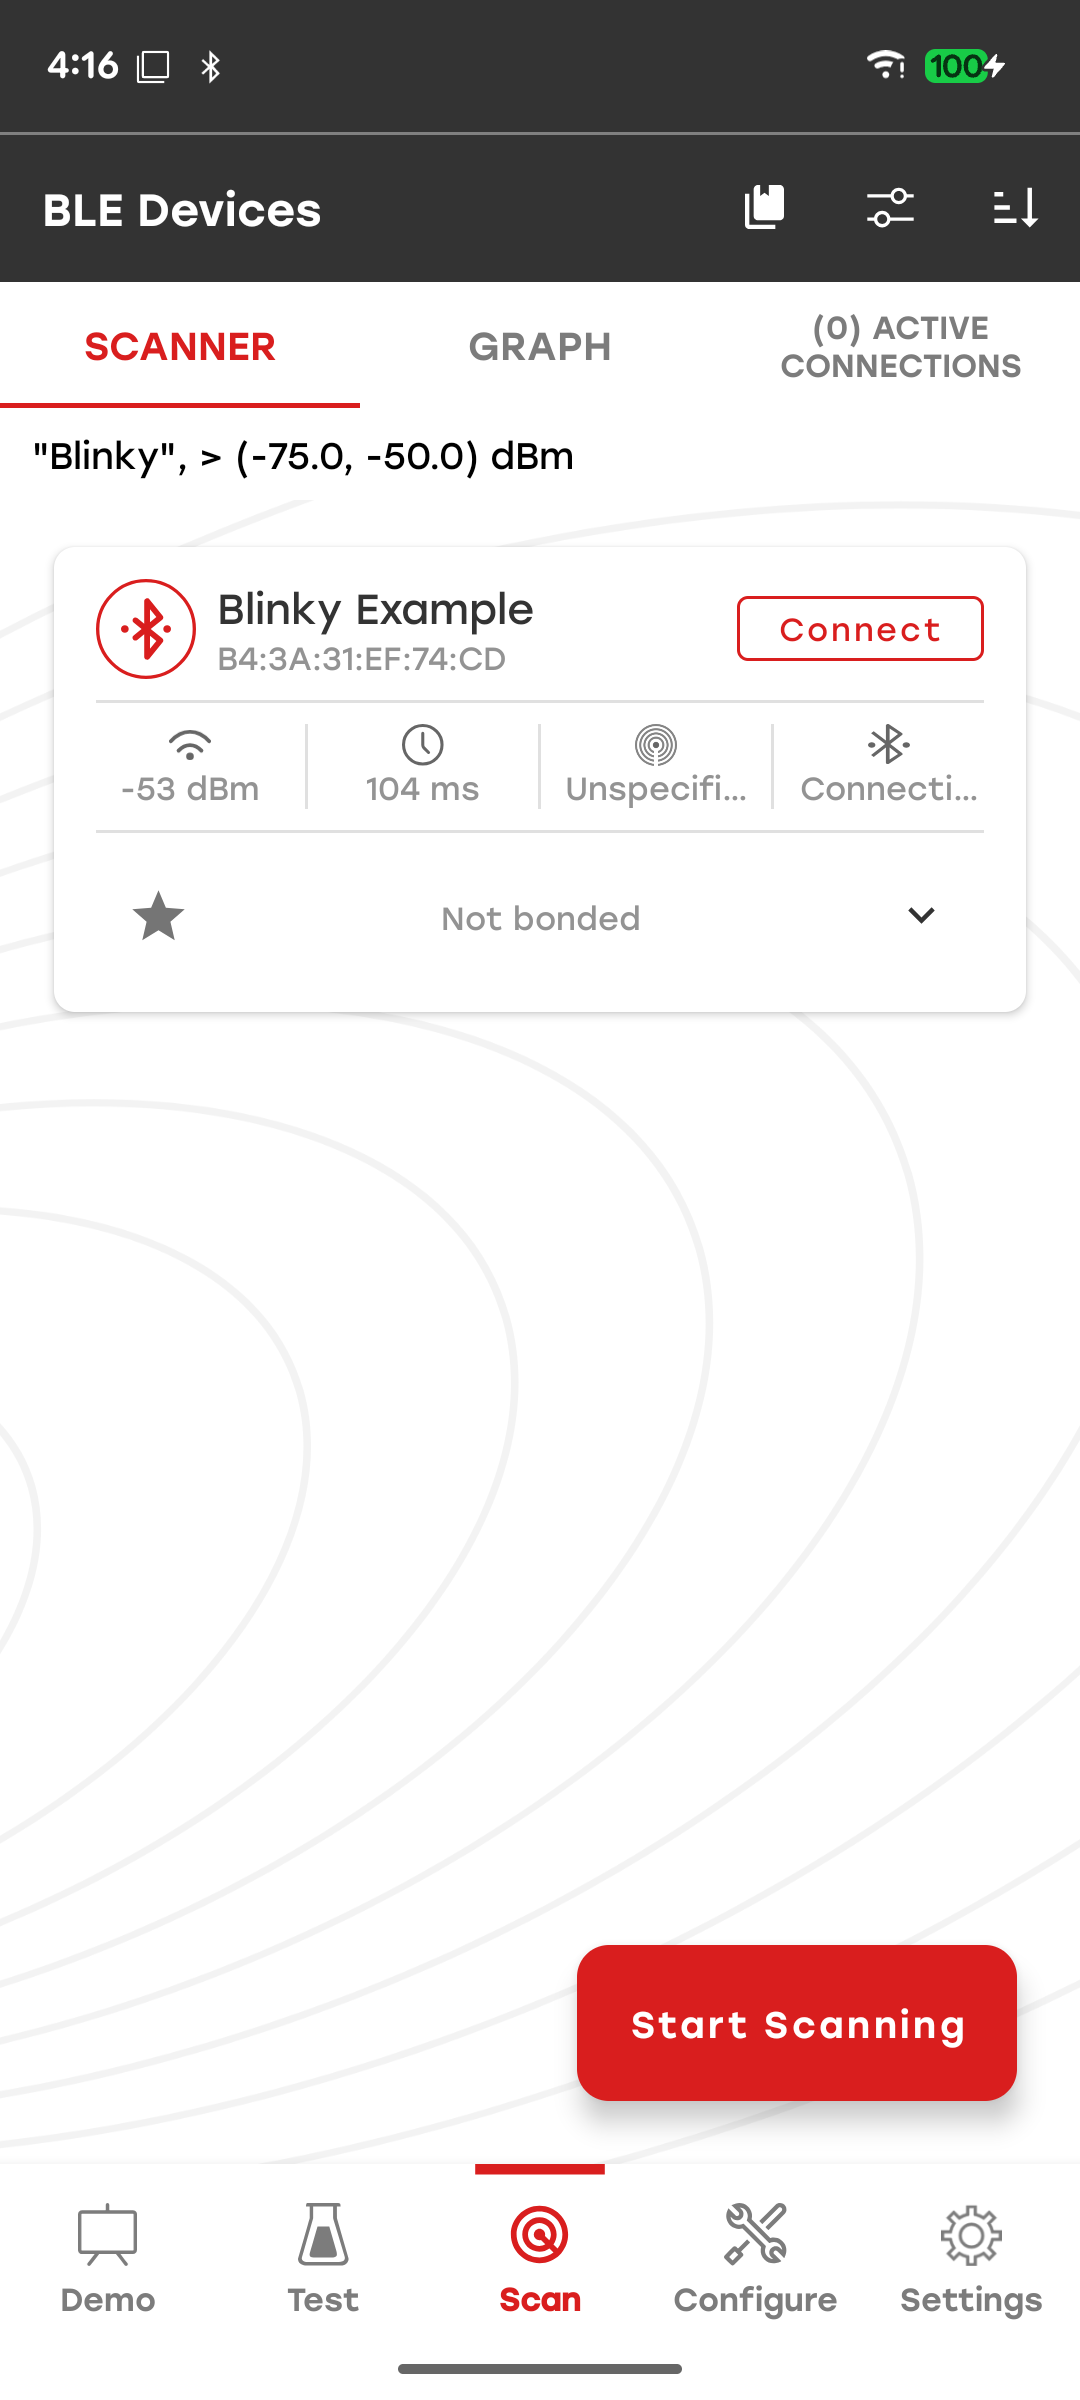
When a filter is active, the current filtering criteria are displayed on the top of the Scanner view.
Sort#
The sort functionality does not have a dedicated view. Pressing Sort (located in the top right corner of the Scanner and RSSI Graph views) sorts the list of devices by the RSSI in descending order.
UUID Dictionary#
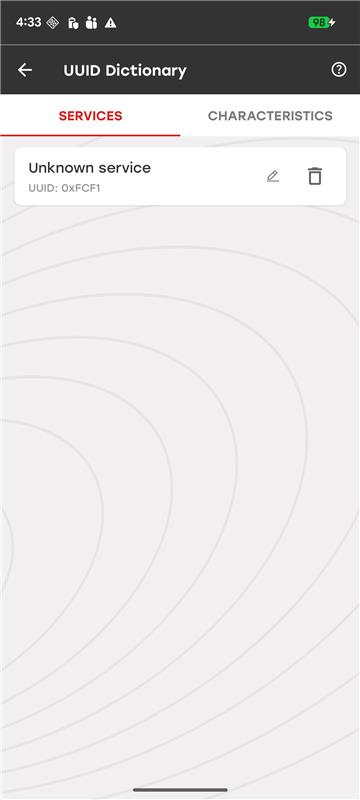
The UUID dictionary can be accessed via the dictionary icon on the top right corner of the Scanner view. It contains a list of all the 128-bit UUIDs that have been renamed by the user. Inside the UUID dictionary, you can further edit their names as well as delete them.
Connect and Disconnect#
You can connect and disconnect devices directly from the Scanner view.
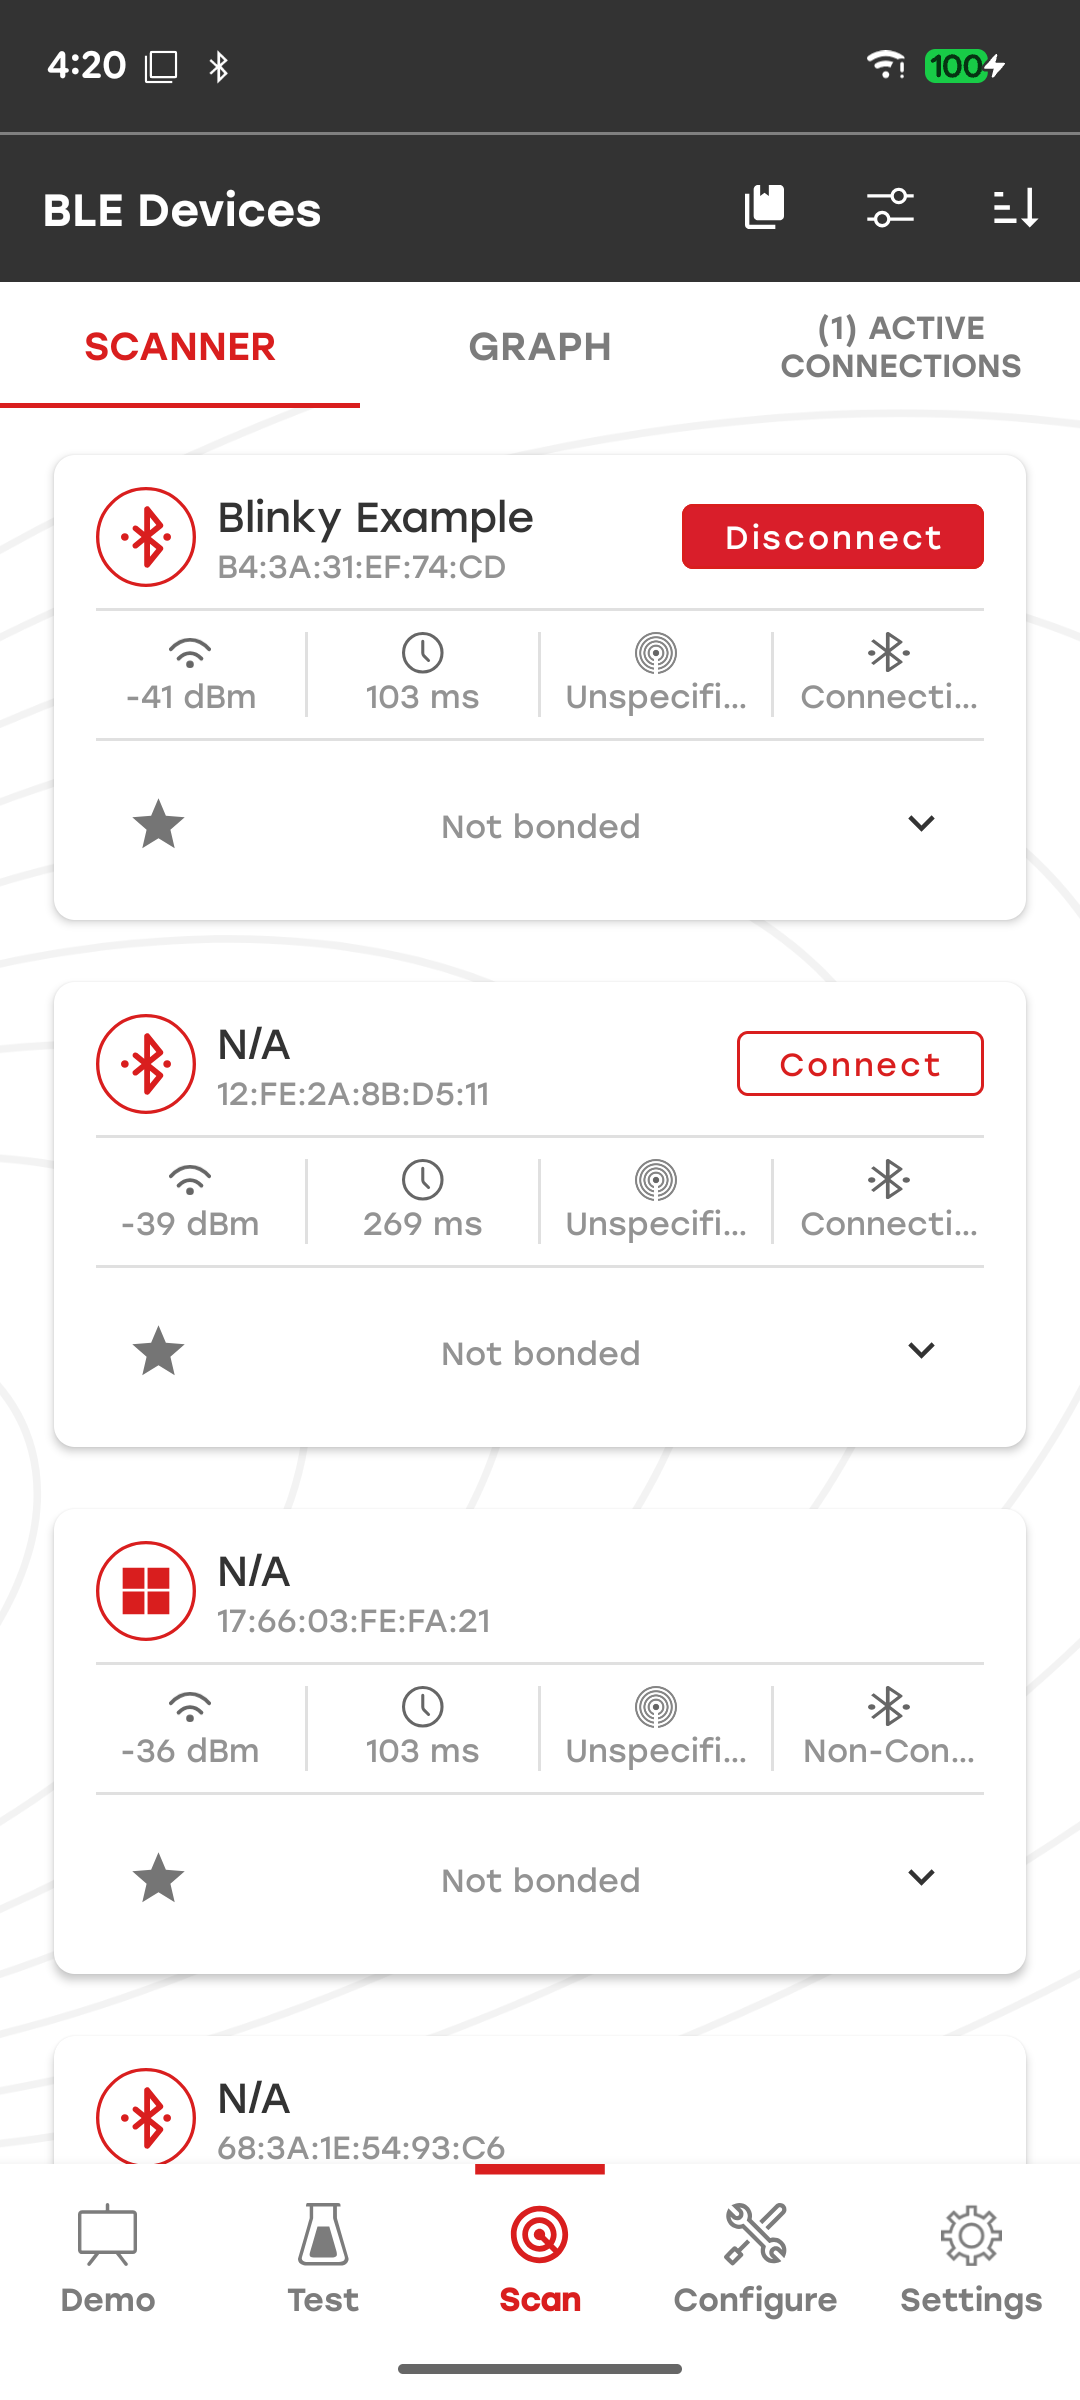
Once the device is connected, the app jumps directly to the Device View. When the scan list is refreshed, connected devices are removed from the list unless they continue advertising during the connection.
RSSI Graph#
The RSSI Graph displays the Received Signal Strength Indicator (RSSI) over time for all scanned devices. The sort and filter functionality is similar to that in the Scanner view.
The RSSI Graph uses the same scan data as the Scanner. Therefore, filters applied in the Scanner view are also reflected in the RSSI Graph.
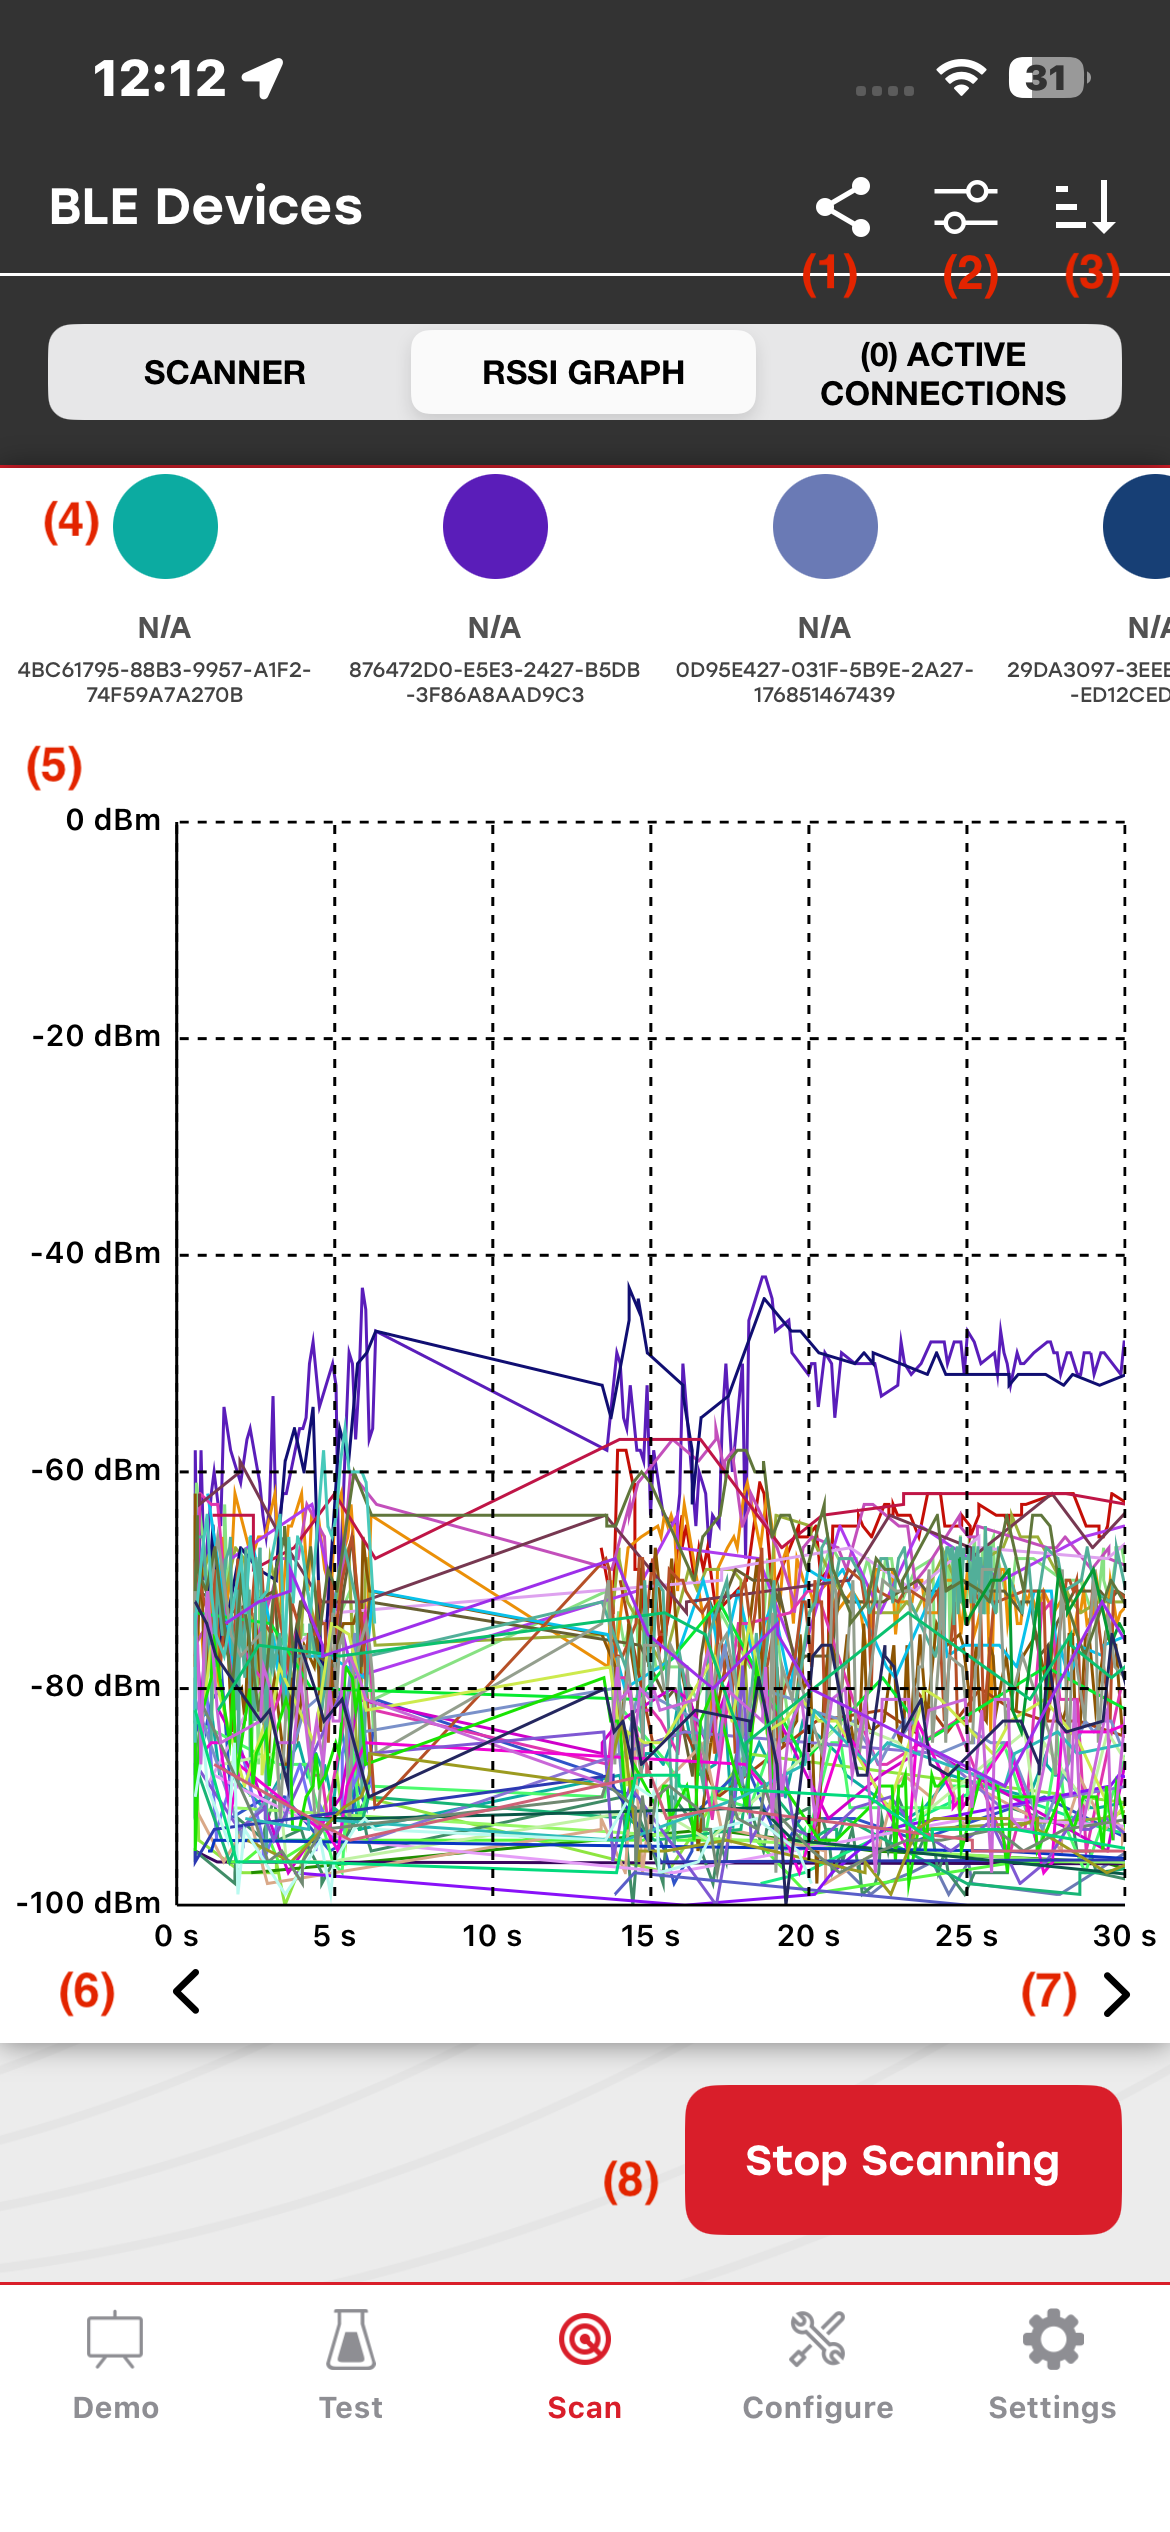
The main elements of the RSSI Graph view are:
Export: Saves scan data to a
.csvfile.Filter: Filters the displayed devices.
Sort: Sorts devices by RSSI.
Device list: Horizontally scrollable list of devices.
Graph data: Scrollable and scalable RSSI graph.
Scroll to start time: Scrolls the graph to the start time. This control is available when the graph is not already at the start time.
Scroll to current time: Scrolls the graph to the current time. This control is available when the graph is not already at the current time.
Start/Stop scanning: Starts or stops scanning.
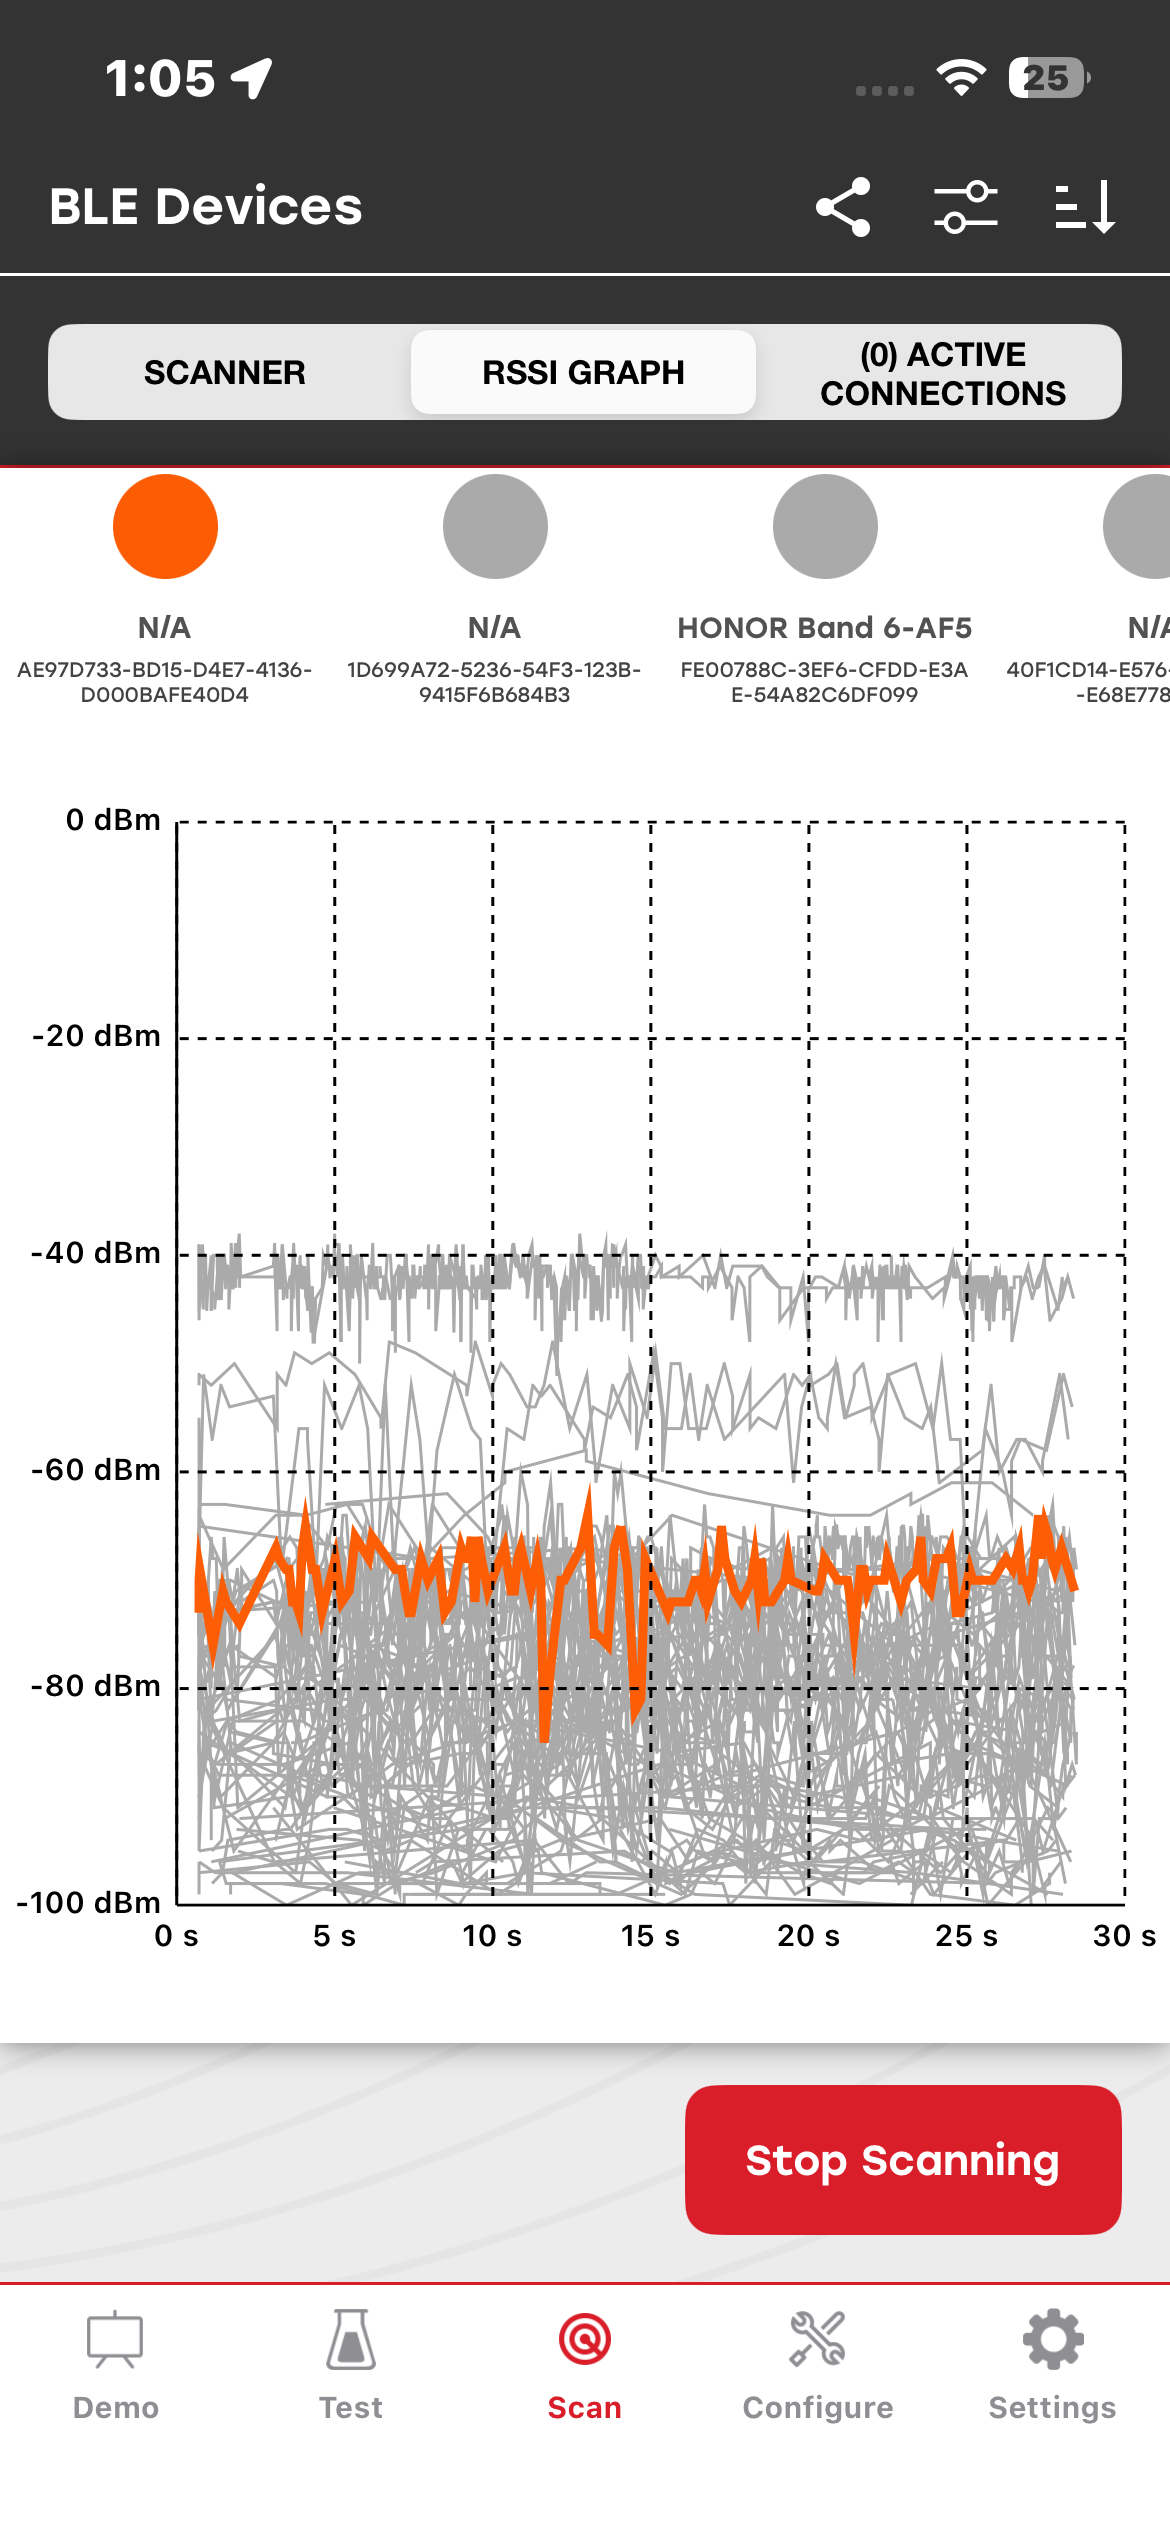
To highlight the data for a specific device, select the device name in the device list.
Active Connections#
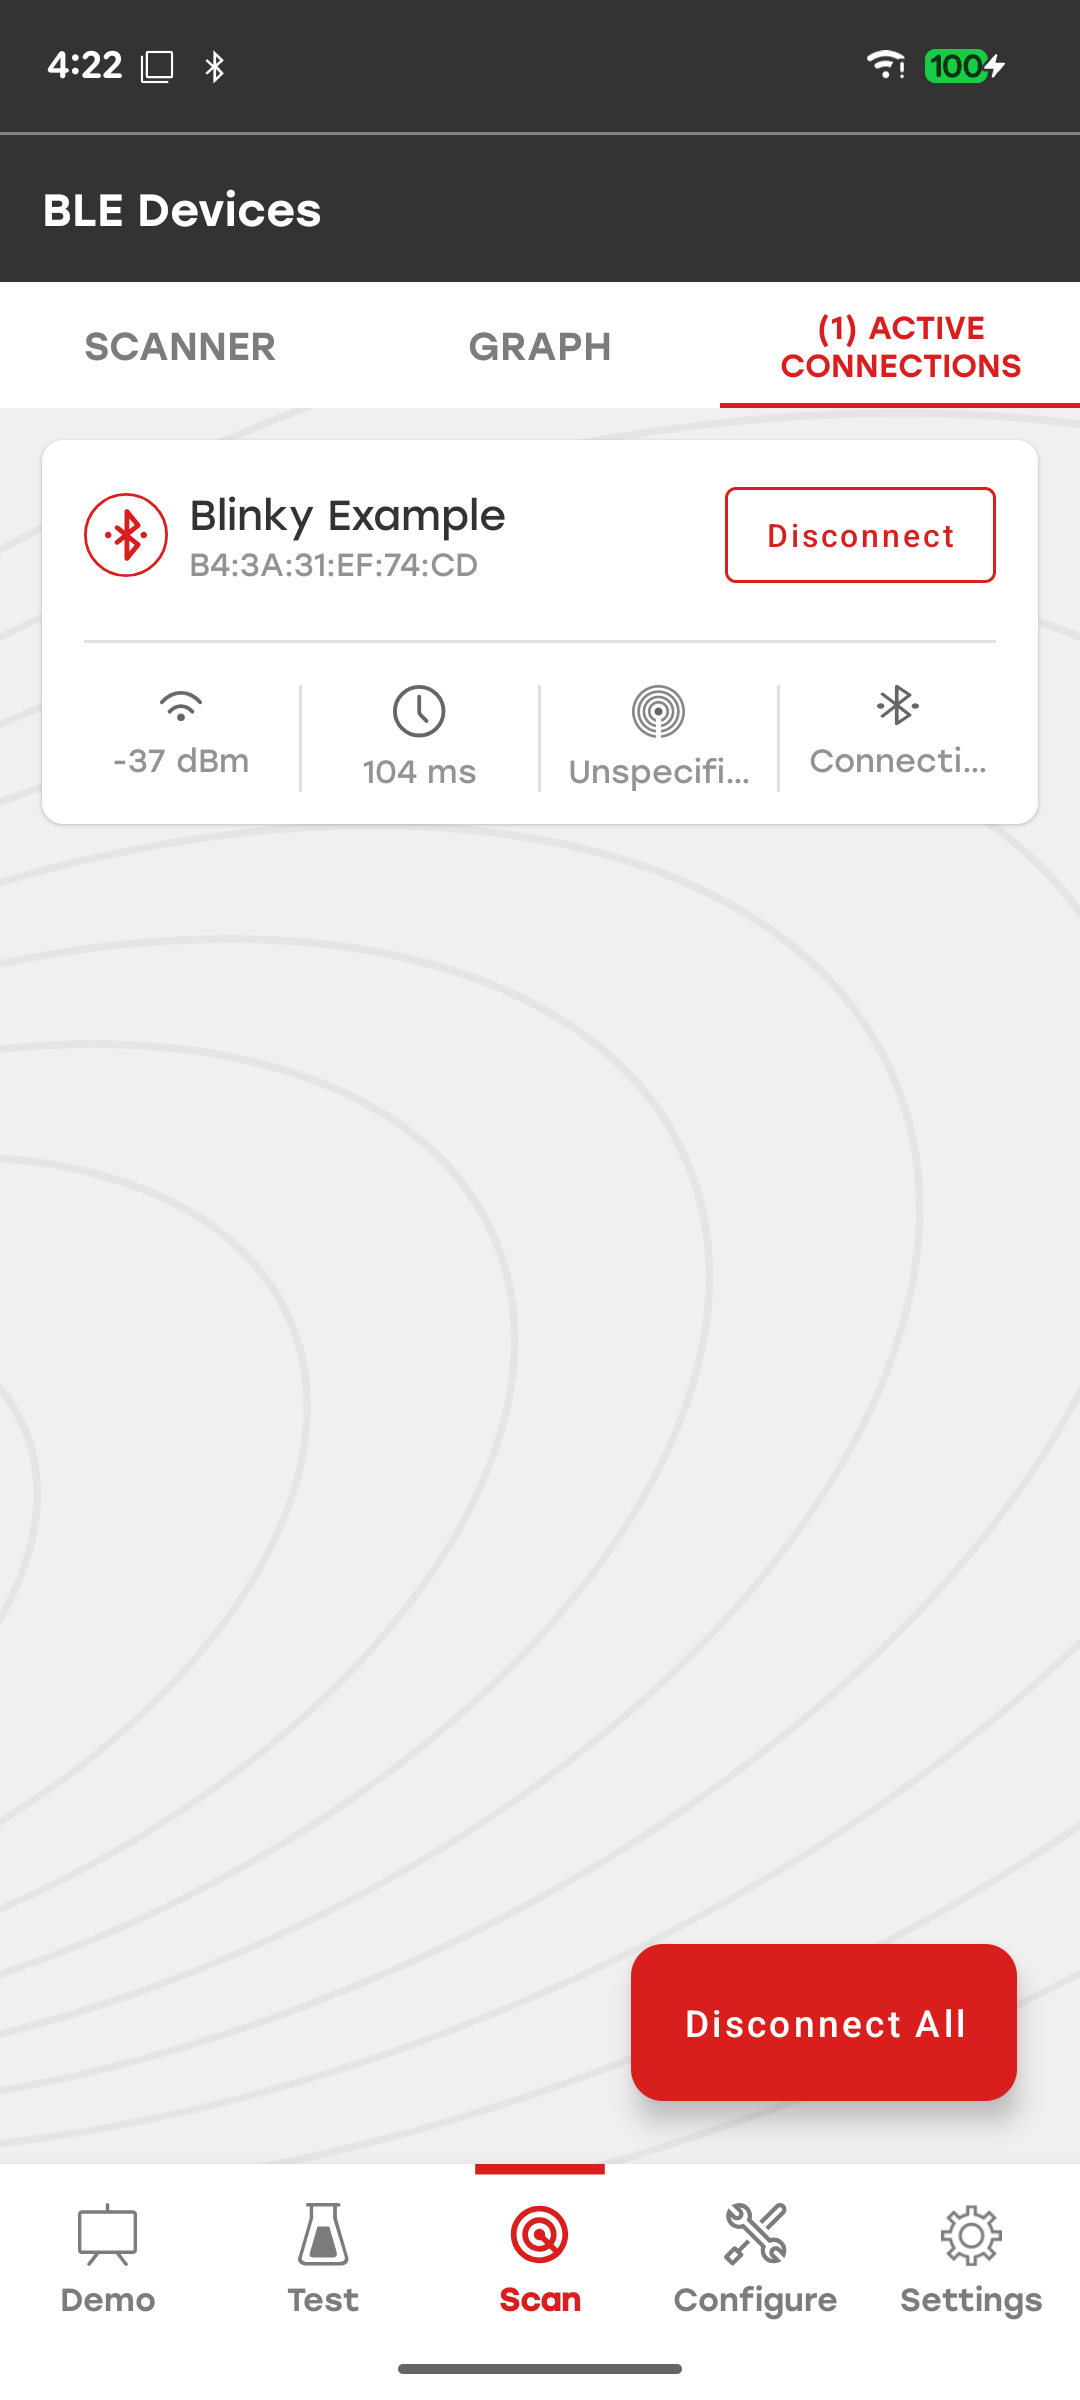
The Active Connections view lists all connected devices. It allows you to go to a specific connection view or disconnect from devices. All devices can be disconnected with the Disconnect All control at the bottom.
Device View#
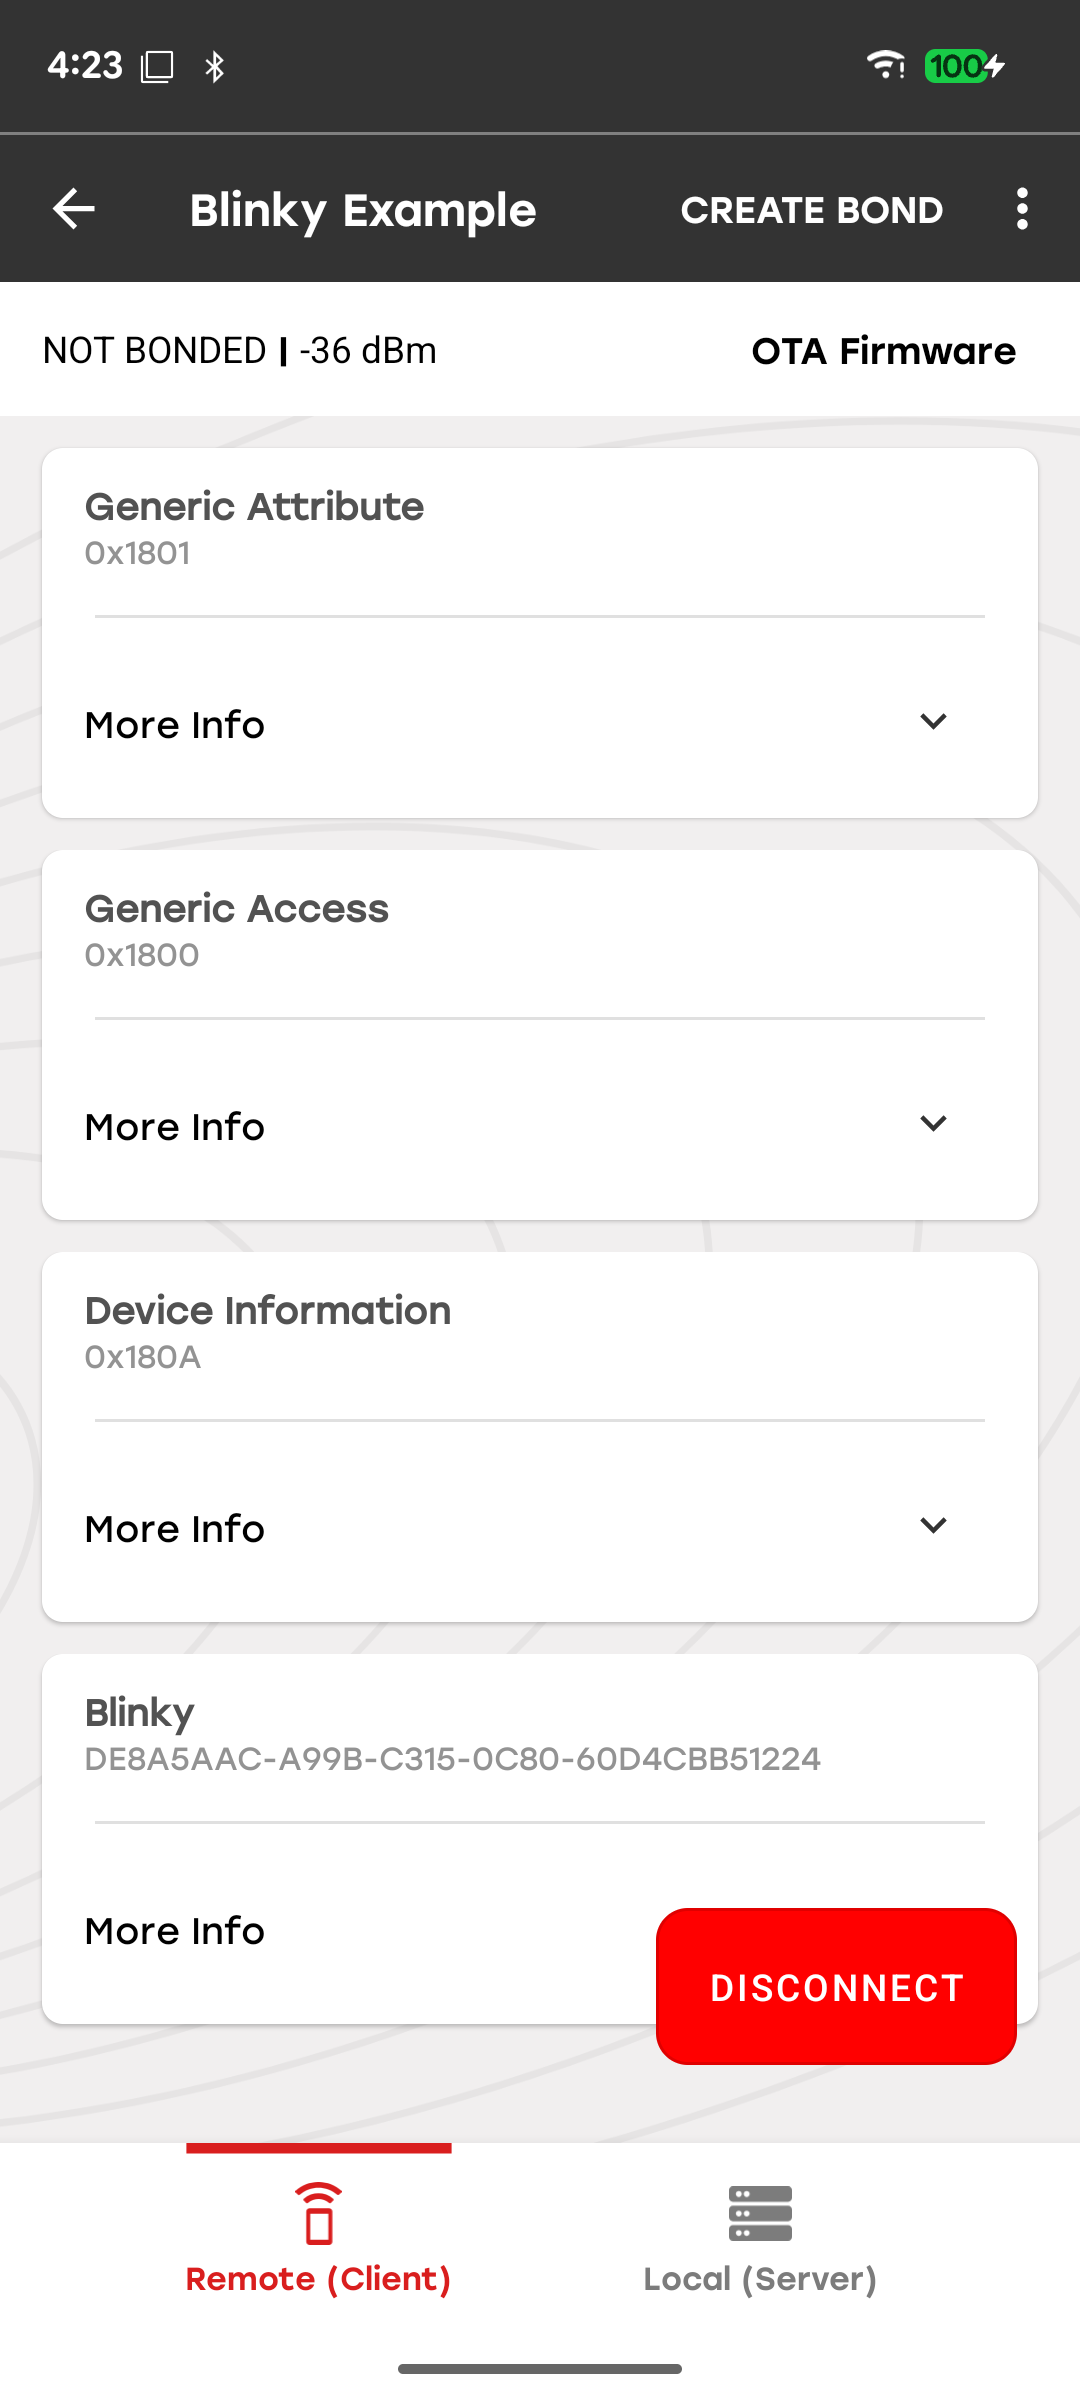
Once a connection with a device is established or you tap an existing connection in the Active Connections view, the app jumps to the Device view, where GATT databases for both the remote and local side are displayed.
Remote (Client) vs Local (Server)#
At the bottom of the device view, you can switch between the GATT database of the remote device (where the mobile app acts as a client) or the GATT database of the local device (where the mobile app acts as a server). The UI representation of both GATT databases is the same. The local GATT database can be modified in the GATT Configurator view.
GATT Services#
Each card represents a GATT service and contains the service name and UUID. A custom service (128-bit UUID) that has not been renamed by the user is displayed as Unknown service. Similarly, a custom characteristic that has not been renamed is displayed as Unknown characteristic. There are a few exceptions for that rule, for example some Silicon Labs custom services and their characteristics, which cannot be modified.
GATT Characteristics#
Tapping the down arrow expands the card to show a list of all the characteristics belonging to the service as well as supported properties. This will not automatically read the characteristics, which means that the data fields might be empty. Reading has to be done explicitly by the user. If the characteristic has descriptors, they are listed underneath the characteristic UUID.
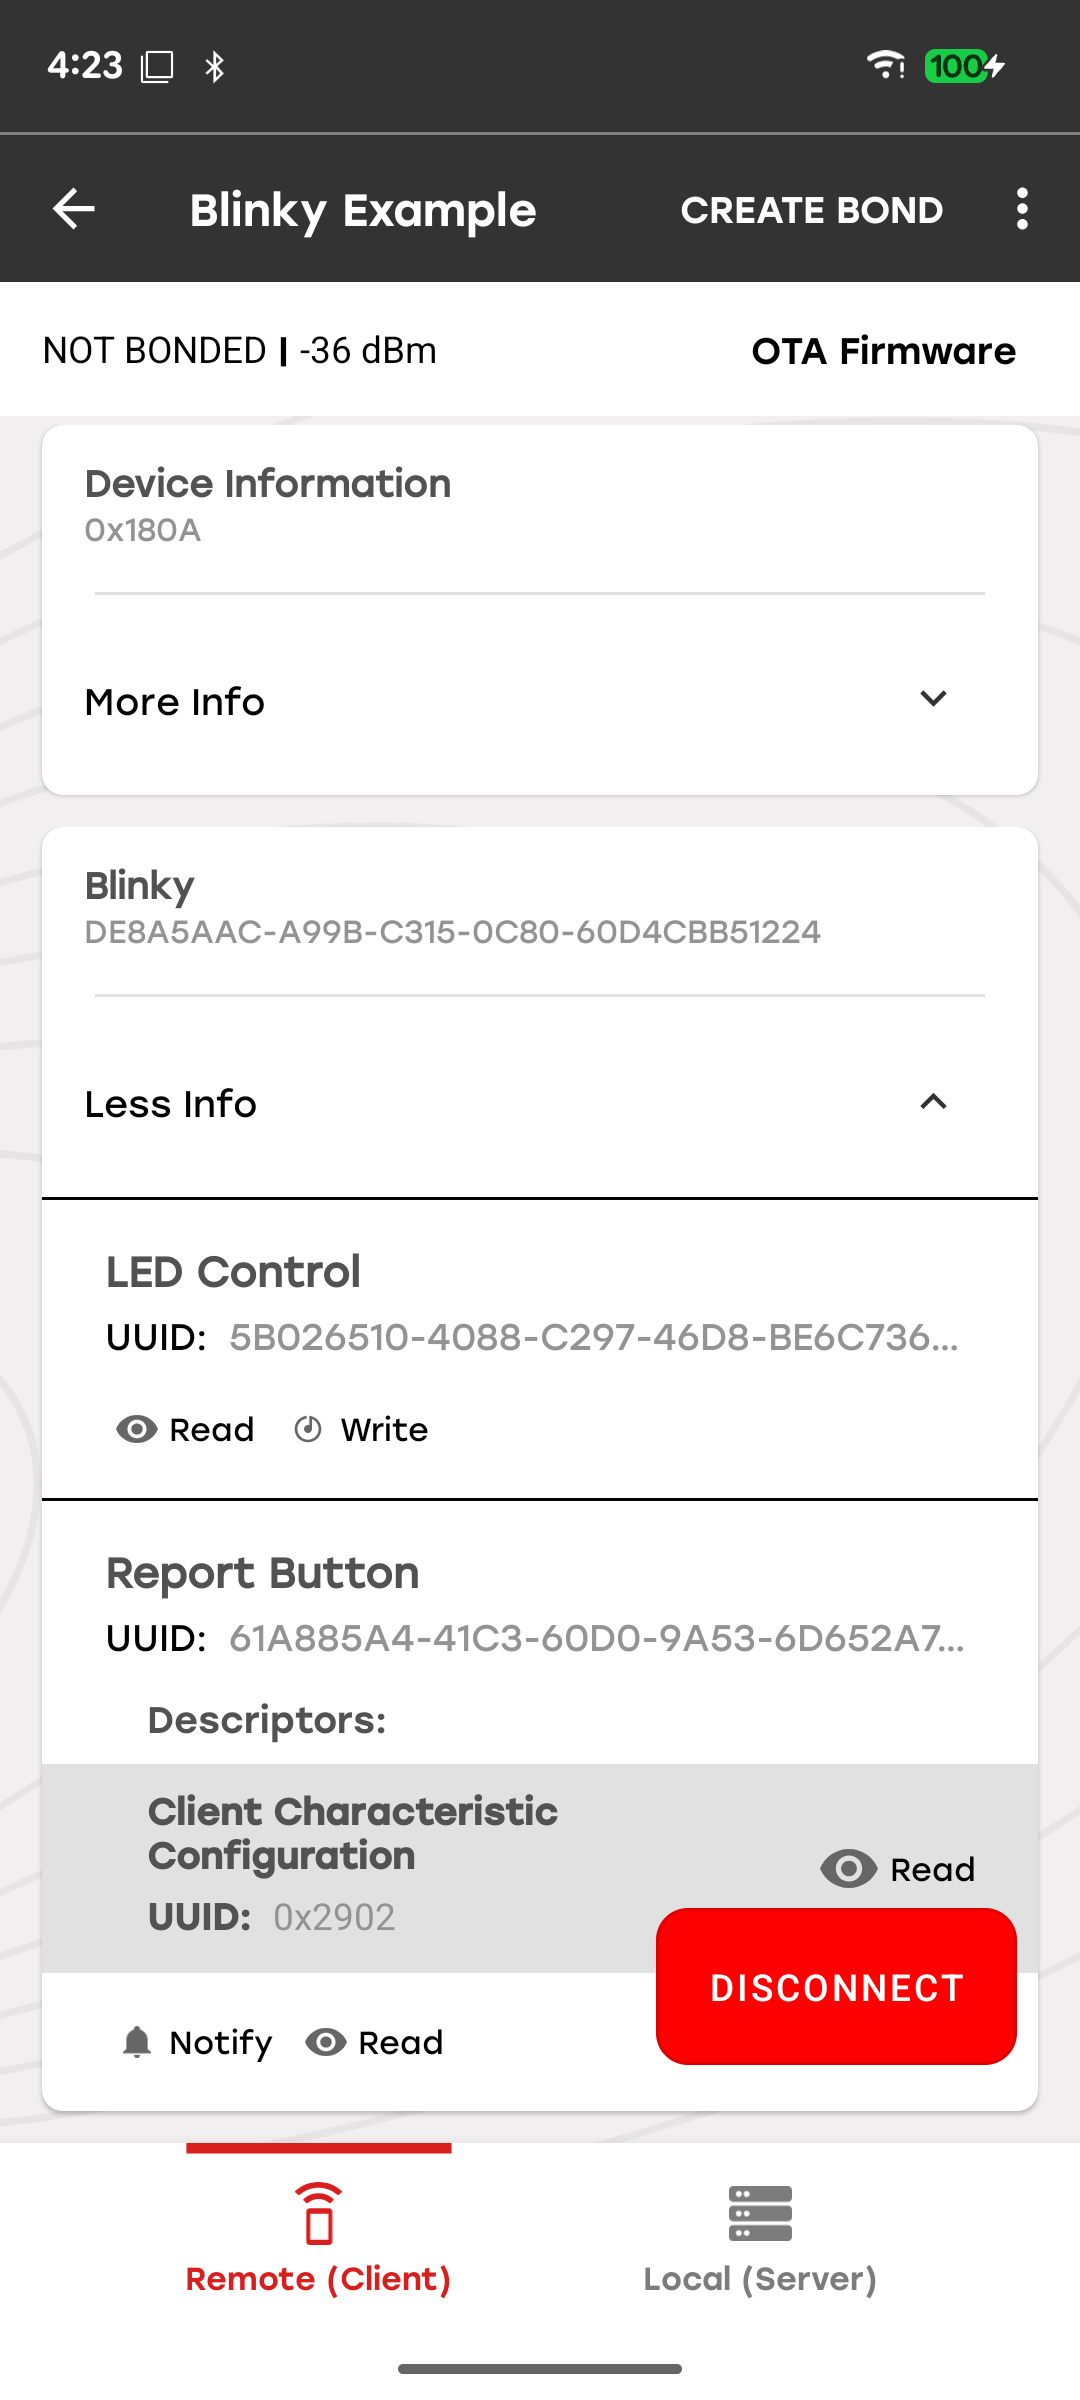
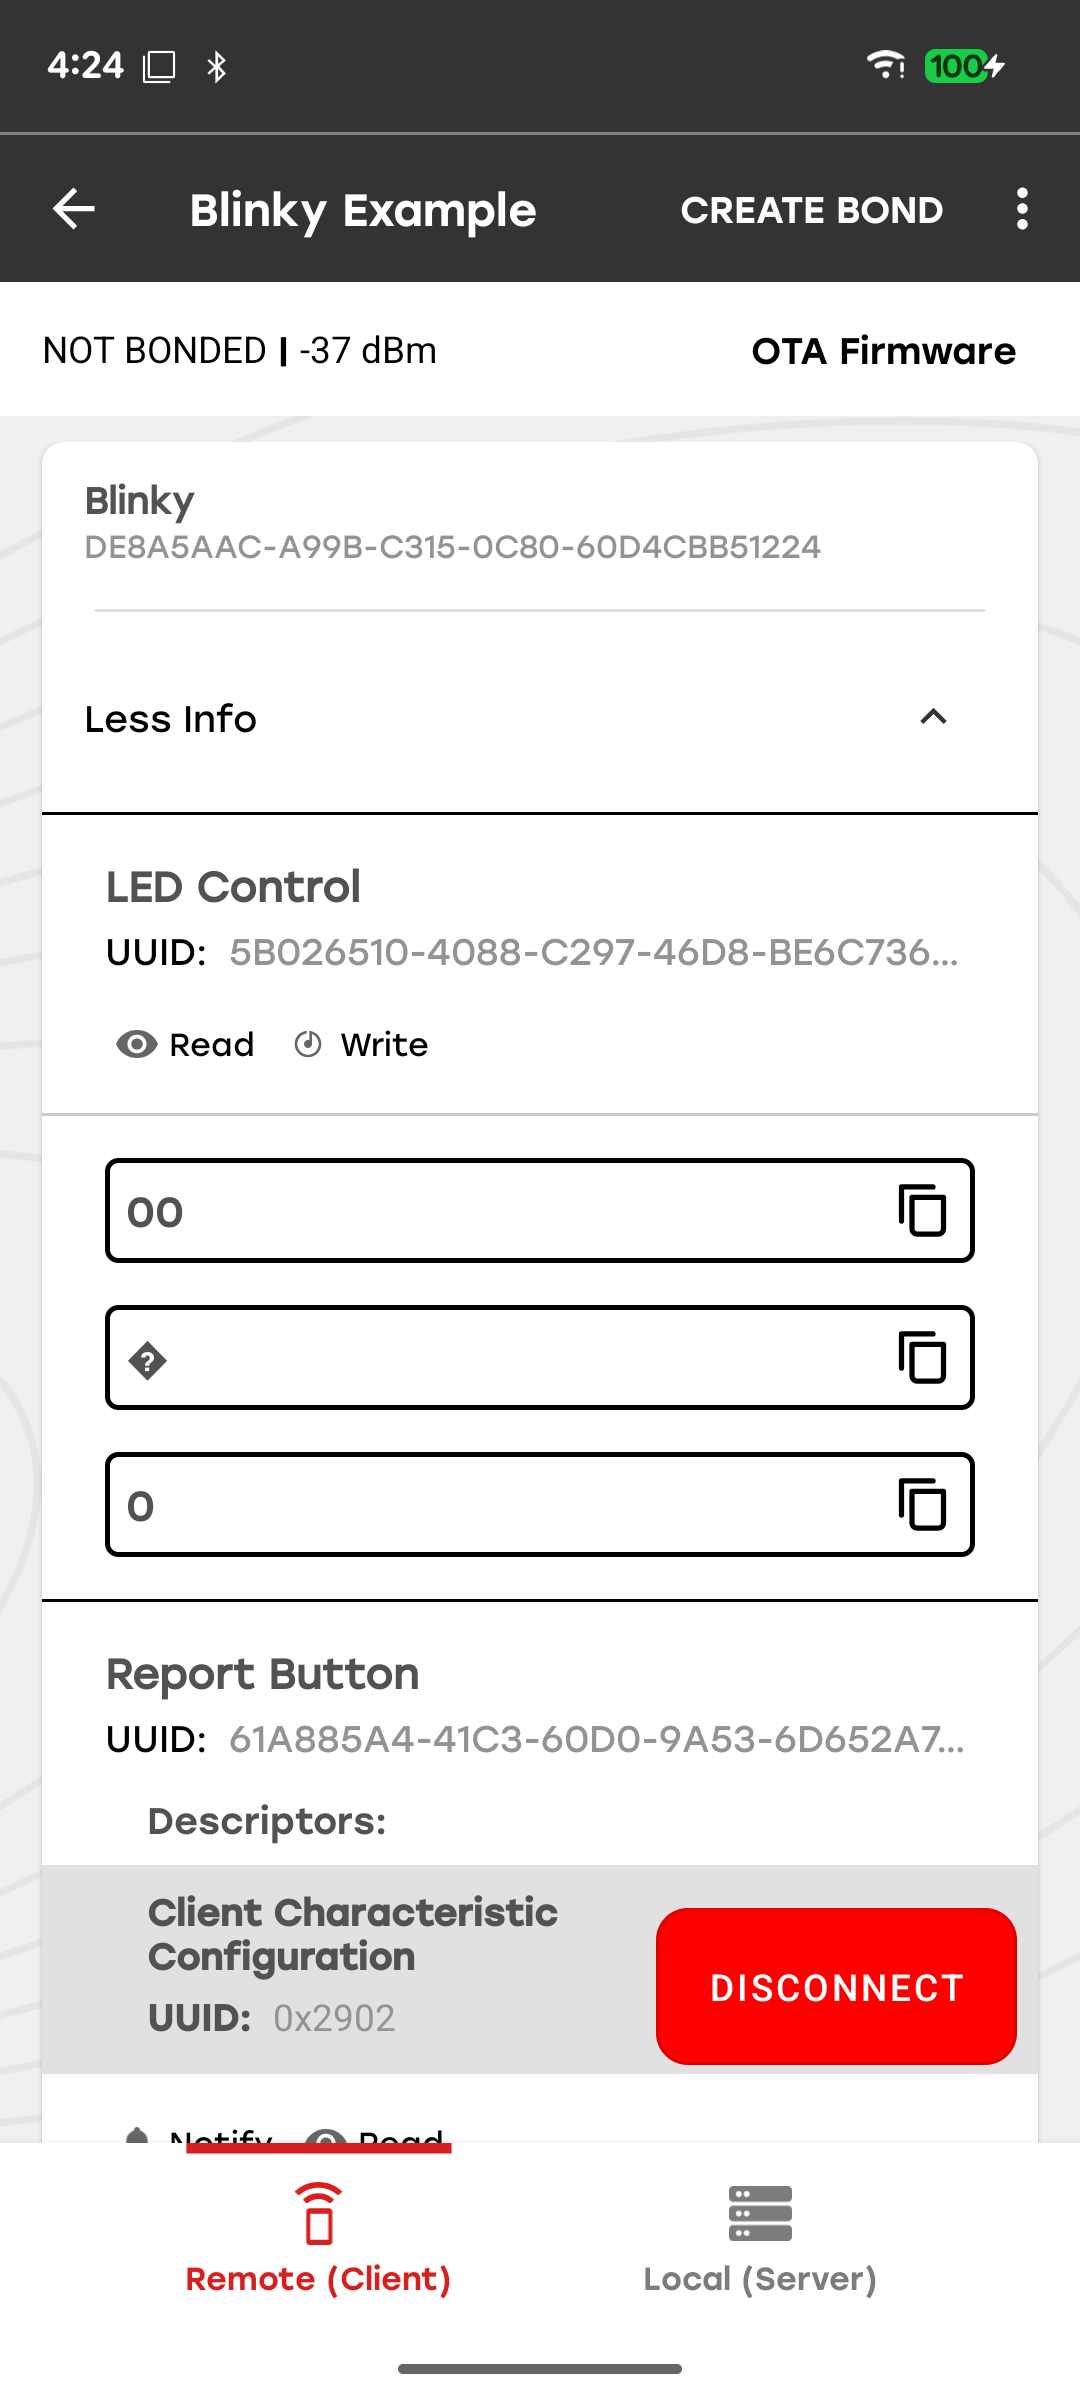
If other properties are available, they will have additional associated icons. For characteristics without any specific data format, you can copy data to the clipboard with the copy icon on the right side of the characteristic data. Data is copied using the respective format (hex, ASCII, or decimal).
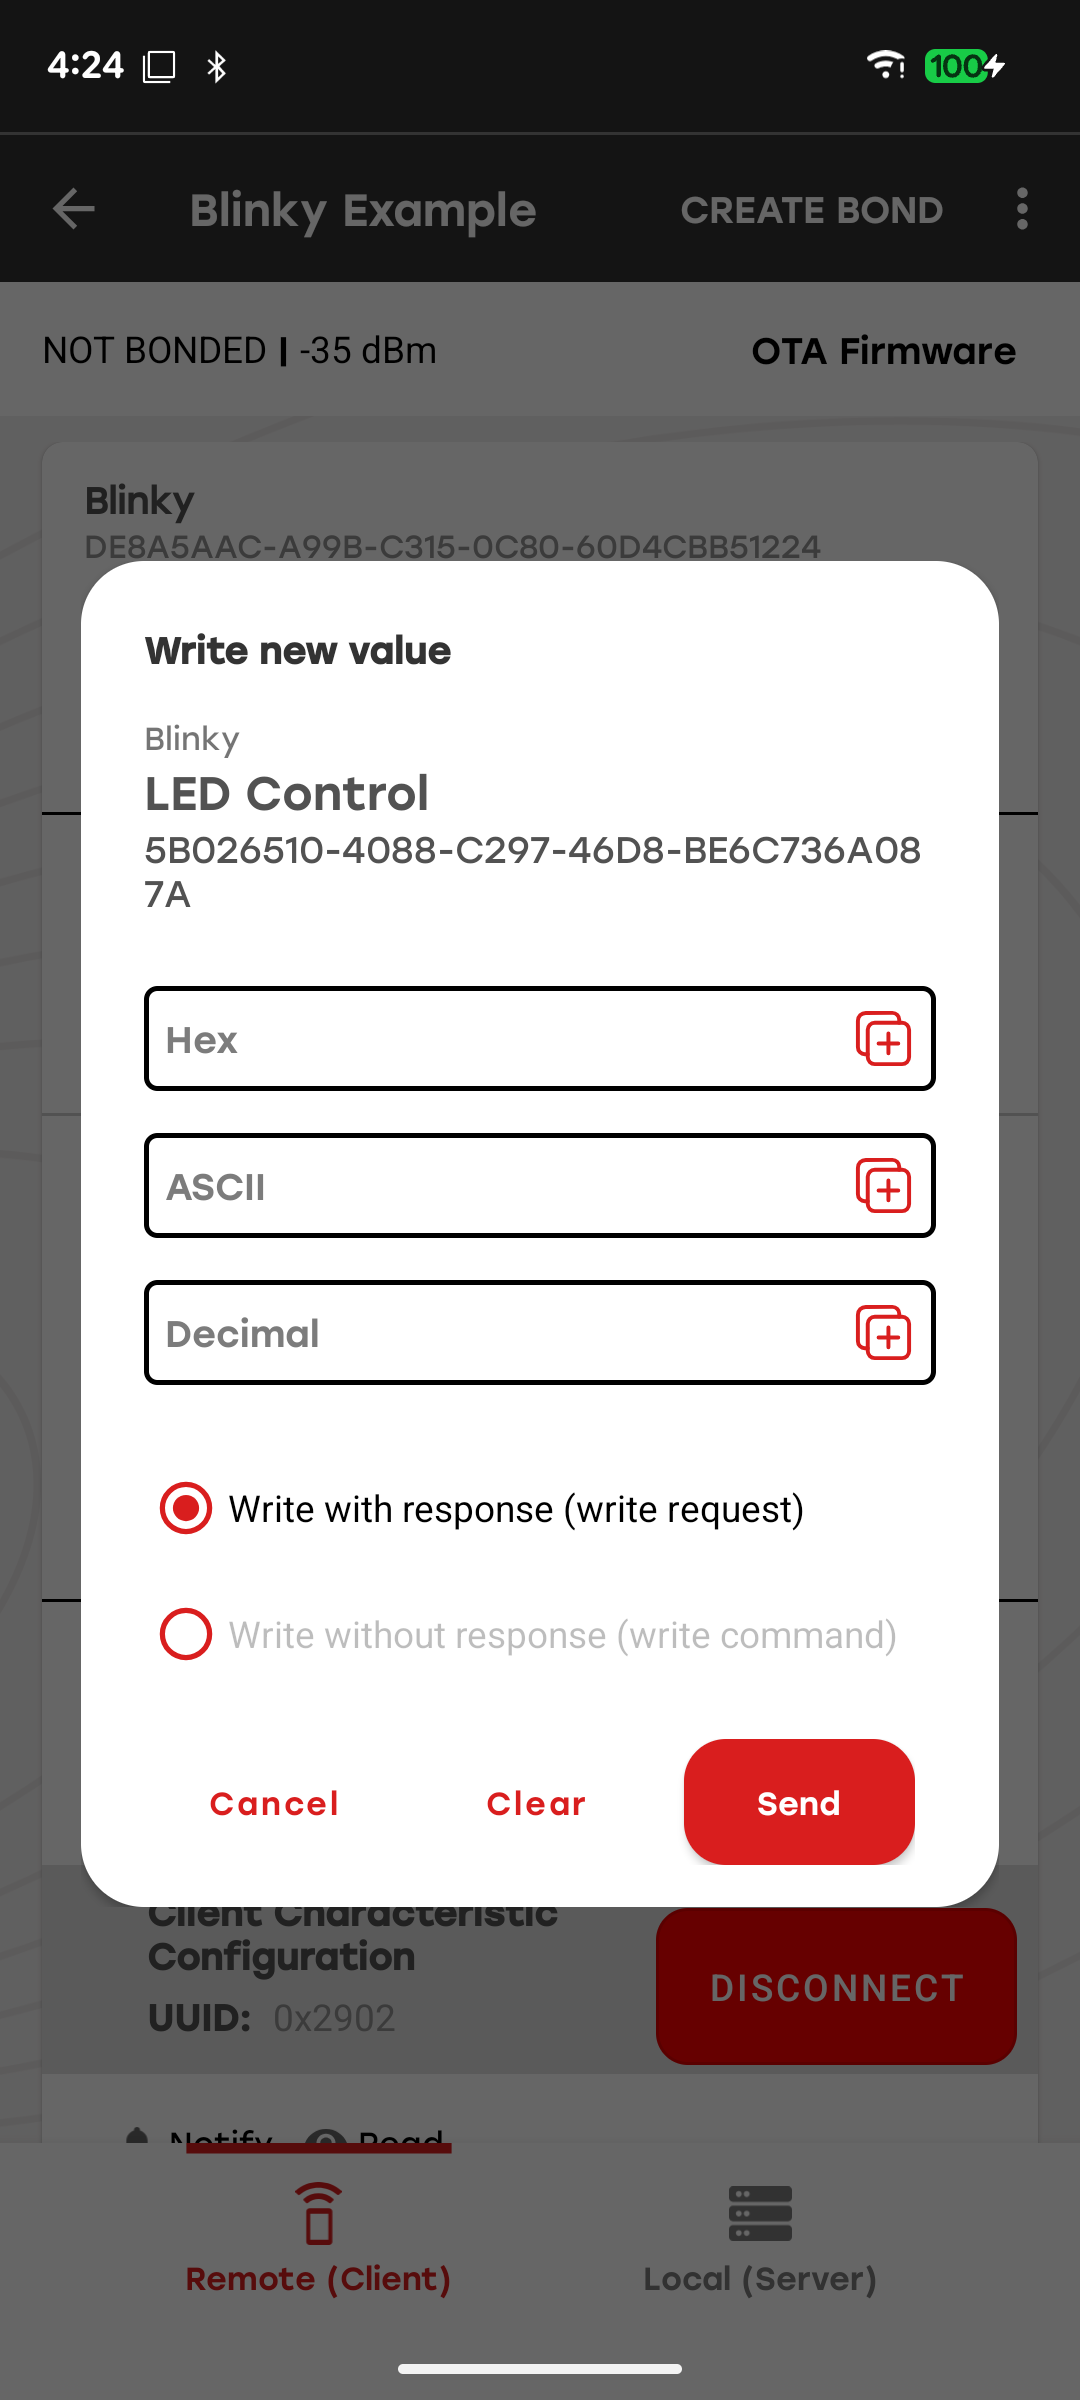
If the write property is available, tapping the write icon opens a dialog to write data to the characteristic. Within that dialog you can select the write method (write request or write command), depending on what is supported by the characteristic. If one is not supported, it will be grayed-out. You can also paste data from the clipboard by tapping the Paste icon on the right side. If the data is not correctly formatted, data validation will show a warning.
Activity Log#
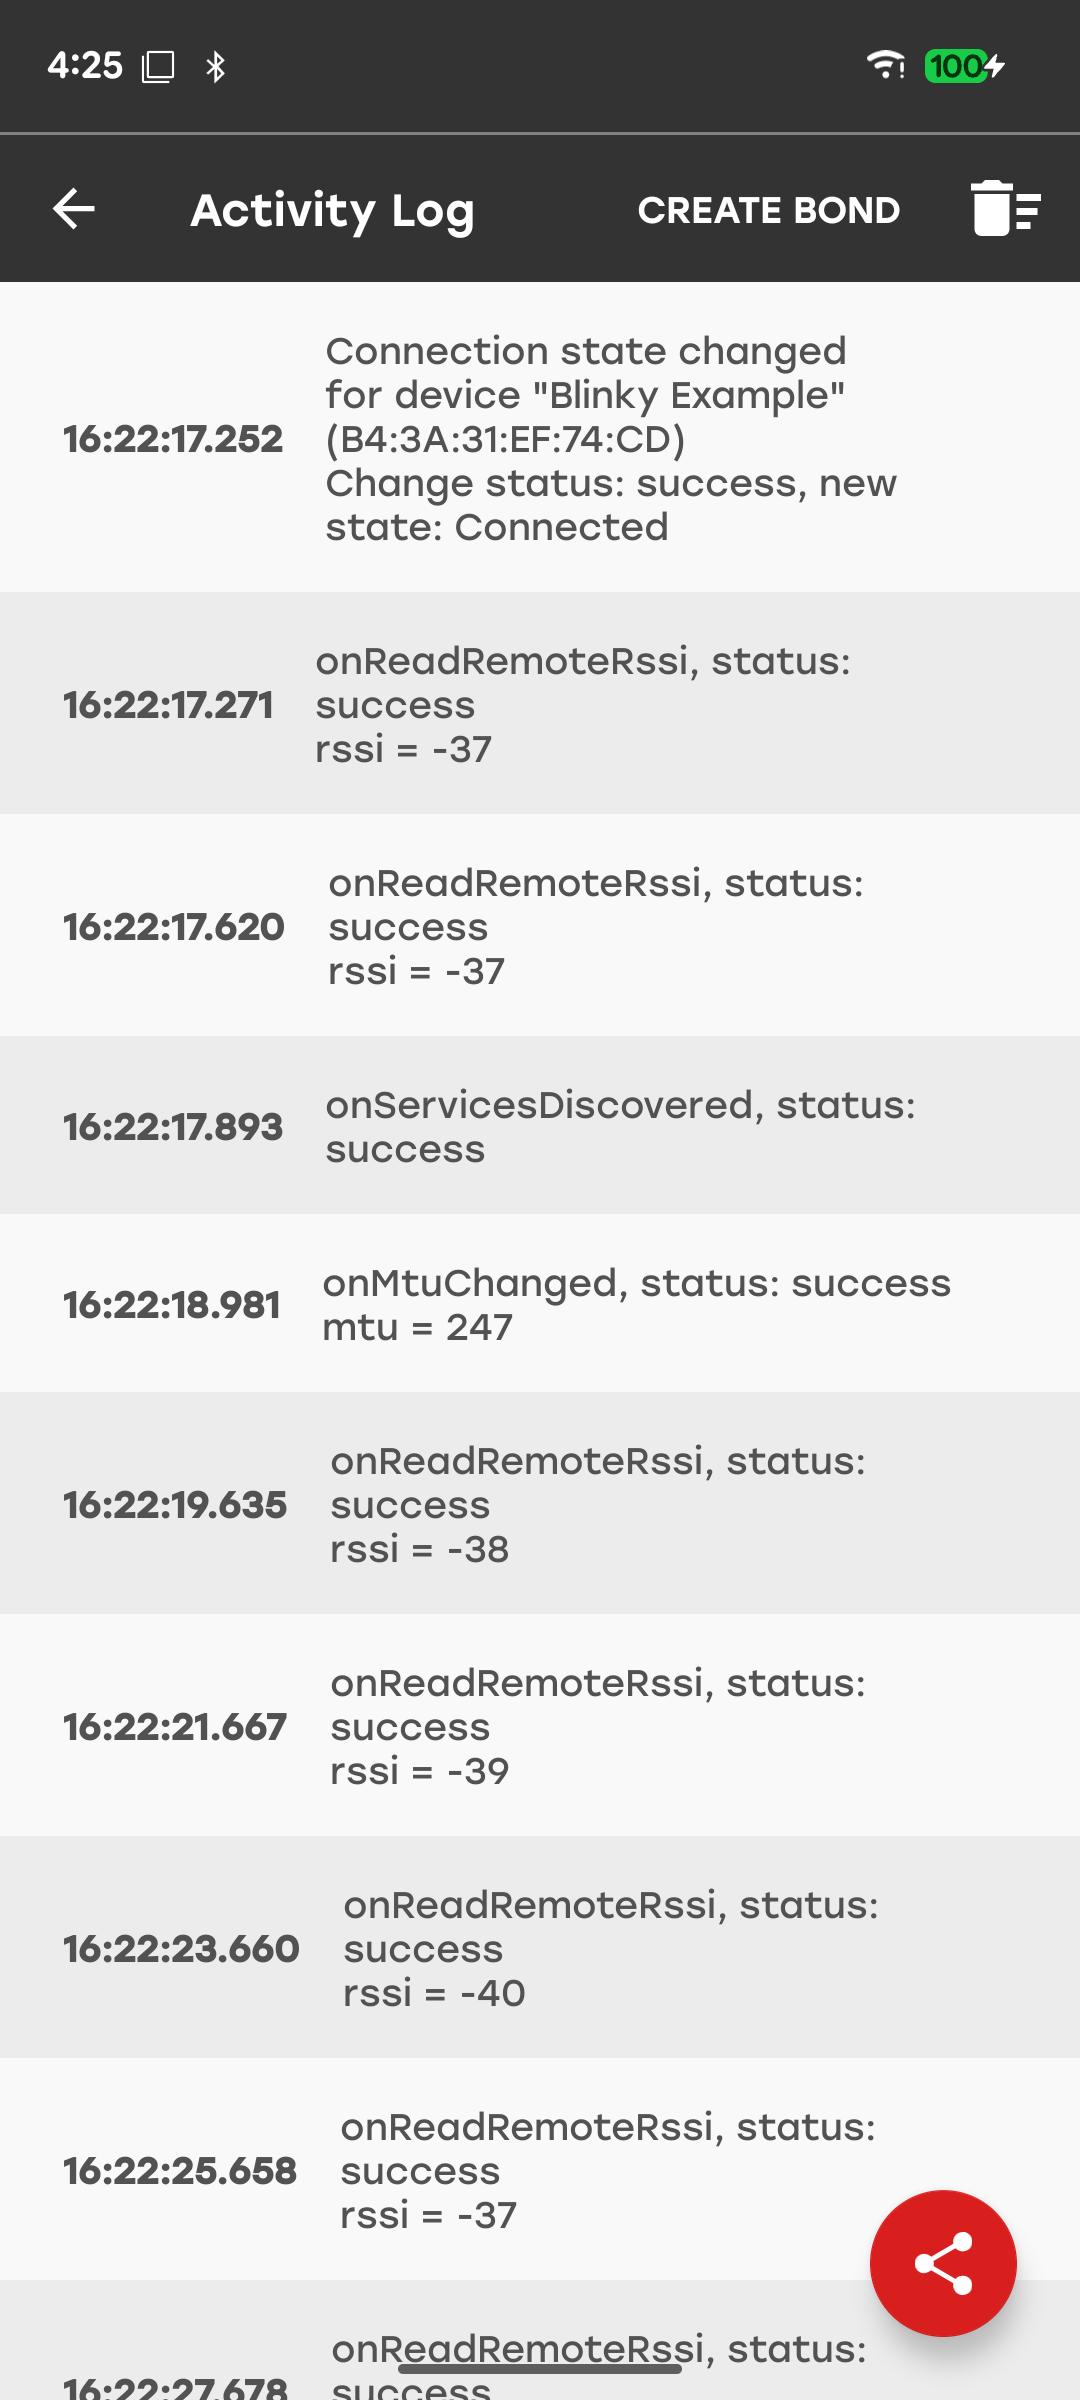
The Activity Log button is located in the top right corner of the Device View. The log keeps a record of all the Bluetooth activity. It can be shared via email or other methods for later analysis.
Connection Priority#
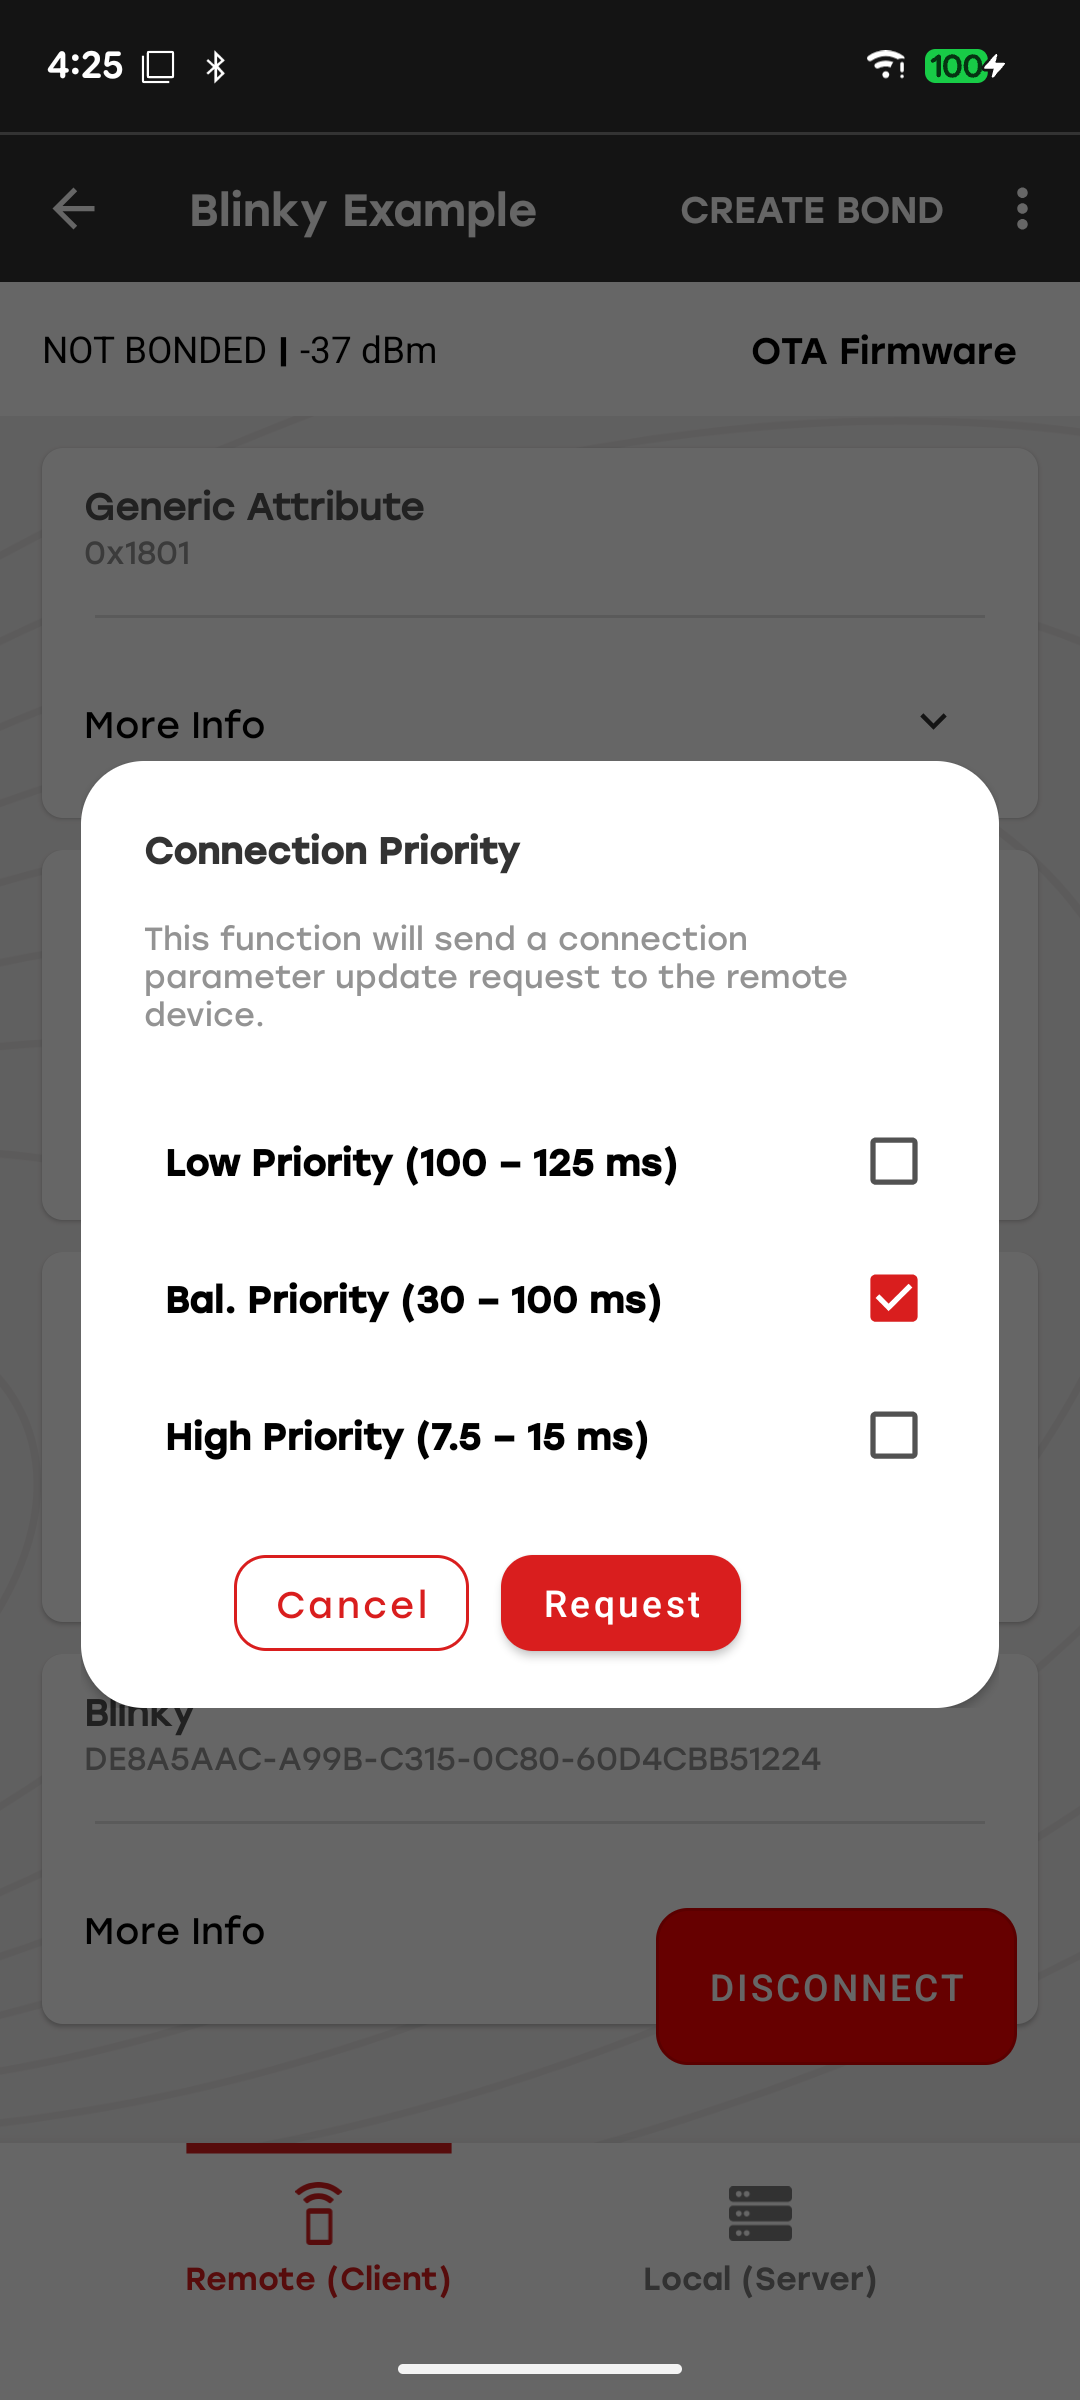
The Connection Priority control is located in the top right corner of the Device View. It allows you to choose one of the predefined connection intervals:
Low priority (100-125 ms)
Balanced priority (30-100 ms)
High priority (7,5-15 ms)
Notes:
The ranges are defined by the Android stack and are not limitations imposed by the Simplicity Connect app.
This option is not available on iOS because of system limitations.
Request MTU#
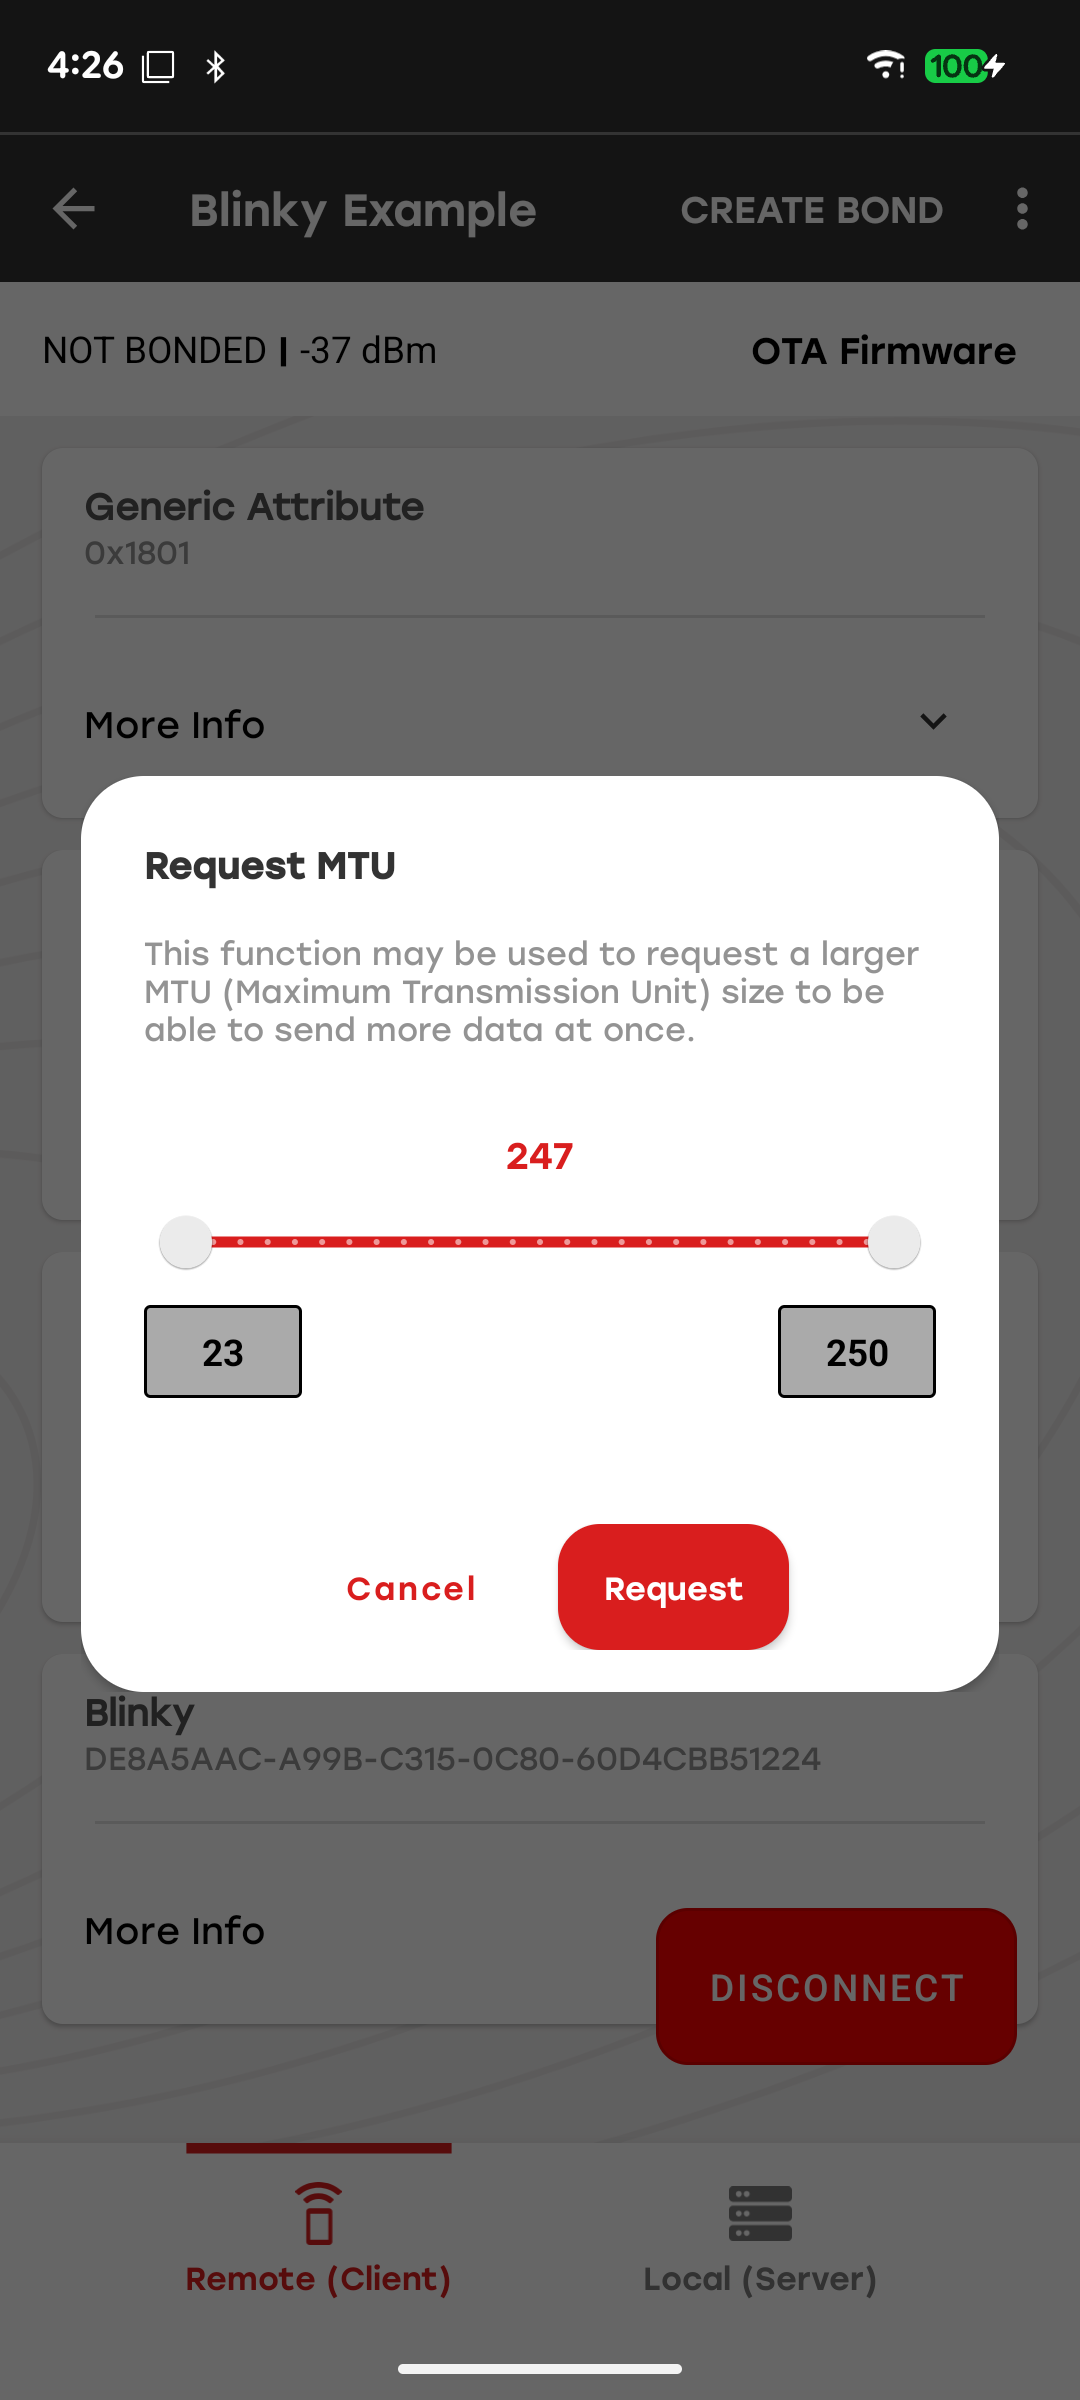
The Request MTU control is located in the top right corner of the Device View. It allows you to request a new MTU size in the range of 23 to 250 bytes.
Note: This option is not available on iOS because of system limitations.
OTA Firmware Update#
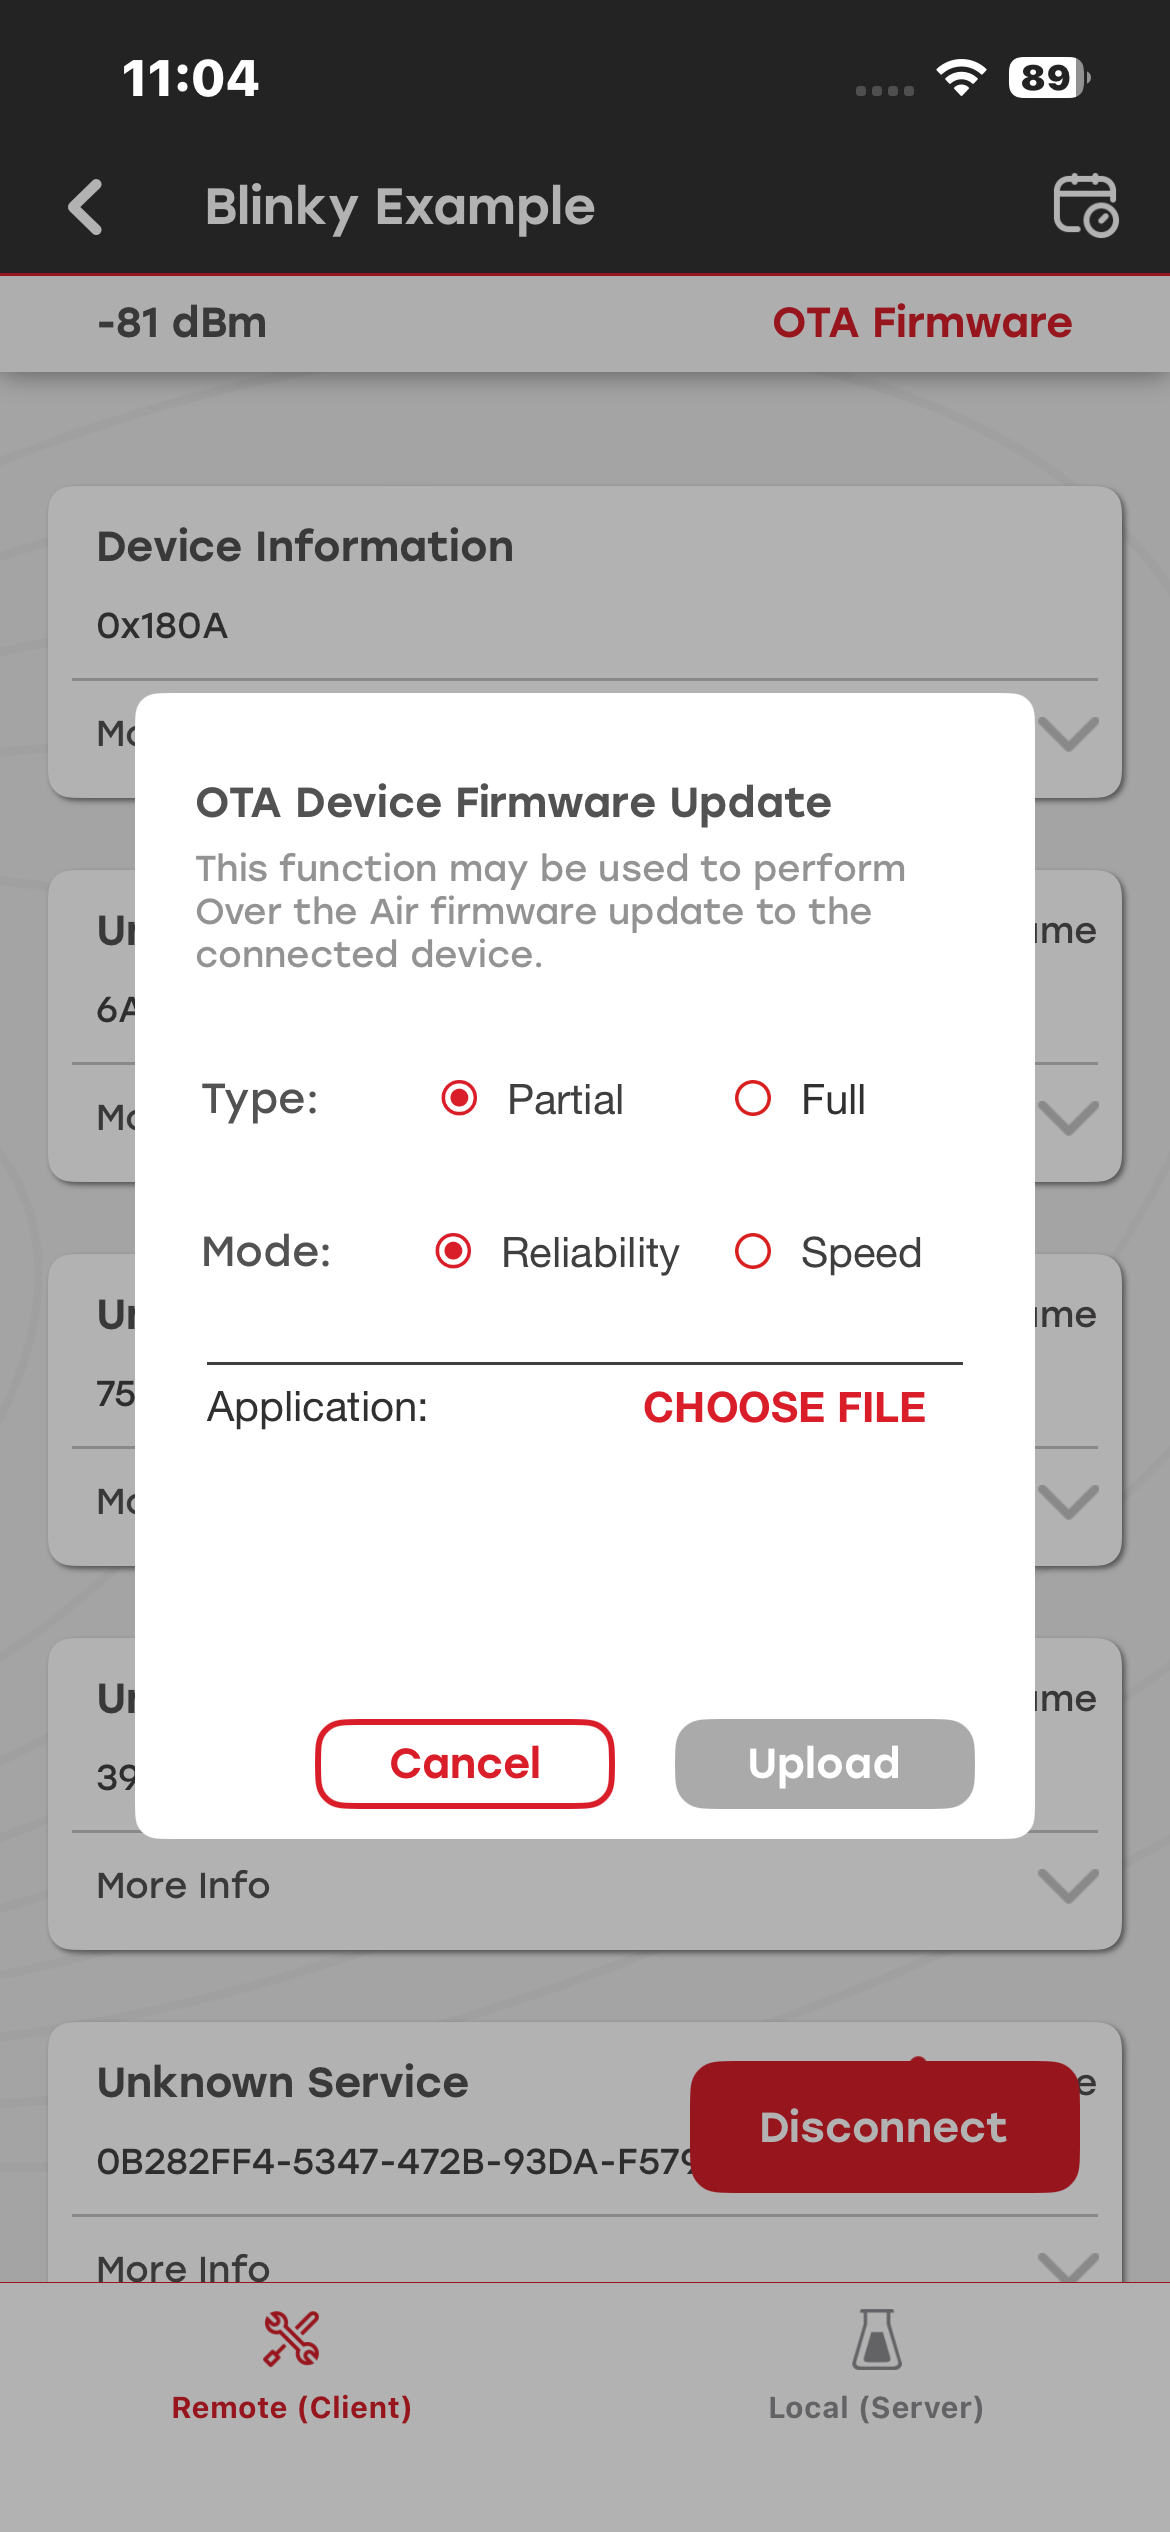
OTA firmware update is a process of updating a device firmware image over a wireless connection (BLE in this case). There is a dedicated OTA firmware control located below the top right corner icons. Tapping that control opens the OTA dialog. If the Silicon Labs OTA service was not found in the GATT database, a warning is displayed.
OTA type
Partial: Only the application is updated.
Full: Both application and AppLoader are updated. This requires uploading two separate GBL files, one for the application and one for the AppLoader.
OTA mode
Reliability: Uses a write operation to send the GBL file data.
Speed: Uses write without response operation to send the GBL data.
Application/AppLoader: The GBL file(s) to flash the device.
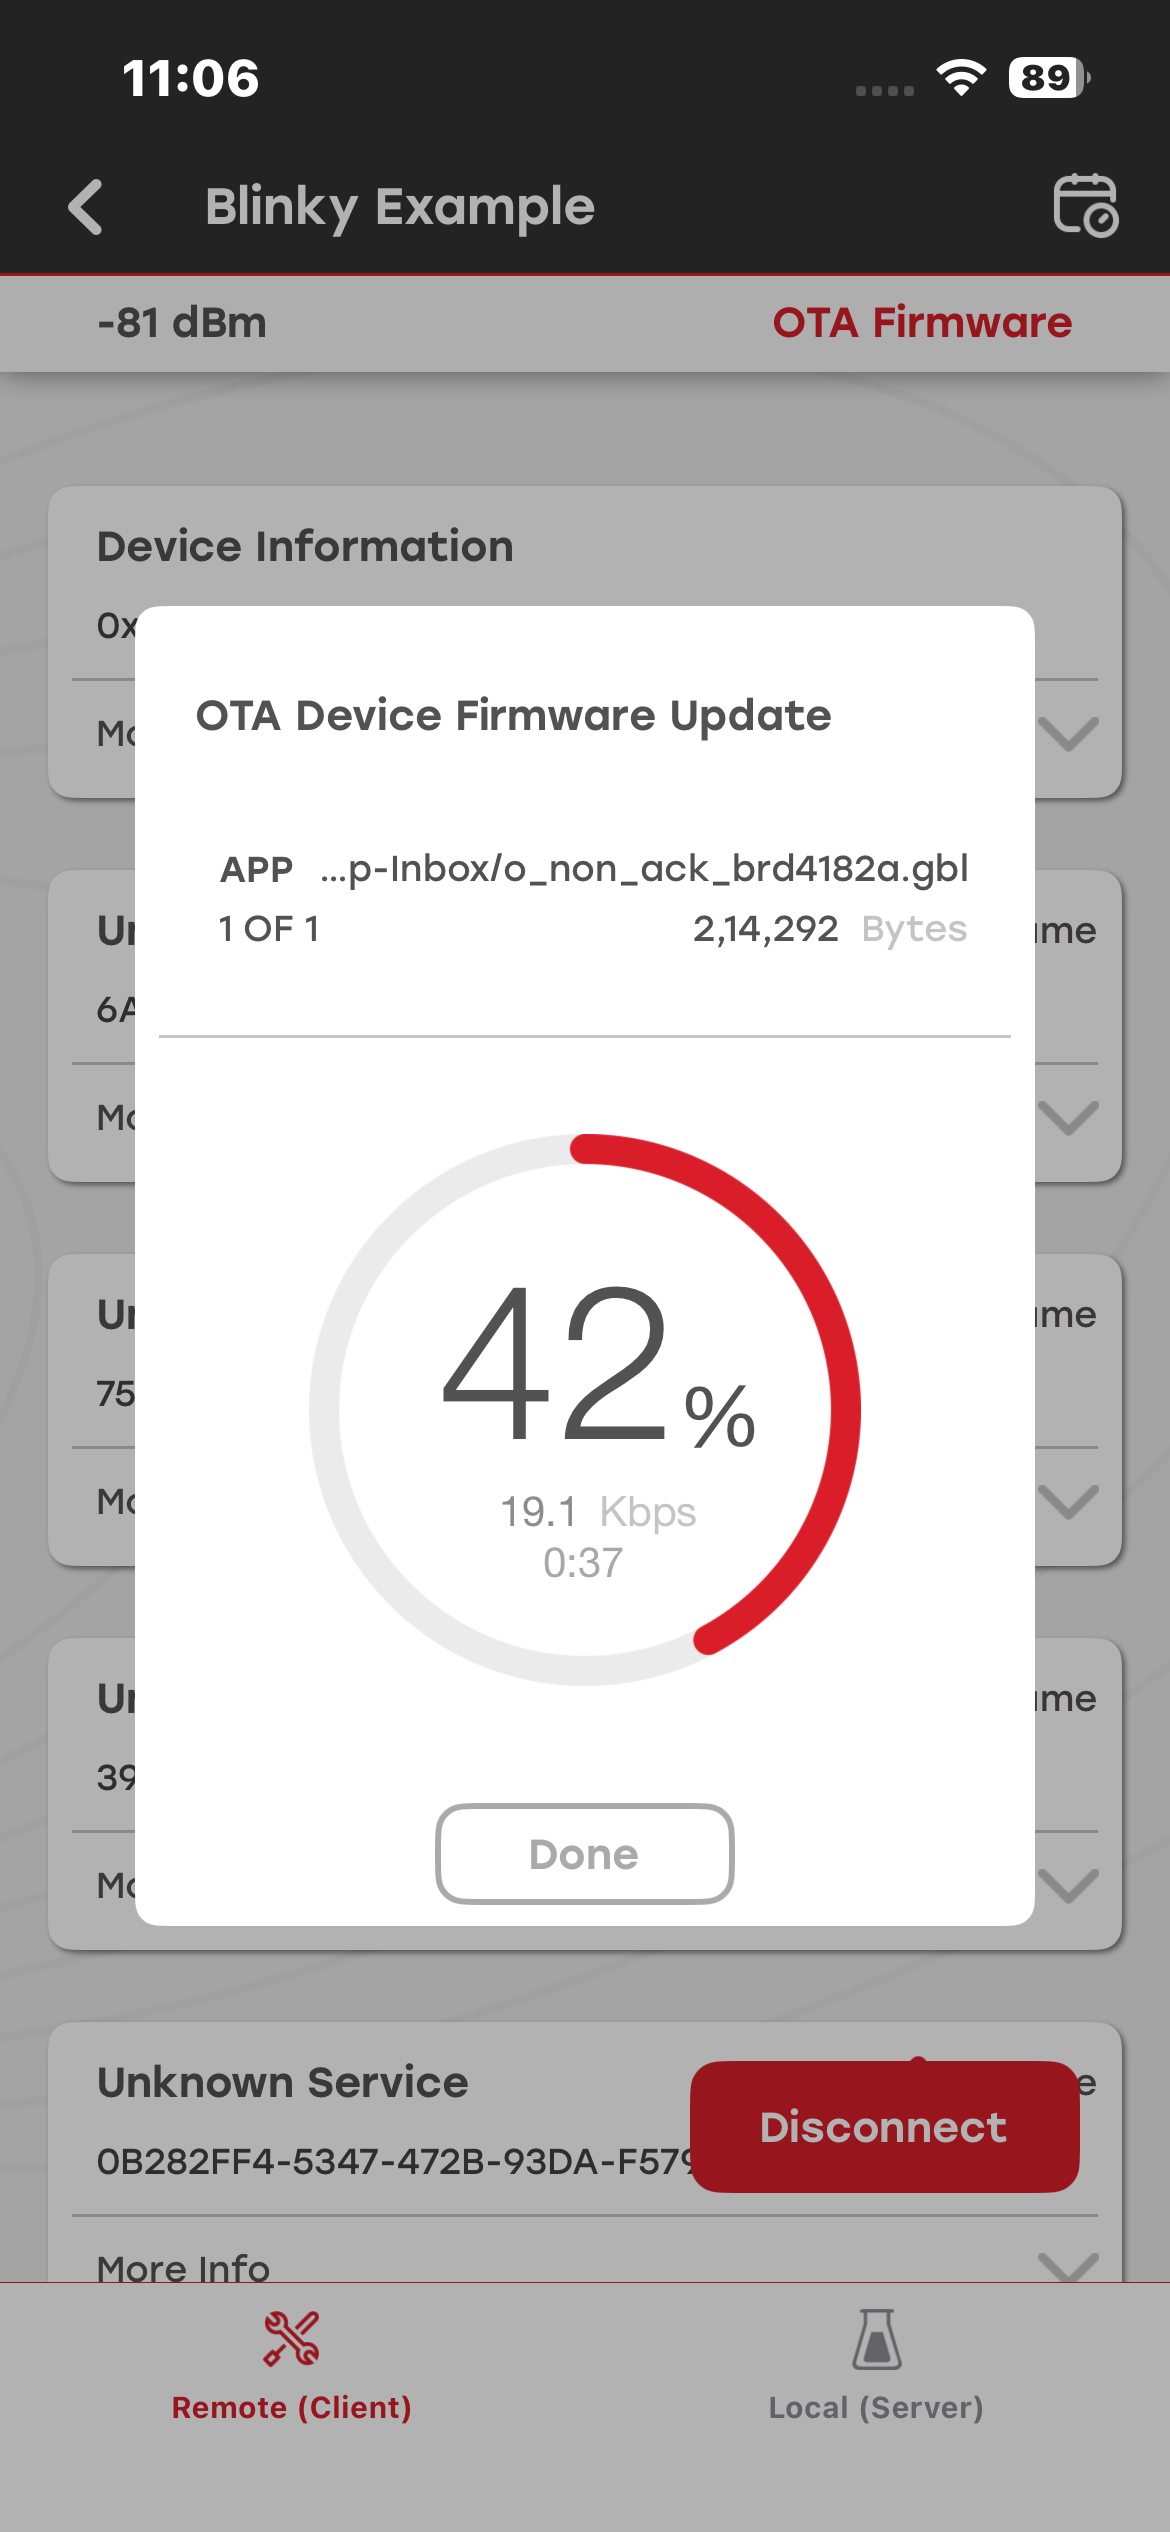
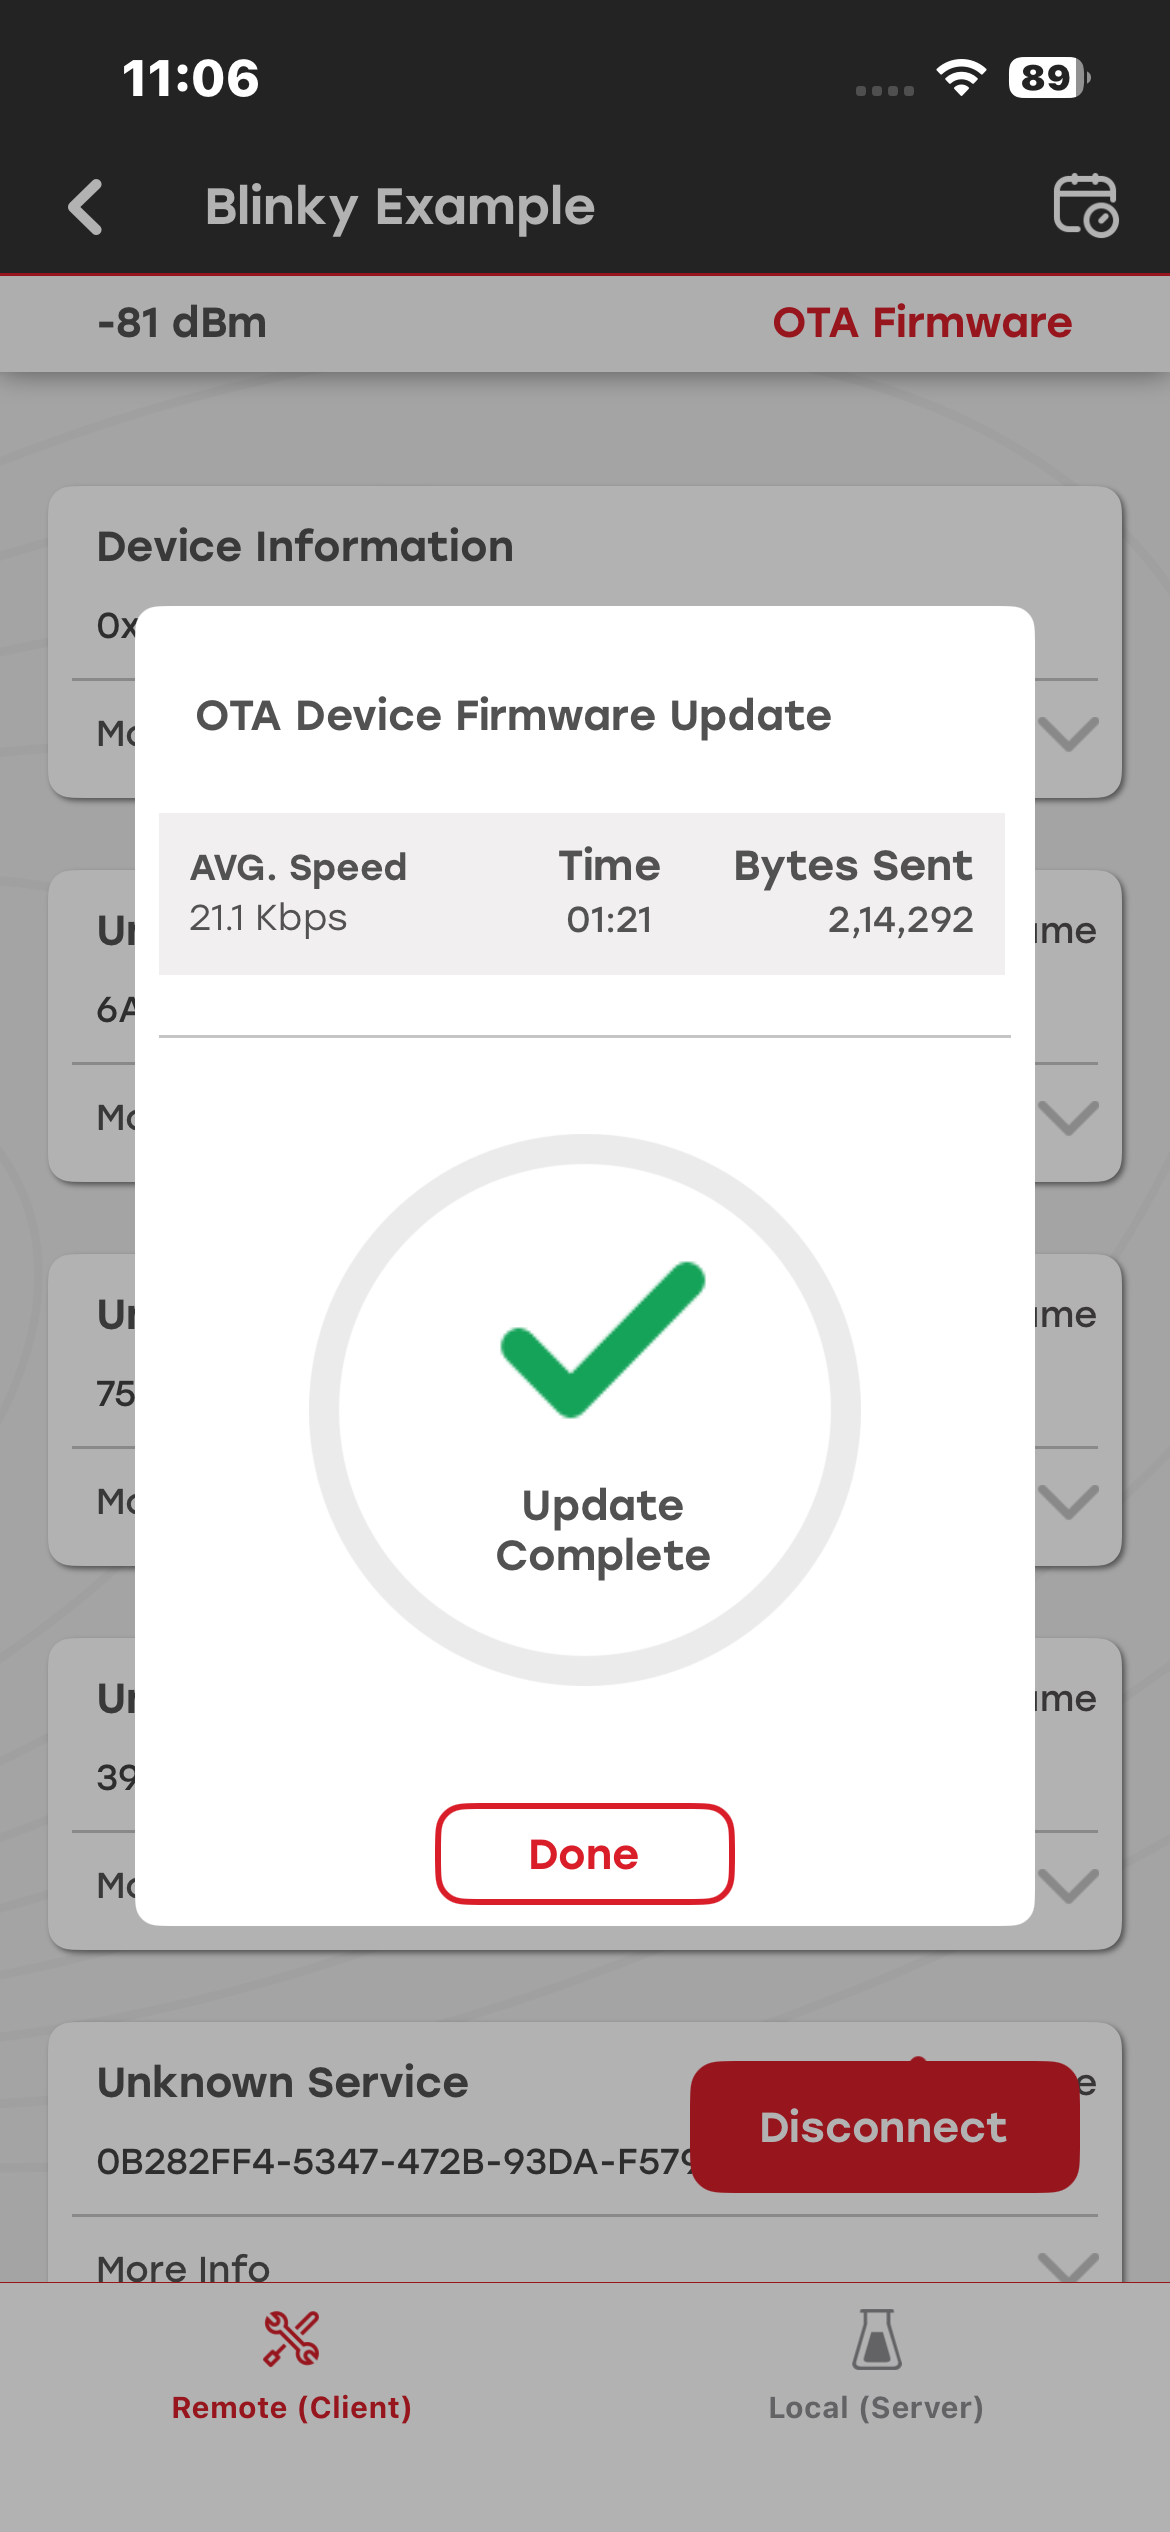
During the OTA process, the information about progress is displayed.
For more information about performing an OTA update with Simplicity Connect, see Using Simplicity Connect for OTA DFU.