Explore SSv5#
When Simplicity Studio® 5 (SSv5) opens, the first screen is the Welcome page within the Launcher perspective. A "perspective" is an Eclipse term for an arrangement of views and an editor area. This page provides an overview of the Launcher perspective's main parts. A detailed reference to all of the functions accessed through the Launcher perspective can be found in the About the Launcher reference section.
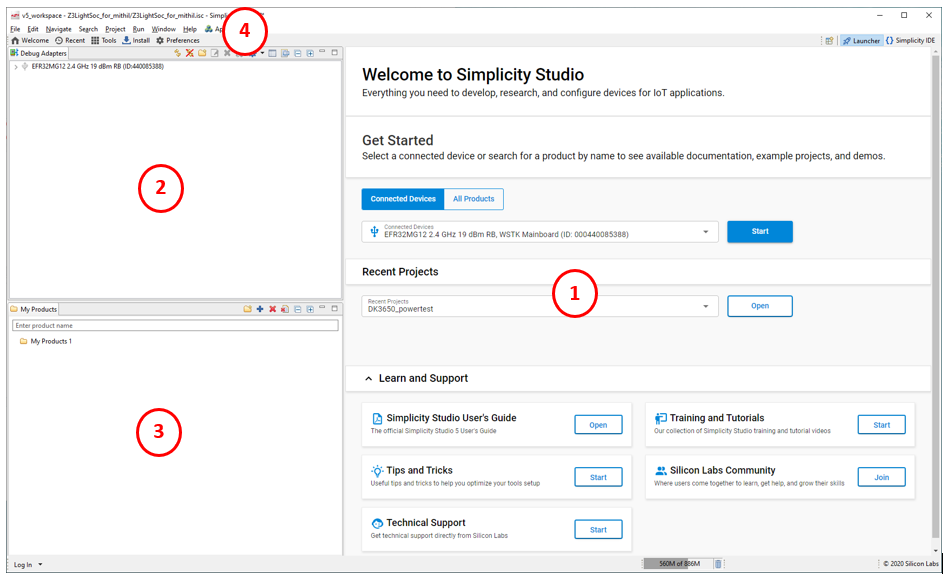

1 - Editor. The editor begins in Welcome mode. Here you get started by selecting a part, and then find resources and create projects based on that part. Note that, when you drop down the Learn and Support area, you have access to technical support, the Silicon Labs Community, and educational resources.
2 - Debug Adapters view: Shows devices physically connected to your computer with a debug adapter, or detected on a local network. Select a device to begin a project
3 - My Product view: Here you can add devices, boards, or kits and select them just like a connected kit. You can then explore resources or create and configure projects for the selected (target) device.
4 - Menu and Toolbar: Many of the main functions of interest are provided on the toolbar.


Welcome returns you to the Launcher Welcome page.
Recent shows you a list of recent projects. Select one to go to that project in the Simplicity IDE Project Explorer view.
Tools provides a list of available tools.
Install brings you to a menu where you can install or uninstall software packages and tools, or review available updates.
Preferences is a shortcut to the list of preferences also available through the menu selection Window > Preferences.
Throughout SSv5, the contents of the launcher and other perspectives depends on the device you have selected as your development target, as well as your software environment. When you first open SSv5, the Launcher perspective does not have a target device context. When you connect a kit, it appears both in the the Debug Adapters view and in the device selector in the Get Started editor area.


If you don’t have a Silicon Labs kit to connect, but would like to explore more of SSv5’s functions, click All Products, and enter a part number for a kit, board, or device. As you type you will be presented with a list. Use the checkboxes to filter the list.


You can also add products to the My Products view, and select a target device there. If you have added a product under Get Started, once you click Start the selected product is added to the My Products view for easy access in the Welcome page or other Launcher perspective views.
Once you have connected or selected a target device, click Start to move to the Launcher perspective's OVERVIEW tab, showing the details about that device.
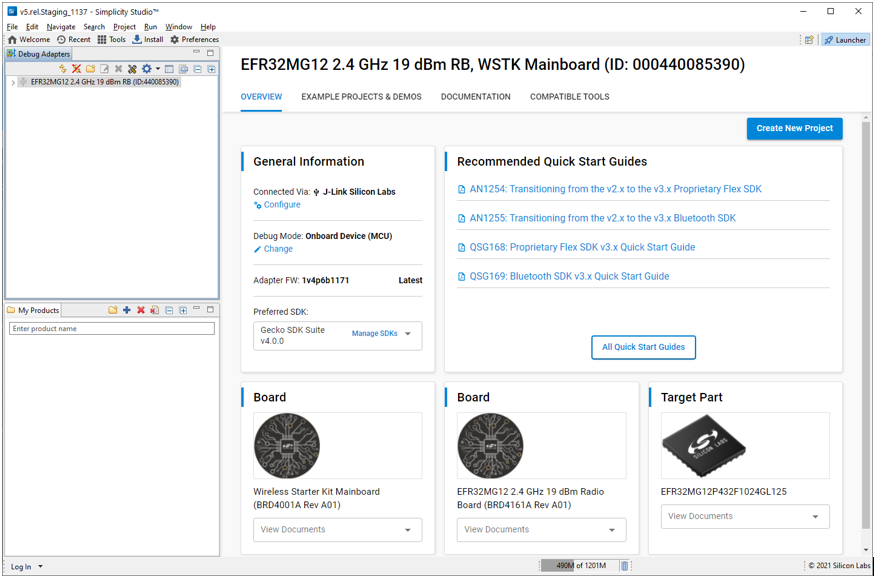

You'll find several "cards" on the OVERVIEW tab. The first is the General Information card where you can update the debug adapter firmware of your Silicon Labs kits, change the mode of the debug adapter, manage the security settings of the target device (if applicable), and change the active/preferred SDK.
The Recommended Quick Start Guides card highlights some of the getting-started resources available for the selected target device. Click All Quick-Start Guides to quickly go to the DOCUMENTATION tab, pre-filtered for quick-start guides. Cards are also available for each board and device of the selected target. The View Documents drop-down list on each hardware card provides a filtered view of hardware documentation for that item.
You can start a project with the Create New Project control. See Start a Project for an introduction to creating projects.
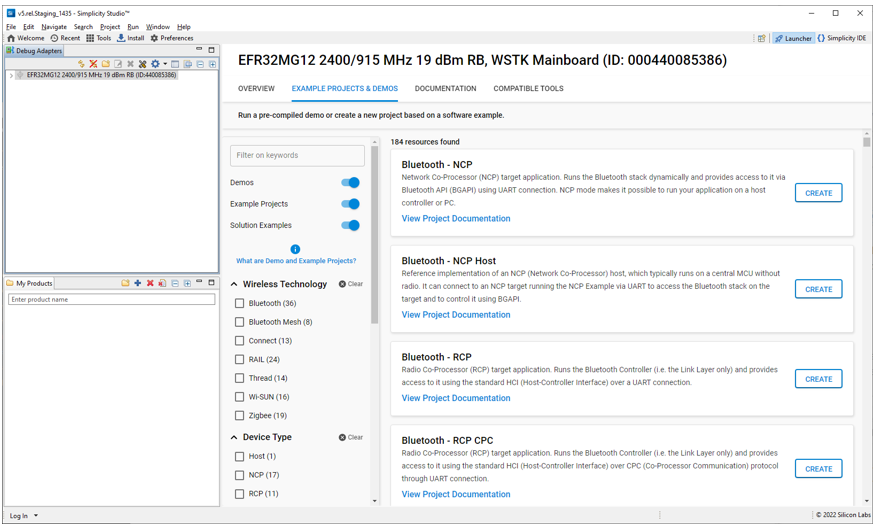
The EXAMPLE PROJECTS & DEMOS tab shows a list of example projects and demos compatible with the selected device. A demo is a prebuilt software example that can be loaded into a compatible device and used to show and test application functionality. Every demo comes with an associated example project. See the Quick Start Guide for your SDK for more information about the examples and demos provided.
Use the checkboxes and search box to filter the list. A number of different filter categories are available. The categories and filters displayed depend on your selected device. Click RUN on any demo to install it on a target device. Click CREATE on any project to create it. This is equivalent to creating a project from the OVERVIEW tab, except that the project is already selected.

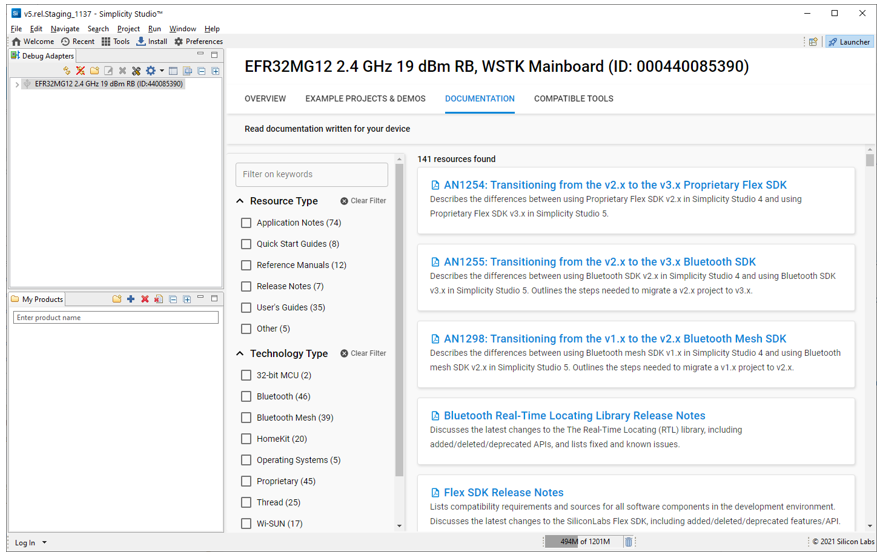
The DOCUMENTATION tab shows all documentation compatible with the selected device. Use the checkboxes or text filter field to find a resource of interest. The technology filter corresponding to your development environment will show you most software documents relevant to that environment.

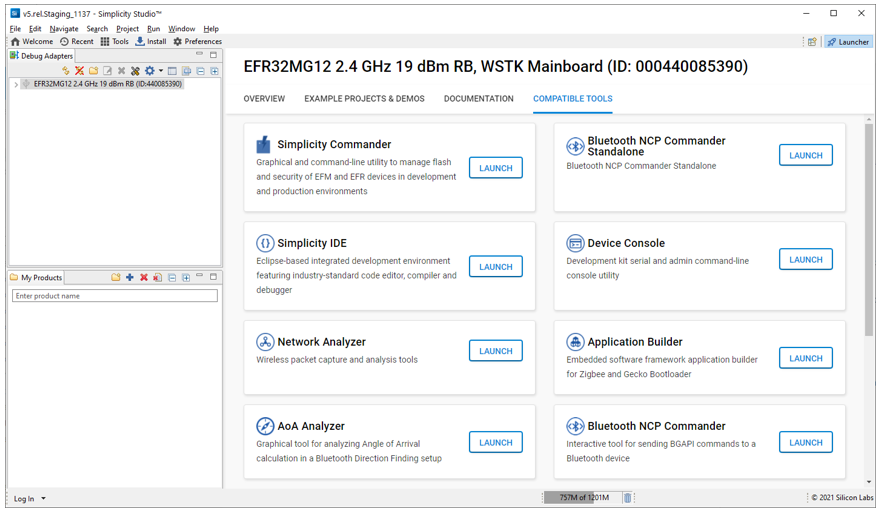
The COMPATIBLE TOOLS tab shows the tools compatible with the selected device. The Tools button on the toolbar shows all tools unfiltered.
