BLE Throughput App#
1. Purpose / Scope#
This application demonstrates how to exchange continuous data to the remote device to measure the On-Air Throughput using a BLE Sniffer.
In this Application, the GATT server configures with Custom service with write, read, and notification characteristic UUIDs.
When connected remote device enables the notification on UUID, Silicon Labs device sends the continuous notifications to the connected device.
This is data can be captured with Sniffer to measure the throughputs.
Sequence of Events
This Application explains to the user how to:
Create a Simple chat service
Make the device advertise / scannable
Connect from remote BLE device/ Connect to remote BLE device
Initiate the Security
Excite the Data length and Phy rate features
Sends the notification messages to the connected peer/Smartphone when the notification is enabled
2. Prerequisites / Setup Requirements#
Before running the application, the user will need the following things to setup.
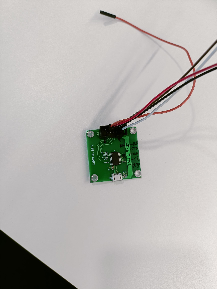
2.1 Hardware Requirements#
Windows PC with Host interface(UART/ SPI/ SDIO).
SiWx91x Wi-Fi Evaluation Kit. The SiWx91x supports multiple operating modes. See Operating Modes for details.
SoC Mode:
Silicon Labs BRD4325A
NCP Mode:
Silicon Labs (BRD4180A, BRD4280B);
Host MCU Eval Kit. This example has been tested with:
Silicon Labs WSTK + EFR32MG21
Silicon Labs WSTK + EFM32GG11
BLE peripheral device in case of Silicon Labs module as master.
BLE central device in case of Silicon Labs module as slave.
2.2 Software Requirements#
Embedded Development Environment
For Silicon Labs EFx32, use the latest version of Simplicity Studio
Download and install the Silicon Labs EFR Connect App in the android smart phones for testing BLE applications. Users can also use their choice of BLE apps available in Android/iOS smart phones.
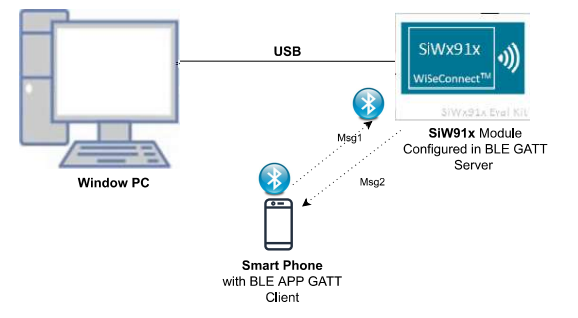
2.3 Setup Diagram:#
SoC Mode :
NCP Mode :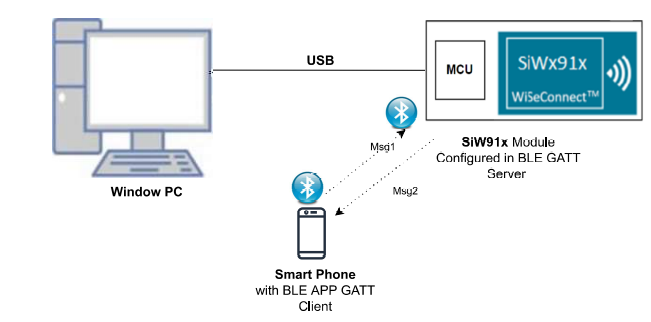
3. Application Build Environment#
3.1 Project Setup#
SoC Mode
Silicon Labs SiWx91x SoC. Follow the Getting Started with SiWx91x SoC to setup the example to work with SiWx91x SoC and Simplicity Studio.
NCP Mode
Silicon Labs EFx32 Host. Follow the Getting Started with EFx32 to setup the example to work with EFx32 and Simplicity Studio.
3.2 NCP Mode - Host Interface#
By default, the application is configured to use the SPI bus for interfacing between Host platforms(EFR32MG21) and the SiWx91x EVK.
3.3 Bare Metal/RTOS Support#
This application supports bare metal and RTOS environment. By default, the application project files (Keil and Simplicity Studio) are provided with RTOS configuration. To select a bare metal configuration, see Selecting bare metal.
4. Application Configuration Parameters#
The application can be configured to suit your requirements and development environment. Read through the following sections and make any changes needed.
4.1 Open rsi_ble_common_config.h file
4.1.1 User must update the below parameters
RSI_BLE_NEW_SERVICE_UUID refers to the attribute value of the newly created service.
#define RSI_BLE_NEW_SERVICE_UUID 0xAABBRSI_BLE_ATTRIBUTE_1_UUID refers to the attribute type of the first attribute under this service (RSI_BLE_NEW_SERVICE_UUID).
#define RSI_BLE_ATTRIBUTE_1_UUID 0x1AA1BLE_THROUGHPUT refers the name of the Silicon Labs device to appear during scanning by remote devices.
#define RSI_BLE_DEVICE_NAME "BLE_THROUGHPUT"Note: Following are the Non-configurable macros in the application.
RSI_BLE_CHAR_SERV_UUID refers to the attribute type of the characteristics to be added in a service.
#define RSI_BLE_CHAR_SERV_UUID 0x2803RSI_BLE_CLIENT_CHAR_UUID refers to the attribute type of the client characteristics descriptor to be added in a service.
#define RSI_BLE_CLIENT_CHAR_UUID 0x2902Note: Following are the properties:
RSI_BLE_ATT_PROPERTY_READ is used to set the READ property to an attribute value.
#define RSI_BLE_ATT_PROPERTY_READ 0x02```
- **RSI_BLE_ATT_PROPERTY_WRITE** is used to set the WRITE property to an attribute value.
```c
#define RSI_BLE_ATT_PROPERTY_WRITE 0x08RSI_BLE_ATT_PROPERTY_NOTIFY is used to set the NOTIFY property to an attribute value.
#define RSI_BLE_ATT_PROPERTY_NOTIFY 0x10BT_GLOBAL_BUFF_LEN refers Number of bytes required by the application and the driver.
#define BT_GLOBAL_BUFF_LEN 150004.2 Open rsi_ble_config.h file and update/modify following macros,
#define RSI_BLE_PWR_INX 30
#define RSI_BLE_PWR_SAVE_OPTIONS 0
#define RSI_BLE_REMOTE_DEV_ADDR "00:12:45:AB:1D:32"
#define RSI_REMOTE_DEVICE_NAME "Note10"
#define CONN_BY_ADDR 1
#define CONN_BY_NAME 2
#define CONNECT_OPTION CONN_BY_NAME
#define CENTERAL_ROLE 1
#define PERIPHERAL_ROLE 2
#define CONNECTION_ROLE PERIPHERAL_ROLE
#define CONN_INTERVAL_MIN 45
#define CONN_INTERVAL_MAX 45
#define CONN_LATENCY 0
#define SUPERVISION_TIMEOUT 800
#define SMP_ENABLE 1
#define TX_LEN 0xFB
#define TX_TIME 0x0148
#define TX_PHY_RATE 0x02
#define RX_PHY_RATE 0x02
#define CODDED_PHY_RATE 0x00
#define NOTIFY_DISABLE 0x00
#define NOTIFY_ENABLE 0x01
#define DLE_ON 1
#define DLE_BUFFER_MODE 1
#define DLE_BUFFER_COUNT 25
#define RSI_BLE_MAX_DATA_LEN 232Note: rsi_ble_config.h file is already set with the desired configuration in respective example folders user need not change for each example. ```
5. Testing the Application#
Follow the below steps for the successful execution of the application.
5.1 Loading the SiWx91x Firmware#
Refer Getting started with a PC to load the firmware into SiWx91x EVK. The firmware file is located in
<SDK>/connectivity_firmware/
5.2 Creating the Project and builing the Application#
Refer Getting started with EFX32, for settin-up EFR & EFM host platforms
5.2.1 Project Creation - SoC Mode :#
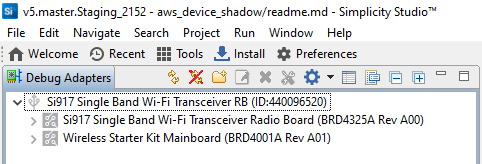
Connect your board. The Si917 compatible SoC board is BRD4325A.
Studio should detect your board. Your board will be shown here.
5.2.2 Project Creation - NCP Mode :#
Connect your board. The supported NCP boards are: BRD4180A,BRD4280B
Studio should detect your board. Your board will be shown here.

5.2.3 Selecting an example application and generate project#
Go to the 'EXAMPLE PROJECT & DEMOS' tab and select your desired example application
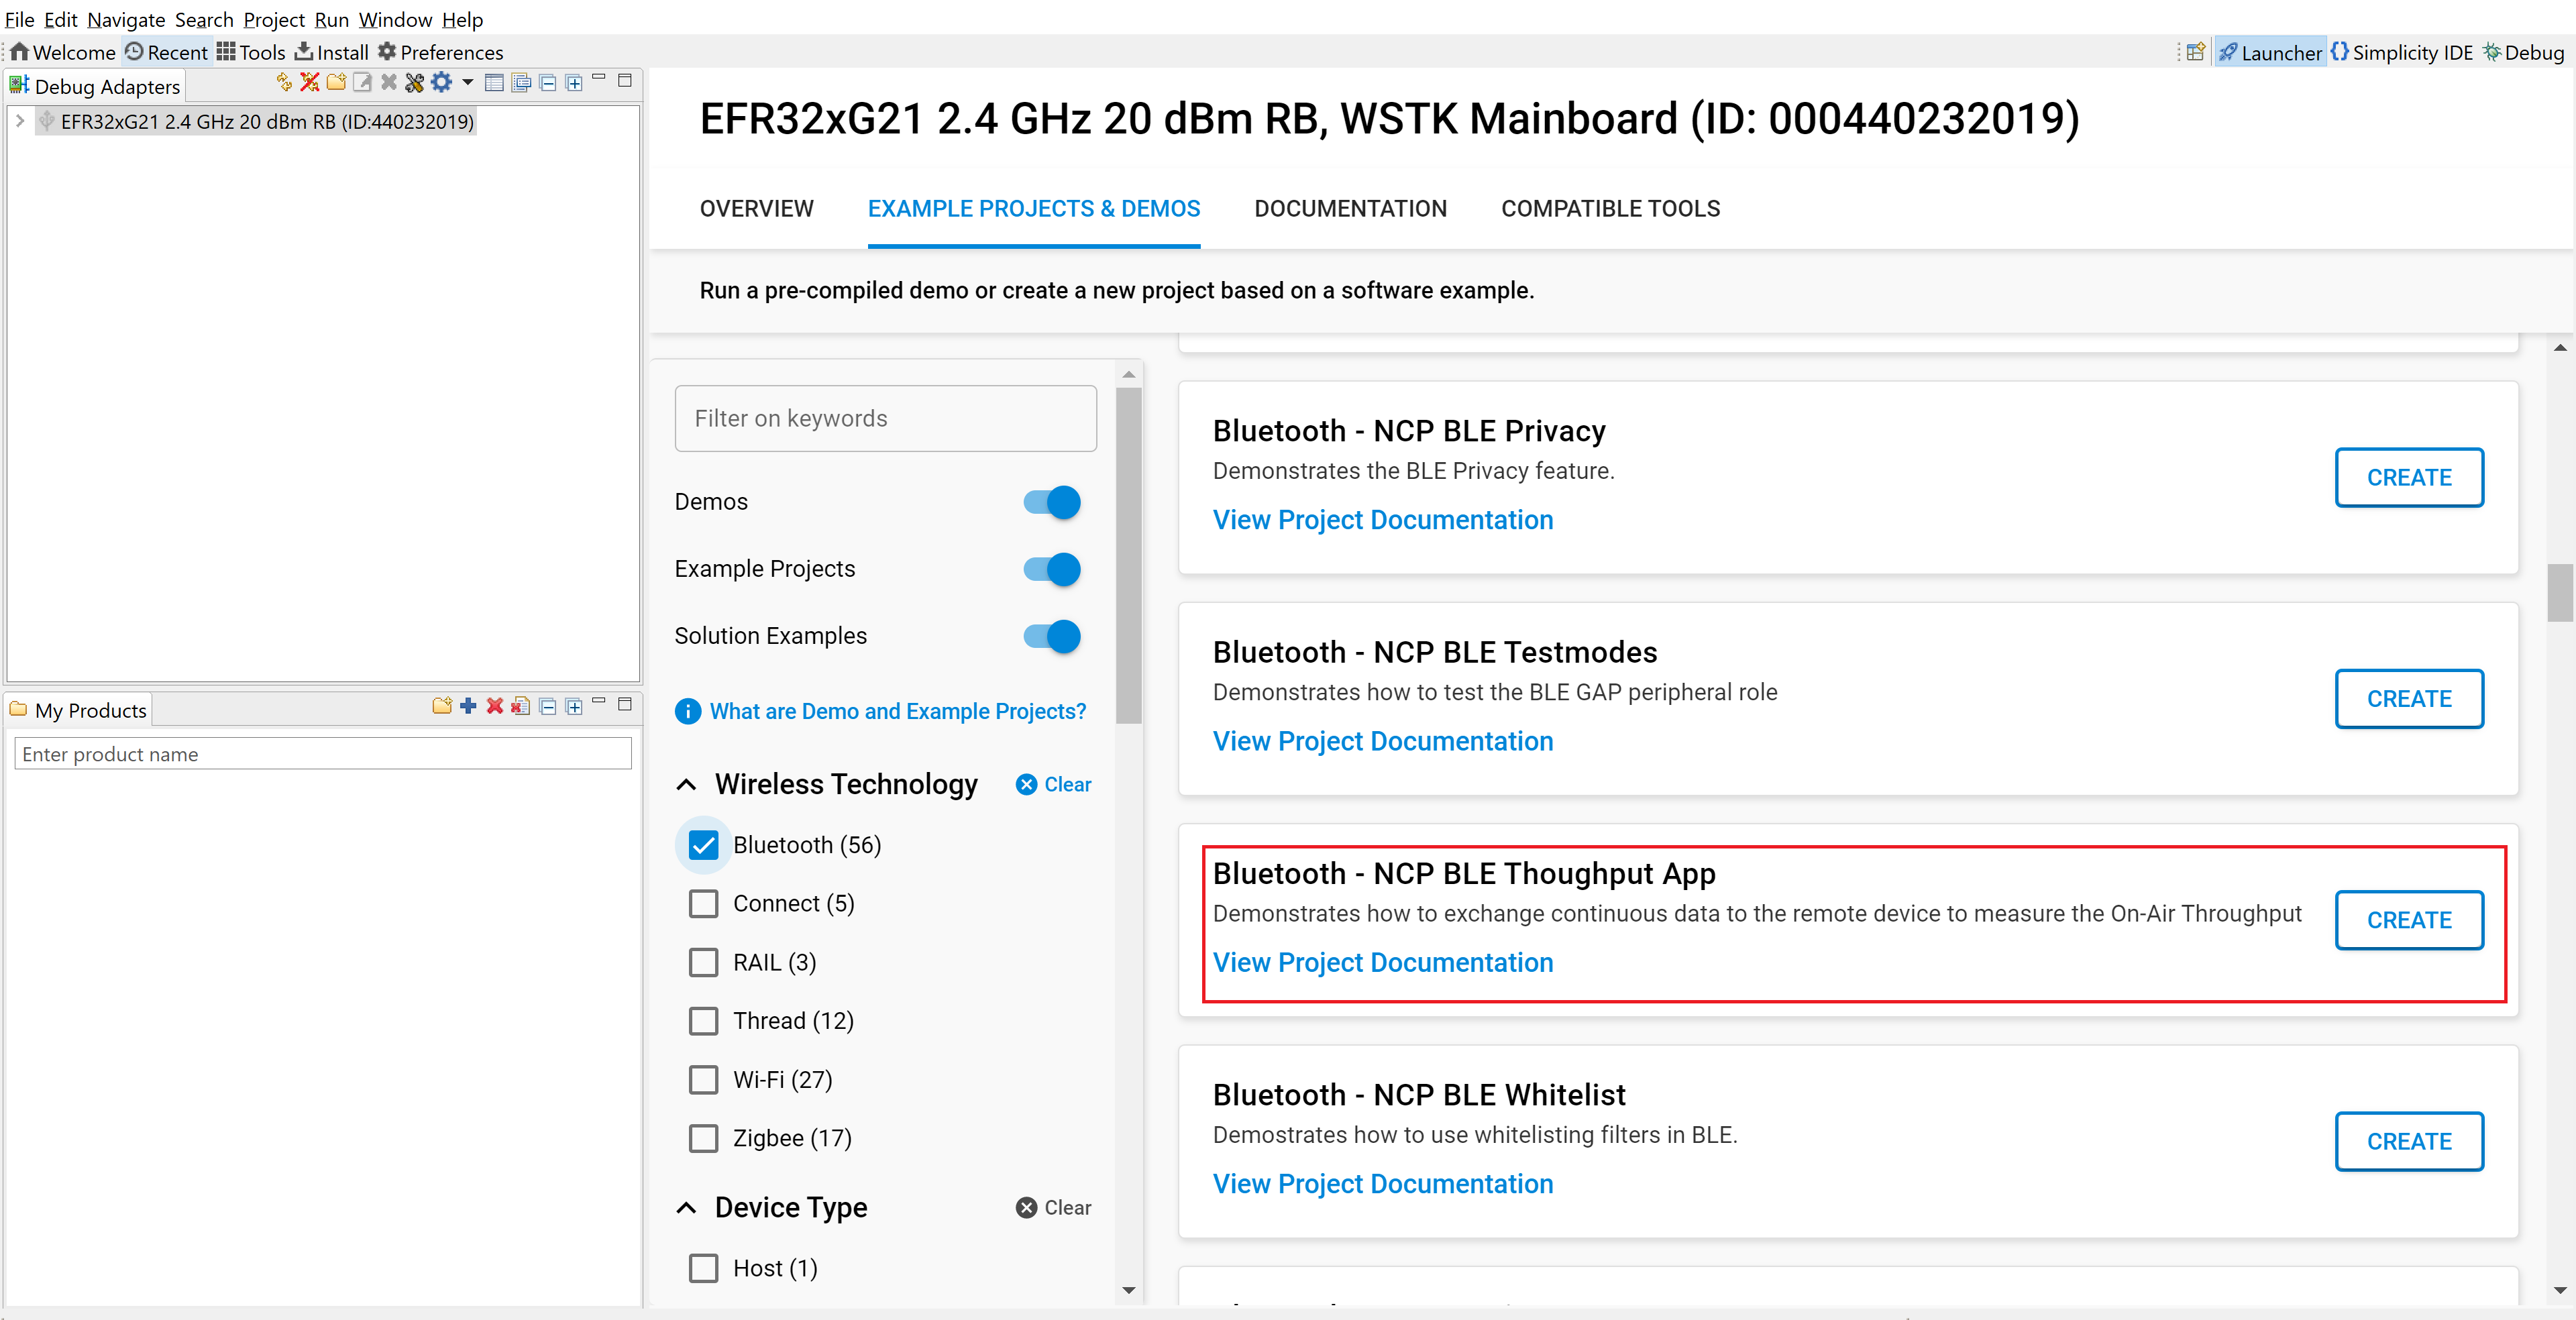
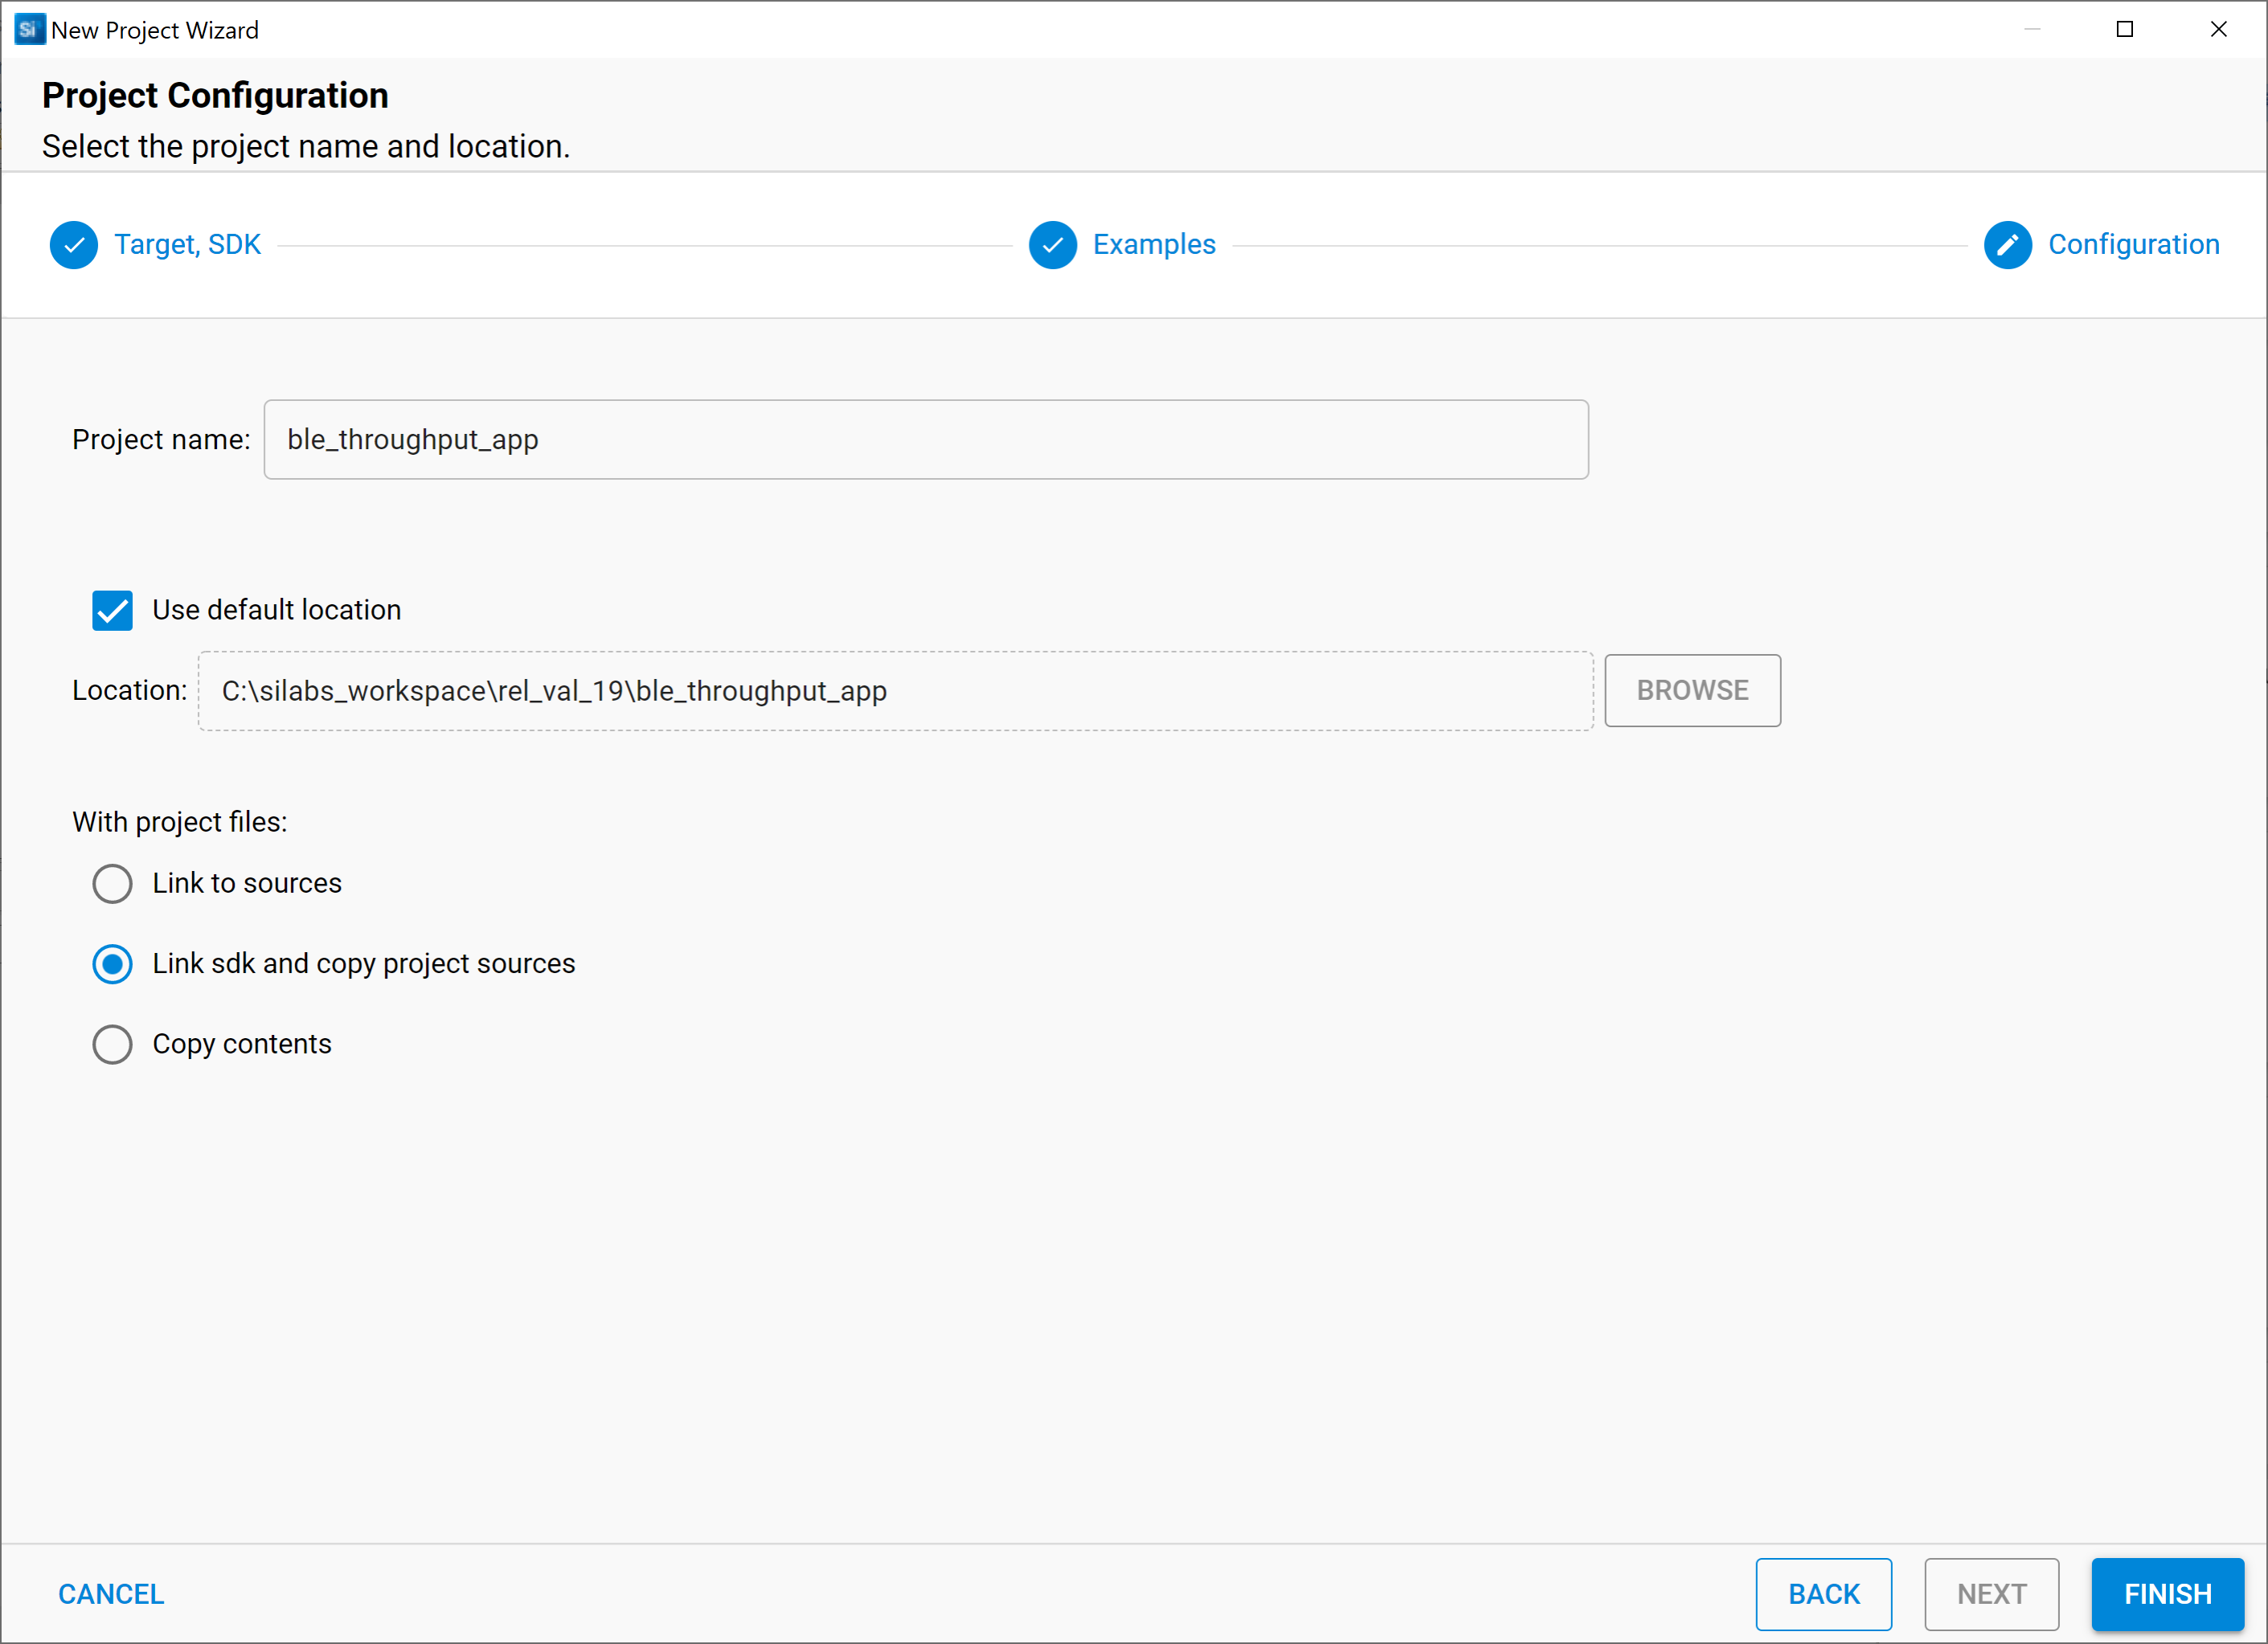
Click 'Create'. The "New Project Wizard" window appears. Click 'Finish'
5.2.4 Build Project - SoC Mode#
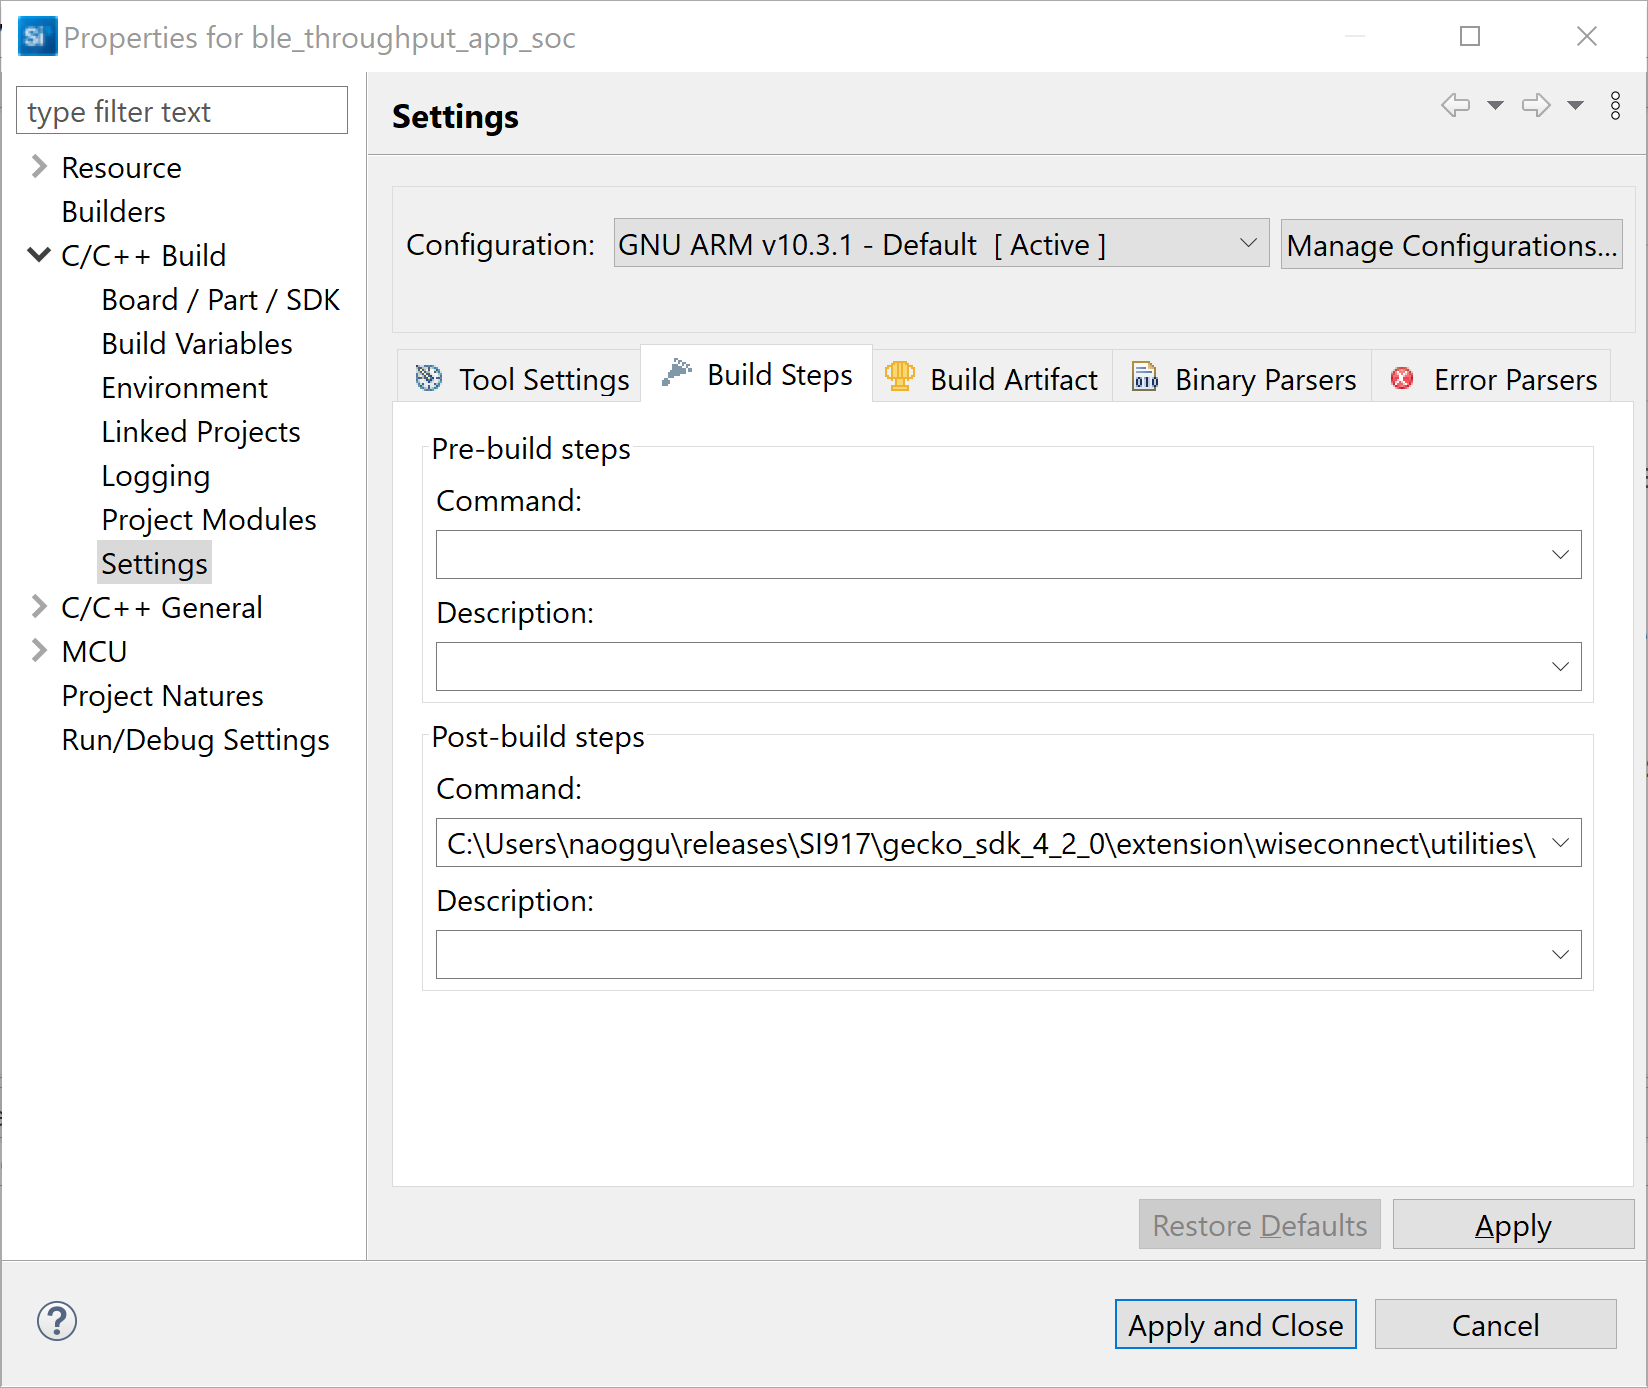
Once the project is created, right click on project and go to properties → C/C++ Build → Settings → Build Steps
Add post_build_script_SimplicityStudio.bat file path (SI917_COMBO_SDK.X.X.X.XX\utilities\isp_scripts_common_flash) in build steps settings as shown in below image.
Check for M4 projects macros in preprocessor settings(RSI_M4_INTERFACE=1)
Check for 9117 macro in preprocessor settings(CHIP_9117=1).
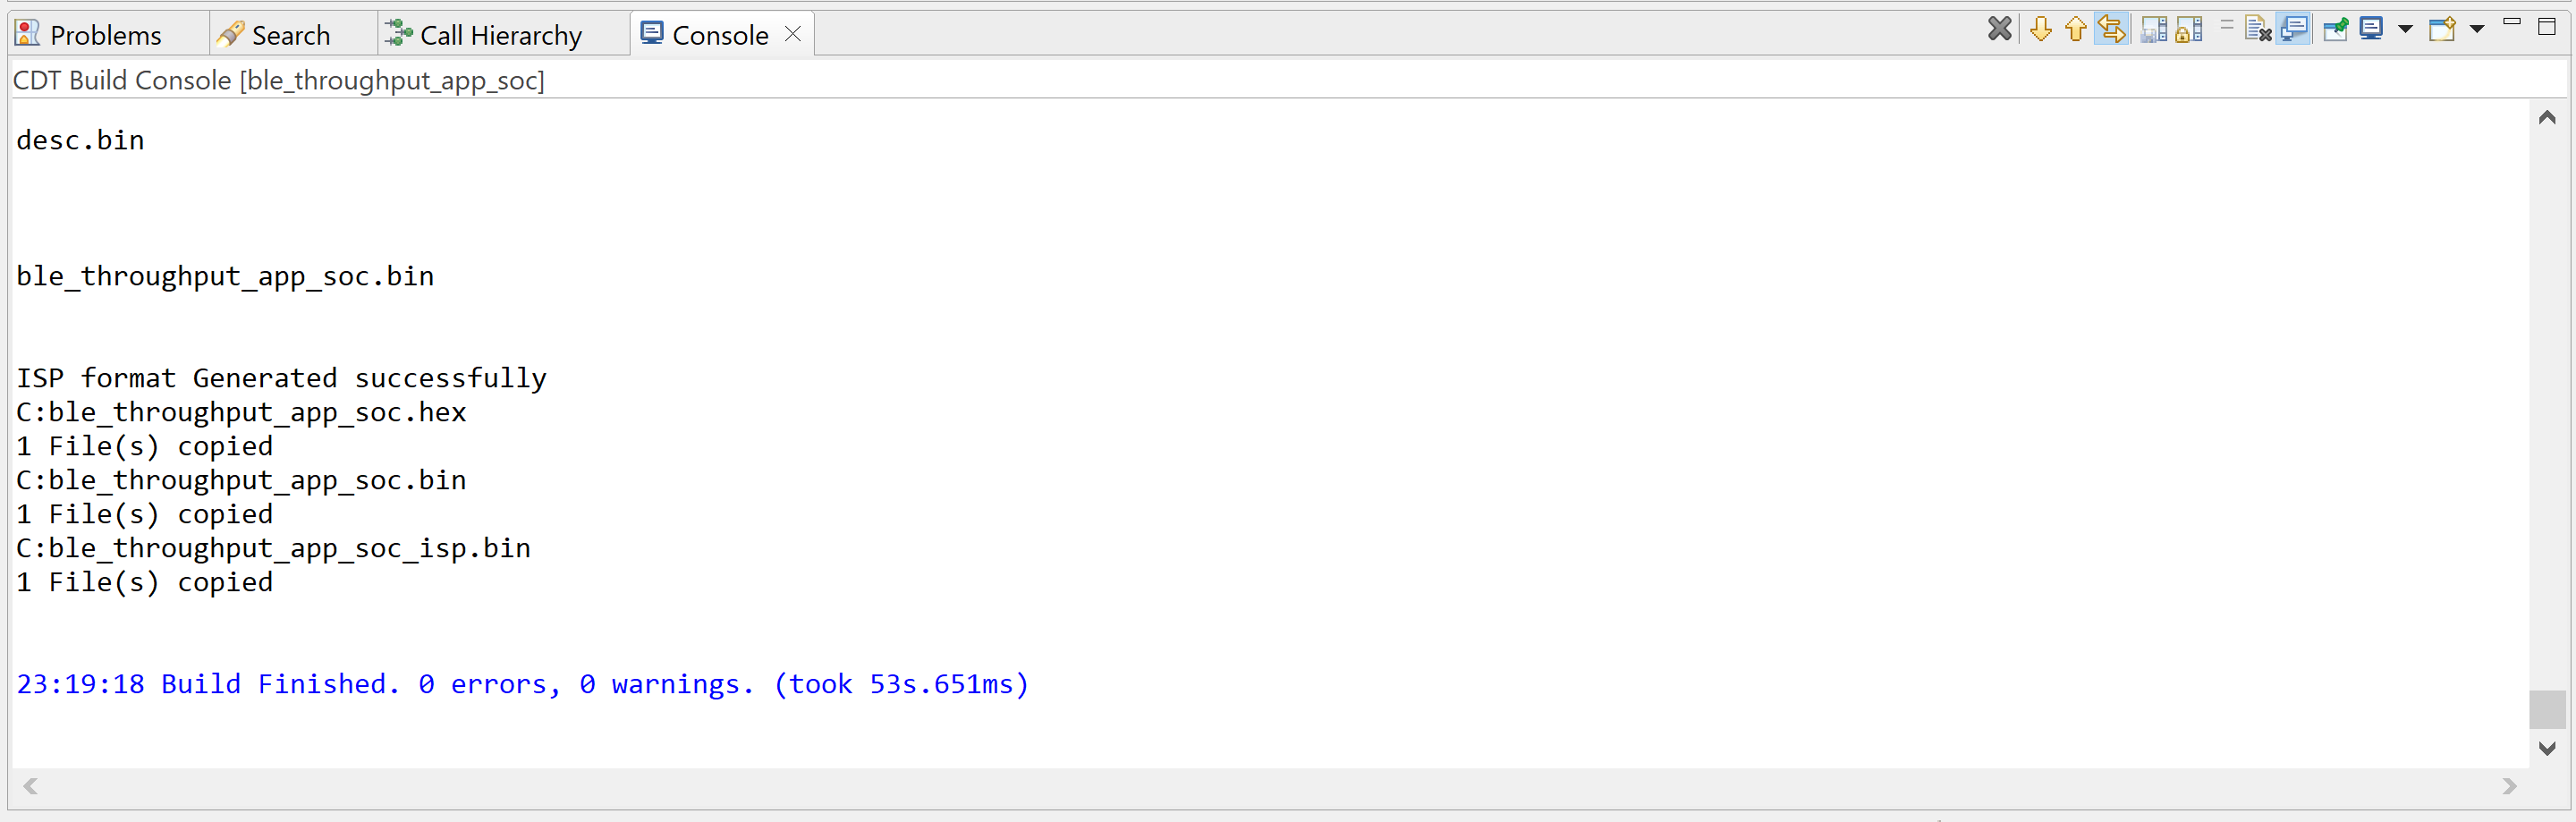
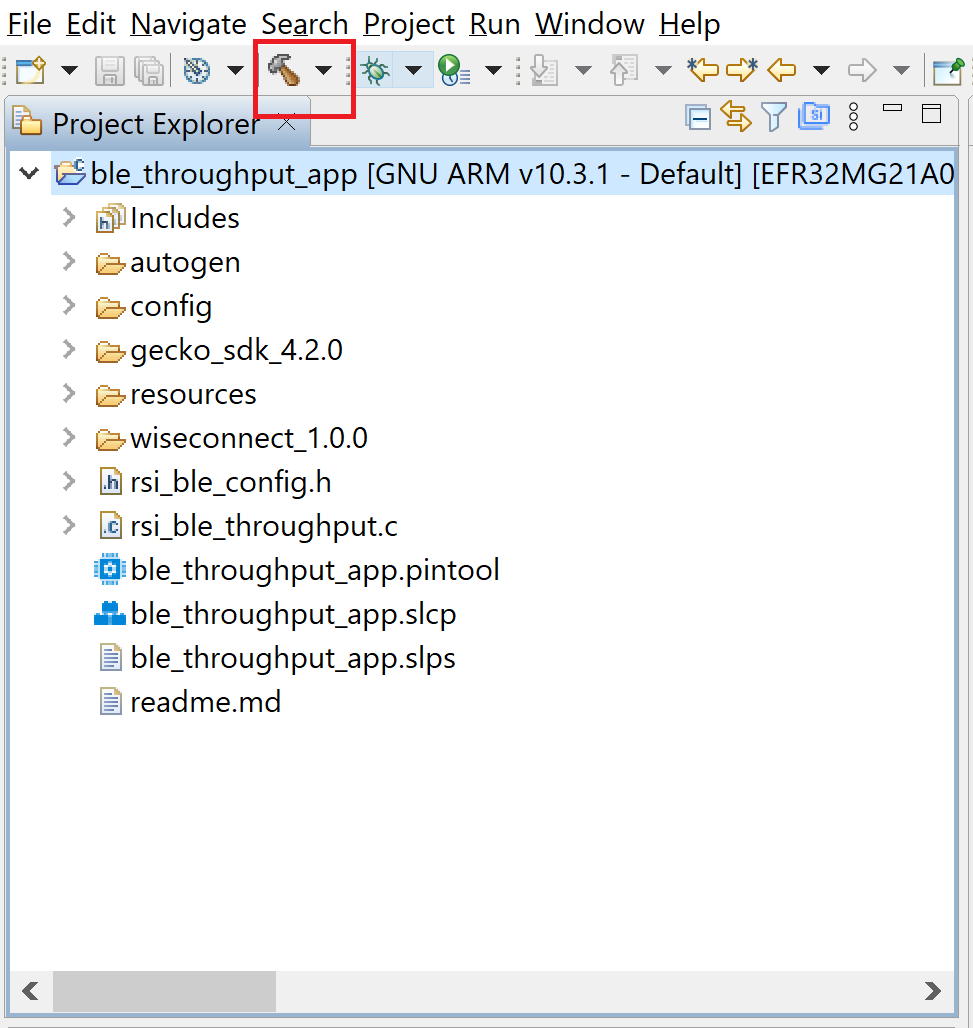
Click on the build icon (hammer) to build the project
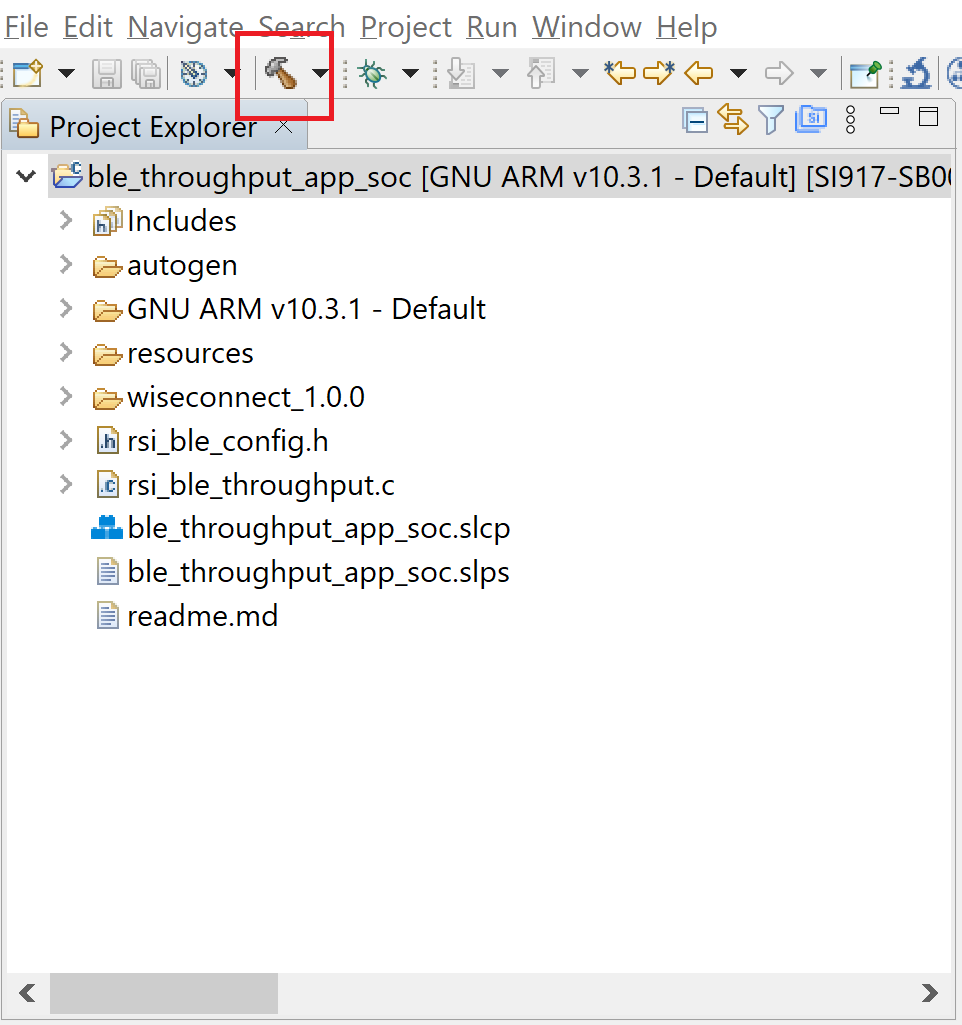
Successful build output will show as below.
5.2.5 Build Project - NCP Mode :#
Check for 9117 macro in preprocessor settings(CHIP_9117=1).
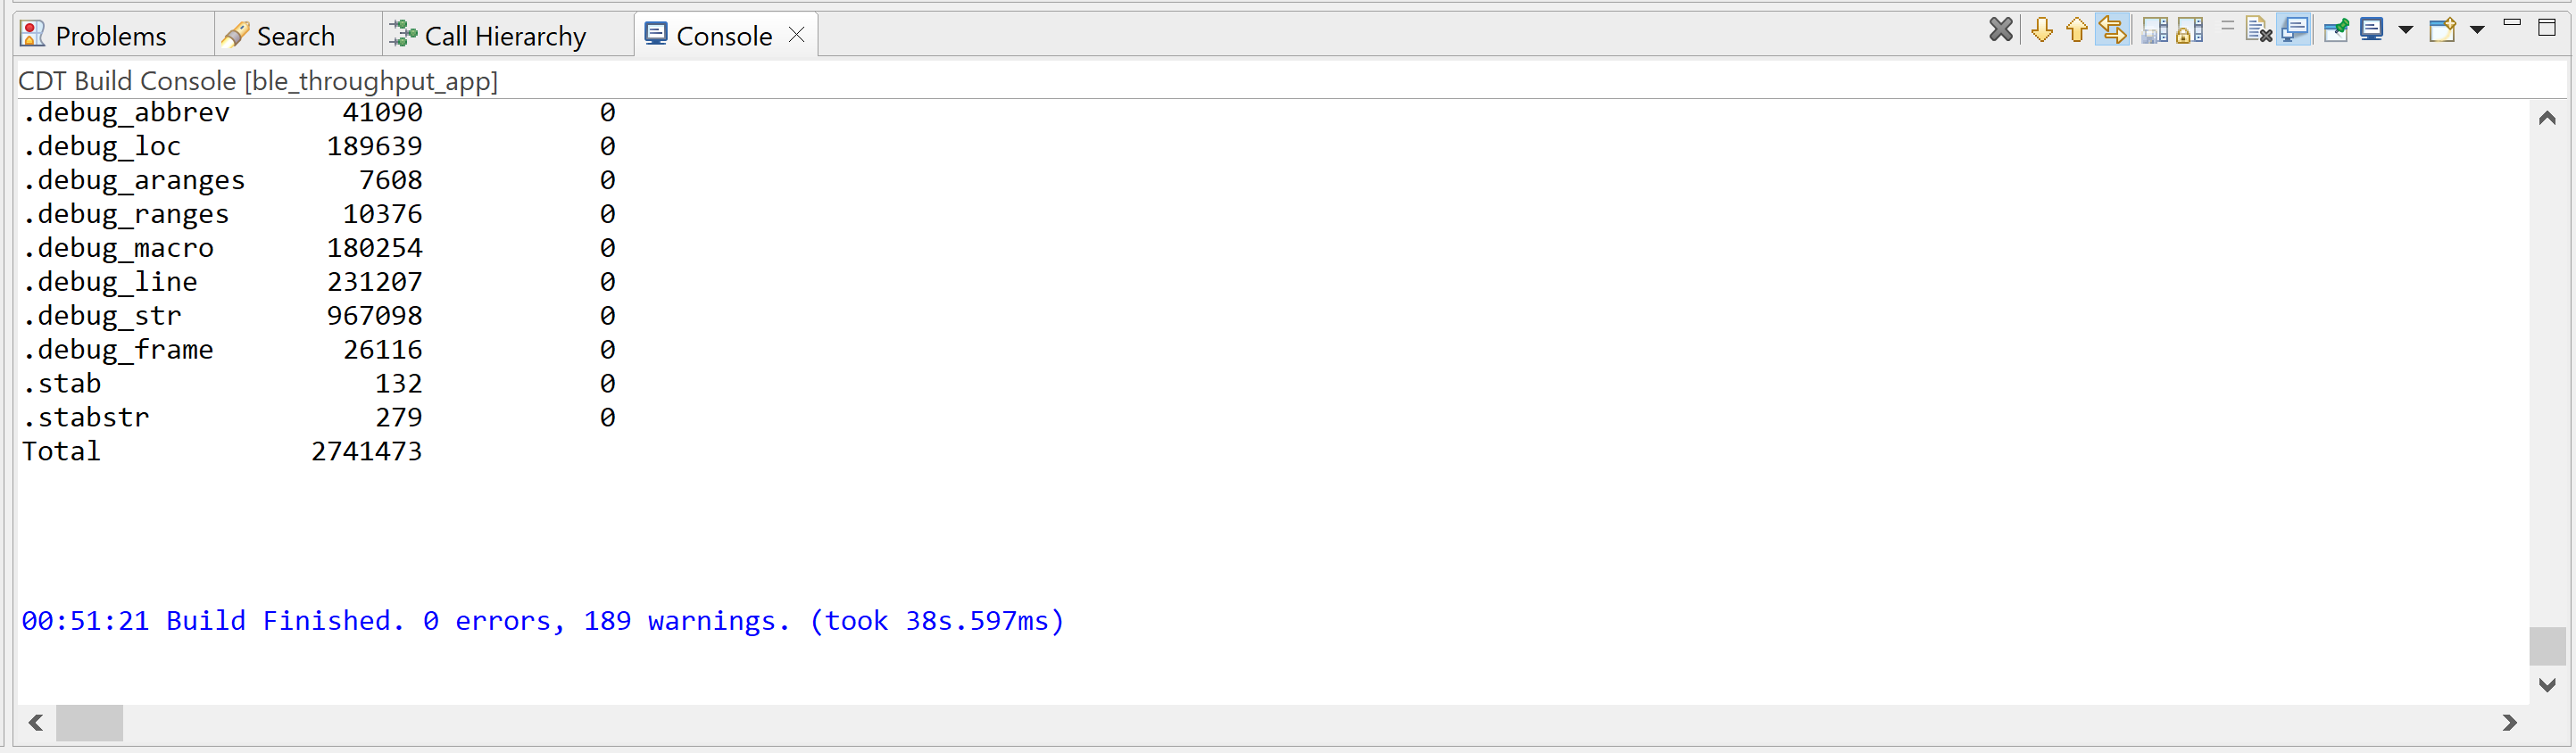
Click on the build icon (hammer) to build the project
Successful build output will show as below.
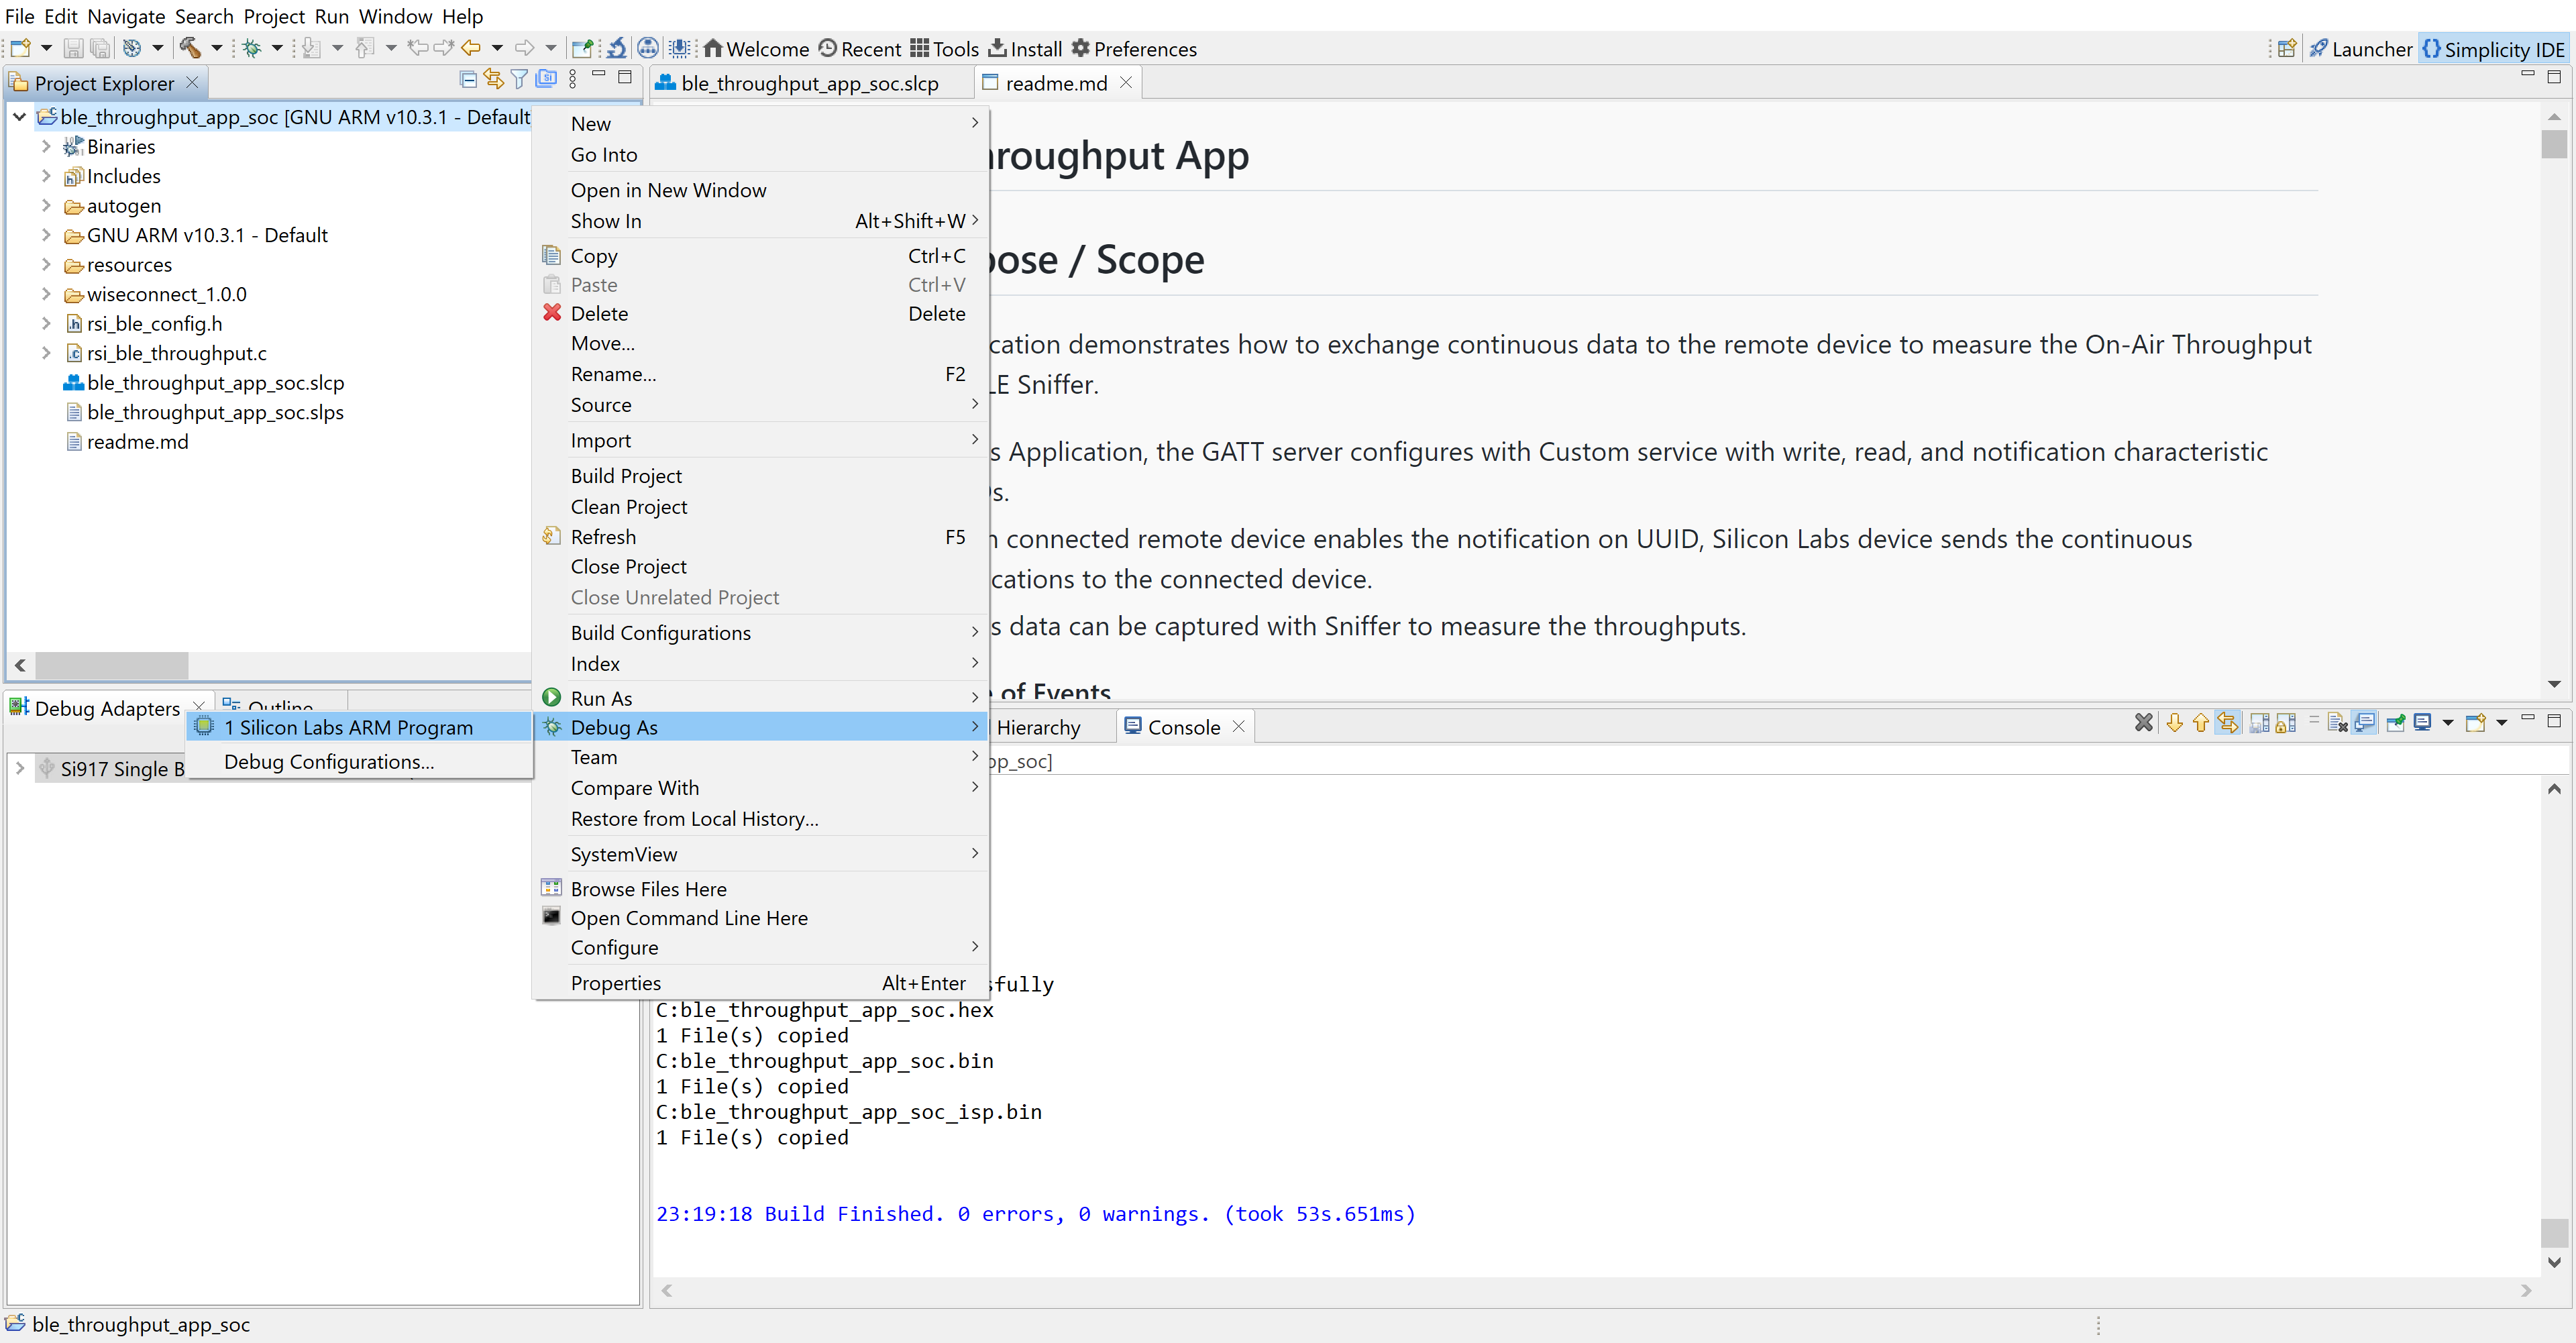
6. Program the device#
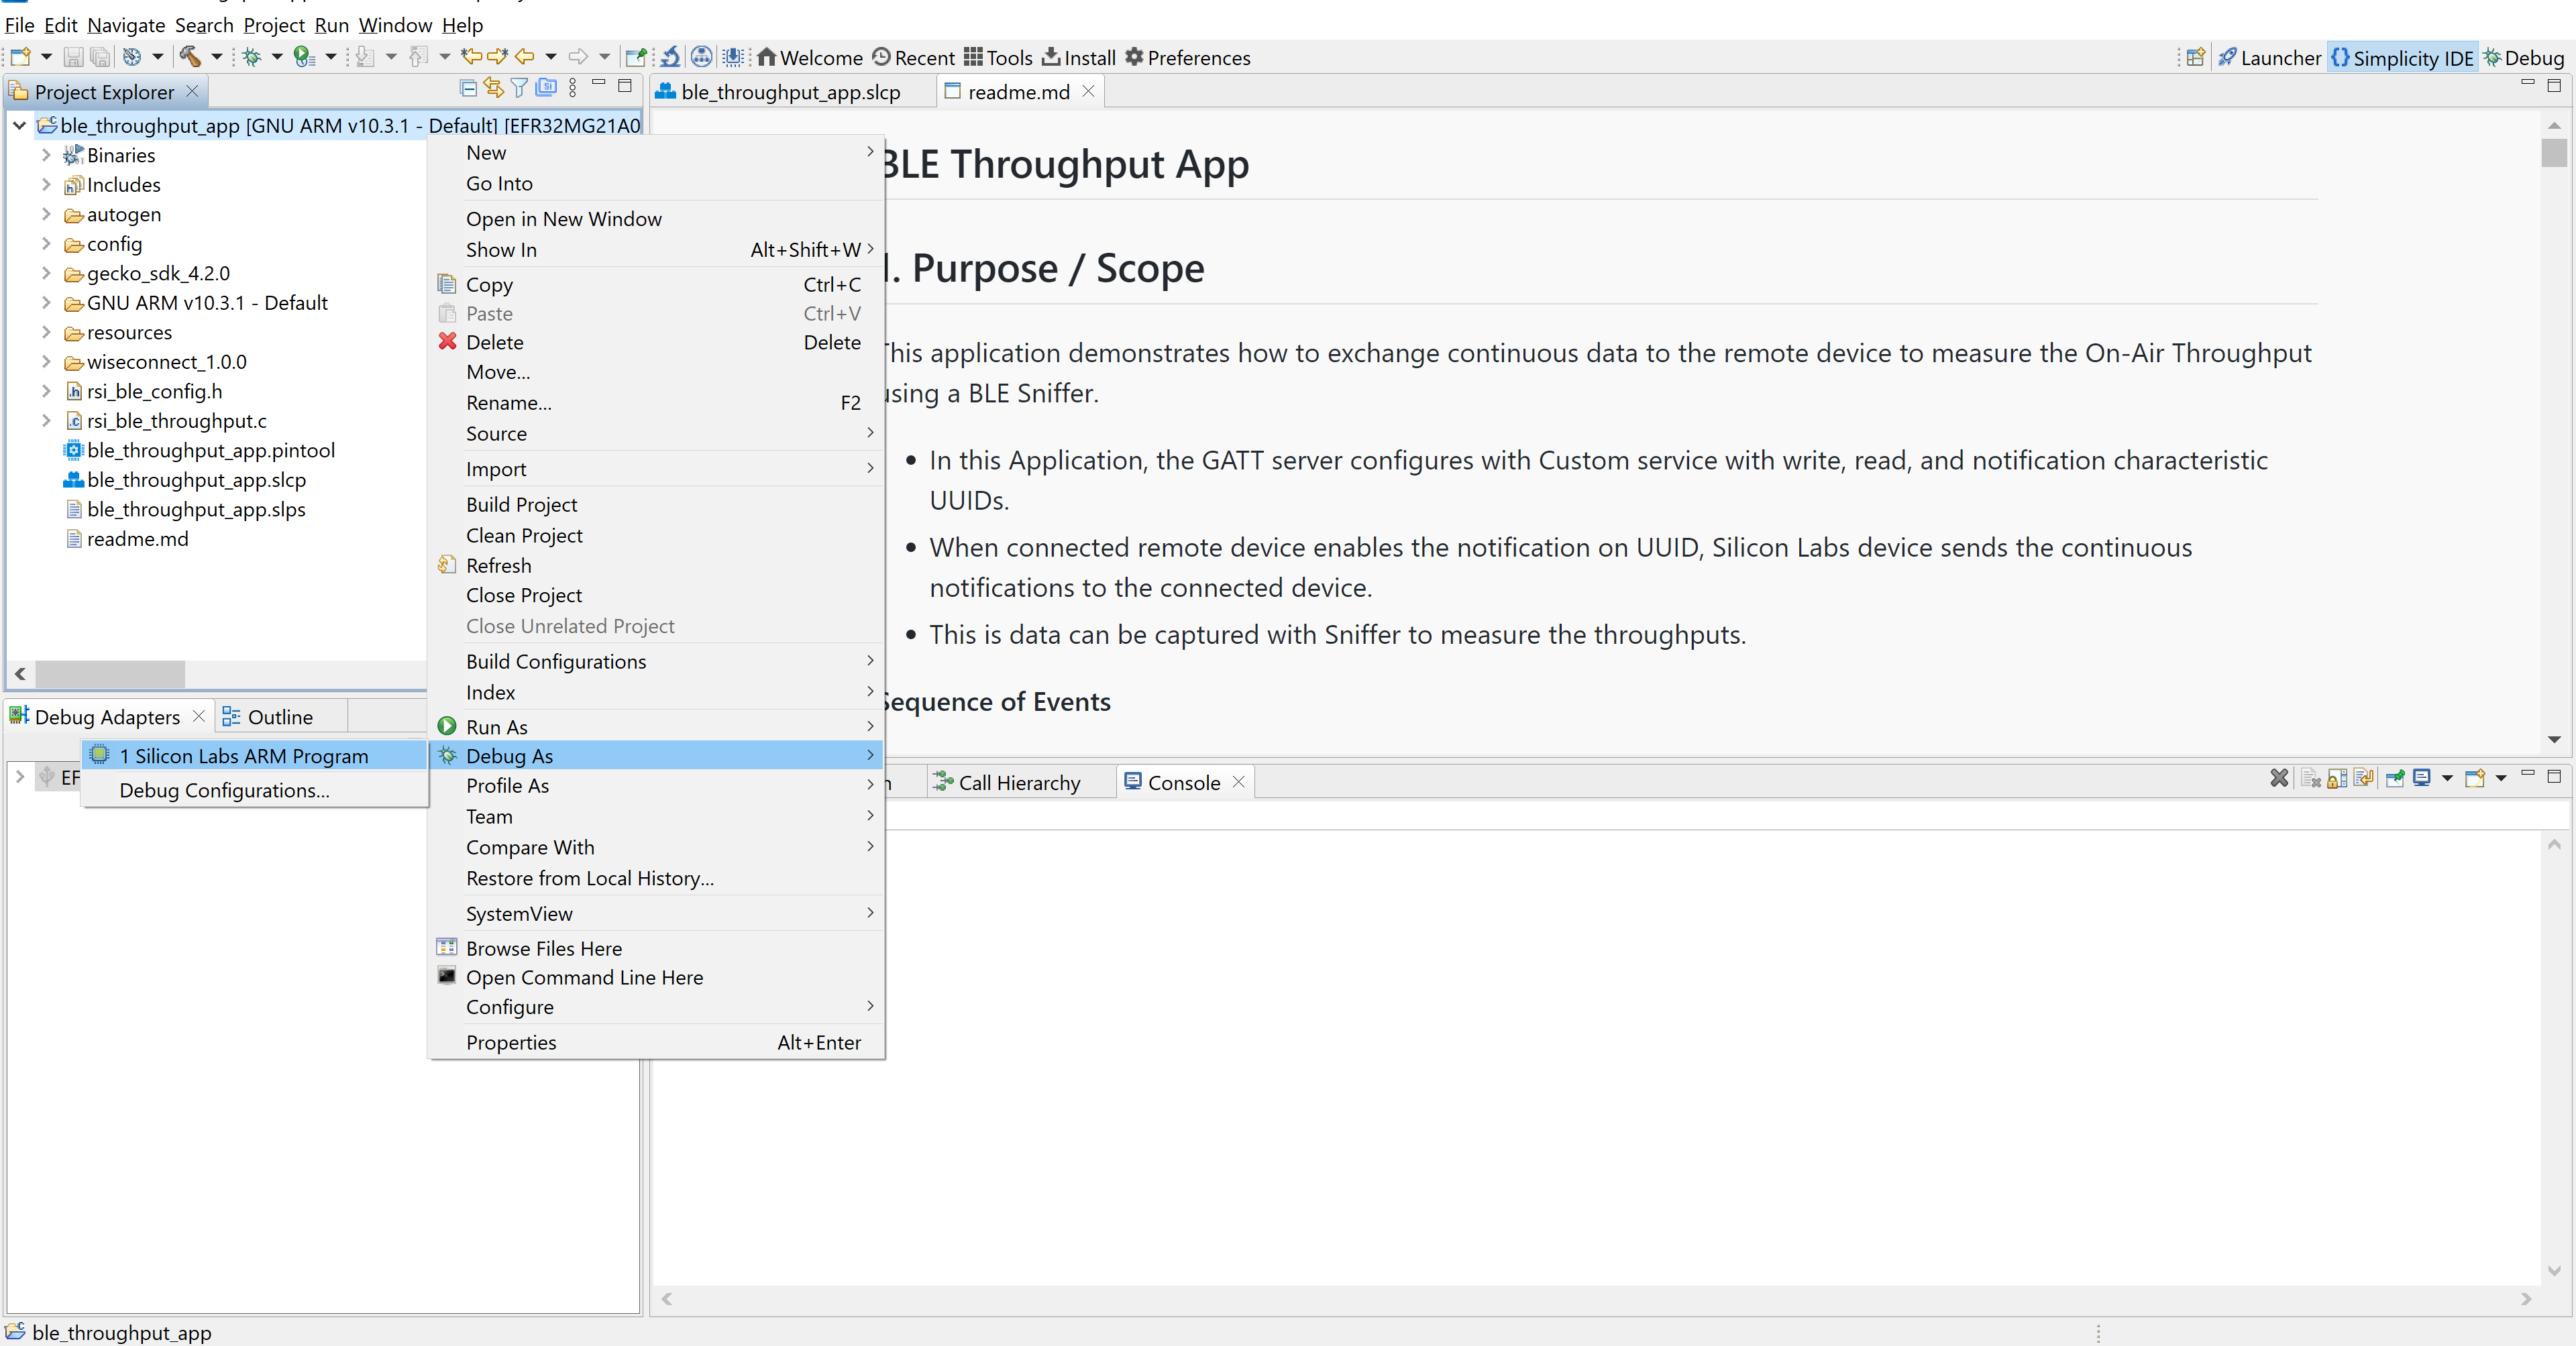
Once the build was successfull, right click on project and click on Debug As->Silicon Labs ARM Program as shown in below image. SoC Mode :
NCP Mode :#
6.1 Running the SiWx91x Application#
After the program gets executed, the Silicon Labs module will be in an Advertising state by default.
Connect any serial console for prints.
Open a EFR Connect App on the Smartphone and do the scan.
In the App, the Silicon Labs module device will appear with the name configured in the macro RSI_BLE_DEVICE_NAME (Ex: "BLE_THROUGHPUT")

Initiate a connection from the App.
After successful connection, EFR connect APP displays the supported services of Silicon Labs module

Select the attribute service which is added RSI_BLE_NEW_SERVICE_UUID (Ex: 0xAABB)
After Enable notifications for the read attribute RSI_BLE_ATTRIBUTE_2_UUID (Example: 0x1BB1) So that the GATT server notifies when value updated in that particular attribute.
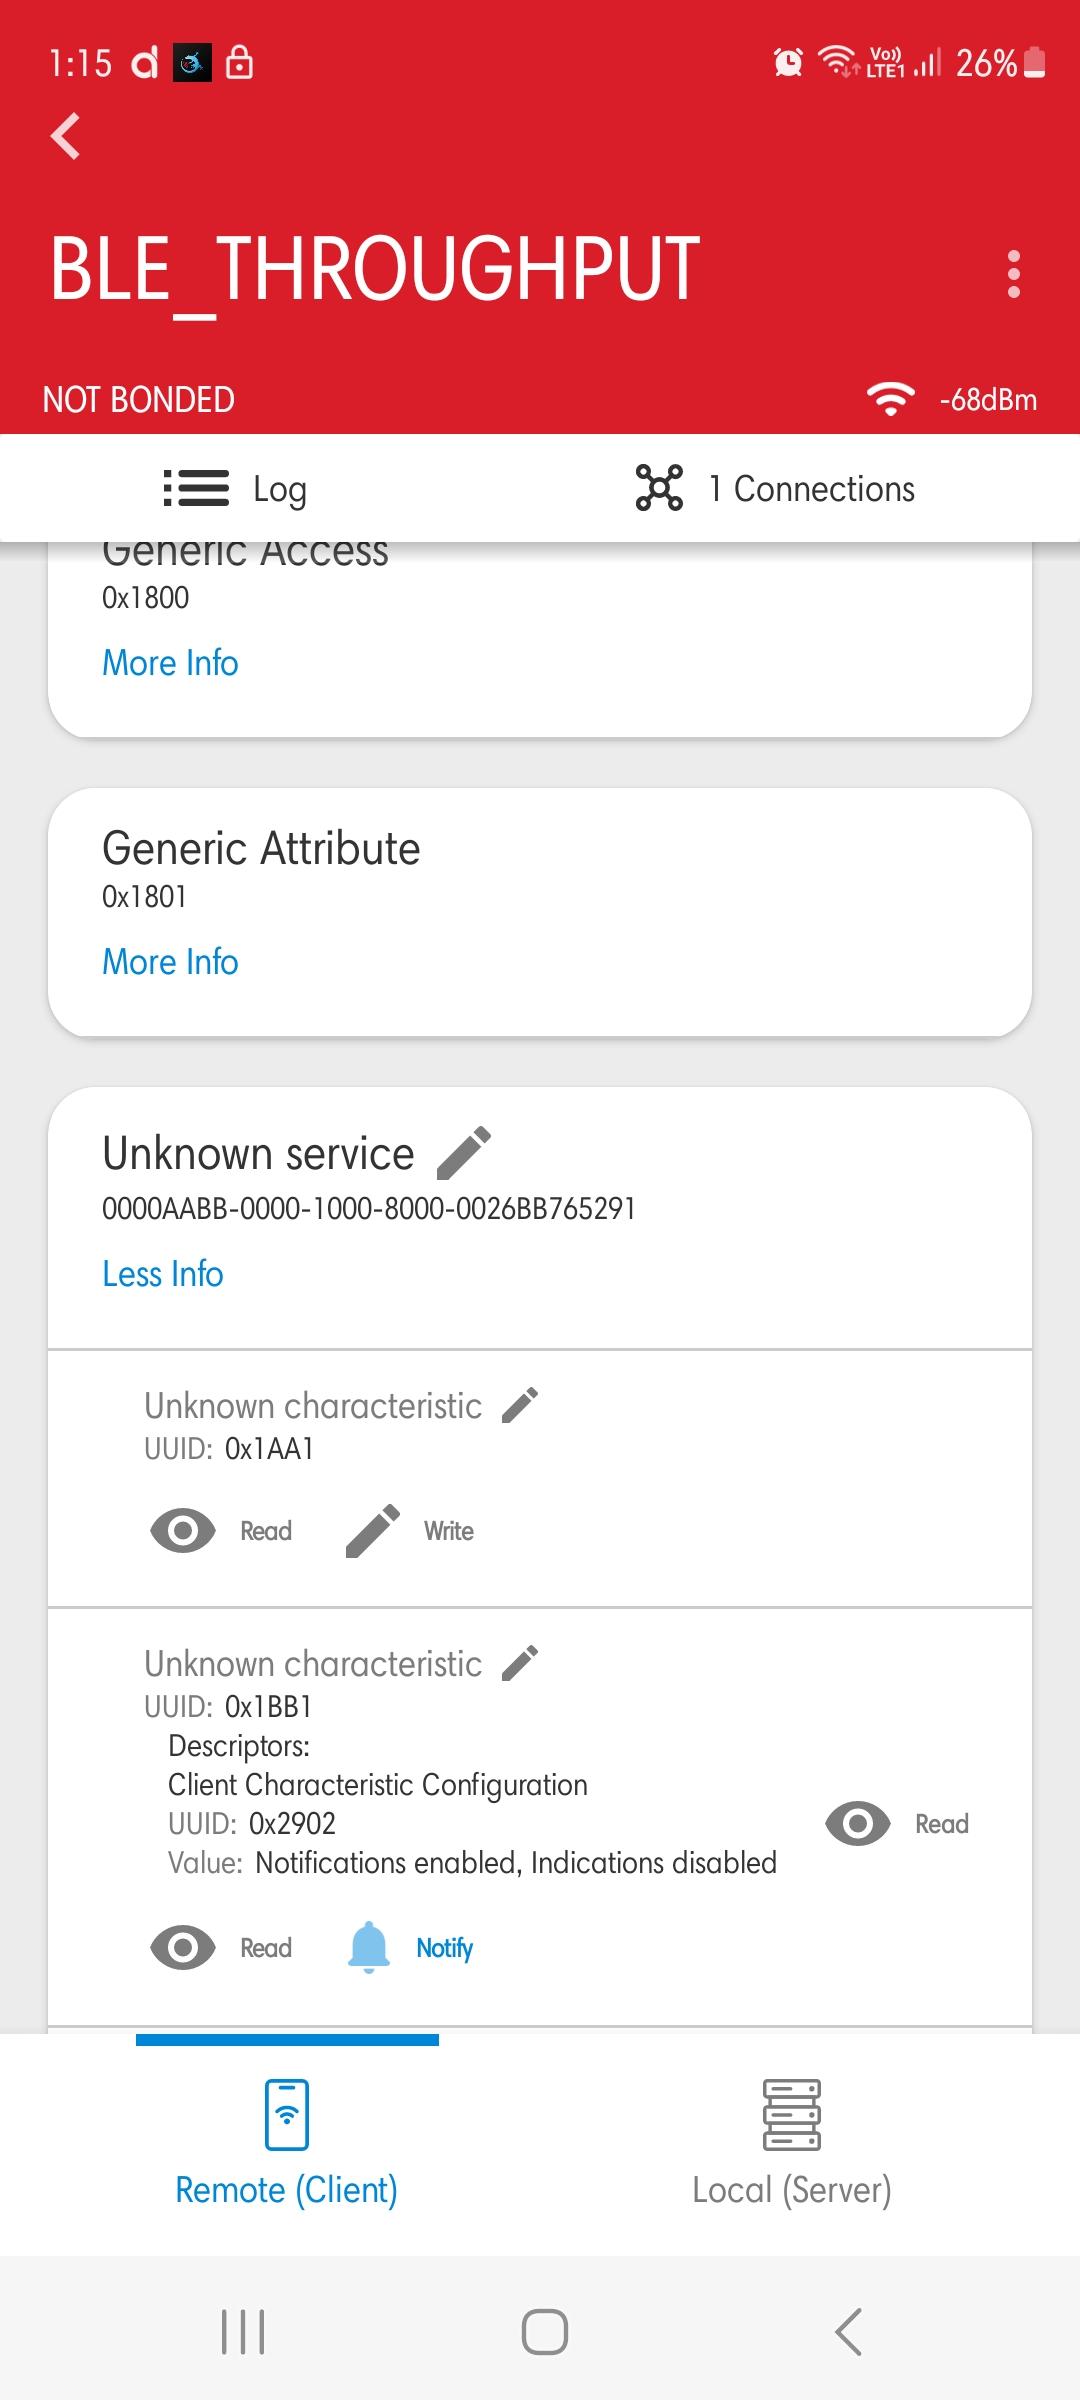
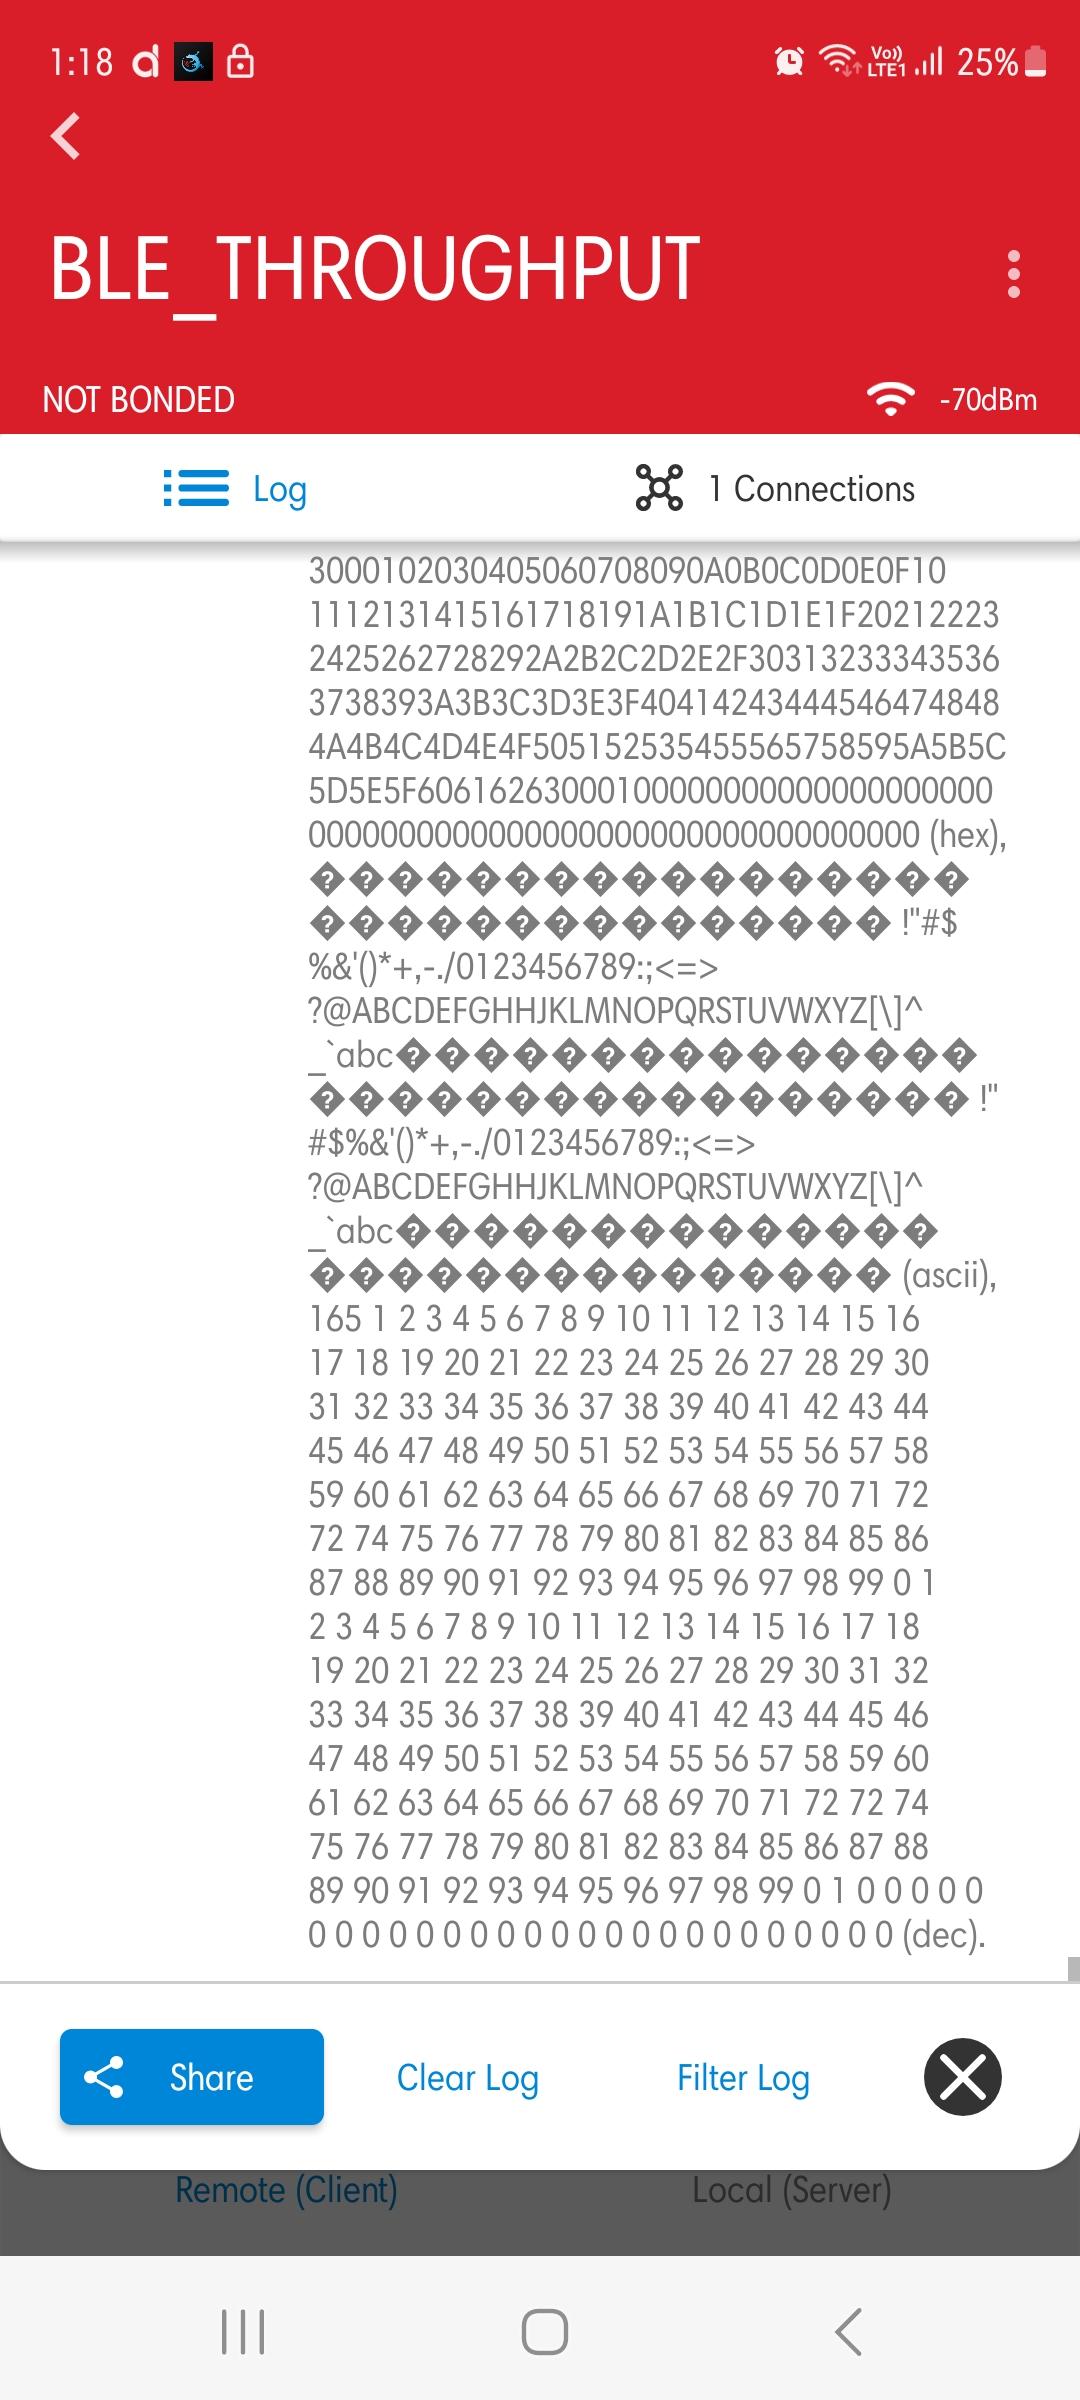
Please refer to the given below images for continuous notification received on the mobile.
7. Observing the output prints on serial terminal#
7.1 SoC Mode:#
Connect USB to UART connector Tx and GND pins to WSTK radio board.
Connect Tx(Pin-6) to P27 on WSTK
Connect GND(Pin 8 or 10) to GND on WSTK
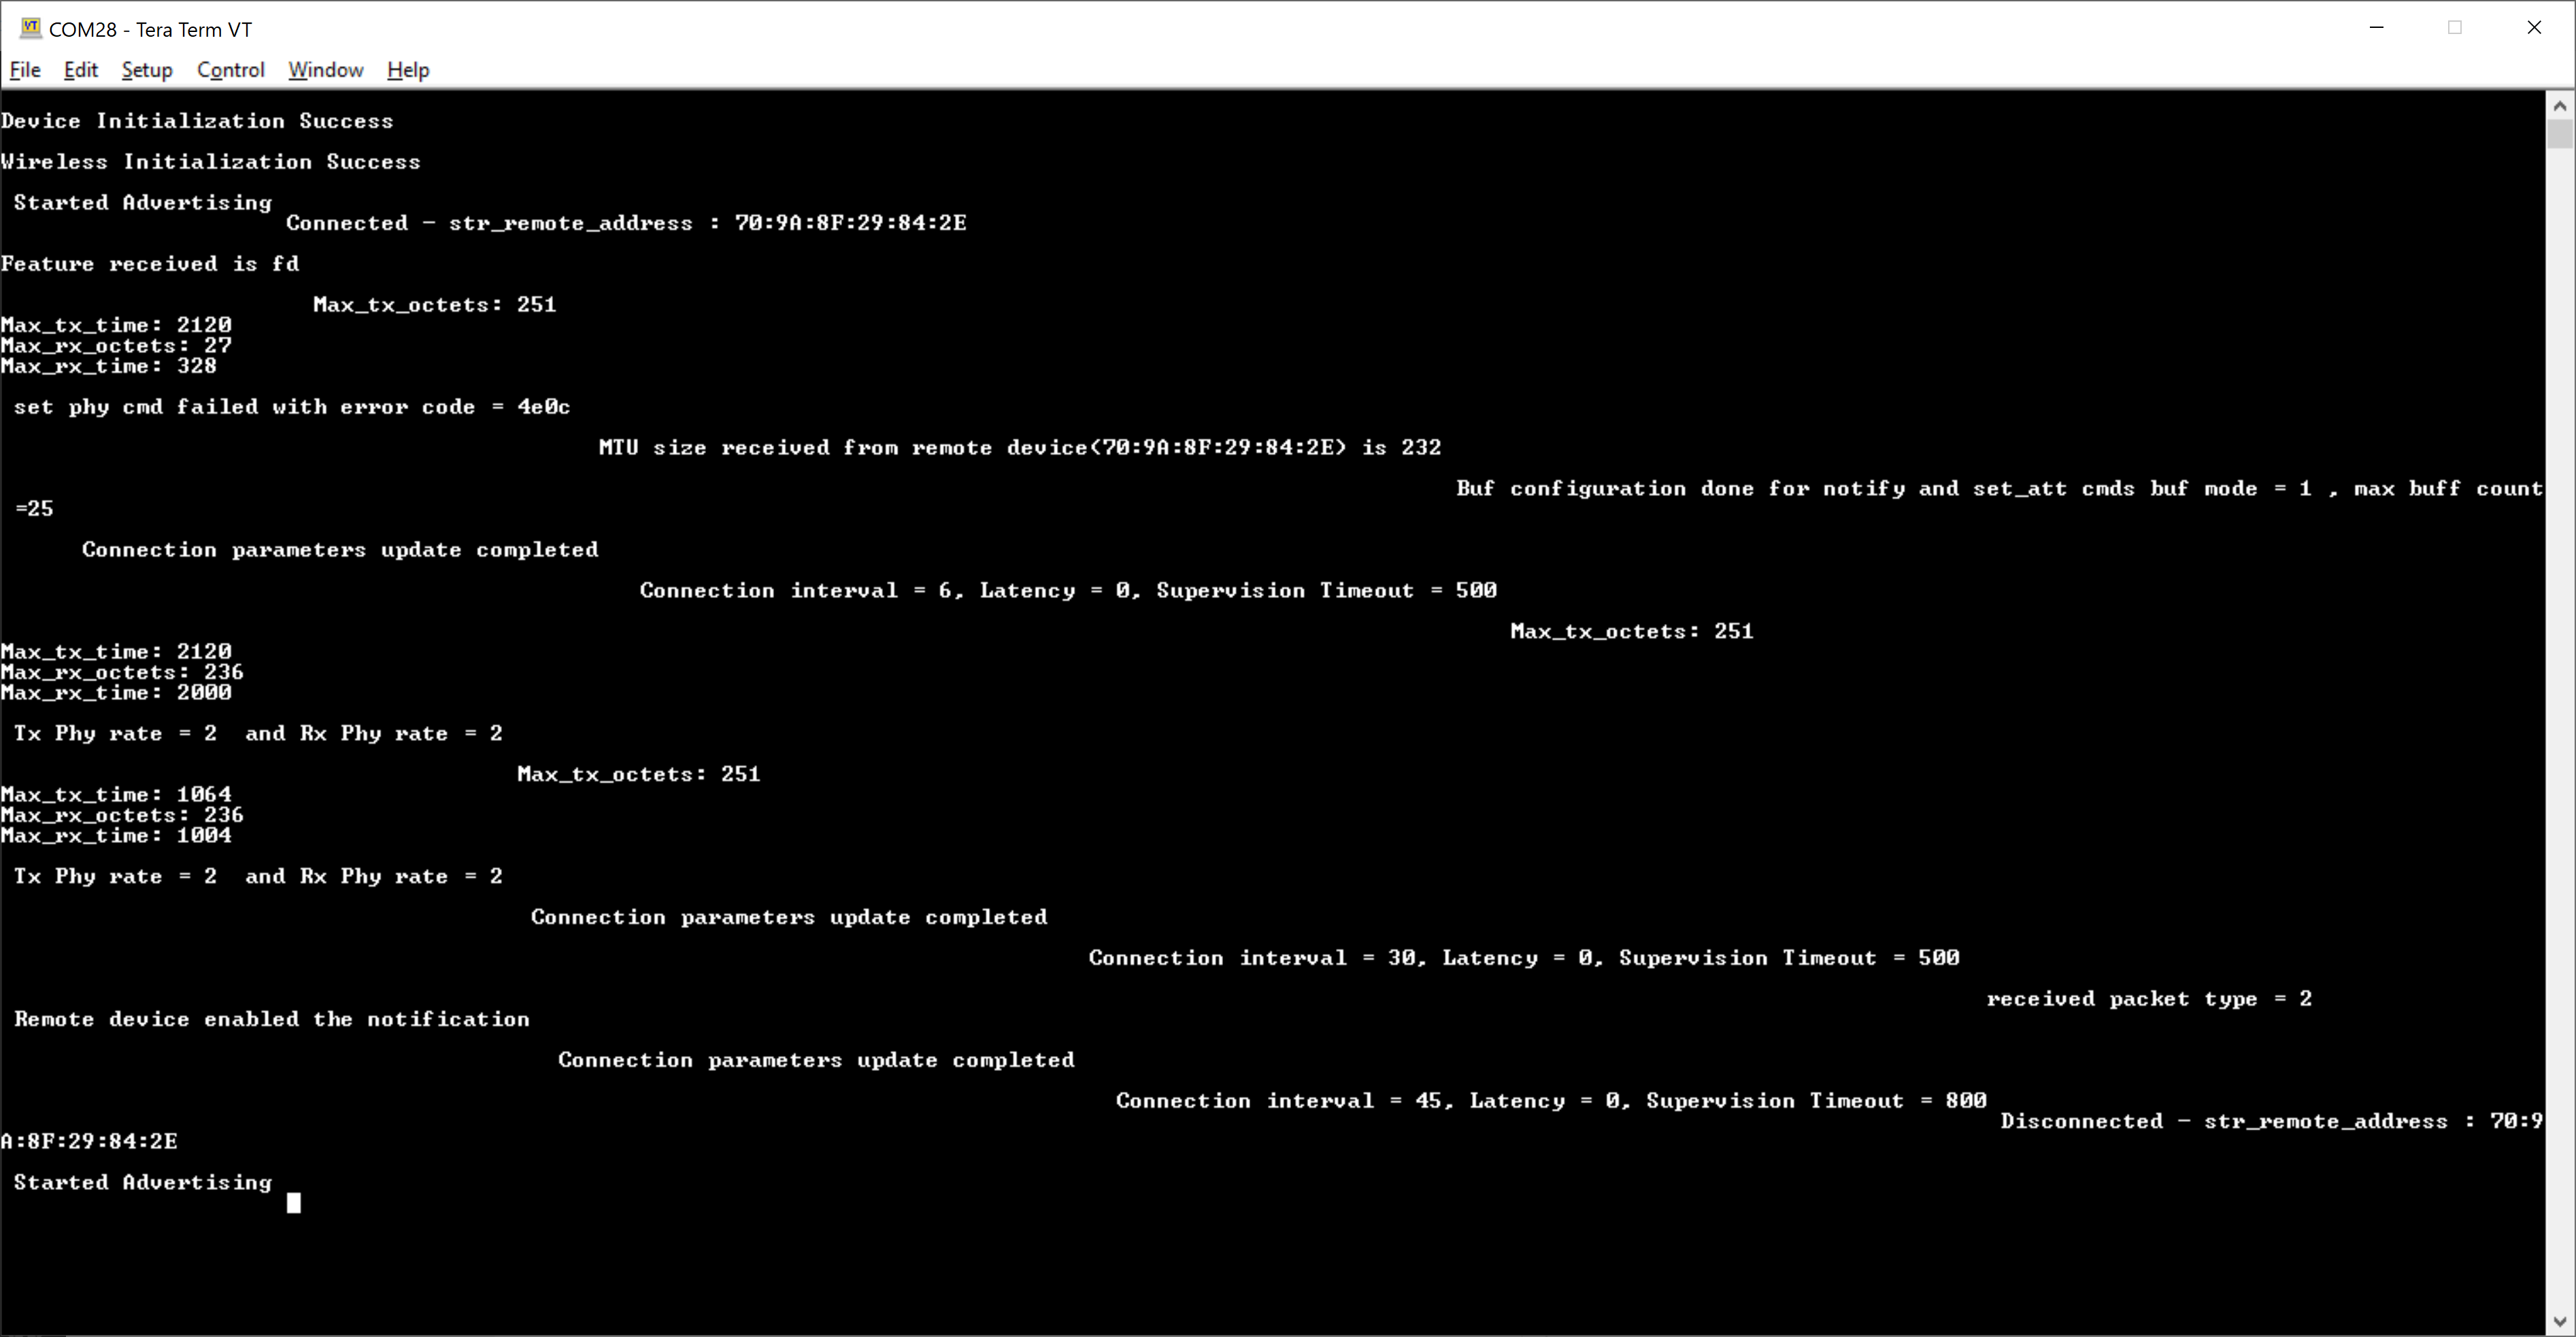
Prints can see as below in any Console terminal
Prints can see as below in any Console terminal
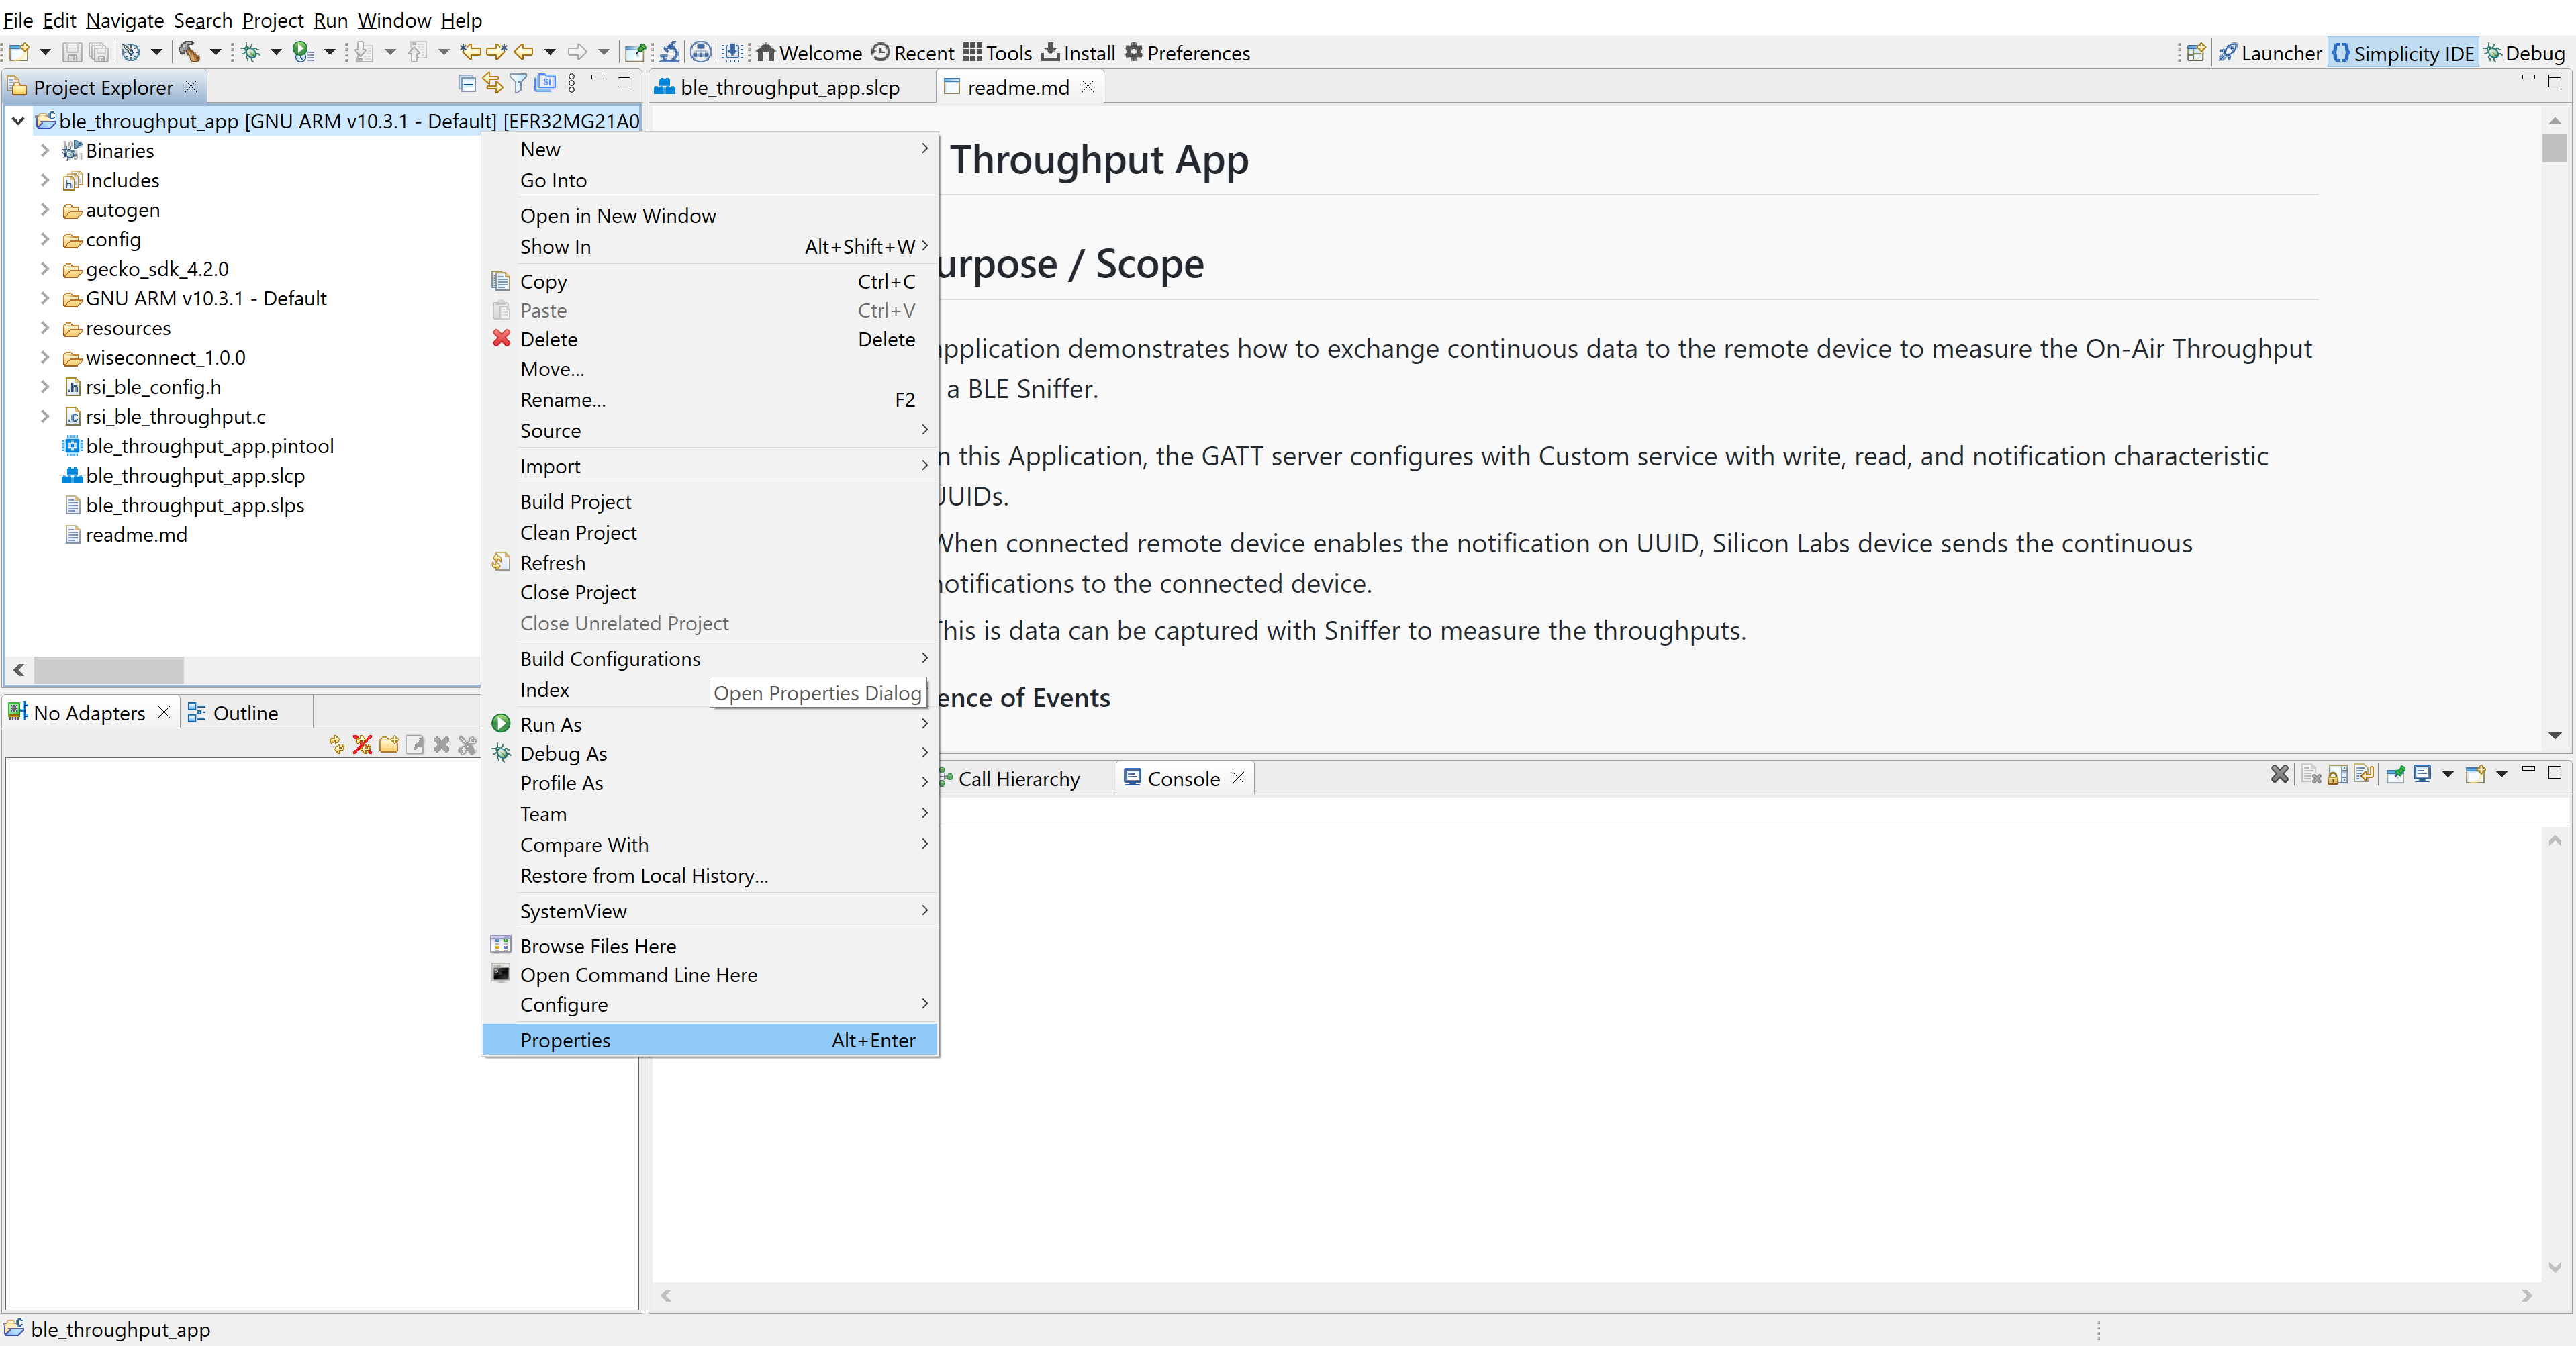
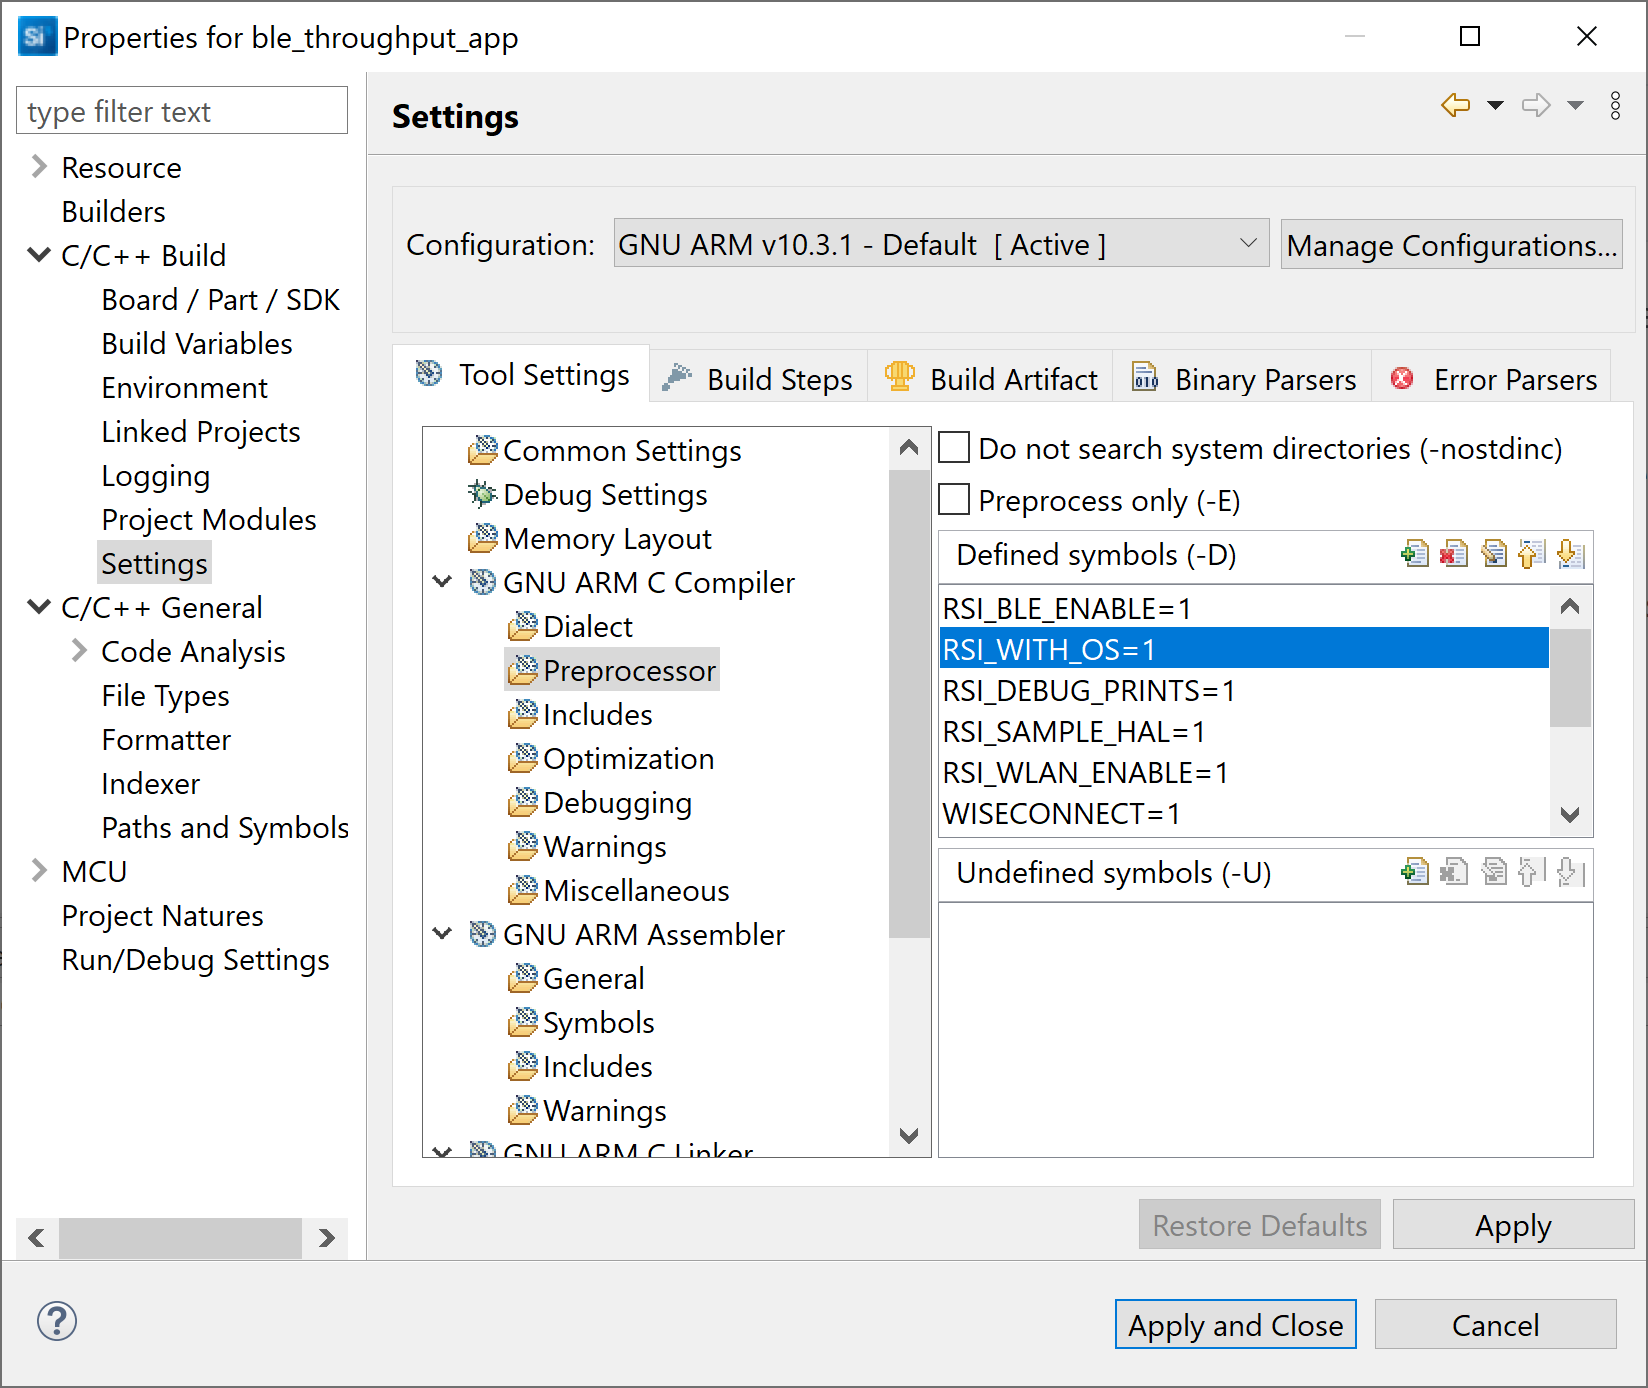
Open the project in Simplicity Studio
Right click on the project and choose 'Properties'
Go to 'C/C++ Build' | 'Settings' | 'GNU ARM C Compiler' | 'Symbols' and remove macro 'RSI_WITH_OS=1'
Select 'Apply' and 'OK' to save the settings
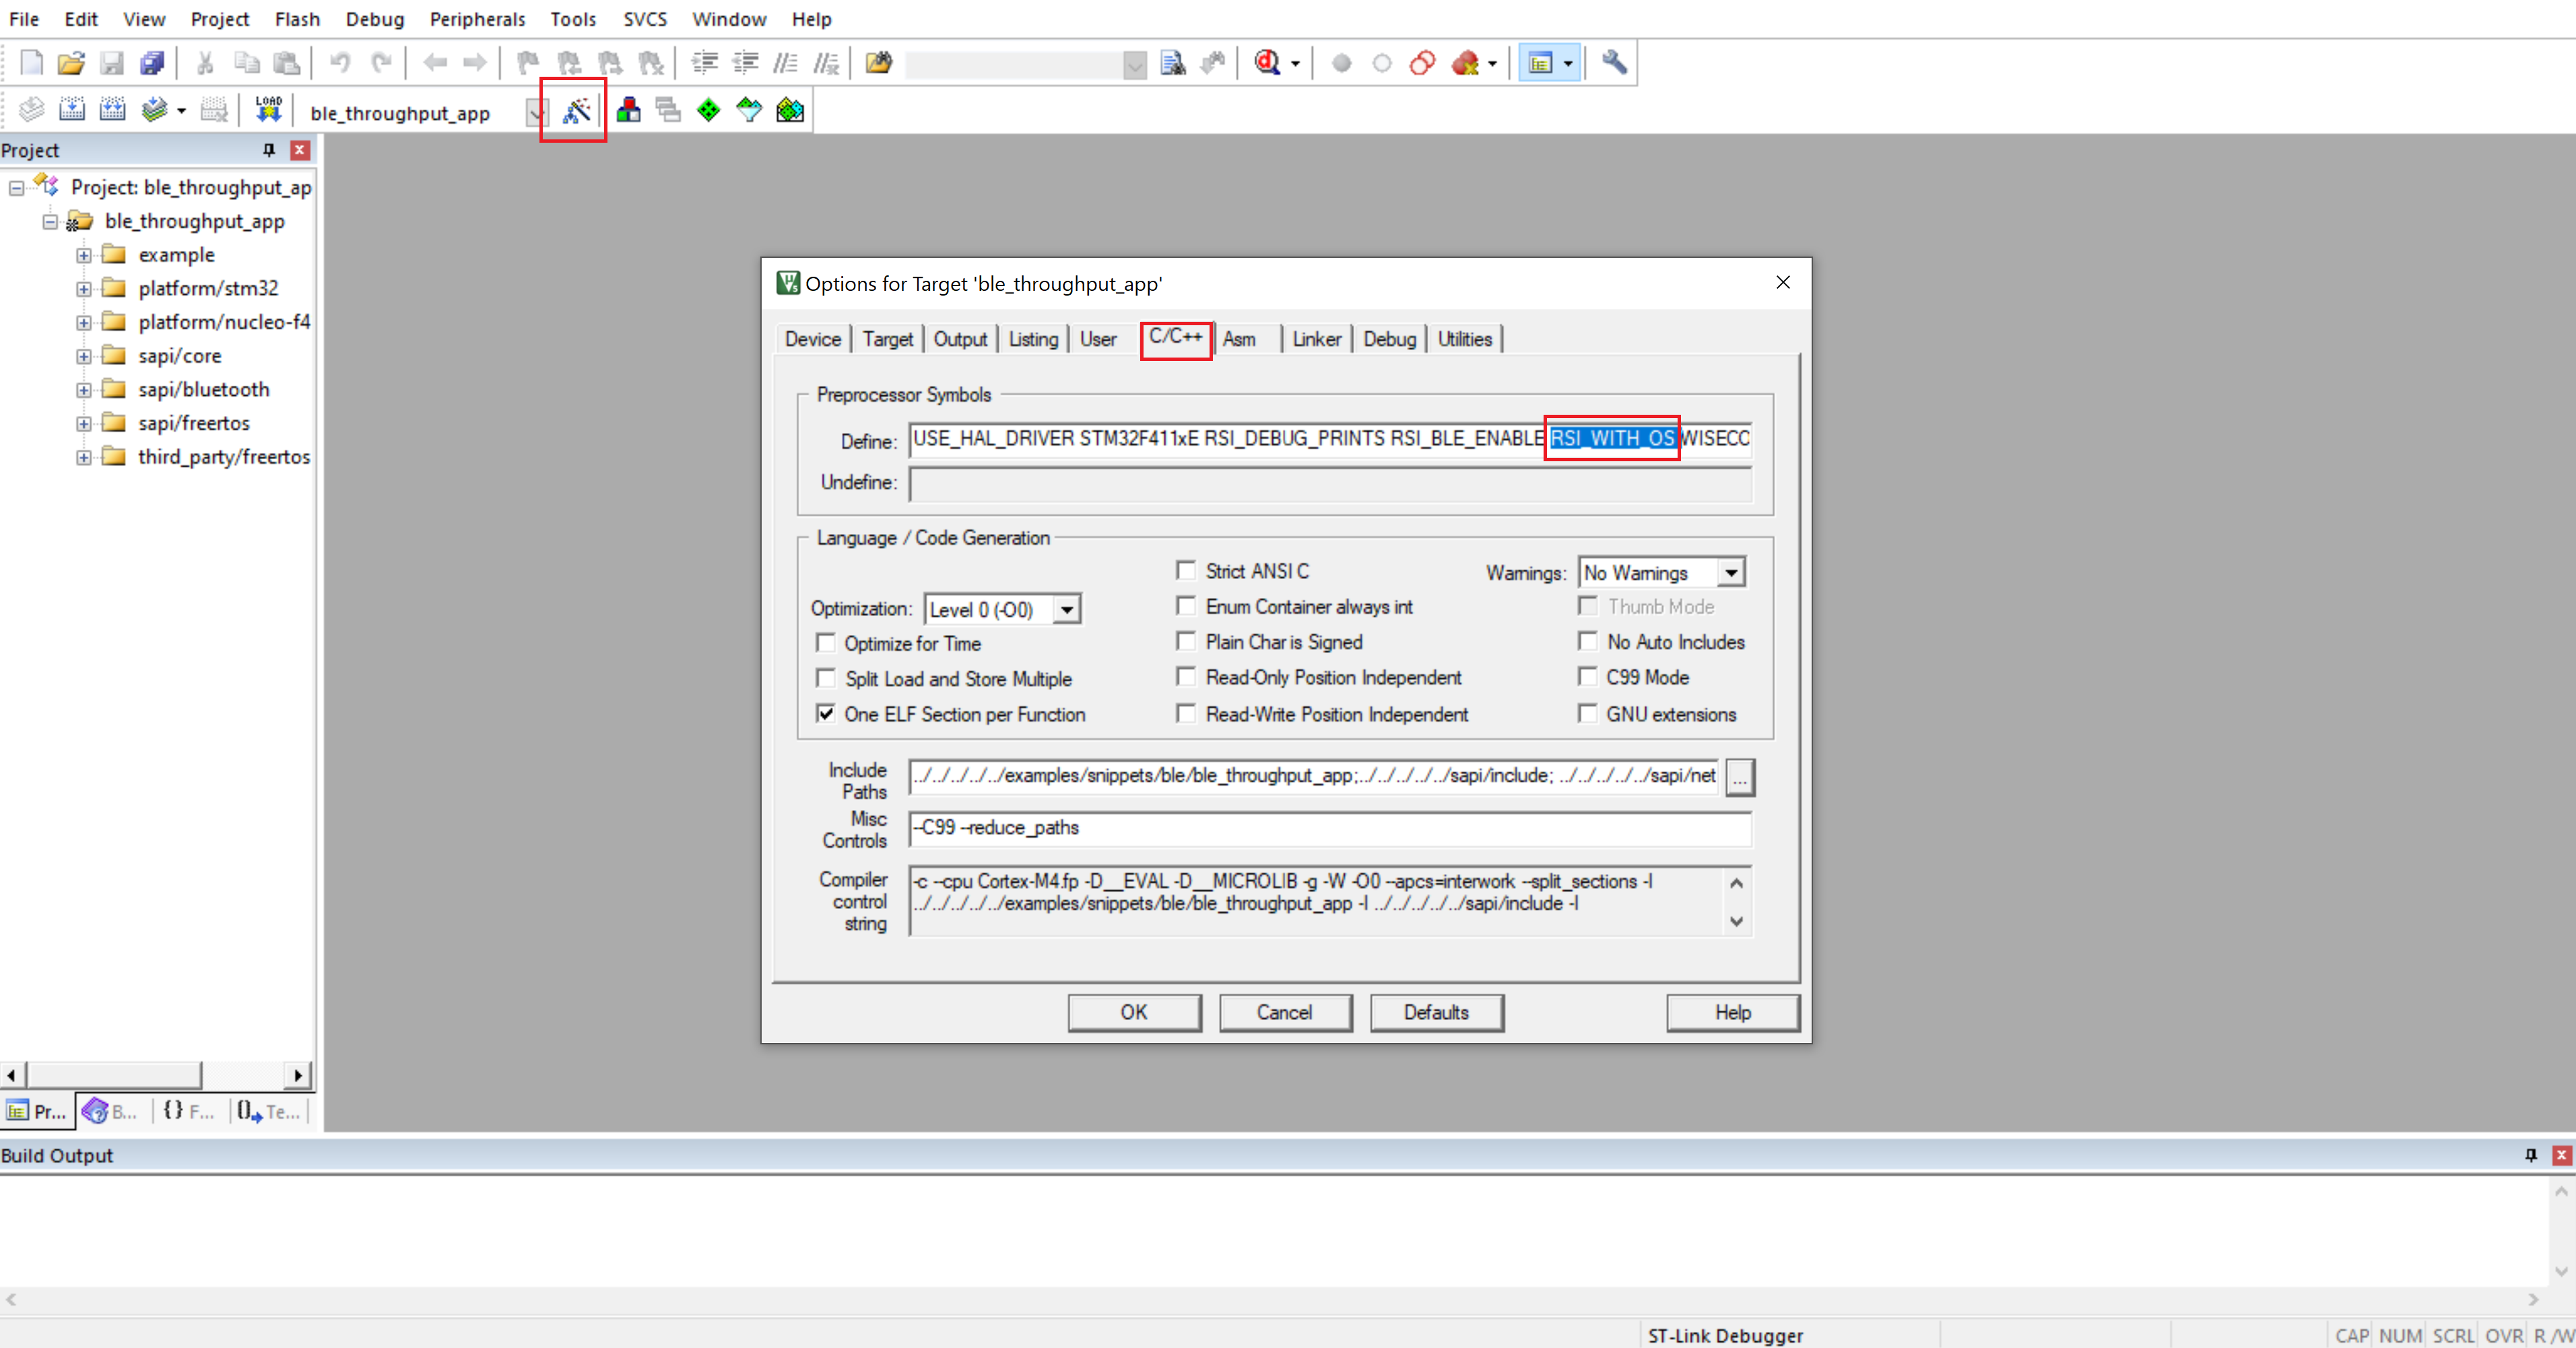
8.2 Bare Metal with Keil#
Open project in Keil IDE and click on 'Options for Target'
Go to 'C/C++' tab and remove 'RSI_WITH_OS' macro present under Preprocessor Symbols
Click on 'OK' button to save the settings