Installing and Running the Z/IP Gateway#
This hands-on exercise demonstrates how to install Z/IP Gateway and control a Z-Wave network using the Z/IP Clients libzwaveip, PyZIP, and the PC Controller. This exercise is the first exercise in the ‘Z-Wave controller training course’ series.
Set up a Raspberry Pi from scratch with remote access, through SSH and VNC
Install and run Z/IP Gateway
Verify that Z/IP Gateway is running correctly
Install required dependencies of PyZIP
Control Z/IP Gateway using PyZIP
Include a Z-Wave always on node in the network and do basic control of the node.
Introduction#
In this exercise, a Raspberry Pi is prepared as a headless device for running Z/IP Gateway. Z/IP Gateway and a Z/IP client are installed, and finally a Z-Wave node is included into the Z-Wave network and controlled.
Hardware Requirements#
1 UZB Controller
1 Raspberry 3B (+)
1 SD card
1 IP Router with built in DHCP
1 WSTK Main Development Board
1 Z-Wave Radio Development Board: ZGM130S SiP Module
1 USB Zniffer
Software Requirements#
Raspberry Pi imager, SD Card writer https://www.raspberrypi.org/downloads/
SSH client https://www.chiark.greenend.org.uk/~sgtatham/putty/latest.htmlVNC client https://www.realvnc.com/en/connect/download/viewer/
Simplicity Studio v4
Z-Wave 7 SDK
Z-Wave Zniffer

Prerequisites#
This is the first exercise in the ‘Z-Wave controller training Course’ series, familiarize yourself with the Z-Wave protocol by referencing the following materials:
https://www.silabs.com/support/training/z-wave-700-series
Videos 1-3
exercise 6,7 and 10
Setting up the Raspberry Pi#
Flashing the Operating System to an SD Card#
Download Raspbian Stretch
Install and run the “Raspberry Pi imager”.
Insert the SD card in the computer.
From the "Operating system" dropdown menu, select "Use custom", and select the file downloaded above.
From the "SD card" drop down menu, select the inserted SD Card and click “Write”:
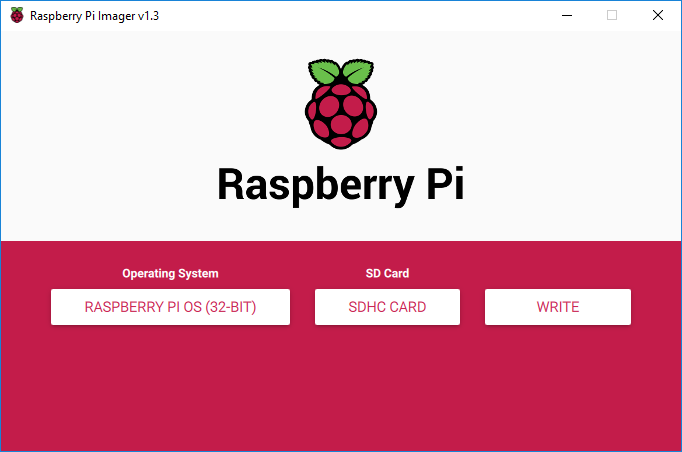
The Raspberry Pi OS image is now downloaded and written to the SD card. Wait for the process to finish.
Enabling SSH Access#
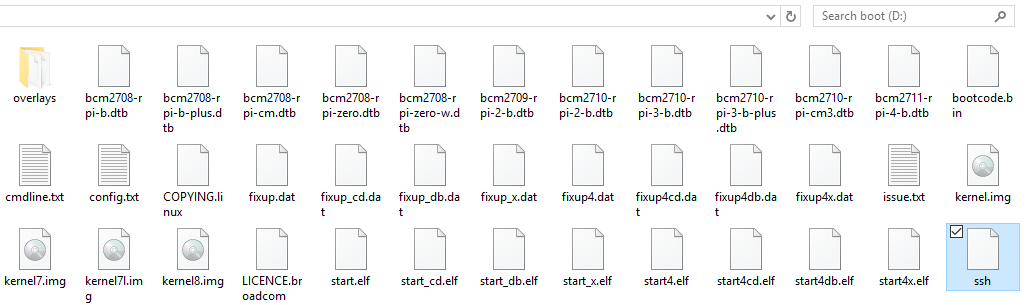
Remove and reinsert the SD card in the PC to mount the boot partition. Place a file named “ssh” in the boot partition to enable SSH on the Raspberry Pi:
Initial Power-up and Network Connection#
Complete the following steps:
Insert SD card into Raspberry Pi and power it up.
Power up the router
Connect the PC either through Ethernet or WIFI
Connect the Raspberry PI using Ethernet Make sure that
raspberrypi.localcan be pinged from the PC.
Connecting to the Raspberry Pi#
Open a terminal with ssh (such as Putty for Windows), and type in either raspberrypi.local or the IP address of the Raspberry Pi in the host name field
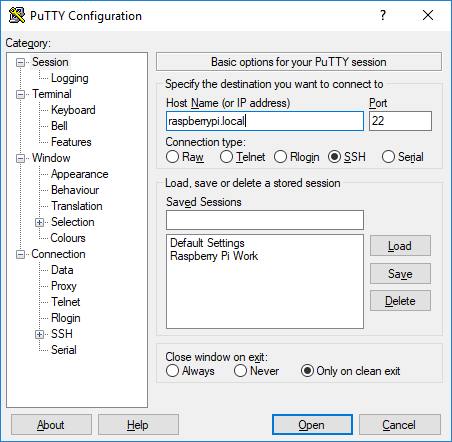
pi and password is raspberry.
Enabling VNC Server#
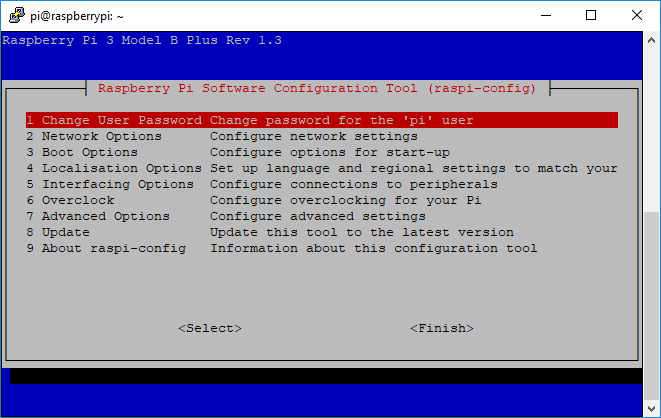
To enable VNC, run “raspi-config":
$ sudo raspi-config
Connecting through VNC Viewer#
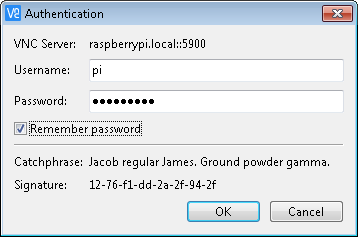
To connect to the graphical desktop of the Raspberry Pi, open VNC Viewer.
Type in either raspberrypi.local or the IP in the address field and press enter

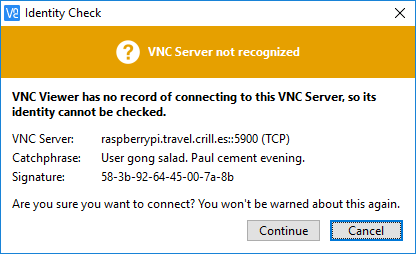
pi in username and raspberry in password.
Software installation#
Transferring Required Files to the Raspberry Pi#
Download the following components through Simplicity Studio:
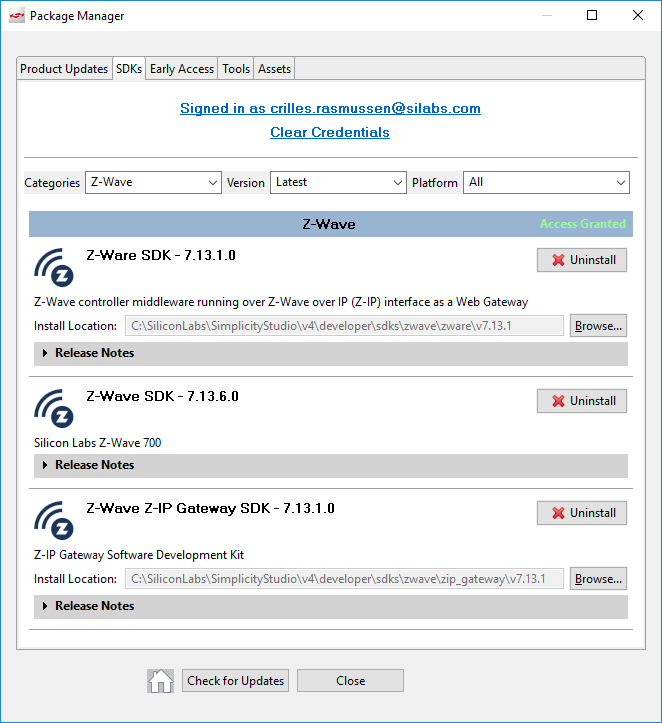
Z-Wave Z-IP Gateway SDK
Z-Ware SDK
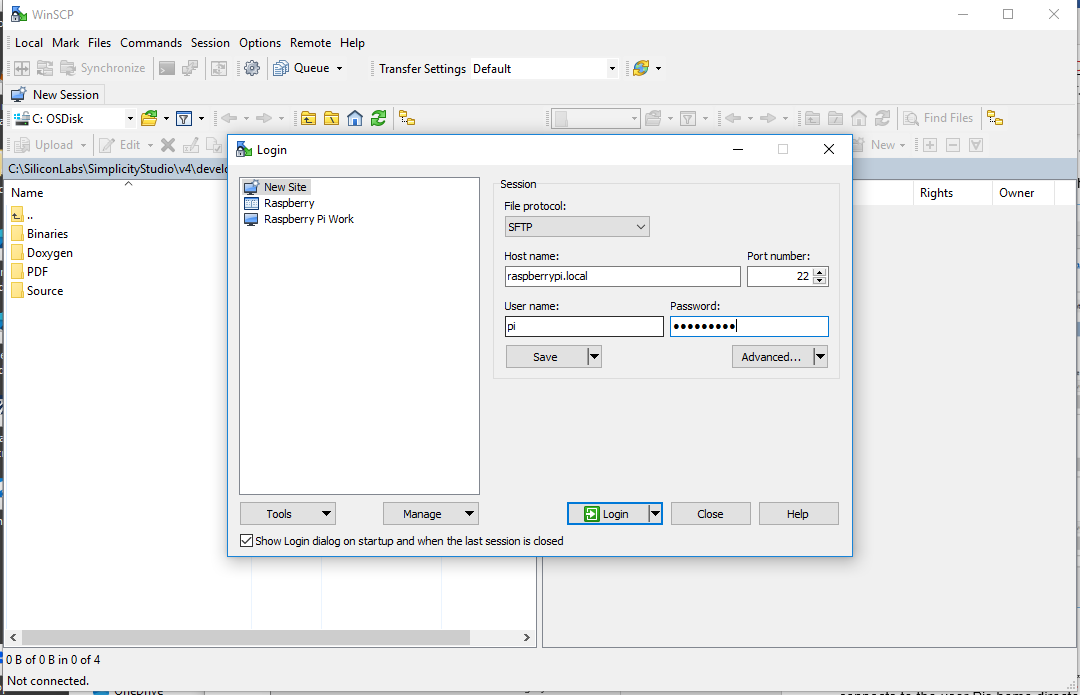
Open winscp, enter raspberrypi.local in host name, pi in username and raspberry in password, and click connect. Winscp by default connects to the user Pis home directory.
c:\SiliconLabs\SimplicityStudio\v4\developer\sdks\zwave\zip_gateway\v7.13.1And transfer the following files:
.\Binaries\ zipgateway-7.13.01-Linux-stretch-armhf.deb
.\Doxygen\ zipgateway-7.13.01.release-docs.zipAnd, If using Z/IP Gateway 7.13.xx or earlier:
.\Source\ pyzip_ver1_23.zipOr if using Z/IP Gateway 7.14.xx or newer:
.\Binaries\libzwaveip-7.14.01-Linux-stretch-armhf-Binaries.zipAnd from
c:\SiliconLabs\SimplicityStudio\v4\developer\sdks\zwave\zware\v7.13.1>
.\Image\ zwarelocal-rpi.tar.gz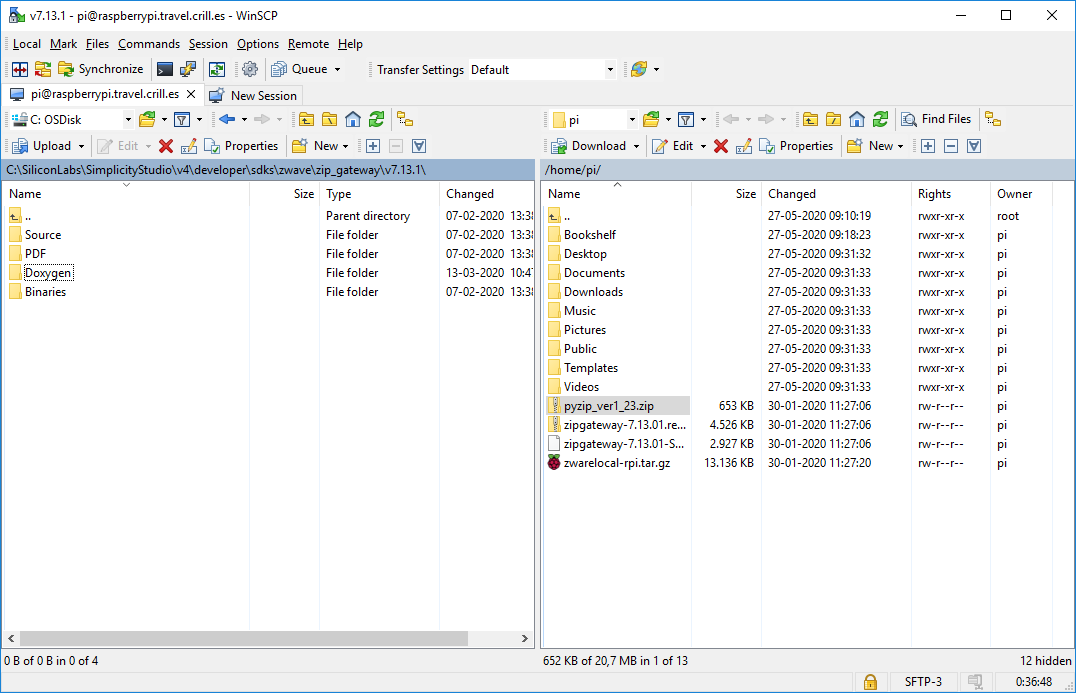
Identifying the UZB Z-Wave USB Controller Stick#
While installing Z/IP Gateway, you have to know which UART is used. While it can be changed later, it is practical to know before starting the installation.
Insert the UZB Z-Wave controller USB stick in the Raspberry Pi.
Open a terminal window.
Enter dmesg|grep usb
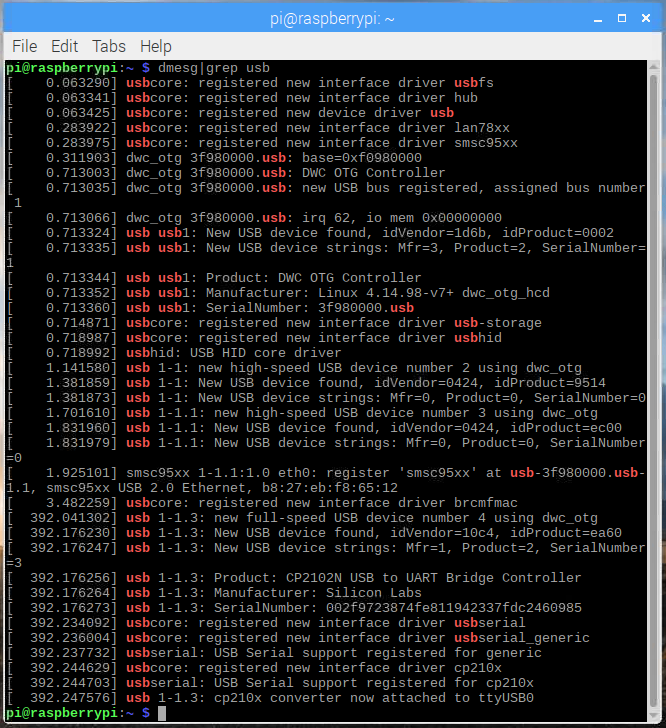
ttyUSB0, which is the latest attached device, the UZB.
Z/IP Gateway Doxygen Documentation#
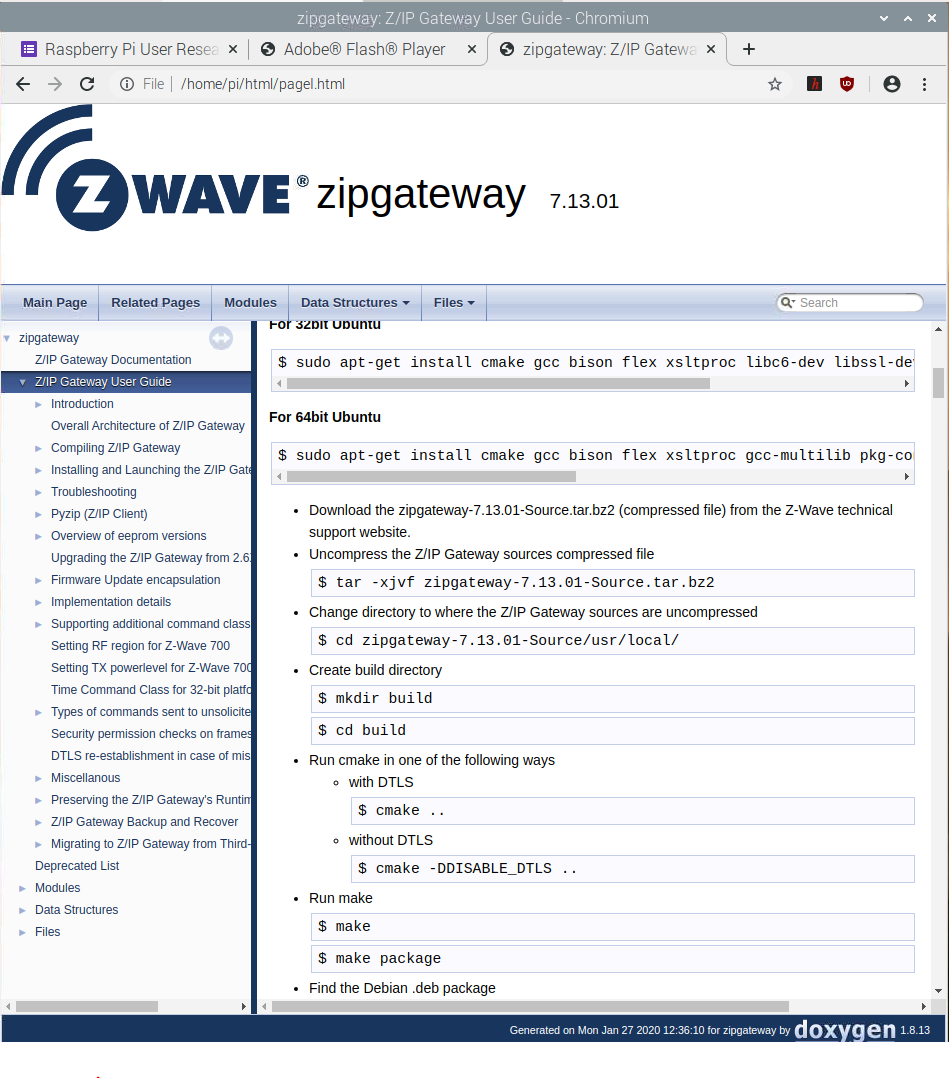
Z/IP Gateway ships with extensive documentation in HTML format. To view the documentation, go to the folder that the doxygen documentation was initially transferred to, typically /home/pi/ and unzip the documentation:
$ unzip zipgateway-7.13.01.release-docs.zip
Open the files using chromium:
$ chromium-browser ./html/index.html
The documentation contains the “Z/IP Gateway user guide”, which details building, installation, and use, along with the use of tools, such as PyZIP, used later in this exercise. The remaining part of this exercise loosely follows the steps in this documentation.
Installing Dependencies#
The documentation outlines the dependencies required. To install them, enter:
$ sudo apt-get update
$ sudo apt-get install libusb-1.0-0 libssl1.1 radvd parprouted bridge-utils libjson-c3 net-tools zip unzip
Installing Z/IP Gateway#
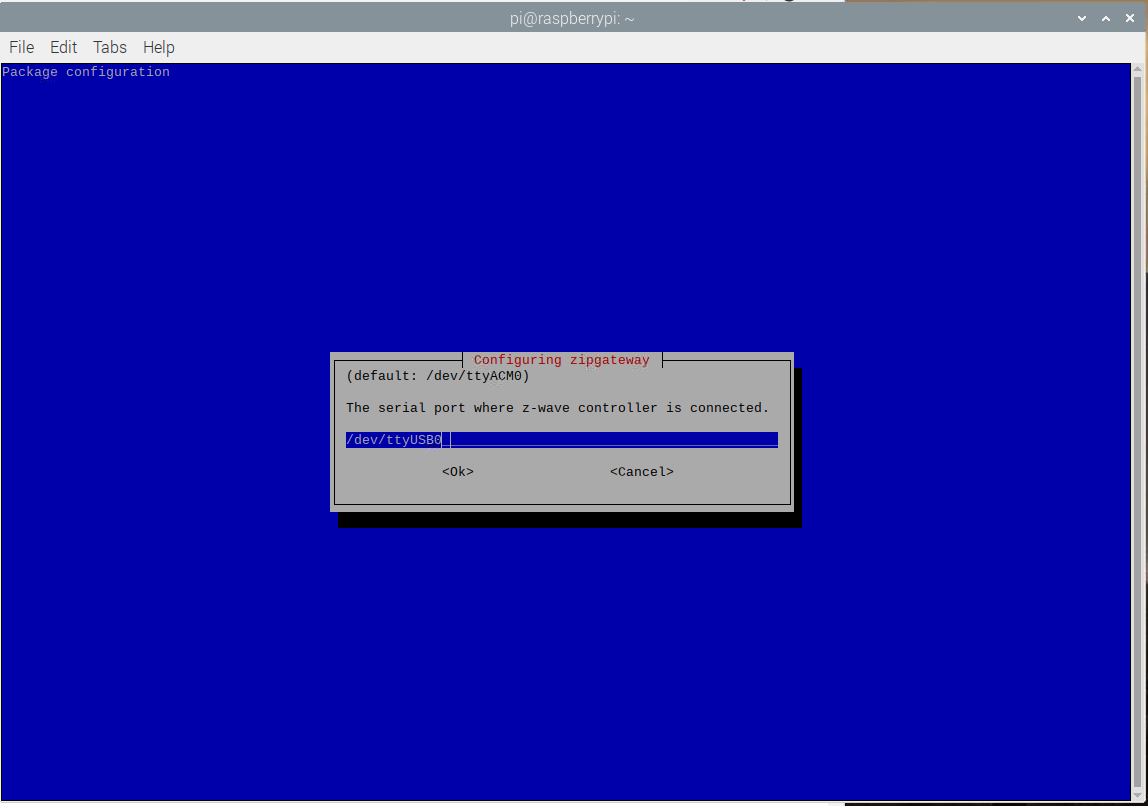
$ sudo dpkg -i zipgateway-7.13.01-Linux-stretch-armhf.deb
When prompted, enter the device name found in the previous step:
/dev/ttyUSB0
fd00:aaaa::3fd00:bbbb::1Wired
Eth0 and wait for the system to restart.
Verifying that Z/IP Gateway is Running Correctly#
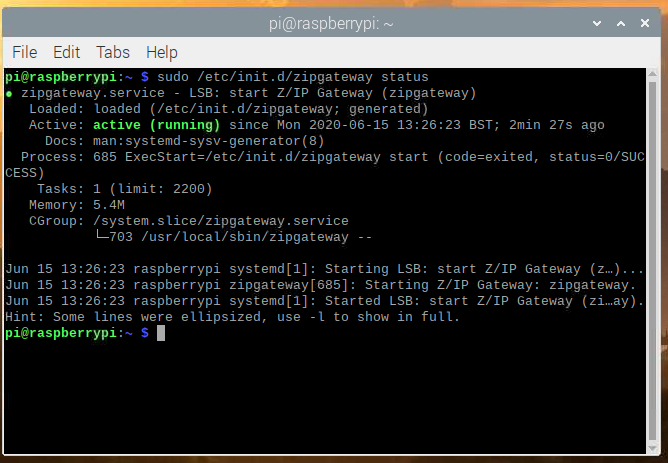
First verify that Z/IP Gateway is running.
Open a terminal and enter:
sudo /etc/init.d/zipgateway status
Next continue to inspect Z/IP Gateways log:
less /tmp/zipgateway.log
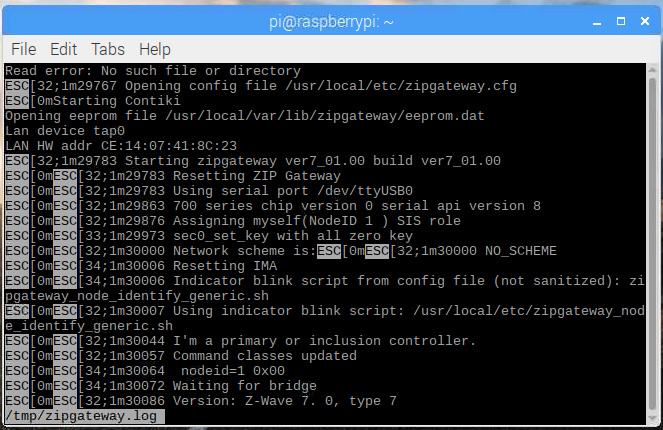
q
RF Configuration#
The UZB stick is not configured for any particular region by default and the transmit power is set to a moderate level. To configure the UZB:
Open the file /usr/local/etc/zipgateway.cfg
Remove the
#in front ofNormalTxPowerLeveland set the value to0x99Remove the
#in front ofMeasured0dBmPowerand set the value to0x31Remove the
#in front ofZWRFRegionand set it to0x00(EU)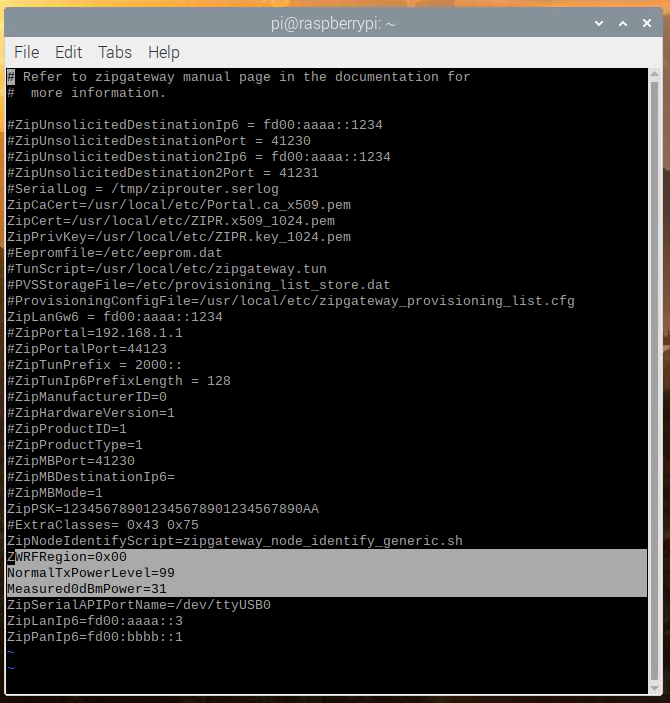
Save the file
Restart Z/IP Gateway:
sudo /etc/init.d/zipgateway restart
Include and Control a Z-Wave Node using libzwaveip (Z/IP Gateway 7.14.xx and Newer)#
Getting Setup#
Go to the home directory where libzwaveip-7.14.01-Linux-stretch-armhf-Binaries.zip was placed initially:
$ cd ~
Unzip libzwaveip:
$ unzip libzwaveip-7.14.01-Linux-stretch-armhf-Binaries.zip
Libzwaveip does not do gateway discovery. Instead we must determine the gateway IP address manually. The gateway IP is typically found in zipgateway.cfg. To find the gateway IP address, run:
$ sudo grep "ZipLanIp6" /usr/local/etc/zipgateway.cfg
Which on a standard configuration gives this output:
ZipLanIp6=fd00:aaaa::3In this case, the gateway has the standard IP, fd00:aaaa::3
To connect to Z/IP Gateway, run:
$ ./reference_client -s fd00:aaaa::3
As Z/IP Gateway is using the default DTLS PSK, hence it needs not be specified here.
Include a Node#
With the reference_client running, enter
Addnode
This puts the Z/IP Gateway in inclusion mode, and it should answer with
(ZIP) Transmit OKOn the end device, enter learn mode by pressing BTN1 on the demo board.
When prompted, grant the requested keys by entering
Grantkeys
And accept the DSK, by entering
Acceptdsk XXXXX
With the “X”s representing the DSK of the device.
Allow the inclusion to finalize.
The full inclusion looks like seen below:
(ZIP) addnode
(ZIP) Transmit OK
(ZIP)
cmd_class: COMMAND_CLASS_NETWORK_MANAGEMENT_INCLUSION v3
cmd: NODE_ADD_KEYS_REPORT
param: Seq No 0x09
param: Properties1 >
Request CSA : false
Reserved:: 00
param: Requested Keys 0x83
bytestream: 34 11 09 00 83
The joining node requests these keys:
* Security 2 Authenticated/Normal key
* Security 2 Unauthenticated/Ad-hoc key
* Security S0 key
Enter 'grantkeys' to accept or 'abortkeys' to cancel.
Usage: grantkeys [argument_1] [argument_2]
argument_1: a byte that describes which keys to grant
argument_2: a byte to allow CSA request
Example:
type 'grantkeys' without arguments to accept the keys/CSA request
type 'grantkeys 87 00' to grant all keys and reject CSA if it is requested
type 'grantkeys 87 01' to grant all keys and accept CSA
(ZIP) grantkeys
(ZIP) Transmit OK
(ZIP)
cmd_class: COMMAND_CLASS_NETWORK_MANAGEMENT_INCLUSION v3
cmd: NODE_ADD_DSK_REPORT
param: Seq No 0x09
param: Properties1 >
Input DSK Length:: 02
Reserved:: 00
param: DSK >
000 000 215 133 001 165 130 140 225 092 183 075 189 120 199 203
bytestream: 34 13 09 02 00 00 d7 85 01 a5 82 8c e1 5c b7 4b bd 78 c7 cb
The joining node is reporting this device specific key:
00000-55173-00421-33420-57692-46923-48504-51147
Please approve by typing 'acceptdsk 12345' where 12345 is the first part of the DSK.
12345 may be omitted if the device does not require the Access or Authenticated keys.
(ZIP) acceptdsk 36728
(ZIP) Transmit OK
(ZIP)
cmd_class: COMMAND_CLASS_NETWORK_MANAGEMENT_INCLUSION v3
cmd: NODE_ADD_STATUS
param: Seq. No 0x09
param: Status >
NODE_ADD_STATUS_DONE
param: Reserved1 0x00
param: New Node ID 0x06
param: Node Info Length 0x1A
param: Properties1 >
Z-Wave Protocol Specific Part 1:: 53
Listening : true
param: Properties2 >
Z-Wave Protocol Specific Part 2:: 1c
Opt : true
param: Basic Device Class 0x04
param: Generic Device Class 0x10
param: Specific Device Class 0x00
param: Command Class >
COMMAND_CLASS_ZWAVEPLUS_INFO :
COMMAND_CLASS_TRANSPORT_SERVICE :
COMMAND_CLASS_SECURITY :
COMMAND_CLASS_SECURITY_2 :
COMMAND_CLASS_SUPERVISION :
COMMAND_CLASS_ZIP_NAMING :
COMMAND_CLASS_ZIP :
(null) :
COMMAND_CLASS_NO_OPERATION :
COMMAND_CLASS_VERSION :
COMMAND_CLASS_SWITCH_BINARY :
COMMAND_CLASS_ASSOCIATION :
COMMAND_CLASS_IP_ASSOCIATION :
COMMAND_CLASS_MULTI_INSTANCE_ASSOCIATION :
COMMAND_CLASS_ASSOCIATION_GRP_INFO :
COMMAND_CLASS_MANUFACTURER_SPECIFIC :
COMMAND_CLASS_DEVICE_RESET_LOCALLY :
COMMAND_CLASS_INDICATOR :
COMMAND_CLASS_POWERLEVEL :
COMMAND_CLASS_FIRMWARE_UPDATE_MD :
param: Granted Keys 0x83
param: KEX Fail Type 0x00
param: Properties3 >
DSK Length:: 10
Reserved2:: 00
param: DSK >
0x8f 0x78 0xd7 0x85 0x01 0xa5 0x82 0x8c 0xe1 0x5c 0xb7 0x4b 0xbd 0x78 0xc7 0xcb
bytestream: 34 02 09 06 00 06 1a d3 9c 04 10 00 5e 55 98 9f 6c 68 23 f1 00 86 25 85 5c 8e 59 72 5a 87 73 7a 83 00 10 8f 78 d7 85 01 a5 82 8c e1 5c b7 4b bd 78 c7 cb
Inclusion done
(ZIP)Control a Node#
With the node now included into the Z-Wave network by Z/IP Gateway, it can now be controlled.
To control the node, enter:
send "Switch Binary [d82ca65f-006-000]" COMMAND_CLASS_SWITCH_BINARY SWITCH_BINARY_SET FFEach step can be completed through tab-completion. The hex string in the name of the device is based on the home and node ID of the device and will vary from network to network. Sending this command turns on LED0.
To turn off LED0 again, send:
send "Switch Binary [d82ca65f-006-000]" COMMAND_CLASS_SWITCH_BINARY SWITCH_BINARY_SET 00Receiving Unsolicited Data from a Node#
When Z-Wave plus v.2 compliant devices are controlled locally, they are required to send status updates to the controller, to allow the controller to register any status changes. The reference client can be used to receive these updates. As these reports were not requested, they are referred to as “unsolicited” reports. A challenge with these reports is that because they were not requested, Z/IP Gateway does not know which IP destination to forward them to. Instead, they are forwarded to the unsolicited destination. Hence, the first step is to configure the unsolicited destination on the Z/IP Gateway.
First, determine the IPv6 address of the host running reference_listener; the Raspberry Pi:
$ ip -6 address showThe output is:
1: lo: <LOOPBACK,UP,LOWER_UP> mtu 65536 state UNKNOWN qlen 1000
inet6 ::1/128 scope host
valid_lft forever preferred_lft forever
3: br-lan: <BROADCAST,MULTICAST,UP,LOWER_UP> mtu 1500 state UP qlen 1000
inet6 fd00:aaaa::fc9b:8b93:2e2c:b6c1/64 scope global mngtmpaddr noprefixroute dynamic
valid_lft 6639sec preferred_lft 6639sec
inet6 fe80::43ef:f2ab:2a29:2f20/64 scope link
valid_lft forever preferred_lft forever
12: tap0: <BROADCAST,MULTICAST,UP,LOWER_UP> mtu 1500 state UNKNOWN qlen 1000
inet6 fd00:aaaa::974f:ea62:e244:45cf/64 scope global mngtmpaddr noprefixroute dynamic
valid_lft 4349sec preferred_lft 4349sec
inet6 fe80::dba1:e437:1c1a:bcaf/64 scope link
valid_lft forever preferred_lft foreverThe IP address should be an IPv6 Address with the same prefix as Z/IP Gateway, fd00:aaaa::, and br-lan has such and address:
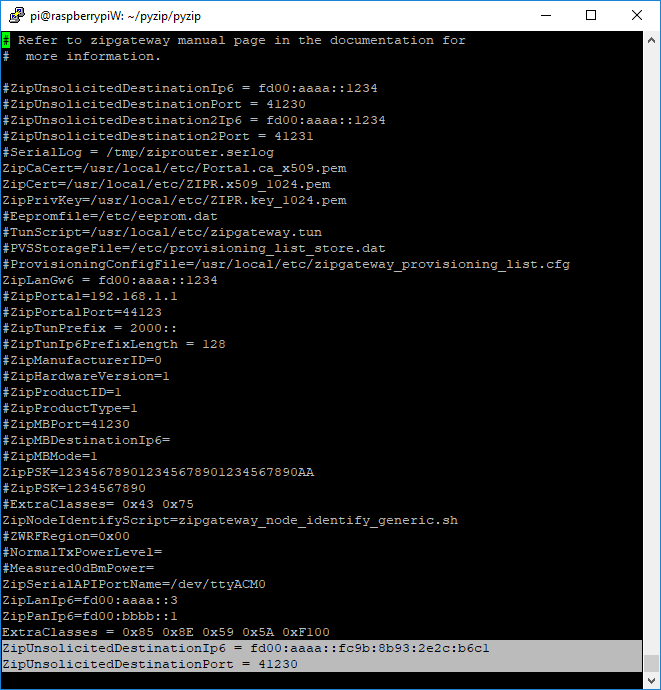
fd00:aaaa::fc9b:8b93:2e2c:b6c1Configure Z/IP Gateway to Forward Unsolicited Traffic#
Open zipgateway.cfg and insert the address found above as the ZipUnsolicitedDestinationIp6. The value of ZipUnsolicitedDestinationPort is not important, as long as it is set, and it is set to the same value on both reference_listener and Z/IP Gateway. Make sure that there is only one entry and that it has not been commented out.
$ sudo /etc/init.d/zipgateway restartZ/IP Gateway will now be forwarding unsolicited reports to the defined destination.
Configure End Nodes to Send Unsolicited Traffic#
For end nodes to send unsolicited traffic, they need to know where to send it and they need to know the node ID of the controller. This can be configured through associations by adding the controllers node ID to the lifeline group, group ID 1. As Z/IP Gateway was the first node in the network, it has node ID 1. Send the following command:
send "Switch Binary [d82ca65f-006-000]" COMMAND_CLASS_ASSOCIATION ASSOCIATION_SET 0101The first 01 in the payload is the group identifier; the lifeline group, and the second 01 is the node ID being added to the association group.
Using reference_listener#
With the slave nodes and Z/IP Gateway configured, to send and forward unsolicited traffic, the reference_listener can now be started in order to receive incoming unsolicited traffic.
Run:
$ ./reference_listener -l fd00:aaaa::fc9b:8b93:2e2c:b6c1 -o 41230
As with the reference_client, the DTLS PSK is not specified, as Z/IP Gateway is configured to use the default key.
When starting refererence_listener, pay special attention to the specified IP address, which matches the IP assigned to br-lan, and configured as ZipUnsolicitedDestinationIp6 in zipgateway.cfg, and the port, which matches the ZipUnsolicitedDestinationPort entry in zipgatway.cfg.
To trigger an unsolicited frame from the end device, press BTN0 on the development board to toggle the LED. Each time the LED toggles, the reference_listener receives a frame, and parses it in this format:
-----------------------------------------
Received data:
25 03 FF FF 00
cmd_class: COMMAND_CLASS_SWITCH_BINARY v2
cmd: SWITCH_BINARY_REPORT
param: Current Value >
on/enable
param: Target Value >
on/enable
param: Duration >
Already at the Target Value
bytestream: 25 03 ff ff 00Starting with the hex data, and then parsing it into command class, command and payload.
Include and Control a Z-Wave Node Using PyZIP (Z/IP Gateway 7.13.xx and Earlier)#
PyZIP is a light weight Z/IP client written in Python.
Install the PyZIP dependencies:
$ sudo apt-get install python-wxgtk3.0PyZIP currently relies on the deprecated libssl 1.0, that must be sideloaded:
$ wget http://ftp.de.debian.org/debian/pool/main/o/openssl1.0/libssl1.0.2_1.0.2u-1~deb9u1_armhf.deb
$ sudo dpkg -i libssl1.0.2_1.0.2u-1~deb9u1_armhf.debFrom the terminal, first unzip the Pyzip Archive:
$ unzip pyzip_ver1_23.zipEnter the folder containing Pyzip:
$ cd zw-pyzip/pyzip/And run pyzip:
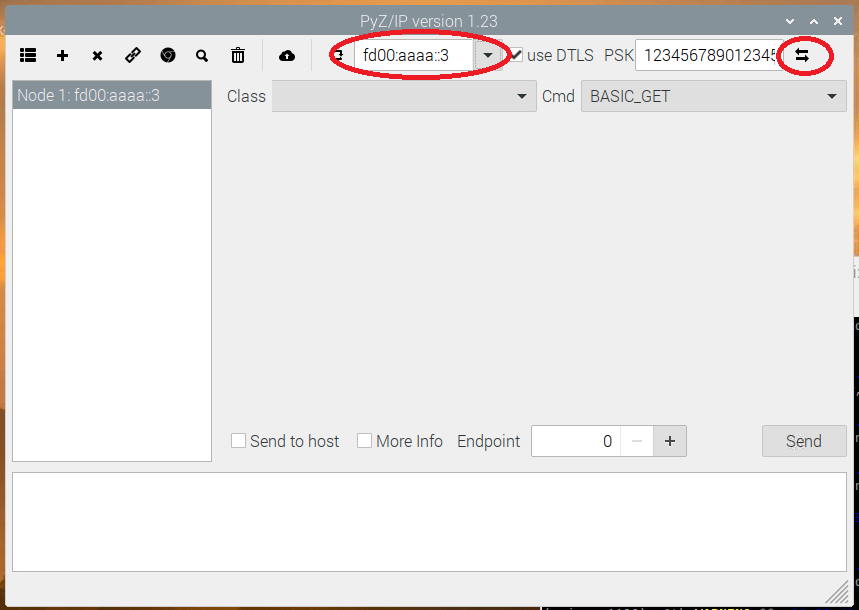
$ python2 gui.pyTo control Z/IP Gateway, select it from the drop down, and click connect. This example relies on IPv6, so the gateway with the address fd00:aaaa::3 should be selected:
Include a Node#
To include Z-Wave nodes using PyZIP, follow these steps:
In Pyzip, click “+” button
Put the slave node in learn mode
Depending on the slave node capabilities you may be prompted to
grant s2 keys.
Do not change the default selected keys.
Click ok
enter the S2 DSK
Read out the DSK using Simplicity studio Enter the DSK:
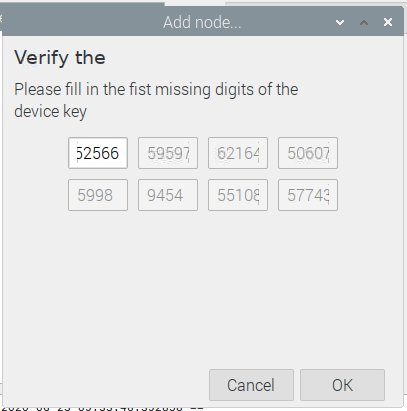
Click ok
Control a Node#
PyZip is a very basic Z/IP client, and does not filter the listed command classes based on the capabilities of the Z-Wave node. As such, it allows for sending all command classes to all Z-Wave nodes.
To control a Z-Wave node:
Choose the include Z-Wave node in the left hand list.
From the command class drop down, "Class", click a supported command class. For the Switch on/off sample app a choice could be “binary switch command class”; "SWITCH_BINARY".
From the command drop down, "Cmd", select a command within this command class, e.g., command switch_binary_set.
Select the payload for the frame.
Click send.
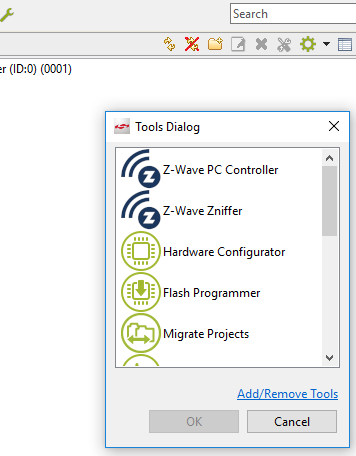
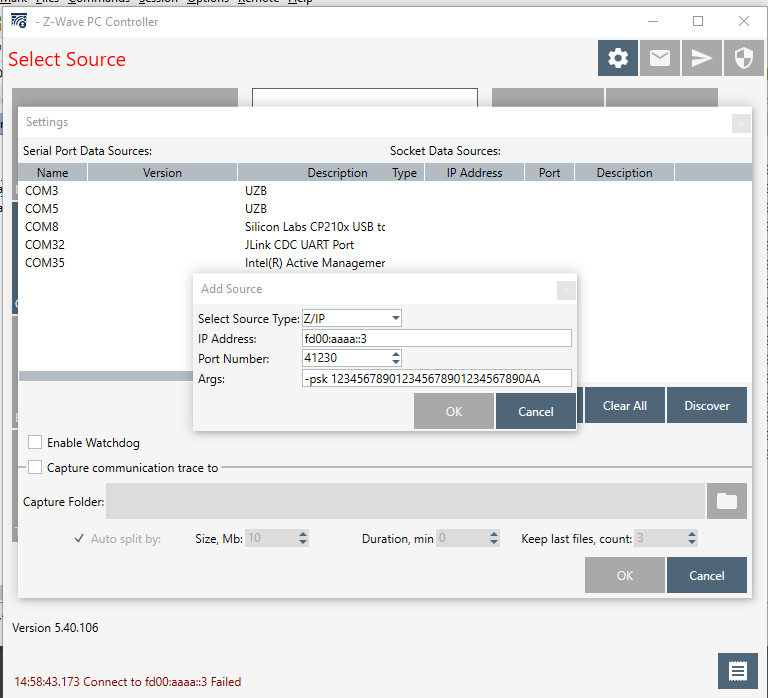
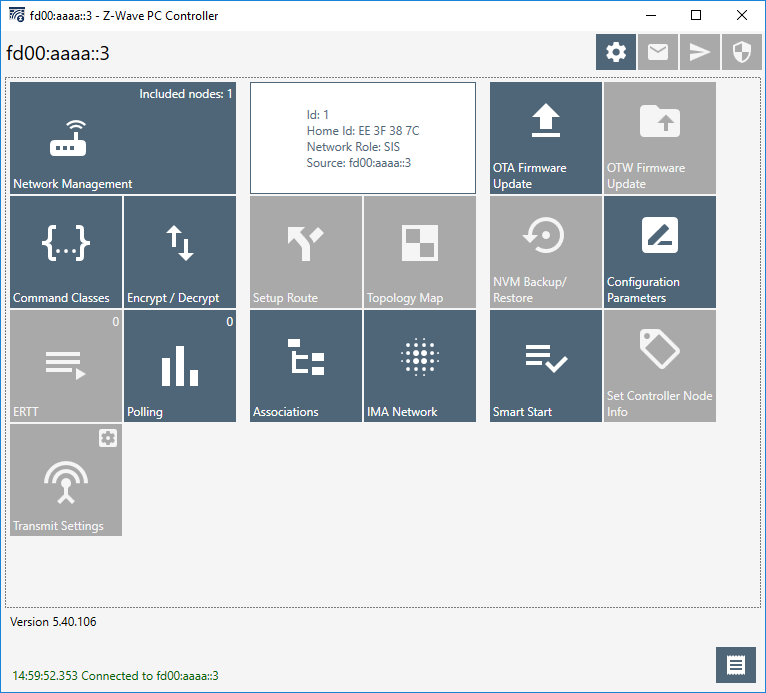
Include and Control a Z-Wave node Using “PC Controller”#
Simplicity Studio Includes a Windows application that can also control Z/IP gateway; the “PC Controller”.
Conclusion#
At this point, you should be familiarized with the Raspberry Pi platform for running Z/IP Gateway, Z/IP Gateway itself, and the Z/IP Clients, libzwaveip, PyZIP and PC Controller. The Raspberry Pi is the reference platform for the controller stack, and Z/IP Gateway the core of the controller stack. This setup is needed for the subsequent exercises.