Prepare Your First Z-Wave Sample Application#
Having all the hardware and software set up, you are finally ready to build and run the sample applications.
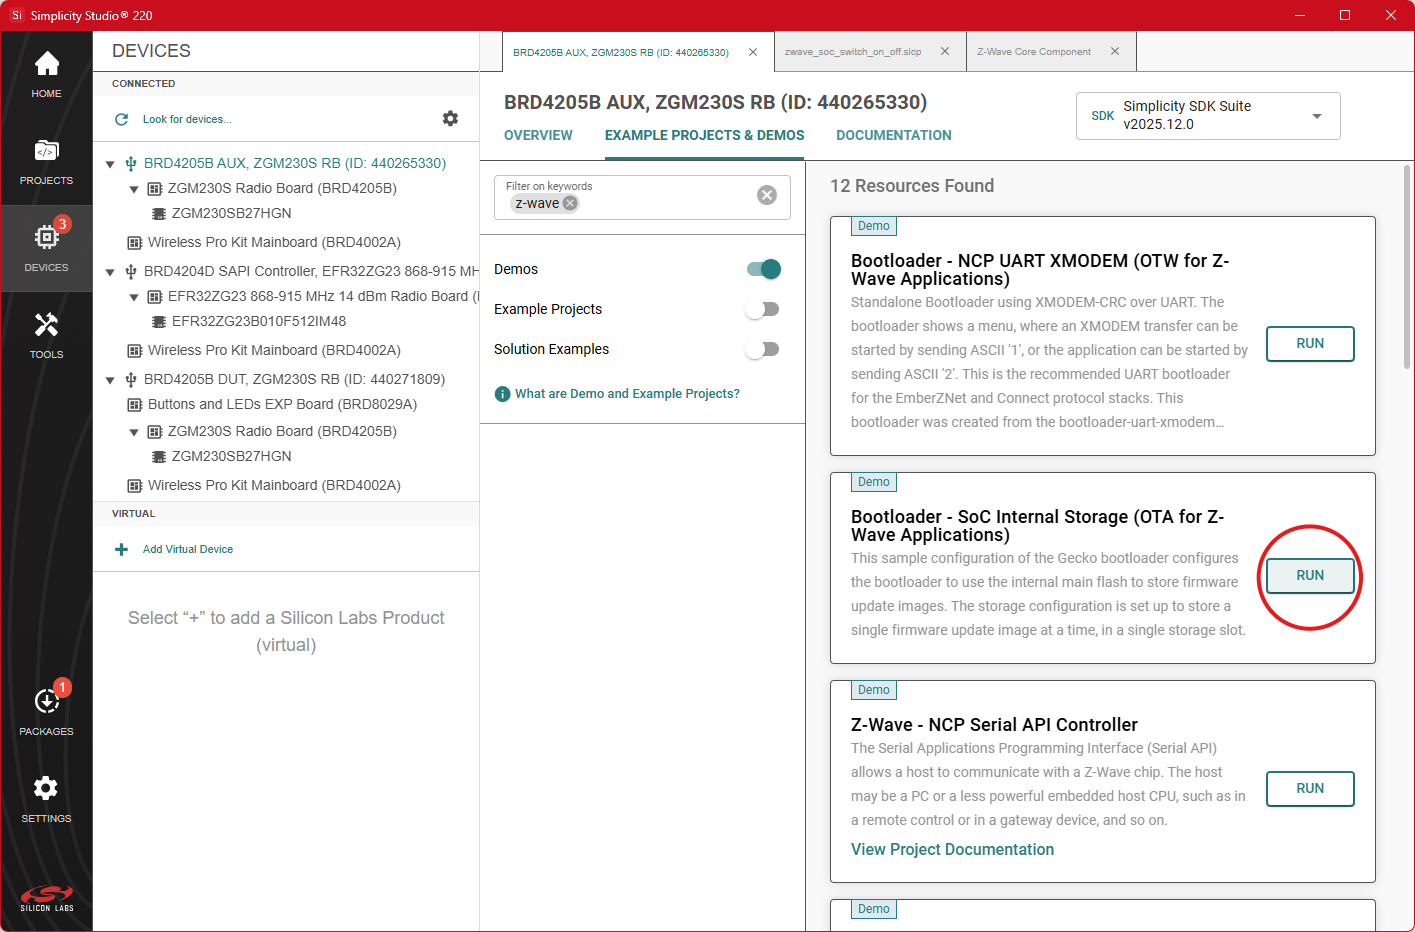
On the Devices page, select your hardware and navigate to the Example Projects & Demos tab.
A list of available Z-Wave sample applications is displayed, including applications with different features and levels of customization.
Pre-built Demos are binary files either containing a bootloader or a sample application in its default configuration.
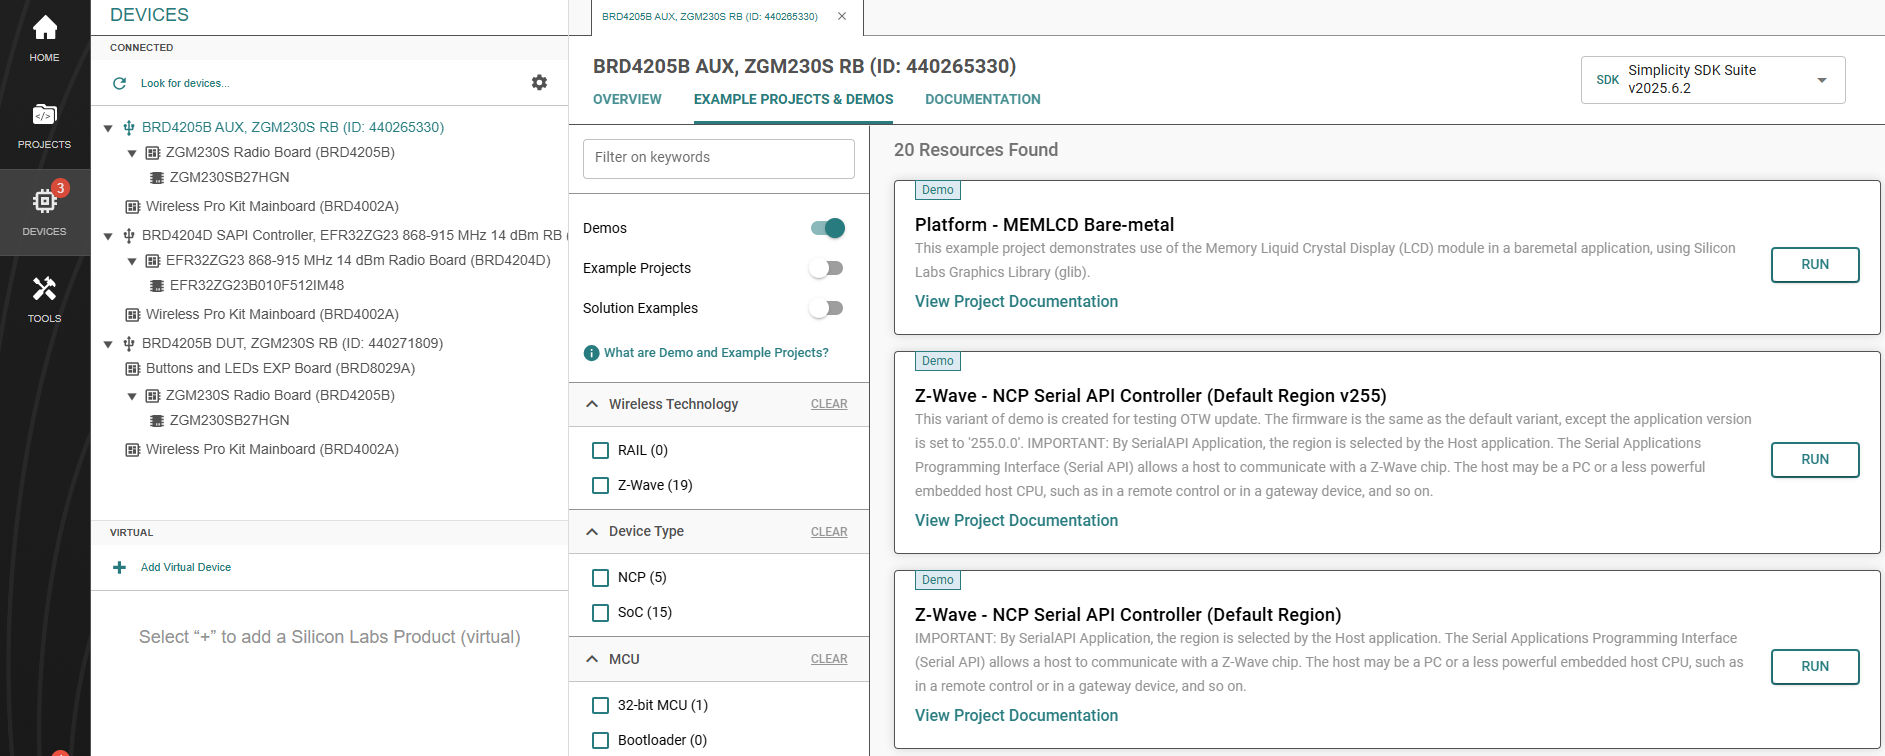
These demo binaries are ready to be flashed to a compatible Z-Wave development board using the RUN button.
The demo binaries are configured to use the default Z-Wave region (Europe), unless otherwise configured via a manufacturing token. To set a different region, refer to Changing the Region.
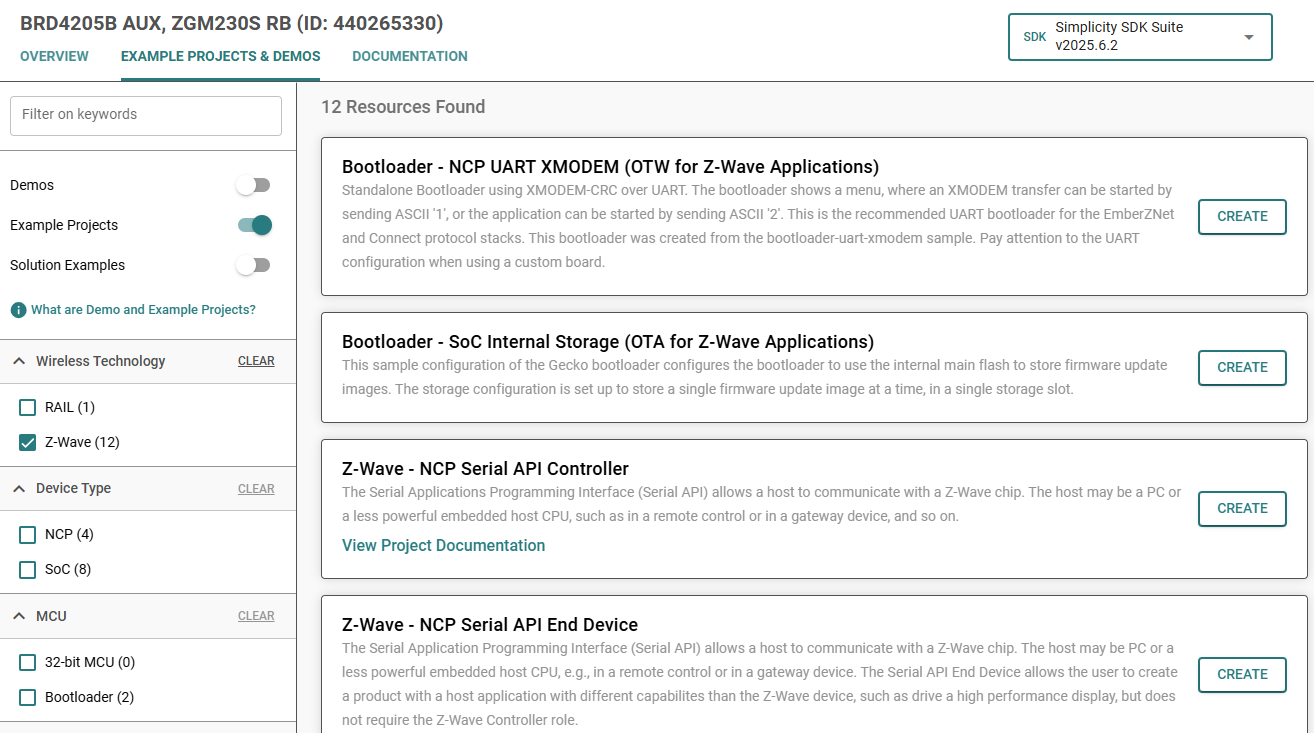
Example Projects are sample applications that can be used as a basis for custom application development. These projects do not contain a bootloader; a pre-built bootloader demo may be used in conjunction with them.
Z-Wave Solution Examples, sometimes referred to as workspaces, are combinations of a bootloader project and a Z-Wave Example Project.
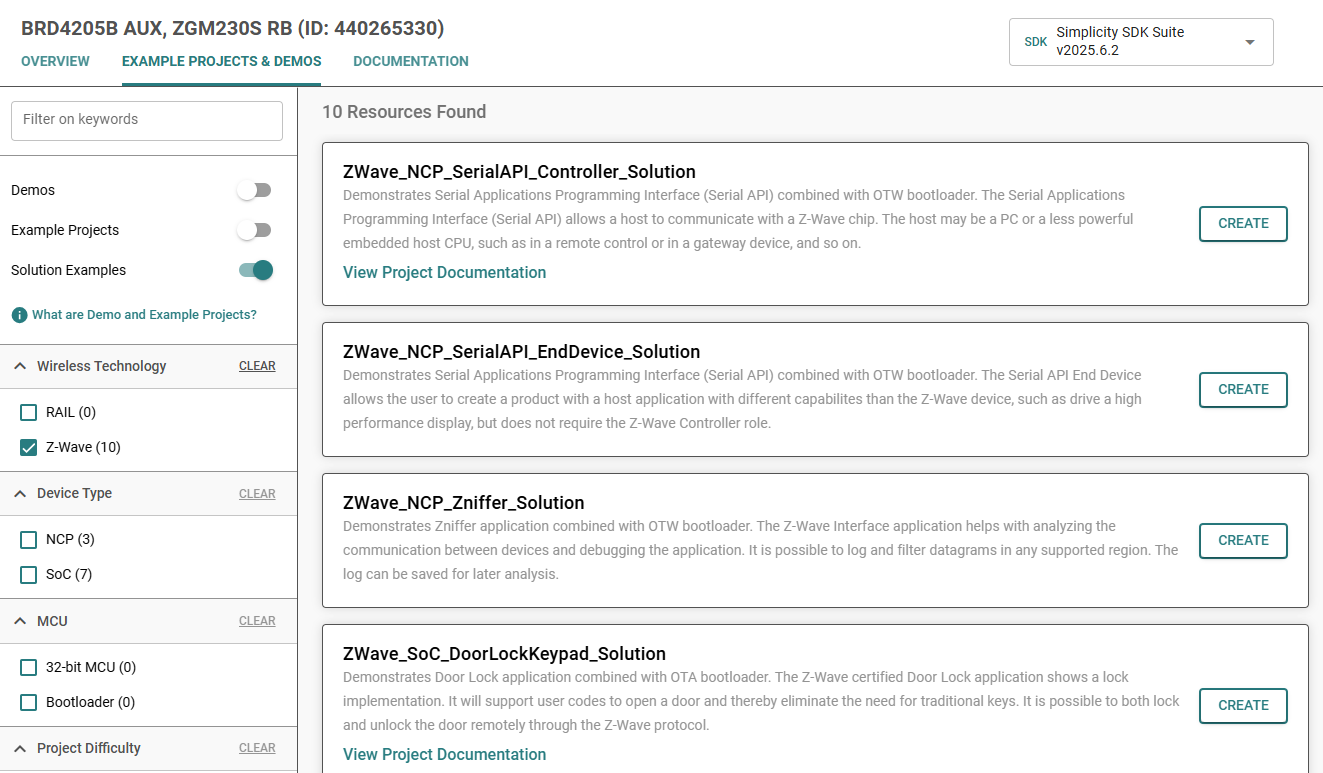
In Solution Examples, a binary combining the bootloader and the sample application is created at the end of the build process. This binary can be found in the artifacts folder of the application project, with a ‘_full’ postfix. Other binaries containing only the bootloader and only the application can also be found in this folder.

This guide demonstrates how to open, compile, and program a device with the Switch On/Off Sample Application, using an Example Project, with Visual Studio Code as the target IDE.
Flashing the Bootloader#
800 Series radio boards require a Z-Wave specific bootloader before flashing an application.
To flash a bootloader to your 800 Series device, perform the following steps:
Open Simplicity Studio and navigate to the Devices page.
Select your device in the Connected view.
Go to the Example Projects & Demos tab.
Find the Z-Wave OTA bootloader. Use the filtering options to speed up this process.
Click Run and select your device from the list if prompted.
To avoid having to flash the bootloader manually, you can create a Solution Example instead of an Example Project.
For further details about the bootloader, refer to [13].
Configuring a Sample Application#
Still on the Example Projects & Demos tab, find the Z-Wave - SoC Switch On/Off example project and click Create. The Project Configuration dialog will appear. Click Finish. Simplicity Studio will generate a local copy of the example project and open the project overview, as shown below.
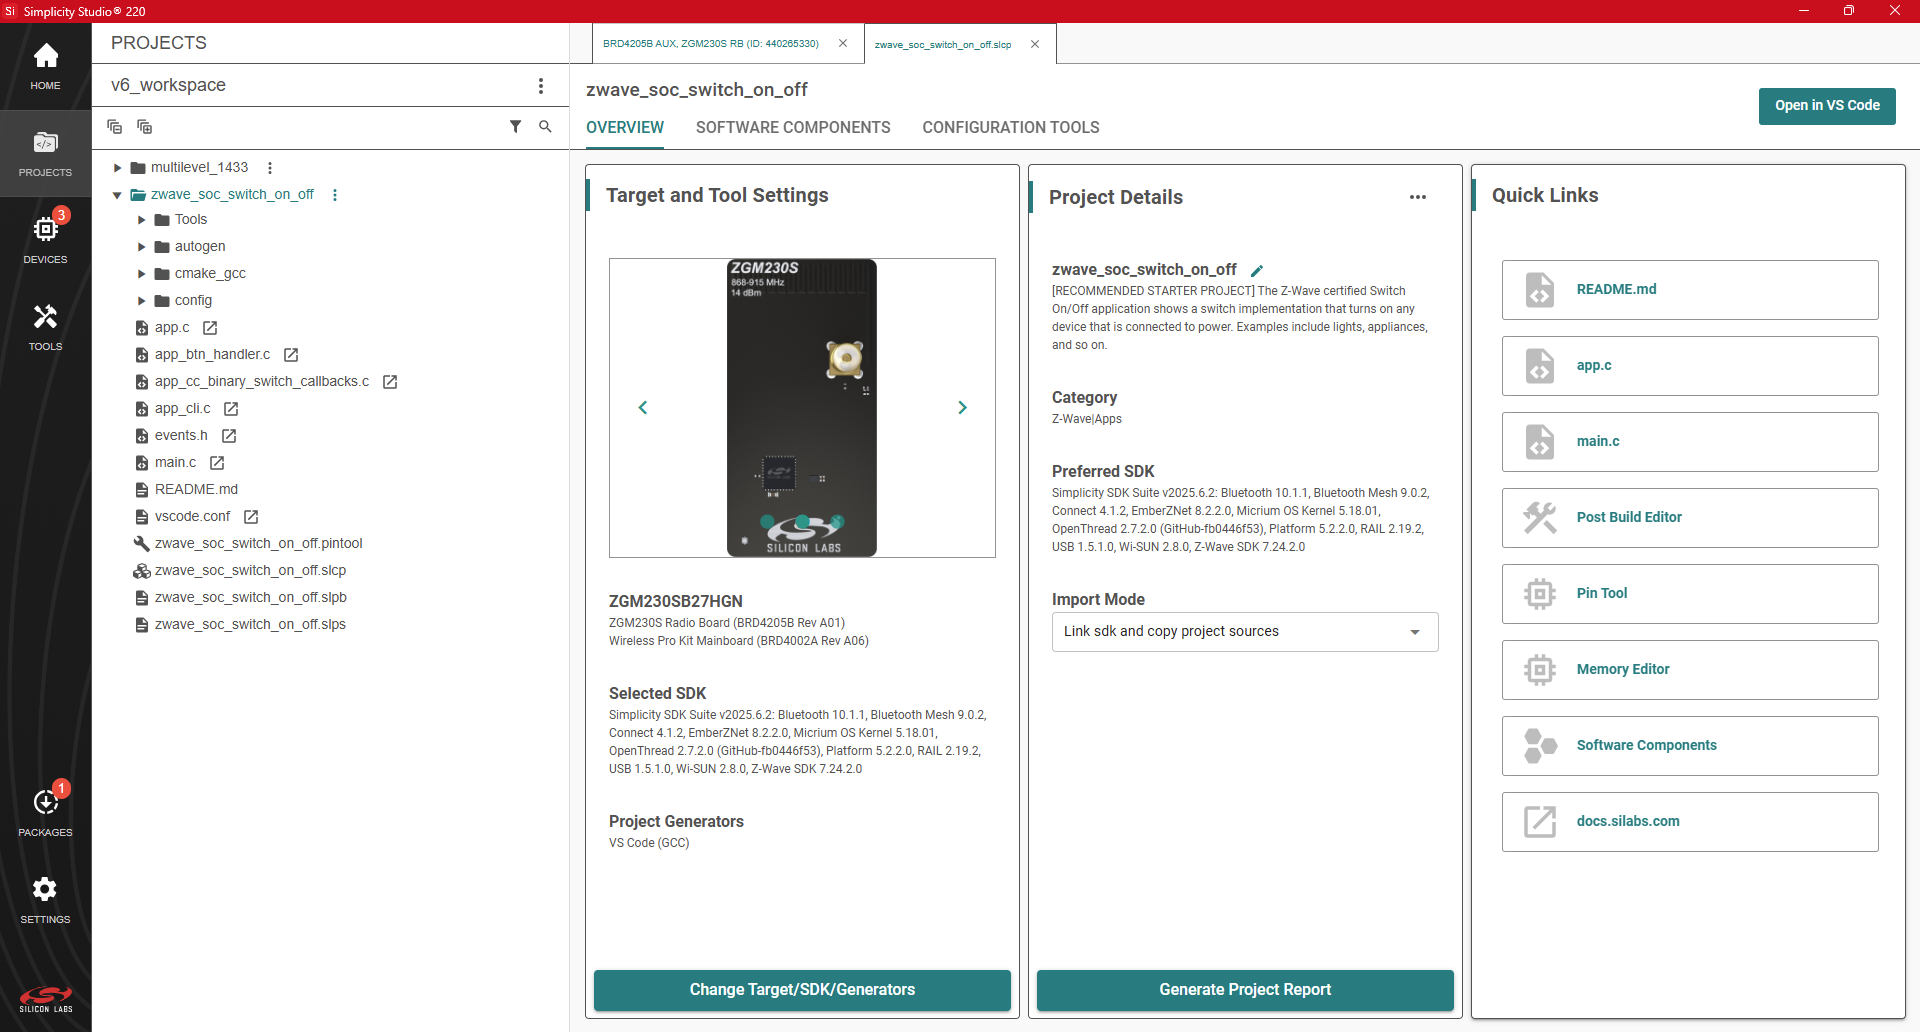
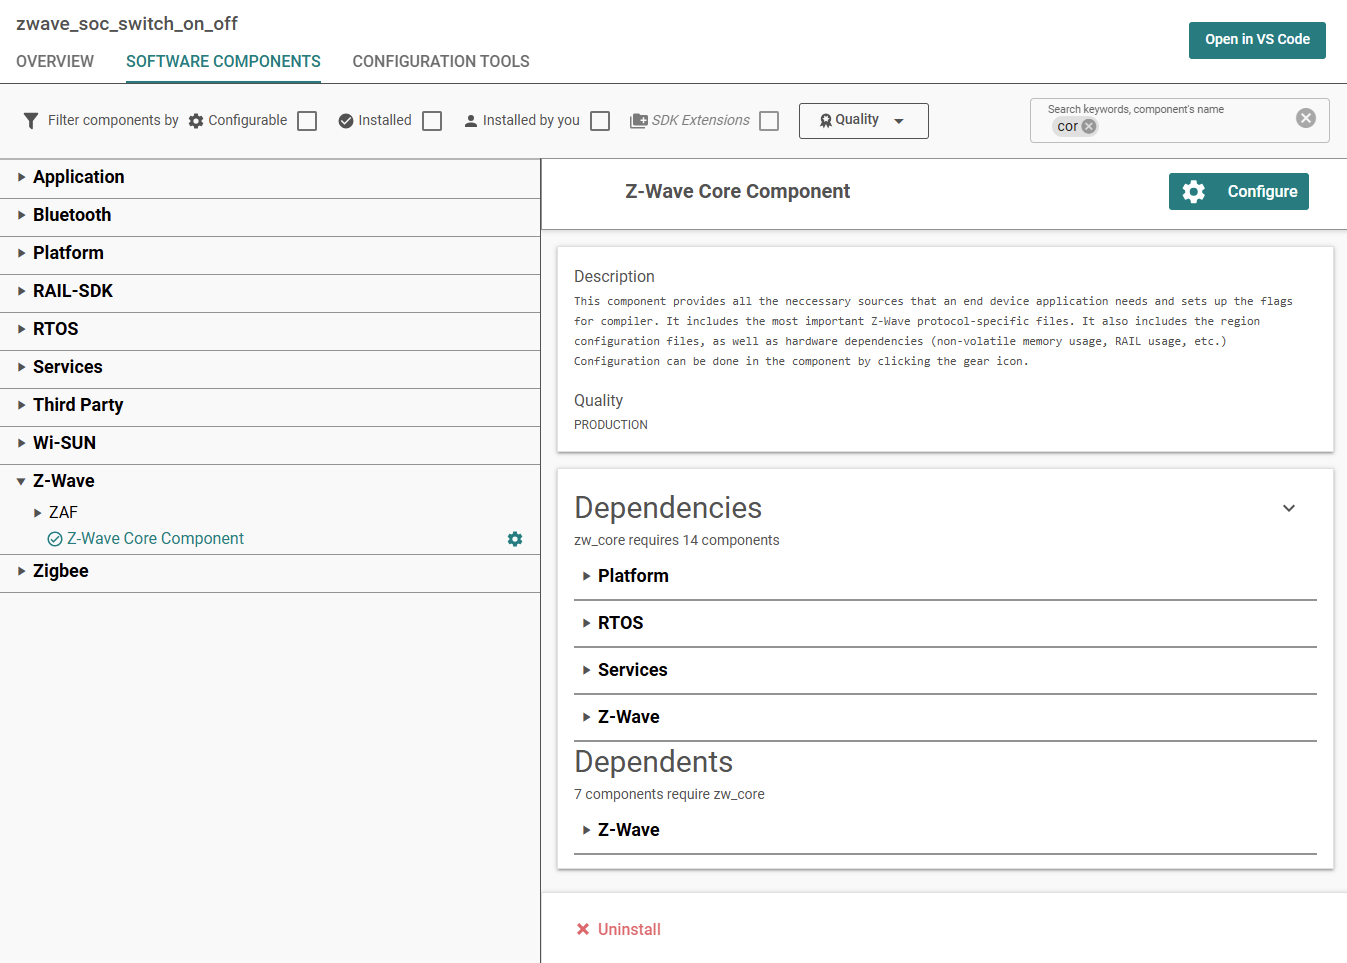
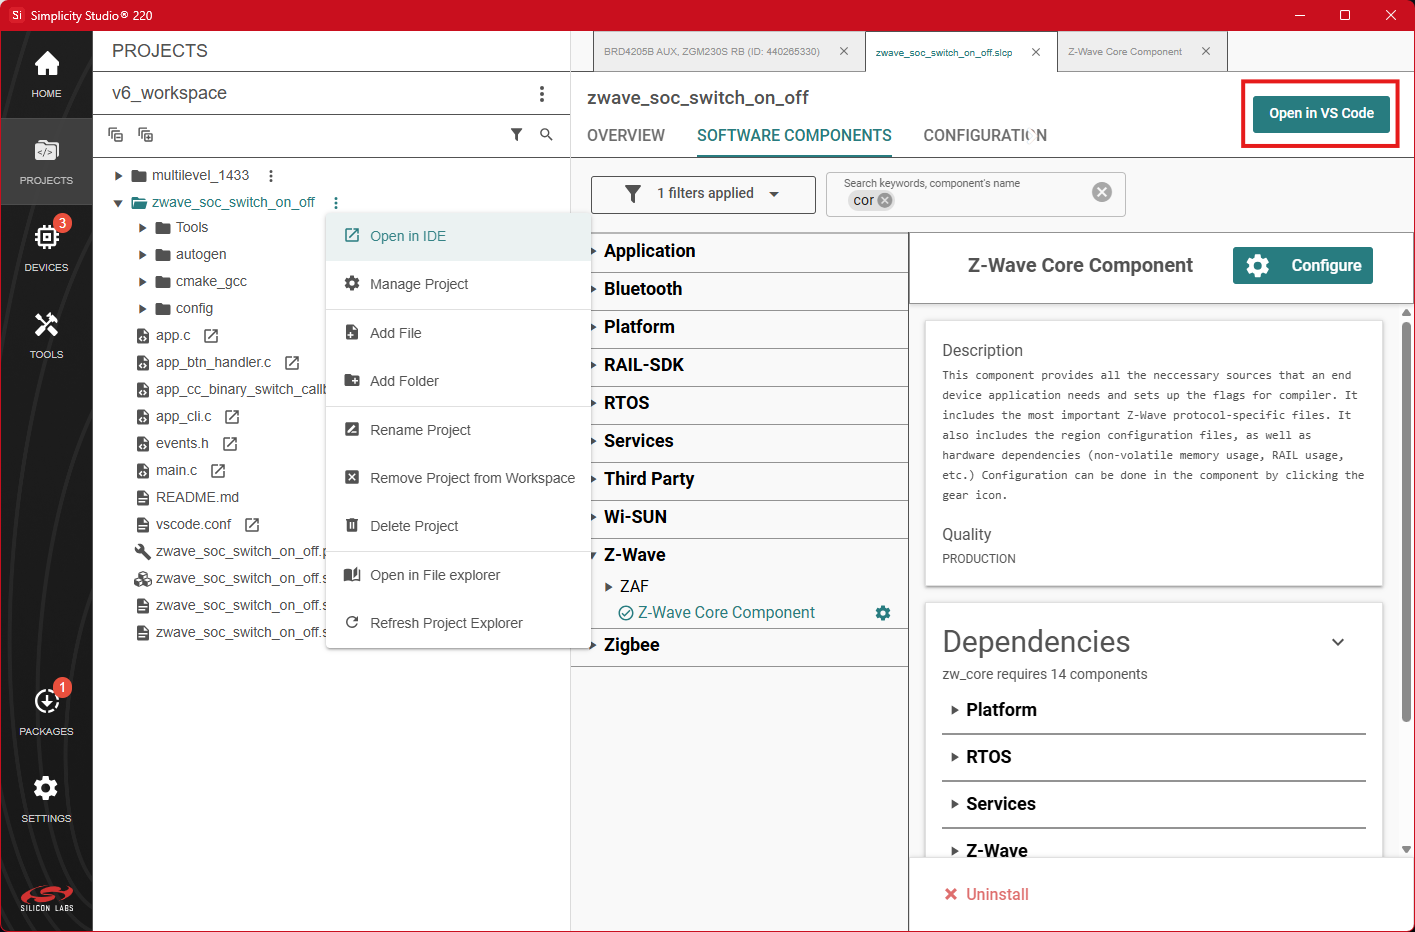
The main logic of this sample application is in the file called app.c (or SwitchOnOff.c prior to SDK version 7.20). Before building the application, the desired region for the sample application can be configured by going to the Software Components tab, selecting the Z-Wave Core Component, and clicking Configure in the top right corner.
A new view will appear where you can select the desired region.
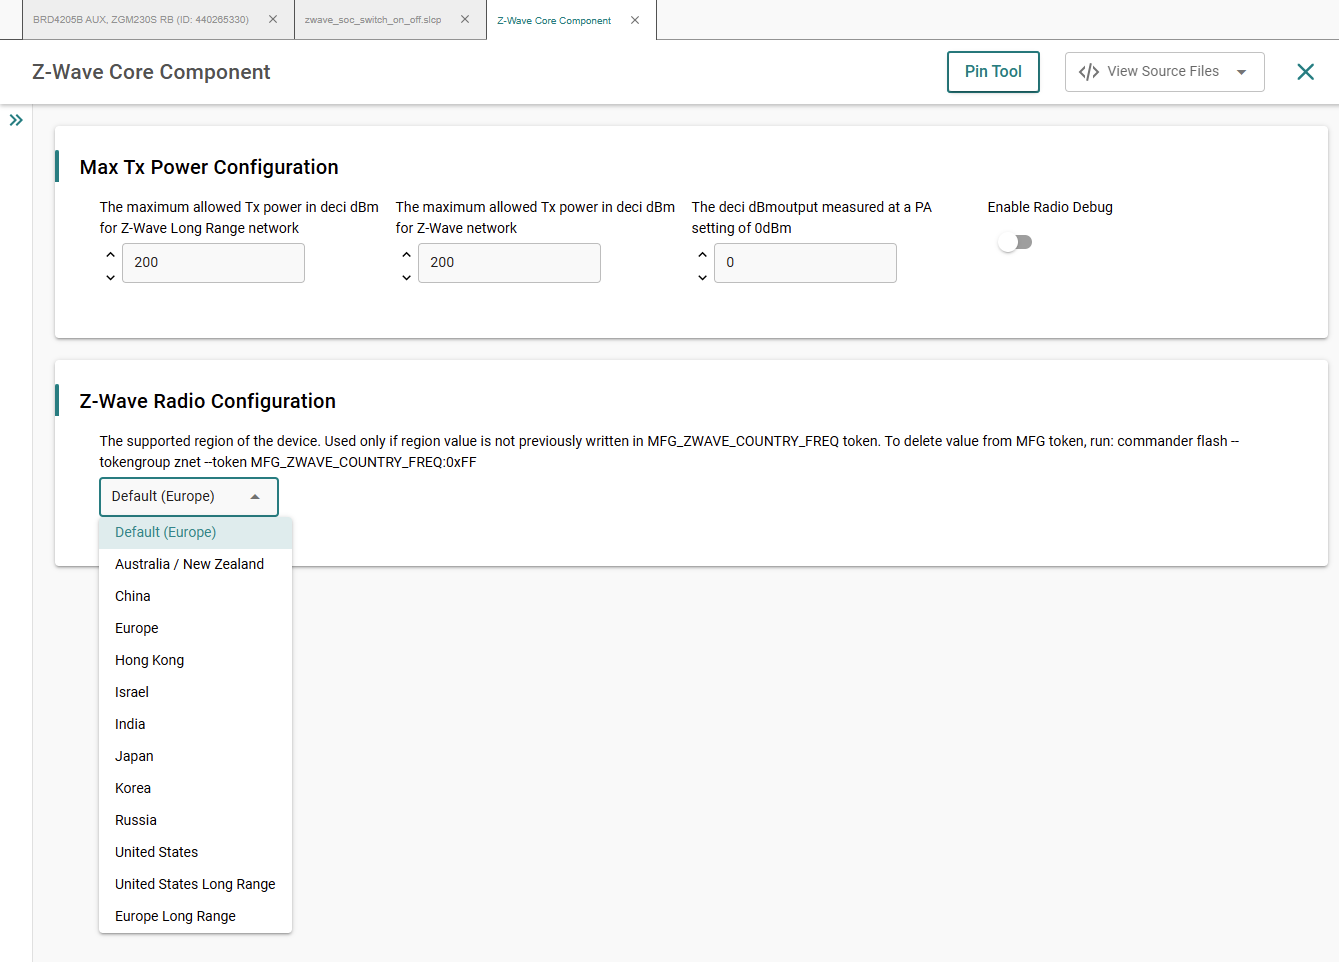
The default frequency is set to EU region. Visit the Silicon Labs website, to see where Z-Wave RF has been approved.
The IDE will be used to build the project. Navigate back to the project overview and click on Open in VS Code. Alternatively, you can also access this option from the context menu of the project.
Visual Studio Code will open, displaying the documentation for the project.
Hover over the project's name in the Silicon Labs extension's sidebar and click the Build icon. Alternatively, you can right click on the project and select Build.
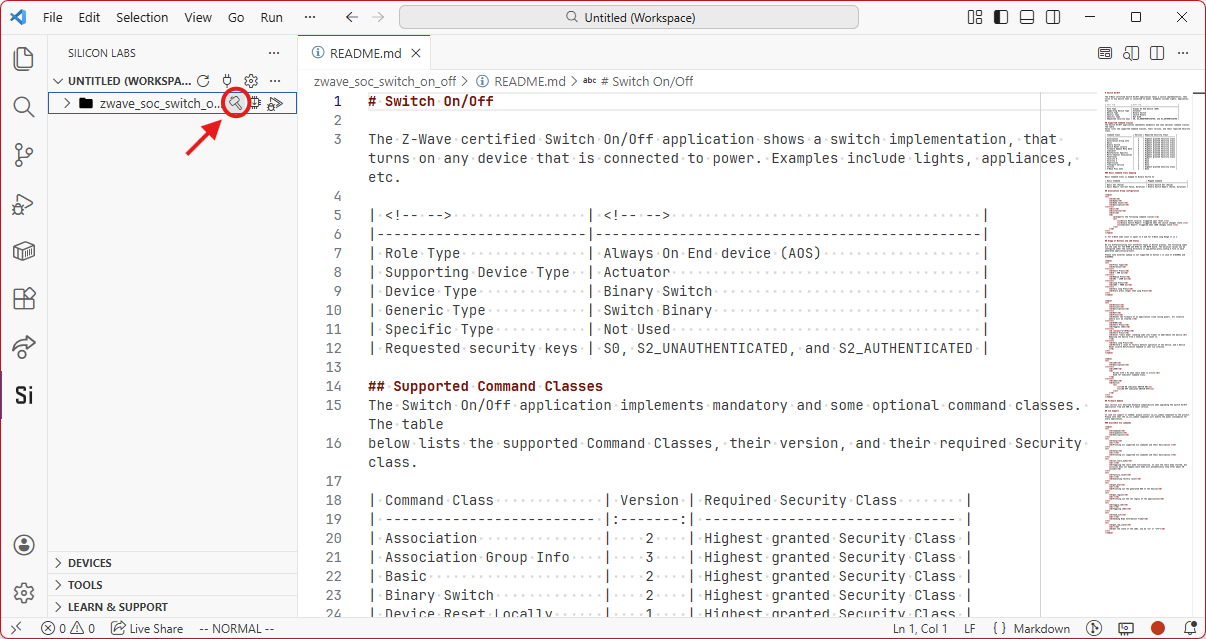
Once the build finishes, a new folder named Binaries will appear under your project. You might have to expand the project by clicking the chevron to the left of its name in the sidebar to see it.
Flashing the Application#
Hover over the project's name in the Silicon Labs extension's sidebar and click the Flash icon.
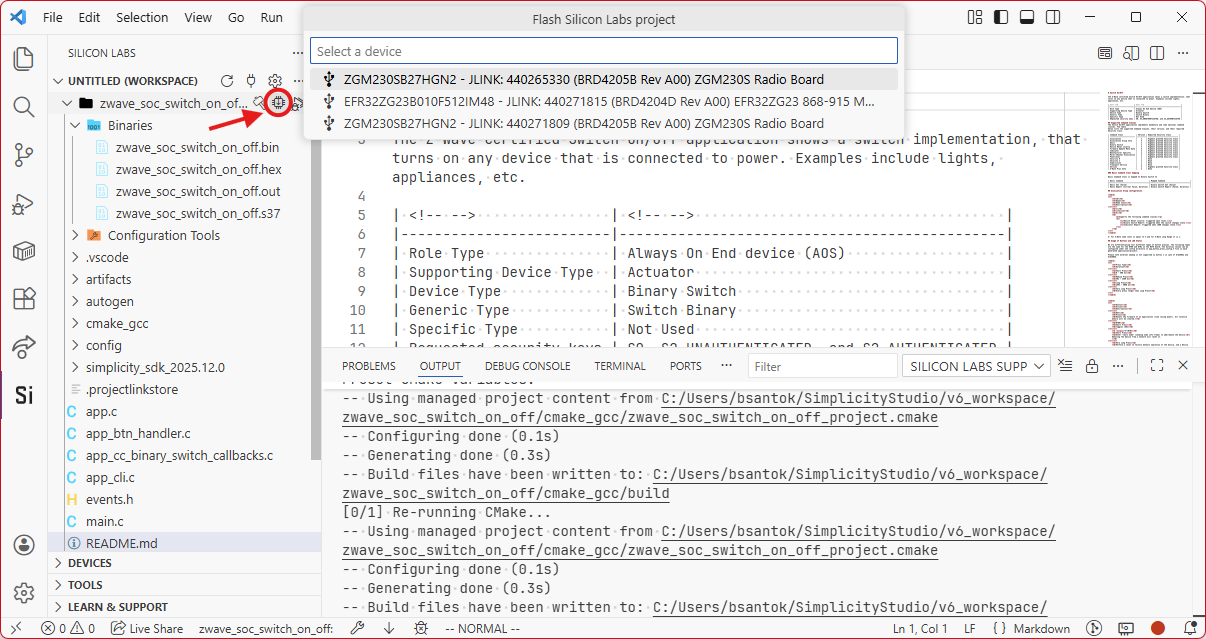
Select the connected hardware in the pop-up window, then select the binary file ending in .hex.
Shortly thereafter, the Z-Wave sample application will be flashed to your end device. Include it in a Z-Wave network using the PC Controller to start testing the functionalities. See Run Your First Z-Wave Sample Application.
Refer to [1] for instructions on how to operate the sample application. Refer to [10] for instructions on how to read out the DSK value.
The following sections, Changing the Region and Reprogramming a Sleeping Device, describe procedures that you do not normally have to perform, but of which you should be aware.
Changing the Region#
If you need to change the frequency at which the module operates, you will need to set a special token on your device using Simplicity Commander.
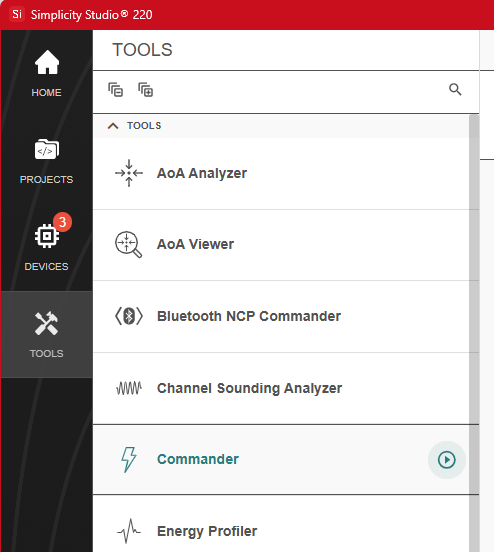
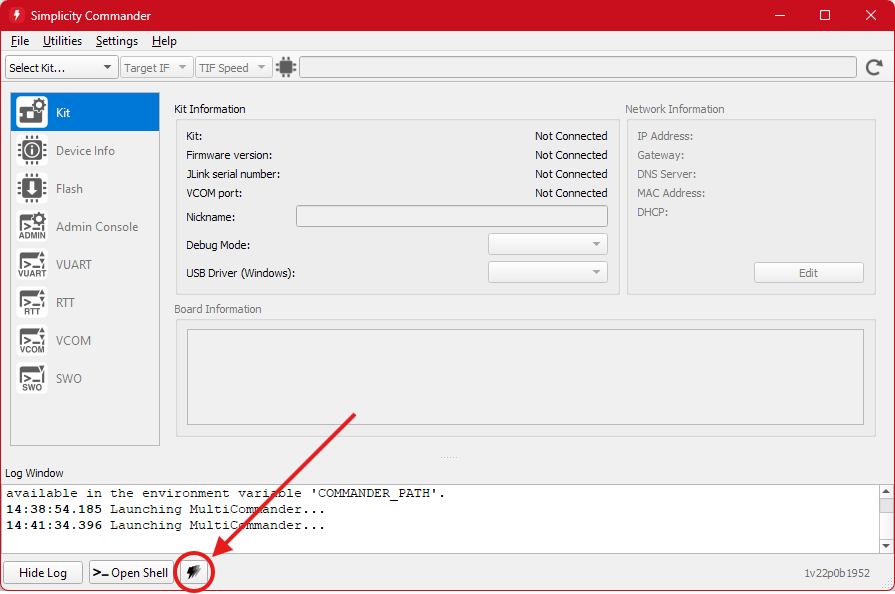
Open Simplicity Commander by navigating to the Tools page in Simplicity Studio and clicking the launch icon for Commander.
Open the MultiCommander view by clicking the lightning bolt icon.
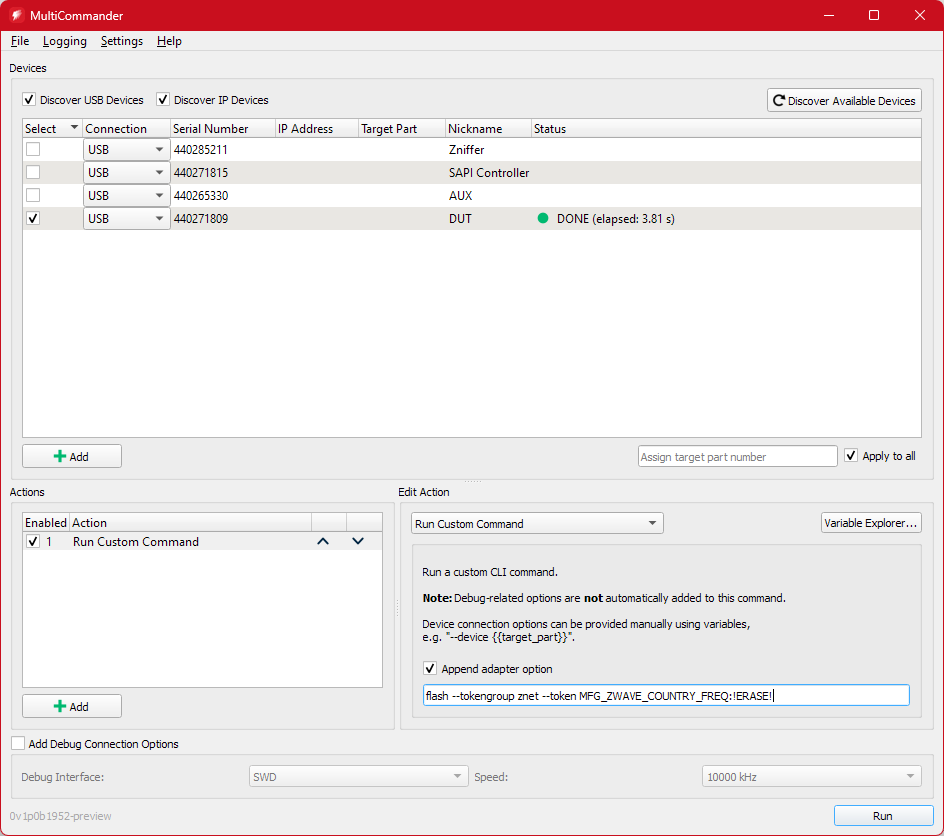
Click Discover Available Devices in the top right corner of the window.
Once the list of devices is displayed, tick the checkbox next to your device.
In the Actions view in the bottom half of the window, add an action with the following parameters:
Run Custom Command
Append adapter option ticked
CLI command to run:
flash --tokengroup znet --token MFG_ZWAVE_COUNTRY_FREQ:!ERASE!
Click Run in the bottom right corner of the window.
For running Z-Wave applications in a custom region, i.e. to run applications that do not have corresponding demos shipped with Simplicity Studio, write the region value to MFG Token instead of !ERASE!. For example, for Australia/New Zealand (ANZ), use:
flash --tokengroup znet --token MFG_ZWAVE_COUNTRY_FREQ:0x02The hexadecimal values for each of the regions are defined in <Simplicity SDK directory>/zwave/PAL/inc/zpal_radio.h for releases from 2025.12.0 onwards and in <Simplicity SDK directory>/protocol/z-wave/PAL/inc/zpal_radio.h for earlier releases.
To locate your SDK installation directory, open the Settings page in Simplicity Studio, navigate to the SDKs section, right click on the SDK and select Browse to Location.
Alternatively, you can invoke commander.exe via the command line with the following command, substituting your device’s serial number in the serialno option and your desired region in the token option:
commander.exe flash --serialno <serial number> --tokengroup znet --token MFG_ZWAVE_COUNTRY_FREQ:<desired region>Reprogramming a Sleeping Device#
After a device has been programmed with an application capable of deep sleep (such as Sensor PIR), the programmer will throw an error when you attempt to flash it again. The reason for this is because the processor has been put into deep sleep mode (EM4) and the programmer cannot wake it.
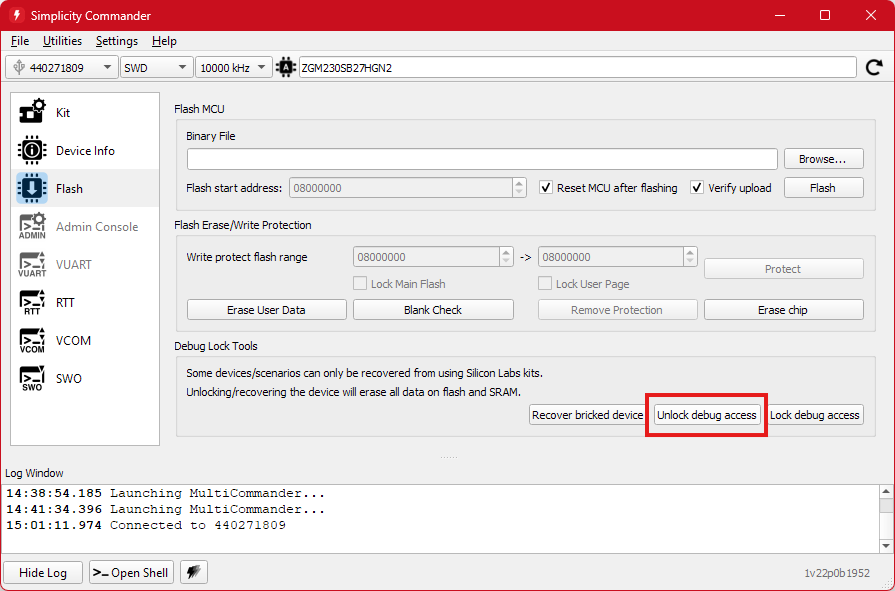
You can recover the device by performing what's called a Debug Unlock. This will completely erase the device and allow you to connect to it again. This process can be performed by either Simplicity Commander or the Flash Programmer within Simplicity Studio.
Using Simplicity Commander, select your device in the top left corner of the window, navigate to the Flash view, click Unlock Debug Access and then flash the device with the new firmware.